

Texsport 01111 User Manual
INSTRUCTIONS
Item 01111
Meadow Breeze Screen Porch Tent
hank you for purchasing this Texsport tent. Please read and understand each step of the set-up instructions. We encourage you to set-up this tent
T
t least once prior to your camping trip, ensuring that you have a satisfactory understanding of the set-up process. We hope you enjoy your new
a
tent and that it will give you many years of camping pleasure.
Do not apply excessive force to this product.
E
A
C
B
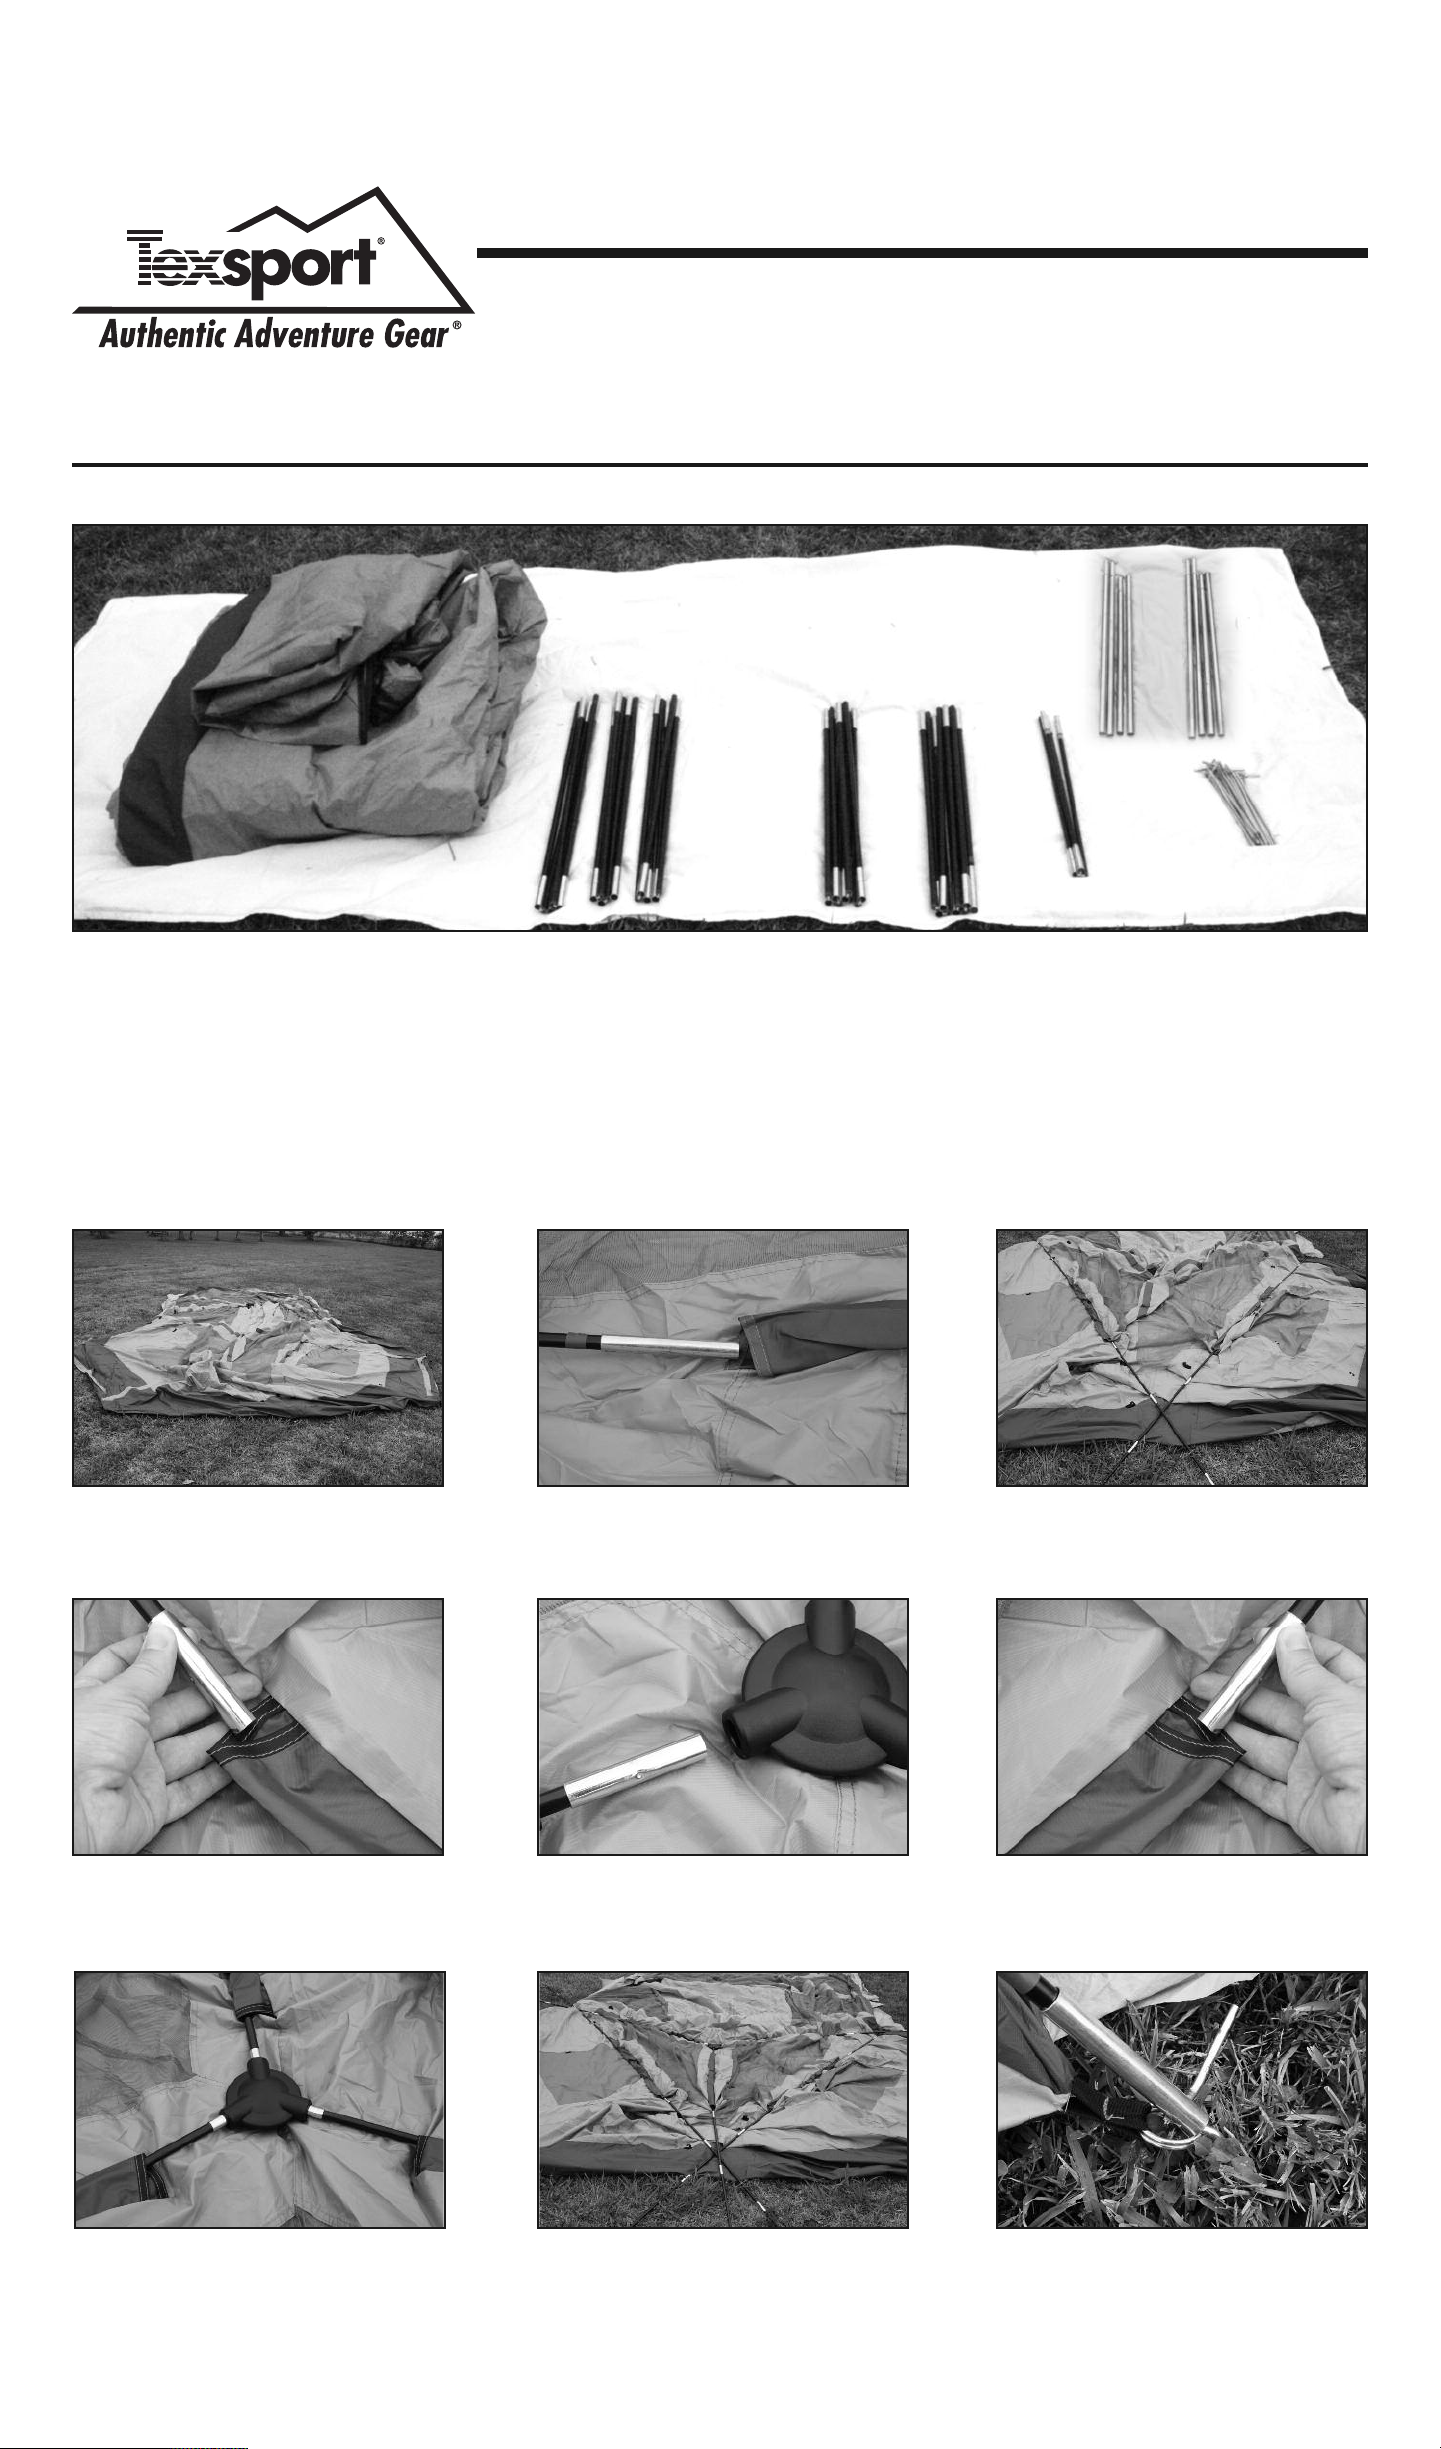
PARTS LIST:
A......Tent skin
B......3 Sets of tent poles taped with black
C......2 Sets of window arch poles taped
with red
F
D
D......1 Porch roof pole taped with blue
E......2 Sets of porch legs
F......Stakes, guy ropes and clews.
NOTE:
Prepare your camp site by removing all sharp stones,
twigs, etc. The site should be flat and have no depressions that could collect rain water.
STEP 1 - Spread out tent skin. STEP 2 - Assemble the red taped
tent poles (C) and insert through
the window arch tent sleeves.
STEP 4 - Assemble the black
taped tent poles (B) and insert
through back center sleeve.
STEP 5 - Insert the other end of
the pole (B) into the attached
center hub.
STEP 3 - Your poles should form
an X as shown above.
STEP 6 - Repeat step 4 for the
side/roof sleeves.
STEP 7 - Insert the side/roof
poles (B) into the center hub.
STEP 8 - This is how your poles
should look.
STEP 9 - Insert the pin and ring
into the red taped pole (C) on
the side of the tent skin first.
Then repeat with the black
taped pole (B).
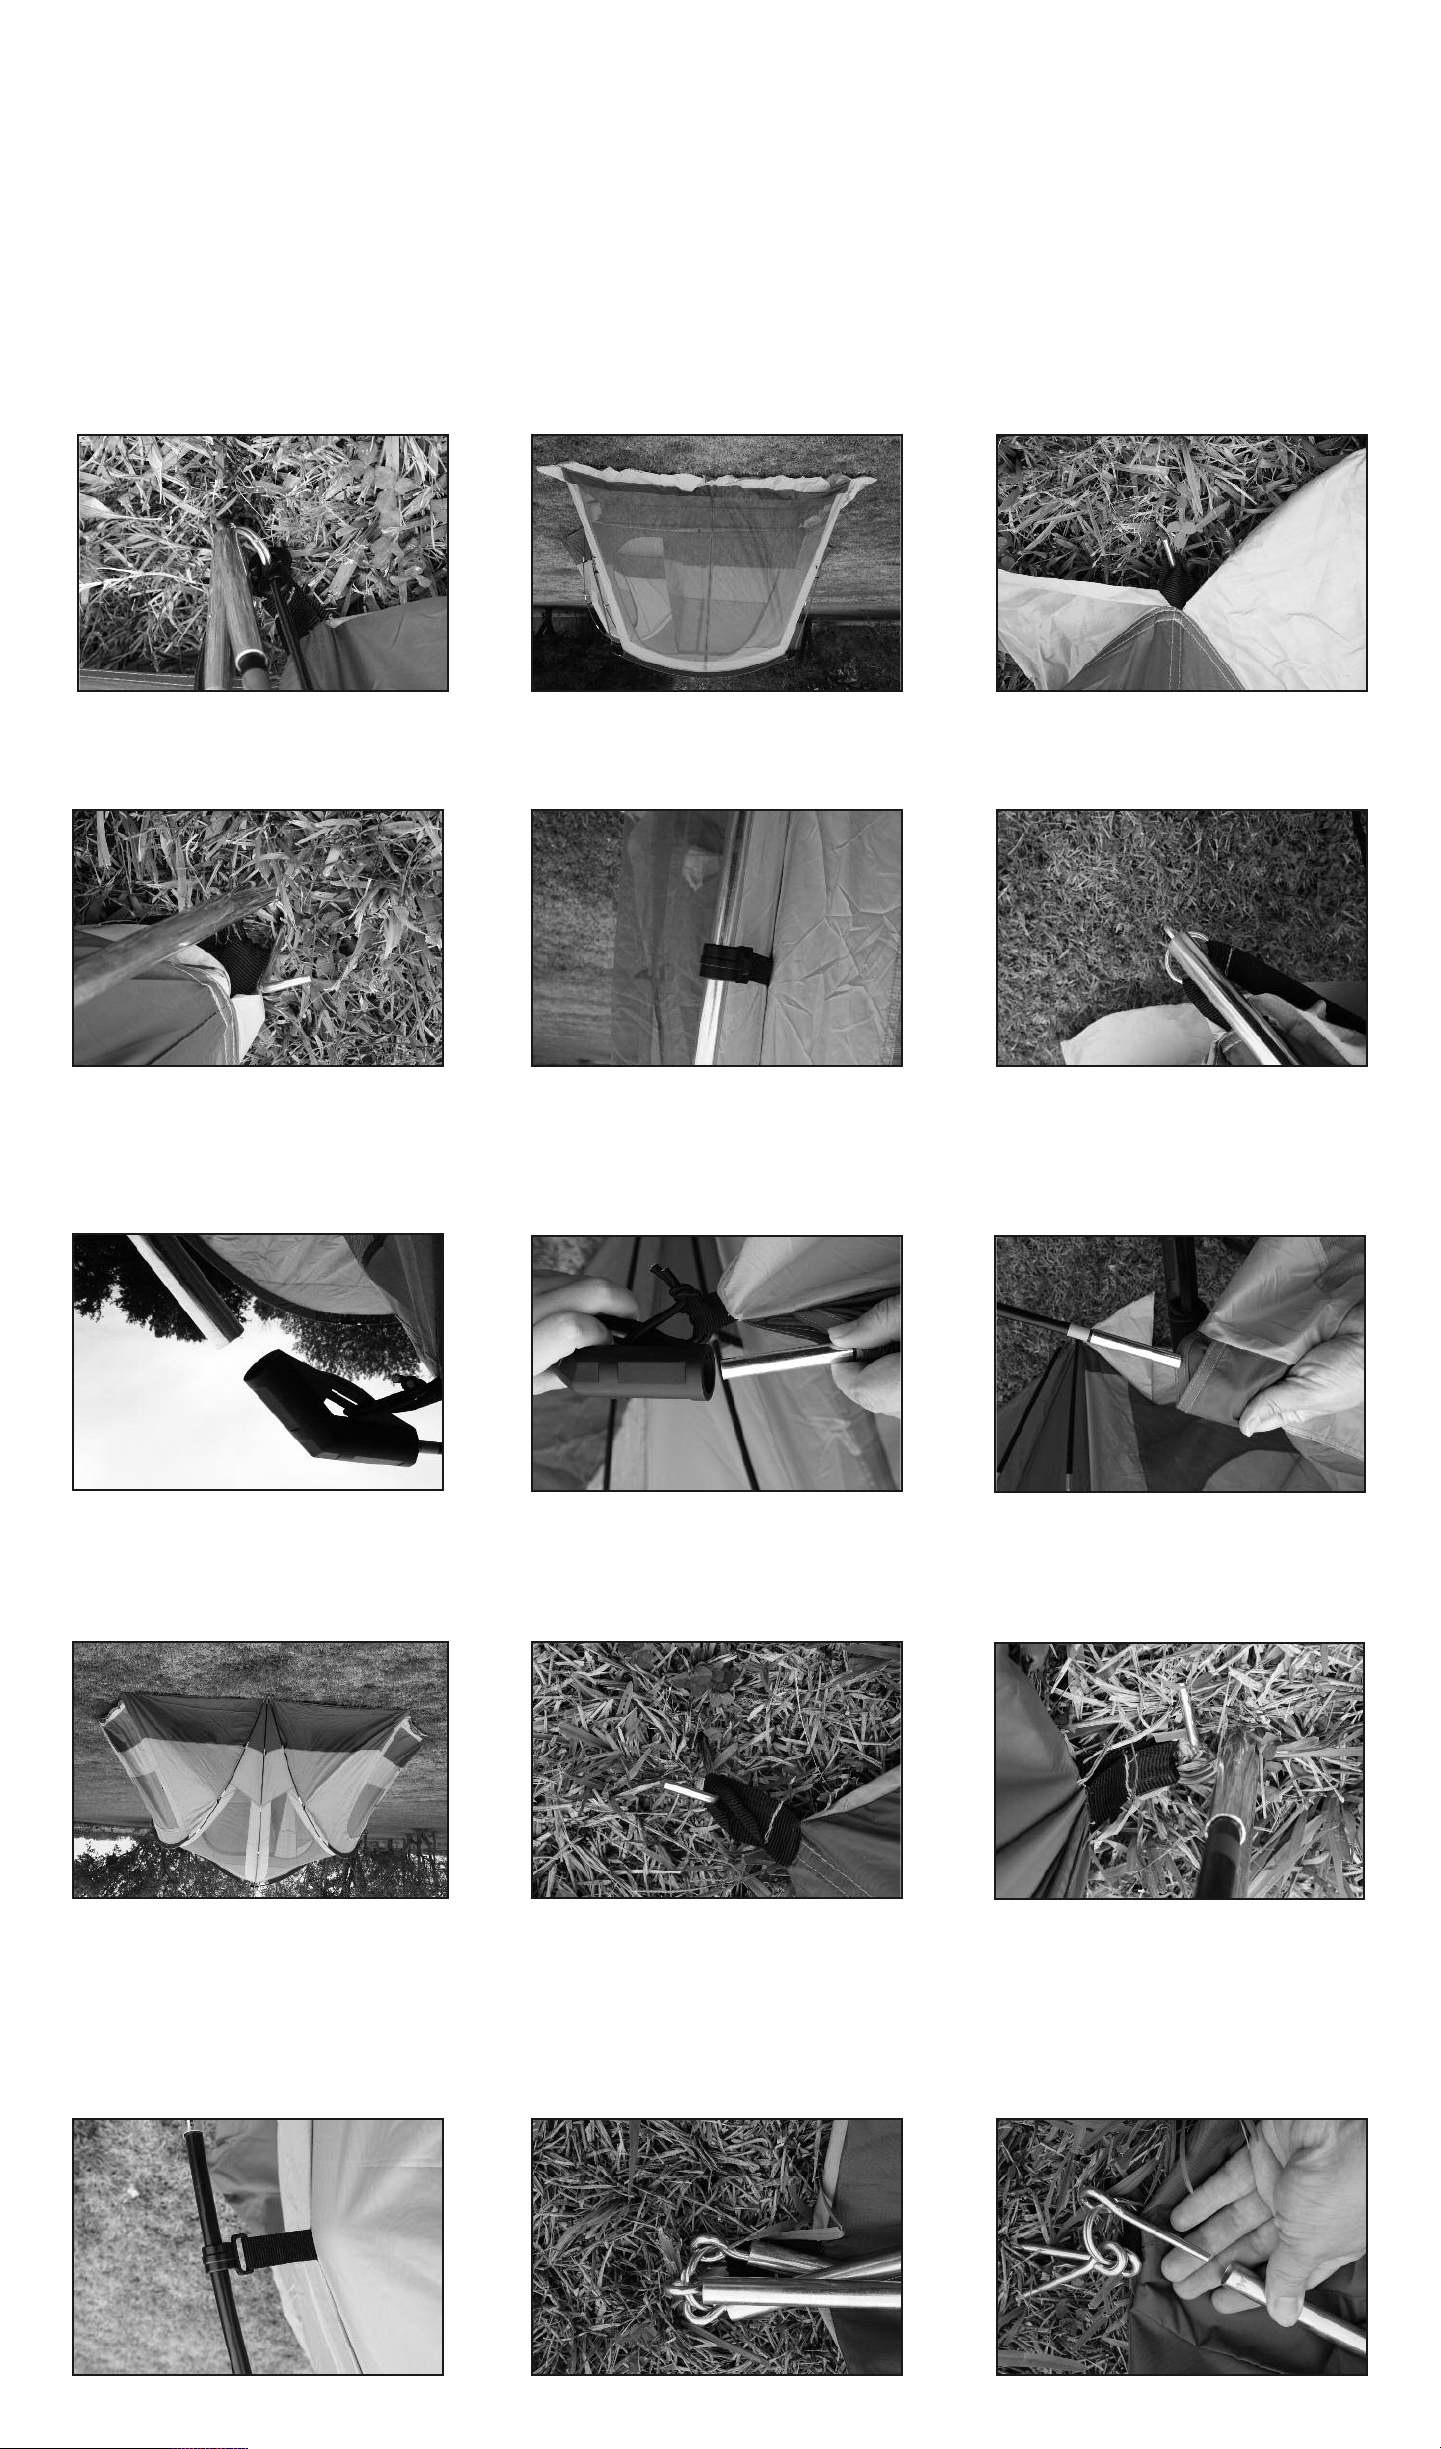
ring.
the hooks onto the pin and
ent and secure by attaching
t
TEP 24 - Drape the fly over the
S
rings on both sides.
STEP 21 - Stake down at the
porch should look like.
TEP 23 - This is what your
S
porch legs.
STEP 20 - Attach speed clips to
with the tabs provided.
TEP 22 - Stake porch down
S
porch leg poles.
ring of the porch skin into the
TEP 19 - Insert the pin and
S
ner joint.
end of theattached molded corlegs (E) and insert into the open
STEP 18 - Assemble the porch
should look like so far.
STEP 15 - This is what your tent
corner joint.
opening of theattached molded
STEP 17 - Insert into the small
provided.
doors of the tent with the tabs
STEP 14 - Stake out the side
through the porch arch sleeve.
taped tent poles (D) and insert
STEP 16 - Assemble the blue
the tent.
around the sides and rear of
STEP 13 - Stake down all rings
shown above at the ring.
should overlap each other as
taped poles (B & C). The poles
pole frame.
STEP 12 - Attach speed clips to
for the other red and black
STEP 11 - Repeat steps 8 and 9
rear of the tent skin.
the red taped pole (C) at the
and ring into the other end of
STEP 10 - Then insert the pin
 Loading...