

Page 1

1
User Manual
DPF-830
Please read these instructions before use and retain for future
reference
Page 2

2
CONTENTS
1. Safety Precautions ------------------------------------------------------------------------------3
2. INTRODUCTION ----------------------------------------------------------------------------------4
2.1. Panel control -------------------------------------------------------------------------------4
2.2. Remote Control ----------------------------------------------------------------------------4
3. SELECTION MODE AND READING OF FILES ----------------------------------------------------5
3.1. Example (Photos) ---------------------------------------------------------------------------5
3.2. Example Preview & Display)-------------------------------------------------------------5
4. PERSONAL ADJUSTMENT ------------------------------------------------------------------------6
4.1. Enter Setup ---------------------------------------------------------------------------------6
4.1.1. Language ----------------------------------------------------------------------------6
4.1.2. Slideshow Time ---------------------------------------------------------------------6
4.1.3. Transition effect -------------------------------------------------------------------7
4.1.4. Music repeat mode ----------------------------------------------------------------7
4.1.5. Movie repeat mode ----------------------------------------------------------------8
4.1.6. Display mode -----------------------------------------------------------------------8
4.1.7. Start up mode ----------------------------------------------------------------------9
4.1.8. Date and clock ---------------------------------------------------------------------9
4.1.9. Power off ---------------------------------------------------------------------------10
4.1.10. Power on ---------------------------------------------------------------------------10
4.1.11. Alarm -------------------------------------------------------------------------------11
4.1.12. TFT Brightness --------------------------------------------------------------------11
4.1.13. TFT Contrast -----------------------------------------------------------------------12
4.1.14. TFT Saturation ---------------------------------------------------------------------12
4.1.15. Load Default -----------------------------------------------------------------------13
5. Calendar Model ----------------------------------------------------------------------------------13
6. Movie, Music, Photo Menu----------------------------------------------------------------------14
7. HELP IN CASE OF PROBLEMS ------------------------------------------------------------------15
8. TECHNICAL SPECIFICATIONS ------------------------------------------------------------------16
9. RECYCLING ELECTRICAL PRODUCT-----------------------------------------------------------17
For further information on the TEXET range, please refer to www.texet.com
We would like to thank you for your purchase of the Texet DPF-830. The user manual
should be thoroughly read to understand all functionality of the Texet DPF-830.
Page 3
3
1. SAFETY PRECAUTIONS
FOR HOUSEHOLD AND INDOOR USE ONLY
PLACE THE APPLIANCE ON A FLAT, STABLE SURFACE WITH ADEQUATE VENTILATION AND AWAY FROM
OTHER SOURCES OF HEAT. MINIMUM DISTANCES AROUND THE APPLIANCE FOR ADEQUATE
VENTILATION IS 5CM. DO NOT COVER OR RESTRICT VENTILATION OPENINGS.
CHILDREN SHOULD BE SUPERVISED TO ENSURE THEY DO NOT PLAY WITH THE APPLIANCE, AND
THE APPLIANCE AND CABLE SHOULD BE KEPT COMPLETELY OUT OF REACH OF YOUNG CHILDREN.
THIS APPLIANCE IS NOT DESIGNED FOR USE BY CHILDREN, OR PERSONS WITH REDUCED PHYSICAL,
SENSORY OR MENTAL CAPABILITIES, AND SHOULD NOT BE USED BY SUCH PERSONS UNLESS THEY
CAN DO SO SAFELY. WHERE NECESSARY, SUCH PERSONS (OR ANYONE WITH LACK OF
EXPERIENCE OR KNOWLEDGE) SHOULD FIRST BE GIVEN SUPERVISION OR INSTRUCTION
CONCERNING USE OF THE APPLIANCE BY A PERSON RESPONSIBLE FOR THEIR SAFETY.
FULLY UNWIND THE CABLE BEFORE PLUGGING IN AND ENSURE THE CABLE IS POSITIONED AWAY
FROM AREAS WHERE IT IS LIKELY TO GET DAMAGED OR CAUSE A TRIP HAZARD.
THE OUTPUT CORD OF THIS MAINS ADAPTOR CANNOT BE REPLACED. IN THE EVENT OF DAMAGE TO
THE CABLE, JACK PLUG OR ADAPTOR, THE ENTIRE ADAPTOR UNIT SHOULD BE REPLACED.
CONNECTIONS MUST ONLY BE MADE VIA THE MAINS ADAPTOR SUPPLIED, NEVER CONNECT THE
APPLIANCE DIRECTLY TO THE 240V MAINS SUPPLY.
NEVER USE THE ADAPTER SUPPLIED WITH ANY OTHER APPLIANCE.
THE MAINS ADAPTOR WILL BECOME WARM IN USE; DO NOT COVER OR PLACE ON OR NEAR
SURFACES THAT COULD BE AFFECTED BY HEAT SUCH AS TABLE TOPS AND CARPETS.
DO NOT PULL ON CABLE TO DISCONNECT FROM MAINS SUPPLY.
KEEP APPLIANCE, CABLE, MAINS ADAPTOR PLUG DRY AND AWAY FROM AREAS WHERE IT IS LIKELY
TO GET SPLASHED. AVOID USING IN HOT, HUMID ENVIRONMENTS.
DO NOT PLACE ITEMS WITH NAKED FLAMES OR CONTAINERS WITH LIQUIDS ON THIS APPLIANCE.
SWITCH OFF AND UNPLUG WHEN NOT IN USE AND BEFORE CLEANING OR SERVICING THE
APPLIANCE. SERVICING OF THIS APPLIANCE MUST ONLY BE CARRIED OUT BY A QUALIFIED
ELECTRICIAN.
ALWAYS ENSURE THE MAINS ADAPTOR PLUG IS READILY UNPLUGGABLE – DO NOT USE WITH
‘LOCKABLE’ SOCKETS OR PERMANENTLY WIRE TO MAINS.
The exclamation point within an
equilateral triangle is intended to alert
the user to presence of important
operating and maintenance (servicing)
instructions in the literature
accompanying the appliance
WARNING: TO REDUCE THE RISK OF ELECTRIC
SHOCK, DO NOT REMOVE COVER (OR BACK).
NO USER SERVICEABLE PARTS INSIDE, REFER
SERVICING TO QUALIFIED SERVICE
PERSONNEL.
The lightning flash with arrow-head
symbol, within an equilateral
triangle, is intended to alert the user
to the presence of un-insulated
"dangerous voltage" within the
product's enclosure that may be of
sufficient magnitude to constitute a
risk of electric shock.
Page 4
4
2. INTRODUCTION
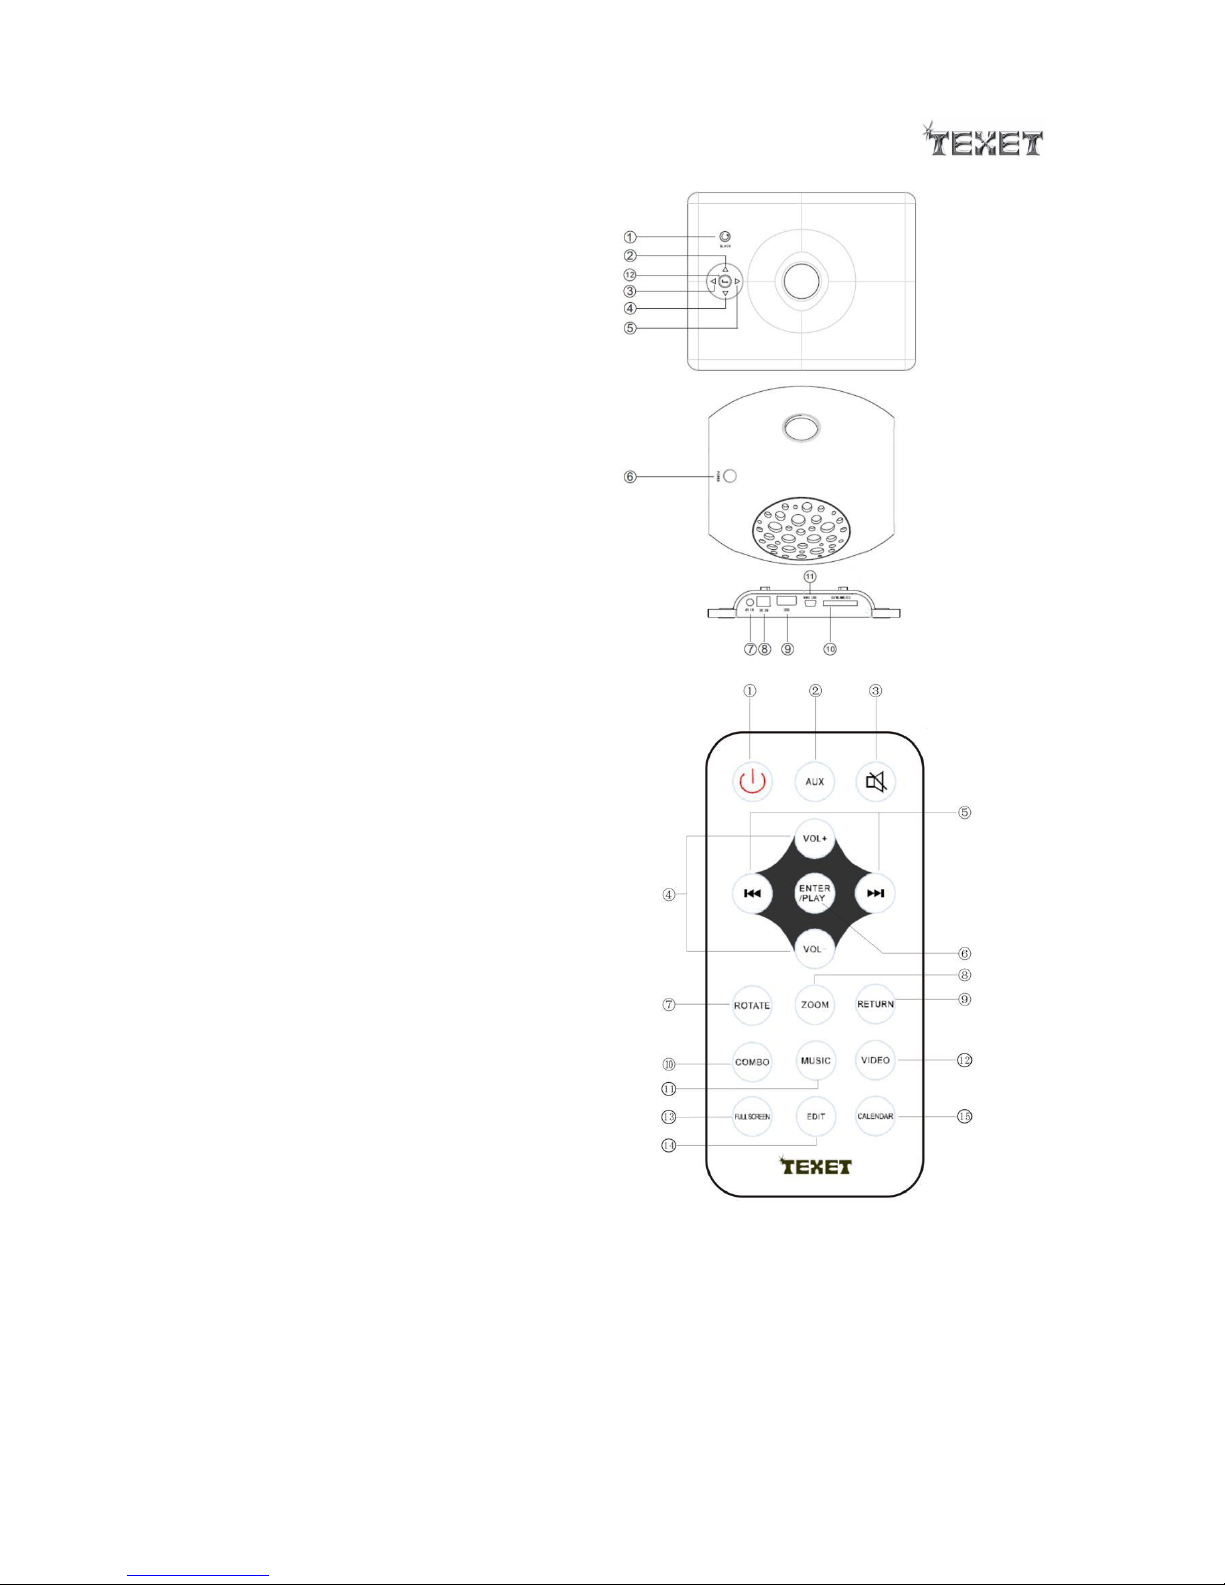
2.1. Panel control
1 Back button
2 Up button
3 Left button
4 Down button
5 Right button
6 Power button
7 Aux in jack
8 DC in jack
9 USB port
10 SD/MMC/MS card reader jack
11 Mini USB jack
12 Enter/play button
2.2. e control
1. Power ON/OFF switch and standby
2. Switch Aux In mode
3. Mute
4. Adjust volume or UP/DOWN
5. Previous chapter/Next chapter
6. Enter or play your selection
7. Rotate the image
8. Zoom the image
9. Return to the previous menu
10. Slideshow photo & music
11. Switch to music mode
12. Switch to video mode
13. Switch to full screen
14. Switch to edit mode
15. Switch to calendar mode
Page 5
5
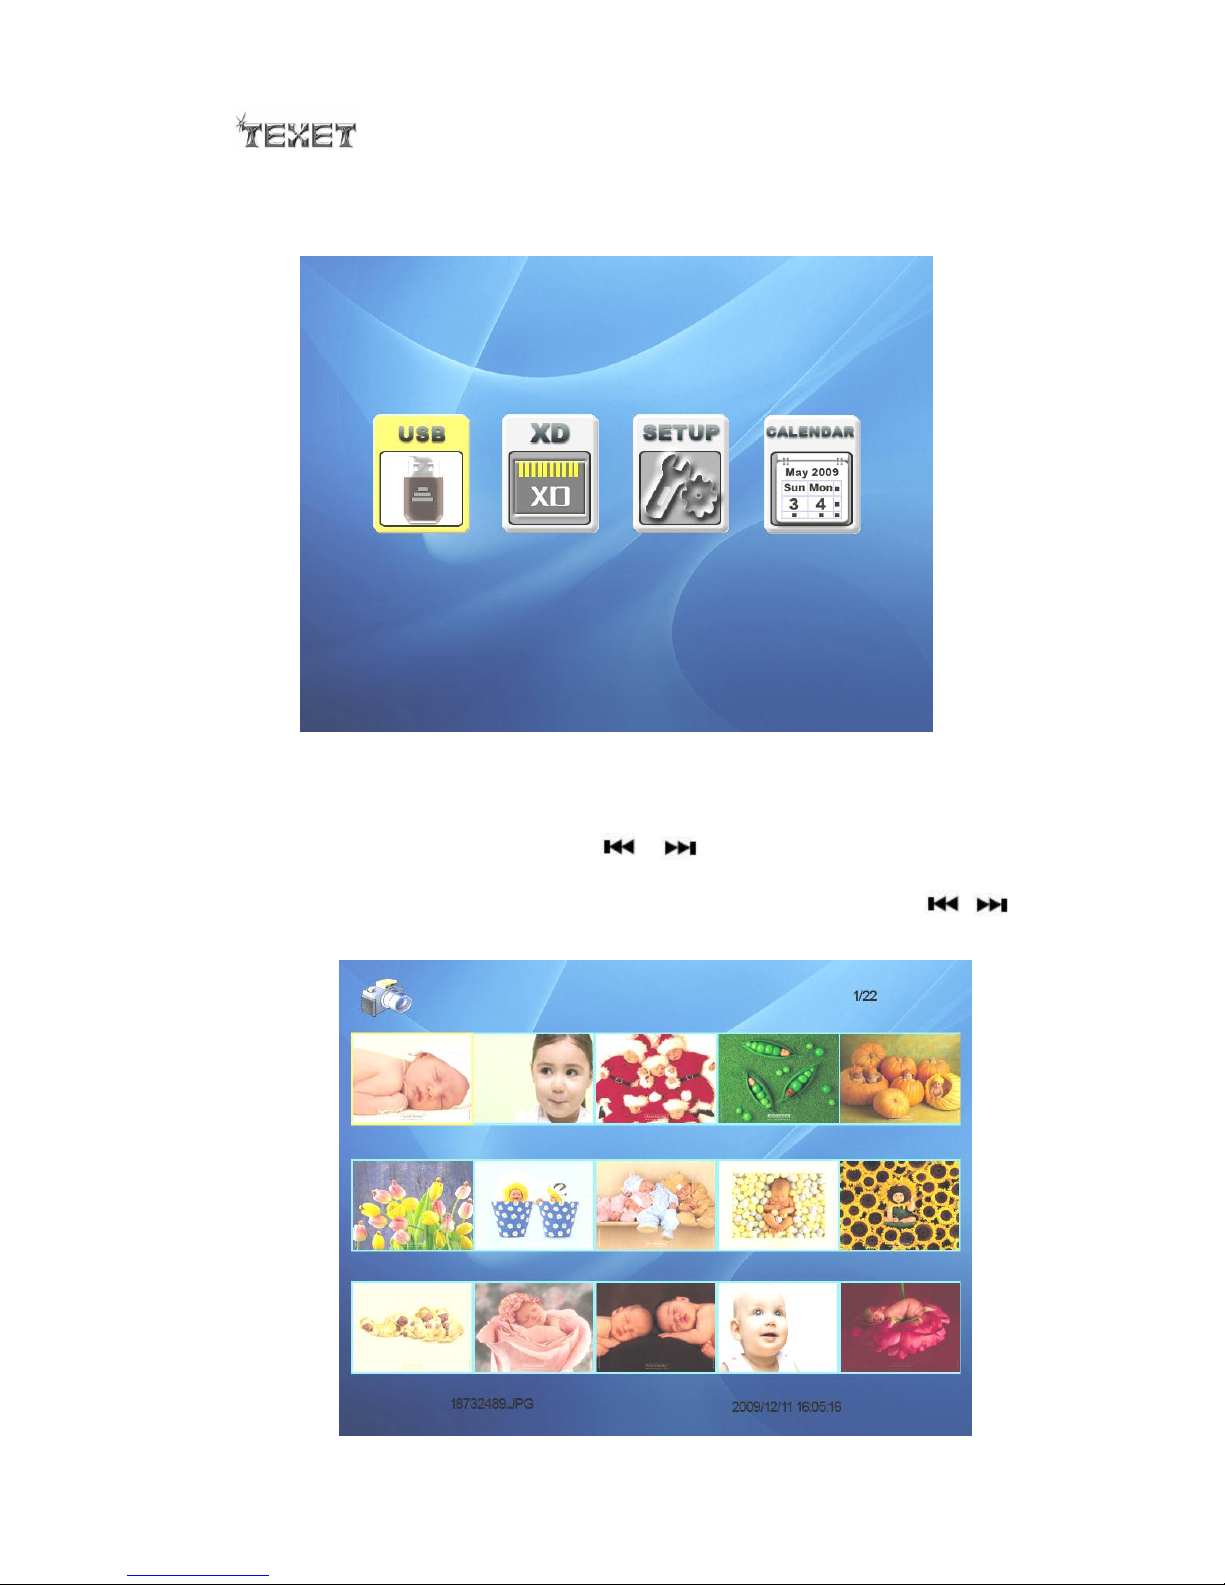
3. SELECTION MODE AND READING OF FILES
If there are no cards, please Insert the card / usb and it will show you the inserted card /
usb as below picture.
Example:
3.1. Select Photo
Select CARD/USB by pressing or buttons and then confirm by ENTER.
3.2. Preview & Display Photo
Select PHOTO, to obtain preview of 15 photos, use the Vol+, Vol-, ,
buttons to choose the photo to display, press “Enter/Play” key to confirm.
Page 6
6
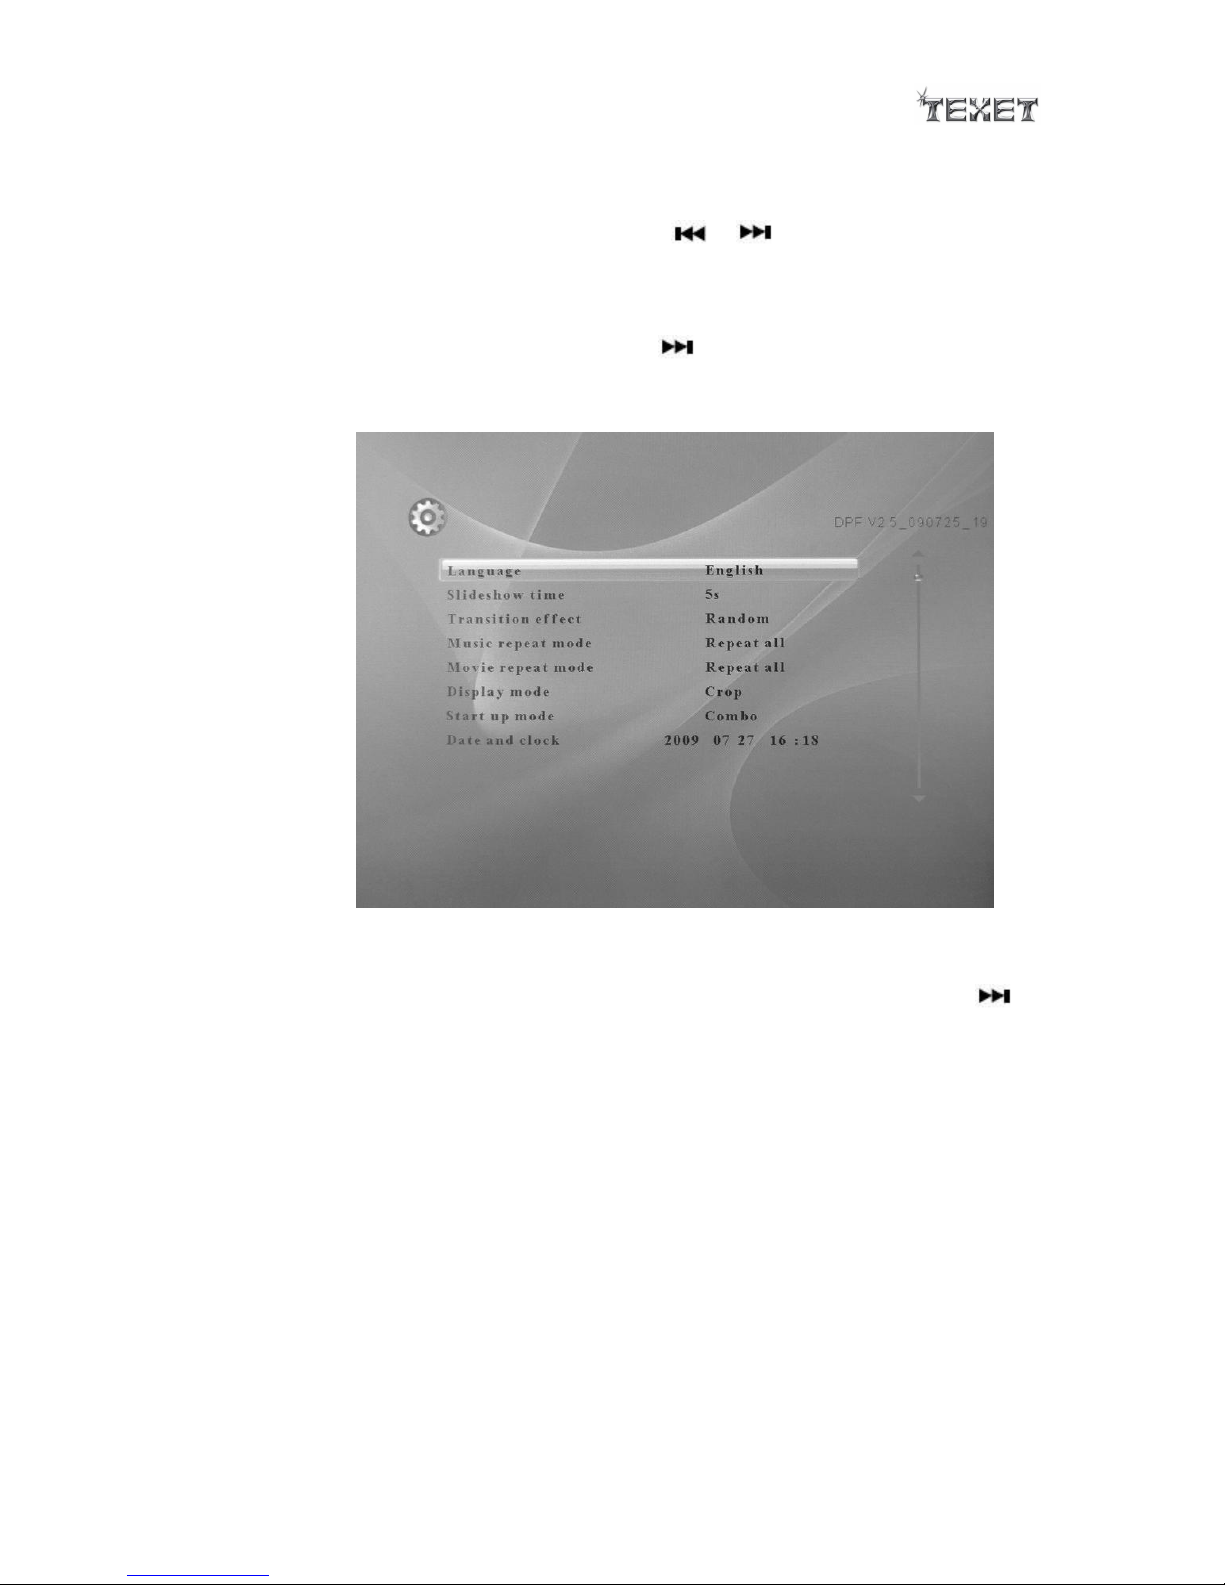
4. PERSONAL ADJUSTMENT
4.1. Enter Setup mode
Select SETUP from Main menu by pressing or buttons and then confirm by
ENTER.
4.1.1. Language
Select LANGUAGE by pressing the button and then confirm by ENTER.
Select your language, and then confirm by ENTER.
Exit the menu by RETURN button.
4.1.2. Slideshow Time
Select SLIDESHOW TIME by pressing the Vol+ Vol- button, then press
button to select slideshow time and then confirm by ENTER. Exit the menu by
RETURN button.
Page 7
7
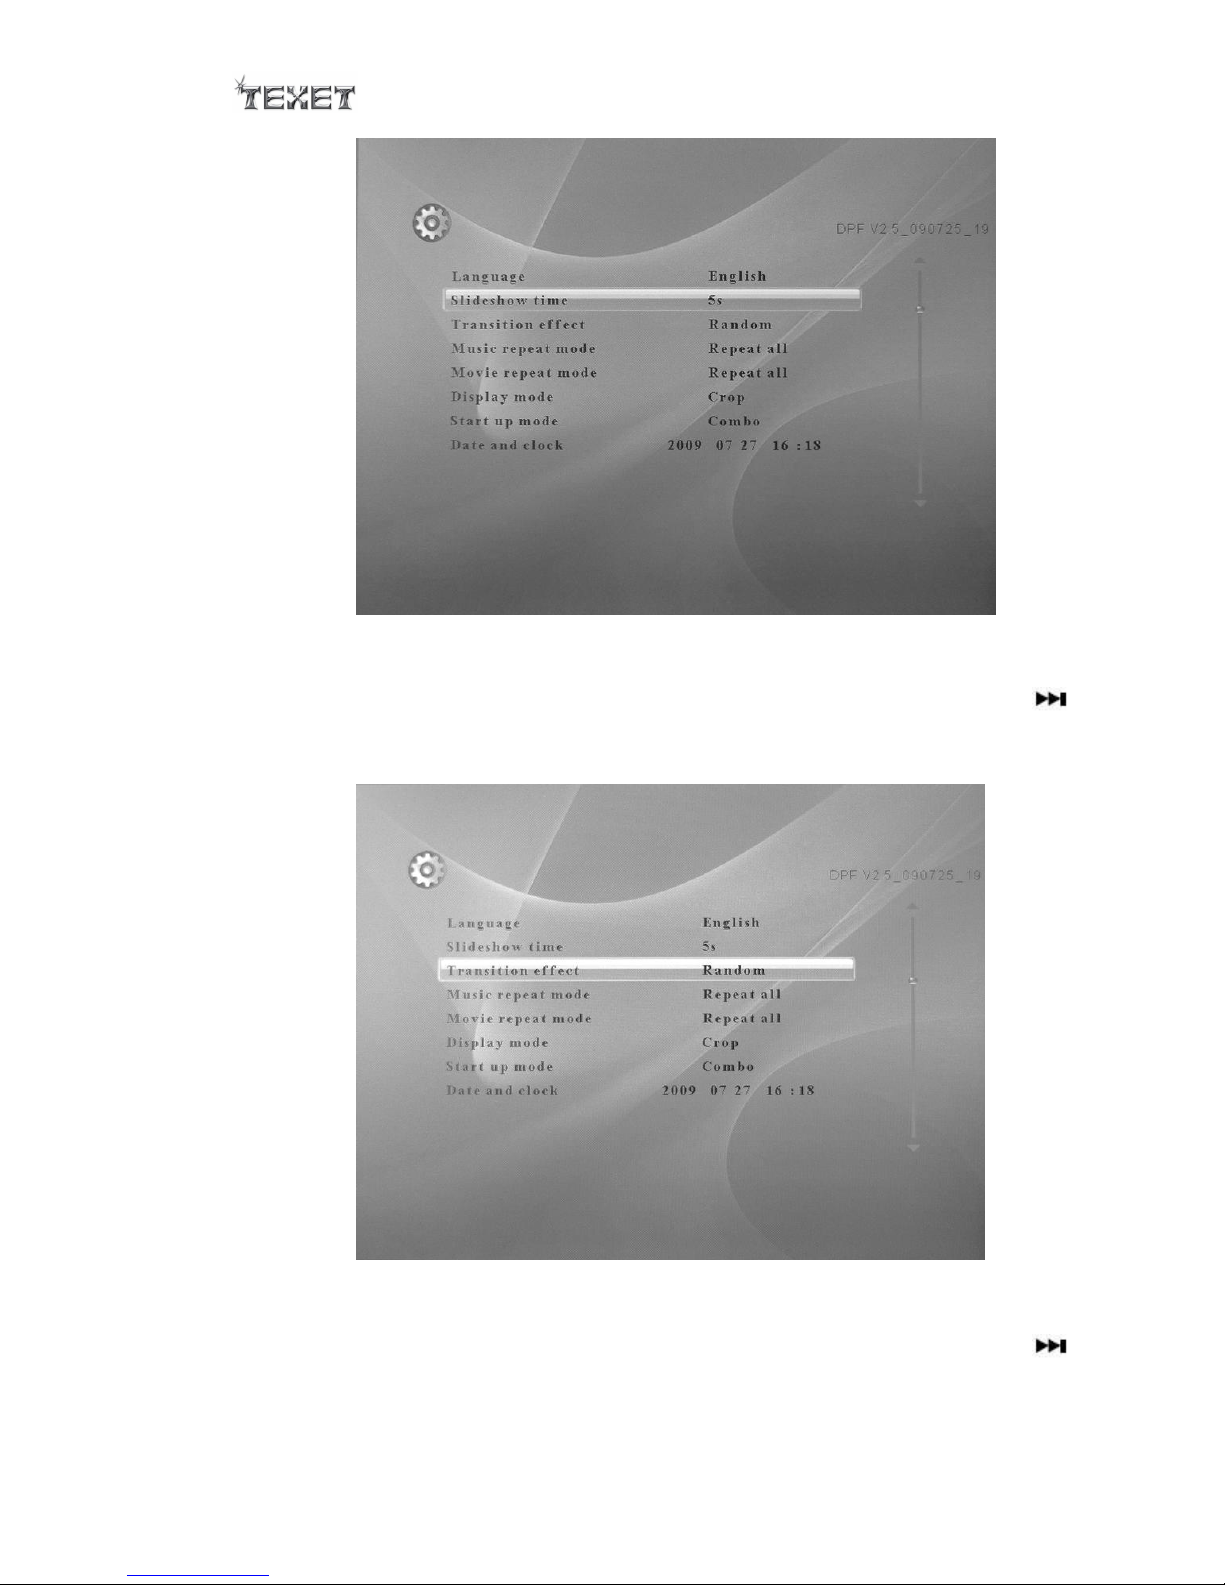
4.1.3. Transition effect
Select TRANSITION EFFECT by pressing the Vol+ Vol- button, then press ►
button to select transition effect. And then confirm by ENTER. Exit the menu
by RETURN button.
4.1.4. Music repeat mode
Select MIUSIC REPEAT MODE by pressing the Vol+ Vol- button, then press ►
button to select music repeat mode and then confirm by ENTER. Exit the menu
by RETURN button.
Page 8
8
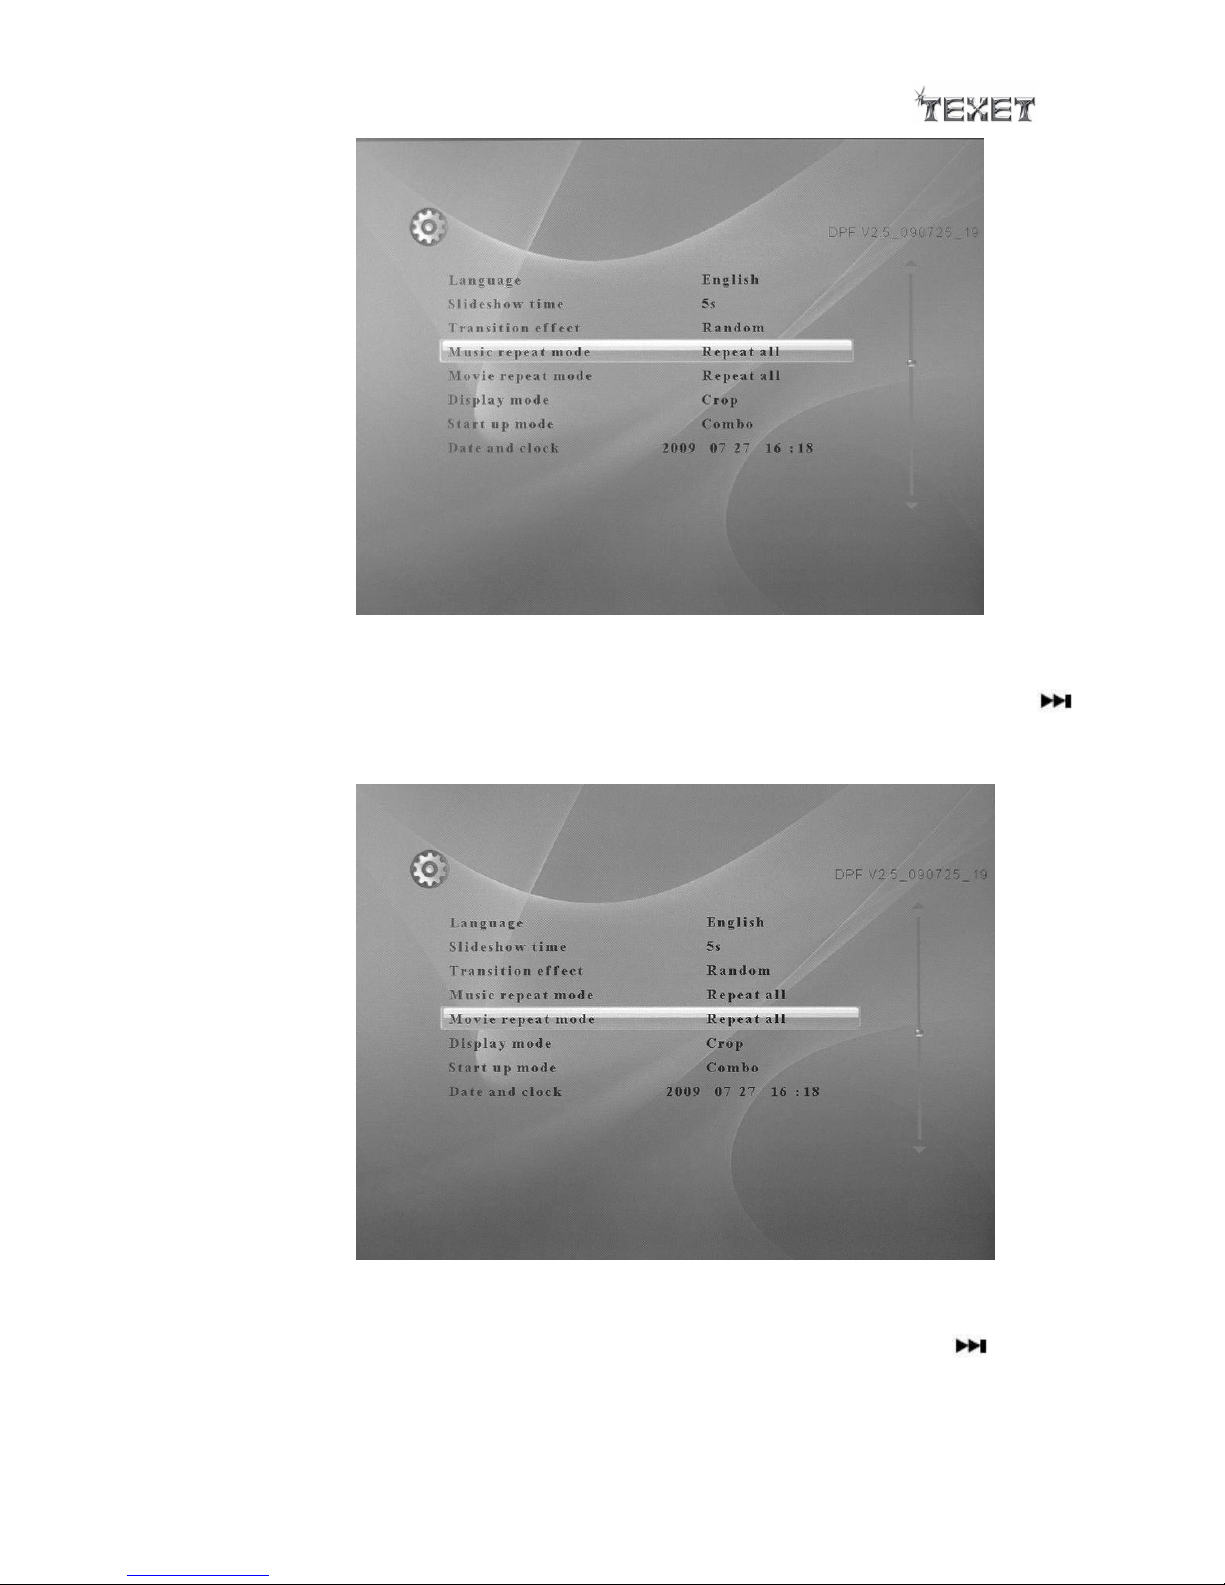
4.1.5. Movie repeat mode
Select MOVIE REPEAT MODE by pressing the Vol+ Vol- button, then press ►
button to select movie repeat mode and then confirm by ENTER. Exit the menu
by RETURN button.
4.1.6. Display mode
Select DISPLAY MODE by pressing the Vol+ Vol- button, then press button
to select display mode and then confirm by ENTER. Exit the menu by RETURN
button.
Page 9

9
4.1.7. Start up mode
Select START UP MODE by pressing the Vol+ Vol- button, then press button
to select start up mode and then confirm by ENTER. Exit the menu by RETURN
button.
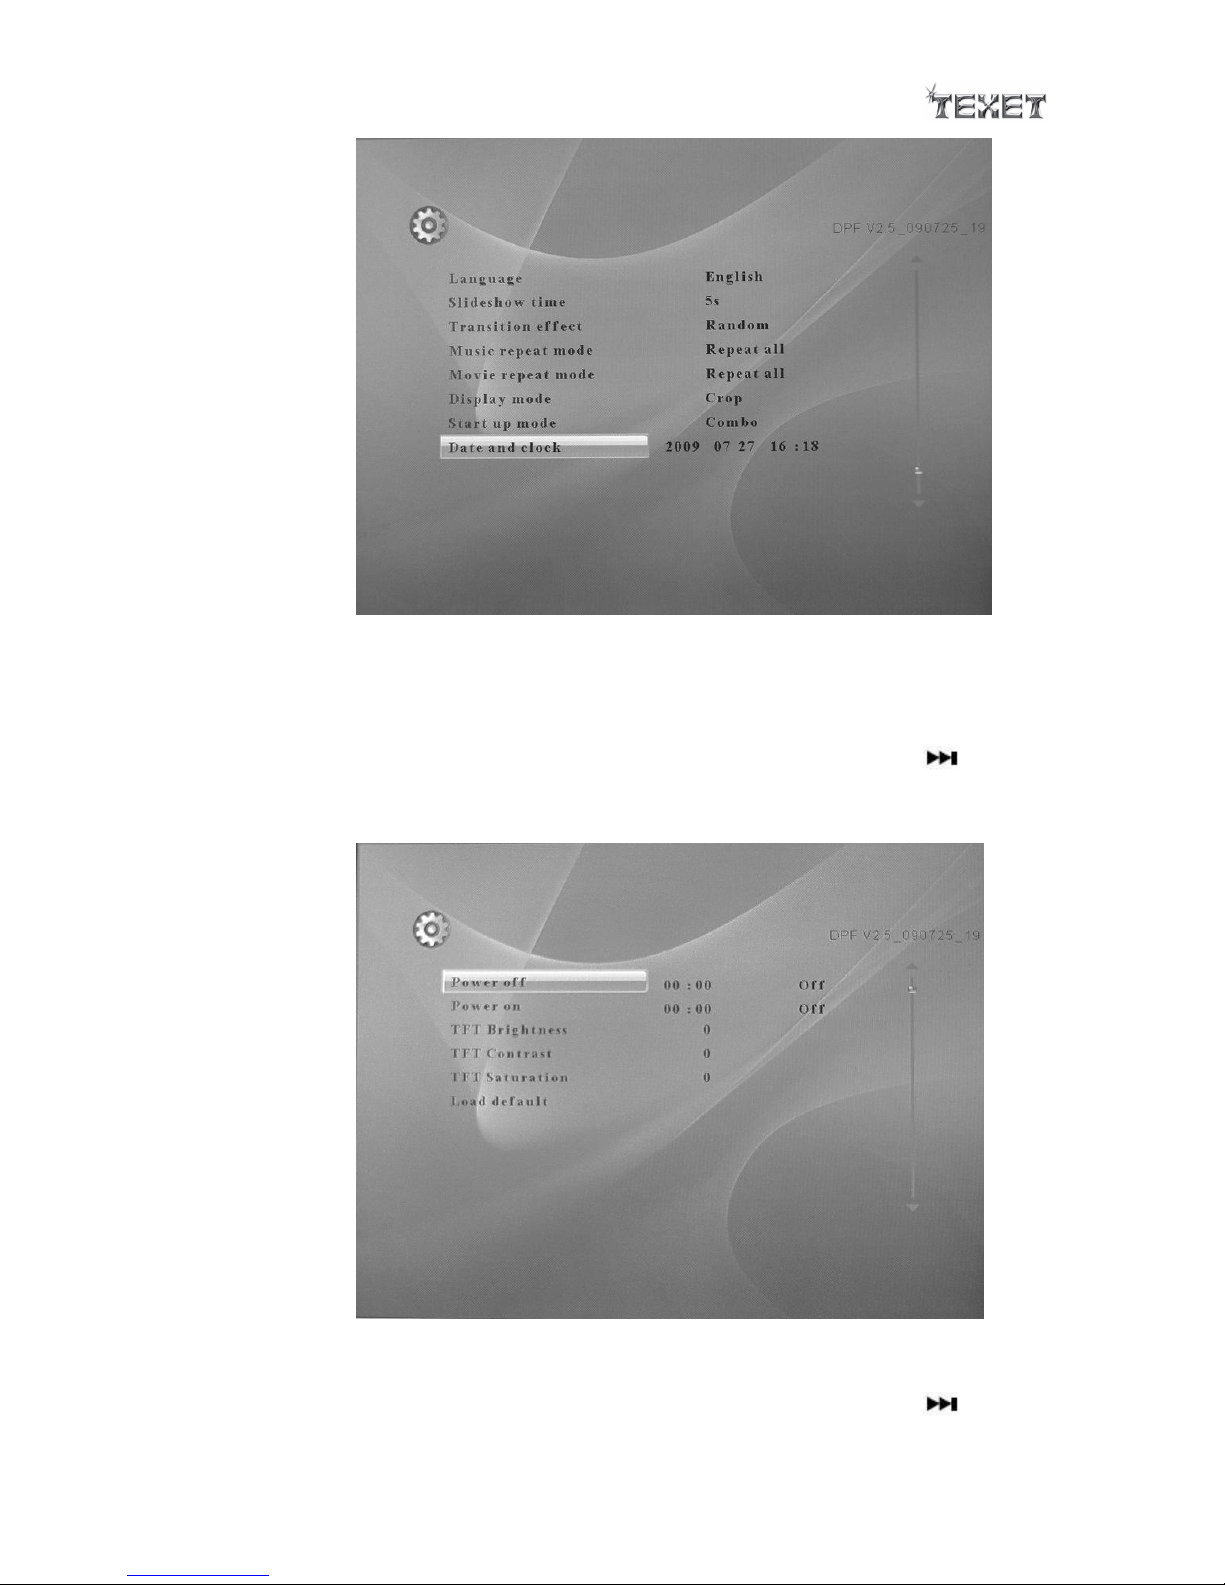
4.1.8. Time
Select TIME(DATE & TIME) by pressing the Vol+ Vol- button, then press
button to select the date and time, press the Vol+ Vol- button to set, and then
confirm by ENTER. Exit the menu by RETURN button.
Page 10
10
4.1.9. Auto power off
Select POWER OFF by pressing the Vol+ Vol- button, then press button to
select the hour of minute, press the Vol+ Vol- button to set, and then confirm
by ENTER. Exit the menu by RETURN button.
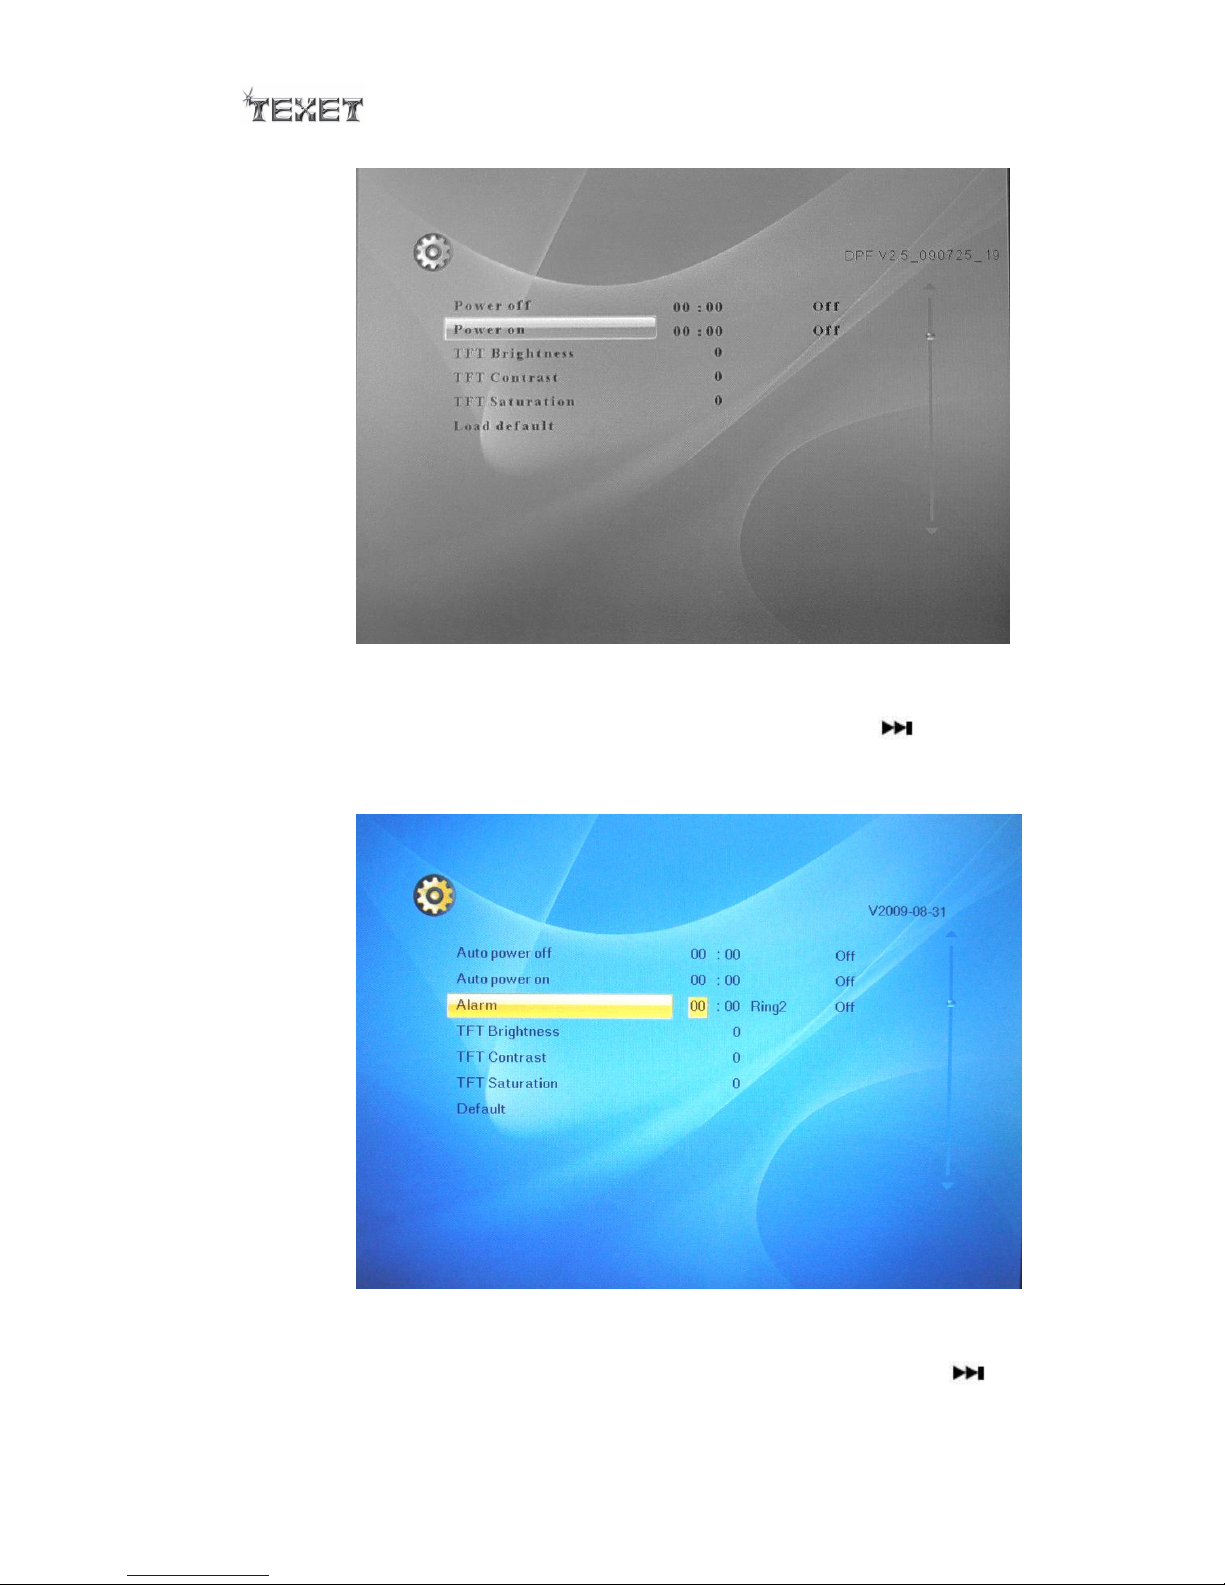
4.1.10. Auto power on
Select POWER ON by pressing the Vol+ Vol- button, then press button to
select the hour of minute, press the Vol+ Vol- button to set, and then confirm
Page 11
11
by ENTER. Exit the menu by RETURN button.
4.1.11. Alarm
Select ALARM by pressing the Vol+ Vol- button, then press button to
select the time, ring type and alarm on/off, press the Vol+ Vol- button to set,
and then confirm by ENTER. Exit the menu by RETURN button.
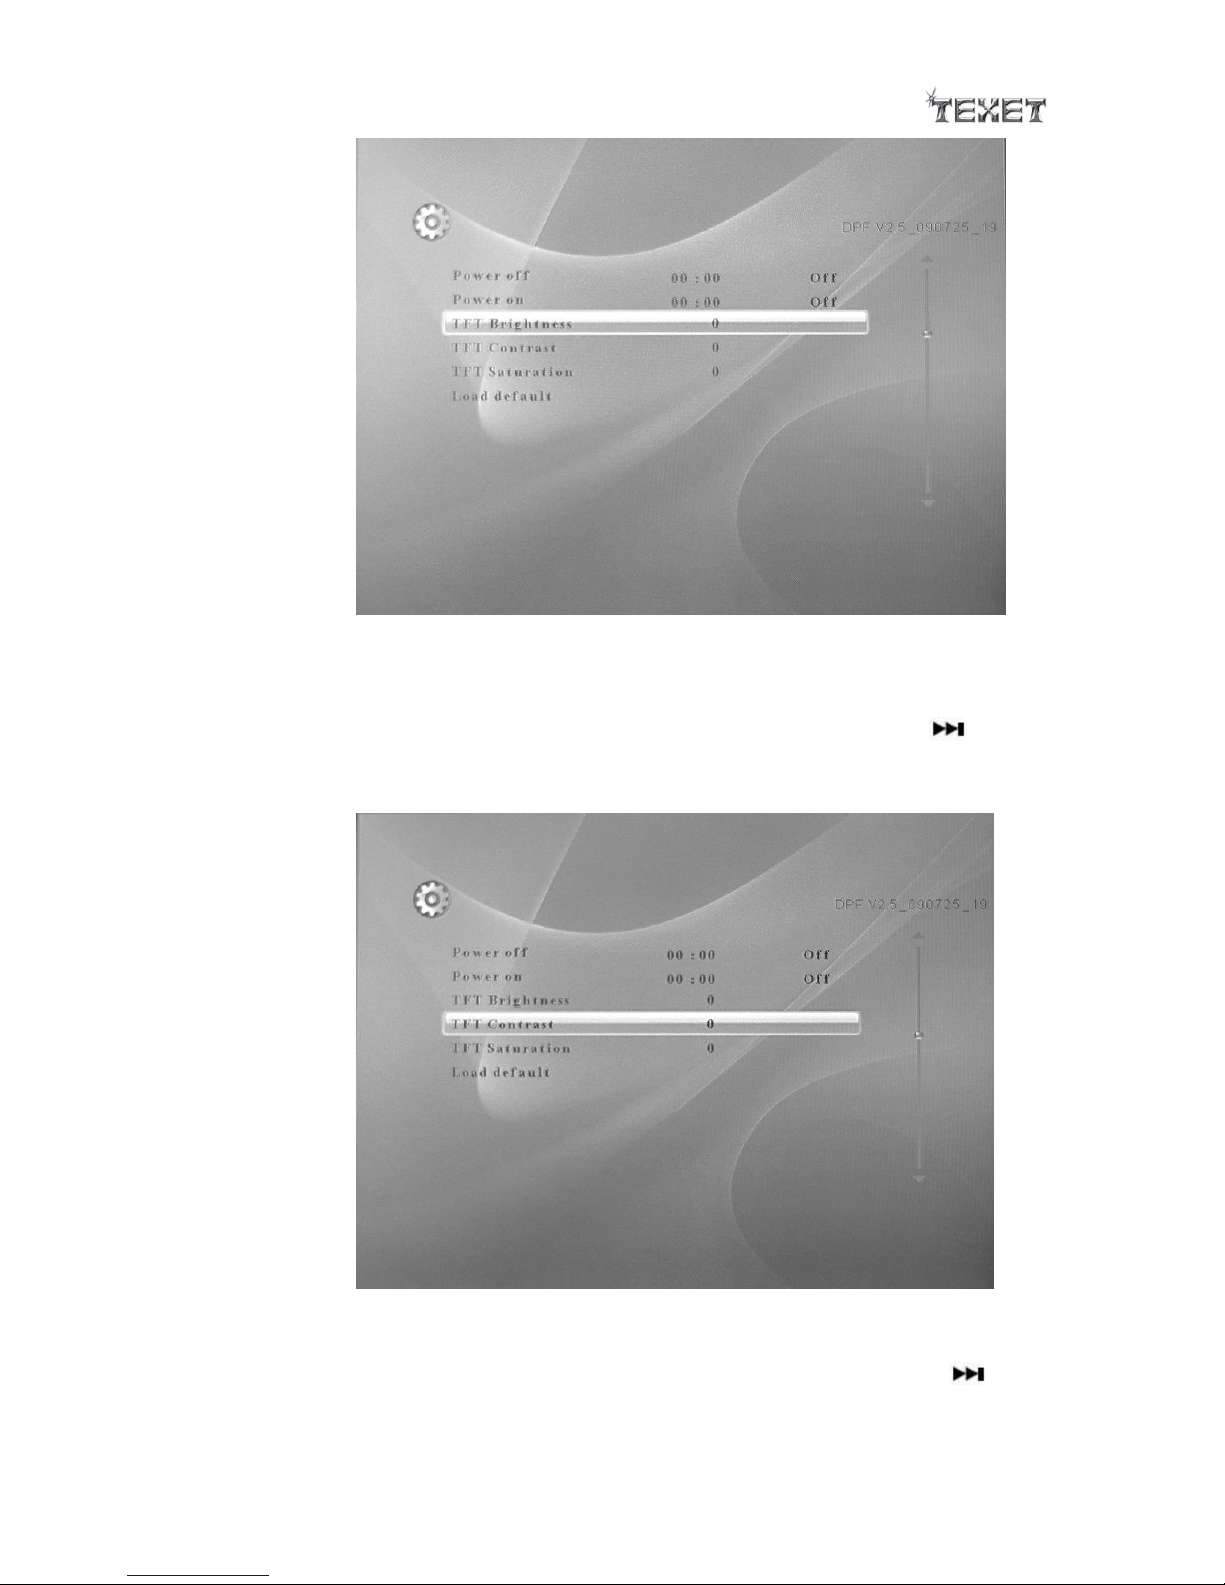
4.1.12. TFT Brightness
Select TFT Brightness by pressing the Vol+Vol- button, then press button
to select the brightness of TFT screen and then confirm by ENTER. Exit the
menu by RETURN button.
Page 12
12
4.1.13. TFT Contrast
Select TFT Contrast by pressing the Vol+ Vol- button, then press button to
select the Contrast of TFT screen and then confirm by ENTER. Exit the menu by
RETURN button.
4.1.14. TFT Saturation
Select TFT Saturation by pressing the Vol+ Vol- button, then press button
to select the Saturation of TFT screen and then confirm by ENTER. Exit the
menu by RETURN button.
Page 13

13
4.1.15. Load Default
Select DEFAULT by pressing the Vol+ Vol- button, then confirm by ENTER. Exit
the menu by RETURN button.
Notice:Load Default will lose all your PERSONAL ADJUSTMENTS.
5. CALENDAR MODE
When you are at the main MENU, select CALENDAR, and press ENTER to activate the
date and hour function. Also you can press the CALENDAR button at the Remote.
Page 14

14
Press ENTER to enter calendar with picture mode.
6. MOVIE, MUSIC, PHOTO, FILES MENU
Select the supported Storage (SD/MMS/MS/XD USB) by pressing the or
buttons and then confirm by ENTER.
6.1. MOVIE
Select MOVIE by pressing the or buttons and then confirm by ENTER, then
Page 15

15
select the supported movie files to play by Vol+ Vol- button, play by enter.
6.2. MUSIC
Select MUSIC by pressing the or buttons and then confirm by ENTER, then
select the supported music files to play by Vol+ Vol- button, play by enter.
6.3. PHOTO
Select PHOTO by pressing the or buttons and then confirm by ENTER, then
select the supported photo files to play by Vol+ Vol- button, play by enter.
Page 16

16
Notice: Also, you can use remote control to choose MUSIC MODE or VIDEO MODE and
the SLIDESHOW to start playing music or movie and the SLIDESHOW functions.
6.4. FILES
Select FILES by pressing the or buttons and then confirm by ENTER. Then select
the supported files to edit by Vol+ Vol- button, press to choose, you can also
choose the other files by press , then select COPY or DELETE to edit the files
that you chosen.
Page 17

17
7. HELP IN CASE OF PROBLEMS
If the photo frame does not function correctly, you need to read the following information
carefully. Before requesting for technical assistance, you need to verify the following
matters:
Failure symptom
Probable cause and possible solution
No power supply
If there is no power supply, verify that the photo frame is well
connected to its power supply block and if the latter is
connected to the sector, and try once more.
No display
Verify that you have inserted a memory card or a USB key
properly into the appropriate readers and that the latter contain
files legible by the apparatus ? only JPG and TXT formats are
supported.
The remote control
does not function.
1. The distance is too long or the angle exceeds 30 degrees.
2. The battery of the remote control is discharged.
3. The infrared sensor is perturbed by another luminous source
Your photo frame
dies or goes back to
its welcome screen.
This may be provoked by an electrostatic environment. You need
to make a stop/forward step of your photo frame, if you know its
origin, and keep the frame away from the source generating
electrostatic problems (ESD).
It does not functions
with a PC
The digital photo frame is not provided to function when
connected to a PC. The USB port is intended to receive USB keys
uniquely in order to read .JPG or any other support files.
Observation
Potential cause / solution
The frame does not
work
Does the socket that is being used have power?
Is the frame switched on at the plug?
Is the adaptor correctly / fully connected?
Has the FUNCTION switch been moved to ON?
No start up screen
Has the memory card device been inserted?
No photo being
displayed.
Has the memory card been correctly inserted?
Have photos been saved on the memory card or internal
memory?
Has correct photograph source (e.g. memory or card) been
selected in the control menu?
Incompatible file format – is the photo saved in JPG or JPEG
formats?
8. TECHNICAL SPECIFICATIONS
Screen size: 8 inches 800*600 4:3 ratio
Speaker Output: 8W (2W*2+4W)RMS
Page 18

18
Supported file format: .JPG, AVI, MP3, MP4, DIVX,WMA.
Acceptable photo cards: MS, MS Pro, MMC, SD, XD, USB2.0, Mini USB.
USB ports: USB 1.1 and USB 2.0
Power supply: AC 110V-240V~60/50Hz (DC 9V2A)
Max power consumption: 15 W
Disposition: placed or suspended
Dimensions (with frame): 260(L) x 230(W) x 244(H) mm
Weight: 1016 g
9. RECYCLING ELECTRICAL PRODUCTS
You can now recycle your waste electrical goods and in doing so help the environment.
This symbol means an electrical product is designed for recycling when finished with.
Visit www.recycle-more.co.uk, click on “bank locator” and enter your postcode to find
your nearest recycling site.
 Loading...