

Operation Manual
®
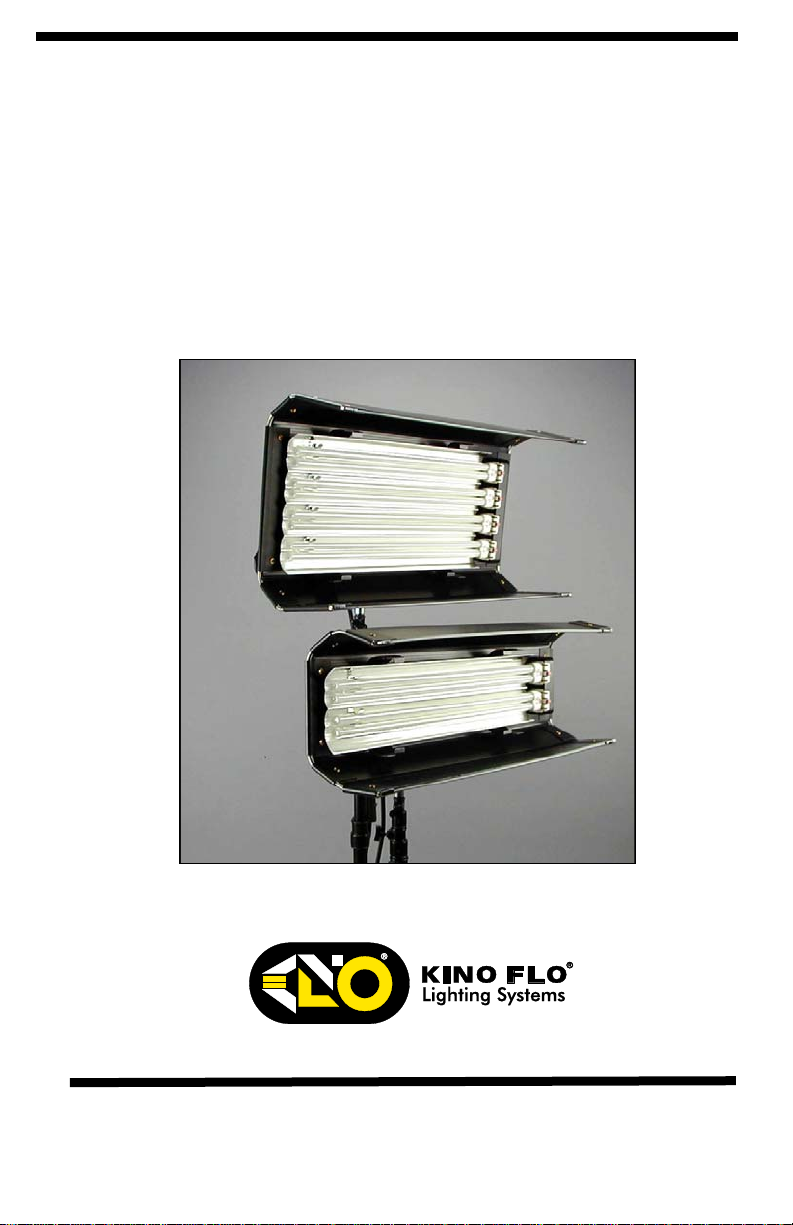
Diva-Lite
400 / 200
Part No. 3100024 Rev D 01-07-2008
DIV-400-120……..Diva-Lite 400, 120VAC
DIV-400-230……..Diva-Lite 400, 230VAC
DIV-400-120U….. Diva-Lite 400, 120U
DIV-400-230U….. Diva-Lite 400, 230U
Universal Voltage
DIV-200-120……..Diva-Lite 200, 120VAC
DIV-200-230……..Diva-Lite 200, 230VAC
GFR-D4…………. Diva-Lite 400 Gel Frame
(Included)
GFR-D2…….…… Diva-Lite 200 Gel Frame
(Included)
LVR-D4-S ….. Diva-Lite 400 Louver / Silver
(Included)
LVR-D2-S…… Diva-Lite 200 Louver / Silver
(Included)
MTP-LB ……..Lollipop w/Baby Receiver
(Included)
Universal Voltage
2
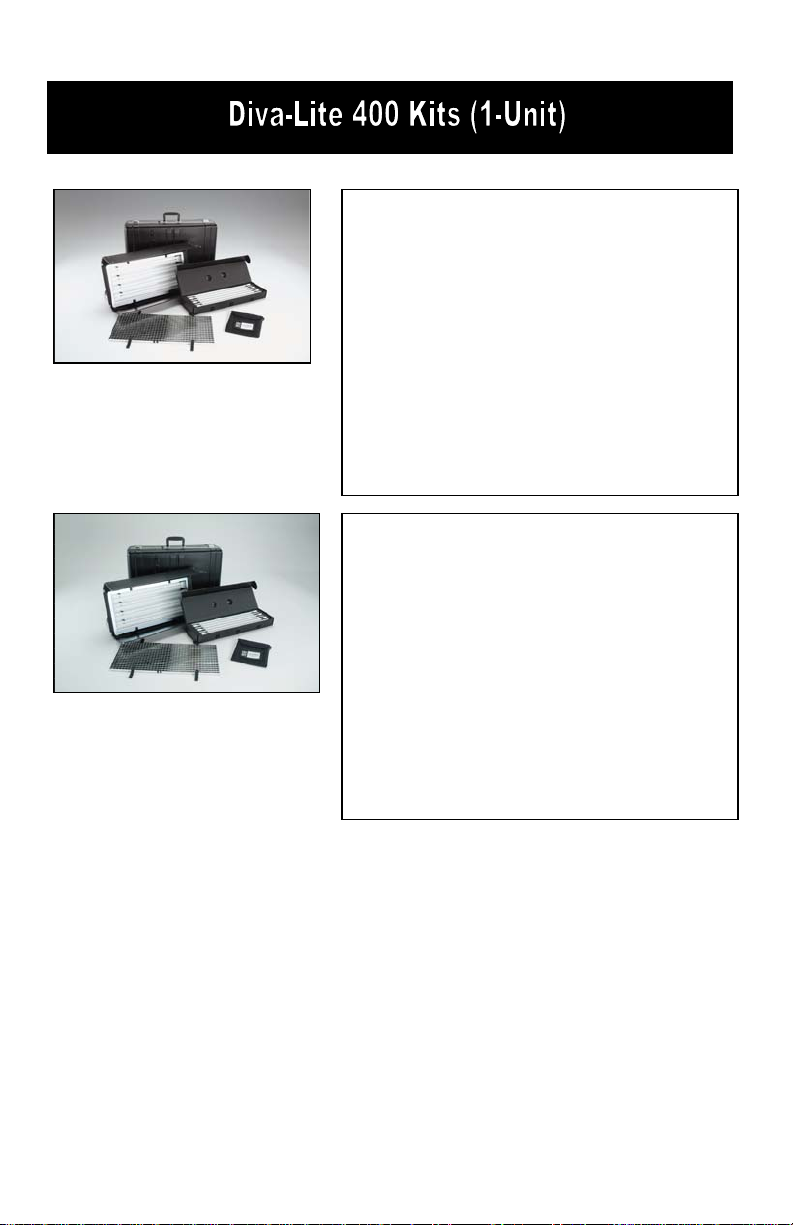
KIT-D4-120
Diva-Lite 400 Kit, 120VAC
w/ Travel Case
KIT-D4-230
Same as above for 230 voltage
Kit Contents:
1 Diva-Lite 400 1 Lamp Case
1 Flozier, Full 1 Travel Case
Dimensions Weight
28 x 8 x 18” 25lb
(71 x 20.5 x 45.5cm) (11.3kg)
KIT-D4-120U
Diva-Lite 400 Kit (Universal), 120U
w/ Travel Case
KIT-D4-230U
Same as above for 230 voltage, 230U
Kit Contents:
1 Diva-Lite 400 Universal 1 Lamp Case
1 Flozier, Full 1 Travel Case
Dimensions Weight
28 x 8 x 18” 25lb
(71 x 20.5 x 45.5cm) (11.3kg)
3

KIT-D42-120
Diva-Lite 400 Kit, 120VAC
(2-Unit) w/ Flight Case
KIT-D42-230
Same as above for 230 voltage
Kit Contents:
2 Diva-Lite 400 2 Flozier, Full
2 Stand 2 Lamp Case
2 Off-set Mount 1 Flight Case
Dimensions Weight
22 x 16 x 33.5” 61.5lb
(56 x 41 x 85cm) (27.7kg)
KIT-D42-120U
Diva-Lite 400 Kit (Universal), 120U
(2-Unit) w/ Flight Case
KIT-D42-230U
Same as above for 230 voltage, 230U
Kit Contents:
2 Diva-Lite 400 Universal 2 Flozier, Full
2 Stand 2 Lamp Case
2 Off-set Mount 1 Flight Case
Dimensions Weight
22 x 16 x 33.5” 63lb
(56 x 41 x 85cm) (28.4kg)
4
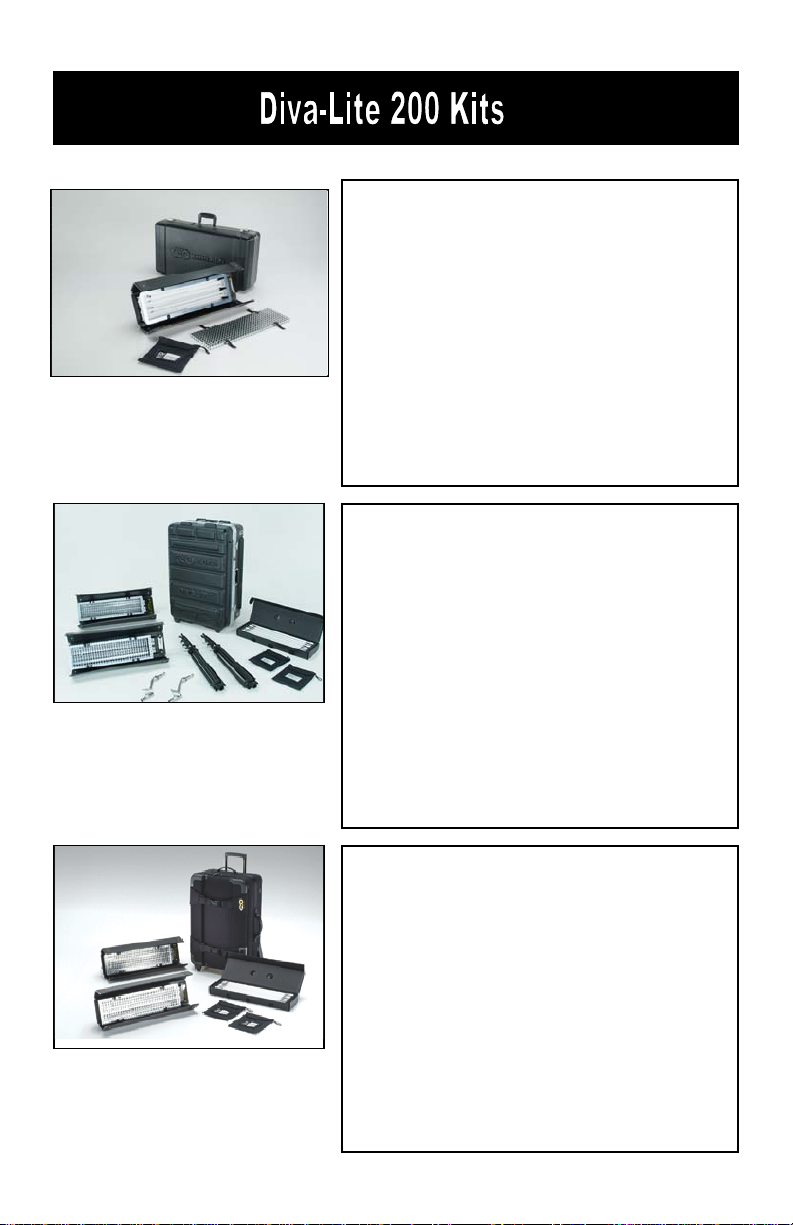
KIT-D2-120
Diva-Lite 200 Kit, 120VAC
w/ Travel Case
KIT-D2-230
Same as above for 230 voltage
Kit Contents:
1 Diva-Lite 200 1 Lamp Case
1 Flozier, Full 1 Travel Case
Dimensions Weight
28 x 8 x 15” 18lb
(71 x 20.5 x 38cm) (8.1kg)
KIT-D22-120
Diva-Lite 200 Kit, 120VAC
(2-Unit) w/ Flight Case
KIT-D22-230
Same as above for 230 voltage
Kit Contents:
2 Diva-Lite 200 2 Flozier, Full
2 Stand 1 Lamp Case
2 Off-set Mount 1 Flight Case
Dimensions Weight
22 x 13 x 33.5” 54lb
(56 x 33 x 85cm) (24.3kg)
KIT-D2-120/2
Diva-Lite 200 Kit, 120VAC
(2-Unit) w/ Rolling Case
KIT-D2-230/2
Same as above for 230 voltage
Kit Contents:
2 Diva-Lite 200 1 Lamp Case
2 Flozier, Full 1 Rolling Ship Case
Dimensions Weight
31.5 x 12.5 x 22” 41lb
(80 x 32 x 56cm) (18.5kg)
5

Position Lamp over
Lamp holder.
Press red locking tab down
and pull up on lamp.
Press lamp base down
until it clicks into place.
Pull lamp out of lamp clip.
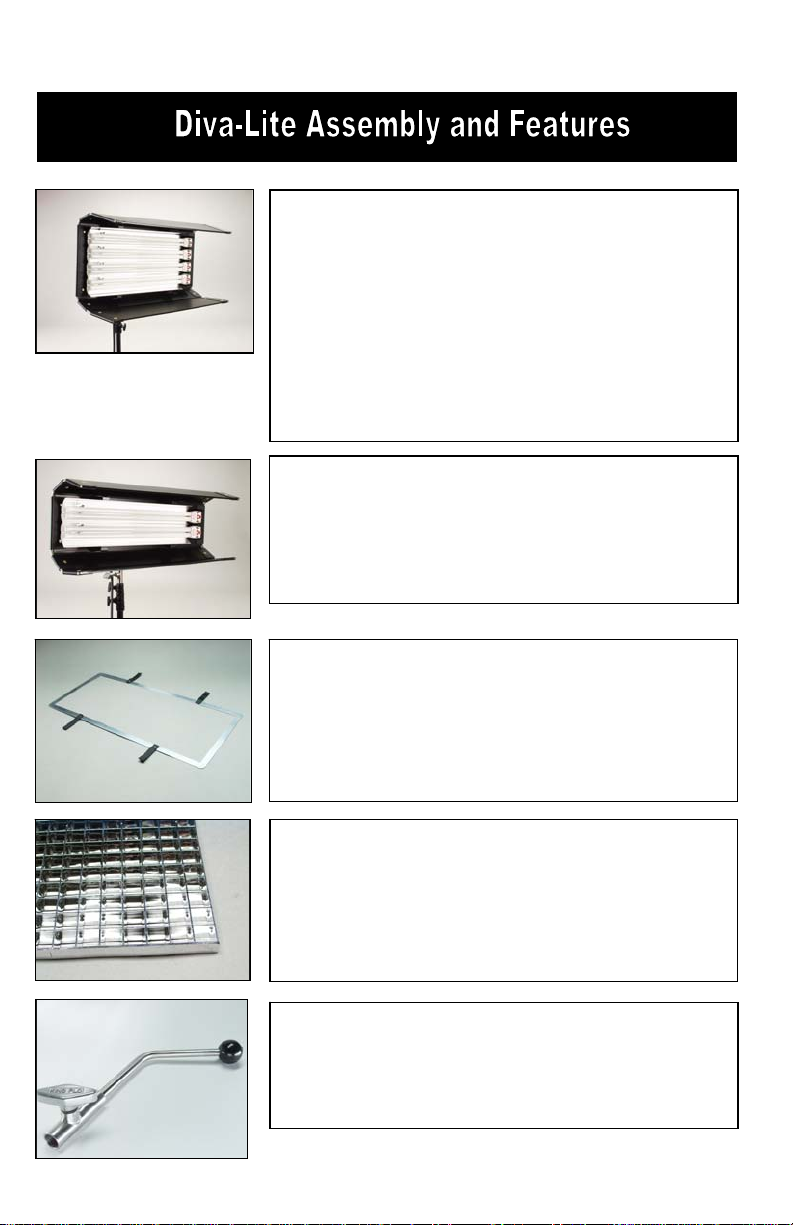
The Gel Frame is held to the Fixture with 4 Velcro straps.
Press lamp end
into lamp clip.
Warning!
Do Not lubricate
the sliding lock
mechanism on the
lamp holder.
6

The Louver is fastened to the Fixture with 4 Velcro straps.
Mounted on a baby stand
Mounted to pipe grid
Note:
When hanging in
a studio, loop a safety
cord through the strainrelief ring provided on
the back of the fixture.
A 180 degree turn is all that is required to
loosen the mount for orientation.
To adjust the tension on the lock lever,
pull handle away from mount.
This disengages the handle from the
screw mechanism and allows the lever
to be reoriented. You can also use a
screwdriver to adjust the tension.
Pull back on handle and adjust screw.
7

MTP-B41F… Baby offset arm
The Baby Offset Arm allows fixtures
to mount on the center of a stand.
The Baby offset Arm can also be under
slung from a baby stand to use as an
up light.
8

VERTICAL MODE:
Follow the principle of lamp
base up and lamp tip down.
This orientation keeps the
mercury away from the
cathodes and provides best
color temperature stability
and best color rendering.
DO NOT operate fixtures with
lamp base in the down
position. Color can diverge
up to 400K and will get very
green.
HORIZONTAL MODE:
Even in the horizontal position
a slight rotation favoring the
lamp tips (lamp base higher
than the lamp tip) will allow
for better color temperature
stability.
9

Warning! To Ensure Proper Operation
ALWAYS TURN OFF THE FIXTURE
BEFORE connecting or disconnecting
lamps. After the lamps are properly
installed, the in-line switch can turn on the
Ballast. Avoid operating in temperatures
above 125°F (51°C) or below 60°F (15°C).
In temperatures below 60°F (15°C) the ballast may take longer to strike.
If lamps do not strike within 5 seconds, switch the ballast to OFF, and
try again. Check that the lamps are properly seated, set dimmer to Full and
restrike. If temperatures are too low, try to warm up the fixture to at least
60°F. Lamps will turn on at preset dimmer settings as long as the temperature
is above 60°F (15°C).
LAMPS FAIL TO LIGHT:
• Check ambient temperature. Operating in temperatures above 125°F
(51°C) or below 60°F (15°C) the unit might have trouble starting.
• With the power switch in the ON position, the red light should be on.
If it is not, Voltage is not present. Check your power feed.
• The onboard dimmer should be full up. (Turned completely clockwise.)
• Check lamp contact. Lamps must be properly seated. If one lamp is
not making contact or is burned out, two lamps will be off.
• Replace lamp or lamps.
• After having checked that lamps are correctly seated, turn off power to
the fixture for 60 seconds and restart.
• Check that the lamp selector switch is in the appropriate setting.
10

The Diva-Lite 400 Lamp Select
Switch allows for 4 lamp or 2
lamp operation.
Turning off 2 lamps equals a
one-stop reduction in light
output without color shift. In the
4 Lamp position all lamps are
on. In the 2 Lamp position only
the two center lamps are on.
Note: This feature is not
available for the Diva-Lite 200.
MANUAL DIMMING CONTROL
The Dimmer should be full up when
striking the lamp. Once the lamps
have come up to full temperature,
in about 3-5 minutes, then dim to the
desired light level.
For full light output, turn dimmer fully
clock wise.
An input jack for an optional Remote
Dimmer (DIM-5) is located next to
the power cord.
Dimming and Color Temperature Shift
Dimming can be used to adjust the light output of the Fixture. The color
temperature will shift marginally if kept to within one f-stop. Dimming
beyond one f-stop may result in a reduction of color temperature as well
as a noticeable shift to magenta.
11

The Diva-Lite Dimmer (DIM-5) is designed to remotely dim Diva-Lite 400
and Diva-Lite 200 Fixture models, which have the REMOTE DIM feature.
A 15ft Dimming Cable is supplied with the Dimmer.
Note: No batteries are required to operate the Dimmer. The power for the
Dimmer is drawn from the Fixture.
Insert the Dimmer Cable into
the receptacle marked:
REMOTE DIM.
Inserting the Dimmer Cable will
automatically disable the
onboard Dimmer.
Insert the other end of the
Dimmer Cable into the
Diva-Lite Remote Dimmer
(DIM-5).
12

DIM-5….…. Diva-Lite Dimmer
w/ 15’ remote cable
DFS-D4….. Diva-Lite 400 Flozier, Full
DFS-D4-H....Diva-Lite 400 Flozier, Half
DFS-D2….. Diva-Lite 200 Flozier, Full
DFS-D2-H…Diva-Lite 200 Flozier, Half
LVR-D445… Diva-Lite 400 Louver 45°
LVR-D460… Diva-Lite 400 Louver 60°
LVR-D490… Diva-Lite 400 Louver 90°
LVR-D245… Diva-Lite 200 Louver 45°
LVR-D260… Diva-Lite 200 Louver 60°
LVR-D290… Diva-Lite 200 Louver 90°
MTP-B41F… Baby Off-set w/ Baby Receiver
STD-M30.…..Medium Duty Stand/Black, 30”
STD-M36.…..Medium Duty Stand/Black, 36”
13

pty
Diva-Lite Travel Case
Diva-Lite Flight Case
Diva-Lite Rolling Case
Part Description Dimensions Weight Holds
Number Em
KAS-D2-C Diva-Lite 200 Travel Case 28 x 8 x 15” 10lb Diva-Lite 200 Kit Items
(71 x 20.5 x 38cm) (4.5kg)
KAS-D2-R Diva-Lite 200/400 20 x 11.5 x 32.5” 24lb Diva-Lite 200 (2)
Rolling Case (51 x 29 x 82.5cm) (10.8kg) Diva-Lite 400 (1)
KAS-D22 Diva-Lite 200 Flight Case 22 x 13 x 33.5” 27.3lb Diva-Lite 200 Kit
(56 x 33 x 85cm) (12.3kg) Items (2)
KAS-D4-C Diva-Lite 400 Travel Case 28 x 8 x 19” 11.5lb Diva-Lite 400 Kit Items
(71 x 20.5 x 48.5cm) (5.2kg)
KAS-D42 Diva-Lite 400 Flight Case 22 x 16 x 33.5” 28.5lb Diva-Lite 400 Kit
(56 x 41 x 85cm) (12.8kg) Items (2)
Lamp Carry Case
(55Watt Compact)
Part Description Dimensions Weight Holds
Number Empty
KAS-CL4 4-Lamp Carry Case 24 x 5 x 2.5” 0.8lb 55Watt Lamps (4)
(55W Compact) (61 x 12.7 x 6.5cm) (0.4kg)
KAS-CL6 6-Lamp Carry Case 24 x 7 x 2.5” 0.8lb 55Watt Lamps (6)
(55W Compact) (61 x 18 x 6.5cm) (0.4kg)
14

Diva-Lite 400
Diva-Lite 400
Universal
Diva-Lite 200
Power requirements: 120VAC or 230VAC
Amperage: 1.1 amps at 230VAC, 2.0 amps at
120VAC 50/60Hz
Switching: 4 Lamps/ 2 Lamps
Weight: w/ lamps, louver and diffuser
13lb / 5.9kg
Dimensions: 26 x 12 x 6” (w/ 6” barn doors)
(66 x 30.5 x 15cm)
(w/ 15cm barn doors)
Lamp types: 55 watt compact fluorescent lamps
with 2G11 base
Power requirements: 100 - 265VAC 50/60Hz
Amperage: 1.8 amps at 120-230VAC
Switching: 4 Lamps/ 2 Lamps
Weight: w/ lamps, louver and diffuser
14.2lb / 6.4kg
Dimensions: 26 x 12 x 6” (w/ 6” barn doors)
(66 x 30.5 x 15cm)
(w/ 15cm barn doors)
Lamp types: 55 watt compact fluorescent lamps
with 2G11 base
Power requirements: 120VAC or 230VAC 50/60Hz
Amperage: 1.1 amps at 120VAC
0.6 amps at 230VAC
Weight: w/ lamps, louver and diffuser
9lb / 4.1kg
Dimensions: 26 x 7.5 x 6”
(w/ 3.5” barn doors)
(66 x 19 x 15cm)
(w/ 9cm barn doors)
Lamp types: 55 watt compact fluorescent lamps
with 2G11 base
15

Environmental: Disposal of Old Electrical & Electronic Equipment.
This symbol on the product or on its packaging indicates that this product
shall not be treated as household waste. This product is made of recyclable
materials and should be disposed of in accordance with local and state
regulations.
Kino Flo, Inc. 2840 N. Hollywood Way, Burbank, CA 91505, USA
Tel: 818 767-6528 website: www.kinoflo.com
16
 Loading...