

Tevion UR4200 Instruction Manual
Universal Remote Control 10 in 1
Instruction Manual • Model Number UR4200
After Sales Support
Tel: 1300 663 907 Web: www. winplus.com.au
27

After Sales Support TEL: 1300 663 907 After Sales Support TEL: 1300 663 907
Universal Remote
Control 10 in 1
What your 1 year warranty means
Great care has gone into the manufacture of this product and
it should therefore provide you with years of good service
when used properly. In the event of product failure within
its intended use over the course of the first 1 year after the
date of purchase, we will remedy the problem as quickly as
possible once it has been brought to our attention. In the
unlikely event of such an occurrence, or if you require any
information about the product, please contact us via our after
sales support services, details of which can be found in this
manual and on the product itself.
1 26
Troubleshooting
Problem – What if the remote does not have the codes for
the brand of TV/Device I have?
Solution – Use the automatic code search function, shown
on page 11 of this booklet.
Problem – What do I do if the built in codes do not work with
my TV/Device?
Solution – Please refer to the instruction manual for the
learning method where the remote can learn each button
function from your old remote. Instructions can be found on
page 13 of this manual.

25 2
Welcome
Congratulations on choosing to buy a TEVION® product.
This TEVION® product is manufactured to the highest
standards of performance and safety. As part of our
philosophy of customer service and satisfaction this product
is backed by a comprehensive 1 year warranty.
We hope you will enjoy using your product for many years to
come.
Contents
i. General information and safety instructions..................... 3
Pack Contents
Warnings
Product use
Product Features
ii. Getting Started……………………………….......................5
Remote Control Keys
Inserting the batteries
iii. Programming the Remote Control....................................8
Programming Device Codes
Programming the Device Code by Manufacturer Name
Entering Device Codes directly
Searching for Device Codes automatically
iv. Learning Function .......................................................... 13
Learning a Key Code Signal
Erasing a Key Code
Erasing All Key Codes for a Device
Erasing All Learned Key Codes
v. Macros ........................................................................... 16
Programming a Macro
Executing a Macro
Erasing a Macro
vi. Special Features ............................................................. 18
Controlling a PC
Consistent Volume Control / VPT
Favourites
Backlight
Setting the Time
Calculator
Teletext Mode
Child lock
Powering All Devices On/Off
Deleting All Settings
vii. Troubleshooting…………………..……….........................26
viii. Warranty…………………………………………................. 27
ix. Further technical support………………………………......27

After Sales Support TEL: 1300 663 907 After Sales Support TEL: 1300 663 907
3 24
General Information
& Safety Instructions
For correct use and safe operation of this product, please
read this manual and safety information carefully. Follow all
instructions and retain this manual for your future reference.
This product is approved to Australian standards. Internal
manipulation of this product or any modification to this
product is forbidden, due to safety, security and electrical
authority approval issues.
If this product is used improperly or if you have opened,
altered and repaired the product yourself, all warranties
expire. The supplier does not accept responsibility for
additional damage other than covered by the legal product
responsibility.
Young children should use the device only under adult
supervision. No guarantee or liability will be accepted for
any damage caused due to incorrect use of the equipment
supplied, other than indicated in this user manual and the
included warranty card.
If you do have any problems with this product, please contact
us on 1300 663 907.
Pack Contents
1 x Universal remote control
2 x AA batteries
1 x User manual
1 x Code book
1 x Warranty card
2 x Warranty stickers
WARNING
1. Indoor use only
2. Keep the device away from flame and direct heat
sources (e.g. heating radiators, candles)
3. Keep out of direct sunlight
4. Avoid contact with liquids by storing in a dry place,
and away from any objects filled with liquids such
as vases or drinks.
5. Keep away from strong magnetic feilds, such as
loudspeakers.
6. Do not tamper with or open the device in any way
contrary to the instruction manual.
7. Keep the device away from high temperature
and humidity areas (e.g. bathrooms)
8. Clean only with a clean, dry cloth.
8. Press the OK button (22). The result will be displayed.
9. Quit the process by pressing any source device
selection button (2).
Teletext Mode
Use the TTX/MIX button (31) to switch to Teletext mode.
Press the TTX/MIX button (31) again to exit Teletext mode.
Depending on the device that you use for Teletext
reception, the mixed mode will appear first. In this
case you must press the TTX/MIX button (31)
a third time to switch Teletext off.
The following buttons are available for Teletext control:
(3) Direct input of the Teletext page via numeric buttons
(24) Toggle to the next Teletext page
(25) Toggle to the previous Teletext page
(5) Stop page scan
(6) Mix Teletext and TV picture
(20) Disable Teletext
Child lock
The child lock function lets you block the numeric keypad
(3) and the buttons CH+ (24) and CH- (25). This will avoid
channels being switched. The child lock can be enabled and
disabled for each source device selection button individually.
Proceed as follows to enable or disable child lock:
1. Press and hold the SET button (21) for at least 3 seconds.
The display shows [CODE SETUP]. Then release the SET
button (21).
2. Press
(8). The display shows [CONFIGURE].
3. Press the OK button (22). The display shows
[TIME SETUP].
4. Press
(8) twice. The display shows [KIDS LOCK].
5. Press the OK button (22). The display shows [TV OFF].
6. Press the source device selection button for which you
want to enable or disable the child lock function.
7. Press
or (8) to toggle between [ON] (child lock
enabled) or [OFF] (child lock disabled).
8. Press the OK button (22). The message [SUCCESS] will
appear for a few seconds and the device returns to the
[KIDS LOCK] level.
9. Quit the process by pressing the EXIT button (23) twice.

23 4
Product Use
This product is designed to control up to 10 AV devices using
one remote control. The remote control can replace your
old remote controls, using the learning function to mimic
their exact function. The extensive code library features
most common models of DVD players, TVs, and CD players,
allowing you to quickly program the universal remote for your
particular AV setup.
Product Features
• Controls up to 10 devices – replace up to 10 remotes with
just one device.
• Extensive pre programmed code library – the remote
control already knows how to control most common
devices using the code book.
• Learning function – learns the behaviour of remotes which
are not featured in the code book.
• Backlit LCD display – easily see which device is selected,
and what functions are active.
• Backlit keypad – see the keys in the dark.
or (8)

After Sales Support TEL: 1300 663 907 After Sales Support TEL: 1300 663 907
5 22
Getting Started
In this manual, the remote control keys are represented
in capital letters, followed by a number in brackets that
represents the key number. Key numbers are shown in
the next section, remote control keys.
For example:
OK (22)
Messages displayed on the remote control’s screen are
represented in squared brackets.
For example:
[CODE SETUP]
More detailed information or warnings are shown in a
shaded box.
Information fi eld example:
Here you’ll fi nd more detailed information
or warnings.
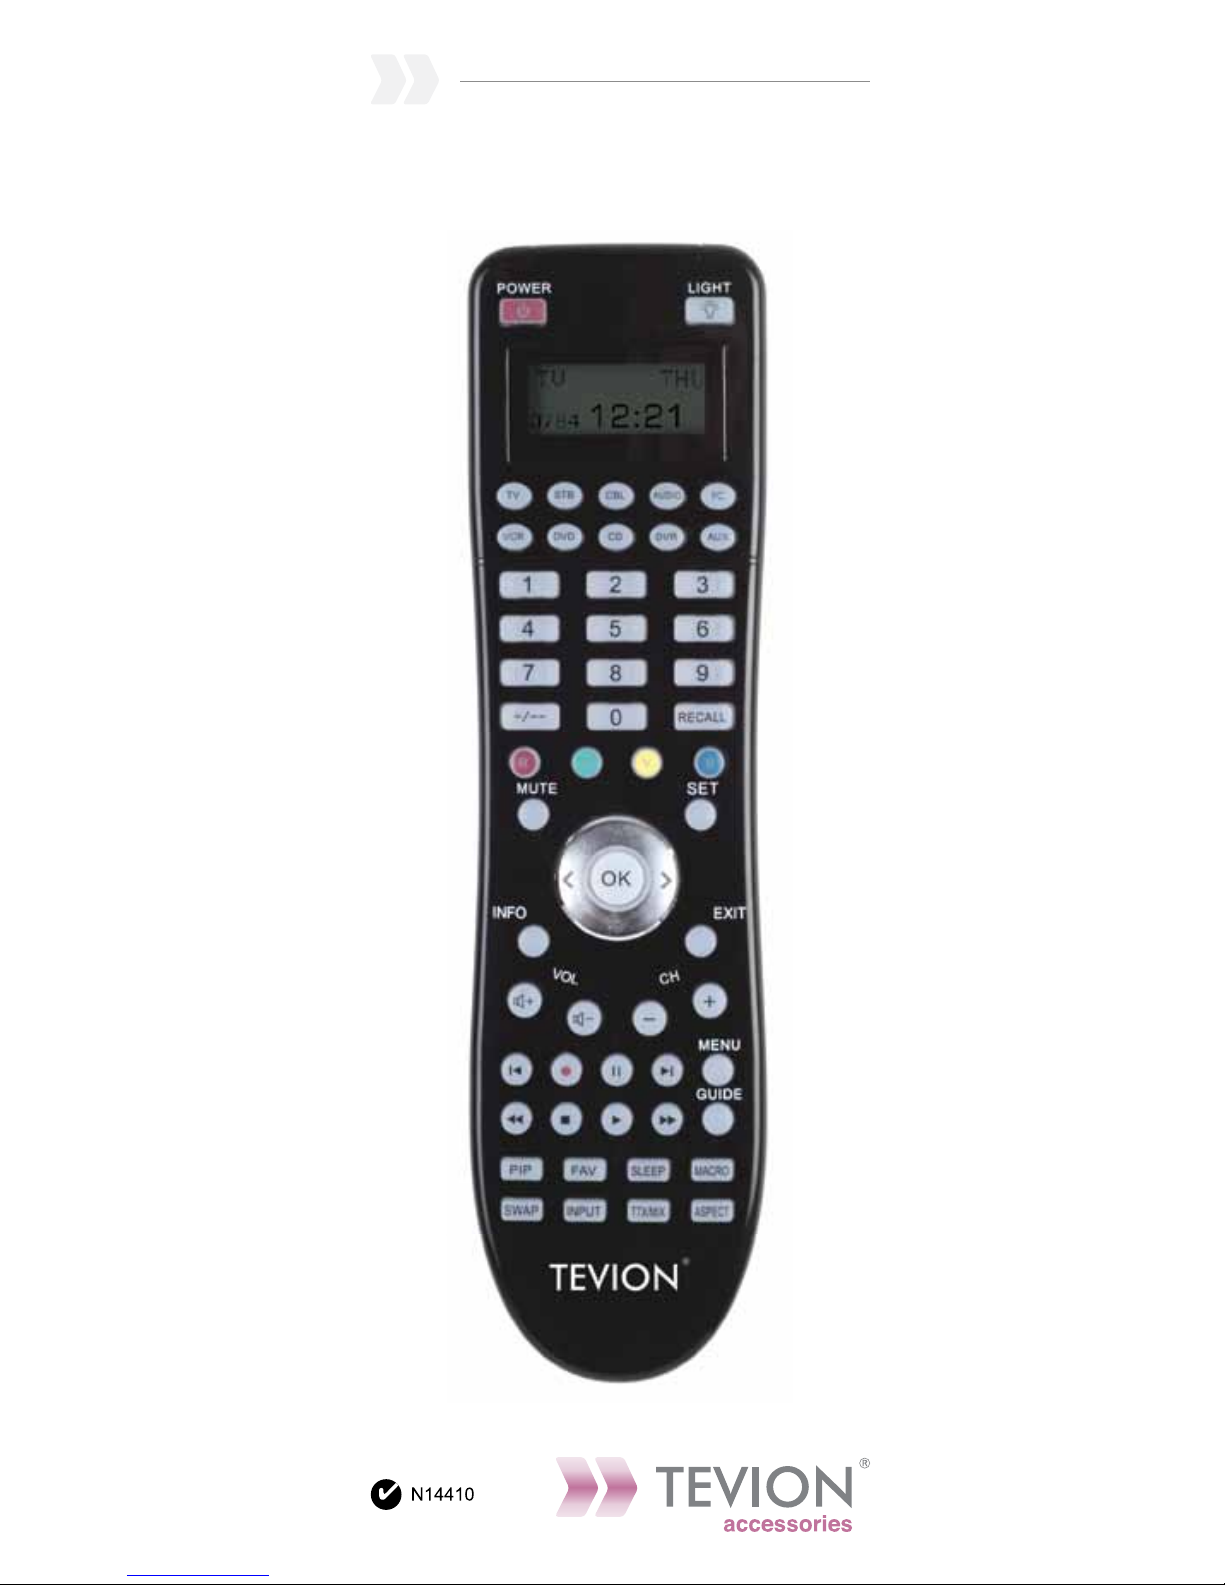
Remote control keys
1 17
18
19
20
21
22
23
24
25
26
27
28
29
30
31
2
12
13
15
16
14
3
4
5
9
10
11
6
7
8
Erasing Favourites
1. Press and hold the SET button (21) for at least 3 seconds.
The display shows [CODE SETUP].
2. Then release the SET button (21).
3. Press
(8) four times. The display shows [FAV CH].
4. Press the OK button (22). The display shows [SETUP].
5. Press
(8). The display shows [DEL ALL].
6. Press the OK button (22). The display shows [SURE DELET].
7. Press the OK button (22). The message [DELETED] will
appear for a few seconds and the device returns to the
[SETUP] level.
8. Quit the process by pressing the EXIT button (23) twice.
Backlight
1. Press the LIGHT button (17) to switch on the backlight
illumination. The backlight illumination will switch off after
a preset delay.
2. If you wish to switch off the backlight before the preset
delay, press the LIGHT button again. This will switch off
the backlight.
Backlight Delay Time
1. Press and hold the SET button (21) for at least 3 seconds.
The display shows [CODE SETUP]. Then release the
SET button (21).
2. Press
(8). The display shows [CONFIGURE].
3. Press the OK button (22). The display shows [TIME SETUP].
4. Press
(8). The display shows [LIGHT-TIME].
5. Press the OK button (22). The present backlight delay
time (in seconds) will appear.
6. Press
or (8) to select a different time. You can choose
a value of 3, 5, 10 or 15 seconds. Choosing “00” will
disable the backlight illumination.
7. Press the OK button (22). The message [SUCCESS] will
appear for a few seconds and the device returns to the
[LIGHT-TIME] level.
8. Quit the process by pressing the EXIT button (23) twice.
21 6
1. On/Standby button
2. Source device selection buttons (TV, STB, CBL, AUDIO,
PC, VCR, DVD, CD, DVR, AUX) *
3. Numeric keys (0 to 9)
4. Toggle button for one or two-digit input
5. Red function button
6. Green function button
7. Mute button (MUTE)
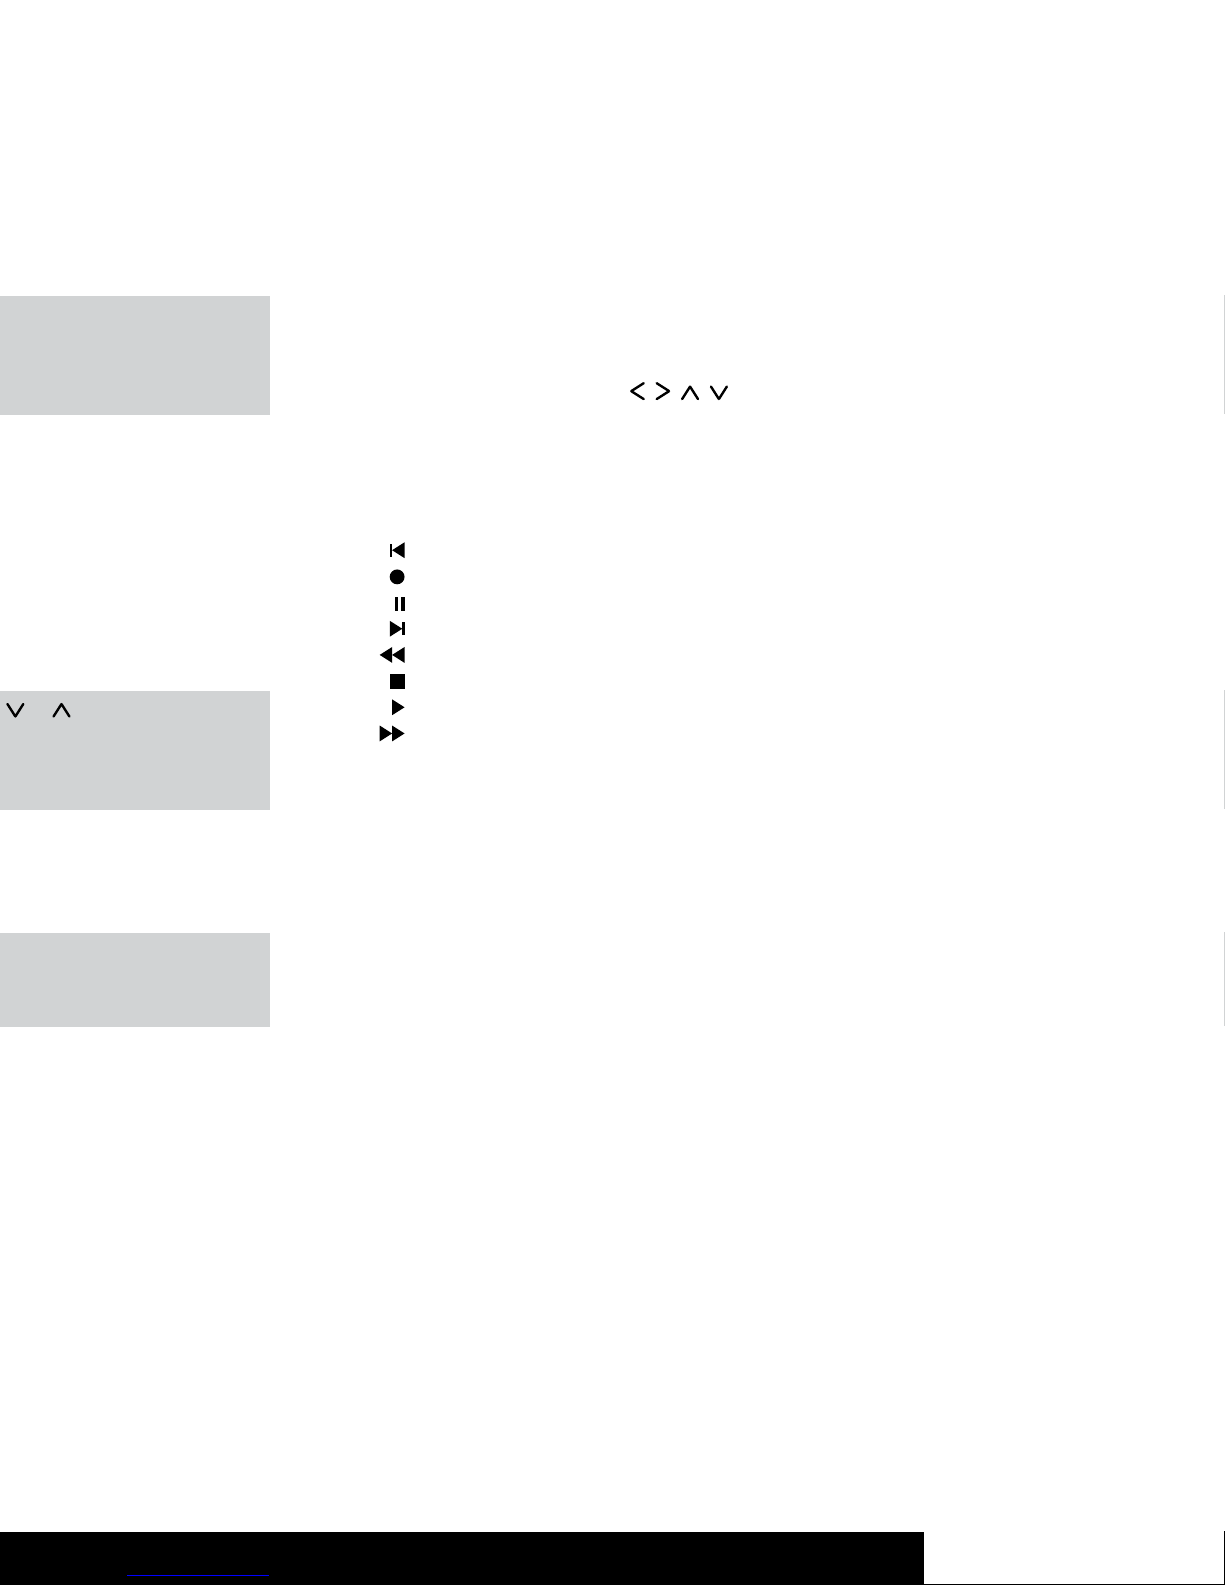
8. Four-way directional control (
, , , )
9. Information button (INFO)
10. Increase audio volume (VOL+)
11. Reduce audio volume (VOL-)
12. Player controls (for DVD, VCR, etc.):
Skip backward
Recording
Pause
Skip forward
Rewind
Stop
Play
Fast forward
13. Picture-in-Picture (PIP)
14. Favourites (FAV) *
15. Swap between main and secondary PIP window (SWAP)
16. Input selection (INPUT)
17. Keypad illumination *
18. Last programme (RECALL)
19. Blue function button
20. Yellow function button
21. Programming (SET) *
22. Confirmation (OK)
23. Exit the menu (EXIT) *
24. Next channel (CH+)
25. Previous channel (CH-)
26. Menu button (MENU)
27. Electronic Program Guide (GUIDE)
28. Macro programming (MACRO) *
29. Sleep timer (SLEEP)
30. Aspect ratio (ASPECT)
31. Videotext (TTX/MX)
*not programmable
or (8) button to select

After Sales Support TEL: 1300 663 907 After Sales Support TEL: 1300 663 907
7 20
While sending a command by pressing a button, the display
and buttons backlight illumination will turn off. As soon as
you release the button the backlight illumination will turn on
again. This is not a fault: it has been designed to maximise
the transmission range.
The described button functions are available only whenever
the programmed device supports these functions.
Inserting the Batteries
Open the battery compartment cover on the back of the
remote control by pressing firmly on the triangular shaped
thumb grip and sliding the cover down off the end of the
remote.
Insert the supplied batteries (size AA) into the remote control.
Take note of the battery polarity when inserting batteries. The
correct polarity is indicated on the diagram within the battery
compartment.
To replace the battery cover, slide the battery cover in the
opposite direction, onto the remote control until it clicks into
place.
Programming VPT Manually
If you want to control the volume of a specific device
individually (not using VPT), this must be programmed
manually.
Example:
You are using the remote control for a satellite
receiver too. For all devices, VPT controls the
volume via the TV set, but the sat receiver has
its own volume control that you want to use.
For manual programming, proceed as follows:
1. Press and hold the SET button (21) for at least 3 seconds.
The display shows [CODE SETUP]. Then release the SET
button (21).
2. Press
(8) three times. The display shows [VPT SETUP].
3. Press the OK button (22). The display shows [TO DEV].
4. Press the source device selection button (2) of the device
for which you want to override the volume control (e.g.
STB). The display shows [FROM DEV].
5. Press the source device selection button (2) of the device
that you want to use for volume control (in this example
also STB). The message [SUCCESS] will appear for a few
seconds and the device returns to the [VPT SETUP] level.
6. Quit the process by pressing the EXIT button (23).
Please note that using VPT overrides any manually-learned
key functions.

19 8
Programming the
Remote Control
Programming Device Codes
To program this remote to function with your Tevion,
Bauhn or Vivid brand device, please refer to the learning
function on page 13 of this product manual.
To be able to control a device with your universal remote
control, you must first set up the corresponding device
codes. For the PC device selection, please see “Controlling a
PC” under the special features section.
There are different ways to setup the device codes.
• Search for your device by manufacturer.
• Use the code book to program the remote control.
• Use automatic search to locate the suitable device code.
This type of programming is recommended if your device
is not contained in the list of preset codes.
• The learning function can be used to learn the functions
and features of any IR remote.
Programming the Device Code by
Manufacturer Name
Switch on the device for which you want to program the
remote control. If your device is a VCR or a CD or DVD player,
please insert a tape or CD/DVD.
To cancel the following programming at any time, press
EXIT (23) to return without saving any changes. Press the
EXIT button (23) multiple times until the remote control
has returned to standard mode.
Proceed as follows to program the device codes (this
example refers to programming a TV set).
1. Point the remote control to the TV set while entering the
commands.
2. Press the source device selection button of the device
you want to program. In this example, it is the TV button
(2). The display shows [TV].
3. Press and hold the SET button (21) for at least 3 seconds.
The display shows [CODE SETUP]. Then release the SET
button (21).
4. Press the OK button (22). The display shows [BRAND
SRCH].
5. Press the OK button (22). The display shows the
first preset manufacturer name, e.g. [A R SYSTEM].
Underneath the device code of the displayed
manufacturer appears.
 Loading...