

SAFETY INSTRUCTIONS
About this manual
Please observe the following safety instructions carefully before
putting the unit into operation. Take note of the warnings on the
unit and in this manual.
Always keep the instruction manual near at hand. If you sell or pass on the
product, make sure to include this manual together with the unit.
Do not let children use electrical devices unattended.
Swallowing batteries may be fatal. Always keep the unit
and batteries out of reach of young children. If a battery
has been swallowed, consult a doctor immediately.
Also, keep the plastic packaging out of reach of children
to avoid danger of suffocation.
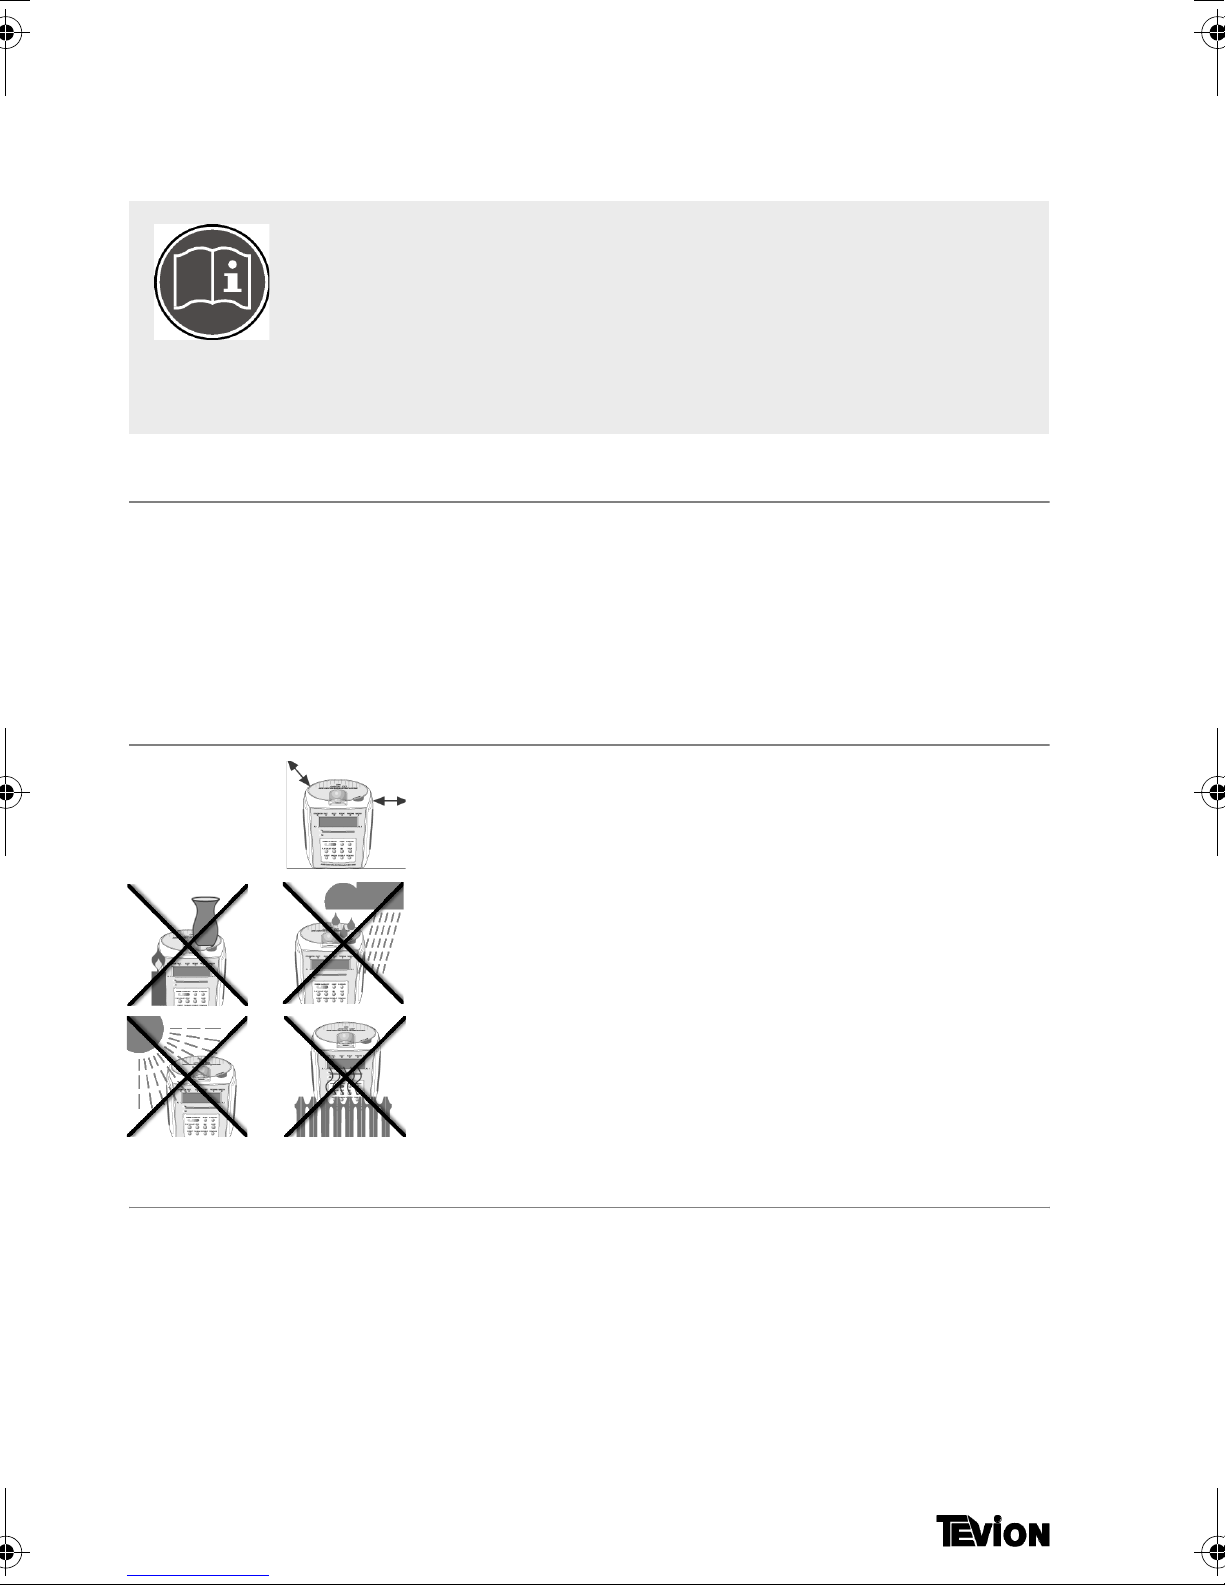
Setting the product up safely
Choose a flat, firm surface to set the product on. Make
sure that
the ventilation slots are not covered (ensure some
distance from any walls)
no foreign bodies or fluids get into the unit (e.g., do
not place vases on the unit)
the unit does not come into contact with dripping
water, splash water or humidity,
the unit is not exposed to sunlight or other direct
heat (e.g. from radiators)
no open fire sources, such as candles, are placed on
the unit
Keep the power connections accessible
Connect the unit to an easily accessible power socket
(AC 120 V ~ 60 Hz) close to the unit. In case the unit has
to be disconnected quickly, the plug has to be within
easy reach.
2
In order to avoid tripping, do not use an extension cord.
Do not open or attempt to repair the unit yourself.
In case the power supply cord or the unit is damaged,
pull out the AC power plug immediately.
Under no circumstances attempt to open or repair the
unit yourself. There is danger of electric shock!
If your unit requires service, please contact customer
support.
Thunderstorms
Disconnect from the AC outlet during thunderstorms or
when you will be absent for a long period of time.
CD-Player
The CD player is a Class 1 laser product. The unit is
equipped with a safety system that prevents the emergence of dangerous laser beams during normal operation. To avoid injury to the eye, do not manipulate or
damage the safety system of the unit.
S
AFETY INSTRUCTIONS
Battery disposal
Empty batteries do not belong in the household refuse.
The batteries must be disposed of at a designated disposal/recycle point.
Cleaning the CD Clock Radio unit
Always disconnect the AC power plug before cleaning
the unit.
To clean the unit, only use a moistened, soft cloth. Do
not apply chemical solvents or cleaning agents, as they
may damage the surface and/or labelling of the unit.
Stereo CD Clock Radio MD 4414 3

SET-UP
Unpacking and placing the unit
` Remove all packaging material including the trans-
port cardboard in the CD compartment.
ATTENTION!
To avoid danger of suffocation, do not let
young children play with plastic bags!
Check the contents of the box
After unpacking the product, make sure that the following items are supplied:
CD Clock radio unit
Instruction manual
Place the unit on a flat, firm surface. Make sure that
Connecting the power
the ventilation slots at the rear are not covered in or-
der to guarantee sufficient ventilation;
no strong heat affects the unit;
the unit is not exposed to direct sunlight;
the unit does not come into contact with liquids, in-
cluding dripping or splash water.
AC power supply
` Connect the AC plug to an easily accessible AC outlet
120 V ~ 60 Hz. To avoid tripping, do not use an extension cord.
After connecting power the clock starts at
time flashes in the display until the time is set (see “Setting the clock“).
12:00. The
4
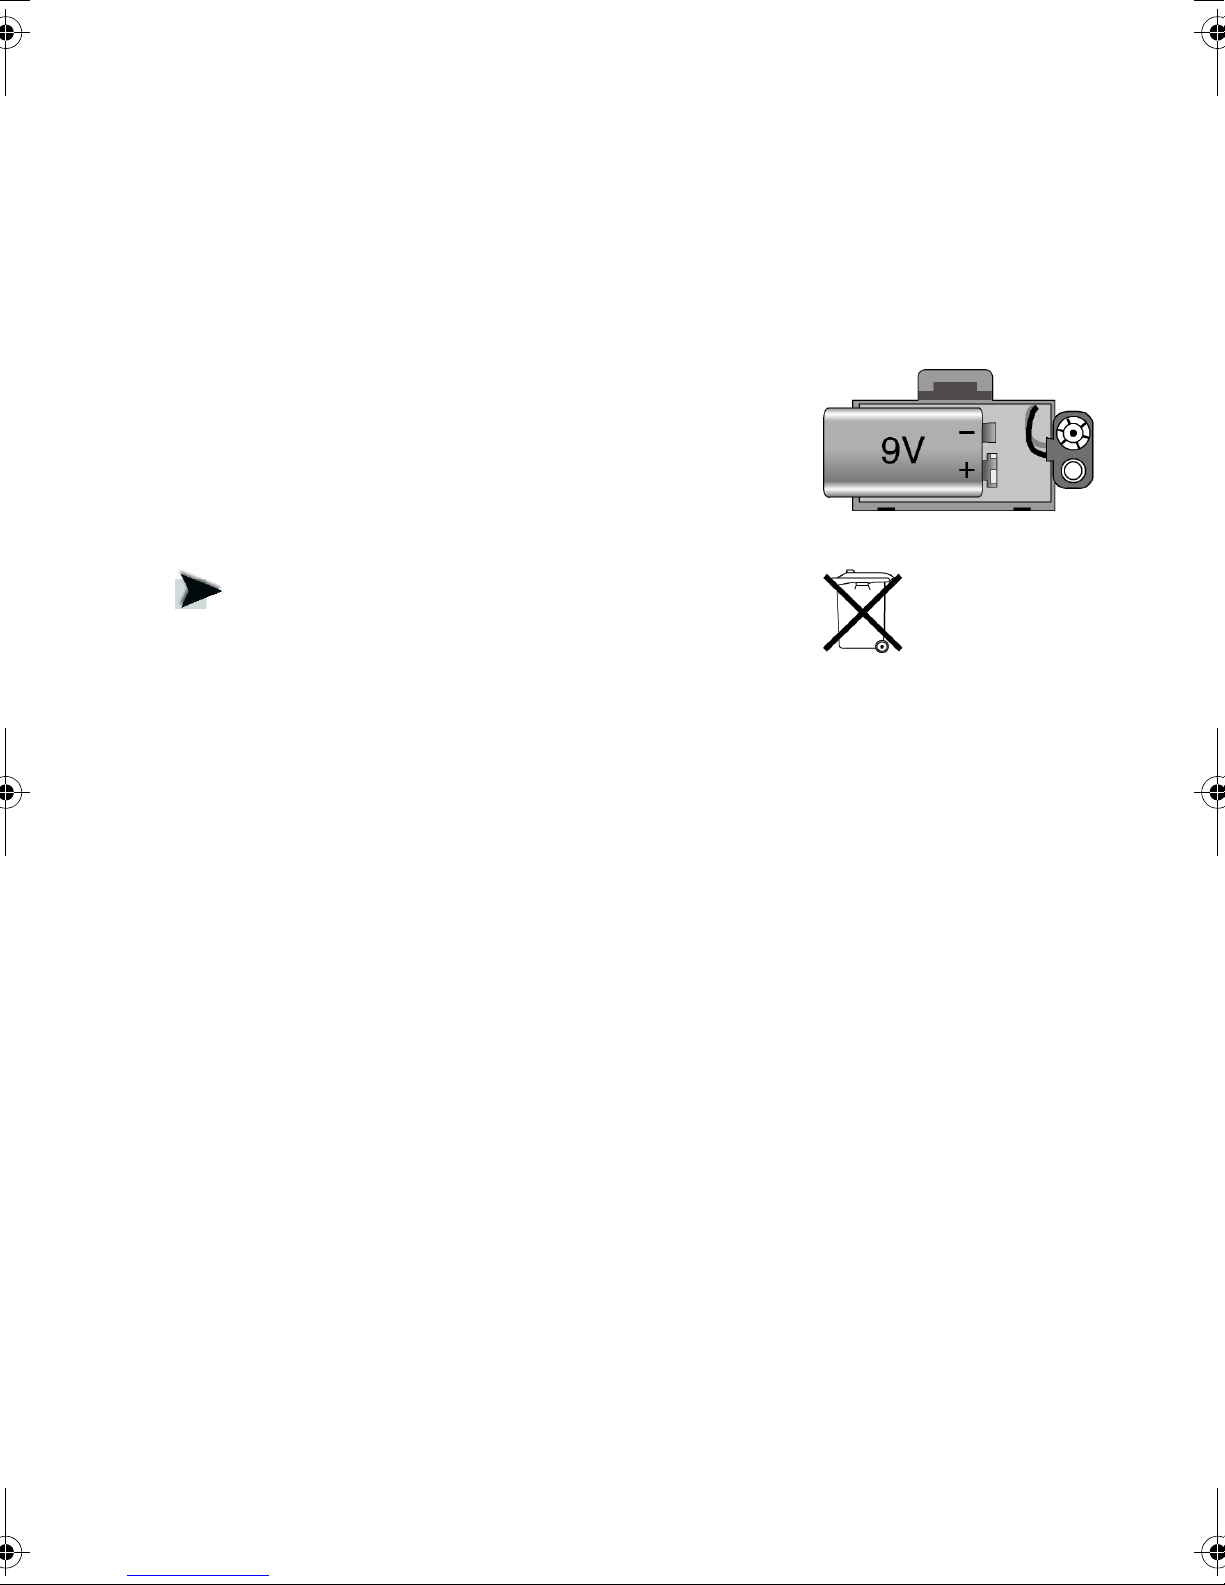
Power backup battery
To prevent the clock from resetting when power is temporarily disconnected, you can insert a 9 Volt rectangular battery (type 6LR61; not supplied). Make sure the
unit is connected to the AC power outlet when inserting the battery!
` Remove the lid of the battery compartment at the
rear of the unit.
` Connect both plug-and-socket connections of the
battery with those on the unit. Observe the polarity
(+/-)!
` Insert the battery and close the battery compart-
ment.
Used batteries are not household refuse. Flat
batteries must be disposed of at designated disposal/recycle points.
S
ET-UP
Stereo CD Clock Radio MD 4414 5

BASIC FUNCTIONS
POWER
` When the unit is plugged in, press the POWER key to
turn the unit on. The STANDBY/ON LED is illuminated.
Display brightness – DIMMER
` To increase the display brightness, switch the DIM-
MER
(at the rear of the unit) to HI;
` to decrease the display brightness, switch the DIM-
MER
to LO.
Setting the clock – CLOCK ADJ.
` If necessary, press POWER to turn the unit off (the
STANDBY/ON LED goes out).
` Make sure no alarm is on (if necessary, press the
ALARM ON/OFF button repeatedly until both alarm
LEDs are out).
` Press the key CLOCK ADJ/PROGRAM until the hour
digit flashes.
` To set the hour, press one of the keys SKIP/TIME SET
until the correct hour shows in the display. – Observe
the PM indicator in the top left corner of the display.
` Press CLOCK ADJ/PROGRAM to save the hour; the
minute digit will flash.
` To set the minutes, press one of the keys SKIP/TIME
SET
until the correct minute shows in the display.
d : 1 = Monday
d : 2 = Tuesday
d : 3 = Wednesday
d : 4 = Thursday
d : 5 = Friday
d : 6 = Saturday
d : 7 = Sunday
` Press the key CLOCK ADJ/PROGRAM . In the display,
d : 1 (Monday) flashes.
` To set a different weekday, press one of the keys
SKIP/TIME SET until the correct day shows.
Note: You have to select the current day of the week
to make the weekend function work correctly.
` Wait for a few seconds or press CLOCK ADJ/PRO-
GRAM again twice to comfirm the set time.
`If you disconnect the unit from the AC outlet
and want the clock time saved, make sure you
have inserted a 9V battery (see above).
6

ALARM CLOCK
Setting the alarm time
Your CD Clock Radio provides two independent alarm
functions. Each alarm must be set separately.
` If necessary, set the clock (see last page).
` If necessary, press POWER to turn the unit off (the
STANDBY/ON goes out).
LED
` To set Alarm 1, press and hold the button ALARM
SET. The LED labelled ALARM1 will blink; after a few
seconds the hour digit will start to blink.
If you want to set Alarm 2, press
so that the LED labelled ALARM2 will blink.
` To set the hour, press one of the SKIP/TIME SET keys
until the correct hour shows in the display.
` Press CLOCK ADJ/PROGRAM to save the hour; the
minute digit will flash.
` To set the minutes, press one of the SKIP/TIME SET
keys until the correct minute shows in the display.
` Wait for a few seconds or press CLOCK ADJ/PRO-
GRAM
again to comfirm the set alarm time.
ALARM SET twice,
Activating the alarm time
` To activate the alarm, press ALARM ON/OFF:
– press
(the LED
– press
(the LED ALARM2 is illuminated)
The display shows the clock time.
– press
alarms (both LEDs are illuminated).
ALARM ON/OFF once to activate ALARM 1
ALARM1 is illuminated)
ALARM ON/OFF twice to activate ALARM 2
ALARM ON/OFF three times to activate both
Choosing alarm functions
Using th
can select the mode in which the alarm is to go off:
for an alarm sound: set position to BUZZER;
for the radio: set positon to RADIO;
for the CD function: set positon to CD.
With the switch
louder sound (
e operation switc
BUZZER HI - - LO, you can select a
HI) or a softer sound (LO).
h at the side of the unit, you
Stereo CD Clock Radio MD 4414 7

ALARM CLOCK
Turning the alarm off
If you want to be woken by music, the unit must not be
in standby mode.
Note that if the radio or a CD is to start at the set
time, obviously a station must be tuned in or a
CD inserted, respectively (see below).
Alarm off on weekends
` Press the SNOOZE button. The WEEKEND LED will
light up. In this mode, the alarm will not go off on
Saturday and Sunday (d : 6 and d : 7).
` To cancel the weekend function, press SNOOZE
again.
SNOOZE
` In order to interrupt the alarm, press SNOOZE when
the alarm sounds. The alarm will sound again after
nine minutes.
ALARM OFF
` Press POWER / ALARM OFF to turn off the alarm off
for the day. It will sound again at the set time on the
following day (the LED display is still lit).
Turning off
` To turn off the alarm completely, press ALARM ON/
OFF. The LED light in the display goes out.
Automatic switch-off – SLEEP
The unit is equipped with a ‘sleep mode’. You can program a time period of up to 59 minutes after which the
unit switches off automatically.
If the unit is turned off while the sleep timer is counting
down, it will automatically switch to standby mode.
If you disconnect the unit from the AC outlet and
want the alarm time saved, make sure you have
inserted a 9V battery (see above).
8
` When the radio or a CD is playing, press and hold the
SLEEP button. The time will count down from 90,
80 etc to 10, 9, 8 etc.. Release the SLEEP button at the
desired sleep time.

RADIO OPERATION
Antenna
Your clock radio is equipped with an FM and an AM
band.
` For a good reception of FM stations, uncoil the loop
antenna completely and orient it for the best signal.
` For a good reception of AM stations, a ferrit antenna
is built in. If necessary, orient the unit to obtain a
clear signal.
Selecting a radio station
` Move the operation mode switch at the left side of
the unit to Tuner.
` Adjust the VOLUME control to a low position.
` If necessary, press POWER to turn the unit on.
` Select the required band on the right side of the unit:
AM or FM: With AM stations, a green LED lights up in
the left lower corner of the display;
a green LED lights up in the right lower corner of the
display.
FM MONO for mono FM stations, FM S.T. for stereo
FM stations
` Select a radio station by turning the TUNING knob on
the side of the unit. The band scale pointer (unit
front) indicates the position in the band.
with FM stations,
A stereo station is indicated by the lighted
A weak station in the FM band might be imby using FM MONO instead of FM S.T. AM does not
broadcast in stereo.
` To turn the radio off, press POWER or move the op-
eration mode switch to CD.
Stereo CD Clock Radio MD 4414 9
FM.ST LED.

CD OPERATION
CD display
` Move the operation switch at the left side of the unit
to CD.
` Open the CD compartment by lifting the lid at the
notch.
` Insert a CD with the labelled side facing up. Ensure
that the CD snaps in place in the center.
` Close the CD tray. In the standby mode, the display
will show
few seconds. The CD will spin, then stop, then play
automatically.
In CD mode, the clock time is shown in the display. In
order to see the present status of the CD, press the key
CD DISPLAY.
When the CD is not playing, the CD display will show
the number of tracks on the CD (e. g.
CD - - and the total number of tracks for a
09).
PLAY, PAUSE, STOP
` If necessary, press POWER for the standby mode.
Press
PLAY
` Press PLAY/PAUSE to interrupt the playback. The
track number blinks for a few seconds. Press
PAUSE
` Press STOP to stop the playback.
Track and fast search – SKIP
` To skip to the next/previous track, press SKIP or
SKIP , respectively. If you press SKIP during
playback, the player will skip to the beginning of the
current track.
` Hold for a few seconds during playback to prompt a
quick search within the current track. The current
track number will show in the display.
PLAY/PAUSE to start the CD. Pressing CD DIS-
will display the current track number.
PLAY/
again to resume playback.
If you accidentally open the CD compartment
during playback, the rotating CD will stop.
not touch the CD while it is still spinning!
Do
10
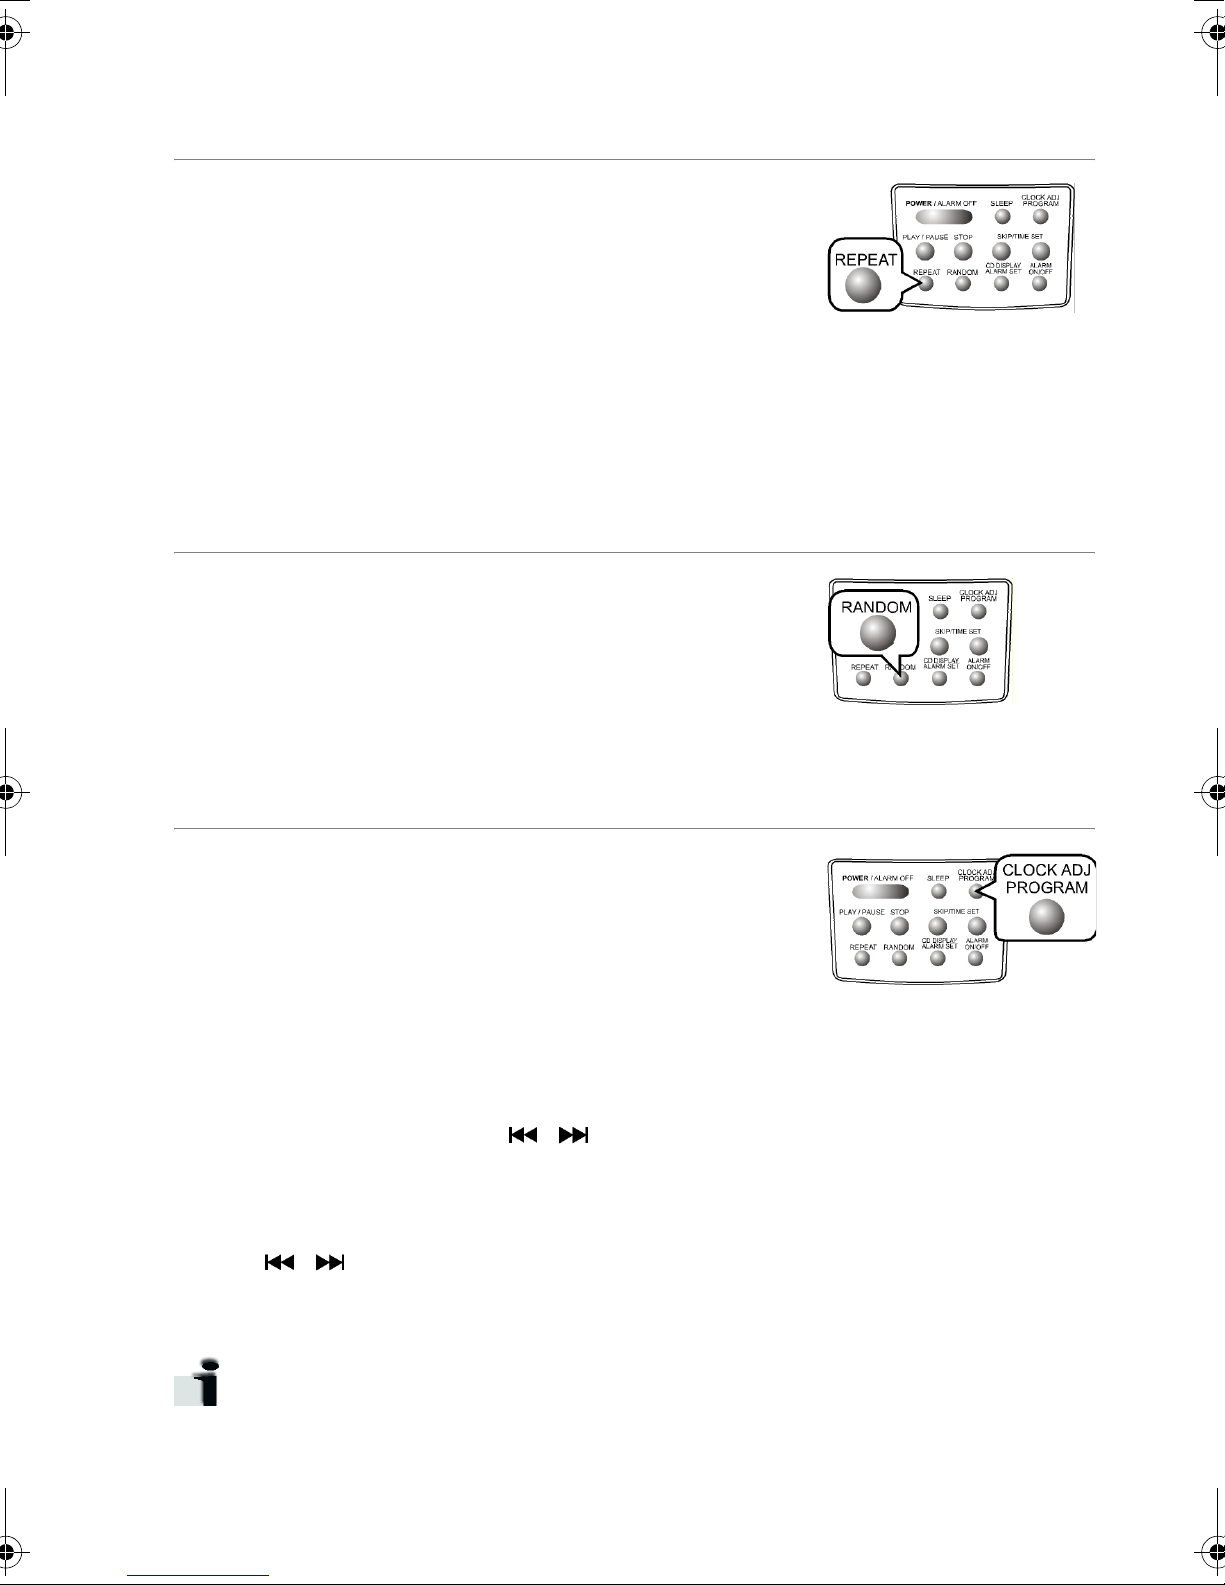
REPEAT functions
` Press the REPEAT button once before or during play-
back. The
the display blinks. The current track is repeated infinitely.
REPEAT LED in the right bottom corner of
` Press the REPEAT button twice before or during
playback. The
All of the tracks on the current CD are repeated infinitely.
REPEAT LED lights up permanently.
` Press the REPEAT button a third time to switch off
the function. The
REPEAT LED goes out.
RANDOM function
You can play a random sequence of CD tracks.
` Press the RANDOM button before or during play-
back. The
the display lights up. The tracks will be played in a
completely random order.
` Press RANDOM again to resume normal playback.
RANDOM LED in the upper left corner of
CD O
PERATION
Programming tracks
You can program a sequence of up to 20 tracks. The
unit must NOT be in Standby Mode. The STANDBY/ON
LED indicates whether the unit is in standby mode. If it
is lit, press POWER/ALARM OFF to enter STOP mode.
` Press the PROGRAM key. P 01 for the first program
place is shown in the display and the
in the lower left corner of the display blinks for a few
seconds.
` While the LED is blinking, select the first track for your
program list with the SKIP keys.
` Press the PROGRAM key again to save the first track.
P 02 is shown is displayed.
` Select the second track for your program list with the
SKIP keys etc.
` To playback the programmed sequence, press PLAY/
PAUSE.
You can apply all of the skip, repeat, and random
functions to the programmed sequence as described previously.
PROGRAM LED
Stereo CD Clock Radio MD 4414 11

CD OPERATION
Editing a programmed list
As long as the PROGRAM LED is on, you can edit the list
to change tracks in the programmed sequence.
` If necessary, press STOP. Press PROGRAM repeat-
edly until you get to the desired program place (e. g.,
if you want to change the track in program place
press
PROGRAM three times).
3,
` Select another track with the SKIP keys and
wait until the blinking LED lights up steadily.
You can now play the revised sequence.
Deleting a programmed track
The programmed sequence remains stored if you press
STOP.
You can delete the programmed sequence by
the POWER key or changing to the radio mode.
pressing
12
TECHNICAL DATA
Unit
Radio frequency range: FM 88 - 108 MHz
AM 560 - 1690 kHz
Power supply
Power input: AC 120 V ~ 60 Hz
Power backup battery: 1 x 9 V alkaline battery 6LR61
(not included)
CD-Player, discs
CD player: Class 1 Laser
Playable discs:
Audio CDs, CD-Rs, CD-RWs
When playing audio CDs, only use CDs which are labelled as follows:
Please note:
There are numerous, often not standardized techniques of CD recording and
copying protection, as well as a great variety of blank CD-Rs and CD-RWs. In
rare cases, reading mistakes or delays may occur. This is not a malfunction of
your CD Clock Radio.
Subject to technical modifications!
Stereo CD Clock Radio MD 4414 13
Dear Customer,
Please note that there is a typo on page , line of the instruction manual.
Incorrect: The unit must not be in standby mode.
Correct: The unit must be in standby mode.
In addition, please disregard the following line on page : "If it is lit, press POWER/ALARM OFF to enter STOP mode."
We apologize for any inconvenience.
 Loading...