

Page 1

USER MANUAL
LCD TV
Thank y ou for your purchase of this Tevi on® LCD TV. To enjoy yo ur TV to t he full f rom
the ver y begin ning, read t his man ual carefu lly and k eep it handy f or future referenc e.
LCD1912
Page 2
Warning
To preven t fire or sh ock haz ard, do n ot use this pl ug with a n exten sion co rd, recept acle or othe r out let unl ess the
blade s can be fu lly ins erted to pre vent blade exposu re . Do not expo se this a pplia nce to ra in or moistu re.
WARNING
RISK OF EL ECT RIC SHOCK
DO NOT OPEN
The l ightn ing fla sh with a rrowh ead sym bol
wit hin an eq uilat eral tr iangl e, is int ended t o
ale rt the us er to the p resen ce of uni nsula ted
dan gerou s volta ge with in the pr oduct s
enc losur e that ma y be of suf ficie nt magn itude
to co nstit ute a ris k of elec tric sh ock to pe rsons .
WARNI NG: TO RED UCE THE R ISK OF
ELEC TRIC SH OCK, DO N OT REMOV E COVER
(OR B ACK) NO U SERSE RVI CEABL E PARTS
INS IDE, RE FER SERVI CING TO Q UALIF IED
SERVI CE PERS ONNEL
The e xclam ation p oint wi thin an e quila teral
tri angle i s inten ded to al ert the u ser to th e
pre sence o f impor tant op erati ng and
mai ntena nce (se rvici ng) ins truct ions in t he
lit eratu re acco mpany ing the a pplia nce.
IMPORTANT SAFEGUARDS
When using any electrical apparatus always observe safety regulations and use basic safety
precautions to reduce the risk of fire, electric shock and personal injury, including the following
Read, Keep and Follow these instructions, heeding all Warnings.
WARNING! No objects filled with liquid, such as vases, shall be placed on this equipment or in any position where liquid may
fall into this equipment or any other electrical apparatus.
WARNING! Do not insert any objects into any openings of this equipment or any other electrical apparatus.
WARNING! Do not use this apparatus near water. To avoid the risk of fire or electric shock, do not expose this apparatus to rain
or moisture. The apparatus shall not be exposed to dripping or splashes and is strictly for indoor use only.
WARNING! Do not immerse in any liquid whilst in use or cleaning. Clean only with a damp cloth, dry with a dry towel. Do not
use harsh abrasives as these may damage the plastic parts.
WARNING! DO NOT block any ventilation openings. Keep away from curtains, newspapers and restricted areas. Install in
accordance with any specific manufacturer's instructions. Always allow a sufficient gap around the apparatus to avoid overheating.
WARNING! Do not install near any heat sources such as radiators, gas heaters, stoves or other apparatus (including amplifiers)
that produce heat. Do not leave in direct sunlight.
WARNING! Do not place any naked flame source, such as lighted candles on any electrical apparatus.
WARNING! Connect to a suitable 230-240V ~ 50 Hz power supply only.
WARNING! Keep out of reach of young children. This apparatus is not suitable for use by young children or infirm persons
without supervision. Young children must be supervised to ensure that they do not play with the apparatus. Ensure young
children have enough knowledge to operate the equipment safely if they do have access to this equipment.
WARNING! Do not abuse or damage a power cord. If any power cord is damaged, it must be replaced by the manufacturer, its
service agent or a similarly qualified person in order to avoid a hazard. A replaceable cord must be replaced with an authorised
replacement from an authorised service agent only.
WARNING! Only use attachments/accessories specified by the manufacturer.
WARNING! Unplug completely from the power source this apparatus during lightening storms or when unused for long
periods of time.
WARNING! Attention is drawn to the environmental aspects of disposing of any battery.
WARNING! Refer all servicing to qualified personnel. Servicing is required when the apparatus has been damaged in any way,
such as when the power supply cord or plug is damaged, liquid has been spilled or objects have fallen into the apparatus, the
apparatus has been exposed to rain or moisture, does not operate normally, or has been dropped.
WARNING! For household use only, this apparatus is not intended for commercial use.
WARNING! If this apparatus is to be used by a third party, please supply these instructions with it.
WARNING! No liability will be accepted for any personal injury or damage caused by failure to follow these instructions.
Page 3
WARNINGS AND CAUTIONS
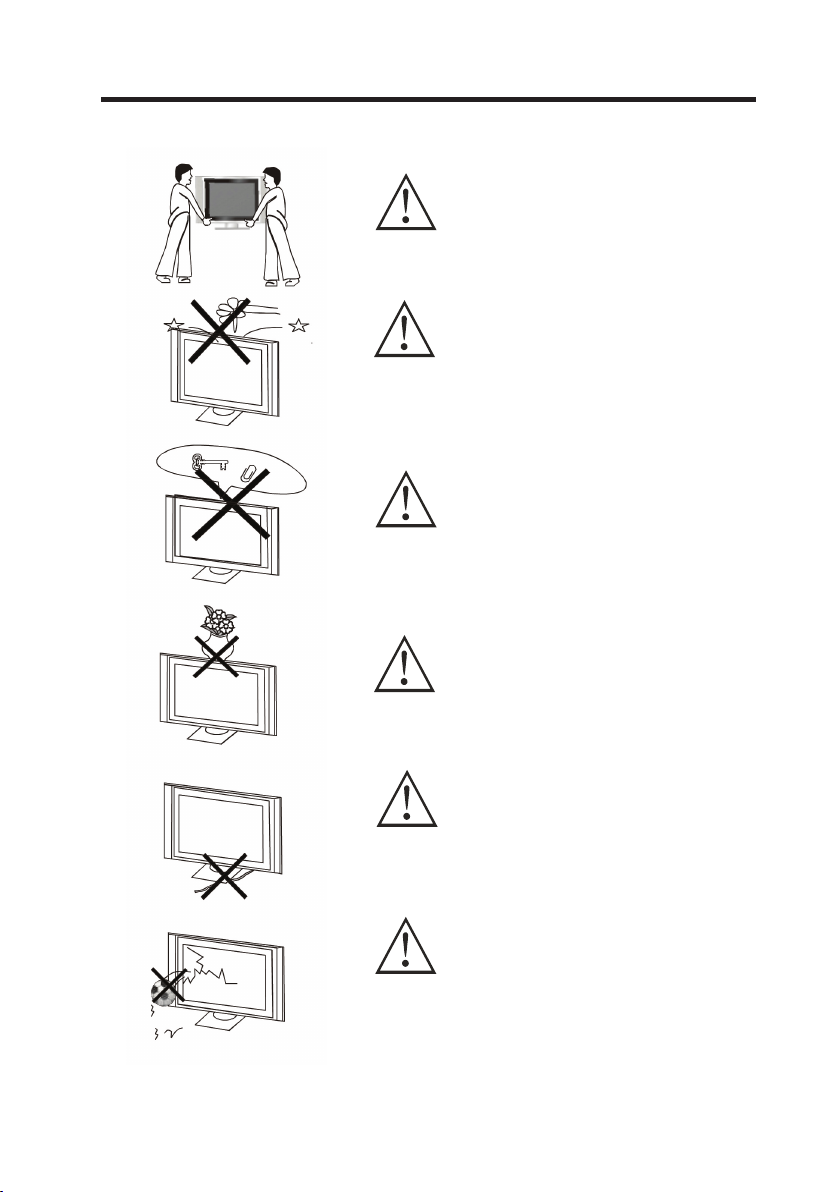
Caution
Carry ing the s et re quires two o r more people
Caution
Do not drop or push object s into th e telev ision
cabin et slot s or op ening s. Neve r spi ll any ki nd
of liqu id on the t elevi sion.
Caution
Do not in sert an ythin g in the ventilatio n holes .
if meta l or so methi ng flam mable e nters, it may
res ult in fi re or e lectric sh ock.
Caution
Do not pl ace obj ects on t his unit. it may dama ge
the screen s urfac e
Caution
Do not sq uash po wer supply c ord und er th e
telev ision rece iver.
Caution
Do not th row a nythi ng at the s et. The screen
glass m ay expl ode by im pact and cause seri ous
injur y.
2
Page 4
WARNINGS AND CAUTIONS
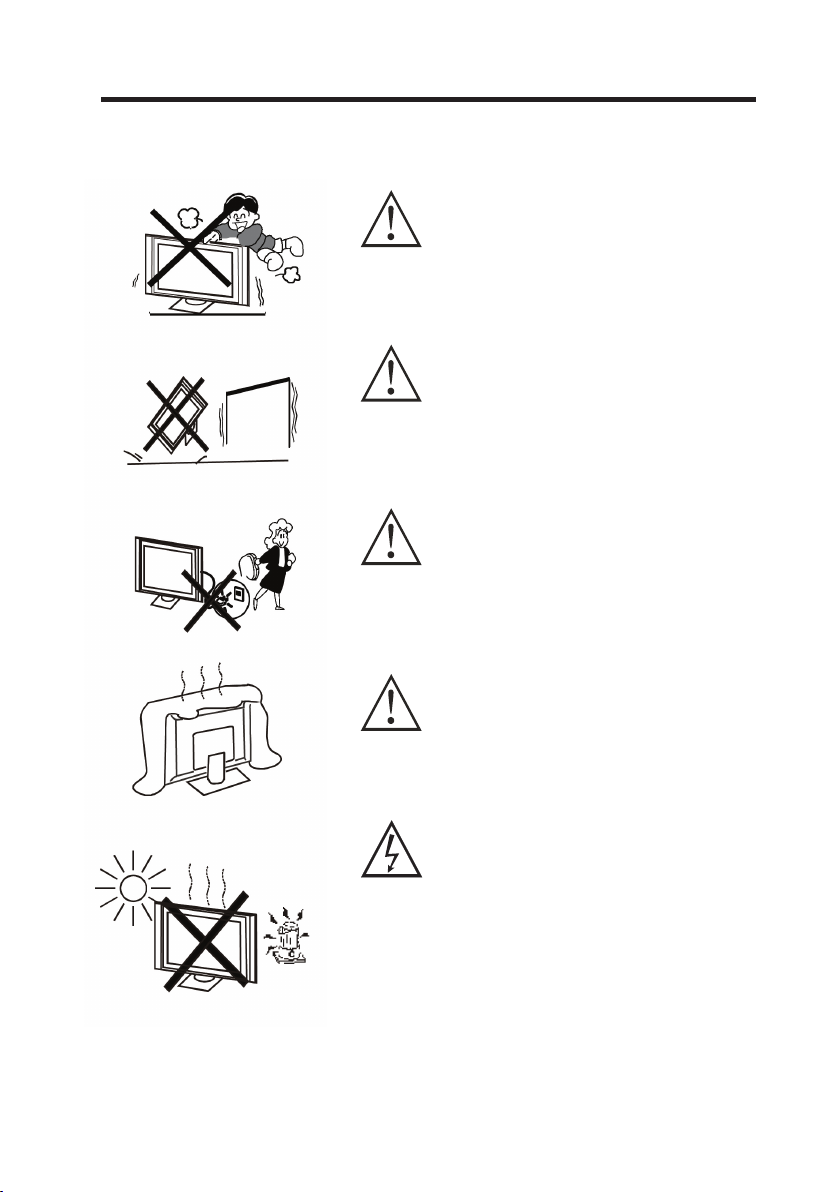
Caution
Never stan d on, lea n on or sudden ly push t he
telev ision o r its s tand. You sh ould pa y speci al
atten tion to c hildren. S eriou s injury may result
if it sho uld fal l.
Caution
Do not pl ace you r tel evisi on on an un stabl e cart,
stand , shelf o r tab le. Ser ious in jury to an
indiv idual , and dam age to the televisi on, may
res ult if it s hould f all.
Caution
When th e telev ision rece iver is not us ed for an
exten ded per iod of ti me, it is advi sable t o
disco nnect t he AC power cor d fro m the AC o utlet .
Caution
Do not bl ock the v entil ation holes in the ba ck
cover. Ade quate v entil ation i s essentia l to prevent
failu re of e lectr ical co mpone nts.
Warning
Avoi d expos ing the t elevi sion recei ver to direct
sunli ght and o ther source of th e heat.
Do not st and the t elevi sion recei ver dire ctly on
other product s which g ive off h eat. E. g.vid eo
casse tte pla yers. Audio a mplif iers.
Do not pl ace nak ed flam e sources, s uch as li ghted
candl e on the te levis ion. Do not expose th e LCD
screen sur face to t he sun, i t may dam age the
screen sur face.
3
Page 5
WARNINGS AND CAUTIONS
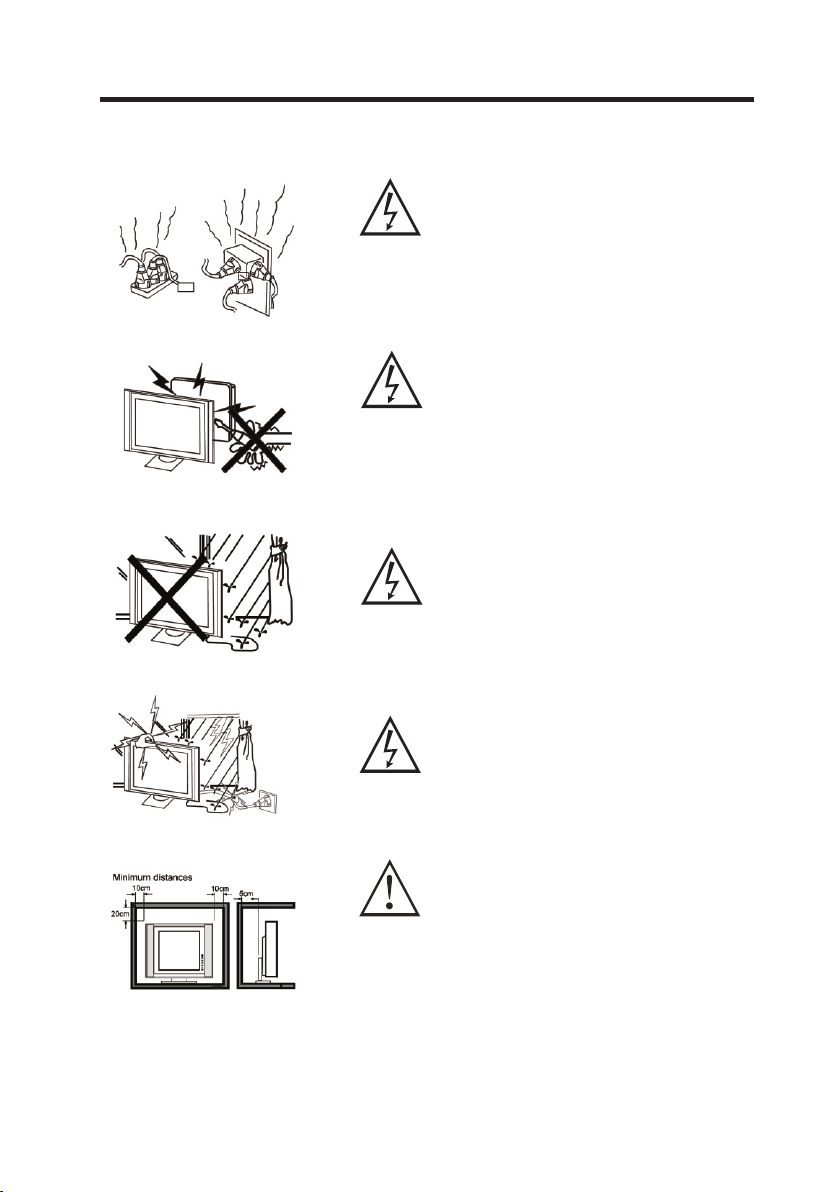
Warning
Take care n ot to connec t too man y appli ances t o
the sam e mains s ocket a s this could result i n fire or
elect ric sho ck. Do no t place obje cts on th is unit .
it may da mage th e screen sur face.
Warning
High vo ltage s are u sed in th e opera tion of this
telev ision rece iver. Do no t rem ove the c abine t
back from yo ur se t. Refe r servicin g to qual ified
servi ce pers onnel .
Warning
To preven t fire or el ectri cal sho ck hazard, D o not
expos e the tel evisi on re ceive r to ra in or moistu re.
Warning
For you own sa fety, do n ot touc h any part of the
set, ma in lead o r aer ial lea d durin g lighting storms .
Caution
If the te levis ion is to b e built into a C ompar tment
or si milar encl osure, the m inimu m dista nces
must be m ainta ined.
Heat bu ild-u p can reduce t he serv ice life of your
telev ision , and can a lso be dangerous.
4
Page 6

Table of Conten ts
Warnings a nd cautions
Table of Conten ts
Front /Back panel d iagram
Systems con nection
Remote Control
Using the Remote Control
Remote co ntrol ins truction
Battery I nstallati on
OPERATON INST RUCTIONS
Tuner on the LC D TV
Main menu
Teletext
Nicam
HELP / TRO UBLESHOOT ING
SPECIFICATION
2
5
6
7
8
8
8
8
9
9
9
13
14
15
16
5
Page 7

Front /Back panel d iagram
CH-
1
CH+
2
VOL-
3
VOL+
4
MENU
5
SOURC E
6
Pow er Indi cator
Rem ote Sen sor
Pow er / Stan dby
But ton
7
8
SIDE BUTTONS
CH- but ton
1.
2. CH+ bu tton
3. VO L- button
4. VO L+ button
5. MENU b utton
6. SOUR CE butt on
9
11 12 13 14
10
REAR CONNECTIONS
7. Comp onent ( YUV) AUDIO INPUT
8. DC INP UT (D C 12V)
9. PC (VG A) INPU T
10. Com ponen t (YUV) VIDE O INPUT
11. PC (Au dio) IN PUT
12. AV INPU T
13. S-V IDEO IN PUT
14. ANTE NNA IN PUT
6
Page 8

SYSTEMS CON NECTION
CONNECTIO N:
INPUT /OUTP UT JA CK AS FOLL OWS: ANT Inp ut, S-VIDEO Input , PC (VGA ) Input ,
PC (aud io) Inp ut, Com ponent (Y Pb Pr) In put, AV Inp ut.
CONNE CT PO WER: Co nnect t he 12Vp ower adapter to the p ower in put of th e LCD TV,
and the n conne ct the other end to 230 -240V ~ 50Hz po wer out let.
Note:
1. The sy ste m must be conn ect ed prop erl y.
2. This pict ure i s only fo r you r referenc e.
VGA OUT PUT
VGA
OUTPUT
AUDIO CAB LE
Pow er
Soc ket
PC
VGA C ABL E
POW ER
Adapte r
AUDIO CA BLE
Y Pb Pr C ABL E
TV signal o ut put
(wall soc ke t)
TV ANT
LCD TV Rear Pa nel
AV CAB LE
S-V IDE O CAB LE
ANTEN NA
L
R
Audio Outp ut
for Compo ne nt
Video
Y
Pb
Pr
Compone nt Vi deo
(Y Pb Pr) Ou tput
7
VID EO
L
S-V IDEO
R
AV / S-VIDE O Output
Page 9

Remote Controlle r
Using t he Remo te Cont rol
Unles s state d other wise, the re mote co ntrol
can ope rate al l the features of the L CD TV.
Alway s point t he remo te control d irect ly at
the rem ote sen sor on the front of the L CD TV.
Batte ry Inst allat ion
Remov e the bat tery compartmen t lid on th e
rear of t he remo te control by slidi ng the li d
down, t hen off. Put t wo AAA ba tteries inside
the bat tery co mpartment with th eir + and -
ends al igned a s indicated.
Do not mi x old and n ew batteries or dif ferent
types o f batte ries Replace the ba ttery c ompartm ent lid . Slide the lid until y ou hear i t
click i nto pla ce.
Remote Control
1. Powe r: Turns t he power on / Standby
2. 0-9: N umeri cal keys
3. Reca ll: Swi tch to the previous c hanne l
4. SOUN D (RED) / PICTU RE(GR EEN)/
CH.ED IT(YE LLOW) / TUN E (BLUE ):
Corre spond s to the di ffe rent co loured
pages i n Teletex t mode
Enter s the ind ividual Sound, Pi cture ,
Ch. Edi t and Tune r Menus
5. TX T/TV: Switch bet ween Teletext & TV
6. MIX: S witch t o the Telet ext wit h Mix mod e
7. HOLD : Turns th e HOLD function on an d
off w hen vie wing Teletext pa ges
8. SIZE : C hange s the dis play size wh en
viewi ng Telete xt page s
9. Canc el: Rem oves th e Teletex t infor mation
when vi ewing Tel etext p ages
10.ME NU: Ent er or exi t the on-scr een men u
11. VOL-: Volu me down
12. P.MOD E: Sets t he pict ure to mo vie, sport,
weak si gnal, g ame or personal mod e
13. ADV.SKIP: Commercia l Skip (s ee p.14 )
14. INC RED.M ONO: Sw itch between
virtu al ster eo and mono mode
15. CH- : Chann el down
16. S.M ODE: Se ts the so und to personal,
voice , music o r theatre mode
17. VOL+: Vol ume up
18. CH+ : Chann el up
19. Sle ep: Set t he slee p time
20. CAL L: Disp lays th e channel nu mber
21. REV EAL: Sh ows hid den on-screen tex t when
in Teletext mode
22. IND EX/SU BTITL E: Request index pa ge
& SUBTI TLE Men u
23. NIC AM: Nic am func tion on/of f
24. Mut e: Mute o n/off
25. AV: Input s ource s election
8
10
11
12
13
2
5
0
CH.E DIT
AV
3
6
9
MUTE
TUNE R
25
24
POWE R
1
1
2
3
4
7 8
REC ALL
SOUN D
PICT URE
4
CH+
MENU
CH-
SLEE P
INCRE D.M ON O
NICA M
SUB P.
SUBT ITLE
INDE X
CALL
VOL
+
23
22
21
20
19
18
17
16
15
14
TV
5
6
7
TXT MIX
HOLD REVE AL
CAN CEL
SIZE
8
9
VOL
-
P.MODE S.MO DE
ADV.SKI P
Page 10

OPERATION INSTRUC TIONS
Turn on the L CD TV
1.Con nect th e 12Vpo wer adapte r to the po wer inp ut of the L CD TV, and the n connect the
other e nd to a sui table 230-240V~ 5 0Hz pow er supp ly sock et.
2.Pre ss the PO WER but ton to turn th e LCD TV on or off.
3.Whe n the pow er is on, p ress the SOU RCE or AV(remo te) but ton to se lect the inp ut mode
you des ire.
Avai lable I nputs :
TV - AV - S-VIDEO - HD(Y Pb P r) - PC(V GA)
MAIN ME NU
Press t he MENU b utton t o enter the ma in menu . Whe n in the ma in menu , press t he
VOL + or VOL - bu ttons t o chang e betwe en the Sound, Pictu re, Ch. E dit, Se t Up and
Tun er Menu’s. You can also access the S ound, P ictur e, Ch. Ed it and Tuner Menu’s
direc tly thr ough the Red, Green , Yello w and Blue coloured b utton s on your r emote
contr ol.
Use the C H + or CH - but tons to e nter into a me nu and mo ve up or do wn to scr oll thr ough
the set tings o f the selected menu . Once th e setti ng that y ou woul d like to adju st is
highl ighte d, use the VOL + or VOL - to adju st the se tting.
Press t he MENU b utton a gain to go bac k to the ma in menu . Press t his but ton once more to
exit th e main me nu completely.
If no but ton is pr essed f or 10 second s when in t he menu m ode, th e menu wi ll exit
autom atica lly.
Compon ent
SOUND M ENU
Volume
Balance
Bass
Treble
AVL On
Equalizer
1. Volume : Adju st the vo lume.
2. Bala nce: Adjust the bala nce of so und bet ween le ft and right speake rs.
3. Bass : Adjus t the bas s volume.
4. Treble : Adjust the t reble v olume .
5. AVL : Selec t the Au to Volume Le vel ON or OFF.
6. Equa lizer : Adjust the eq ualiz er leve ls (100 Hz, 300 Hz, 1K, 3K, 8K).
7. Preset: S elect f rom the p reset S ound Modes : perso nal, vo ice, mu sic or th eatre.
9
Page 11

OPERATION INSTRUC TIONS
PICTU RE MENU
1. Brig htnes s: Adju st the pictu re brig htnes s.
2. Cont rast: A djust t he picture c ontra st.
3. Colo ur: Adj ust the p icture col our.
4. Shar pness : Adjus t the picture sharp ness.
5. Nois e Reduc tion: S et the Noise Reduct ion fun ction t o ON or OFF.
6. Dyna mic ski n tone : Se t this function to On o r OFF.
7. Wh ite ton e: Adju st the pi cture c olour temp eratu re.
8. Preset: S elect f rom the p reset P icture Mod es: mov ie, spo rt, wea k signa l, game or per sonal .
Brightn ess
Contrast
Colour
Sharpness
Noise Reduction ON
Hue: Hu e can onl y be adju sted when using the N TSC col our system .
CHANN EL EDIT MENU
Use the C H+, CH- , VOL + and VOL- but tons to h ighlight the Chan nel tha t you wou ld like
to Edit . Press t he GREE N button to Mo ve the ch annel t o anoth er posi tion. Pres s the RED
butto n to Dele te the channel.
1
2
3
4
5
6
7
8
9
10
Move
11
12
13
14
15
Delet e
10
Page 12

OPERATION INSTRUC TIONS
SET UP MENU
1. Show i ndica tor: Se t the Show Indicato r funct ion to On o r OFF.
2. Lang uage: S elect t he On Screen D ispla y (OSD) l angua ge.
3. Chil d lock: S et the ch ild lock con trol to O N or OFF.
4. Ti mers: Sele ct and se t the tim er mode s.
5. Telete xt lang.: Se lect th e Teletext langu age. The def ault la nguag e is Pan Eu ropean.
6. Telete xt E/W: Selec t the Telet ext loc ale (No t Applicable for Aust ralas ia).
7. RT Cloc k: Adju st the clock or time.
Note: The de fault C hild Lo ck pass word is 0 000, if you ch ange th e passw ord you w ill be
req uired to ent er a new 4-dig it numb er (this wil l be your new pa sswor d).
Show indicator On
Language En glish
Child lock
Timer s
Teletext lang . Pan Europ ean
Teletext E/W West
TUNER M ENU
1. Program n r.: Use the VOL+/- butt ons to se lect th e chann el number.
2. Program n ame: Us e the CH+ /- butt ons to selec t the cha racte r, Use the VOL+/-
butto ns to cha nge the p osition.
3. Colo ur sy stem: S elect t he corr ect Colour S ystem ( PAL for Au stralia).
4. Soun d syste m: Sele ct the correct Soun d Syste m (BG for Au stralia).
5. Auto st ore : Use the VOL+ /- butt ons to be gin Auto Tun ing.
6. Frequen cy: Use t he VO L+/- bu ttons t o tune th e frequency manua lly.
7. AFC: Se t the AF C function to ON or OFF.
8. Skip : Set the C hanne l Skip funct ion to ON o r OFF.
9. Lock : Set the L ock fun ction to ON or O FF.
Progr am nr. 1
Progr am name
Colour system PAL
Sound syste m BG
Autostore
Frequ ency 773.50 M hz
If you will be us ing any of th e Input Sources: HD (Y Pb Pr) / PC (V GA) /
S-VIDEO / AV, please als o adjust the SO UND MENU, PIC TURE MENU &
SET UP MEN U for the I nput Sources that you wi ll be using.
11
Page 13

OPERATION INSTRUC TIONS
PC (VGA ) MODE - SU PPORTE D RESOL UTION AN D FREQU ENCY
The bel ow tabl e denotes the Scree n Resol ution s and Fre quenc ies supported by th is
produ ct when i n the PC Mo de. Ensure y our PC (o r other d evice ) opera tes to one of the
below R esolu tions a nd Vertica l Frequ encie s.
Resol ution
Vertica l fre quenc y(Hz)
640x4 80
60/75
800x6 00
60/75
1024x 768
60/75
12
Page 14

OPERATION INSTRUC TIONS
TELETEXT
Tele text fe ature s may var y depending on the Br oadca sting i n your ar ea. Telet ext is on ly
avail able if t he channel select ed is tra nsmit ting Tele text. When i n Teletext mode, t he
volum e may sti ll be altered by pres sing th e VOL +/VOL- or MU TE butt ons.
TXT Button
Press t he TX T but ton to en ter the Teletext m ode. Pr ess the TXT butto n again t o turn th e TV
back to TV model
Teletex t Langu age
The Teletext Lan guage i s set to Pa n Europ ean. This is t he default settin g. Pan Eu ropea n is
the equ ivale nt of English.
Page Se lecti on
Pages c an be sel ected in the follow ing way s:
- By ente ring th e page number, us ing 0-9 b utton on the remote c ontro l.
- By pres sing on e of the co loured but tons (red, g reen, yellow or blue), which co rresp onds to
a page li sted at t he bottom of the Tel etext s creen. The se pages will be in the s ame col ours
as thes e four bu ttons ( Note: this f uncti on may no t alway s be avai lable).
Size Bu tton
Press S ize to ch ange th e display si ze: nor mal => la rge t op => large bo ttom => norma l.
Revea l Butto n
Press R eveal t o revea l hidden wor ds e.g. Q uiz pag e answe rs. Pre ss again to hide.
Hold Bu tton
Press H old to pa use the Tel etext p age whe n viewing multi-p age inf ormat ion. Pr ess again to
retur n to the au tomatic page upda tes.
Index B utton
Press I ndex to r eturn t o the main ind ex page .
Depen ding on t he way th at the infor matio n is tran smitt ed, thi s may have to be p resse d more
than on ce to ret urn to the main index p age.
Subpa ge Butt on
When Teletext in forma tion ex ceeds m ore than one page, it m ay take s ome tim e for the
autom atic ch anging of the sub pag es to rea ch the su b page yo u requi re.
It is pos sible t o enter your requir ed sub pa ge and co ntinu e watch ing the norm al prog ramme
until t he corr ect sub page is found .
Selec t the req uired page number u sing th e 0-9 but tons.
Press t he Subp age but ton. “Page number /---- ” will be d ispla yed at the bottom-r ight of t he
scree n. Ente r the desired sub pag e numbe r befor e the “pa ge numb er/----” d isapp ears. To
selec t sub pag e 6, enter 0, 0, 0 and 6 usin g the num erica l butto ns on the r emote cont rol.
If the to p of the pa ge indicates that s ub page s are bei ng tran smitted yet the pag e does no t
chang e, then t he number at the top of t he page i s there t o indic ate that the broadc aster h as
updat ed the pa ge’s conten ts and th at ther e are no lo nger any sub pages.
Mix But ton
Press M ix to ent er the Tele text mo de wher e both the TV pictu re and te xt pages are visibl e.
Cance l Butto n
Press C ancel t o remov e the Telet ext inf ormation from the s creen .
13
Page 15

OPERATION INSTRUC TIONS
NICAM
Press t he NICA M butto n to set the TV’s soun d to Nica m Stere o.
This se tting i s usual ly set to Ster eo to provid e the bes t repro ducti on. If re ception
deter iorat es or if the service is n ot avai lable t hen swi tch to Mono.
Mono (M 1) and (M 2) can al so be select ed if a mon o signa l is bein g trans mitted.
GLOSS ARY
AVL: Au to Volume Le vel. Mi nimises sudden ch anges i n TV volume when co mmerc ials
are tra nsmit ted.
Noise R educt ion: He lps to reduce pictu re nois e to give a c leare r, crisp er pict ure.
Dynam ic Skin Tone: Di splay s more re alist ic and ev en skin tone s.
White Ton e: All ows you t o adjus t the col our temperature .
Hue: Ca n only be a djusted for the NTS C colou r syste m. Adjus ts the pictu res hue b etwee n
a green a nd mage nta tint.
Show In dicat or: Sho ws the program numb er on the s creen .
Child L ock: En sures t he user must enter a pa sswor d to watc h adult c ontent.
AFC: Au tomat ic Freq uency Cont rol. Aut omati cally fine tunes th e set for t he best
possi ble pic ture.
ADV. SKIP: Tu rns the TV back to th e origi nal cha nnel after a set peri od of tim e. Th is butt on
can be us ed to ski p an advert break whe n watch ing a pro gram.
Press t he ADV. SKIP but ton on th e remot e contr ol for the len gth of ti me you wo uld lik e to
skip. F or exam ple, If y ou would lik e to auto matic ally re turn ba ck to the chan nel you a re
curre ntly wa tching in 4 minutes , press t he ADV. SKIP button 4 tim es. The word s
“Comm ercia l Skip 4” will appear o n the scr een. You can then cha nge the c hanne l, or wat ch
from an AV sour ce, and a fter 4 minutes the TV will s witch back to the ori ginal c hanne l that
you wer e viewi ng.
To rem ove thi s funct ion, pr ess the ADV. SKIP butto n until “Commerci al Skip O ff” i s
displ ayed on t he TV.
14
Page 16

HELP / TRO UBLESHOOTING
No picture and no soun d
Has pictu re but no sou nd
Picture is in black an d white
or has a co lour problem
Picture or sound i nterference
No signal display
Remote co ntrol problem
Snowy pictu re with n oise
Check pow er supply and c able connec tion
Make sure the power butt on is ON
Check tha t the setting f or brightne ss and
contras t ratio are cor rect
Check aud io cable and au dio volume
Make sure TV was not muted
Check tha t the colour an d sound syste ms are
set to PAL BG
Check tha t the Colour Sy stem select ion is
correct
Check if TV is too close to other e lectronic
devices f or potentia l interfere nce.
Check the i nput source a nd connecti on
Check if th e selected in put source is w orking
Check bat teries
Remote wa s not aimed at th e TV re mote signal
receive r
Check if th ere is an obsta cle between t he
remote an d the TV
Remote is t oo far away fro m the TV or the
angle is to o sharp
Adjust antenna locat ion and angle f or better
recepti on
Check ant enna locati on and angle fo r better
recepti on
Check PC or connected de vice for corr ect
frequen cy and bandwi dth
15
Page 17

SPECIFICATION
LCD: 19 ”LCD (1 6:10)
Vie w angle: Hor izont al view a ngle: 1 60 degrees
Vertica l view angle : 135 deg ree s
Resol ution : 1440 x 90 0
Displ ay Colo urs: 16 .2 Million
Respo nse Time : 8ms (Gr ay to Gra y)
TV Co lour System: PAL , NTSC, S ECAM
TV So und Sys tem: B/ G, D/K, I
Chann els: 10 0
Input s: VG A (PC), Y Pb Pr (H D), S-V IDEO, P C
Audio, AN TENNA, AV
Speak ers
ANTEN NA: 75 oh m
Power Adapt or: Inp ut 100- 240V~ 5 0/60Hz
Outpu t DC12V 5A
TV Po wer Supply : DC12V
Power Cons umpti on: 45W
Acces sorie s Remot e Control, 2 x AAA batt eries
This us er ma nual is f or reference only. Sp ecifi catio ns are subje ct to cha nge wit hout notic e.
: 3W x 2 (I mpeda nce 4oh m)
16
Page 18

75 -L1 00 220 1- 01
 Loading...