


INSTRUCTION MANUAL
HIGH DEFINITION
SET TOP BOX
MODEL: HDSTB8800
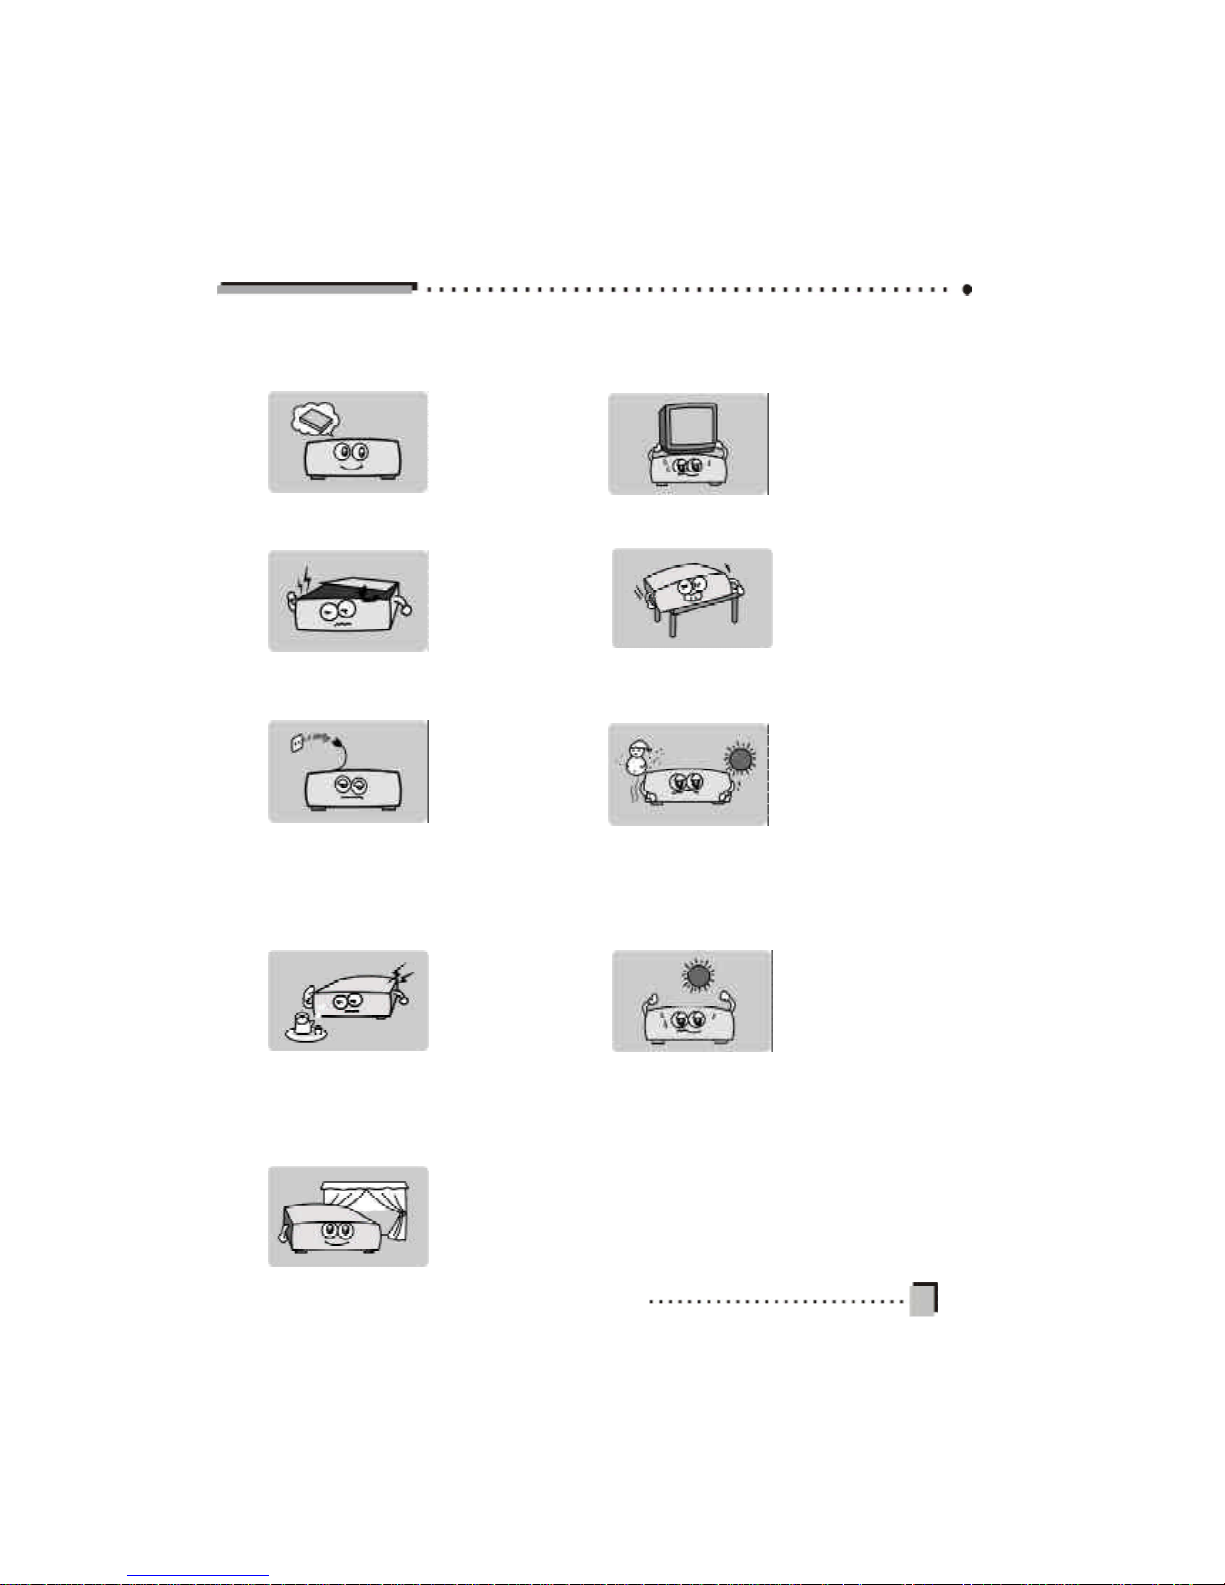
1.Be sure to read this
Instruction Manual
before attempting to
operate th is unit.
2. Ne ver open the
cover. It is very dangerous to touch the
inside of the unit due
to the possibility of
electric s hock.
3. When this uni t will
not be used for an
extende d period of
ti me, re move the
power cord from the
ou tlet. Also, do not
use this unit if the
power cord has been
damaged.
4. The apparatus
shall not be exposed
to dripping or splashing and no o bjects
f illed with liquids,
such as vases, shall
be placed on the
apparatus.
5. Place the unit in a
we l l ve n ti lat ed
enviro nment, and
awa y fro m he at
sou rces.
7. Install the unit
horizontally. Unbalanced installation may
cause th e unit to
malfu nction.
6. Do not place heavy
objects on th e unit.
9.Install the unit in a
place with :
good ventil ation
suita ble temperature
no direct sunl ight
low hu midity
low vibration
8. W hen the unit is
sudden ly moved to a
ho t area from a cold
a rea, it may cause
condensation inside
the unit. In this case,
turn off the power, and
turn on after 1-2 hours.
IMPORTANT SAFETY INSTRUCTIONS-1

Wh en using any electrical apparatus always observe safety regulations and use basic
safety precautions to reduce the risk of fire, electric shock and personal injury, including
the fol lowing.
1. Read, Keep and Follow these instructions, heeding all Warnings.
2. Keep out of reach of young children. This apparatus is not suitable for use by young
chil dren or infirm persons without supervision. Young children must be supervised to
ensure that they do not play with the apparatus.
3. WARNI NG. Do not insert any objects into any openings of an electrical apparatus.
4. WARNING. Do not touch any moving parts of any electrical apparatus.
5. WARNING. This equ ipment is only to be used in moderate climate areas.
6. WARNING. Do not use this apparatus near water. To avoid the risk of fire or electric
shock, do not expose t his apparatus to rain or moisture. The apparatus shall not be
exposed to dripping or sp lashes.
7. WARNING. No o bjects filled with liquid, such as vases, shall be placed on any electrical
apparatus.
8. Do no t immerse in any liquid whilst in use or in cleaning. Clean only with a damp cloth,
dry with a dry towel. Do not use harsh abrasives as these may damage plastic parts.
9. DO NOT block any ventilation openings. Keep away from curtains, newspapers and
restricted areas. Install in accordance with any specific manufacturer’s instructions. Always
allow a suff icient gap around the apparatus to avoid overheating.
10. DO NOT install near any heat sources such as radiators, gas heaters, stoves or other
apparatus (including amplifiers) that produce heat. Do not leave in direct sunlight.
IMPORTANT SAFETY INSTRUCTIONS-2

11. WARNING. Do not pla ce any naked flame source, such as lighted candles on any
electric al apparatus.
12. WARNING! Conn ect to a suitable 230-240 ~ 50 Hz power supply only. If a class 1
product it must be connected to a suitably earthed mains socket.
13. Always unplug from the power source when an y electrical apparatus is not in use.
14. Do not abuse or damage a power cord. If any power cord is damaged, it must be
replaced by the manufact urer, its service agent or a similarly qualified person in order to
avoid a h azard. A replaceable cord must be replaced with an authorised replacement
from an authorised service agent only.
15. Only use attachments/accessories specified by the manufacturer.
16. Unplug this apparatus duri ng lightening storms or when unused for long periods of
time .
17. Attention is drawn to t he environmental aspects of disposing of any battery.
18. Refer all servicing to qualified personnel. Servicing is required when the apparatus has
been dama ged in any way, such as when the power supply cord or plug is damaged,
liquid has been spilled or objects have fallen into th e apparatus, the apparatus has been
exposed to rain or moisture, does not operate normally, or has been dropped.
19. Do not attempt to service any double insulat ed apparatus. Double insulated apparatus
requires specialist servicing and knowledge to retain the safety of the apparatus.
20. WARNING. Do not use any electrical apparatus outdoors. If any electrical apparat us is
to be used outdoors, use a suitable Isolating transformer or Electrical Safety Switch
(RCD).
21. For household use onl y, this apparatus is not intended for commercial use.
22. If this apparatus is to be used by a third party, please supply these instructions with it.
23. No liability will be accepted for any personal injury or damage caused by failure to follow
these instructions.
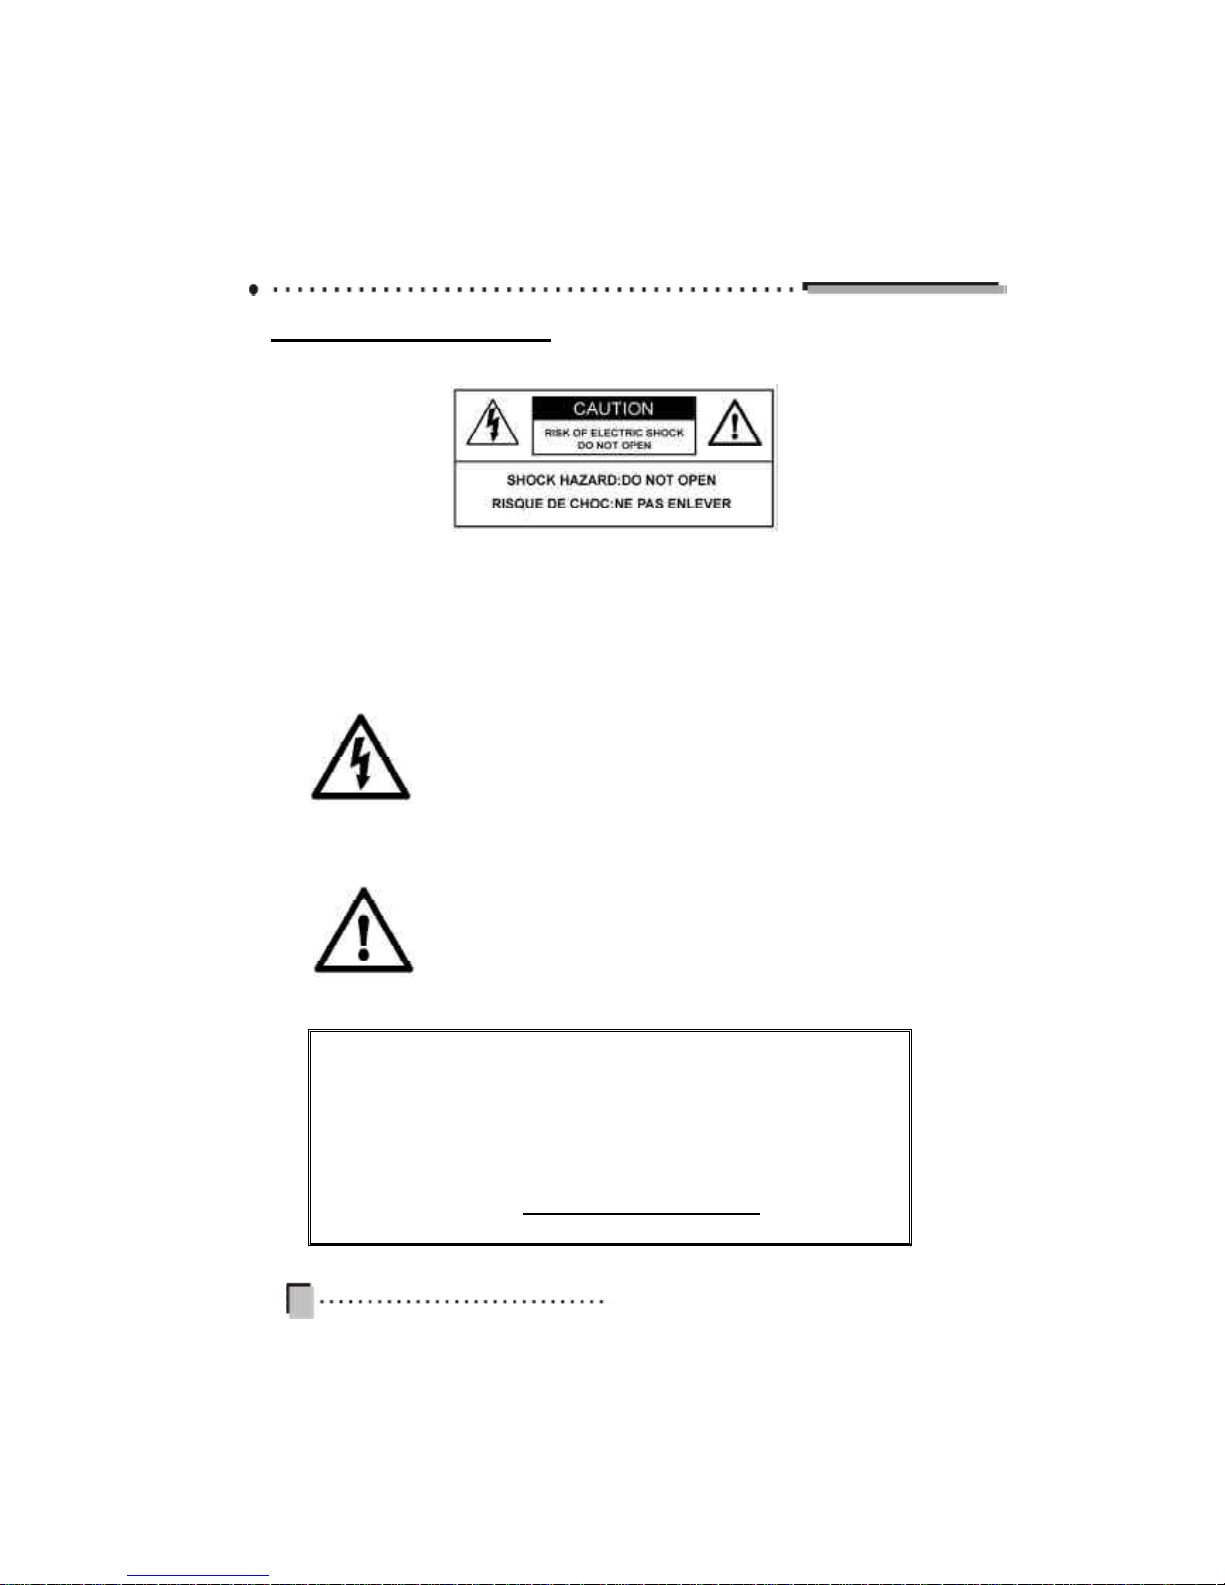
The lightning flash with arrowhead symbol, within an equilateral
tr iangle, is intended to alert the user to the presence of
uninsulate d “dange rous voltage” within the pro duct’s enclo sure
tha t may be of sufficient magnitude to con stitute a risk to persons.
The excl amation point, within an equilateral triangle, is intended
to alert the user to the pr esence of important operating and
maintenance (servicing) instructions in the literature accompanying the appliance.
Instructi on Markings:
Whe re symbols or caution labels are used on this product or in this manual, the follow
ing expl anations are made.
For any customer query or in the unlikely event of a product failure,
please phone or email the helpline contact details below for assistance.
DO NOT RETURN THE PRODUCT TO THE RETAILER.
Toll Free Help line: 1300 366 144
Email: info@telefixsales.com.au

1
Table of Contents
I. General Information ........................................................................................................ 2
1. Preface ........................................................................................................................ 2
2. Main Features.............................................................................................................. 2
3. Front Panel .................................................................................................................. 3
4. Rear Panel .................................................................................................................. 4
5. Remo te Control Unit.................................................................................................... 5
6. Keys sp ecification-1 .................................................................................................... 6
7. Keys sp ecification-2 .................................................................................................... 7
II. Connection and Installation ........................................................................................... 8
1. System Connection ..................................................................................................... 8
2. Connectio ns ................................................................................................................ 9
3. Quick Ins tallation ....................................................................................................... 10
III. Software ...................................................................................................................... 12
1.Main Menu .................................................................................................................. 13
2. Insta llation ................................................................................................................. 13
2.1 Auto Search .......................................................................................................... 13
2.2 Manual Search ..................................................................................................... 14
2.3 Chan nel Edit ........................................................................................................ 15
2.4 Factory Default ..................................................................................................... 16
2.5 Upgrade ............................................................................................................... 16
3. Program Guide .......................................................................................................... 16
4. Program Manage....................................................................................................... 17
4.1 Progra m Edit ........................................................................................................ 17
4.2 Favourite Edit ....................................................................................................... 18
5. Program Select.......................................................................................................... 20
6. System Setting .......................................................................................................... 21
6.1 Video Setting ........................................................................................................ 2 1
6.2 Audio Setting ........................................................................................................ 21
6.3 Timer Setup ......................................................................................................... 21
6.4 On Screen Dis play Setup..................................................................................... 22
6.5 Parenta l Guide ..................................................................................................... 23
6.6 Lan guage Setup .................................................................................................. 24
6.7 Time Zone Adjust ................................................................................................. 24
6.8 System Information .............................................................................................. 24
7. Shortcut Key Explanation........................................................................................... 25
IV. Technical Specification .............................................................................................. 27
V. Trouble Shooting.......................................................................................................... 29

2
I. General Inf ormation
1. Preface
Thank you for choosing to purchase one of our TEVION products, we appreciate
your business and believe that we have provided you with a product that is both
reliable and value for money. We encourage you and your friends to choose from
our ra nge of TEVION products again in future.
This TEVION Hig h Definition Set Top Box is built on a powerful ATI X225 Chip, and
can de code high and standard definition digital TV programs.
2. Main Features
l Fully DVB-T & MPEG-2 compliant
l Digital Receptio n covers VHF & UHF band
l Multi Bandwidth selection: 7M & 8M
l Multi demodulation selecti on: QPSK,QAM16, QAM64
l MEPG-2 HD/SD decoding (MP@HL/ML)
l Dolby AC-3 or MPE G-1 audio decoding
l Down-mixes 5.1 AC3 to two channels encoded with Dolby Prologic Surround
l Component (YPbPr) Output: supports 1080i/720p/576p”
l VGA output: supports 1080i /720p/576p
l DVI output: supports 1080i /720p/576p
l Conversion between SD p rograms and HD p rograms
l Teletext (VBI & OSD output)
l Aspect ratio: 4:3/16:9
l Dolby 5.1 channel or PCM digital audio output
l Electroni c program guide (EPG)
l Parenta l guidance
l Software upgrade via RS232
l 32 bits true color on screen display (OSD)
l Channe l and Program editor
3
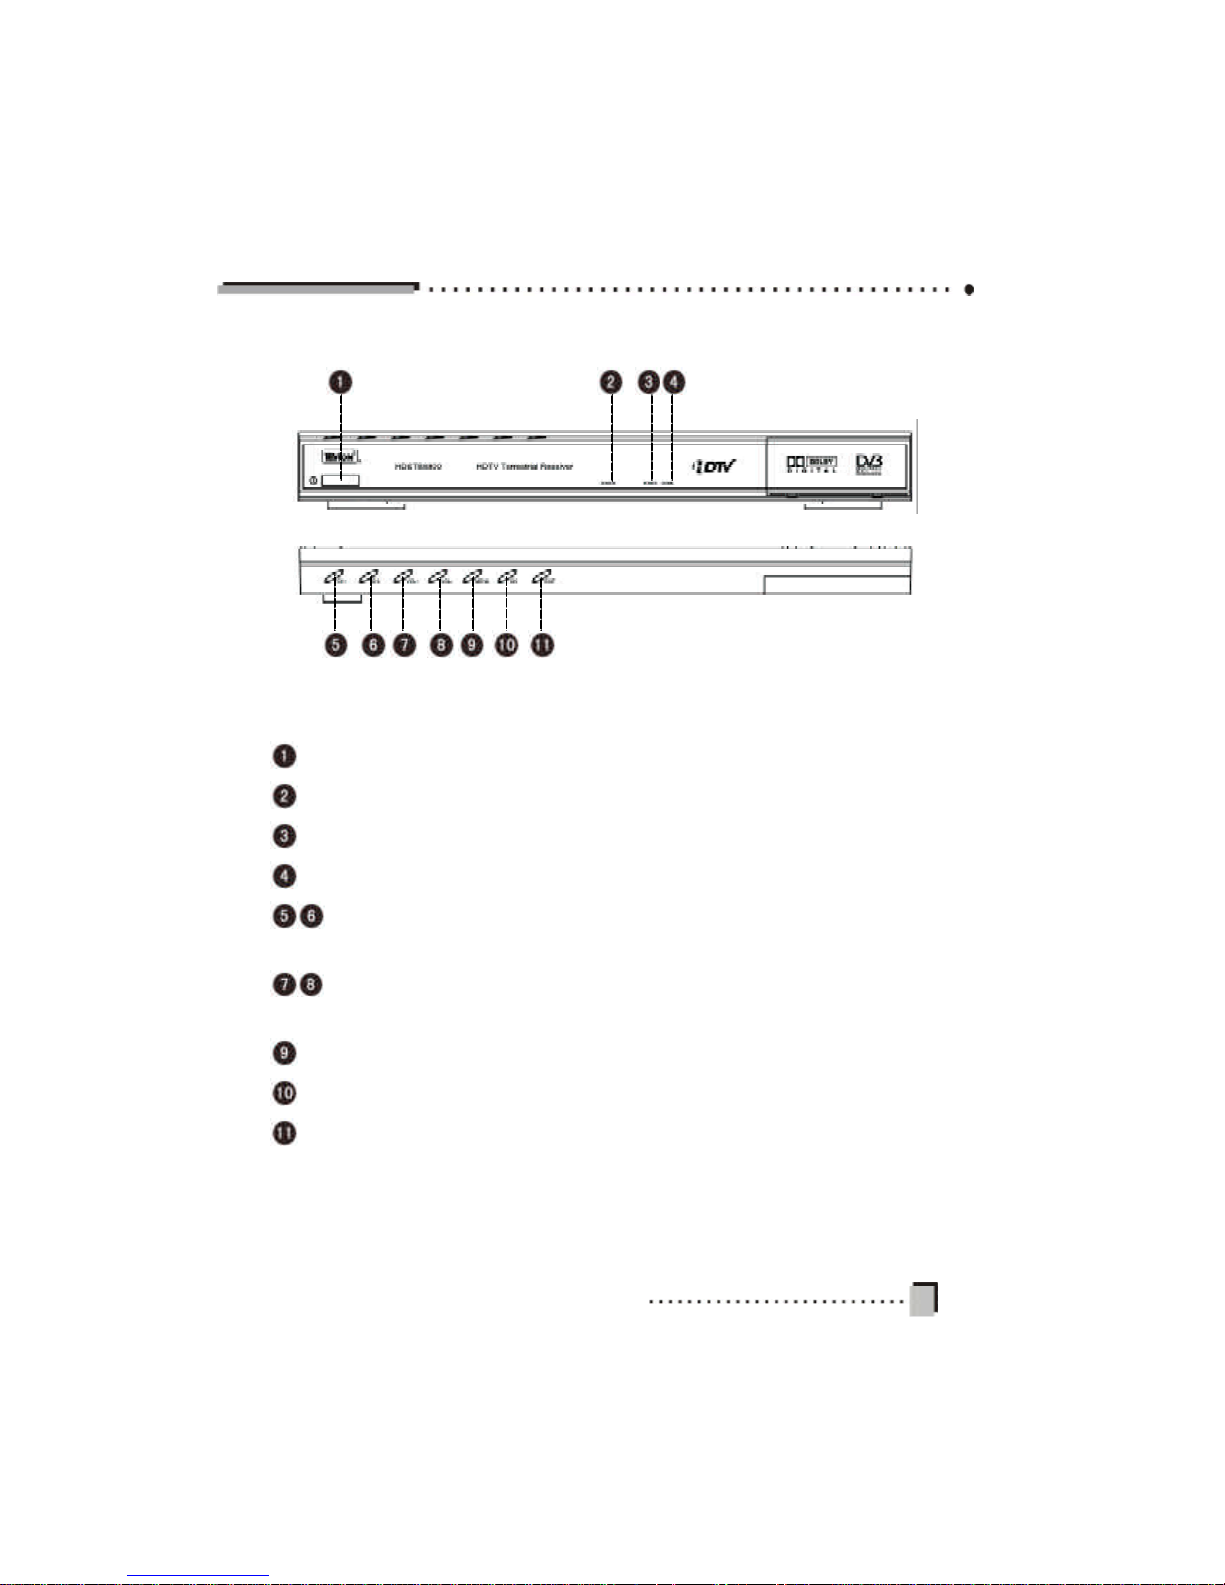
POWER: Press to turn the Set Top Box ON / OFF
SENS OR: Remote Control sensor
POWER INDICATOR: Power-on lamp
SIGNAL: Indicates the signal intensity
CH: P ress to switch between programs when watching TV, or move the
cursor up or down in the menu
VOL: Press to adjust the volume when watching a program, or move the cursor
left or right in the menu
MENU: Press to display the Main Menu or exit from the displayed menu screen
OK: Press to execute the selected item or confirm your selection in the menu
EXIT: Press to exit from current menu
3. Front Panel
4
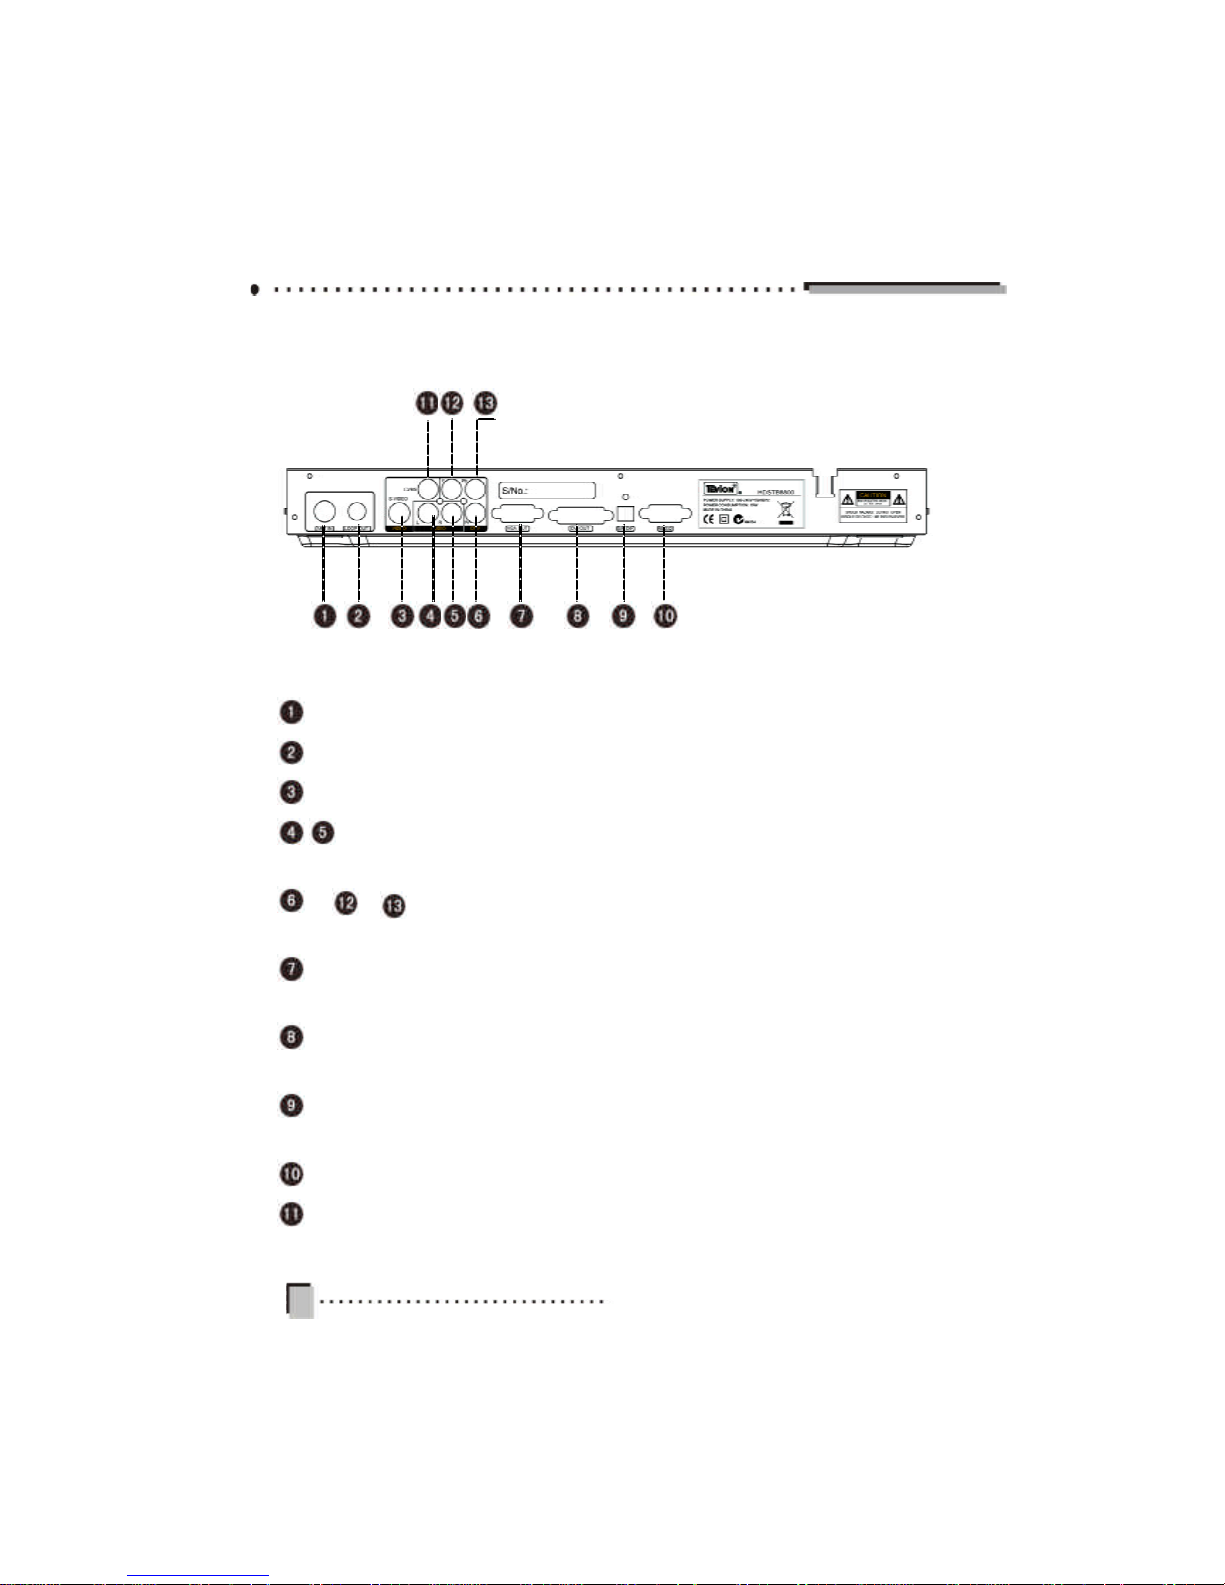
ANT IN: Co nnect to terrestrial antenna
LOOP OUT: RF output to TV set’s antenna input
S-VIDEO OUT: Connect to the S-VIDEO jack of the TV or VCR
L-AUDIO/R-AUDIO OUT: Connect to a TV or other audio device using the
RCA cables provided
Pr Y Pb (COMPONENT) OUT: Connect to a TV or Monitor with Compo-
nent inp ut. Compatible with high definition signal
VGA OUT: Connect to a monitor with VGA input. Compati ble with high definition
signal
DVI OUT: Connect to a monitor with DVI Input. Compatible with high definition
signal
OPTICAL DIGITAL OUT: Connect to an amplifier or Hi-Fi system with an optical
digitial input
RS232: Connect to a PC for software upgrade only
CVBS: Connect to the video input of a TV or VCR. Compatible with standard
definition signal.
4. Rear Panel
5
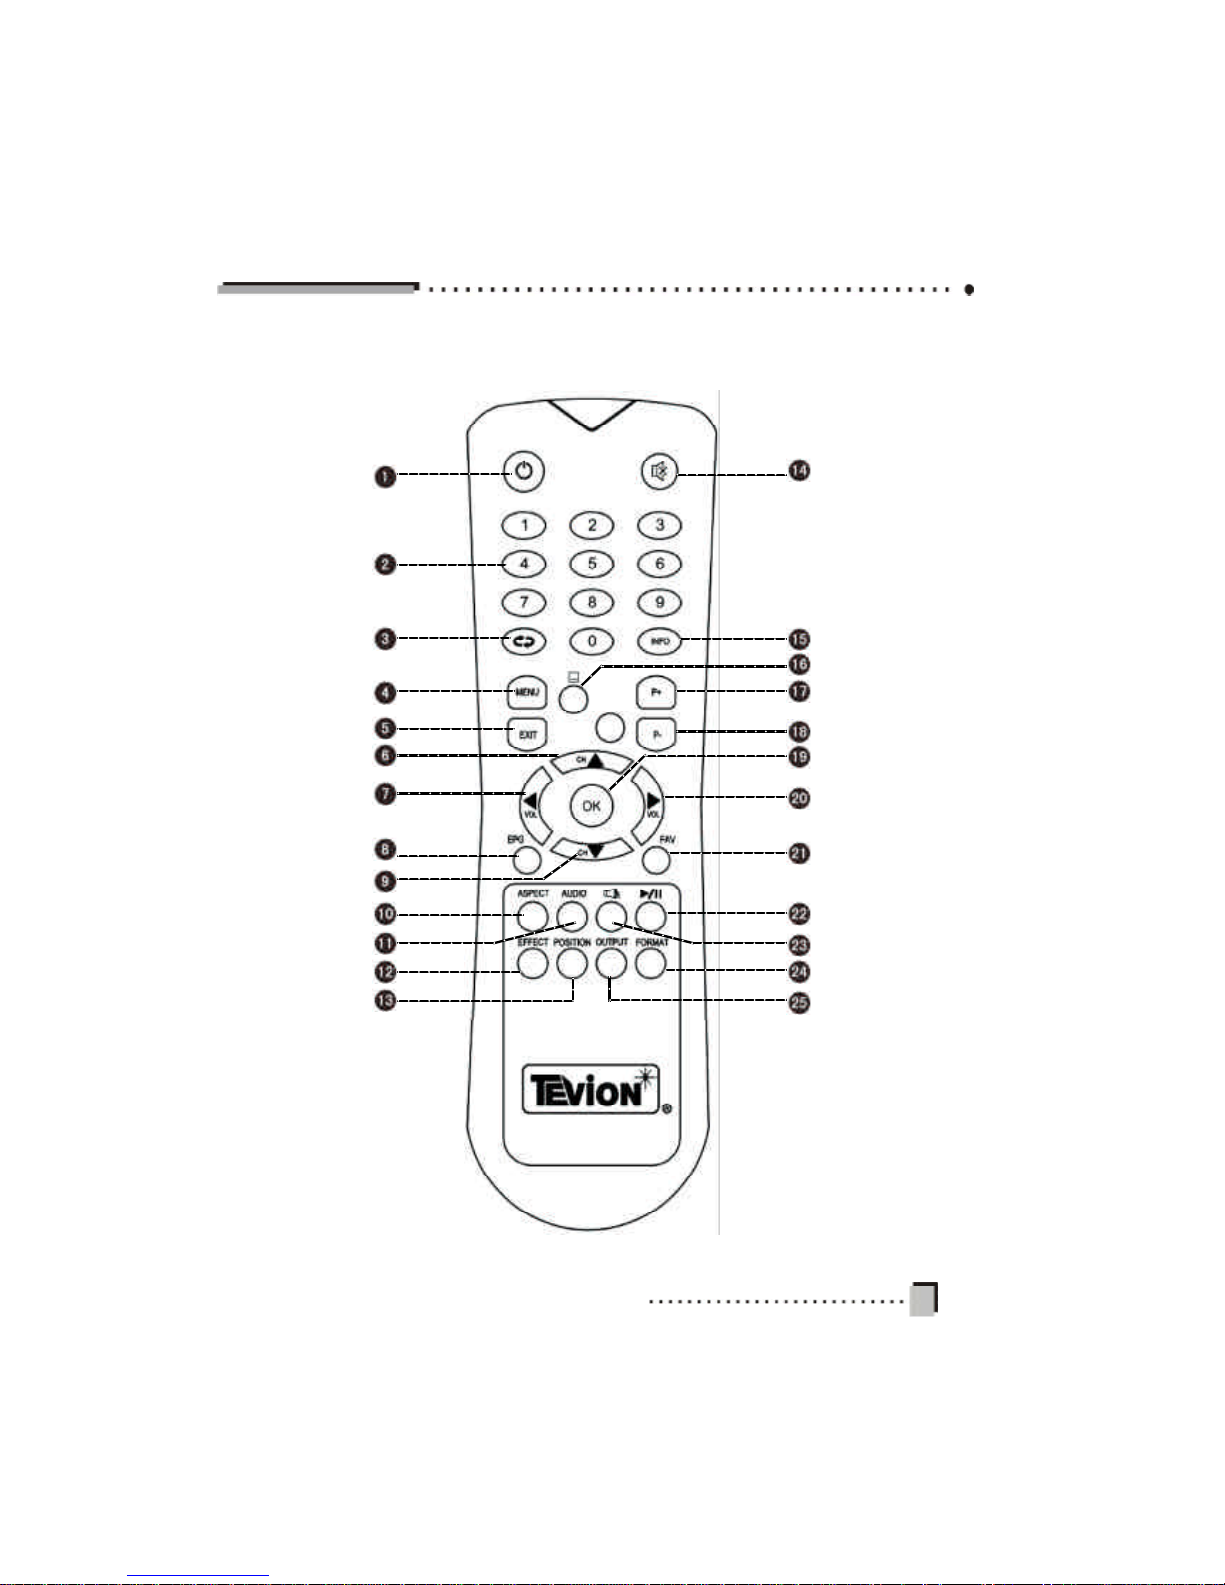
5. Remote C ontrol Unit
6
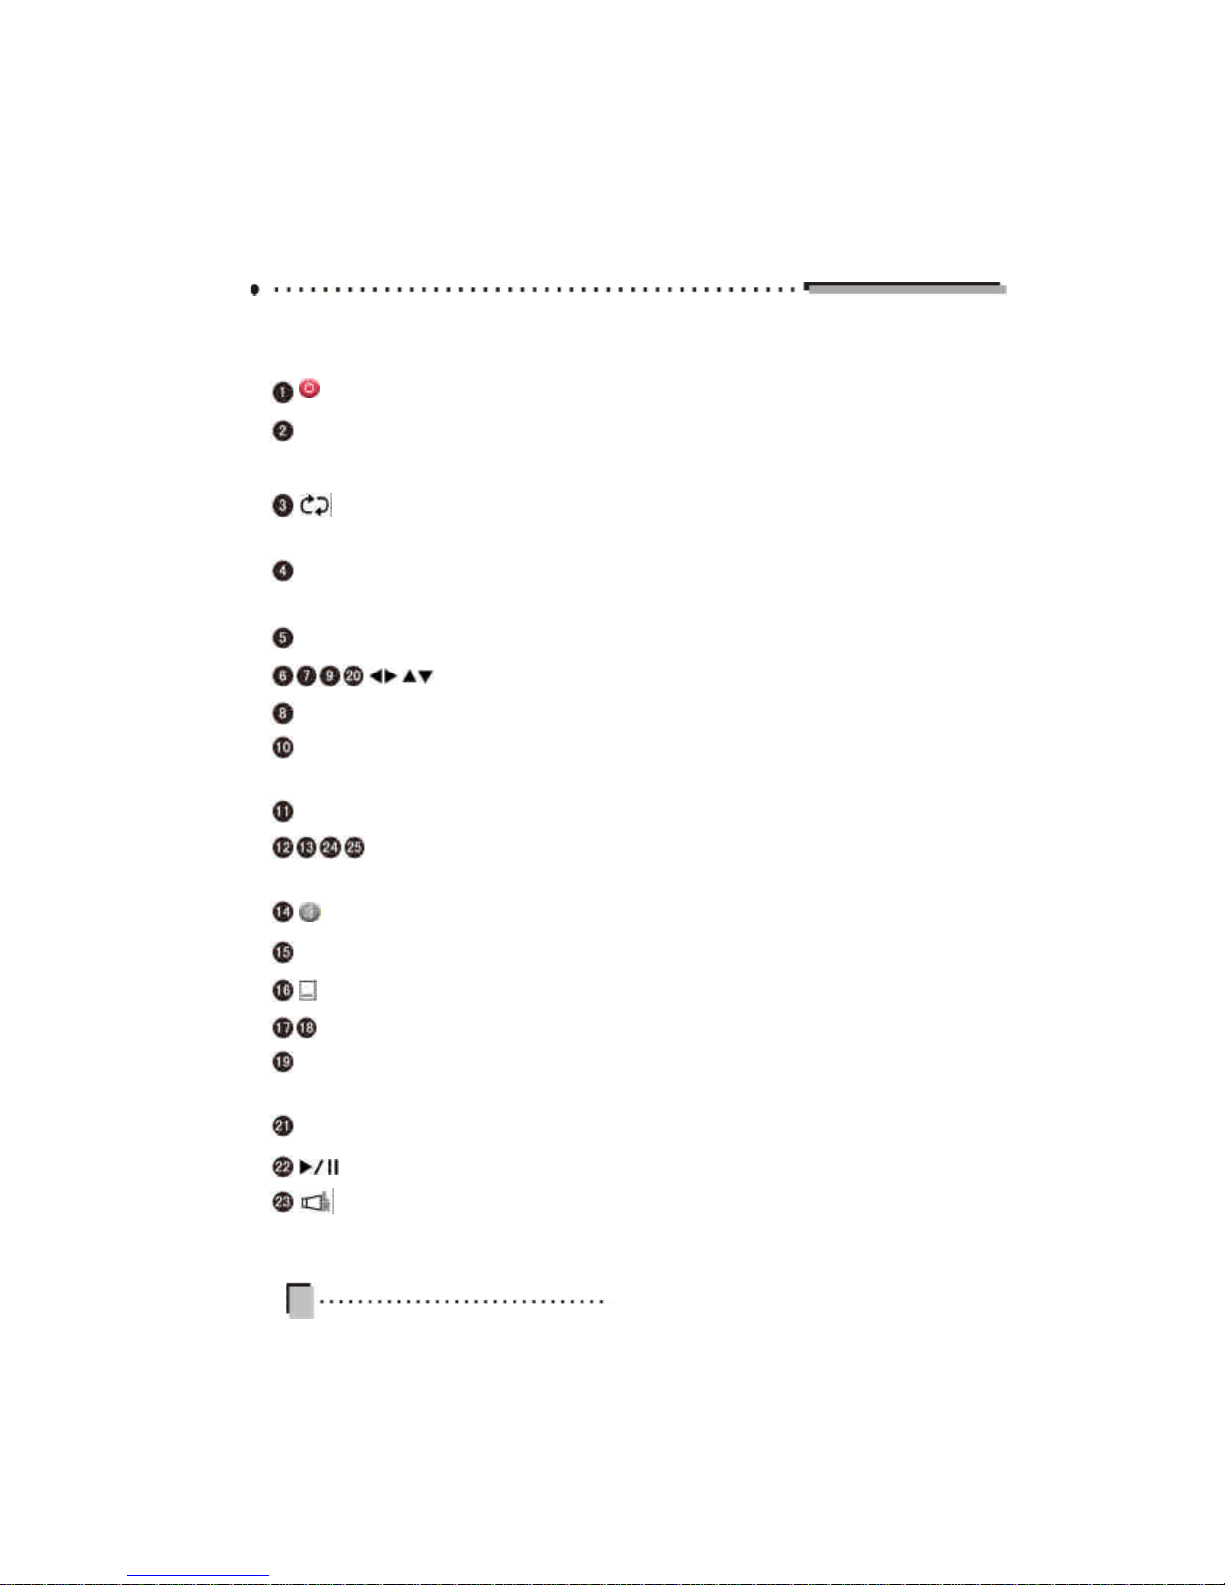
6.Keys specification-1
: Press to turn the Set Top Box on/off.f.
0 ~ 9: 0 ~ 9: Pres s to select a channel number, or to enter a number in an on
screen menu.
: Switch back to the previous channel. In the EPG mode, moves the guide
forwa rd several days
MENU: Displays the main menu on your TV screen. Closes the current menu
screen and returns to the n ormal view mode
EXIT: Retu rn to the previous menu on the menu screen or exit the Main Menu.
: Move cursor left/right/up/down.
EPG: Press to display Program Guide screen.
ASPECT: Use this HOTKEY to select your televison screen output format.
Continuously press this button to toggle through the di fferent modes.
AUDIO: Press to dislplay the Audio Language Menu Screen.
Colour keys: have their corres ponding functions in specified menus.
(refer to page 7)
: Press to mute or unmute.
INFO: Shows the information of the current channel being viewed.
: Press to switch between teletext and closed caption.
P+/P-: Press to page up or down.
OK: Press to save the results a nd exit the current menu screen
Bring up the Prog ram List when not in the menu mode.
FAV: Display the favourite list.
: Pause/Play A/V..
: Press to switch b etween Left, Right, Mix and Stereo Audio modes.

7
Vision Adjus t (Red Key)
When not in the menu mode, press the Red col our key
on the Remote Control to enter into the Vision Adjust
menu. Here, ad just the brightness, contrast, satu ration
and sharpness directly.
Postion Adjust (Green Key)
When not in the menu mode, by pressing the Green
colour key on the Remote Control, four big direction
arrows will be displayed in the middle of the scr een.
Use the four directio n arrow keys on the Remote Control to adjust the position o n the screen.
Output Mode (Yellow Key)
When not in the menu mode, use the Yellow colour key
to select the output mode between: P AL, VGA, YPbPr
and DVI Outputs. Continuously pr ess this button to
toggle through the d ifferent modes. On the front panel,
the first position on the LED display will show a different character for these four modes. The display will show
“P” on PAL mode, “V” on VGA mode, “Y” on YPbPr
mode and “D” on DVI mode. The PAL model is used for
the CVBS and S -Video Outputs.
Video Resolution (Blue Key)
When not in the menu mode, use the Blue colour key
to select the video resolution among 576P, 720P and
1080I. Continu ously press this button to toggle through
the different resolutions. On the front pan el, the LEDs
will show the output mode by your choice. The Video
Resolution is not accessable when in the PAL mode.
7.Keys specification-2

8
II. Connection and Installation
1. System Connection
Make sure the Power, Terrestrial Antenna, TV and other relevant equipment are connecte d according to following diagram. If you have other equipment that you would like
to install, and are unsure of the installation process of this equipment, consult the
instru ction manua l for the other equipment, or contact the retai ler that this other equipment was purchased from. Otherwise, please call the toll free number provided for
assistance.
1
2
3
4
5

9
2. Connections
There are five method s of connecting this Set Top Box to your TV or Monitor.
The TV’s or Moni tors can be divided into two types: stan dard definition (SDTV), and
high definition (HDTV).
With each connection use d, the left and right audio connections must be connected
as well.
Note: 1 , 2, 3, 4 , 5 please refer to connections in the previous diagram.
Don’t connect y our TV or monitor with VGA and YPbPr at the same time.
CVBS 1 576I Analog
S-VID EO 2 576I Analog
Y, Pb, Pr 3 576P, or 720P, or 1080I YPbPr
VGA 4 576P, or 720P, or 1080I VGA
DVI 5 576P, or 720P, or 1080I DVI
Connect
to what
Used Connector on S TB
(L-AUDIO and R-Audio)
Selected Definition
Video Output mode
HDTV
SDTV

10
3. Quick Installation
STEP 1: Check connections
Prior to powering up the recei ver, ensure that all ca bling is
correctly conne cted as explained in system co nnections.
Ensure that the unit is connected to the A/V equipment
and the power so cket.
STEP 2: Adjust TV set
Turn on the television and adjust TV’s video input mode
accordin g to the receiver’s vid eo ouput mode.
STEP 3: Power up
Turn on the power switch ON /OFF on the front panel of
your receiver. The startup On Screen Display(OSD) will
be sh own on the TV screen. The startup OSD will remain
for several seconds and then disappear. If there are programs stored in the S et Top Box, the channel number will
be shown on the LED displ ay.
STEP 4: Search program
1. If there are no programs stored in the receiver, the system will guide you step by step to begi n the search process.
The first scre en that will appear will be the System Infor-
mation screen. This will show the words “Please press
OK key to initialize s ystem”. Press the OK key to
continue, or press EXIT if you do not want to proceed. If
you select OK, you will enter the Country Select menu.
Here you select the country that you are in (Australia).
Press OK to continue. The next screen will be the Time
Zone Adjust menu. In this menu, select the co rrect time
zone for where you live, and set the daylight savings i f it is
applicable .
Press OK to continu e. This will bring you to the Parantal
Guide menu. Here you can change the password, and
set parenta l locks if you d esire (see section 5.5 for further

11
detail s on parental locks). Press OK to continue. The next
menu is the Auto Search menu. The system will now search
for programs from all available channels.
When the search has completed, all programs that were
found will be added to the TV program list. The Set Top
Box will re turn to the normal viewing mode, and will show
the first channel that was found.
2. To search for programs manually, follow these steps:
When not in the menu mode, press the MENU key to
display the MAIN MENU. Use the keys to select Installation and press OK. The system has provided two
ways to search programs: Auto Search and Manual
Search.
We recommend that you use Auto Search. Move the cursor to Auto Search and press OK. The system will search
for programs au tomatically. After searching, the programs
that were found will be added to TV prog ram list, and the
TV will return to the first program that was stored. If you
are fa miliar with the location of the channels, you can use
the Manual Search. For more details, please refer to 1.
Installation in Section III.
STEP 5: Vi ew program
Press OK when in the normal view mode and the program
list will appear. Use keys to s elect the desired program and press OK to view in full-screen.
Note: All functions can be oper ated by using the
keys on the Remote Control, and some of the functions can also be operated by using the keys on the
front pa nel of the Set Top Box.

12
III. Software
Program Manage
Program Guide
Program Edit
Favori te Edit
Installation
Auto Search
Manual Search
Channel Edit
Factory De fault
Up grade
System Setting
Audio Setup
OSD Setup
Parental Guide
Langua ge Setup
Time Zone Adjust
Video Setup
System Info rmation
Program Select
Timer Setup

13
1.Main Menu
When not in the menu mode, pressing MENU key will
display the Main Menu.
This menu consists of five menu items as shown below.
v Installation
v Program Guide
v Program Manage
v Program Select
v System Setting
Use the keys to move up or down from one item to
another. The corresponding sub-menu will be displayed
on the screen when the OK key is pressed on the selected
item.
To escape the menu system at anytime, press EXIT or
MENU o n the Remote Control.
2. Installation
In the Installatio n menu there are two ways to search for
progra ms: Auto Se arch and Manual S earch. The Channel
List determines what channels will be searched in those
two menus, so it is important to edit the channels in the
Channel Edit menu.
2.1 Auto Search
For first time users, Auto Search is the best option. First,
use the keys to select Auto Search in the Instal lation
menu. Then press OK to enter the Auto Search menu.
The system will se arch for programs automatically. After
searching, the programs that were found will be added to
TV pro gram list, and the TV will return to the fi rst program
that was foun d.

14
While sea rching, you can press EXIT to stop or press OK
to skip. Press EXIT again or MENU to exit from this menu.
2.2 Manual Search
You can set parameters in the Manual Search menu if
yo u are familiar with the relevant parameters. In this mode,
only on e channel at a time, whose necessary parameters
are ente red into the Manual Search menu manually, wi ll
be searched.
Channel No.: Press key to select the correct option.
Frequency : The value varies with what you have selected
in Channel No.
Bandwidth: Press keys to switch between 7M and
8M.
Transmission Mode: You have a choice of 2K, 8K and
Auto. Press keys to select appropriate mode.
Guard Interval: Available options are: 1/4, 1/8, 1/16, 1/
32 and Auto. Press keys to select one of these.
Network Search: Press keys to select “Yes” or “No”.
If you select “Yes”, the receiver will search all programs
according to the channel lis t. If you select “No”, the receiver will only se arch programs from the current channel
that you have entered above. At the bottom of this menu,
there are two colour bars reflecting the signal’s quality
and str ength. You can check whether you have set the
antenna correctly by these two bars. After modi fying, press
OK to begin searchi ng. After searching, the TV will return
to the first program that was found. During the entire
process, you can press EXIT or MENU to exit.

15
2.3 Channel Edit
Select Channel Edit in the Installation menu and press
OK. The Channel Edit menu will be displayed on the screen.
Here, a new chan nel can be added and the existing ones
can be edited or del eted. You can use the colour keys on
the Remote Control to execute the corresponding command to each colour.
Add (Red key) Delete (Green key)
Modify (Y ellow key)
v Add
After pressing the Red key on the Remote Control, the
Add Channel menu will be displayed. Here you ca n set
the nece ssary parameters of the new channel.
Channel No: This value is determined by the receiver
automatically and cannot be modified.
Frequency: You can input values referring to above.
Bandwidth: Pr ess keys to switch between7M and
8M.
Transmission Mode: You have the selection of 2K, 8K
and Auto. Press keys to select appropriate mode.
Guard Interval: Available options are: 1/4, 1/8, 1/16, 1/
32 and Auto. Press keys to select one of these.
Ensure a ll of the above parameters are set, press OK to
confirm and exit from the Add Channel menu. In the
Channel Edit menu you will see that the ne w channel
has been ad ded to end of the list.
v Delete
This command allows you to delete one or more unwanted
channels. First select the channel you want to delete and
press the Gre en key on the Remote Co ntrol, and you will
find this item will be marked with the symbol. You can

16
cancel this operation by pressing the Green key again.
Press Exit to exit from Channel Edit menu. You will find
that all channels marked with the s ymbol have been
deleted from th e channel list.
v Modify
Select the channel you want to edit first and then press
Yellow key or OK to display the Modify Channel menu.
The operations are the same as “Add”.
2.4 Factory Default
In the Installation menu, move the cursor to Factory Default and press OK . The P assword screen will appear to
ask you to input the password. The default value is 1111 (If
you want to change the password, pl ease refer to 6.5 Parenta l Guide). If you ha ve inputted the correct p assword, a
warning message box will be displayed on the screen.
Press OK key to resume the default.
Note: After restoring default, all programs you have
stored w ill be erased and all parameters will return
to the factory default . So, this operation is applied
only in special situations and only when necessary.
2.5 Upgrade
This upgrade function requires software support.
3. Program Guide
In the Program Guide menu, the top-right small picture
screen and bottom-right program guide list will vary with
what you have selected in the program list on the left hand

17
4. Program Man age
In the Main Menu, s elect Program Manage, and press
OK. This menu consists of Program Edit and Favorite Edit.
4.1 Program Edit
Through this menu, you can edit programs according to
your requirements. The col our keys on the Remote Control have their corresponding functions.
Delete (Red key ) Move (Green key )
Modify (Y ellow key)
v Delete
This delete command allows you to delete one or more
unwa nted progra ms permane ntly. First select the program
you want to delete and press the Red key on the Remote
Control, you will find this item will be marked with an “X”
symbol. You can cancel this operation by pressing the
Red key again. Press OK or EXIT to exit from the Program Edit menu. When you next enter this menu, you
will find that all programs that were marked with an “X”
symbol have been deleted from the program list.
screen . Use keys to move the cursor between the TV
program List on the l eft and the bottom-right program list,
and keys to move up or down in each list. The bottom-right list is your selec ted TV program’s EPGs. The
key is used to move the EPG forward several days.
Move the cursor to desired EPG and press OK, a large
text box wi ll appear for a more detailed explanation. Press
EXIT to return to the Main Menu, or press the MENU key
to return to the normal view mode .

18
4.2 Favourite Edit
This menu includes the three columns: FAV, Selected
and Programs. While th ere are no prepared favourite
groups in the FAV column, you can define and modify
favourite g roups’ names by using the colour keys on the
Remote Control. You can also add programs to any
favo urite group .
v Move
Only one program can be moved up or down at a time.
Press keys to select the program you want to move
and press the Green key on the Remote Control . A double-
pointe d arrow pointing north and south will be displayed to
the right of the selected program. You can press keys
to move this program to whe re you want to relocate it to.
Press the Green key again to confirm the new location.
v Modify
Press keys to highlight the program that you want to
modify and press the Yellow key on the Remote Control.
You will then enter into the Program Modify menu where
you can modify the following parameters of the selected
pro gram.
Video PID: Use keys to fix a location where you can
input a number using the numeric keys on the Remote
Control, and inpu t this number.
Audio PID: Input the specified value in the same way as
ab ove.
PCR_PID: Input appropriate value in the same way as
ab ove.
Teletext PID: Input appropriate value in the same way as
ab ove.
After modifying, press OK to save or press EXIT to cancel
this operation.

19
The keys are used to switc h between the three
columns, and keys are us ed to select item in each
column. Notice that what will be shown in the Selected
and Programs column varies wi th the favorite group that
you ha ve selected in the FAV column.
How to define a favourite group
Press the Red key on the Remote Control, and a keypad
menu will appear where you can define a favorite group
name. In this keypad menu, select your required character by usi ng the direction keys on the Remote Control and
press O K. The selected character will be shown in the
title bar at the top of this keypad menu. To switch between capital and lower case, select Caps On and press
OK on the Remote Control. The Back command allows
you to erase an unwanted character in the title bar. To
confirm the new name, move the cu rsor to the OK command and press OK. The keypad will disappea r and the
new name will be shown i n the FAV column. You can define several favorite groups in the same way.
How to modify a favourite group
In the FA V column, use keys to select the group that
you want to modify and press the Yellow key. A keypad
menu will appear . For further operation, refer to the
paragraph above.
How to delet e a favourite group
In the FAV col umn, the selected favorite group will be deleted from the lis t as soon as Green colour key on the
Remote Control is pressed.
How to add programs into a favourite group
Select one favourite group (for examaple Sports favourite
group that you have just defined) in the Fav column, and
move the cursor to the Programs column. In the Programs

20
column select programs that are similar to Spor ts and
press OK. Those programs will now be added into your
Sports favourite gr oup and be shown in the Selected
column. Those selected programs will also disappear in
the P rograms column.
If you want to delete on e program in your Sport favourite
group, move the cusor to the program that you want to
delete in the S elected column and press OK. The selected
program will disappear in the Selected column and will be
shown in the Programs col umn.
Program Edit Menu
By pressing the Blue colour key, you can switch between
the Pro gram Edit menu and the Favourite Edit menu.
5. Program Select
In the Main Menu, use keys to select Program Select,
and press OK.
Here, the default mode i s “ALL” . Suppose that you have
defi ned several favorite groups (please refer to 3.2 Favorite
Edit) , you can use keys or FAV key to select your
desired favorite group. You will also find that programs
shown in the below program list will vary with your sel ected
favorite group. If there is no defined favorite group,
keys or FAV key are not available. By pressing keys,
the cursor will retu rn to the below program list.
In the below program list, keys are used to select
your desired program. Press OK to view in full screen.

21
6. System Setting
In the Main Menu, use keys to select System Setting,
and press O K. This menu consists of eight items. You
can access the sub-menus by highlighting this item and
pressing OK.
6.1 Video Setting
Aspect Ratio: Press keys to select the aspect ratio
of the output video format between Full Screen, 4:3 P illar
box, 16:9 Letterbox and 16:9 Crop.
NTSC/PAL/SECAM: The default i s PAL.
Hs Frequency: Press keys to select between 28KHz
and 31.5KHz.
After setting, press OK or EXIT to save and exit.
Note: You have to r eboot the box to set the changes
to Colour Sy stem and HS Frequency.
6.2 Audio Setting
Decoder: Press keys to switch between Inner and
Outer. If you have a Hi-Fi system with an Optical Digital
input (S /P DIF input), please select “outer” to output AC3
(Dolby Digital) stream to your Hi-Fi system. If the unit is
set to “inner” the set-top box will decode the AC3 stream.
Channel Mode: There are four options that you can select:
Left, right, Mix an d Stereo.
After setting, press OK or EX IT to save and exit.
6.3 Timer Setup
Here you can make se veral timer reservations.
Timer Number: Press keys to select the timer in-
dex from 0 to 31.
Enable: Press keys to select between “Yes” and “NO”.

22
If you select “Yes”, the timer will take effect.
Event type: Press keys to select an even t between:
Turn On, Turn Off an d Turn Channel. If you select “Turn
On” or “Turn Off”, the Set Top Box will be turned on or
turned off automatically at the designated time. In “turn
on” mode, if you have sele cted a particular channel in the
following Turn on Ch annel mode, the Set Top Box will
turn on to the selected channel at the designated time. If
you select “Turn Channel”, the Set Top Box will change
channe ls to your selected channel at the designated time.
Turn on Channel: This can be modified only when you
have selected “Turn On” or “Turn Channel” in the Event
type menu. Use keys to bring up the Program List
where you can use keys to select your desired
channel. Press OK key to confirm.
Time Type: Press keys to select among One Time,
Daily, Weekly and Monthly. The selected option determines what other fields will need setting. For example, if
you select “One Time”, the menu will show: Month, Date
and Time. In each field, use keys or numeric k eys
(0~9) to set the correct time of program.
After setting, press OK or EX IT to save and exit.
6.4 On Screen Display Setup
Tra nsparency: The transparency of the on screen menu
can be adjus ted. The value ranges from 0% to 20% in
steps of 5%.
Banner Time: Whenever a new channel is selected, an
Info bar appears momentarily at the bottom edge of the
screen. This setting sets the display duration of the Info
bar.
After setting, press OK or EXIT to save and exit.

23
6.5 Parental Guide
Select Paren tal Guide and press OK, a password is
needed before accessing the Parental Guide menu. The
default password is 1111.
Parental lock: You can prevent children or unauthorized
people from watching programs. Use keys to select
your desired level. Since there are differences between
the parental rating standar ds of Australia and that of
Europe, the available options that you can select are determined by the sel ected country. T he differences are described as follows:
Parental Rating Value (A ustralia standard)
No Block: Not Classified
Block R: Restricted 18+
Block AV: Adult, Strong Violence (15+)
Block MA: Mature Audience (15+)
Block M: Mature Audience (15+)
Block PG: Parental Guidance
Block G: General
Block All: Lock all channels
Parental Rating Value (Europe standar d)
No Block: Not Classified
Block 18: Restricted 18+ Block 17: Restricted 17+
Block 16: Restricted 16+ Block 15: Restricted 15+
Block 14: Restricted 14+ Block 13: Restricted 13+
Block 12: Restricted 12+ Block 11: Restricted 11+
Block 10: Restricted 10+ Block 9: Restricted 9+
Block 8: Restricted 8+ Block 7: Restricted 7+
Block 6: Restricted 6+ Block 5: Restricted 5+
Block 4: Restricted 4+
Block All: Lock all channels
When viewi ng programs, you have to input the PIN code
in ord er to view a program beyon d your selected level of
restriction.

24
Program Man age Lock: If “Yes” is selected, you have
to input a password before accessing the Program Man-
age Menu.
Installation Lock: If “Yes” is selected, you can’t enter
into the In stallation menu until you input the correct
password.
Change Pa ssword: Highlight this button and press OK,
you will enter the Password Set menu. Use the numeric
keys (0~9 ) on the Remote Control to enter your new password into the Input New Password and Confirm New Password fields. After setting, press OK to confirm the new
password and return to the Parental Guide menu.
Press OK or EXIT to save and exit.
6.6 Language Setup
Here, you can select your desired menu language, close
capti on, subtitle and audio. For e ach item, p ress keys
to sele ct your desired language. Press OK or Exit to exit
and save the settings.
6.7 T ime Zone Adjust
In the Time Zone Adjust menu, use keys to select
your ti me zone. The available time zones are determine d
by the country that you have selected. If the selected
country is Austr alia, the time zone is selected by your
city. If th e selected country is a European country, select
the time zone directly. The keys are used to select
betwe en “on” and “off” for Daylight Saving.
6.8 S ystem Information
Here, you can access information about the hardware and
software , and also other typ es of information such as the
Release date.

25
7. Shortcut Key Explanation
When not in a menu screen, you can perform some functions in a n easy a nd fast way by pressing special k eys on
the Remote Control. These keys are explained as follows:
7.1 Program List
Press OK or FAV on the Remote Control. This will display
the Program List menu. Press FAV again and again or
keys to switch between your favourite groups that
you have defined before (refer to 3.2 Favorite Edit). The
keys are used to select the program that you want to
watch and press OK to vi ew.
7.2 Teletext/Closed caption
You can press the key on the Remote Control to switch
between: Teletext and Closed Caption. On the front panel,
the first position of the LED display shows a different symbol for each of the four modes . It shows “T” on Teletext
mode, “C” on Closed Caption and “P” on normal view. Only
when the broadca ster has provided this service, can you
access teletext or closed caption. When in the teletext or
closed caption, you can exit by entering into any menu.
7.3 Information
When watching a channel , press keys to switch channel or p ress the INFO key, and a simple EPG banne r that
includes the current program information, and the next
program information wi ll appear. The duration of the banner can be modified referring to 5.4 OSD Setup Banner
Time. An SD or HD icon will be di splayed at the top-right
corner of this banner according to current TV program being
transmitted.
By p ressing the INFO key agai n while this bar is d isplayed,
a bigger textbox wil l appear showing more details about

26
the current program. If there is too much information for
this textbox, please use the P+/P- keys on the Remote
Control to continue reading the information on the next
page. Pres s the INFO key once again to return to the
normal view mode.
During the whole operation, pre ss EXIT to exit from this
banner at anytime.
7.4 Volume
To increase or decrease the volume, use keys either
on the Remote Control or on the front pan el.
7.5 Audio
Press AUDIO to display the audio language menu. Note
that the available selections in the audio language menu
depen d on the TV bro adcasting signal. If there are several
audio languages provided, use keys to select your
desired lang uage and press OK to confi rm, otherwise there
will b e no selection available.
7.6 Audio Mode
Press the key to switch between: Left, Right, Stereo
and Mix modes. Select the best audio channel output for
the curre nt program.
7.7 Aspect Ratio
When not in the menu mode, pres s ASPECT to select
you r desired television screen output format between: 16:
9 Crop, Full Screen, 4:3 Pillarbox, 16:9 LetterBox . Continuously press this button to toggle through the different
formats.

27
IV. Technical Specification
Tuner
Input frequency
174 ~ 860MHz UHF&VHF(IEC Female
Connector)
Input level -70 ~ -10 dBmV
Input impedance 75O
Channel Decoding
Standard DVB-T EN300 744
Demodulation QPSK, QAM16, QAM64
Code rate 1/2, 2/3,3/4,5/6,7/8
Demultiplexer
Standard ISO/IEC 13818-1
Input max.bit stream
rate
100Mbps(Serial)/12.5Mbps(Parallel)
Video Decoding
Standard ISO/IEC 13812-2 MP@HL/MP@ML
Aspect ratio 4:3, 16:9
Video resolution 1920x1080MAX
Power
Input voltage AC 100 - 240V, 50/60Hz
Power consumption 15 W max
Safety
Insulation resistance
More than 10MO at 500Vdc
Ambient conditions of 28±2% & 70%RH
Withstand Voltage
(Hi-Pot)
I/p to O/p:3kV(1 min)

28
Temperature Rise
<75 on winding & core; <50 on casting
At 264Vac @ 50Hz
Safety Standard Designed to meet IEC/EN6065
Ambient
Operation temperation 0°C ~ 45°C
Size 420mm(W)x277mm(D)x40mm(H)
Weight 2.5Kg

29
V. Trouble Shooting
Problem Possible Causes
What To Do
The display on the
front panel does
not light up.
Main cable is not
connected.
Check that the main cable
is plugged into power
socket.
No sound and
picture, but the
front panel shows
time.
The unit is in standby
mode.
Press the key on the
Remote Control.
No sound or
picture.
No signal or weak
signal.
Check the cable
connections.
Bad picture/
Blocking error.
Signal is too strong. Connect a signal attenuator
to the RF IN port.
There is
interference on
your digital
terrestrial channel.
The system is
connected using RF
leads and the output
channel of the
receiver interferes
with an existing
terrestrial channel or
Video signal.
Change the receiver output
channel to a more suitable
channel.
The Remote
Control is not
working.
Battery exhausted. Change the battery.
Vision disappears
when adjusting
vision position
The offset of vision is
too large.
Adjust vision to adverse
direction until it appears
again.

30
NOTE: If you cannot solve the problem using the above trouble shooting
guide, please call the Toll Free number located at the front of this manual,
and on your warranty card.
DO NOT RE TURN THE P RODUCT TO THE RETAILER
Channels are not
available after
using “Auto
Search” when
installing the
receiver for the
first time.
The country you has
selected is not where
you belong.
Restoring default, and
select the proper country.
Can not lock signal
by using “Manual
Search”.
The channel
frequency is not
accurate.
Check the frequency that
you entered is exactly the
centre frequency of the
current channel.
Picture seems
abnormal, even no
picture.
The definition and
output mode of
receiver, or AV input
mode of TV, is not
correctly selected for
the used connector
between them.
According to the used
connector between
receiver and TV, modify
the definition and AV
output mode (refer to
page 9), and choose the
proper AV input mode of
TV.
 Loading...