

Page 1
99 Washington Street
Melrose, MA 02176
Phone 781-665-1400
Toll Free 1-800-517-8431
Visit us at www.TestEquipmentDepot.com
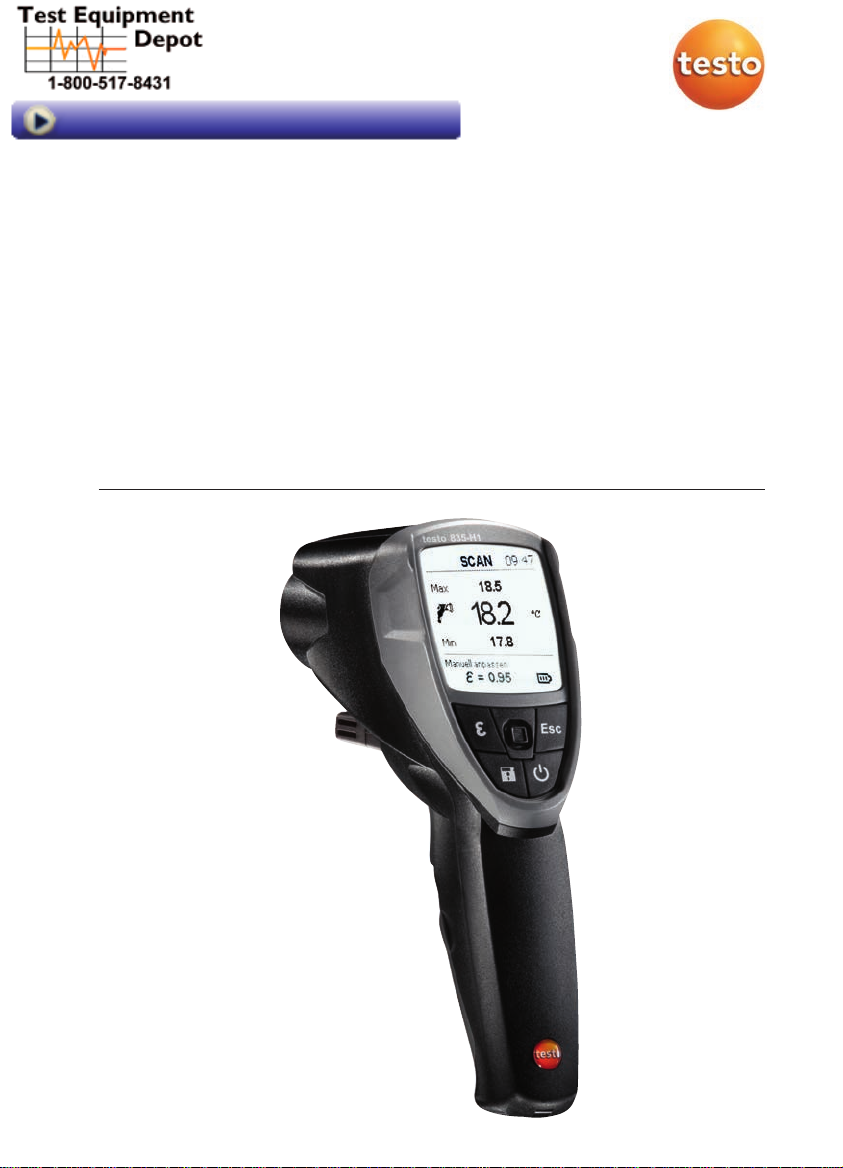
Instruction manual
Infrared and contact thermometer
testo 835
Page 2
1. General information
13
1. General information
Please read this document through carefully and familiarise yourself with the operation
of the product before using it. Keep this documentation to hand so that you can refer to
it when necessary.
2. Safety information
Avoid electrical hazards:
Do not conduct measurements on or near live parts!
Adhere to the product safety/warranty requirements:
Always operate the instrument properly and according to its intended purpose and
within the parameters specified. Do not use force.
Do not store with solvents (e.g. acetone).
Only open the instrument if this is expressly described in the documentation for the
purpose of maintenance or repair work.
Ensure correct disposal:
Dispose of defective rechargeable batteries and spent batteries at the collection
points provided.
Send the instrument directly to us at the end of its life cycle. We will ensure that it is
disposed of in an environmentally friendly manner.
3. Intended use
deenfresitptsvnl????
The testo 835 is a compact infrared thermometer for non-contact measurement of
surface temperatures. When a probe is connected, a contact measurement can also be
carried out. The H2 version also has an integrated humidity probe for measuring
ambient humidity.
The product should not be used in the following areas:
· Potentially explosive areas
· For diagnostic measurements in the medical sector
Page 3

14 4. Techical data
4. Technical data
Feature Values
Infrared measurement
Lens 50:1 + opening diameter of the sensor (24 mm /0.95”)
Spectral range 8 to 14 μm
Laser type 4point laser
Output / wavelength < 1 mW / 8 to 14 μm
Class / standard 2 / EN 608251:2007
Measuring range T1 / H1: 30 to +600 °C / 22 to +1112 °F
Resolution 0.1°C/°F
Accuracy T1 / H1: ±2.5 °C / ±4.5 °F (30.0 to 20.1 °C / 22.0 to 4.1 °F)
(at +23 °C / 73.4 °F, ±1.5 °C / ±2.7 °F(20.0 to 0.1 °C / 4.0 to 31.8 °F)
±1 digit) ±1.0 °C/ ±1.8 °F (0.0 to +99.9 °C / 32.0 to +211.9 °F)
Measuring rate 0.5 s
Contact measurement
Sensor type Thermocouple type K (connectable)
Measuring range T1 / H1: 50 to +600 °C / 58 to +1112 °F
Resolution 0.1 °C/°F
Accuracy (±1 digit) ± (0.5 °C / 0.9 °F + 0.5 % of the measuring value)
Measuring rate 0.5 s
Humidity measurement (only H1)
Measuring range 0 to 100 % RH (at 20 to +50 °C) / 4 to +122 °F)
Resolution 0.1 %RH (humidity)
Accuracy (±1 digit) ± 2 %RH
Measuring rate 0.5 s
General
Operating temperature 20 to +50 °C / 4 to 122 °F
Transportation/storage
temperature 30 to +50 °C / 22.0 to 122 °F
Voltage supply 3 x battery type AA or via USB port (only in conjunction with EasyClimate software)
Battery life 25 h (typical at 25 °C / 77 °F without laser and display illumination)
Housing ABS/PC
Dimensions 193 x 166 x 63 mm / 7.6 x 6.5 x 2.5”
Weight T1 / T2: 514 g / 1.13 lbs (incl. batteries)
EC Directive 2004/108/EC
Warranty 2 years
T2: 10 to +1500 °C / 14 to +2732 °F
±1 % of the measuring value (remaining range)
T2: ±2.0 °C / ±3.6 °F or ±1 % of the measuring value
(the higher value applies)
T2: 50 to +1000 °C/ 58 to +1832 °F
0.1 °C/°F (temperature)
0.1 °C td/°F td (dew point temperature)
± 0.5 °C/ 0.9 °F
10 h (typical at 25 °C / 77 °F without display illumination)
H2: 527 g / 1.16 lbs (incl. batteries)
Page 4

5. Product description
155. Product description
1 Infrared sensor (IR) lens
2 4-point laser for measurement spot marking
3 Ambient humidity probe, ambient temperature probe (only H1)
4 Trigger (measurement, switching on)
5 Battery compartment
6 USB interface, probe connector socket for thermocouple probe (TC)
7 Control keys:
· [
]: Switch instrument on/off
· [
]: Save measuring values
· [
]: Open Emissivity menu
· [
Esc]: Back
· [
]: 5-way joystick (press , up , down , left , right ): Open
configuration menu, confirm entry, navigate
8 Display
?? ?? nl sv pt it es fr en de
Page 5

16
6. Initial operation
6. Initial operation
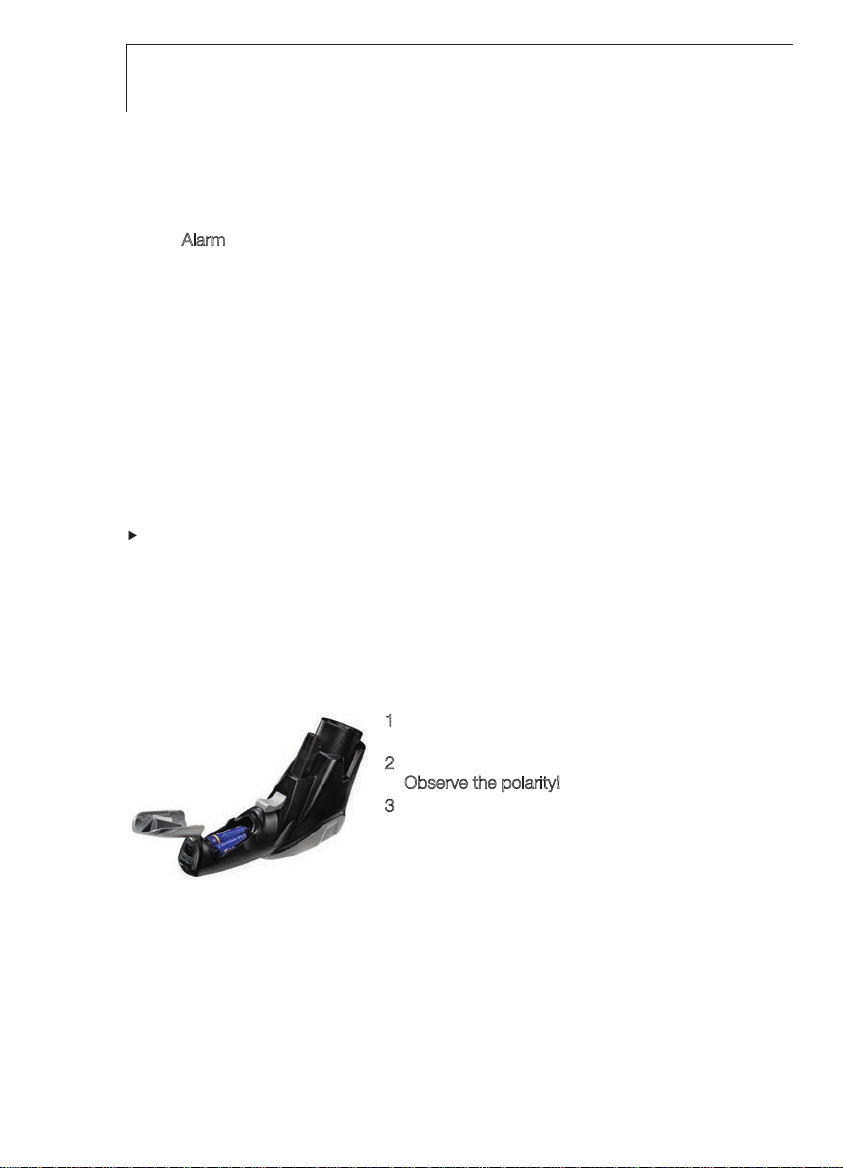
6.1 Inserting batteries
1 Open the battery compartment: open up the
cover.
2
Insert batteries (3x type AA). Observe the polarity!
3 Close the battery compartment: close the cover
again.
6.2 Setting the language
The measuring instrument has a language-specific user interface. English is set as the
default user language.
1 Switch the instrument on with [
2 Open settings mode with [
3 Use [
4 Select the preferred language with [
] to select (Language) and open with [ ].
].
].
] and apply the setting with [ ].
7. Operation
7.1 Connecting a probe
Connect the temperature probe at the probe socket. Observe the polarity!
7.2 On / Off.
Switch the instrument on: [ ] or press trigger.
The display illumination switches off automatically if no key is pressed for 30
seconds. Pressing any key switches the illumination back on.
Switch off the instrument: [
The instrument switches off automatically if no key is pressed for 2 minutes.
].
Page 6
7. Operation
7.3 Changing the display
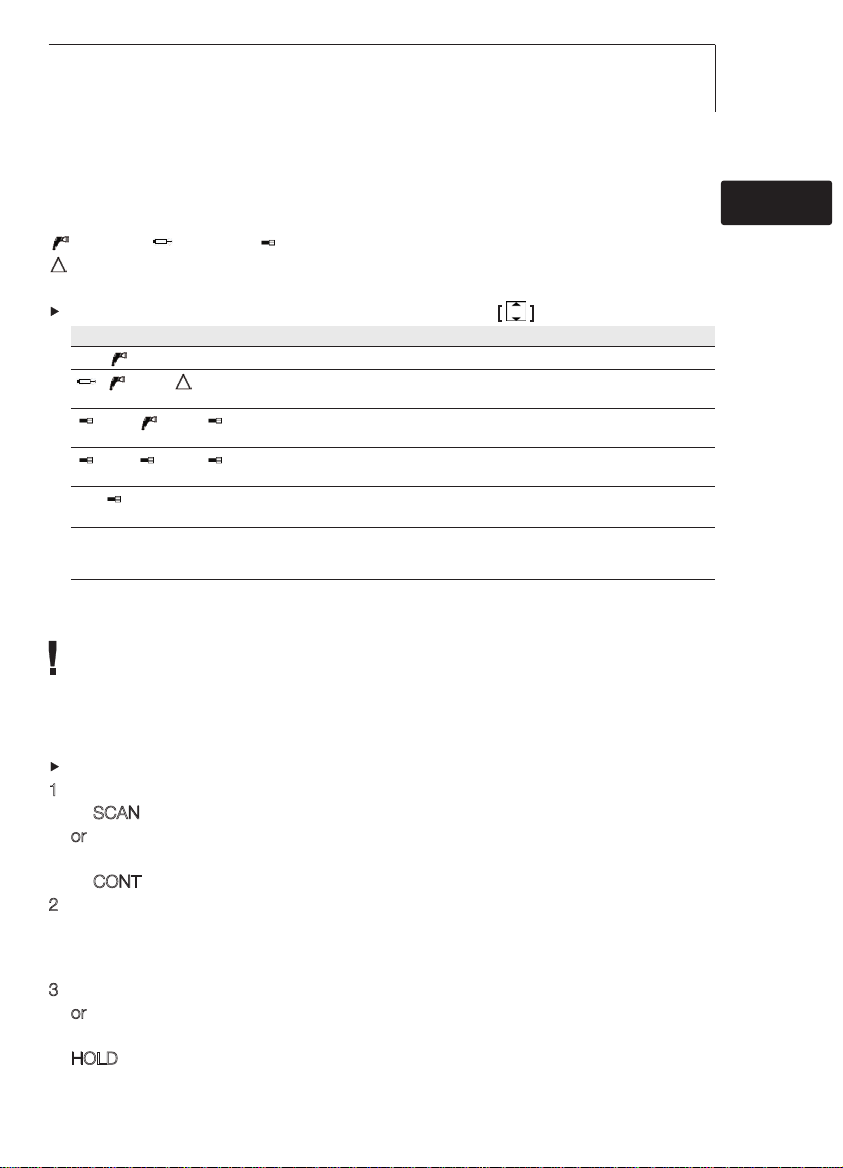
Various combinations of three measurement parameters in each case can be shown on
the display.
Symbols on the display:
IR sensor, TC probe, ambient humidity / ambient temperature probe,
temperature difference
- The instrument is switched on.
Select the desired measurement parameter display with [
Display [unit] Measurement parameters / comments
Max | [°C/°F] | Min Max. IR temperature | IR temperature | Min. IR temperature
| [°C/°F] | TC temperature | IR temperature | Temperature difference TC minus IR View only
[%RH] | [°C/°F] | [°Ctd/°Ftd] Ambient humidity | IR temperature | Ambient dew point temperature View only
[%RH] | [°C/°F] | [°Ctd/°Ftd] Ambient humidity | Ambient temperature | Ambient dew point temperature View
Max | [°CDtd/°FDtd] | Min Temperature difference IR minus dew point max. | current | min. View only
Max | aw[-] | Min Surface moisture max. | current | min. Calculated from dew point of ambient air
available when thermocouple probe is plugged in.
available in testo 835-H1.
only available in testo 835-H1.
available in testo 835-H1.
and surface temperature. 0.00 to 0.64: non-critical / 0.65 to 0.80: potentially
critical / 0.81 to 1.00: critical. View only available in testo 835 - H1.
]:
7.4 Measuring
Observe information on IR measurement (chapter 12)/contact measurement (chapter
13).
- The instrument is switched on.
Performing a measurement
The measurement (IR and contact measurement) is started by pressing the trigger.
Remove orange protective cap from the lens.
1
Continual measurement disabled: hold down the trigger.
- S
CAN is displayed.
o
r
Continual measurement enabled: press trigger.
- C
ONT is displayed.
2
Lock in on measurement object (IR) or position thermocouple (contact
measurement).
- When laser is enabled: the laser points mark the measuring range for IR
measurement.
3
Continual measurement disabled: release the trigger to end the measurement.
o
r
Continual measurement enabled: press the trigger again to end the measurement.
- H
OLD is displayed.
- The measuring values are kept until the next measurement.
17
?? ?? nl sv pt it es fr en de
Page 7

18 8. Settings
8. Settings
8.1 Performing settings
- The instrument is switched on.
1 Open settings mode with [
- A box appears around the selected function.
2 Select the required function with [
3 Perform settings with [
Functions
Backlight: set the intensity of the display illumination.
Laser: switch the laser on/off for measurement spot marking.
Beeper: switch the beeper on/off.
Continual: switch continual IR measurement on/off.
Unit: set the temperature unit.
Emissivity: set the emission level (also see chapter 8.2). This function can also be opened directly from
the measurement view with
Memory: manage the memory (also see chapter 8.3).
Alarm: set alarm thresholds (also see chapter 8.4).
Calendar: set the date and time. When measurement data is saved, it is given a date and time stamp.
Language: set the user interface language (also see chapter 6.2).
Reset: reset to factory settings.
Information: display instrument information.
8.2 Details: Emissivity
The emission level can be set in three different ways.
- The E
Select material
Select a material (with allocated typical emission level) from the list with [
apply the selection with [
Customise manual
1 Use [
2 Set the emission level with [
Customise automatic
A connected contact probe or a separate contact thermometer is required. The
emission level is calculated via a comparison of the measured surface temperatures
(contact measurement and IR measurement).
Automatic calculation is not possible if the temperature difference between the
measurement object and the surrounding environment is too low or the infrared
reading is higher than the contact reading: value is retained.
1 Use [
- If a contact probe (thermocouple type K, class 1) is connected, the surface
temperature measured via the thermocouple (T
connected, the temperature (measured with a different contact thermometer) must
missivity function is opened.
] to select Customise manual and open the function with [ ].
] to select Customise automatic and open the function with [ ].
].
] and open with [ ].
] and apply with [ ]:
[ε]
.
].
] and apply this setting with [ ].
- - is displayed and the previously set
) is displayed. If no contact probe is
TC
] and
Page 8
be entered with [ ].
2 Apply the measured or selected value with [ ].
3 Press the trigger to calculate the surface temperature via the IR sensor (T
- The measured value is displayed.
4 Apply the measured value with [ ].
- The calculated emission level (
5 Apply the calculated value with [ ].
ε) is displayed.
).
IR
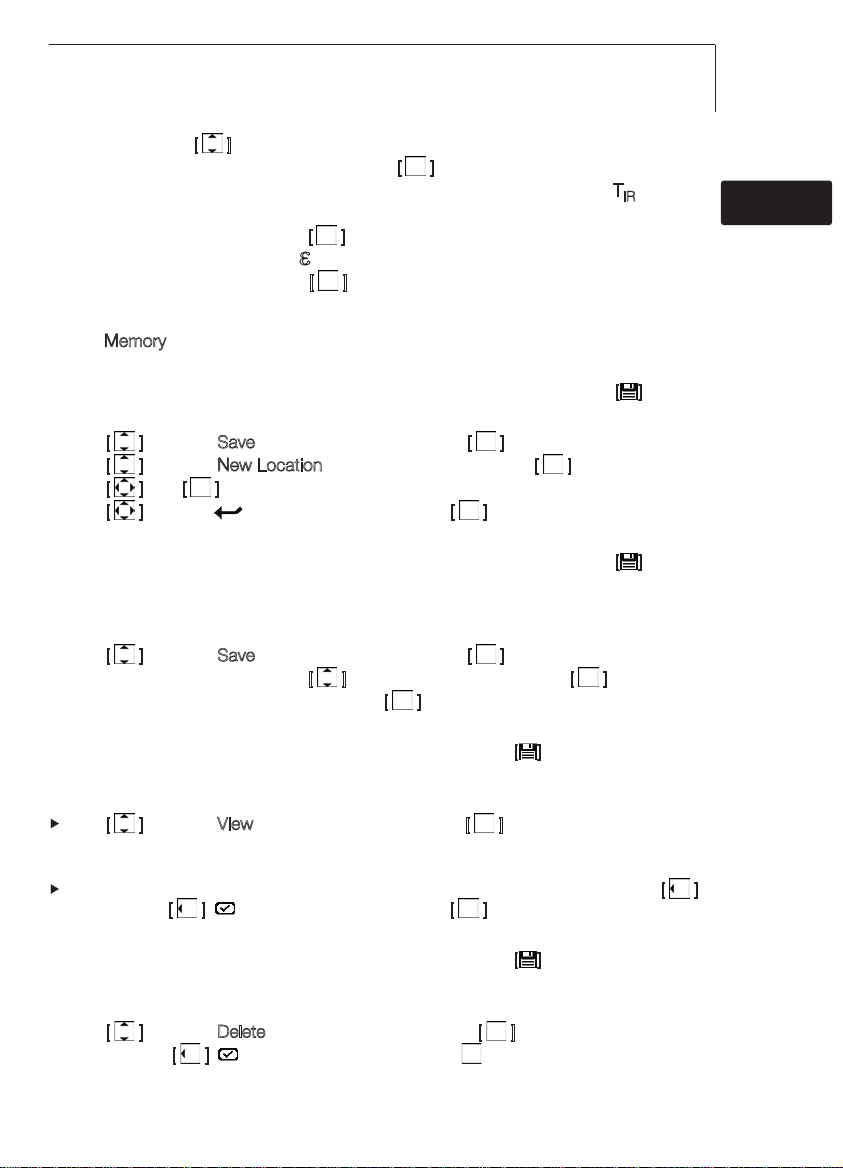
8.3 Details: Memory
- The Memory function is opened.
Save - New Location
This function can also be opened directly from the measurement view with [
A new location can be created.
1 Use [
2 Use [ ] to select New Location and open the function with [ ].
3 Use [ ] and [ ] to enter a memory location description.
4 Use [ ] to select and confirm the entry with [ ].
Save - Save Measurement Data
This function can also be opened directly from the measurement view with [
The current measurement data can be saved in an existing memory location. Only the
individual readings currently shown on the display are stored, no series of measurements!
1 Use [
2 Select an existing location with [ ] and apply this selection with [ ].
3 Save the current measurement data with [ ].
Overview
This function can only be opened via settings mode, not with [
measurement view.
Existing memory locations can be displayed and deleted.
Use [
- The existing locations and the volume of measurement data saved there are
displayed.
To delete a location and the saved measurement data: open the function with [
confirm with [
Delete
This function can only be opened via settings mode, not with [
measurement view.
The entire memory (measuring locations and measurement data) can be deleted.
1 Use [
2 Confirm with [ ] ( ) and carry out deletion with [ ].
] to select Save and open the function with [ ].
] to select Save and open the function with [ ].
] from the
] to select View and open the function with [ ].
] ( ) and carry out deletion with [ ].
] from the
] to select Delete and open the function with [ ].
].
].
198. Settings
?? ?? nl sv pt it es fr en de
],
Page 9
20
9. Connecting to PC software
8.4 Details: Alarm
The alarm function can be switched on/off and alarm thresholds can be set for the
measurement channels Infrared (measured), Thermocouple (measured), Dewpoint
distance (only H1, calculated) and Surface moisture (only H1, calculated).
- The A
1 Select Measurement channel and enable by pressing the joystick.
2 Switch the alarm function on/off for the selected measurement channel: joystick
3 Move the joystick to the right and set limit value(s): joystick up/down.
4 Save entries by pressing the joystick.
larm function is opened.
up/down.
9. Connecting to PC software
The measuring instrument can be connected to a PC via the USB port. With testo
easyClimate software, instrument configurations can be carried out on the PC and
measurement data saved on the instrument can be transferred to the PC.
Connect measuring instruments to a PC via USB cable.
- The instrument switches to slave mode. All instrument control keys are disabled.
For further information, please refer to the instruction manual for testo EasyClimate
software.
10. Service and maintenance
10.1 Changing the batteries
1 Open the battery compartment: open up the
cover.
Remove used batteries and insert new ones.
2
O
3 Close the battery compartment: close the cover
again.
bserve the polarity!
Page 10
11. Questions and answers
10.2 Cleaning the instrument
Only use weak, commercially available neutral/ household cleaning agents (e.g. washingup liquid) to clean the instrument. Do not use aggressive cleaning agents or solvent!
Wipe down the housing with a damp cloth (with detergent).
Clean the IR lens carefully with a cotton bud dipped in water or medical alcohol.
11. Questions and answers
Question Possible causes Possible solution
lights up. Batteries dead. Change batteries.
lights up. Measuring values outside Keep to the permitted
Instrument cannot be Low battery. Change batteries.
switched on.
Instrument switches itself off. Instrument switches off Switch the instrument on
If we have not been able to answer your question, please contact your local dealer or
Testo Customer Service.
the measuring range. measuring range.
automatically 2 minutes after again.
a key was last actuated.
12. Information on IR measurement
12.1 Measuring method
IR measurement is a visual measurement
21
?? ?? nl sv pt it es fr en de
Keep lenses clean.
Do not carry out measurement with foggy lenses.
Keep the measuring range (the range between the instrument and the measurement
object) free of obstacles. There must be no particles of dust or dirt, no humidity (rain,
steam) and no gases.
IR measurement is a surface measurement
If there is dirt, dust, frost, etc. on the surface, only the outermost layer is measured, i.e.
the dirt.
For vacuum-packed food, do not measure at air pockets.
Where the values are critical, always measure separately with a contact thermometer.
Particularly in the food sector: measure core temperature with a
penetration/immersion thermometer.
Adjustment time
If the ambient temperature changes (change of location, e.g. measurement
indoors/outdoors), the instrument must be allowed to equalise for 15 minutes for
infrared measurement.
12.2 Emissivity
Materials have various emission levels, i.e. they emit various amounts of electromagnetic
radiation. The emissivity of the instrument has a default setting of 0.95. This is ideal for
the measurement of non-metals (paper, ceramic, gypsum, wood, paints and varnishes),
plastics and foodstuffs.
Page 11
13. Information on contact measurement22
Because of their low or non-uniform emission level, blank metals and metal oxides are
only of limited use for IR measurement.
Coatings that increase the emission level, e.g. paint or emission adhesive (art. no.
0554 0051) must be applied to the measurement object. If this is not possible:
measure using a contact thermometer.
Emissivity table for important materials (typical values)
Material (Temperature) ε
Cotton (20°C / 68°F) 0.77
Concrete (25°C / 77°F) 0.93
Ice, smooth (0°C/ 32°F) 0.97
Iron, polished (20°C/ 68°F) 0.24
Iron with cast skin (100°C/ 212°F) 0.80
Iron with rolled skin (20°C/ 68°F) 0.77
Plaster (20°C / 68°F) 0.90
Glass (90°C / 194°F) 0.94
Rubber, hard (23°C/ 73°F) 0.94
Rubber, soft grey (23°C/ 73°F) 0.89
Wood (70°C / 158°F) 0.94
Cork (20°C / 68°F) 0.70
Material (Temperature) ε
Heat sink, black anodised (50°C/ 122°F)0.98
Copper, oxidised (130°C/ 266°F) 0.76
Plastics: PE, PP, PVC (20°C/ 68°F) 0.94
Brass, oxidised (200°C/ 392°F) 0.61
Paper (20°C / 68°F) 0.97
Porcelain (20°C / 68°F) 0.92
Black paint, matt (80°C/ 176°F) 0.97
Steel, heat-treated surface (200°C/ 392°F) 0.52
Steel, oxidised (200°C/ 392°F) 0.79
Clay, fired (70°C/ 158°F) 0.91
Transformer paint (70°C/ 158°F) 0.94
Brick, mortar, plaster (20°C/ 68°F) 0.93
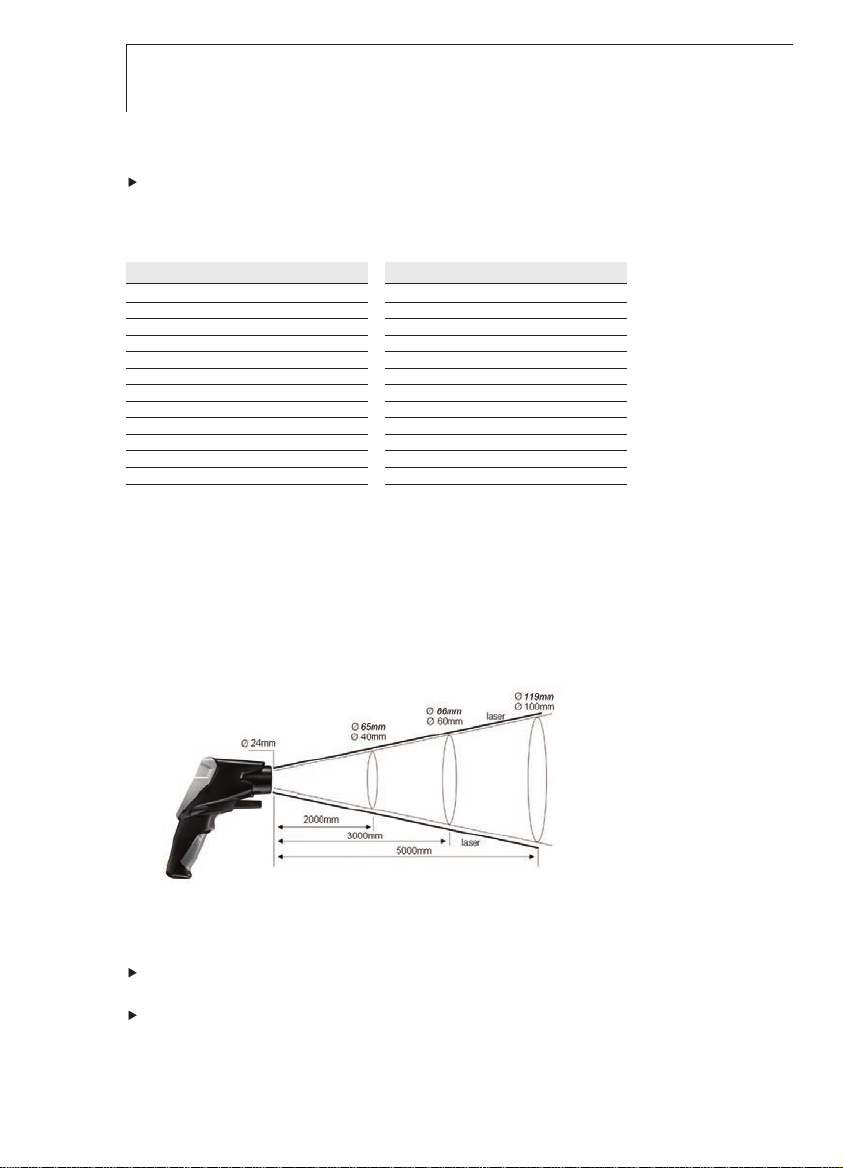
12.3 Measuring range, distance
Depending on the distance of the measuring instrument from the measurement object,
a specific measuring range is recorded.
Measuring lens (ratio of distance : measuring range)
In italics = laser
Not in italics = measuring range
13. Information on contact measurement
Observe the minimum penetration depth for immersion/penetration probes: 10x
probe diameter
Avoid using in aggressive acids or alkalis.
Test Equipment Depot - 800.517.8431
99 Washington Street, Melrose, MA 02176
TestEquipmentDepot.com
 Loading...