

Page 1
1
TESOR PLUS CORP.
TS5 SERIES - MFT USER MANUAL
Touch-Screen Two Way Remote:TS1,TS4,TS5
One Way Remote :TX127
Two Way Transceiver:TR06CC,TR07CC,TR08CC,TR09CC,TR10CC
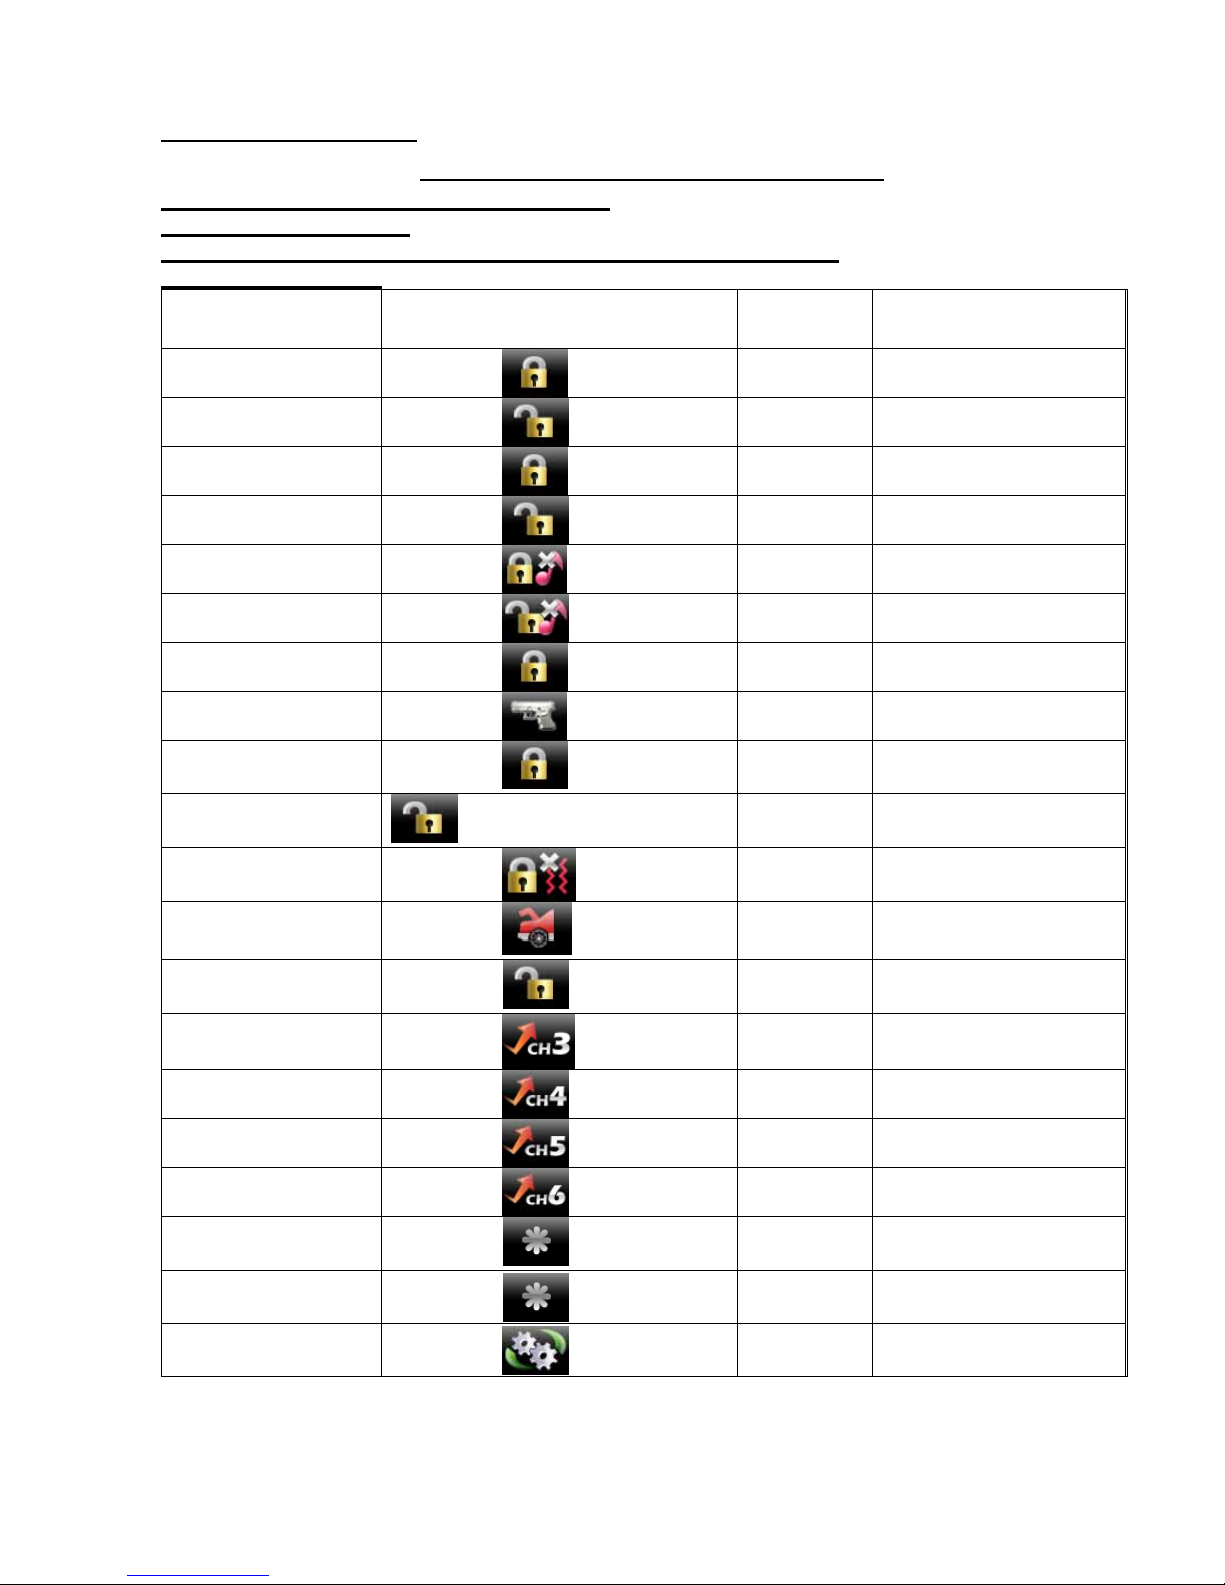
Remote function table:
Remote command Buttons Key Conditions
Arm
P1K1
Disarm
P1K2
Lock
P1K1 Ignition on
Unlock
P1K2 Ignition on
Silent Arm
P0K1
Silent Disarm
P0K2
Car finder
P1K1 Arm state
Anti-hijack
P0K4 Ignition on
Panic
hold 2 sec
P0K4 Ignition off
Two stage unlock
hold 2 sec / press times
P1K2 See function program
Shock bypass
P1K1
Activate Channel 1
hold 2 sec
P1K3 See function program
Activate Channel 2
hold 2 sec
P1K1 See function program
Activate Channel 3
P11K1 See function program
Activate Channel 4
P11K2 See function program
Activate Channel 5
P11K3 See function program
Activate Channel 6
P11K4 See function program
Remote engine start
hold 2 sec
P1K4
Remote engine shut
down
P1K4
Arm with engine
running
P8K1
Engine run (by ignition
key)
Page 2
2
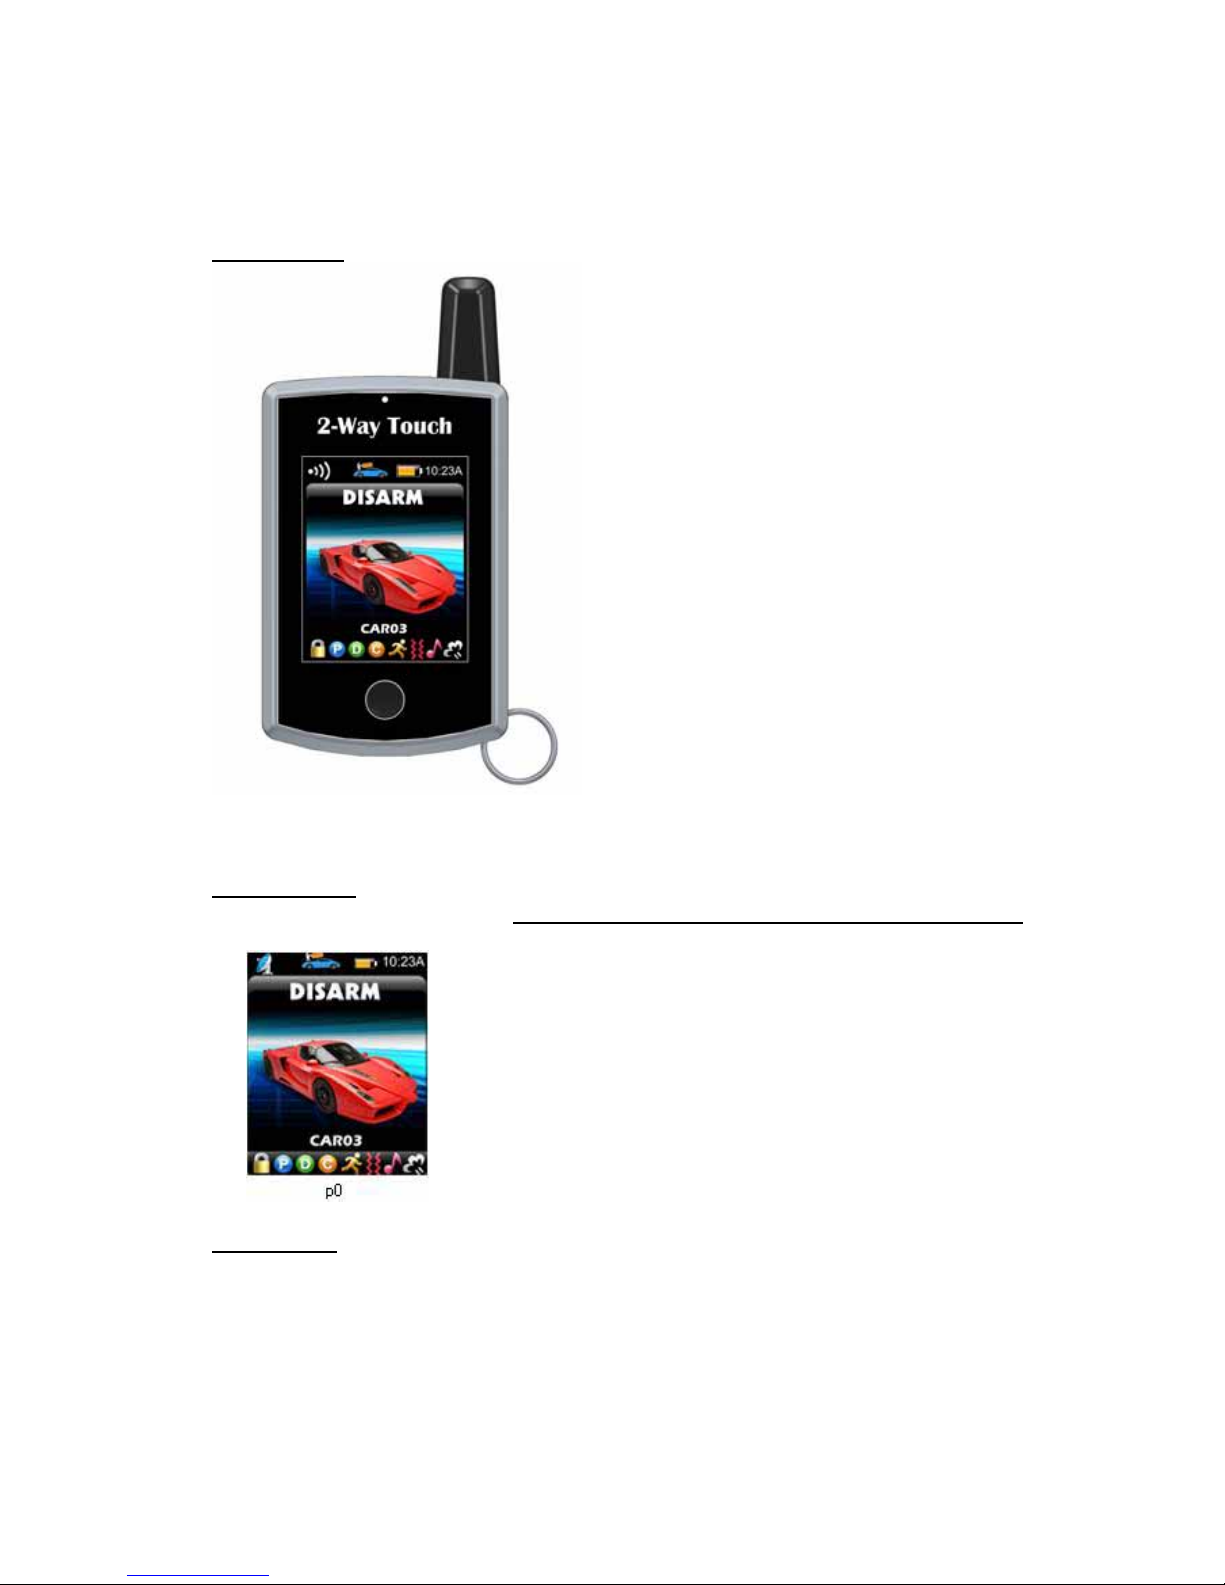
Outside view:
MAIN PAGE:
Press KEY to display Page 0: press anywhere in touch area to display PAGE ONE
PAGE ONE:
Page 3
3
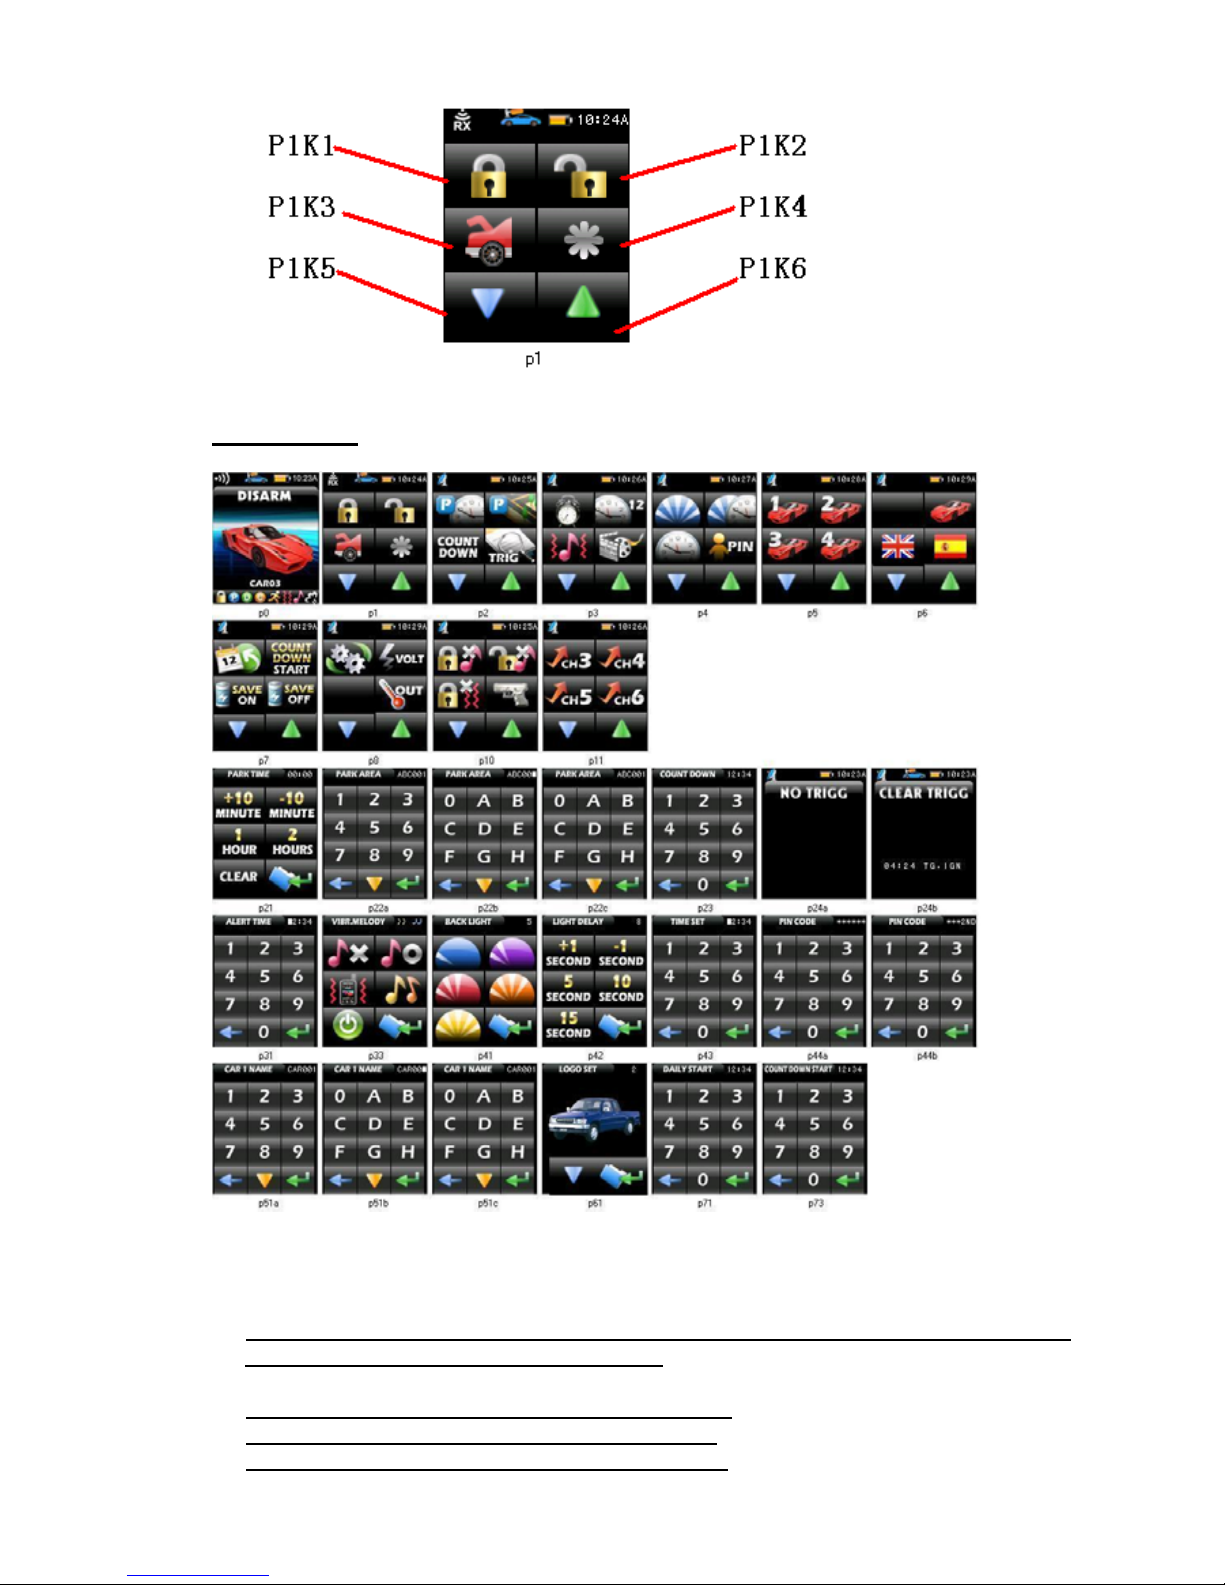
Press Forward or Backward button display other page
Other PAGES:
Button define is same as PAGE ONE,such as : P11K3 is CH5 button in p11
When transmitter received the car alarming will play trigger movies and sound voice:
The move will be stopped,if the key pressed
Cancel count down: set count down =00:00
Cancel alert time: set alert time =00:00
Cancel PIN code: set PIN code =000000
Page 4
4
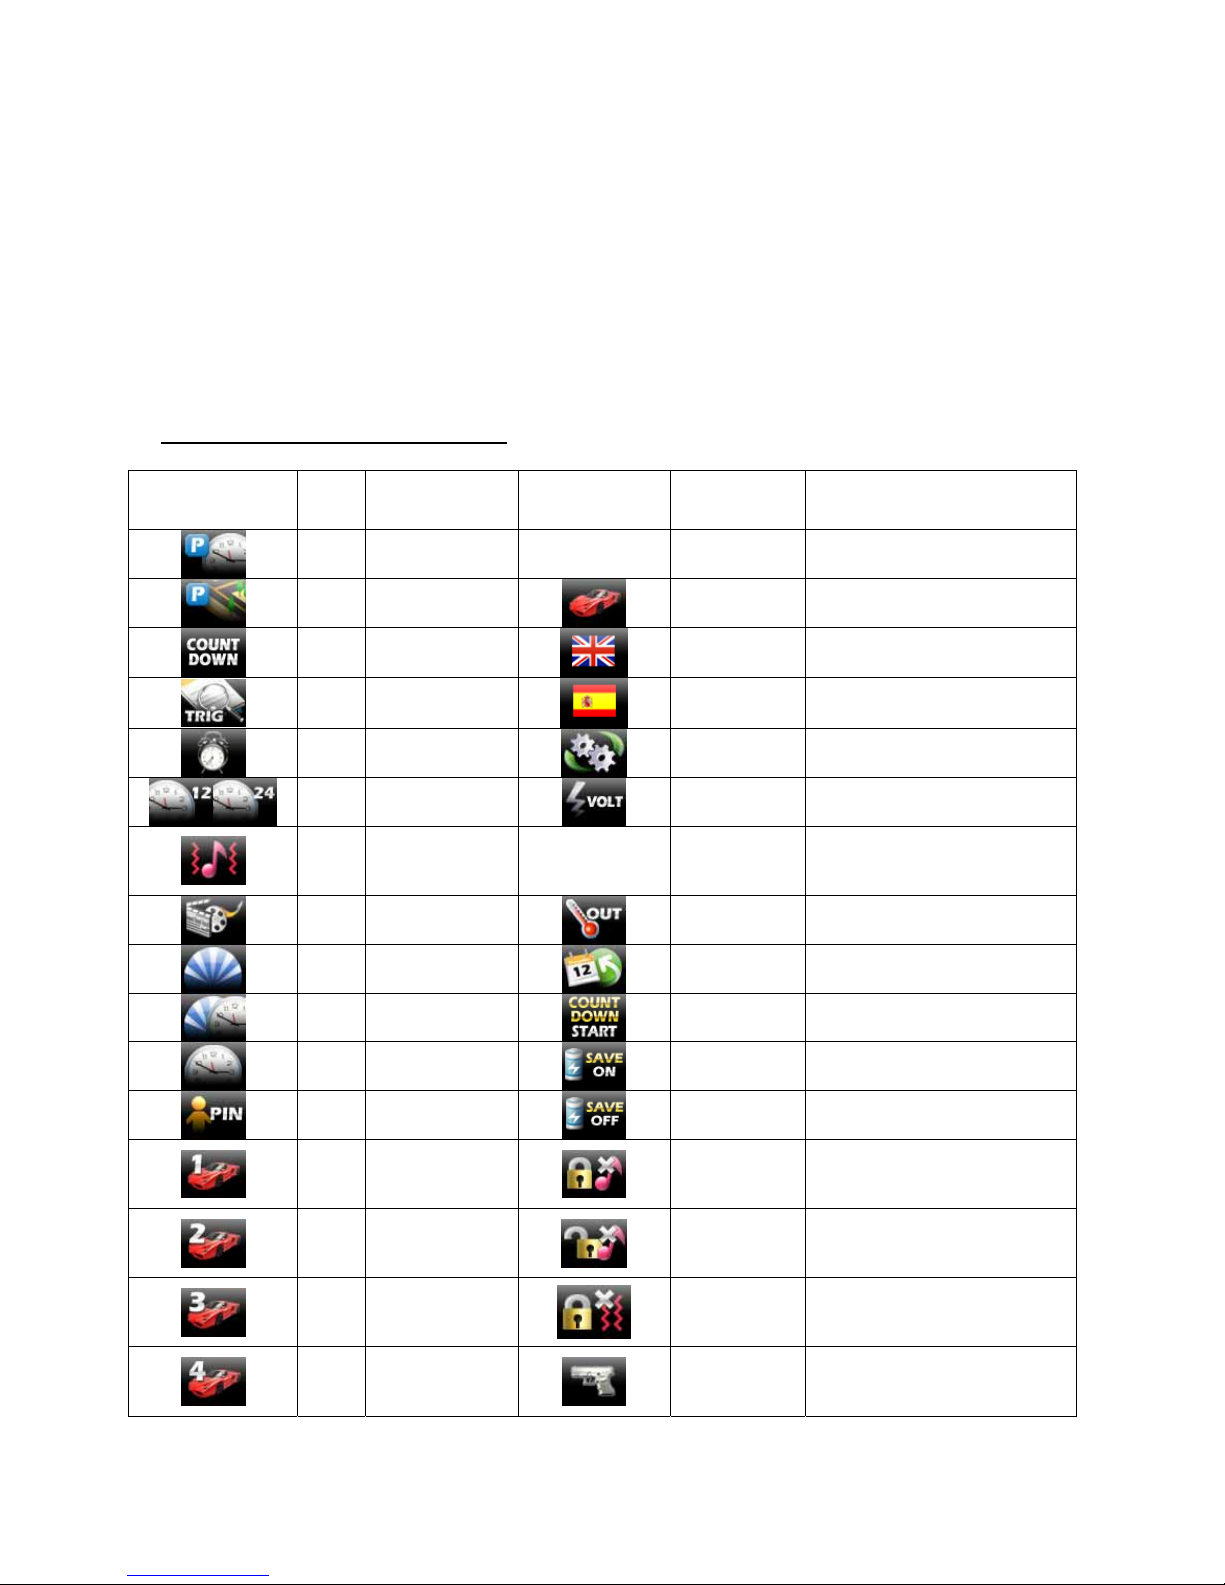
Button in other page function table:
Buttons Key Explain Buttons Key Explain
P2K1 Set park time
P2K2
Set park
position
P7K2 Set car loge in p0
P2K3
Set count down
time
P7K3 Set English menu
P2K4 Clear trigger
P7K4 Set Spain menu
P3K1 Set alert time
P8K1 Engine run
P3K2 Set time display
P8K2
Get
vehicle battery volt
P3K3
Set VIBR.
Melody and key
tone
P3K4 Show DEMO
P8K4 Get the outside temperature
P4K1 Set backlight
P9K1 Set daily start
P4K2 Set light delay
P9K2 Set count down start time
P4K3
Set currently
time
P9K3 Power save on
P4K4
Set handset PIN
code
P9K4 Power save off
P6K1
Set currently
car to 1st and set
car name
P10K1 Silent arm key
P6K2
Set currently
car to 2nd and
set car name
P10K2 Silent disarm key
P6K3
Set currently
car to 3rd and
set car name
P10K3 Arm without ZONE
P6K4
Set currently
car to 4th and
set car name
P10K4 car jack key
Page 5
5
1. Arm
Press
button once, system will chirp once, parking lights flash once, lock the doors,
starter disabled, window close output 1 sec. (if CH4 programmed), status LED start to flash
slowly, will chirp 4 times and parking lights flash 4 times if door or hood or trunk isn’t closed
well while arming, and will not detect the door (hood, trunk) open until there are full closed
well. The system can be triggered 5 second after armed if choosing “off” in program feature
A-3. In other case see program feature table description.
Shock sensor can be trigged after armed in program feature A-3.
2. Disarm
Press button once, system will chirp and flash twice, unlock the door, turn on dome
light, LED flash rapidly 30 sec. (if rearm function ON and off when door or trunk open or
ignition turn ON). IF system was alarmed in arm mode (except warning zone of shock sensor)
then if disarm siren chirps 4 times.
IF system was alarmed in arm mode, Transmitter will chirp 4 times and show triggered detail
record include trigger zone name, time, date.
3. Silent Arm
Press button , system will arming without chirp.
4. SILENT DISARM
Press button , system will disarm without chirp.
5. Alarm mode
The siren will sound, parking lights flash 30 sec. if door or hood or trunk is opened or ignition
key is turned on or triggered main zone of shock sensor. If trigged warning zone of shock
sensor siren chirps 6 times.
To stopping alarm press button or .
Number of alarm hasn’t to be more than 5 times for each zone.
6. Trigger zone display
Page 6
6
When system is alarming or after disarming, if the LED quick flashes several times and then 1
second pauses, it indicates the system has been triggered, and the times the LED flashes
indicate the zone that was triggered, as below:
Twice: AUX 4 PIN 1 heavy trigger
3 times: AUX 4 PIN 2 heavy trigger
4 times: TRUNK
5 times: DOOR
6 times: HOOD
7 times: IGN
7. Arm without ZONE
Press button
, once to set arming, siren chirp, parking lights flash once,
build in shock sensor will be bypassed, other sensor is normal.
Aux sensor 1 and sensor 2 will be bypassed, other sensor is normal.
8. Arm with engine running
While engine is running and the key at ignition ON position press button , parking
lights flash, transmitter sounds. Then get out ignition key (engine goes on running! hand brake
must be pull up). Press button system will chirp once, parking lights flash once. Engine
will be running 15, 30, 45 or unlimited time period (according the program features F-3) then
shut down and system. Shock sensor is bypassed at this period.
Press button once to shut down engine. Parking flash once for confirm.
Engine also shut down when alarm.
9. Auto rearm
System will be rearm and relock if no any door (or trunk) opens or ignition key turn on within
30 seconds after disarmed. It’s programmable function – see program features B-1.
10. Passive arming / Arming reminder
Ignition is off after driving, open the door, leave out and close it. the system will
automatically armed after 30 sec. Passive arming still no lock door. It’s programmable
function – see program features B-2
11. Immobilizer
At immobilizer mode system automatically enter starter disable relay (w/o arm) after 30 sec
from ignition turn off. At this mode LED flash when ignition ON.
12. Two-Stage unlock
Press button will unlock driver’s door only. Hold button for 2 seconds or press
Page 7
7
button twice (see program feature C-2), will unlock the passenger’s doors (activate
“2nd stage Unlock Output”). If programmed.
13. Lock
When system is disarmed and ignition key is on, press button will lock the doors.
14. Unlock
When system is disarmed and ignition key is on, press button will unlock the driver’s
door. Hold button will unlock the passenger’s doors (activate “2nd stage Unlock
Output”).
15. Lock / Unlock door upon ignition
If this function programmed (program feature A-2) car’s doors lock automatically when
ignition turn on and unlock when ignition turn off.
16. Car finder
When system is armed, press button simultaneously one time, siren will chirps 6 times
and parking lights flash 6 times.
17. Trunk release (Channel 1)
Press and hold 2 sec. button
, channel 31will active for 0.8 sec., When system armed
shock sensors and trunk trigger will bypass until 10 sec after trunk closed.
18. Channel 2
Hold button for 2 seconds to activate channel 2. See programmable function (program
feature C-2).
19. Channel 3
Press to activate channel 3, remote Output pulse time of channel 3 is programmable
function (program feature C-3).
20. Channel 4
Press to activate channel 4, remote Output pulse time of channel 4 is programmable
function (program feature C-4).
21. Channel 5
Page 8
8
Press to activate channel 5, remote Output pulse time of channel 5 is programmable
function (program feature D-1).
22. Channel 6
Press to activate channel 6, remote Output pulse time of channel 6 is programmable
function (program feature D-2).
23. Panic
In arm or disarm mode and ignition key is off.
Press button hold 2 sec ,system enter panic mode. System arm (with doors locking),
siren will
sound and parking lights flash for 30 sec. Press button or during 30 sec to
stopping alarm mode. (System stays at arm mode).
24. Anti-hijack mode
Ignition must be ON and all doors closed.
Press button , (or press override button once then open and close door) to activate
anti-hijack mode. Parking lights flash once, LED start to flash rapidly.
To deactivate anti-hijack mode press button or enter PIN-cod.
After 30 sec system enter arm with alarm modes, stopping alarm and disarm by transmitter is
disable. To deactivate anti-hijack mode enter PIN-cod only or follow up override steps.
25. Valet mode
At valet mode system can be remote door lock / unlock, activate channels. No any protect
function.
Enter and exit Valet mode procedure:
Be sure the system is disarmed.
Turn the ignition key on.
Press and hold the valet switch for 3 seconds.
The siren will chirp once to enter valet or twice for exit.
The LED will turn on solid indicating the system is in valet mode, or turn off indicating
26. Override
Enter the vehicle
Turn the ignition key on.
Press and hold the valet switch for 3 seconds.
The siren will stop sounding.
The starter defeat is deactivated.
27. Pin code procedure
Page 9
9
Pin-code consists of two digits. To disarm system with out remote transmitter or deactivate
Anti-hijack mode use PIN-code procedure.
Pin-code consists of two digits: X, Y. Factory default 1:1 (X=1, Y=1)
To disarming:
- turn ignition ON
- press override button (X) times
- turn ignition OFF then ON
- press override button (Y) times
- turn ignition OFF
After that system disarms.
Note: System will automatically get out of PIN-code procedure if no pressing within 20 sec after
last one.
28. PIN-code setting
To change PIN-code:
- turn off ignition and the system is disarmed.
-Press the valet switch 4 times.
-Turn ignition on.
-The siren will chirp 4 times.
- press override button once
- siren chirps one time
- press button of transmitter to enter first digit of PIN-code:
- 1 , - 2, - 3, - 4
- siren confirm selecting digit ( 1…4 chirps)
- press override button once
- siren chirps two times
- press button of transmitter to enter second digit of PIN-code:
- 1 , - 2, - 3, - 4
- siren confirm selecting digit ( 1…4 chirps)
After 20 sec or turning off ignition system will get out the PIN-code setting procedure, parking
lights flash 4 times.
29. Manual arm
Turn ignition off, press override button 3 times. Then open and close all doors. System auto
arms in 10 sec with out door closing. If used manual arm mode and any zone triggered
system turn alarm mode in 20 sec delay.
30. Turbo timer
Turbo timer is programmable function (feature program F-2)
Page 10
10
If function on:
- pull up hand brake while engine is running
- turn ignition key off and take out the key (engine is still running)
- engine will run for the programmed duration
To stopping engine press button once. Parking flash once for confirm.
31. Mid-gear procedure (for manual gear only)
If you are going to leave the vehicle the following procedure must be performed (It is
need for safety engine auto start):
- ignition key is on, engine running
- pull up hand brake
- press and hold 2 sec. button , parking lights flash once
- turn ignition key off and take out the key (engine is still running)
- get out the vehicle and close the door
- after close the door, system shut down engine.
- system shut down engine 1 minute later button pressing or immediately after
arming (and door locking) by remote.
This procedure must be performed each time before getting out the vehicle. Open door
will cancel the setting.
32. Learn tachometer (RPM)
turn off ignition
- press override button 7 times
- turn on ignition
- parking lights flash and siren chirps 7 times
- press override button 6 times
- siren chirps 2 times
Start the vehicle with the key. while the engine is running, the parking will flash. if don’t,
please check tachometer wire connection.
Press on transmitter to record the RPM. Chirp once to confirm.
Press on transmitter to exit the RPM learn mode. chirp 4 times and flash 4 times
33. Remote engine start
Press and hold 2 sec. button
to remote engine start, parking light flash twice to confirm.
If engine isn’t started up from first, the system will automatically total start the engine 4 times.
Cranking time (program feature E-2) of each next attempt will be increased by 0.2 sec.
Page 11

11
If start is successful. parking lights flash 3 times
Engine runs during “running time”. Then shut down automatically.
To stopping engine press button once. Parking flash once for confirm.
Engine auto start isn’t available in case of:
- engine is running
- hood is open
- hand brake isn’t activated
- Mid-gear procedure isn’t executed (for manual gear only)
When remote start is fall, siren chirps 4 times.
34. Learning codes of remote transmitters
There are only four transmitters may be learned in system’s memory.
Codes of learned remote transmitters will be erased each time the learning mode is activated.
To activate leaning codes mode:
-Turn the ignition on, off, on, off and leave on.
The siren will chirp.
-Press and hold the Valet/Override switch.
The siren will chirp 3 times.
-Release the Valet/Override switch.
- press button of first remote transmitter
- siren chirps and remote transmitter beeps once
- press button of second remote transmitter
- siren chirps and remote transmitter beeps two times
- press button of third remote transmitter
- siren chirps and remote transmitter beeps 3 times
- press button
of fourth remote transmitter
- siren chirps and remote transmitter beeps 4 times
After 20 sec or turning off ignition system will get out the transmitter learning procedure, The
siren will chirp 3 times.
Page 12
12
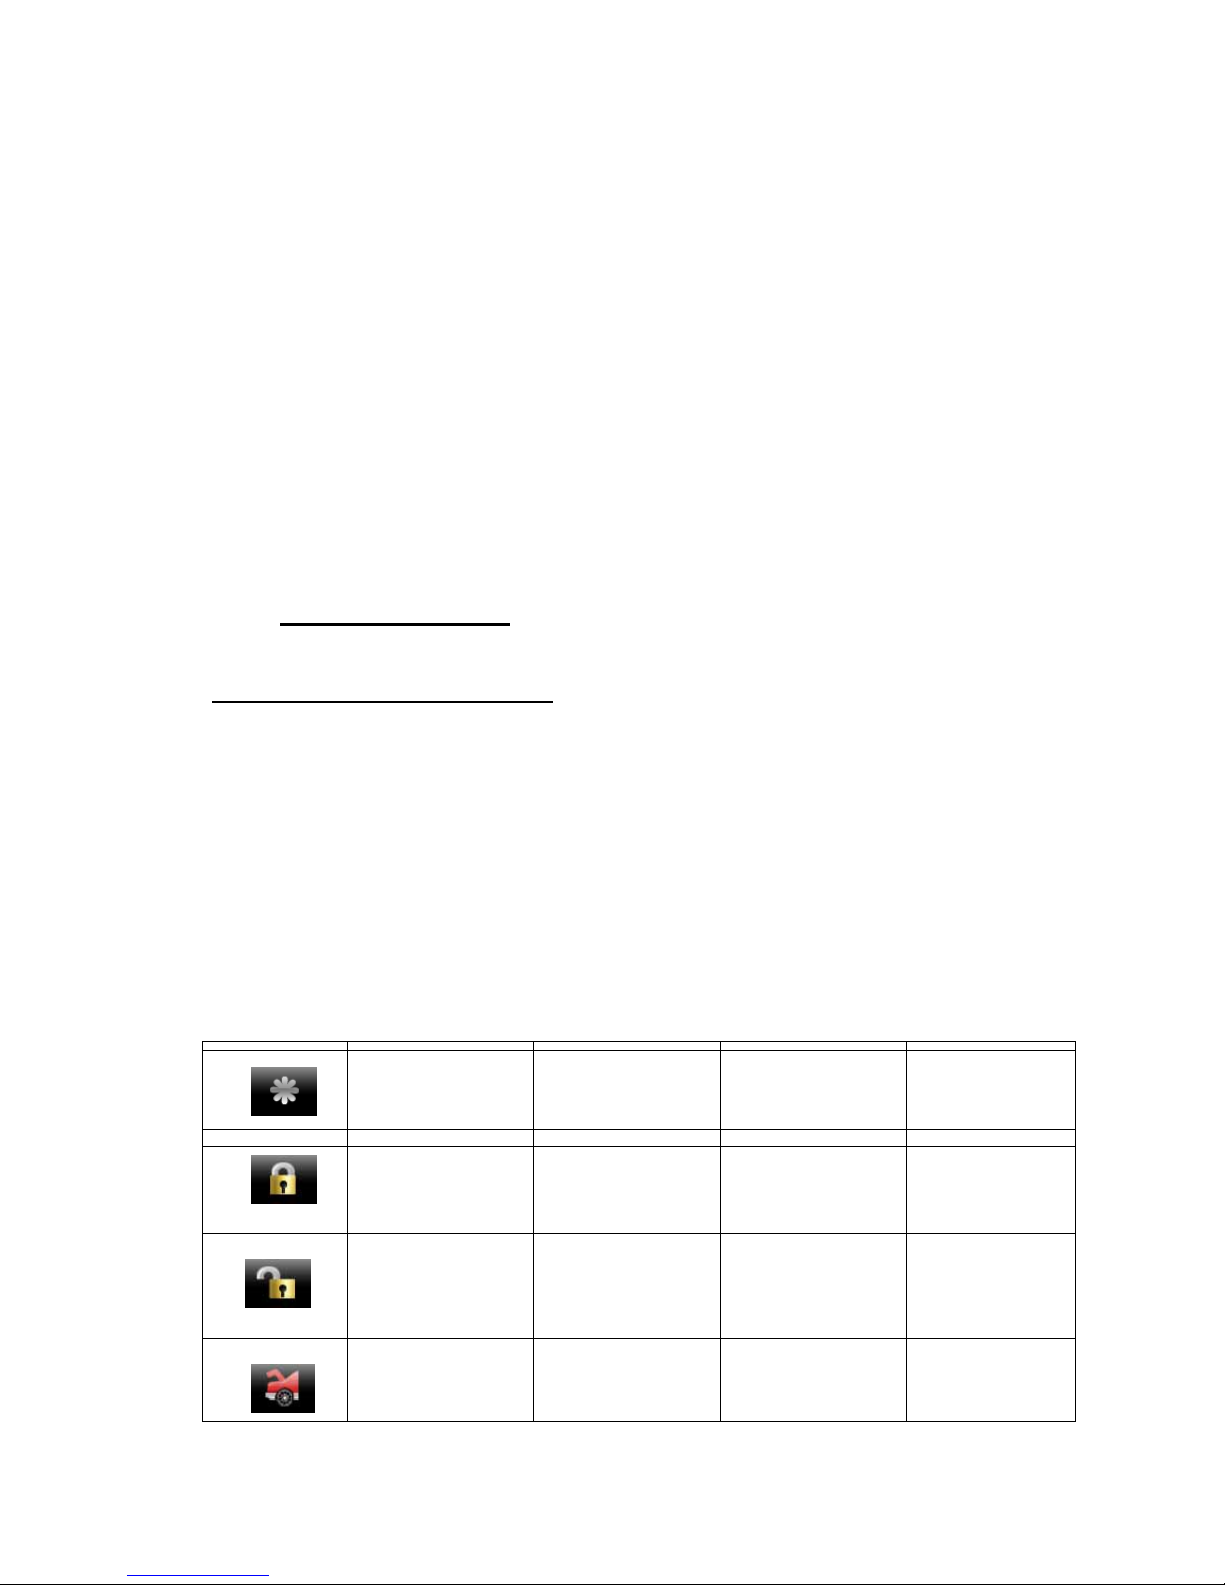
35. Programming functions
FEATURE “A” PROGRAMMING
- turn off ignition
- press override button 3 times
- turn on ignition
- parking lights flash and siren chirps 3 times
- push the Valet Switch 1 times.
- one long chirp with 1 short chirps is heard.
You are now in the start feature “A” programming mode.
- press and release the transmitter button corresponding
to the feature you want to program.
Exit feature programming: After 20 sec or turning off ignition system will get out the feature
programming setting procedure, parking lights flash 4 times.
Press
Transmitter
Button
one chip
LED 1 pulse
Default setting
two chip
LED 2 pulse
three chip
LED 3 pulse
four chip
LED 4 pulse
A1
0.8 Second
Door Lock &
Unlock
3.5 Second
Door Lock &
Unlock
0.8 Second Lock ,
0.8 Second
double Unlock
0.8 Second
double Lock ,
0.8 Second
double Unlock
A2
Ign ON with lock,
Ign OFF with
unlock
Ign ON without
lock,
Ign OFF with
unlock
Ign ON with
lock ,
Ign OFF without
unlock
Ign ON without
lock,
Ign OFF
without unlock
A3
ARM delay 15s ARM delay 30s ARM delay 45s ARM no delay
A4
siren chirps when
arm, disarm
siren no chirps
when arm,
no chirps when
disarm
Page 13
13
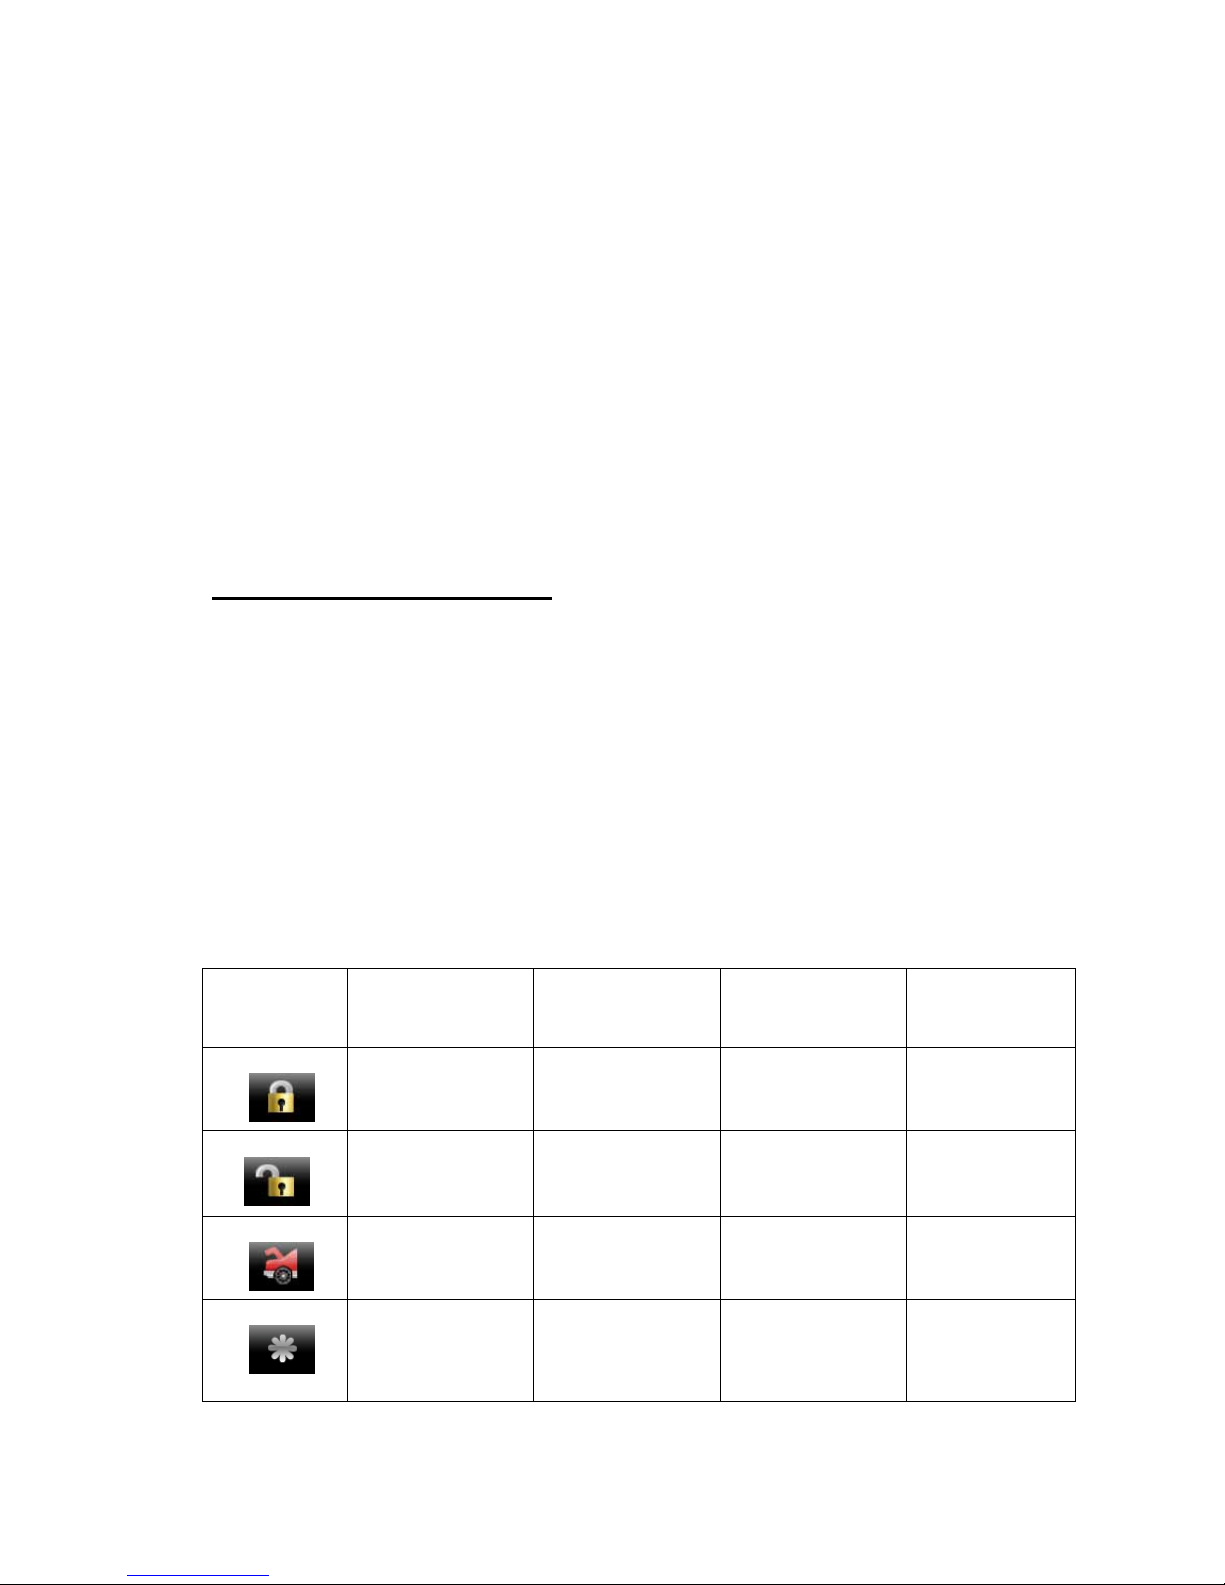
FEATURE “B” PROGRAMMING
- turn off ignition
- press override button 3 times
- turn on ignition
- parking lights flash and siren chirps 3 times
- push the Valet Switch 3 times.
- one long chirp with 3 short chirps is heard.
You are now in the start feature “B” programming mode.
- press and release the transmitter button corresponding
to the feature you want to program.
Exit feature programming: After 20 sec or turning off ignition system will get out the feature
programming setting procedure, parking lights flash 4 times.
Press
Transmitter
Button
one chip
LED 1 pulse
Default setting
two chip
LED 2 pulse
three chip
LED 3 pulse
four chip
LED 4 pulse
B1
Auto rearm off Auto rearm on
without lock
Auto rearm on
with lock
B2
passive arming
off
Passive arming on
without lock
Passive arming on
with lock
B3
Immobilizer
mode off
Immobilizer
mode on
B4
Anti-jack off
Anti-jack on
Page 14
14
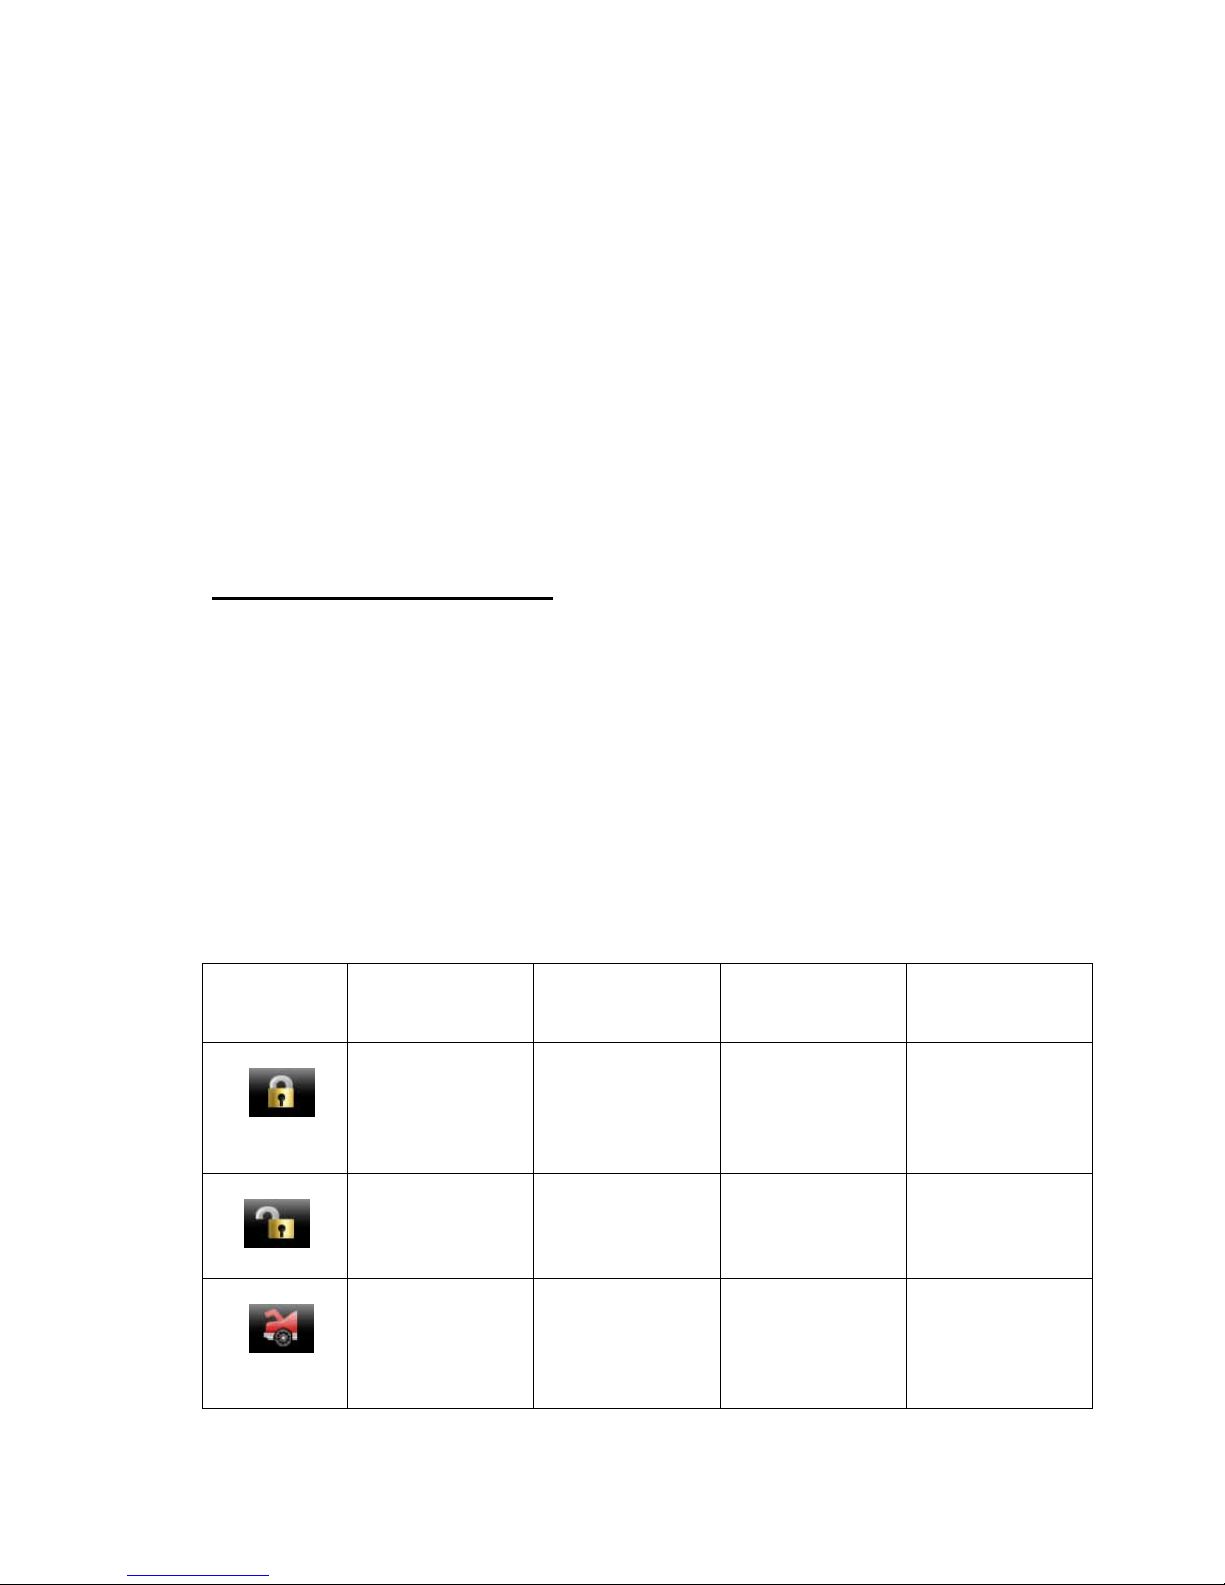
FEATURE “C” PROGRAMMING
- turn off ignition
- press override button 3 times
- turn on ignition
- parking lights flash and siren chirps 3 times
- push the Valet Switch 5 times.
- one long chirp with 5 short chirps is heard.
You are now in the start feature “C” programming mode.
- press and release the transmitter button corresponding
to the feature you want to program.
Exit feature programming: After 20 sec or turning off ignition system will get out the feature
programming setting procedure, parking lights flash 4 times.
Press
Transmitter
Button
one chip
LED 1 pulse
Default setting
two chip
LED 2 pulse
three chip
LED 3 pulse
four chip
LED 4 pulse
C1
CH1
For trunk release
each output 1s
when active.
CH1
for channel output
each output 30s
when active.
CH1
for channel output
=latched output
CH1
for channel output
= latched output
and reset with
IGN on
C2
CH2
for 2nd Unlock
Hold button 2
2second to active
CH2
for 2nd Unlock
Press button 2
2 times to active
CH2
for OEM
DISARM
CH2
for channel output
each output 30s
when active.
C3
CH3
For dome light
CH3
for channel output
= latched output
and reset with
IGN on
CH3
for channel output
each output 1s
when active.
CH3
for channel output
each output 30s
when active.
Page 15
15
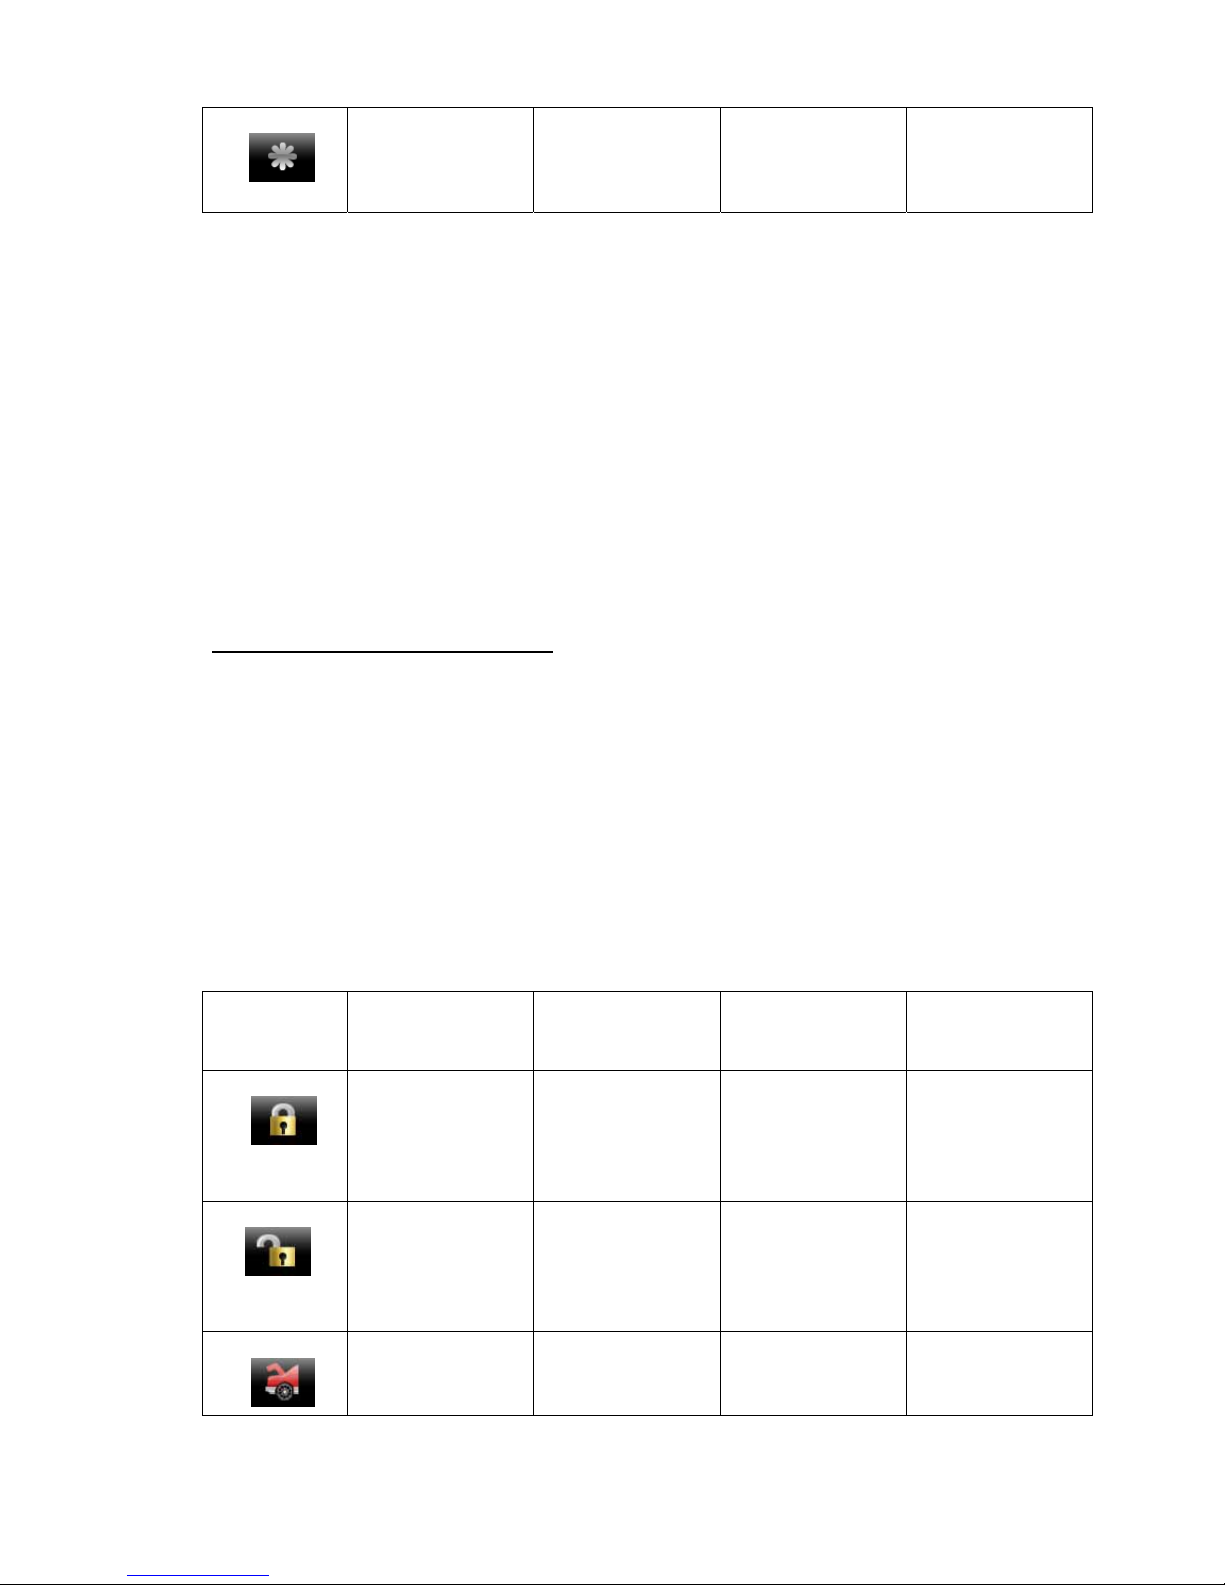
C4
CH4
For Car HORN
output
CH4
For window close
Each output 1s ,
When arming .
CH4
for OEM
REARM
CH4
for channel output
each output 30s
when active.
FEATURE “D” PROGRAMMING
- turn off ignition
- press override button 3 times
- turn on ignition
- parking lights flash and siren chirps 3 times
- push the Valet Switch 7 times.
- one long chirp with 7 short chirps is heard.
You are now in the start feature “D” programming mode.
- press and release the transmitter button corresponding
to the feature you want to program.
Exit feature programming: After 20 sec or turning off ignition system will get out the feature
programming setting procedure, parking lights flash 4 times.
Press
Transmitter
Button
one chip
LED 1 pulse
Default setting
two chip
LED 2 pulse
three chip
LED 3 pulse
four chip
LED 4 pulse
D1
CH5
For ACC output
CH5
for channel output
=30s pulse
CH5
for channel output
= latched output
and reset with
IGN on
CH5
for channel output
=1s pulse
D2
CH6
For IGN3 output
CH6
for channel output
=latched output
CH6
for channel output
= latched output
and reset with
IGN on
CH6
for channel output
= 1s pulse
D3
Trunk pop no
disarm
Trunk pop with
disarm
Page 16
16
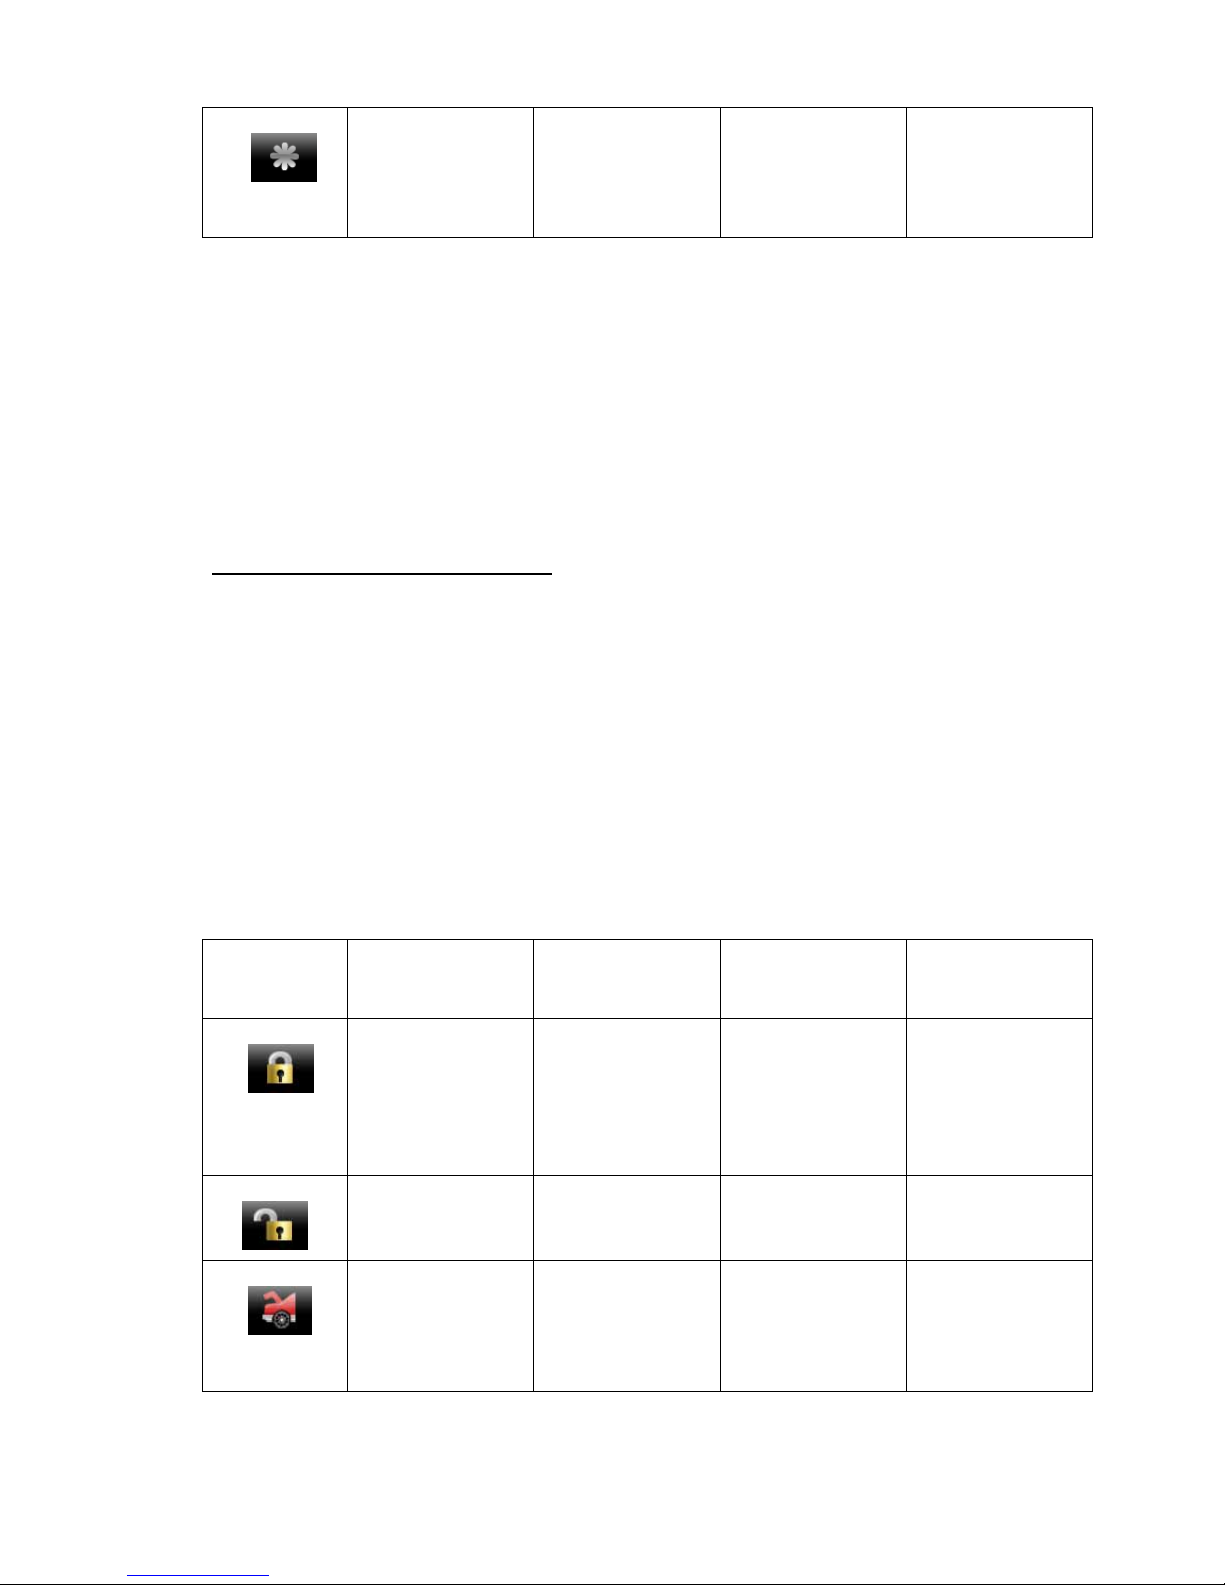
D4
ENABLE
Remote start and
Engine Running
as long as "+" or
"-" Brake input
DISABLE
Remote start and
Engine Running
as long as "+" or
"-" Brake input
FEATURE “E” PROGRAMMING
- turn off ignition
- press override button 3 times
- turn on ignition
- parking lights flash and siren chirps 3 times
- push the Valet Switch 9 times.
- one long chirp with 9 short chirps is heard.
You are now in the start feature “E” programming mode.
- press and release the transmitter button corresponding
to the feature you want to program.
Exit feature programming: After 20 sec or turning off ignition system will get out the feature
programming setting procedure, parking lights flash 4 times.
Press
Transmitter
Button
one chip
LED 1 pulse
Default setting
two chip
LED 2 pulse
three chip
LED 3 pulse
four chip
LED 4 pulse
E1
Gasoline engine.
The glow plug
wire (diesel wait
light) not use.
Diesel engine.
10 seconds
warm-up timer
The glow plug
wire not use.
Diesel engine.
The glow plug
wire must
connect positive
diesel wait light.
(max 120 sec.)
Diesel engine.
The glow plug
wire must
connect negative
diesel wait light.
(max 120 sec.)
E2
Cranking time
0.8 s
Cranking time
1.8 s
Cranking time
3.6 s
Push button start
E3
detects engine
running by
increasing low
level of power
voltage
detects engine
running by
increasing hi level
of power voltage
detects engine
running by RPM
type
detects engine
running by
GENERATOR
Page 17
17
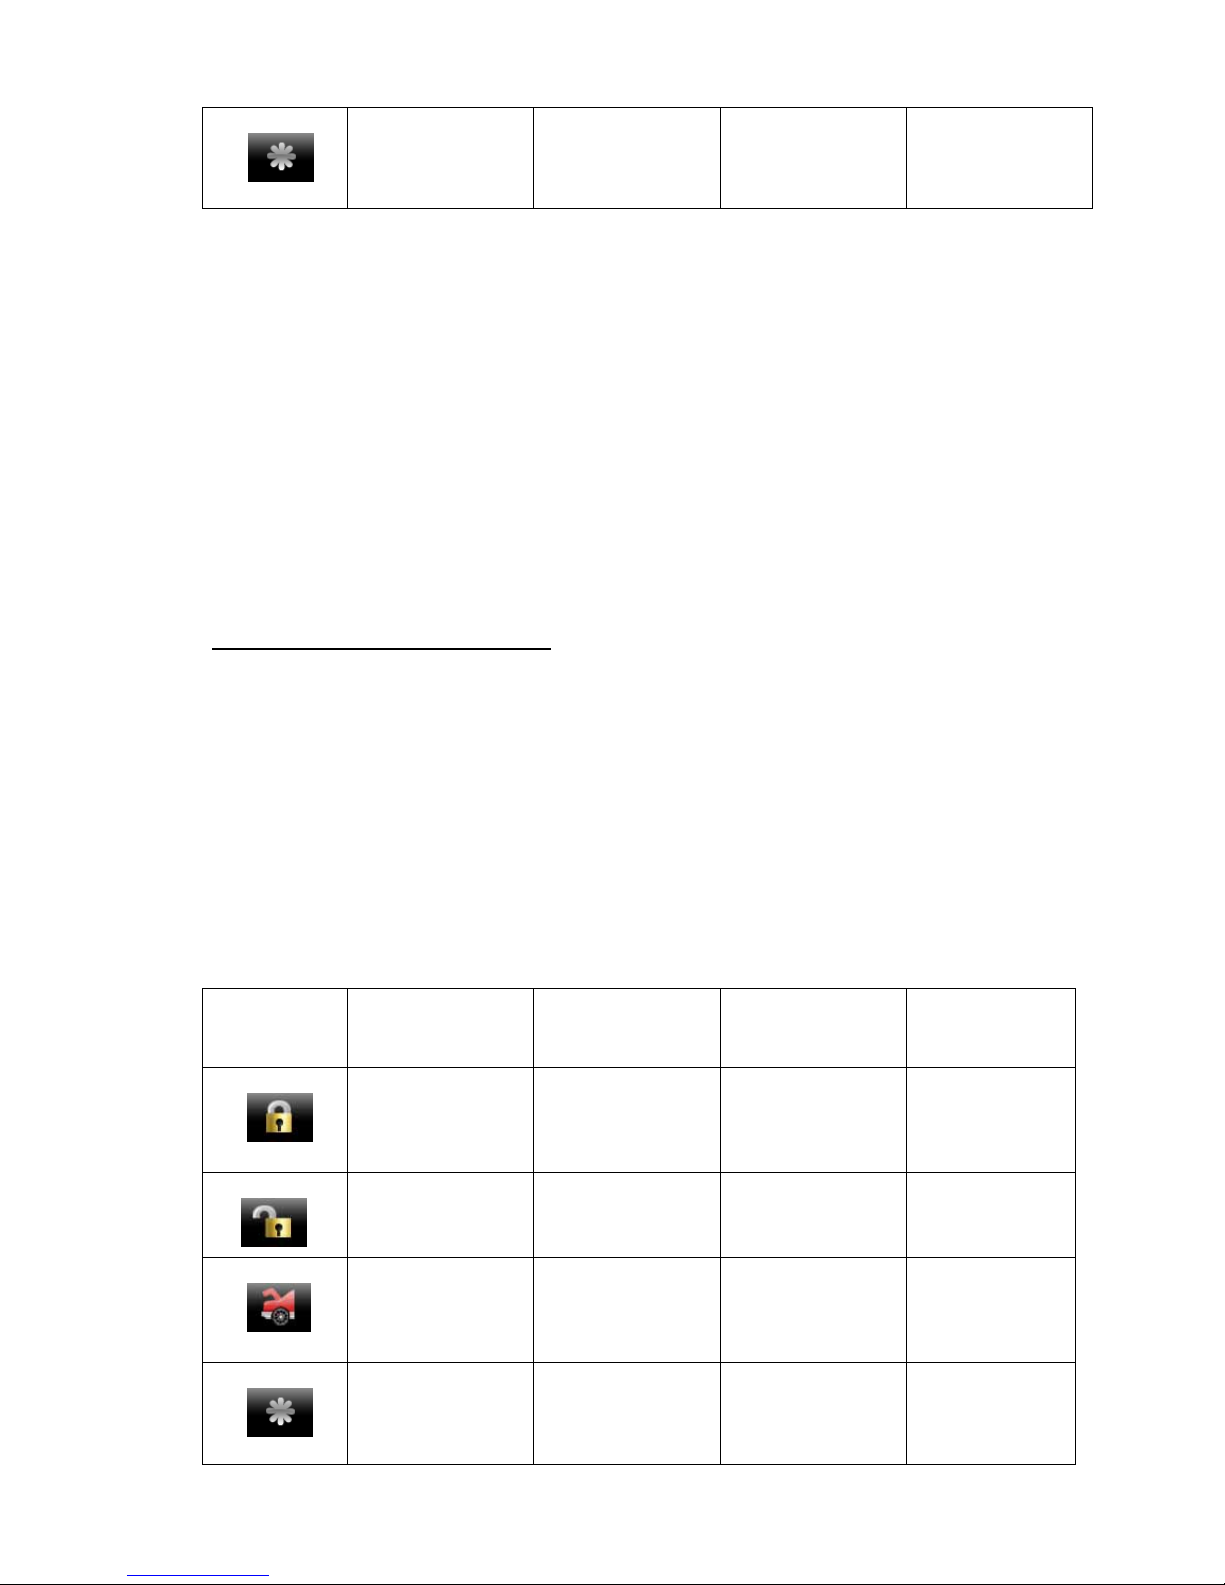
E4
Each time remote
engine running
5 minutes
Each time remote
engine running
10 minutes
Each time remote
engine running
15 minutes
Each time remote
engine running
20 minutes
FEATURE “F” PROGRAMMING
- turn off ignition
- press override button 3 times
- turn on ignition
- parking lights flash and siren chirps 3 times
- push the Valet Switch 11 times.
- one long chirp with 11 short chirps is heard.
You are now in the start feature “F” programming mode.
- press and release the transmitter button corresponding
to the feature you want to program.
Exit feature programming: After 20 sec or turning off ignition system will get out the feature
programming setting procedure, parking lights flash 4 times.
Press
Transmitter
Button
one chip
LED 1 pulse
Default setting
two chip
LED 2 pulse
three chip
LED 3 pulse
four chip
LED 4 pulse
F1
ACC output
When remote
start success
ACC output
When hood
temperature 50℃
ACC output
When hood
temperature 70℃
ACC output
5 min before
engine shut
down
F2
TURBO off
Turbo timer
1 min.
Turbo timer
3 min.
Turbo timer
6 min.
F3
Running time of
Arm with engine
running
15 min.
Running time of
Arm with engine
running
30 min.
Running time of
Arm with engine
running
45 min.
Running time of
Arm with
engine running
no limit.
F4
Temperaturecontrol starting
OFF
Temperaturecontrol starting
ON at -5℃
Temperaturecontrol starting
ON at -10℃
Temperaturecontrol starting
ON at -20℃
Page 18

18
RETURN TO FACTORY DEFAULT SETTING
- turn off ignition
- press override button 3 times
- turn on ignition
- parking lights flash and siren chirps 3 times
- push the Valet Switch 13 times.
- 3 long chirp is heard,
You are now in the “Return to factory default setting” programming mode.
Press and release the transmitter button , there will be a confirmation 1 short chirps to
confirm the system “feature A,B,C&D programming all return to factory default setting”.
Press and release the transmitter button , there will be a confirmation 2 short chirps to
confirm the system “feature E&F programming all return to factory default setting”.
Press and release the transmitter button
, there will be a confirmation 3 short chirps to
confirm the system “pin code return to factory default setting”.
Exit feature programming: After 20 sec or turning off ignition system will get out the feature
programming setting procedure, parking lights flash 4 times.
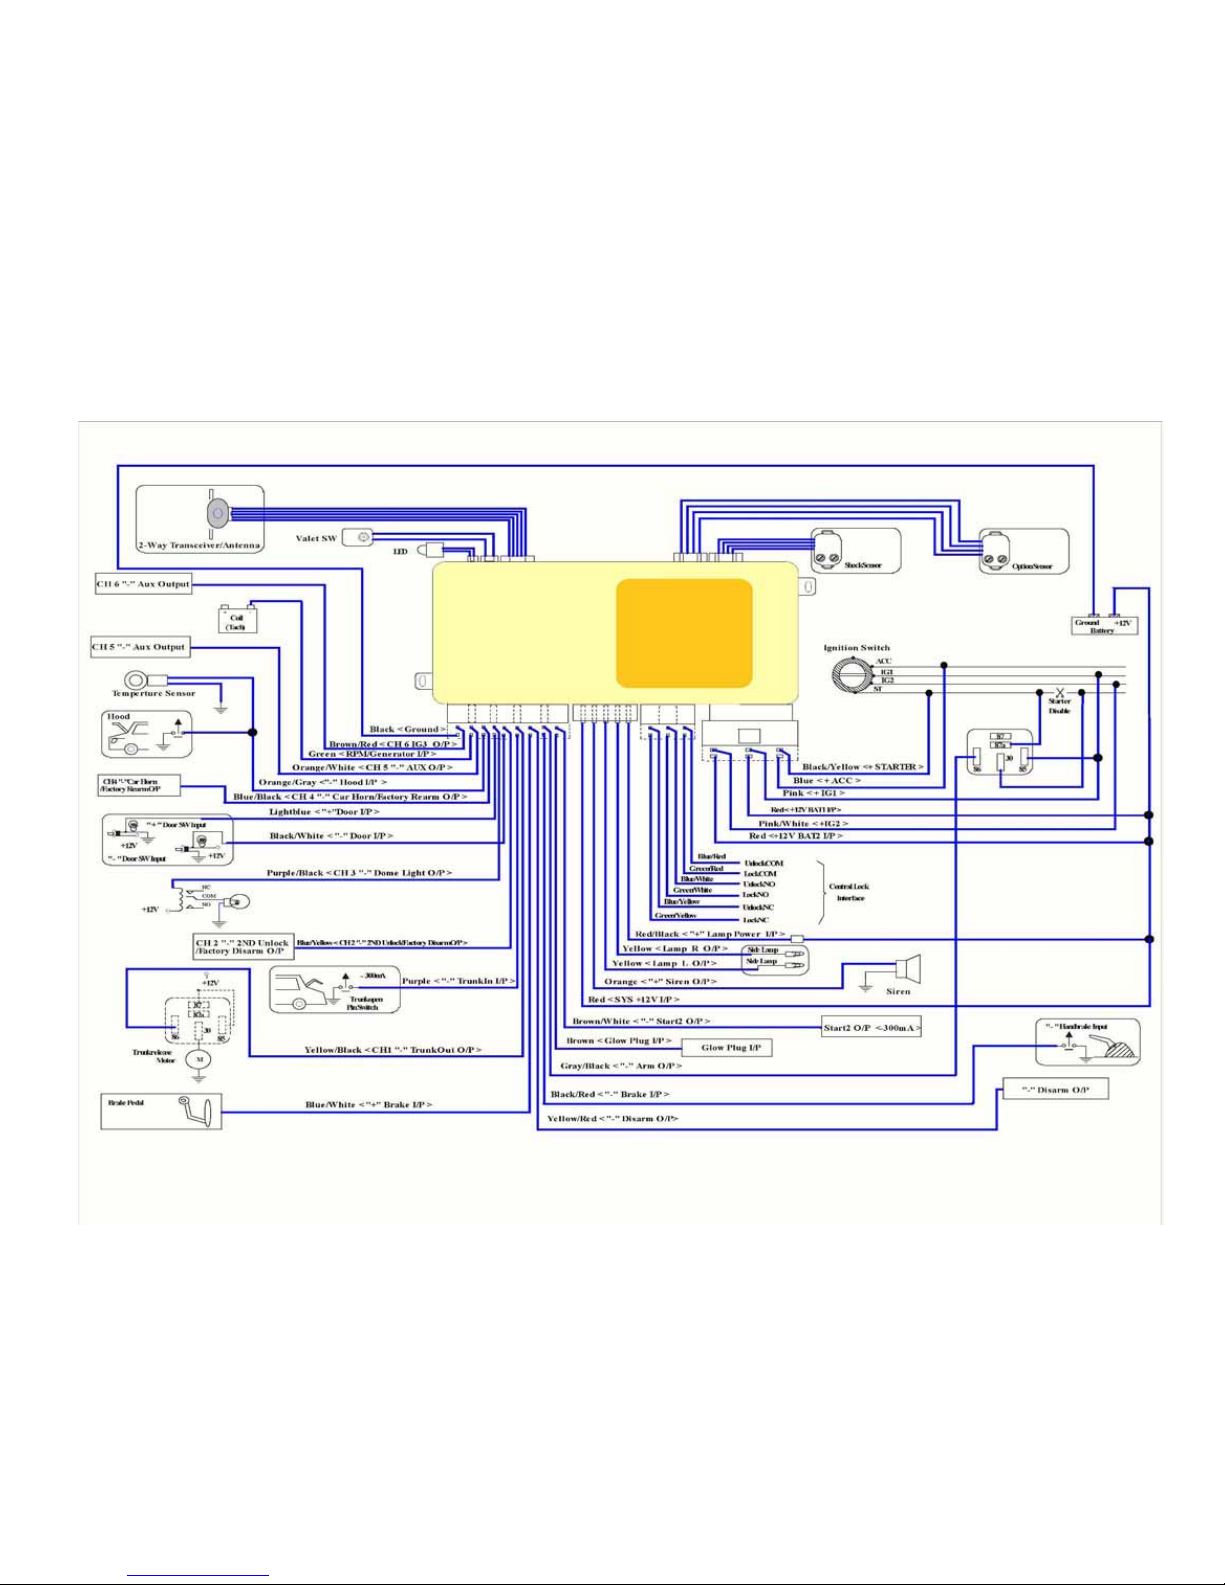
36. Wires description
1 black loop for select type of gear
not cut – auto gear
cut – manual gear
Set handset PIN code:
Page 19

19
To check whether the PIN code is right or wrong, can press P1K2, P9K2 to check, if the PIN
code is correct then can go to the next step. Before PIN code setting, need to check and see top
right side of screen will show ***PIN, after entered the correct PIN code, will show *** 1ST on the
top right side, means in the first entering status, after setting, will show ***2ND, second entering
status, if same as the first setting will display SAVE the PIN code and return to P4, if not the same
will display ERROR and return to P4, if lose the PIN code can read out through the data wire from
PC. PIN code will be cancelled if set PIN code to 000000.
Page 20
20
Page 21

21
Federal Communications Commission (FCC) Statement
15.21
You are cautioned that changes or modifications not expressly approved by the part responsible for compliance could void the user’s authority to operate the
equipment.
15.105(b)
This equipment has been tested and found to comply with the limits for a Class B digital device, pursuant to part 15 of the FCC rules. These limits are
designed to provide reasonable protection against harmful interference in a residential installation. This equipment generates, uses and can radiate radio
frequency energy and, if not installed and used in accordance with the instructions, may cause harmful interference to radio communications. However, there
is no guarantee that interference will not occur in a particular installation. If this equipment does cause harmful interference to radio or television reception,
which can be determined by turning the equipment off and on, the user is encouraged to try to correct the interference by one or more of the following
measures:
-Reorient or relocate the receiving antenna.
-Increase the separation between the equipment and receiver.
-Connect the equipment into an outlet on a circuit different from that to which the receiver is connected.
-Consult the dealer or an experienced radio/TV technician for help.
This device complies with Part 15 of the FCC Rules.Operation is subject to the following two conditions:
1) this device may not cause harmful interference and
2) this device must accept any interference received, including interference that may cause undesired operation of the device.
 Loading...