

Page 1

Quick guide to your
Harmony Home Lift installation
Please Note
Our engineers will be responsible for
ensuring your safety as well as their
own during their time in your home.
This leaflet is for guidance only. If
you require further details, please
contact us via one of the means
listed below.
05.2017
Terry Group Limited
1-3 Longridge Trading Estate
Knutsford, Cheshire, WA16 8PR
Tel: 0345 365 5366
Web: www.terrylifts.co.uk
Email: sales@terrylifts.co.uk
Page 2
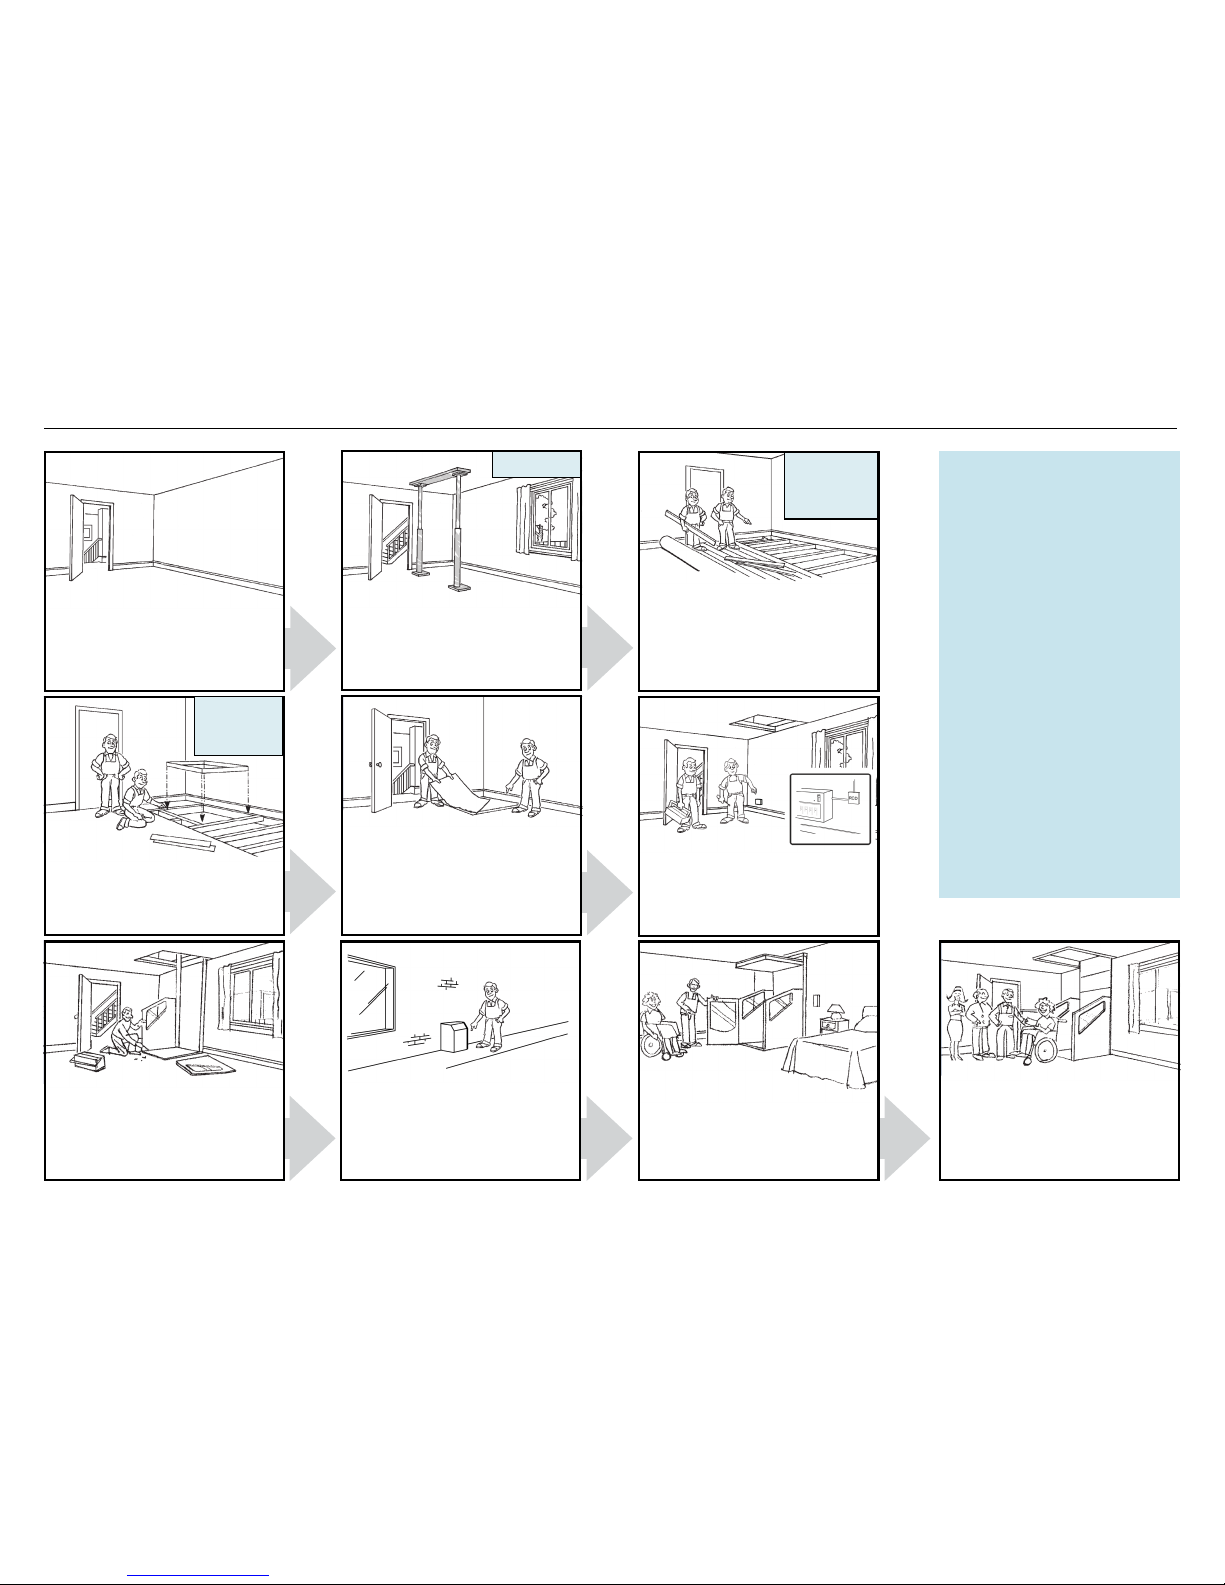
10 simple steps to install your home lift
We will:
• Go through the operation of the
Harmony Lift with you.
• Make final adjustments and ensure
you are familiar with all the safety
features.
We will:
• Install the power pack internally or
externally in the position agreed.
Downstairs we will:
• Support the downstairs ceiling
with adjustable props prior to
forming the aperture.
2
Upstairs:
• Whole room to be cleared by
the customer.
Downstairs:
• Area around the lift installation to
be cleared by the customer.
1
Upstairs we will:
• Replace the floorboards and fit a
temporary cover to the aperture.
4
Upstairs we will:
• Roll back the carpet and cut
around the aperture. This piece of
carpet will be refitted to the top
infill panel.
5
We will:
• Assemble your Harmony Lift.
• Clean and tidy the area.
7 8
Upstairs we will:
• Roll back the carpet at the upper
floor and remove the necessary
floorboards to create an aperture.
• Please be aware that a certain
amount of noise and dust will be
created during this process.
3
We will:
• Provide a 13A fused spur adjacent
to the power pack location. Wiring
runs back to consumer unit.
A telephone socket may be fitted
at this stage if required.
6
9
If possible, the door
should be locked or
we will put a barrier in
place, to protect people,
children or pets from
accidental injury.
The door should still
be locked or a barrier
put in place.
Access to the room
will be restricted.
Easy independent living
• Market leading range of lift car
options for every need
• Smart car design optimises use of
space and minimises the lift’s footprint
• Low floor ensures easy wheelchair
access & egress
• Powered door on all models as
standard
• Adjustable wireless controls in car
and at both floors
• Fire and smoke protection maintained
between floors, whether the lift is
parked upstairs or downstairs
Installation timeline
• 3-5 working days’ notice will be given
to advise you that we are ready to
install your lift
• Builders’ preparation work will take
1-2 days depending on site conditions
• The installation will take
2 days on average
10
Access to the room
will be restricted.
Finally we will:
• Complete the official hand
over of your Harmony Lift to
you and your family and of
course fully demonstrate how
the lift should be used along
with highlighting the benefits
the lift will bring to you all.
 Loading...