

Page 1
TerraWave Solutions® 802.11n MIMO 18”x 18” x 1.5” Hard Cap Ceiling Enclosure
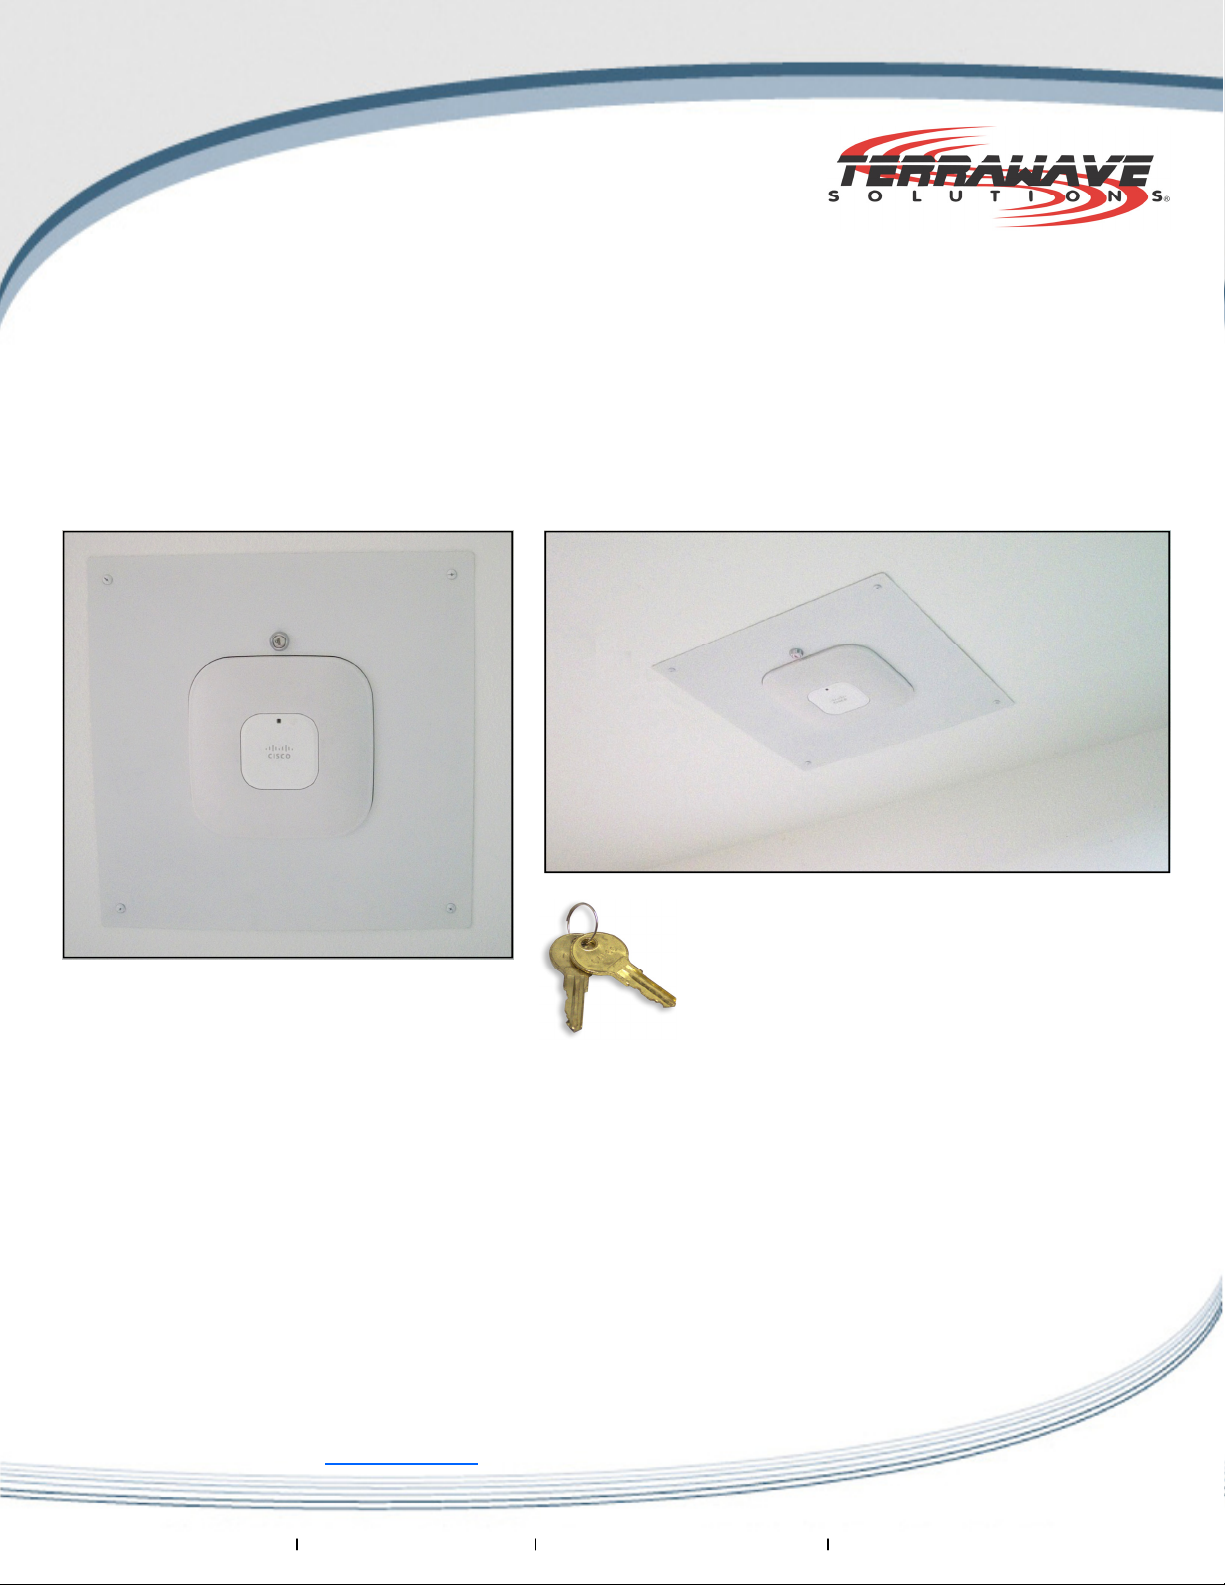
TerraWave's TW-HC-1142A hard cap ceiling enclosure contains and protects the Cisco 1142, Cisco 3502i and
Cisco 3602i access point (AP) in an aesthetically pleasing and stealthy solution within a hard cap ceiling, such
as metal, sheetrock, stucco or wood. Once installed, the enclosure is conveniently secured and flush with the
hard cap ceiling. The enclosure is constructed of powder-coated aluminum and designed to meet NEC300-22
and 300-23 for installation in plenum/air-handling areas. Includes cord grip and CAT60 key lock.
Every TerraWave enclosure is covered by the Company’s two-year TerraNet warranty program. For questions
and to purchase product, contact a wireless networking solutions sales engineer at 210-375-8482, 800-8514965 or sales@terrawave.com. Visit www.terrawave.com for additional information.
TW-HC-1142A shown installed in a sheetrock
ceiling
Enclosure Specifications
• Size: 18” x 18” x 1.5”
• Weight: 2.5 pounds without AP installed, 4.5 pounds with AP installed
• Designed to meet NEC300-22 and 300-23 to mount the Cisco AP 1142, Cisco AP 3502i and Cisco AP 3602i
in plenum/air handling areas
• Enclosure fits into standard ceiling or wall construction (minimum clearance between studs is 13”)
• Constructed of powder-coated aluminum
• Includes CAT60 key lock for security, 1 cord grip, 4 wood screws and 4 toggle bolts
• No moving parts
TerraWave is the primary manufacturer in the
industry to offer such cutting-edge products
for wireless networking deployments.
For detailed product information and to purchase product, please contact a TerraWave
wireless networking solutions sales engineer at 210-375-8482, 800-851-4965,
sales@terrawave.com or visit www.terrawave.com
.
Version 2.0
www.terrawave.com Email: sales@terrawave.com Phone: 210-375-8482 or 800-851-4965 10521 Gulfdale, San Antonio, TX 78216
Page 2
TerraWave Solutions® 802.11n MIMO 18”x 18” x 1.5” Hard Cap Ceiling Enclosure
Installation Instructions
Installing the Enclosure Housing in the Ceiling or Wall
1. Remove the enclosure from the packing material.
2. Knockout the perforated mounting holes (Figure 1). Support the enclosure corners so they will not bend.
Figure 1
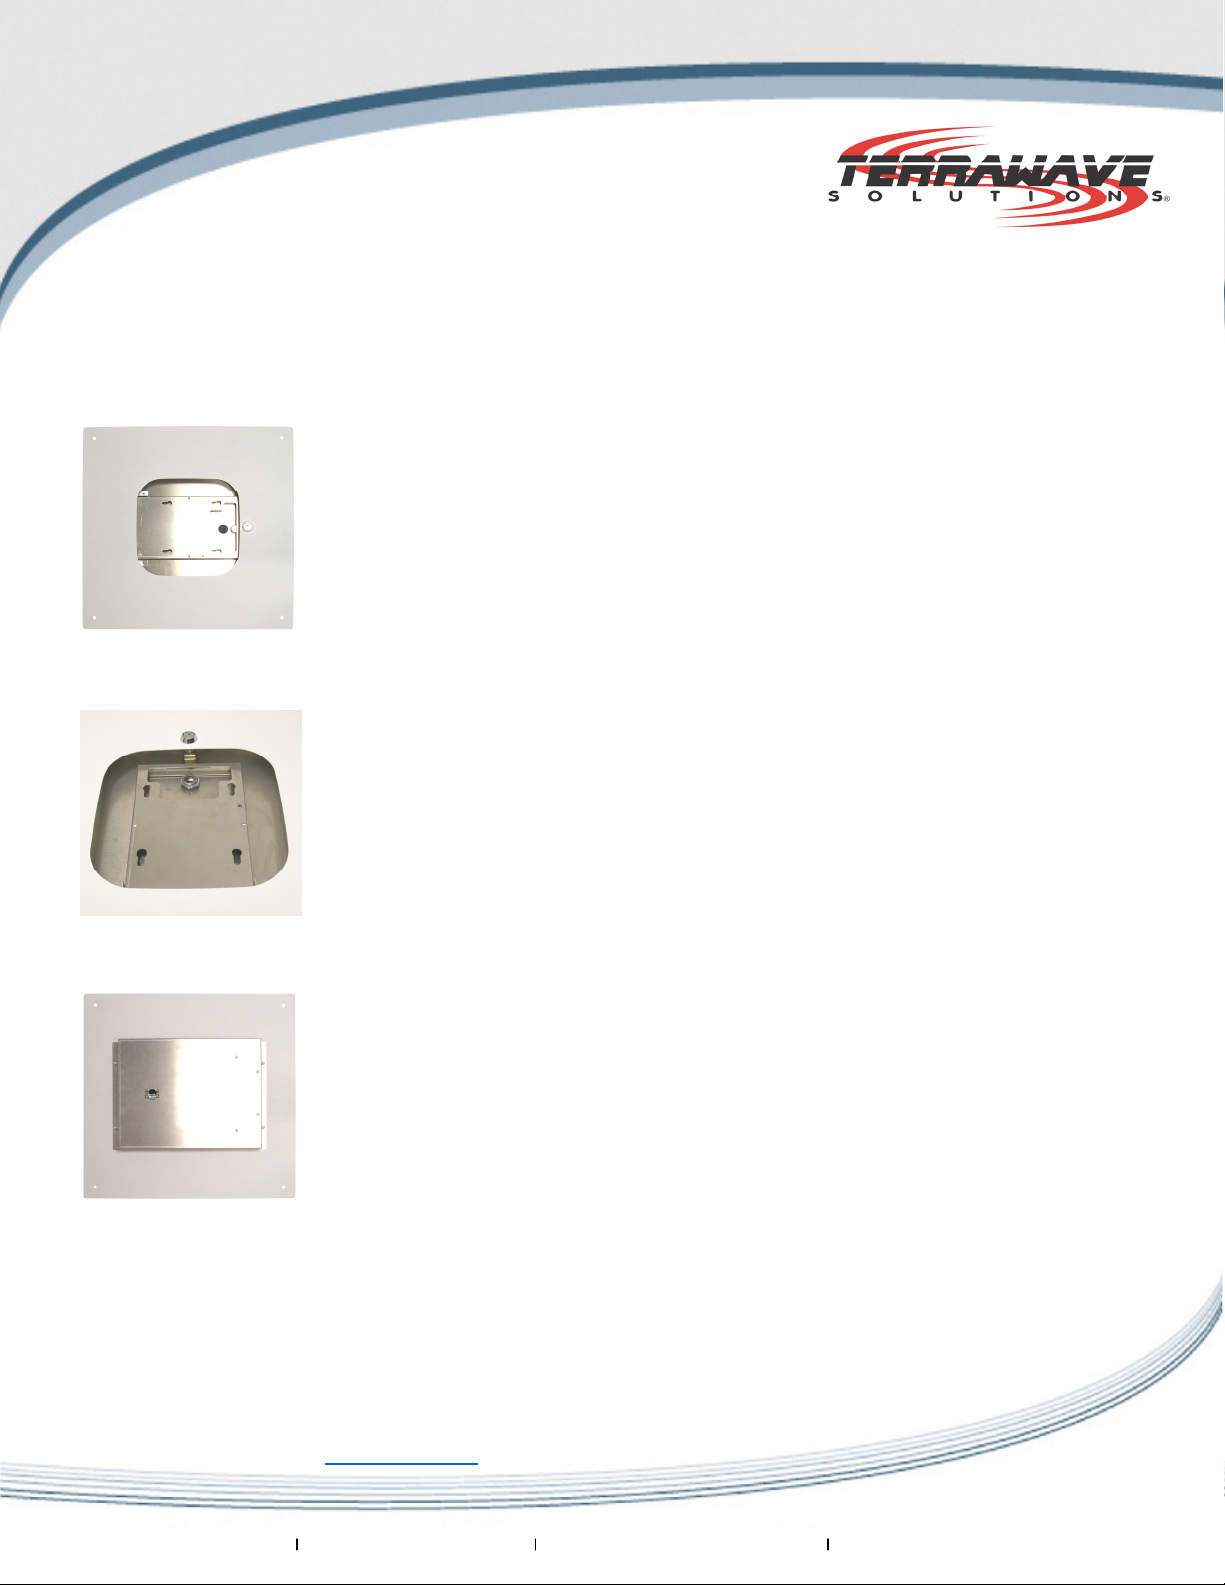
2. Remove the enclosure mounting plate from the enclosure by turning the locking mechanism (Figure 2).
Figure 2
3. Install the included cord grip (Figure 3).
Figure 3
4. Prepare the ceiling or wall for installation.
For detailed product information and to purchase product, please contact a TerraWave
wireless networking solutions sales engineer at 210-375-8482, 800-851-4965,
sales@terrawave.com or visit www.terrawave.com
.
TerraWave is the primary manufacturer in the
industry to offer such cutting-edge products
for wireless networking deployments.
Version 2.0
www.terrawave.com Email: sales@terrawave.com Phone: 210-375-8482 or 800-851-4965 10521 Gulfdale, San Antonio, TX 78216
Page 3

TerraWave Solutions® 802.11n MIMO 18”x 18” x 1.5” Hard Cap Ceiling Enclosure
Installation Instructions
Installing the Enclosure Housing in the Ceiling or Wall (continued)
5. Locate the studs or other obstacles within the ceiling or wall. Do not mount enclosure where obstacles will
prevent enclosure sitting flush with the wall surface.
6. Cut the ceiling or wall surface to accept the enclosure housing. It is not recommended to cut the hole larger than
13” x 13”. If installing using the toggle bolts, pre-drill the holes to mount the enclosure. A 1” bit is recommended.
(Figure 4).
7.
Figure 4
7. Feed power and Ethernet connections through the cord grip in the back of the enclosure (Figure 5).
Figure 5
8. Secure the enclosure to the surface by using the included toggle bolts or wood screws (Figure 6).
Figure 6
For detailed product information and to purchase product, please contact a TerraWave
wireless networking solutions sales engineer at 210-375-8482, 800-851-4965,
sales@terrawave.com or visit www.terrawave.com
www.terrawave.com Email: sales@terrawave.com Phone: 210-375-8482 or 800-851-4965 10521 Gulfdale, San Antonio, TX 78216
.
TerraWave is the primary manufacturer in the
industry to offer such cutting-edge products
for wireless networking deployments.
Version 2.0
Page 4

TerraWave Solutions® 802.11n MIMO 18”x 18” x 1.5” Hard Cap Ceiling Enclosure
Installation Instructions (continued)
Installing the AP into the Enclosure
1. Attach the Cisco AP to the enclosure mounting plate (Figure 7) by aligning the AP mounting feet with the keyholes
provided in the mounting plate (Figure 8). Slide the AP down and the AP will lock onto the mounting plate when it is
secure (Figure 9). You will not need the mounting plate that ships with the Cisco AP.
Figure 7 Figure 9
2. Complete the power and Ethernet connections according to the manufacturer’s instructions by feeding the cables
through the hole in the enclosure mounting plate (Figure 10).
Figure 10
3. Place the enclosure mounting plate, with the access point attached, into the opening in the enclosure by sliding the
long end (opposite the cable connections) into the enclosure at an angle of approximately 30 degrees (Figure11).
Lower the opposite end of the mounting plate into the enclosure, making sure the cables do not bind or crimp (Figure
12).
Figure 11
4. Turn the locking mechanism to secure the access point.
For detailed product information and to purchase product, please contact a TerraWave
wireless networking solutions sales engineer at 210-375-8482, 800-851-4965,
sales@terrawave.com or visit www.terrawave.com
Figure 8
Figure 12
TerraWave is the primary manufacturer in the
industry to offer such cutting-edge products
for wireless networking deployments.
.
Version 2.0
www.terrawave.com Email: sales@terrawave.com Phone: 210-375-8482 or 800-851-4965 10521 Gulfdale, San Antonio, TX 78216
 Loading...