

TerraTrike Rover Auto NuVinci Operation Manual
Operation Manual
Questions?
Contact TerraTrike customer service at:
sales@TerraTrike.com or 1-800-945-9910
or visit www.TerraTrike.com
AUTO NUVINCI
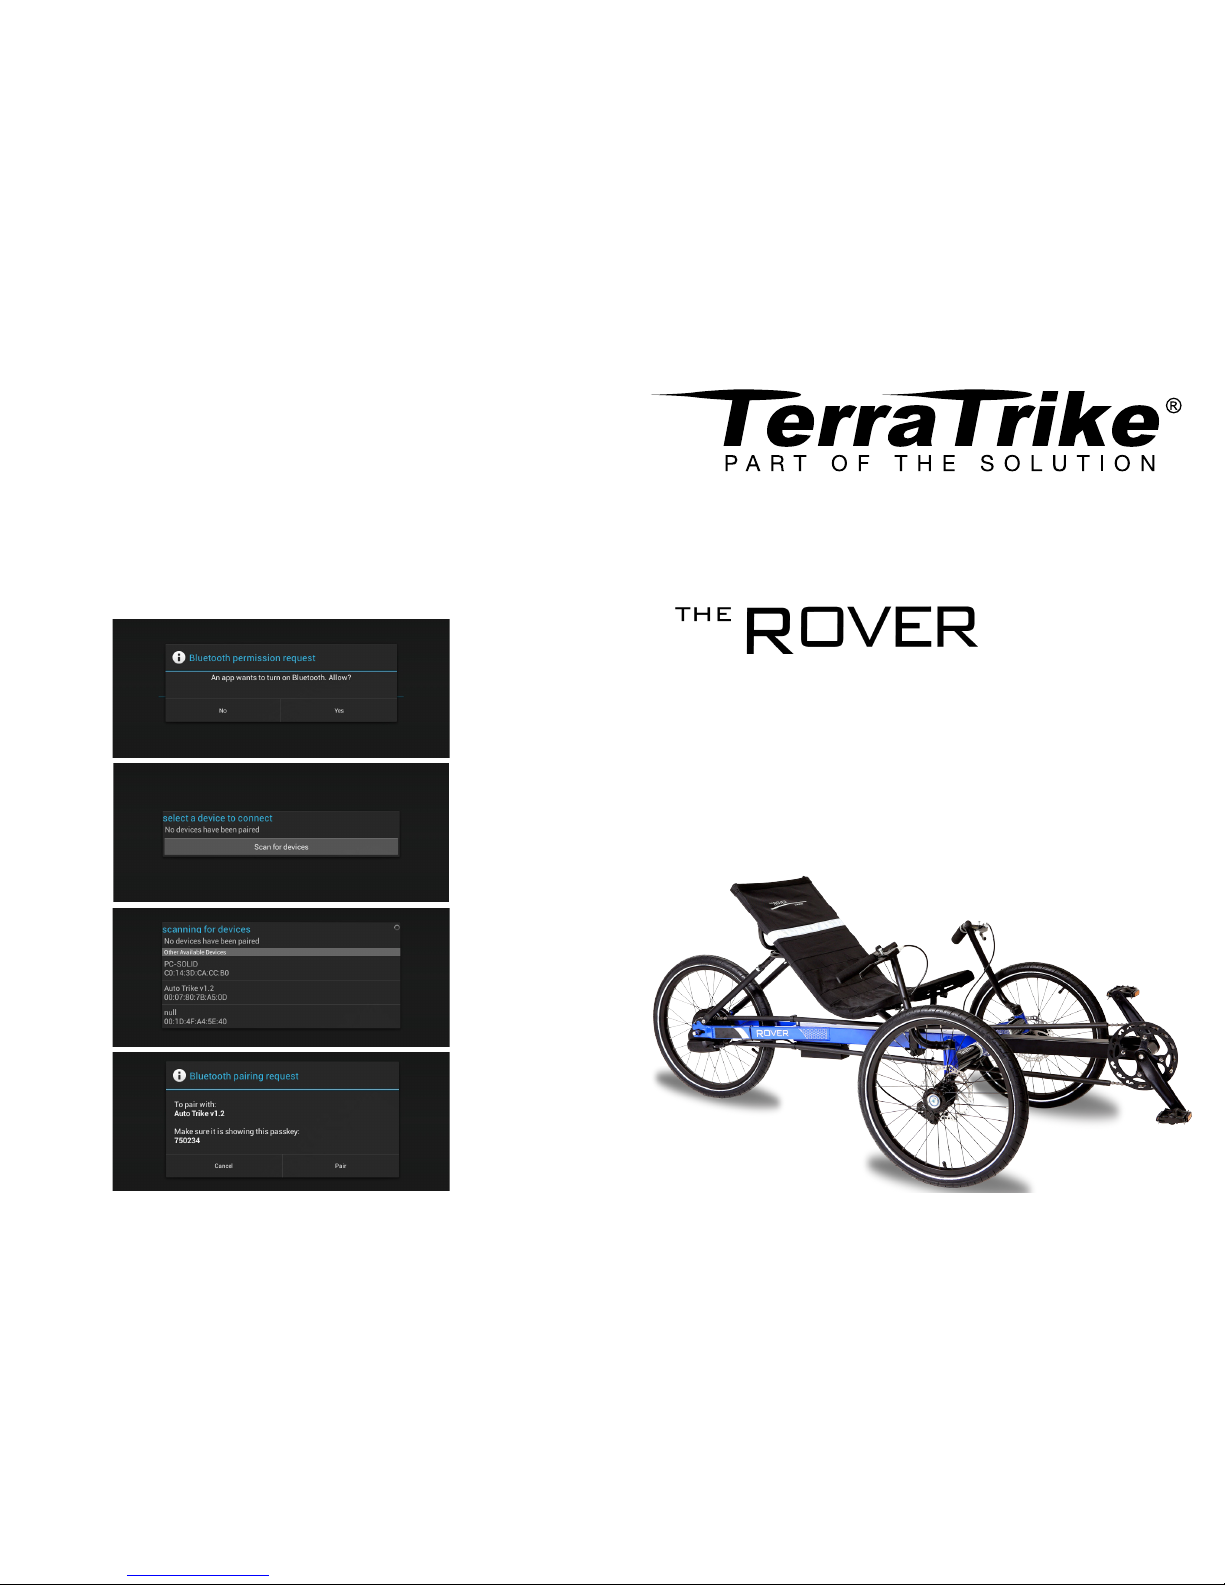
PAIRING THE AUTOBIKE APP (FOR ANDROID 4.0 OR NEWER)
1. Open the app.
2. Accept the Bluetooth Permission request (Figure 1). If you don’t see this request, continue to step three.
3. On the control module, press the Two Dot button. This will activate the system for 30 seconds.
4. Press“Scan for Devices” (Figure 2). If more than 30 seconds have passed since Step 3, repeat
that step to reactivate the system and then press “Scan for Devices.”
5. Select “Auto Trike v1.2” from the device list (Figure 3).
6. When the trike starts to beep, roll forward until beeping stops.
7. Press “Pair” (Figure 4). You are now connected and can start using the app!
*Note: After this first pairing, the app will automatically connect to your Auto NuVinci system when the app
is opened and the system is on. If the app does become disconnected, go to “Settings” in the app and press
“Reconnect” while the Auto NuVinci system is on.
Figure 1
Figure 2
Figure 3
Figure 4
OPERATING THE ROVER AUTO NUVINCI
Step One: Charging the Battery
Remove the rubber cover from the charging port on the battery pack of your trike. Using the
included charging cord, plug the cord into the charging port on the battery pack and into any
standard 120V A/C outlet. Depending upon how drained the battery is, it may take a few hours
to fully charge. A small LED light on the charging cord will indicate the battery’s charge status: red
when not charged, and green when fully charged. Once the light is green, disconnect and store the
cord in a dry location. Replace the rubber cover over the battery charging port to ensure no debris
or water gets in while riding.
Step Two: Turning On the System
To activate the automatic shifting system, press the Two Dot button on the Control Module. The
system is now on. It will remain active for 30 seconds without the back wheel moving before automatically turning off. The system will remain on while the rear wheel is in motion. If it shuts off when
you are stopped, push the Two Dot button again to power on. The system will remember your preset
cadence.
Step Three: Riding
Once the system is on, you can begin your ride. As you pedal, the automatic shifting system will
immediately begin working. When you want to go faster, push on the pedals harder and faster.
You will feel the resistance on the pedals increase just enough to let you ride faster while keeping
your cadence the same. When you want to slow down, ease off your pedalling rate and the
system will match the resistance to that cadence. You’ll hear the servo motor operating as the system
shifts - this is normal.
Step Four: Adjusting Your Cadence
Once you start riding and the system is working, you can fine tune your cadence by pressing the
Three Dot button to increase your cadence or the One Dot button to decrease your cadence.
MAINTENANCE AND TIPS
• Though not necessary, we recommend charging the battery after every ride.
• Do not leave the battery on the charger indefinitely. We recommend unplugging it as soon as
the battery charge is complete (but an overnight charge will not harm the battery).
• The lithium-ion battery will last over 1000 charge cycles. For replacement, call 1-800-945-9910.
• If your battery dies while riding, the system will automatically default to the lowest gear. This
means you can still ride the trike and make it up hills if necessary.
• While the control module and battery pack are water-tight, do not submerge the components.
WARRANTY
The Auto NuVinci system (electronics and hub) has a One Year Limited Warranty. The Rover Auto
NuVinci frame itself carries TerraTrike’s Limited Lifetime Warranty. For more details or to file a claim,
contact our TerraTrike customer service team at 1-800-945-9910.
THE SMARTPHONE APP (OPTIONAL)
The automatic shifting system can be controlled and monitored with a smartphone app that also
acts as a cycle computer. To get this app, visit www.TerraTrike.com/roverauto.php. For instructions
on getting started with the app, see the next page. You do not need the app to ride.
ABOUT THE ROVER AUTO NUVINCI
The Rover Auto NuVinci utilizes a state-of-the-art electronic algorithm by AutoBike along with the
NuVinci N360 hub to create seamless, automatic shifting. It also has all of the great features of our
standard Rover, such as an adjustable seat, disc brakes, and a sturdy steel frame.
What is “Cadence”:
Pedalling cadence is how fast your feet spin while riding. Increasing cadence means your feet spin
faster, while decreasing cadence means your feet spin slower. Traditional trikes and bikes require
you to manually change gears to maintain a comfortable cadence as you ride. The Auto NuVinci
system does all of this work for you!
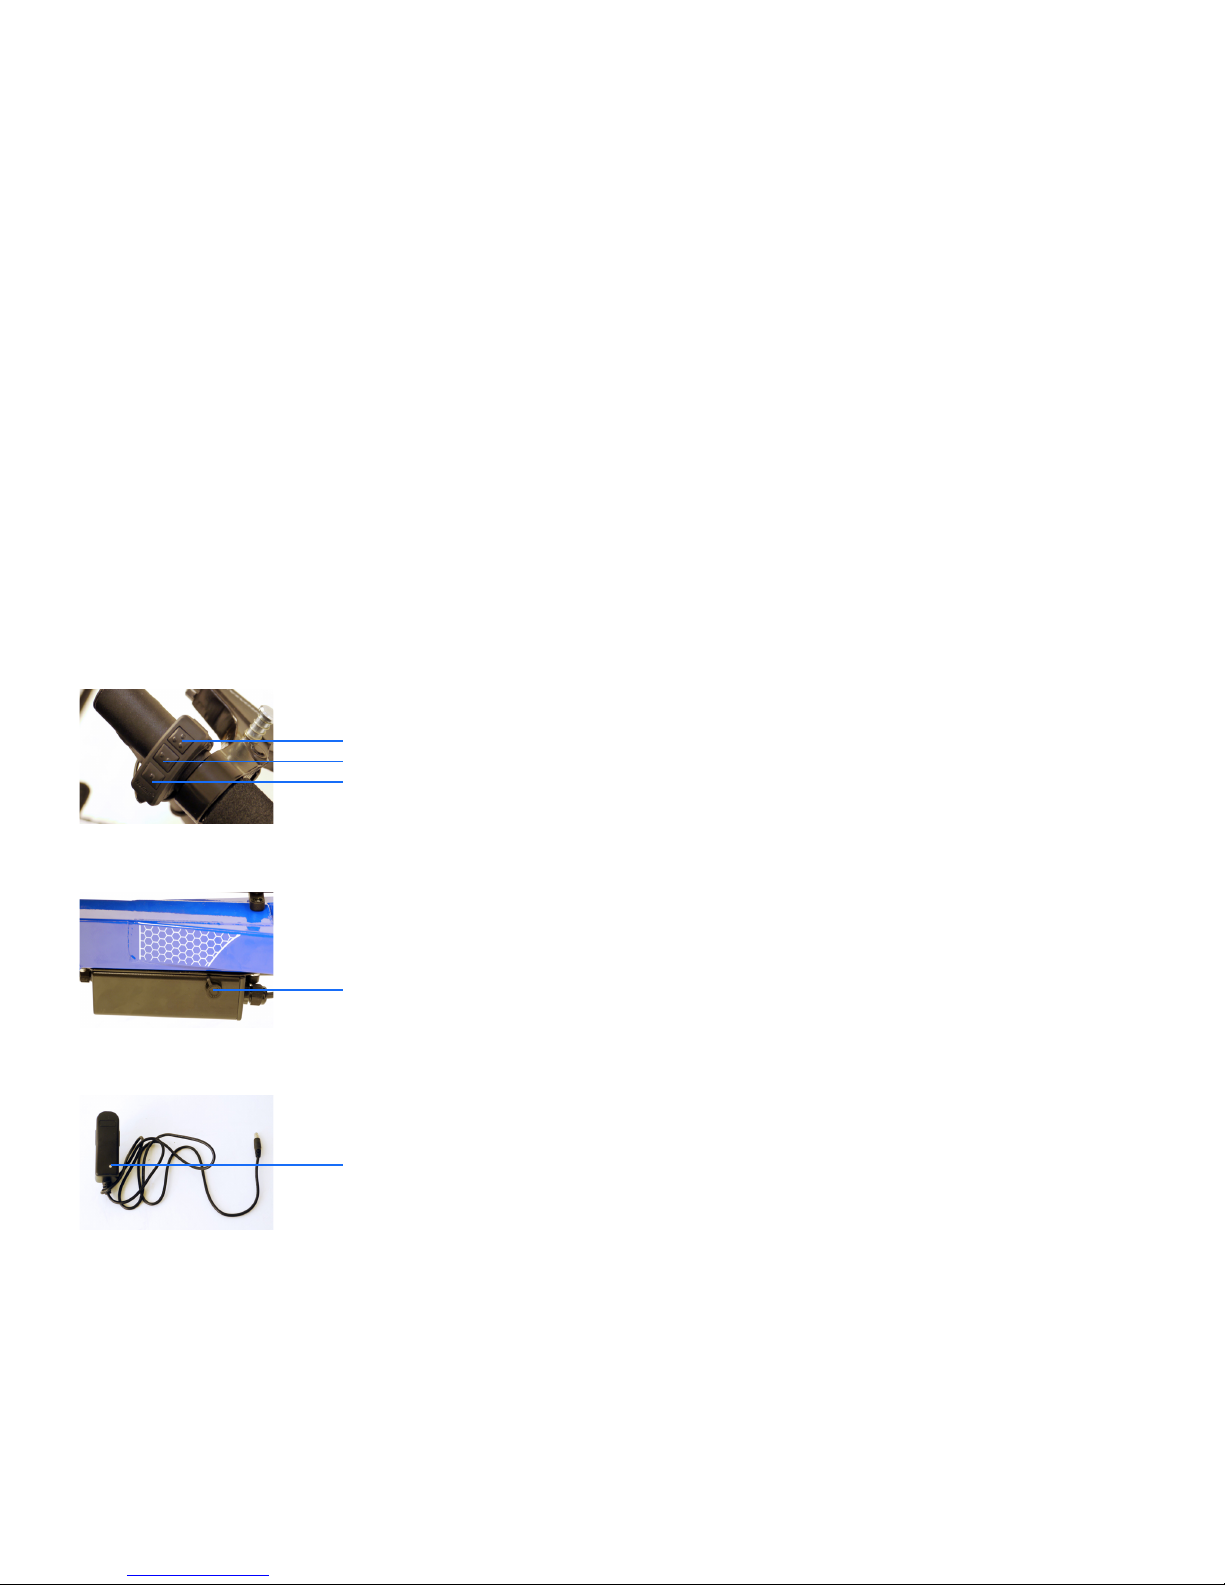
Unique Components:
Your Rover Auto NuVinci has a few specialized components that are key to its unique riding
experience and not found on any of our other trikes. The following instructions will reference these
components:
• Control Module - Located on the handlebar of your trike, the simple control module allows
you to turn on the automatic shifting system and adjust your riding cadence.
• Battery Pack - The battery that powers the electronic control system is housed in a water-tight
steel housing and mounted securely to the trike frame.
• Charging Cord - The charging cord connects to the battery pack on the trike and can then be
plugged into any120V A/C standard outlet to recharge the battery.
Three Dot button - increases cadence
Two Dot button - turns on system
One Dot button - decreases cadence
Charging port and rubber cover
LED charge indicator light
 Loading...