

TerraTrike Pedal Platform Installation Manual
3
TerraTrike
4460 40th St SE
Grand Rapids, MI 49512
(616) 455-5988
(800) 945-9910
www.TerraTrike.com
Rev 02/12/2018
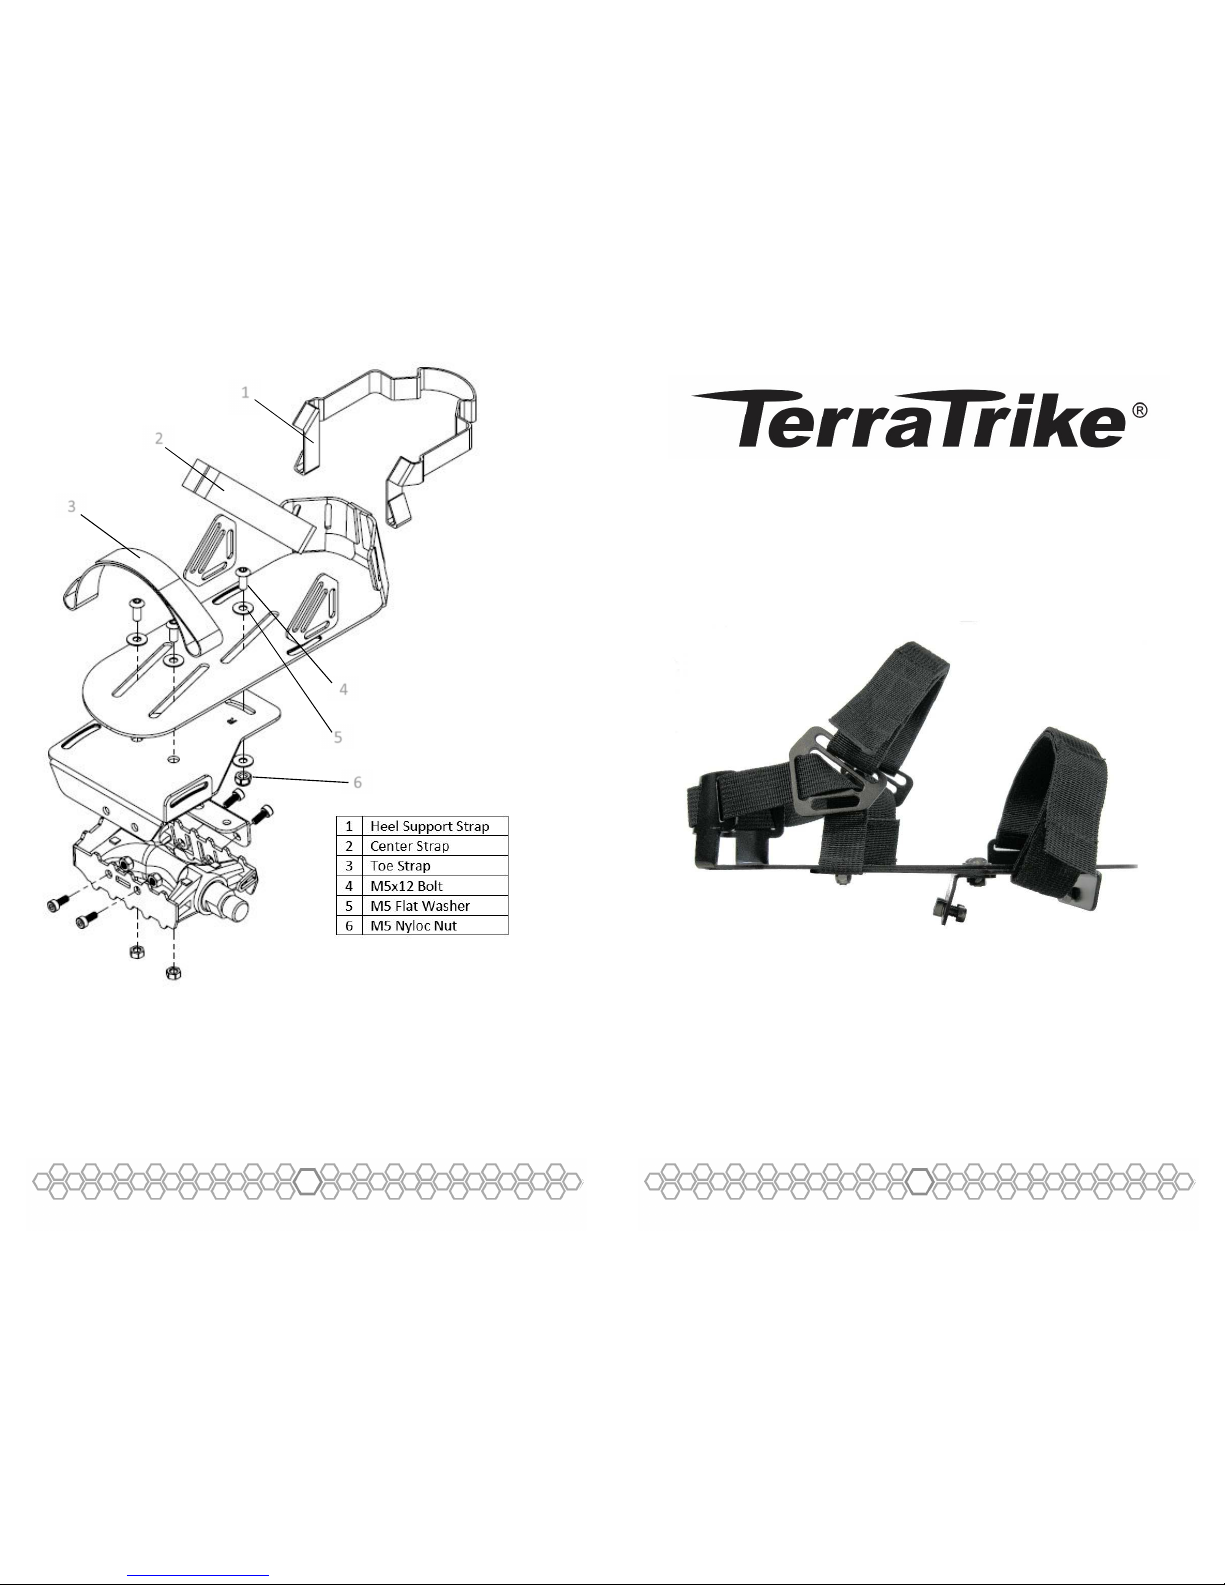
1
2
5
6
4
3
Pedal Platform
Installation Guide
1
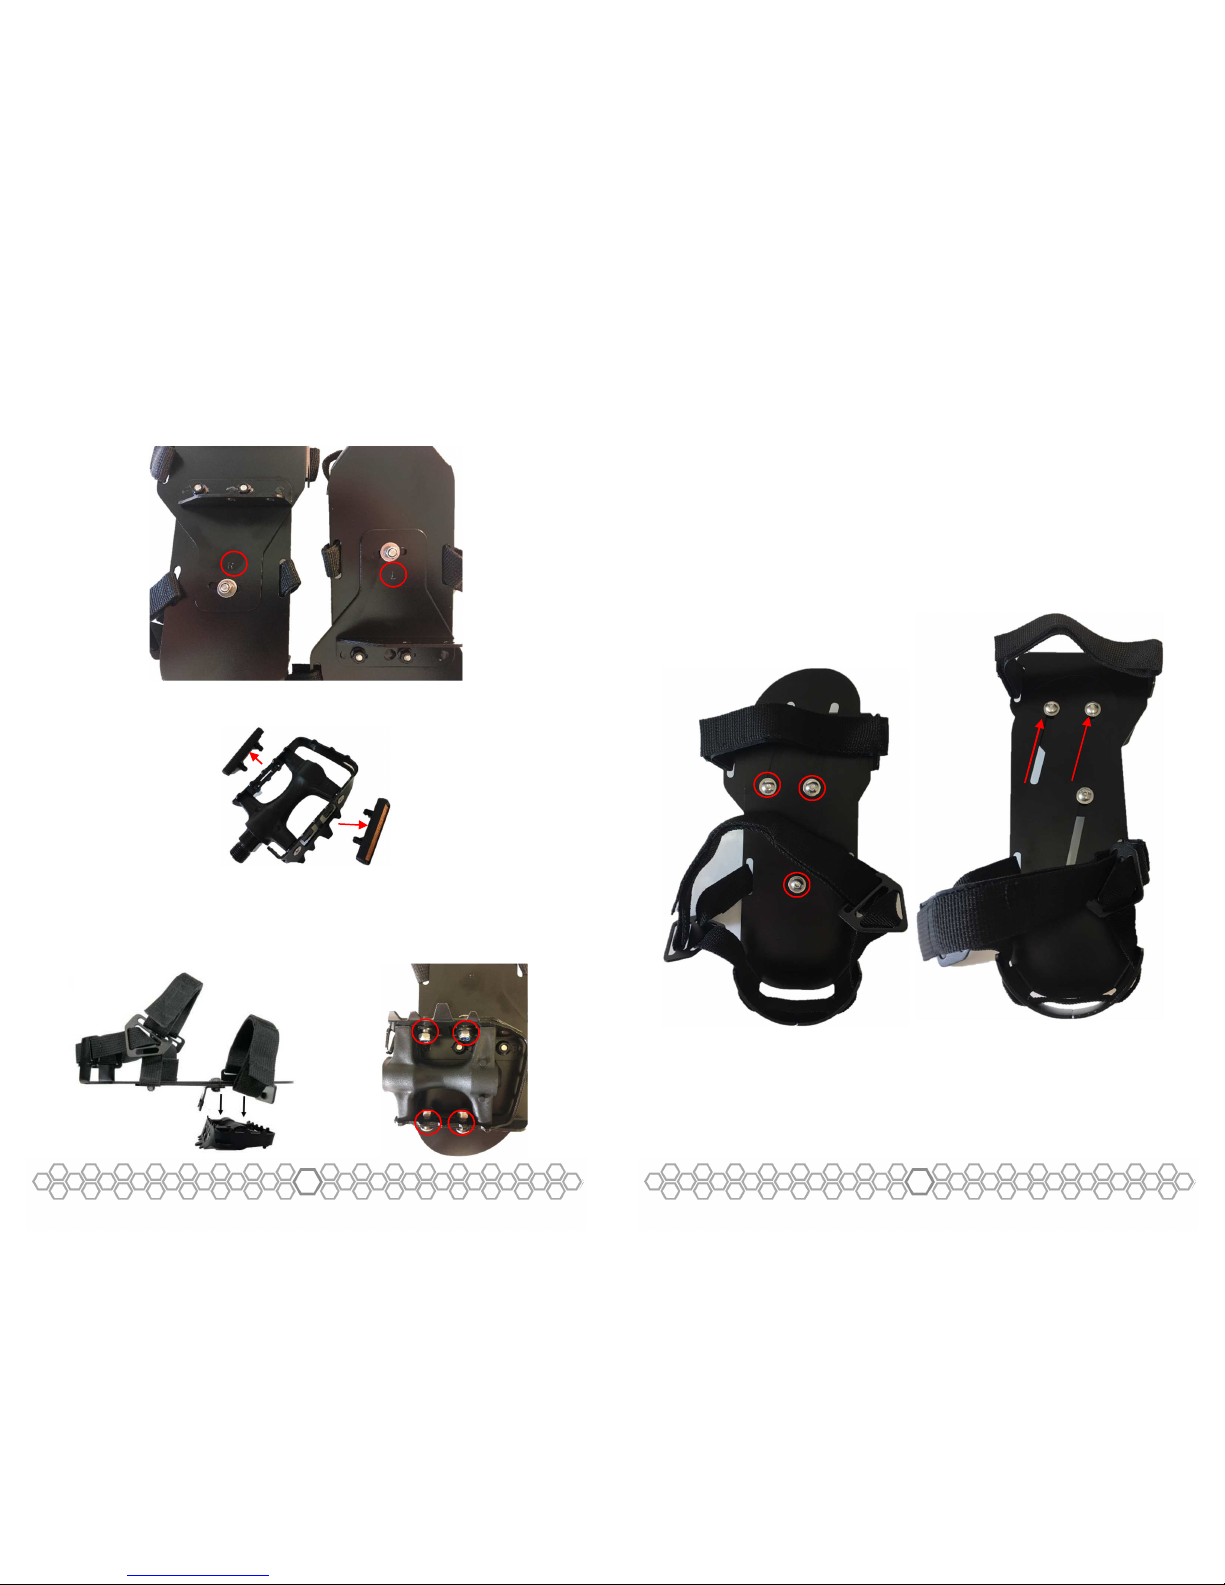
Step 1:
Remove the Pedal Platforms from the packaging and identify the Left
and Right sides by the stamped “L” and “R” on the bottom.
Step 2:
Remove the reflectors from the stock TerraTrike pedals by simply prying
them off.
Step 3:
Position the Platform onto the corresponding pedal and secure with 4
M5x12 bolts and nuts. The Pedal Platform will only fit one way on the
pedal, so be sure the top of the pedal is up. Tighten bolts securely.
2
Adjustment:
To adjust the Pedal Platform to accommodate different shoe sizes,
loosen the three M5 bolts on the top of the platform. The two bolts
towards the front of the platform thread into the platform itself, while
the single bolt towards the back requires an 8mm open ended wrench
to hold an M5 nyloc nut on the underside of the platform. This allows
you to adjust the length of the pedal, as well as the angle of the
platform. Use the Velcro straps to secure foot into pedal. The ball of
the foot should be approximately in-line with the Velcro toe strap. Be
sure to tighten all bolts securely before use.
 Loading...