

Page 1

English Manual
Version: 11.11.02
Page 2

CE Declaration
We:
TerraTec Electronic GmbH, Herrenpfad 38, D-41334 Nettetal, Germany
hereby declare that the products:
AudioSystem EWS MIC 2 and AudioSystem EWS MIC 8
to which this declaration refers are in compliance with the following standards or standardizing documents:
1. EN 55022 Class B
2. EN 55024
The following are the stipulated operating and environmental conditions for said compliance:
residential, business and commercial environments and small-company environments.
This declaration is based on:
Test report(s) of the EMC testing laboratory
In most cases, the designations used in this manual for software and hardware are also registered trademarks and
are thus subject to the relevant regulations.
©TerraTec
®
Electronic GmbH, 1994-2002. All rights reserved (11.11.02).
Meticulous care has been exercised in the preparation of all text passages and illustrations in this manual. TerraTec
Electronic GmbH and its authors, however, accept no liability, legal or otherwise, for any errors or the consequences
of such errors. We reserve the right to technical modifications.
All text passages in this documentation are copyrighted. All rights reserved. No part of this documentation may be
reproduced in any form whatsoever, by photography, microfilming or other process or rendered into a language/form usable by computers without the prior, written consent of the authors. All rights for use and propagation by presentation, radio and television are also reserved.
2 MIC 2/8 (English)
Page 3

Contents
From opening the package to installation. .............................................................................7
Setups - Short and to the point for busy pros....................................................................... 8
The following is a brief description of the PCI card installation for experienced users.......... 9
Important notes for EWS88 MT owners............................................................................10
Installation of the EWS PCI card - step by step.................................................................10
Installing the driver software. .............................................................................................12
Driver installation under Windows 98 SE.........................................................................12
Driver installation under Windows Me. ............................................................................ 13
Installation under Windows 2000. .................................................................................. 15
Installation under Windows XP........................................................................................ 17
The EWS 19" module............................................................................................................19
The rear panel. ................................................................................................................19
The front panel................................................................................................................21
The connectors of the PCI card.............................................................................................23
The drivers. ........................................................................................................................25
The Wave driver. .............................................................................................................25
The System-OUT driver. ...................................................................................................25
The ASIO driver. ............................................................................................................. 26
The GSIF driver. ...............................................................................................................27
The MIDI driver................................................................................................................27
In detail - special properties of the drivers. .................................................................... 28
32-bit data transfer. ....................................................................................................... 28
DirectSound & WDM....................................................................................................... 28
WDM sample rate (SR) interpolation. ............................................................................. 29
WDM kernel streaming. .................................................................................................. 29
The ControlPanel. ...............................................................................................................29
The “Digital Mixer” page.................................................................................................... 30
The “Settings” page. .......................................................................................................... 31
Wave playback/record mode. .........................................................................................34
The “Settings Mic2/8” page. ..............................................................................................34
Signal routing of the EWS MIC8(2)+ systems ..................................................................... 36
MIC 2/8 (English) 3
Page 4

The mixer icon on the Windows taskbar............................................................................. 37
Multiple card mode and managing cascaded cards. ....................................................... 38
ASIO & GSIF.................................................................................................................... 39
Cascading of multiple EWS systems and synchronization............................................... 39
Practical section.................................................................................................................. 43
Sample applications.......................................................................................................... 43
Set A - Studio recording.................................................................................................. 43
Setup B - Live recording without a PC. ............................................................................ 44
Set C - The PC as a digital mixer...................................................................................... 45
Multiple audio cards in a single system. ............................................................................46
Always right on time - digital synchronization. ...................................................................46
Useful information about digital cables (optical waveguides and AES/EBU). ..................... 47
Appendix ............................................................................................................................ 48
Block diagram: EWS MIC2 analog section ..........................................................................48
Block diagram: EWS MIC8 analog section .......................................................................... 49
Technical Details ...............................................................................................................50
EWS MIC2 / MIC8 ........................................................................................................... 50
EWS88 Version 2.0 PCI card ............................................................................................51
Service at TerraTec..............................................................................................................55
Hotline, Mailbox, Internet................................................................................................55
4 MIC 2/8 (English)
Page 5

Safety note.
Please ensure that all analog devices are turned off before plugging them in. This will protect
you from any possible - albeit weak - electrical shocks, as well as protecting your speakers
and your hearing from sudden peaks. For digital devices, be sure to at least reduce the volume of your playback equipment.
Welcome!
We're pleased that you have chosen a TerraTec AudioSystem and would like to congratulate
you on this decision. You've purchased a sophisticated product representing the state of the
art of studio technology, and we're convinced that our product will prove extremely useful to
you in the coming years and provide you with a great deal of entertainment.
This manual describes the EWS MIC2 and MIC8 AudioSystems, as well as their “Plus” versions
(+) including PCI cards. It covers the correct use of the systems in complete detail, and provides practical tips so that you can get started as soon as possible. But first, here's a quick
overview:
Connection versatility - with a system.
The EWS MIC2 and MIC8 19" modules feature a range of professional connector options that
predestine them to become the audiophile hub of your home or project studio.
If you have purchased the Plus version of the MIC2 or MIC8, even more options are available
on the included PCI card: additional S/PDIF connections (coaxial), as well as a range of connectors for internal PC peripherals. The killer feature: a dedicated analog output that lets you
play the system sounds of the operating system - without disturbing your musical work!
ä For everything you need to know about audio connections, see page 19.
Choice preamps - made by SPL.
When it came to selecting microphone preamps, years of experience and our desire for the
best possible audio quality made our choice an easy one: SPL. Important parts of the sophisticated analog circuitry were developed in cooperation with SPL's engineers for a sound as
clear as glass and which doesn't stop dead at the XLR connector, as is often the case.
ä For everything you need to know about audio quality, please turn to page 50.
Nerve center - the software.
As you know, a professional AudioSystem is no sound card for wild-eyed gamers, but the
heart of your day-to-day studio work with your PC. And despite its extensive routing options,
the EWS software gives you a clear overview at all times and - depending on the complexity of
your switching needs - stays transparent and intuitive.
ä For everything you need to know about the EWS ControlPanel, see page 29.
MIC 2/8 (English) 5
Page 6

Pure performance - the drivers.
The selection of drivers for the EWS MIC series leaves nothing to be desired. Our sophisticated software architecture based on Microsoft's WDM technology guarantees the troublefree deployment of the card in all modern Microsoft Windows operating systems.
The thoroughly proven ASIO drivers have often been used as a reference and guarantee the
lowest possible latency between the software-based sound generation and audio output. And
support for the GSIF model provides performance levels in TASCAM's GigaStudio that makes
many hardware synths look pale.
ä For the details on driver use, please turn to page 25.
We hope you enjoy your work with the EWS MIC system and would like to suggest that you
browse this hopefully entertaining manual when you get the chance. In addition to the important information about its technology, we have outlined a number of typical applications as
well as tips and tricks wherever appropriate. We're convinced that even experienced users will
profit from this guide.
Thanks for your attention and here's to your creativity.
...your TerraTec Team
6 MIC 2/8 (English)
Page 7

From opening the package to installation.
Before installing the AudioSystem or the PCI card of the Plus version, please take note of any
special points pertaining to the configuration of your computer. Also refer to the manual of
your computer and other studio peripheral devices for their settings.
Please observe the following instructions to ensure a trouble-free installation. If difficulties
arise nevertheless, please reread the relevant chapter in this manual carefully.
If you are still having problems, please call our service hotline. The phone numbers and hours
of the hotline can be found in the Appendix of this documentation.
Scope of delivery.
Start by making sure that the contents of the package are complete.
The scope of delivery of the EWS MIC2 and EWS MIC8 AudioSystems includes at least the
following:
· 1 19" MIC2 or MIC8 rack module
· 1 splitter cable with MIDI and WordClock sockets
· WordClock T adapter
· WordClock terminator
· 1 customer service card
· 1 registration card with the serial number
· This manual
The scope of delivery of the EWS MIC2+ and EWS MIC8+ AudioSystems also includes:
· 1 PCI card, type EWS88 MT 2.0 or higher
· 1 connector cable, rack module to EWS88 PCI card (4 m)
· 1 thin sync cable to internally connect multiple EWS88 boards
· 1 installation and driver CD with software for EWS88 MT 2.0 or higher.
Please return the enclosed registration card to us at the earliest possible opportunity or register online at http://www.terratec.com/register.htm. This is important for support
and hotline services.
MIC 2/8 (English) 7
Page 8

Setups - Short and to the point for busy pros.
Stand-alone mode. The EWS MIC2 and MIC8 AudioSystems can be used stand-alone, i.e.
without a connection to a computer:
1. For use as a simple but high-quality microphone preamp (in conjunction with a
mixer, for example) simply connect your microphones to the inputs on the rear of
the module. Enable phantom power if needed (see page 21) and connect the MIC
outputs to the LINE inputs of your mixer or tape deck.
2. The modules can also be connected directly to an ADAT device such as an ADAT
multitrack recorder. In this case, connect line devices or microphones to the inputs of the MIC module and transfer the signals to the recorder (EWS MIC2/8 ADAT
optical OUT to ADAT unit IN) using optical waveguides (not included). Ensure that
the optical output of the MIC module is not set to S/PDIF (see page 19). You must
also select the desired sampler rate (44.1 or 48 kHz). A switch is also available for
this function (see page 19).
3. Conversely, digital signals from an ADAT can also be converted and output as a
high-quality analog signal. Connect the optical output of the ADAT (OUT, lit when a
signal is present) to the appropriate input of the module. The sampler rate is determined by the ADAT player. No further settings are required; the format will be
identified automatically.
In conjunction with Macs or PCs, or with studio devices with ADAT interfaces. The EWS MIC2
and MIC8 AudioSystems can also be used as pure AD/DA converters on any ADAT interface.
These can be found (in some cases as optional extras) on devices such as
· digital mixers
· hardware multitrack recorders
· synthesizers and samplers
· computers with suitable PCI cards.
The EWS MIC modules do not need to be configured for playback, as the configuration essentially corresponds to the scenarios 2 and 3 above (MIC module as an alternative converter for
ADATs). The installation of TerraTec software is also not required when using the modules
with a Mac or PC (this also applies in conjunction with an already-installed AudioSystem
EWS88 D, the TerraTec ADAT interface). However, please note the instructions on synchronization and switching of the optical output on page 46.
EWS MIC2+ and EWS MIC8+: with PC using the included PCI card. The AudioSystems EWS
MIC2+ and MIC8+ are supplied with an EWS88 MT Version 2.0 (or higher) PCI card. The system-specific PCI card supports a wide range of routings that would not be possible in standalone use or in combination with ADAT interfaces from other manufacturers. Before you install
the EWS88 MT PCI card, check the CN1 and JP1 jumpers on the card. If you would like to use
the digital input (coax) on the PCI card, set JP1 and CN1 to 1 and 2 respectively. To use the
8 MIC 2/8 (English)
Page 9

digital interfaces of the MIC module (ADAT, S/PDIF or WordClock), set the JP1 and CN1 jumpers
to 2 and 3 respectively.
Operation with additional EWS systems. An EWS88 MT PCI card can be used with up to three
further EWS88 MT/D systems in the same computer. A maximum of one EWS88 MT can be
used together with a maximum of one EWX 24/96 or a maximum of one DMX 6fire. For information on synchronizing multiple PCI systems, please refer to Chapter “Multiple audio cards
in a single system.” starting on page 46.
The following is a brief description of the PCI card installation for experienced users.
· The AudioSystem EWS88 MT is a PCI card with busmastering support. Please choose a
slot which is far away from the graphics card(s) or SCSI/RAID controllers i.e. as far close to
the “bottom” as possible in most installations. Also keep in mind that the heavy connector cable and various audio cables (S/PDIF, System-OUT) will be dangling from the back of
the card.
· A special cable (4 m) is included to connect the 19" EWS MIC2 or MIC8 module. The power
supply is not realized via this cable. Please ensure that all screws are securely tightened.
Ensure that the computer and the EWS MIC module are switched off before plugging or
unplugging the 4 Meter connector cable.
· You will need one (1) IRQ. Installing multiple audio systems of the TerraTec EWS family is
no problem - the cards will run in IRQ-sharing mode.
· You will also need a number of free address ranges (generally no problem).
· The driver installation under Windows (98SE to XP) follows the Microsoft guidelines. The
drivers can be found on the included CD-ROM. Important note: The drivers have not yet
been certified by Microsoft. You will receive a warning to this effect in Windows 2000 and
XP which you can ignore. Continue the installation.
· After installing the drivers, open the Device Manager and check for yellow exclamation
marks. If you find any, you can usually solve the problem by repeating the installation according to the instructions. Please also read the FAQ (frequently asked questions) on the
product CD for other suggested solutions.
MIC 2/8 (English) 9
Page 10

· After the drivers have been installed, install the software. You can start the installation
using the autostart function of the CD, for example. You must install the EWS Control-
Panel. The full functionality cannot be controlled using the Windows Standard Mixer.
· The WDM audio drivers can be selected in the applications as usual. ASIO or GSIF (GigaStudio) drivers are available in compatible programs; WDM kernel streaming is “not visible” (i.e. it is always available for applications and cannot be selected explicitly). The respective buffer sizes can be configured in the EWS ControlPanel (not to be confused with
the Windows Control Panel).
Important notes for EWS88 MT owners.
If you are already using an AudioSystem EWS88 MT and are now the proud owner of an EWS
MIC2 or MIC8 module, please observe the following points:
· It is not possible to use the 5¼" module of the EWS88 MT and the new 19" module at the
same time on only one PCI card. Parallel connection of the modules can damage them.
DAMAGE OF THIS KIND IS NOT COVERED BY THE WARRANTY!
· Please also note that cards with a board version 2.0 or later must be used to ensure trouble-free operation with an EWS MIC module. In the event that you have an older board
version (this information can be found on the component side of the board, near the
edge) please contact TerraTec technical support BEFORE INSTALLING (see page 55). A
board version 2.0 or later is required when using 4 meter cables.
· EWS Control Panel. Be sure to install the latest version of the EWS ControlPanel software
(1.03.35.12X or later) as earlier versions do not support the enhanced routing options of
the MIC module.
· The EWS ControlPanel will automatically recognize the replacement of the 5¼" front module with a 19" MIC module. As the input gains can be adjusted directly using pots on the
module itself, the mixer-side analog input levels are superfluous.
Installation of the EWS PCI card - step by step.
· Switch off your PC and all connected peripheral devices such as your printer and monitor.
Leave the AC cable connected for the time being, so that your computer is still grounded.
· Touch the metal chassis at the rear of the PC to ground and to discharge static. Now unplug the cord from the AC socket.
· Remove the cover from the case of your PC.
· Look for a free PCI expansion slot, remove the screw holding the slot blanking plate (if
present) and remove the plate. Should it be necessary to break a plate out of the case, do
so with great care to avoid injury.
· Check the jumpers of the card as described on page 8.
10 MIC 2/8 (English)
Page 11

· To ensure the optimal function of your AudioSystem, look for an expansion slot that is not
immediately next to an already-installed card. Some cards, such as video or SCSI/RAID
adapters, can send out signals which can interfere with the sound card.
We also recommend a slot as close to the bottom of the computer as possible, as you can
/ must connect several cables directly to the card itself. Due to certain physical properties
of our planet, it is very likely that these cables will dangle downward. ;-)
· Carefully remove the PCI card from its packaging. Pick it up by the edges with one hand
while your other hand is resting on the metal of the PC case. This will ensure that your
body is completely discharged (no joke) via your computer without affecting the card.
Please do not touch the components of the board.
· First, connect the internal cables (e.g. from the CD drive or other EWS cards). For further
information on the various connections, please see page 23.
· Align the audio card so that the strip with the golden connector pins is located exactly
over the PCI slot.
· Insert the card into the slot. You might have to press the card firmly into the slot to make
good contact. Take care to ensure that the contacts are precisely in line in order to avoid
damaging the audio card or the motherboard in your PC.
· Secure the card with the screw from the slot blanking plate (these screws are generally
also included with PC cases).
· Switch on and boot the computer to continue with the driver installation.
MIC 2/8 (English) 11
Page 12

Installing the driver software.
The AudioSystem EWS MIC8(2)+ (including PCI card) currently comes with drivers for Windows
98 SE, Windows ME, Windows 2000 and Windows XP. Windows 95/98 and Windows NT 4 are
not supported. You should therefore determine which operating system you are using before
installing the card. For information on your operating system and its version number, please
check the “System” dialog in the Windows control panel.
Driver support for Apple Macintosh computers (OS9 and OSX) was in development as this
manual went to print. Please check the TerraTec website from time to time for drivers as they
become available.
In the following driver installation descriptions, <CD> stands for the drive letter of the CD-ROM
drive containing the driver CD of the AudioSystem EWS MIC8(2) +.
Driver installation under Windows 98 SE.
1. Boot your computer after installing the EWS88 MT PCI card.
2. During the boot, the Windows hardware wizard will identify the new hardware as a
“PCI Multimedia Audio Device”. Confirm by clicking “Next”.
3. The hardware wizard will ask you how you would like to continue. Select the “Search
for the best driver for my device (Recommended)” item and confirm with “Next”.
4. Select the checkbox “Specify a location” and enter the path to the driver on the CD.
<CD>:\Driver\. Alternatively, you can also select the path to the best driver of your
EWS88 MT PCI card using the mouse by clicking “Browse...”. Confirm by clicking
“Next”.
5. In the final window, the hardware wizard will report that the driver software has been
installed successfully. Close the wizard by clicking “Finish”.
If contrary to all expectations a request should appear for you to perform some action and you
are not sure about it, then pressing the Enter key is generally a safe action.
If Windows requests a second driver file, please refer to the aforementioned directory on the
EWS MIC8 (2)+ CD-ROM. It is also possible (e.g. if this is the first sound card installation in
your system) that some additional Windows extensions have to be installed. Please have your
Windows CD ready for this purpose.
After successful driver installation, the additional bundled software can be added easily using the autorun option(<CD>:\autorun.exe).
Follow the instructions on the screen to install the various bundled software programs. A particular bundled software can also easily be removed from your system. For this purpose, call
up “Control Panel -> Software” and locate the programs to be removed. Select these and click
“Add/Remove Programs...”.
12 MIC 2/8 (English)
Page 13
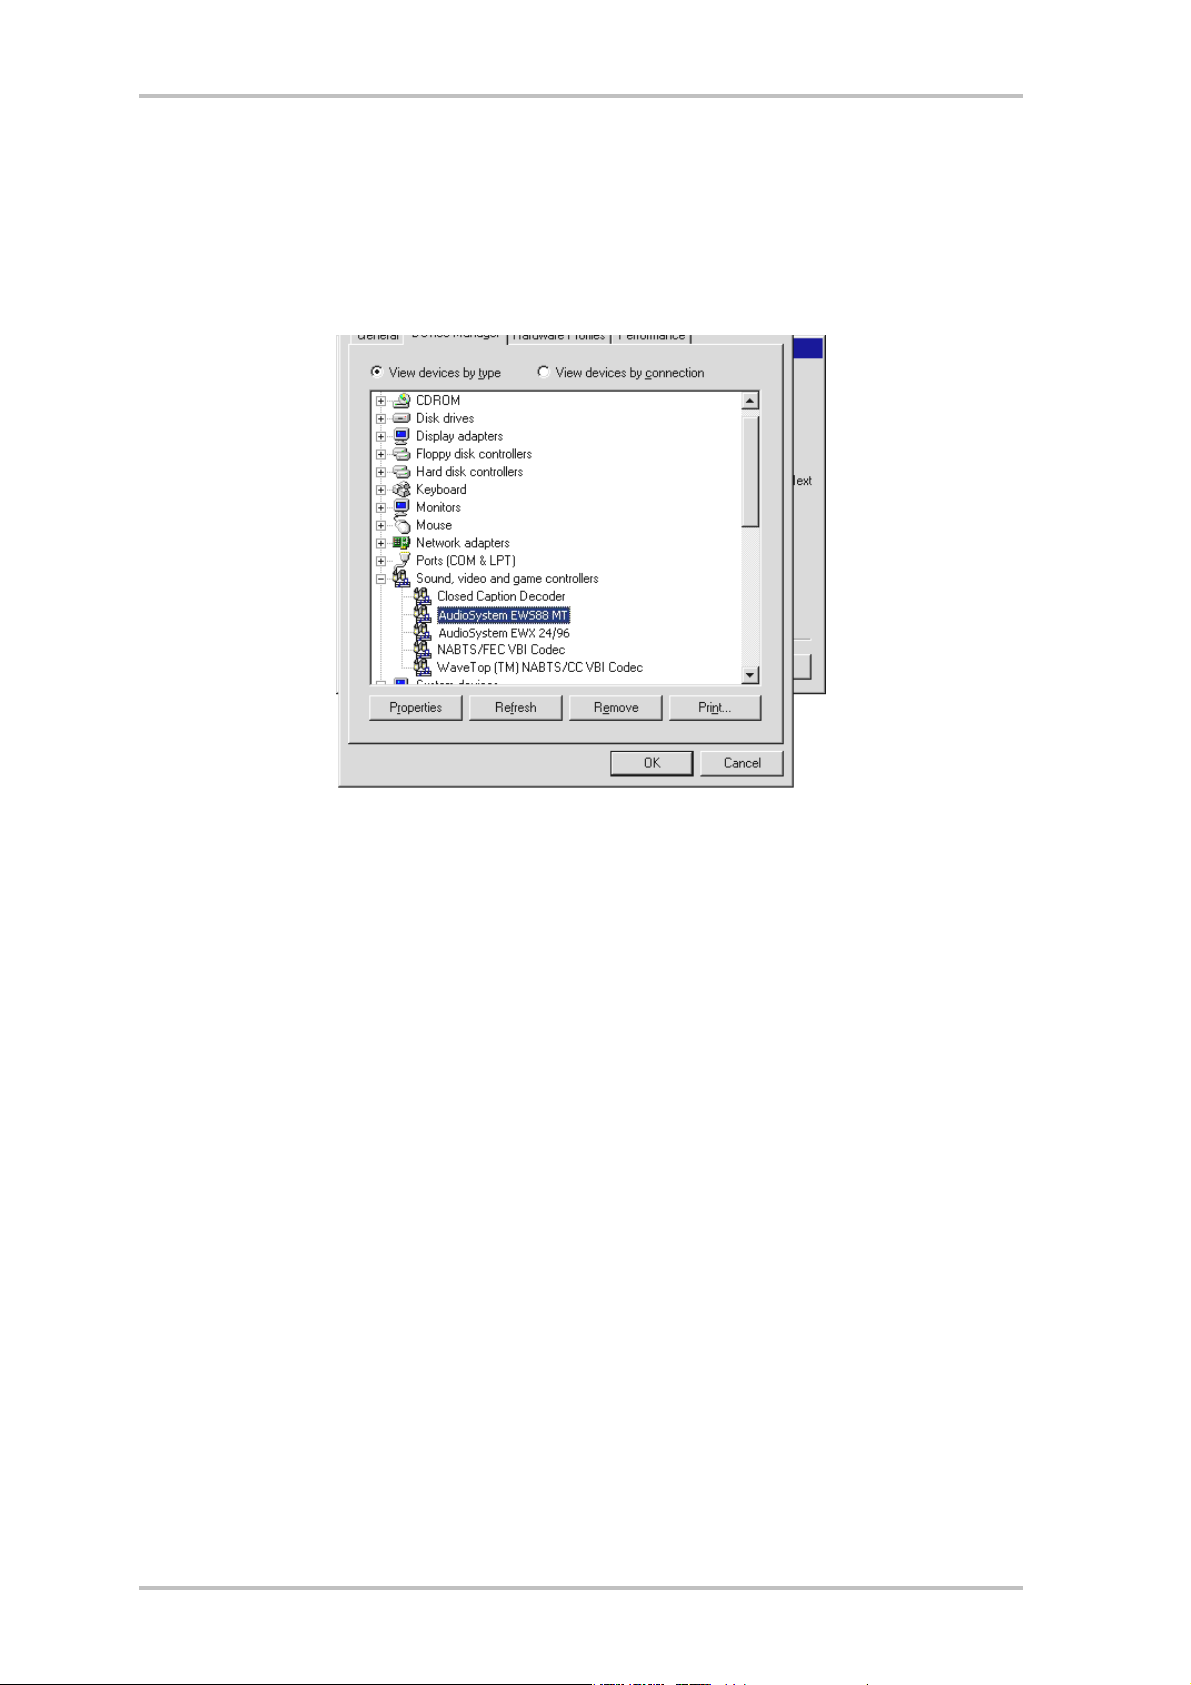
Installed drivers should look like this.
After a successful driver installation, you should verify the correct condition of your Windows
98SE system. The Device Manager presents an overview of installed and recognized hardware
components of your computer. The Device Manager can be found on the Control Panel under
“System.”
If everything is correctly set up, the window should look like this. The figure shows the expanded view of
the “Sound, video and game controllers” branch. To obtain this view, simply click the “+” symbol on the
left side.
Driver installation under Windows Me.
1. Boot your computer after installing the EWS88 MT PCI card.
2. During the boot, the Windows hardware wizard will identify the new hardware as a
“PCI Multimedia Audio Device”. Select here “Specify the location of the driver” and
confirm with “Next”.
3. Activate now the checkbox “Specify a location:”, and enter the path
<CD>:\Driver\. Confirm by clicking “Next”. Alternatively, you can change to the re-
spective directory by clicking on “Browse...”.
4. The hardware wizard will now search for the AudioSystem EWS88 MT driver and will
display the location of the driver. Confirm by clicking “Next".
5. In the final window, the hardware wizard will report that the driver software has been
installed successfully. Close the wizard by clicking “Finish”.
After successful driver installation, the additional bundled software can be added easily using the autorun option(<CD>:\autorun.exe).
MIC 2/8 (English) 13
Page 14
Follow the instructions on the screen to install the various bundled software programs. A particular bundled software can also easily be removed from your system. For this purpose, call
up “Control Panel -> Software” and locate the programs to be removed. Select the various
programs and click “Add/Remove Programs...”.
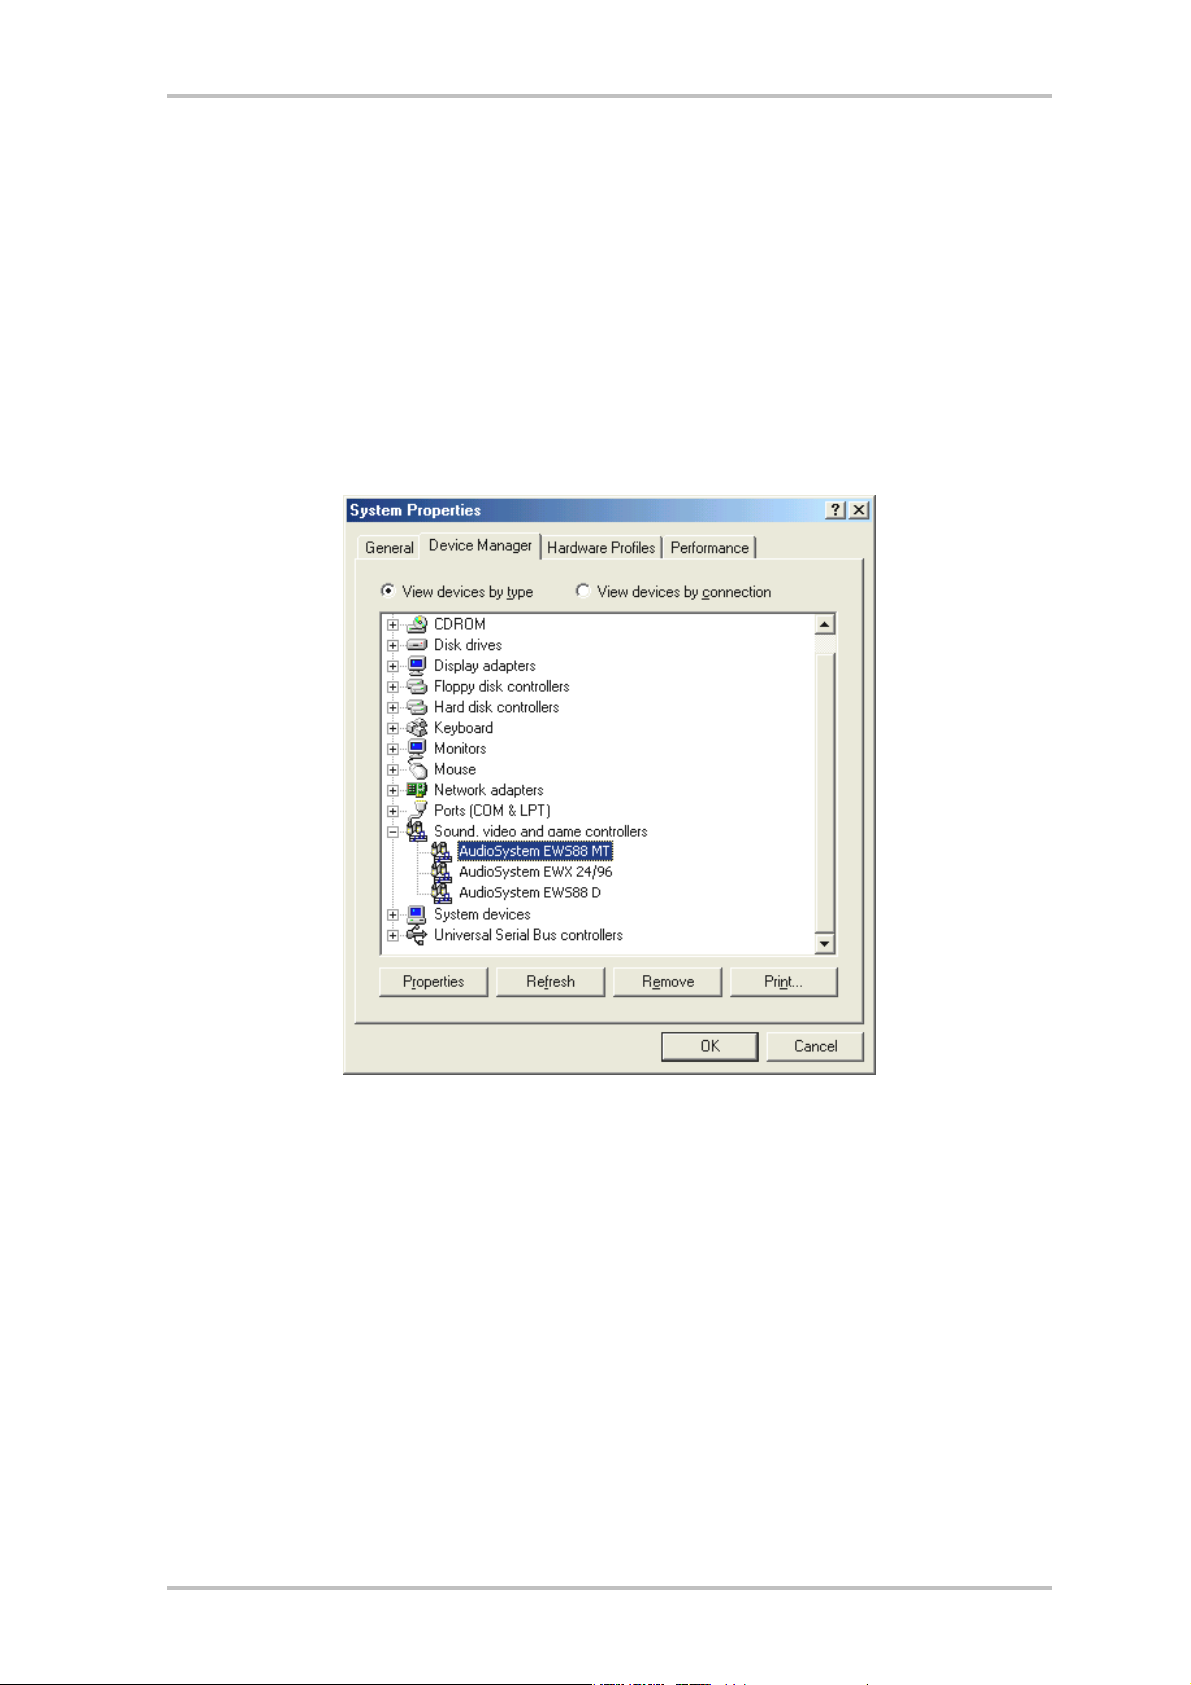
Installed drivers should look like this.
After a successful driver installation, you should verify the correct condition of your Windows
ME system. The Device Manager presents an overview of installed and recognized hardware
components of your computer. The Device Manager can be found on the Control Panel under
“System” > “Hardware”. Then click the “Device Manager” button.
If everything is correctly set up, the window should look like this. The figure shows the expanded view of
the “Sound, video and game controllers” branch. To obtain this view, simply click the “+” symbol on the
left side.
14 MIC 2/8 (English)
Page 15
Installation under Windows 2000.
1. Boot your computer after installing the EWS88 MT PCI card.
2. During the boot, the Windows hardware wizard will identify the new hardware as a
“Multimedia Audio Controller”. Confirm by clicking “Next”.
3. Mark the “Search for a suitable driver for my device (recommended)” checkbox and
insert the EWS product CD if you have not done so already. Click “Next”.
4. The hardware wizard will now inform you that it will search for drivers for a “Multimedia Audio Controller”. Activate the checkbox “CD-ROM drives” and confirm with
“Next”.
5. The hardware wizard will now indicate that it has found a suitable driver for the “Multimedia Audio Controller” on the CD-ROM (<CD>:\driver\). Click “Next” to start
the installation.
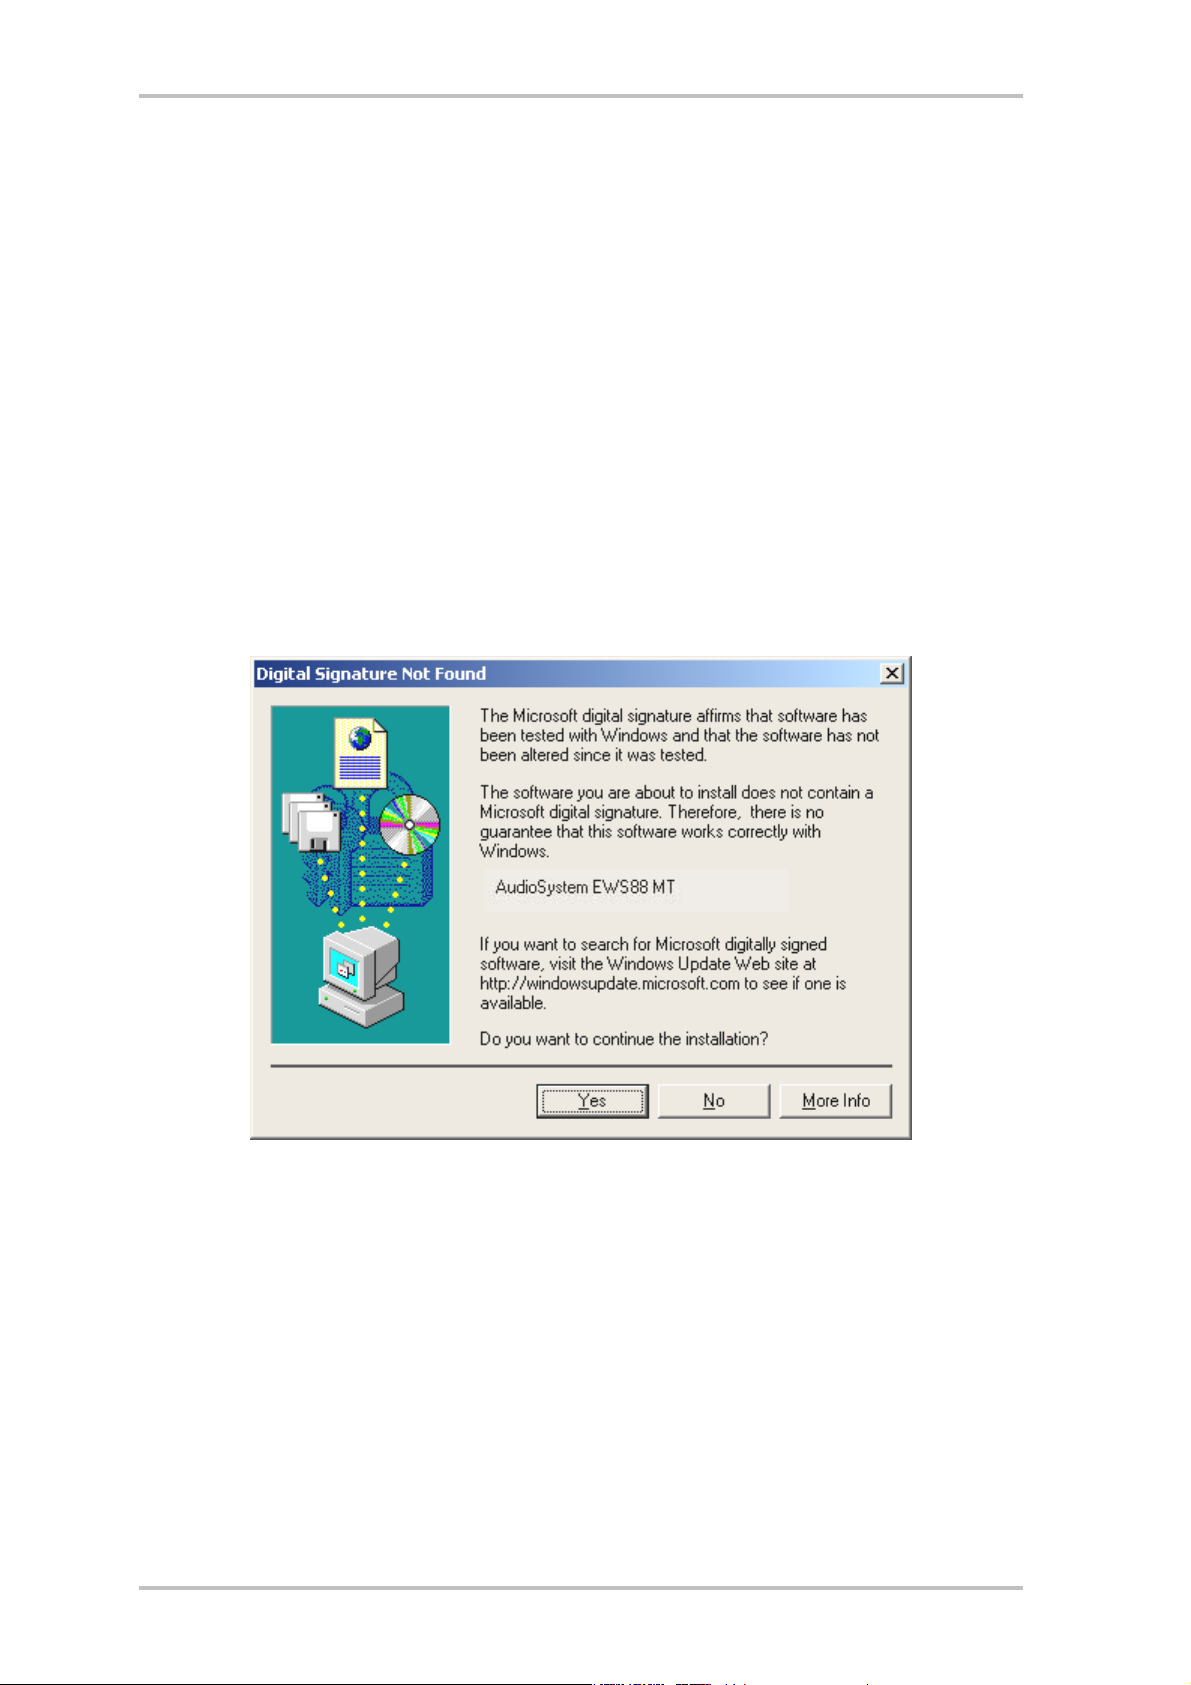
6. The following dialog box may appear at this point or later in the installation:
This is no cause for alarm. Click “Yes” to continue. The installation will now be executed.
If contrary to all expectations an additional request should appear for you to perform some
action and you are not sure about it, then pressing the Enter key is generally a safe action.
If Windows requests a second driver file, please refer to the aforementioned directory on the
EWS MIC8 (2)+ CD-ROM. It is also possible (e.g. if this is the first sound card installation in
your system) that some additional Windows extensions have to be installed. Please have your
Windows CD ready for this purpose.
After successful driver installation, the additional bundled software can be added easily using the autorun option(<CD>:\autorun.exe).
Follow the instructions on the screen to install the various bundled software programs. A particular bundled software can also easily be removed from your system. For this purpose, call
MIC 2/8 (English) 15
Page 16
up “Control Panel -> Software” and locate the programs to be removed. Select the various
programs and click “Add/Remove Programs...”.
Installed drivers should look like this.
After a successful driver installation, you should verify the correct condition of your Windows
2000 system. The Device Manager presents an overview of installed and recognized hardware
components of your computer. The Device Manager can be found on the Control Panel under
“System” > “Hardware”. Then click the “Device Manager” button.
If everything is correctly set up, the window should look like this. The figure shows the expanded view of
the “Sound, video and game controllers” branch. To obtain this view, simply click the “+” symbol on the
left side.
16 MIC 2/8 (English)
Page 17
Installation under Windows XP.
1. Boot your computer after installing the EWS88 MT PCI card.
2. During the boot, the Windows hardware wizard will identify the new hardware as a
“Multimedia Audio Controller”. If you have not done so already, insert the EWS
MIC8(2)+ product CD-ROM now. Next, mark the “Install the software automatically
[Recommended]” checkbox and click “Next”.
3. The hardware wizard will now inform you that it will search for drivers for a “Multimedia Audio Controller”.
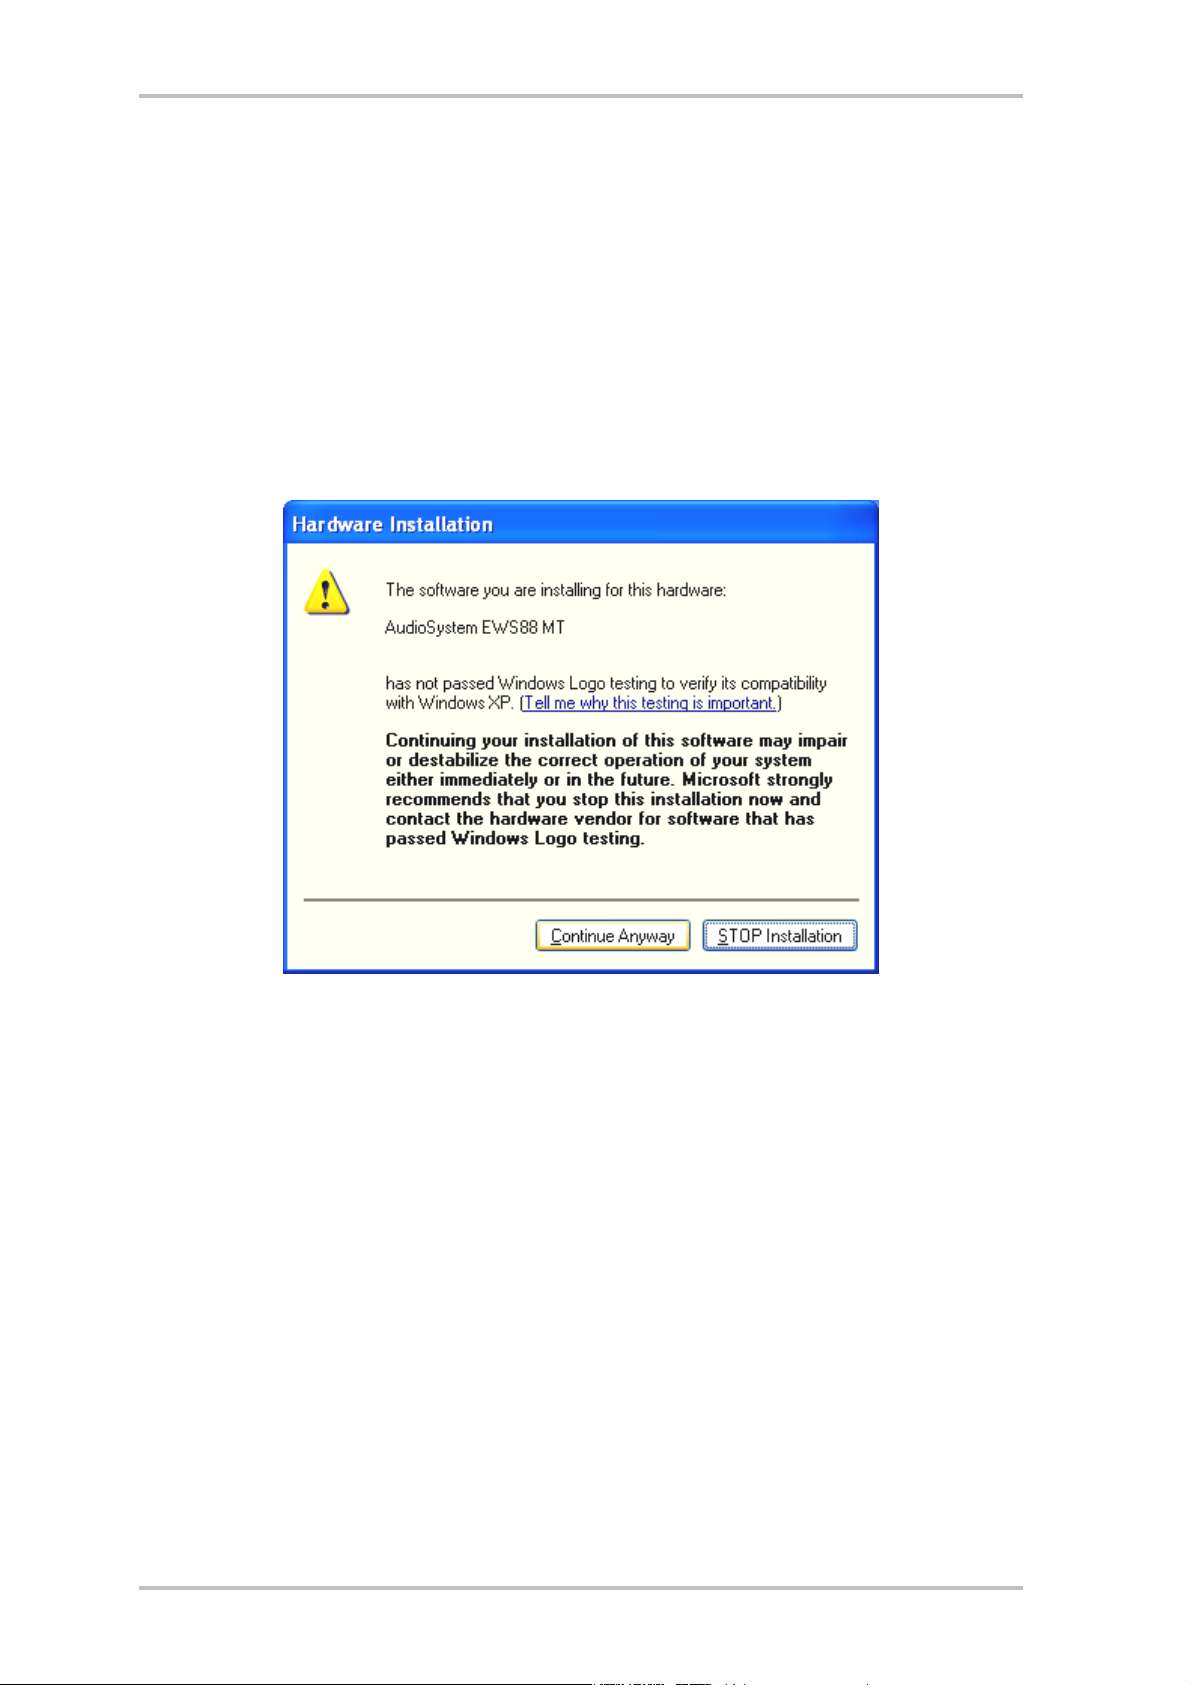
4. The following dialog box may appear at this point or later in the installation:
This is no cause for alarm. Click “Yes” to continue. The installation will now be executed.
5. In the final window, the hardware wizard will report that the driver software has been
installed successfully. Close the wizard by clicking “Finish”.
If contrary to all expectations an additional request should appear for you to perform some
action and you are not sure about it, then pressing the Enter key is generally a safe action.
If Windows requests a second driver file, please refer to the aforementioned directory on the
EWS MIC8(2)+ CD-ROM. It is also possible (e.g. if this is the first sound card installation in
your system) that some additional Windows extensions have to be installed. Please have your
Windows CD ready for this purpose.
After successful driver installation, the additional bundled software can be added easily using the autorun option(<CD>:\autorun.exe).
Follow the instructions on the screen to install the various bundled software programs. A particular bundled software can also easily be removed from your system. For this purpose, call
up “Control Panel -> Software” and locate the programs to be removed. Select the various
programs and click “Add/Remove Programs...”.
MIC 2/8 (English) 17
Page 18

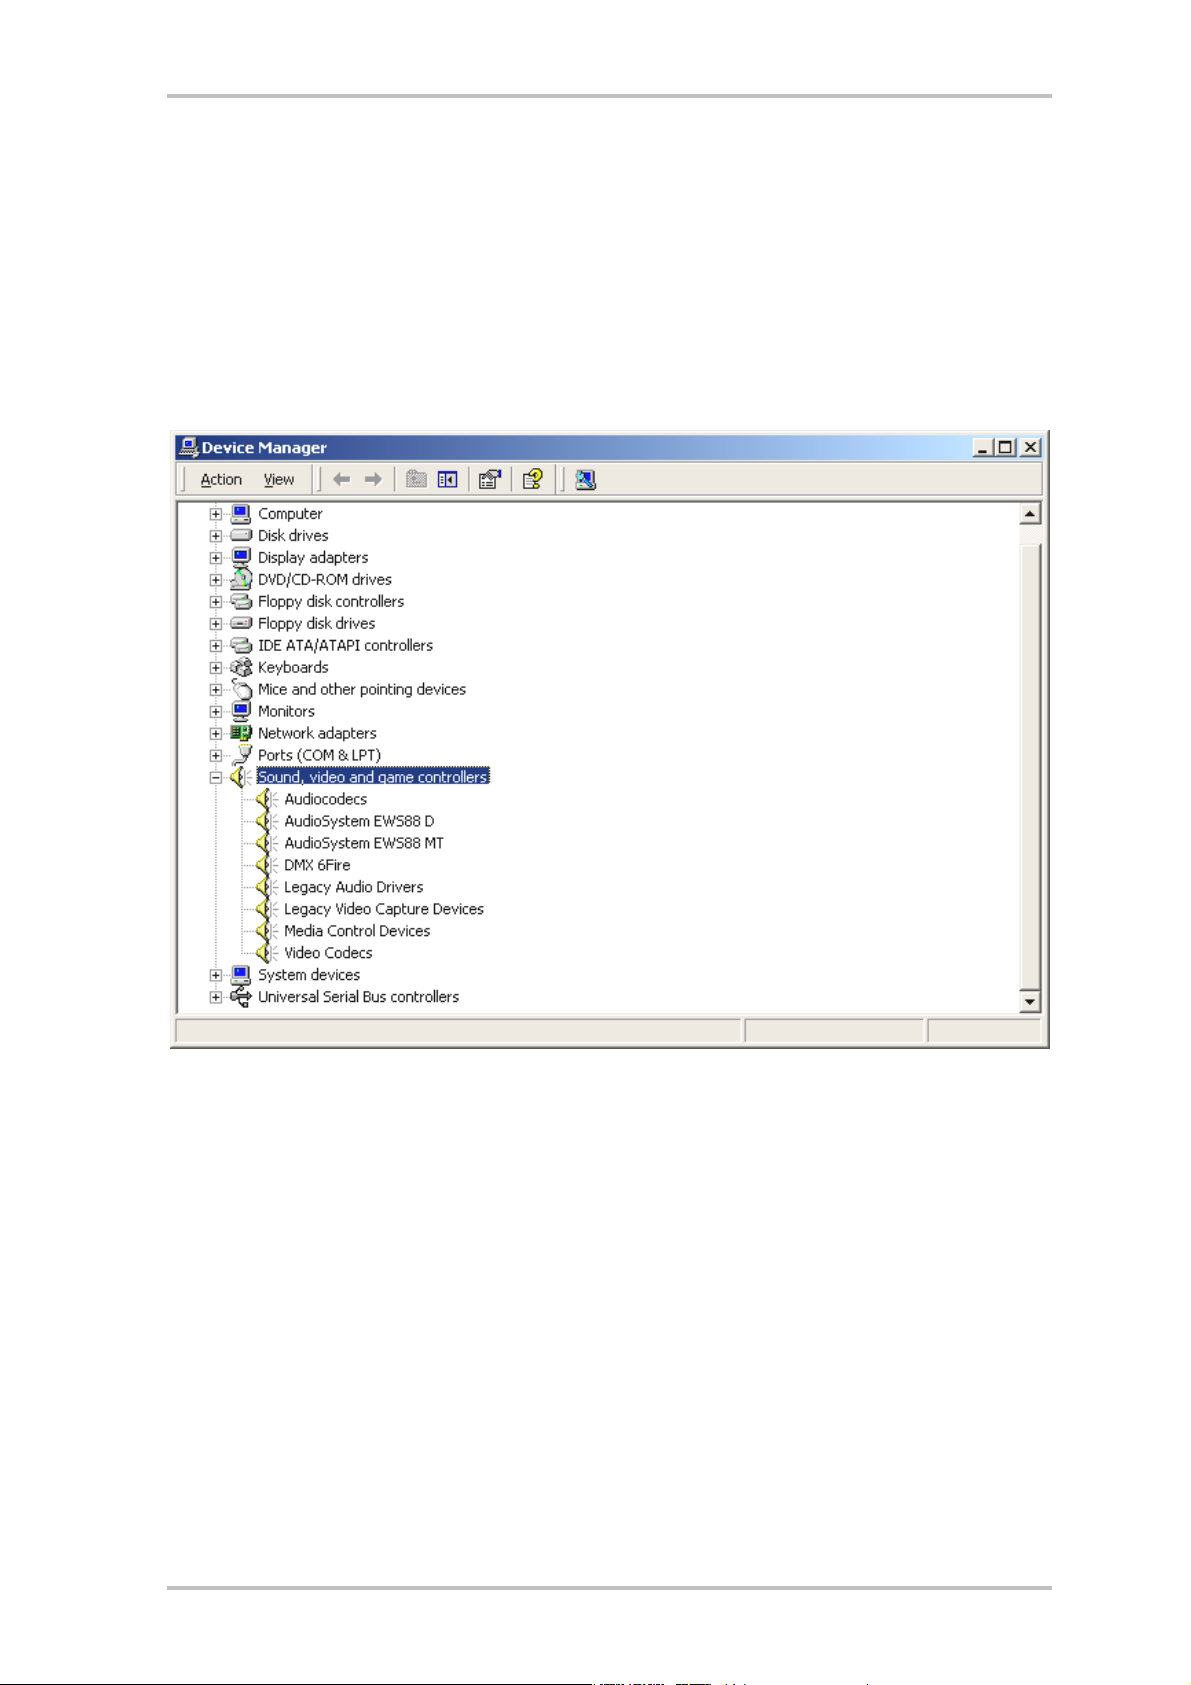
Installed drivers should look like this.
After a successful driver installation, you should verify the correct condition of your Windows
XP system. The Device Manager presents an overview of installed and recognized hardware
components of your computer. The Device Manager can be found on the Control Panel under
“System” > “Hardware”. Then click the “Device Manager” button.
If everything is correctly set up, the window should look like this. The figure shows the expanded view of
the “Sound, video and game controllers” branch. To obtain this view, simply click the “+” symbol on the
left side.
18 MIC 2/8 (English)
Page 19

The EWS 19" module.
A full range of connections in only one 19" rack height unit (1U) - that's the heart of the EWS
MIC system. On the following pages we will be covering the purpose of the individual connectors and controls in detail. For typical sample applications, please turn to page 43.
The rear panel.
A full range of connections in only one 19" rack height unit.
1) Analog inputs. Eight balanced inputs can used with XLR or jack connectors. If one channel
includes a microphone pre-amp the XLR connector is hard-wired to the microphon section
while the TRS connector is hard-wired to the line/instrument input. The sockets on the
front panel of the module can be used as an alternative to the inputs 7 and 8. This disables the signal path of the rear sockets.
Tip: it is not necessary to remove cables plugged into connectors 7 and 8 on the rear
panel when using the sockets on the front panel.
2) Analog outputs. The eight balanced outputs are suitable for jack connectors. Activating
the direct routing on the front panel will send any input signals directly to the appropriate
output (see below).
3) MIDI / WordClock interface. Connect the included adapter cable with two MIDI inputs (IN)
and outputs (OUT) here. Two BNC sockets are also available here for WordClock input and
output.
4) WordClock LED. If a signal is present at the WordClock input, the LED lights and the EWS
MIC module switches completely to WordClock operation if it is being run in stand-alone
mode (without a computer). It does not matter in this case whether the clock signal is
valid. The LED therefore is not a status indicator (in the sense of “synchronization OK”).
5) ADAT & S/PDIF. Both interfaces (IN and OUT) can be equipped with optical waveguides
(not included) as needed. Devices can also be combined - for example ADAT and DAT recorders. A signal conversion, if needed, can be selected in the EWS ControlPanel software
(see page 29) if the module is connected to a computer. When cabling digital equipment,
always verify the synchronization (master/slave). For further information, please see page
39.
In stand-alone operation, incoming ADAT signals (IN) are converted digital-analog (D/A)
and can be picked up at the analog outputs of the module - depending on their channel
assignment (1 to 8).
MIC 2/8 (English) 19
Page 20

Conversely, all analog input signals are present at the ADAT-OUT when the unit is in
stand-alone mode. Gain controllers, phase setting and filters are upstream to ensure an
optimal signal prior to the analog-digital conversion.
If you are using your EWS MIC module with a computer, please note the wide range of
routing options which are described in detail in the chapter covering the EWS ControlPanel starting on page 29.
6) To-Host interface. To take full advantage of an EWS MIC module with a PC, it must be
connected to a type EWS88 MT PCI card (version 2.0 or higher) with the included special
cable (only part of the EWS MIC2/8 + version). This card is included with the EWS MIC2+
and EWS MIC8+ products. Please ensure that the connector strips are firmly screwed onto
the 19" module and PCI card, as the weight of the cable can otherwise cause it to come
unplugged.
7) Switch: digital clock 44.1 or 48 kHz. If you are using a stand-alone EWS MIC module, i.e.
without a computer (as a microphone preamp or ADAT converter, for example) use this
switch to set the sampler rate for all digital interfaces working in master mode. For detailed information on digital synchronization, please turn to page 39.
8) Switch: ADAT or S/PDIF. This switch refers to the signal format to be present at the optical
output when in stand-alone mode. When set to S/PDIF, both channels (7 and 8) are converted and output digitally (in other words: the eight channels are not mixed).
9) Switch: +4 / -10 dB. Globally adjusts the level of the analog outputs to your existing stu-
dio equipment.
10) Switch: Ground Lift. Activate “Ground Lift”, to separate the signal ground from the unit
ground. This can be used to avoid undesirable hum pickup. It is better to eliminate the
source of the hum, however, as activating the ground lift can reduce the signal-to-noise
ratio.
11) AC power. Connect the included AC power cable. Please note: external power is required
even if the device is connected to a computer (PCI card), as the device is not supplied
with power via the data cable in the same way as some USB devices or the AudioSystem
EWS88 MT. The integrated power unit automatically detects the power applied (110
volt/60 Hz or 230 volt/50 Hz).
12) AC power switch. Turns the power on and off.
20 MIC 2/8 (English)
Page 21

The front panel.
As the name suggests, the only difference between the EWS MIC2 and MIC8 modules is the
number of available microphone channels. On the EWS MIC2 module, only channels 7 and 8
are available for microphone signals. As a result, there are fewer buttons on the front panel
for channels 1 to 6.
Three sockets, nine pots and 25 (48) switches for greater convenience in the studio.
1) Inputs 7 and 8. As an alternative to the inputs 7 and 8 on the back, these can be used
for two sources that you may want to change from time to time. Inserting a jack or XLR
plug into either of the sockets disables its counterpart on the rear panel.
2) Headphone output. Connect stereo headphones here. You will hear the mixed signal
of all (!) channels input to the device including audio signals being output by the
computer. By the way: thanks to the choice components used, the headphone amp
will satisfy professional demands and should be used - if possible - in preference to
monitoring via a mixer or even an ADAT recorder.
3) Mono switch. Do you need to quickly check the microphone phase position or the
sound of the mono mix? Just press the button and find out how nice it is to have two
ears.
4) Headphone volume. Even this can be adjusted as needed.
5) GAIN pots. Here you can set the gain of the analog inputs over a range of 20 dB, or 60
dB with the microphone preamp activated, BEFORE the A/D conversion.
6) Signal and clip LEDs. If an input signal is present, the signal LED for that channel will
light up blue. At around -1 dB (the “0 dB mark” is at a solid +20 dBu or +60 dBu), the
red LED lights to warn of impending distortion.
7) Line/Mic switch. Here you can set whether a signal with line level (e.g. synthesizers,
effects) or a microphone signal is being applied to the input.
8) Phantom power. If your microphone needs its own 48 V power supply, it can be activated per channel as required.
MIC 2/8 (English) 21
Page 22

9) Subsonic filter. Unpleasant impact sounds and associated signal peaks - such as
those caused by an over-athletic singer - can be filtered out for the most part prior to
the conversion. Just press the button and enjoy.
10) Phase switch. Reverse the phase position of a microphone signal with this switch.
This can be helpful to prevent signals from canceling one another out (interference).
11) Direct. Activate this switch to transfer an audio signal applied to the analog inputs
directly to the corresponding output. This function is useful in a number of different
respects:
In stand-alone mode, you can use the 19" module as a simple microphone mixer and
preamp (in conjunction with the mute buttons). If you already have a small mixer
which you are using for live recording purposes, we would like to recommend using
the preamps of the MIC2/8 module - the SPL sound will convince you.
When recording with the PC, use the direct mode to monitor input signals directly,
without a trace of latency. This is also possible using the ASIO 2.0 interface. Sometimes quickly pressing a hardware button is simply faster and more intuitive than
three mouse clicks, however.
Sometimes the Direct button is useful simply to check whether an analog signal is actually present at the MIC module and hasn't gone astray in the depths of the computer.
12) Mute button. As seen on your mixer, TV remote and clock radio.
22 MIC 2/8 (English)
Page 23

The connectors of the PCI card.
If you've purchased the Plus version of the AudioSystem MIC2 or MIC8, you can look forward
to a flexible system for routing a variety of signal sources. In addition to the connections on
the 19" module, the following connections are available on the included PCI card:
13
2
11
EWS88 MT PCI Card Version 2.0
16
9
7
5
4
1
8
EWS88 MT PCI Card Version > 2.0
MIC 2/8 (English) 23
Page 24

1) Digital input, coaxial. The input of the PCI card can accept signals in S/PDIF format (up
to 24-bit). When recording, ensure that the card is correctly synchronized (slave mode,
see page 39 “Cascading of multiple EWS systems and synchronization.“).
2) Digital output, coaxial. Signals in S/PDIF format (up to 24-bit) are available at the out-
put of the PCI card. The output can also be used to send raw digital data (e.g. AC3 or
DTS signals to an external Dolby Digital decoder).
3) System OUT / separate analog output. There's more to this inconspicuous little mini-
jack socket on the PCI card than meets the eye - a complete “sound card” which can
be fully isolated from the “musical properties” of the EWS system. For example, you
can have all sounds from the operating system sent to this output to prevent spoiled
recordings whenever a Windows system sound comes between you and your sequencer. Tip: TerraTec's product range also includes economical and visually pleasing
speaker solutions for entertainment applications. Maybe a reason to have a closer
look at our consumer solutions as well. ;-)
4) Connector for EWS MIC module. Connect the 19" module here. Please ensure that the
connector strips are firmly screwed onto the 19" module and PCI card, as the weight of
the cable can otherwise cause it to come unplugged.
5) Internal connection (only!) for EWS88 MT front module. This connection is not de-
signed for use with EWS MIC modules. Both modules cannot be used simultaneously.
Former EWS88 MT users must read the information on page 10 with care!
6) Internal CD audio input 1 and 2. The analog connections are electrically independent
(decoupled) and can be used simultaneously. Their volume controls are not in the
EWS ControlPanel, but in the standard Windows mixer. CD audio playback via these
internal connections is realized using the System-OUT described above, not the “musical” part of the EWS system.
Suitable cables are normally included with your CD drive or can be purchased separately.
®
7) EWS
Connect Sync-IN connection. For the internal synchronization of up to 4 EWS PCI
cards (5 contacts, the plug must remain on the master card). For more information,
please read Chapter “Cascading of multiple EWS systems and synchronization.” starting on page 39.
®
8) EWS
Connect Sync-OUT connection. For the internal synchronization of up to 4 EWS
PCI cards (3 contacts).
9) Jumper 1. Sets the digital input:
1-2 -> Coaxial S/PDIF on the PCI card active.
2-3 -> Digital input on the MIC module active (ADAT or S/PDIF).
24 MIC 2/8 (English)
Page 25

The drivers.
Note: The driver designations are based on the PCI card of the complete system and are thus
called “EWS88 MT”. This does not have any effect on the interaction of the modules, however.
The AudioSystem EWS MIC2+/MIC8+ features a range of drivers for a variety of applications.
The drivers support all bit rates between 8 and 32 bits with all common sample rates between
8 and 96 kHz
system always automatically sets itself to the sample rate with which an application is recording or playing back. This prevents quality losses due to internal sample rate conversions.
There are exceptions, however, which we will be covering below.
And now to the individual drivers.
The Wave driver.
In most Windows programs, you will encounter drivers with the designation “EWS88 MT
Wave” for recording and playback. In order to address the inputs and outputs of the EWS MIC
system, you will also find a numbering that corresponds to five input/output pairs: 1/2, 3/4,
5/6 and 7/8, as well as S/PDIF Left/Right. Please note that they define the physical input or
output in the EWS ControlPanel. The “EWS88 MT Wave ½” playback driver is thus not automatically considered to be identical to the analog outputs 1 and 2 of the MIC module.
Q
. As a rule, the sample rates are not “interpolated”. In other words, the audio
If you are using multiple cascaded EWS MIC systems, the operating system generally numbers
the driver names from 1 to 4. “Generally” in this case means that there may be exceptions
which are unfortunately beyond our control.
Depending on the software, the driver names are displayed with supplements that refer to the
audio architecture of the operating system: MME, WDM or DirectSound (see below for more
information).
Last but not least, there's the “EWS88 MT Digital Mixer” driver (for recording only). If required,
it records the sum of all of the audio signals coming together in the system. It can thus also
be used for a digital resampling of all driver sources.
The System-OUT driver.
We have a special treat for you in the form of the lowly “EWS88 MT System Wave” driver for
the System-OUT output on the slot plate of the EWS88 PCI card (see page 23). An 18-bit converter delivers punchy sound - we suggest using it for the playback of Windows system
sounds (pearls before swine, one could say...) or as an independent output for audio editors
or software synthesizers. The latter benefit from the extremely fast DirectSound part of the
driver - you should easily reach latency values of less than 10 ms with a software synthesizer.
Q
With the exception of the "EWS88 MT System Wave" system sound driver; this part of the card works
with an 18-bit / 48 kHz AD/DA converter.
MIC 2/8 (English) 25
Page 26

Its counterpart, “EWS88 MT System WaveRec” lets you record signals from your connected CD
drives. However, we recommend reading the CD audio data out digitally for quality reasons.
The ASIO driver.
Programs that support Steinberg's ASIO (or ASIO 2.0) interface will display the ASIO driver of
the AudioSystem EWS MIC2+/8+ in the relevant dialogs. With ASIO, programs achieve extremely short delays (latency) during audio recording and playback. That way, a latency averaging 7 to 20 ms should be achievable. On fast, cleanly set up systems, latency can be reduced to 1.5 ms at a sample rate of 96 kHz!
The ASIO driver is listed in compatible programs under “ASIO for EWS88 MT/D”. The inputs
and outputs (generally “busses”) available in the programs are called “EWS88 MT (n) Out”,
wherein “n” is used to distinguish multiple EWS MIC systems (1 to 4). In many cases only the
left channel of the output pair (1/2, 3/4, 5/6, 7/8 and S/PDIF Left/Right) is stated, it applies
for both channels however.
If you have cascaded multiple EWS systems in a PC, you can explicitly enable or disable each
card for ASIO in the ASIO window of the EWS ControlPanel. For example, this permits two synchronized EWS systems to be addressed together under one ASIO driver (e.g. under Cubase
SX) while a third system is available to another application (e.g. CoolEdit) under the MME
driver.
26 MIC 2/8 (English)
Page 27

The GSIF driver.
The GSIF driver by AudioSystems is also visible only in certain programs. The GigaStudio
sampler application and other Nemesys products can also access the hardware in a very fast
and direct manner. The outputs available in the individual programs are also called “EWS88
MT/D GSIF (n)” in this case and are routed - as described in detail below in Chapter “The ControlPanel.” starting on page 29 - to the digital mixer of the card or the outputs on the MIC
module.
The MIDI driver.
A driver is also available for the playback of MIDI information via the MIC module's MIDI IN
and OUT sockets on the splitter cable. The driver designated as “EWS88 MT MIDI 1” (or MIDI 2)
in this system, and it can be selected in any situation in which its use would be appropriate.
Tip: If MIDI files being played using the Windows Media Player are also to be forwarded to
external devices, open the “Sounds and Multimedia Properties” dialog in the Windows Control Panel and set the MIDI output to the driver specified above (see also the chapter
MIC 2/8 (English) 27
Page 28

Installing the driver software., page 12).
In detail - special properties of the drivers.
The following contains in-depth information for those with the need to know. Less experienced users won't encounter any problems if they skip over this section.
32-bit data transfer.
The drivers support a special data transfer format known as “32-bit unpacked”. Audio data
streams are transferred to the computer's main memory via the PCI bus. The PCI bus features
32 “lines” (32-bit). A PC generally takes care to ensure that its data lines are well-utilized. For
this reason, 8-bit audio data is always sent on its way in groups of four packets (4 x 8 = 32),
and 16-bit data (2 x 16 = 32) in groups of two (top of diagram).
The situation is a bit more complicated from the processing standpoint with 24-bit audio
data: suddenly there's “only” 24 sweet-sounding bits available, i.e. 8 bits are “missing”. The
“24-bit packed” process solves this problem in the following manner: the computer CPU (your
Pentium, for example) divides the 24-bit data into multiples of 32 (middle of diagram). That
costs computing power and isn't really necessary.
The “32-bit unpacked” process fills the remaining bits with zeroes and the driver sends suitable 32-bit packets on their merry way. Most commonly-used applications currently support
this process, which is particularly easy on the computer's resources (bottom of diagram).
DirectSound & WDM.
It goes without saying that the drivers of the EWS system also support Microsoft's DirectSound or DirectSound 3D interface. What's more, the software complies strictly with Microsoft's WDM specification. WDM (Windows Driver Model) is a recent driver concept from that
popular Redmond-based software manufacturer which also involves a number of innovations
in the audio sector. For example, the drivers are able to play back audio data streams from
28 MIC 2/8 (English)
Page 29

multiple applications in parallel (multi-client, a “luxury” that faithful TerraTec customers have
enjoyed since 1997).
WDM sample rate (SR) interpolation.
The multi-client capability of the WDM architecture also permits the simultaneous playback of
multiple audio data streams with differing sample rates. The sampler frequency used for all
streams is based on the file called up first. All further data streams - those called up during
the run time of the first file - are interpolated as required and their pitch is not affected.
An SR conversion/interpolation does always result in a certain loss of quality, however. You
should therefore ensure that you do not use several programs simultaneously with differing
sample rates for applications in which the highest possible audio quality is vital. For example,
it's best to only have the playback software running when transferring a piece of music at 44.1
kHz to a DAT recorder.
WDM kernel streaming.
WDM kernel streaming also represents a new technology for Microsoft. Like established models such as Steinberg's ASIO interface, kernel streaming permits extremely fast access to the
audio hardware. The deployed software (such as audio/MIDI sequencers or software synthesizers) must support the WDM function directly, however. At the time of printing, a program
that we know and have tested is Cakewalk's “Sonar” recording software.
The ControlPanel.
The ControlPanel is - next to the drivers - by far the most important piece of software in the
package. Here you can configure your AudioSystem to suit any given situation, reduce volumes, load, save, and much more.
Unlike other “mixers” for PC audio or sound cards, the EWS ControlPanel is a tool in which
certain settings are configured once for a given task and then rarely or never changed. The
chip technology on which the AudioSystem is based provides possibilities that our software
lets you use to their fullest. Depending on the complexity of your setup, the extensive routing
options may require a bit of concentration. Just one request: please take 5 minutes to read at
least the sections on routing and the digital mixer in one sitting - it simplifies quite a bit. Go
for it!
A note for EWS88 MT owners: Be sure to install the latest version of the EWS ControlPanel
software (1.03.35.12X or later) as earlier versions do not support the enhanced routing options
of the MIC module.
The EWS ControlPanel will automatically recognize the replacement of the 5¼" front module
with a 19" MIC module. As the input gains can be adjusted directly using pots on the module
itself, the mixer-side analog input levels are superfluous.
MIC 2/8 (English) 29
Page 30

The “Digital Mixer” page.
The AudioSystem EWS features an internal digital mixer which you can bypass if you don't
need it.
The digital mixer mixes all of the signals output by the drivers as well as those present at the
physical inputs. Switch between the “Wave” and “Input” pages to view and control the levels.
The sum of all signals mixed here can be adjusted with the master volume and finally sent to
the PCI card outputs 1+2 and/or S/PDIF via the “Digital Mixer” entry in the routing dialog.
Tips for operation.
You can change names in the digital mixer display to improve the overview. Simply doubleclick WavePlay 1/2 … 3/4 … or Input 1/2 … 3/4 … and enter a new name (for example that of
the connected device).
Hover over one of the colorful VU meters briefly with the mouse cursor and the current peak
signal level will be displayed.
The VU displays can be disabled with a right-click to conserve system resources.
A mute switch silences the relevant signal completely, whereas it can still be heard faintly
when the fader has been pulled all the way down.
Solo mutes all channels except for the currently selected one.
Unmute all restores the muted channels.
Unsolo all restores the channels set to solo to their normal state.
Post shows the post-fader levels of the signals leaving the mixer.
The stereo link function (enabled by default) permits the left and right signals to be adjusted
simultaneously.
30 MIC 2/8 (English)
Page 31

Internal resampling.
As described above, the mixed signal can also be recorded again! The recording driver provided particularly for this purpose (“Dig. Mix Record”) can be selected in all commonly-used
Windows audio applications.
The “Settings” page.
The Master Clock.
Here we're dealing with the sample rate used by the AudioSystem EWS MIC 2/8. This is a very
important point, as the card can be clocked by an external signal (External, e.g. from a DAT
recorder) or it can set a sampler rate itself and provide this signal to other devices.
You can choose from all commonly used sampler rates from 8 to 96 kHz - the actual bit rate is
not important at this point. In the case of external synchronization (i.e. via a signal applied to
the digital interfaces or the internal connection to cascade multiple cards), the external sampler rate will be displayed. If no signal is available or the connection has been interrupted, the
message “No Signal” will be returned.
The audio controller of the PCI card does not feature a sample rate converter (exception: the
System-Out driver). This module - which is common on sound cards - normally lets you play
back signals with a variety of sampler rates by “interpolating” the sampler rates in real time to
a specific frequency as needed.
An example: Your system is being clocked externally by a DAT recorder at 48 kHz. In your audio editor, you are currently working on a file with a frequency of 44.1 kHz. While you're monitoring this file, an action prompts Windows to play a systems sound (22.05 kHz). All of these
signals can be heard at the same time at 48 kHz - the externally-specified frequency. Everything sounds normal, even though the audio files are not being played at their actual frequency. You can detect a difference when listening closely, however, as the audio data has
MIC 2/8 (English) 31
Page 32

been modified in real time by the sample rate converter. The quality thus suffers under this
converter - which is otherwise quite practical. As the AudioSystem EWS is not a sound card in
the conventional sense, and you would probably hit the ceiling if it came to light that half of
your tracks were accidentally recorded with an interpolated sampler rate, we have chosen not
to provide a sampler rate converter.
Instead, the sampler rate is dynamically adjusted to suit the current audio data stream. This is
realized without the slightest loss in quality - as you would expect from a professional system.
Please note, however, that you will get an error message if you try to simultaneously play back
multiple files with different sampler rates. While it is possible to play back audio data from
several programs at the same time, they must all use the same sampler rate. (You should also
ensure that the “Wave Playback/Record Mode” is set to “Multi-Application”. More on this
below.)
The “Sampler Rate Locked” switch also permits the sampler frequency to be set to a fixed (or
externally specified) value. This will prevent the accidental use of sampler rates other than
the intended one.
Example: You would like to “run” a complete production at 96 kHz. Lock the sampler rate at
96 kHz to prevent audio material with a lower rate from “sneaking in” - you'll receive an error
message if this happens.
The I/O board.
An extremely simple section of the EWS ControlPanel. If the MIC2/8 19" module should ever
get separated from the card (pretty unlikely if the screws are tightened), you will need to recalibrate the converter. This process takes exactly 250 ms and doesn't hurt a bit. However,
you should always be sure not to dock or separate the rack from the PCI card during operation. This could damage them.
S/PDIF Out.
Here you can specify the inclusion of protective information in a signal that you are sending
across a digital interface. It is possible to add copy-protection information (original) to your
recording when transferring it to another device. This can be useful when recording a composition to DAT or a MiniDisk as a demo to prevent (digital) copies from being made.
· Copyright adds a copy-protection ID to the signal or filters it out when deactivating
copy protection. This function sets the so-called “copy protection bit” which ensures
that no digital copies can be made of the signal.
· Original activates the so-called “generation bit”, permitting exactly one digital copy to
be made. Disabling this function sets the bit to 0 - you can then copy to your heart's
content.
· Non-Audio adds information to the data stream that defines it as “anything, but not
audio” so that it can be reproduced in RAW format (e.g. for AC-3 / DVD Audio, see below).
32 MIC 2/8 (English)
Page 33

The DMA buffer transfer latency.
A long term, but a very useful one. Here you can determine the speed with which an application such as a software synthesizer can access the Windows drivers (with the exception of the
SystemOut driver, see page 25). You might think faster is better, but there's a catch. The setting is system-dependent and - if the system is too slow - an excessively low value will result
in audible dropouts during recording and playback. If you detect dropouts when playing back
audio tracks with your hard disk recording program, increase the DMA buffer transfer latency.
The “tuning” of your application is also important in this regard, however. Many programs let
you configure the audio buffer (in this example: WaveLab) and ignore the settings made
within the EWS ControlPanel..
Audio setup in Steinberg WaveLab.
A tip for balancing: If speed is important - i.e. a low delay during playback - try to keep the
number of buffers and their size as low as possible. Next, lower the DMA buffer transfer latency in the EWS ControlPanel step by step. The drivers are cleanly programmed and have
been designed for speed. With a decent system, you should also achieve decent values that
are a joy to work with.
Note: The DMA buffer transfer latency settings have no effect on the performance of the ASIO
or GSIF drivers (see page 26). The DMA buffer transfer latency is of great importance for the
optimization of kernel-streaming applications such as Sonar, however.
MIC 2/8 (English) 33
Page 34

Wave playback/record mode.
· Multi Track
If this function is enabled, the driver optimizes all input and output devices (WavePlay
(Rec) 1/2, 3/4, etc.) for use under a single software application. Multi track mode thus
ensures that all channels are absolutely synchronized during recording and/or playback. Be sure to use this function during multitrack recording and playback.
· Multi Application
If this function is enabled, the driver optimizes all input and output devices (WavePlay
(Rec) 1/2, 3/4, etc.) for use with multiple software applications simultaneously.
Please note: The “Multi Track” and “Multi Application” settings only affect kernel-streaming
applications (Sonar), not ASIO or GSIF applications.
The “Settings Mic2/8” page.
Which input should be routed to which output? Directly from analog to digital? Or run it
through the computer first? You can answer all of these questions in this window by adjusting
the settings in the pop-up menus to suit your needs.
All of the settings of the 19" MIC module are thus configured on the “Settings Mic2/8” page.
34 MIC 2/8 (English)
Page 35

But first the relevant terms:
· Line/Mic refers to the numbered analog input pair.
· Digital In either stands for the numbered channels of an 8-channel ADAT or a (“ste-
reo”) S/PDIF signal which can be applied to the optical input alternatively to the ADAT.
If an S/PDIF signal is present, no signal will be available at the “Digital In” channels 3-
8.
· PCI In goes directly to an application via the connector cable - i.e. a WaveRec driver
corresponding to the number pair. In addition, the signal is also present at the routing
input of the EWS88 MT PCI card (see page 31)
… with which the routing options have essentially introduced themselves. You should simply
bear in mind that not all combinations are possible at random, and that the channel number
pairs of an input are always routed to the corresponding outputs (i.e. 1/2 to 1/2, 3/4 to 3/4,
etc.).
Clock Source.
A word in advance: If you have multiple EWS88 PCI cards (MT or D) connected via the EWS
Connect synchronization, you should set the EWS88 MT PCI card connected to the 19" module
as the master card. If you are using multiple EWS MIC2/8+ systems, we recommend
synchronizing these systems via the WordClock interface of the MIC module. The digital
inputs of all MIC modules can thus be used in independent mode (see page 38).
The ClockSource LEDs indicate the input that has the sync signal that you can use to synchronize the EWS Mic system (as a slave). These can be the WordClock interface and/or the optical digital input (ADAT or S/PDIF, depending on what is connected) on the 19" module.
If more than one connected device provides a suitable sync signal, use the switches to select
a source.
Select Digital Out.
When using the EWS MIC2/8 module in stand-alone mode, the optical digital output can be
toggled between ADAT and S/PDIF format at the press of a button. If you have connected the
module to the PCI card, click the output format here with your mouse. When used with the PCI
card, the switch on the 19" module is disabled.
When set to S/PDIF, both channels (7 and 8) are converted and output digitally (in other
words: all eight channels are not mixed for output via S/PDIF). This ensures that the microphone inputs can also always be converted to S/PDIF format (remember: the MIC2 microphone pre-amps are assigned to channel 7 and 8).
MIC 2/8 (English) 35
Page 36

Signal routing of the EWS MIC8(2)+ systems
36 MIC 2/8 (English)
Page 37

The “About” page.
The “About” page contains - in addition to a silkscreen-like impression of our headquarters in
Nettetal, Germany - important system information that may prove useful when contacting our
hotline or prior to driver updates. Hover over the info area with the mouse cursor for additional information.
The mixer icon on the Windows taskbar.
The mixer icon appears in the Windows system tray (in the lower right corner, next to the
clock) whenever the EWS ControlPanel has been loaded. Right-clicking the icon offers direct
access to a number of functions that are also available from the Panel itself - please see the
sections above for further information.
· Show / Hide. Displays the panel or hides it.
· Select Card. In cascaded audio systems, select the card you want to control here. You
can also do this using the keyboard. Press the keys 1 to 4 on the numerical keypad.
· Select Page. Directly selects a page of the panel. The dialogs for scene management,
colors and ASIO/GSIF settings can also be selected via the keyboard.
· Advanced. “Reset System Out”: It may occasionally become necessary to reset the
System output (see page 23). You should do so whenever the signal on this output is
distorted. “Rescan master/slave configuration” seeks the master card (that you have
set via the type of EWS Connect and/or WordClock connections). “DirectMonitoring”
transfers the control of the digital mixer to an ASIO application. External signals can
thus be output via the digital mixer without latency.
· Exit. ... or Alt+F4. Done. Finished. Basta. Outtahere. That's all, folks.
MIC 2/8 (English) 37
Page 38

Managing scenes.
In modern digital mixers it's known as “total recall” - PC users would call it “load” and “save”.
The “Scene” button at the right-hand edge of the EWS ControlPanel lets you save all of the
card's settings as a scene, or to load or delete previously-saved scenes. Use “Cancel” to exit
the dialog without saving.
Multiple card mode and managing cascaded cards.
The card selector (Select) is also always accessible at the right-hand side. Here you can select
the display mode for multiple cards of the EWS family, if installed. The master card will be
recognized automatically and marked with an (M). Please note that the scene memory function always saves all settings for all of the cards.
You will still have the option of using the individual cards independently at different sampler
rates, even if the synchronized cards are linked via the EWS
®
Connect or WordClock connections. At the right-hand side of the ControlPanel you can choose whether you would like to
use the EWS systems independently or in synchronized mode (Master/Slave).
If you select Master/Slave mode, all slave cards are automatically
set to external synchronization, as the cards are now digitally synchronized among one another. The clock of the first (master) card is
now set to “Internal” (you can choose the cards at the right-hand
side of the ControlPanel in the “Select” field).
All AudioSystems will now run using the sampler frequency set on
the master. If you would like to use an external clock for the master
card as well (using a DAT recorder, for example), set its master
clock to “External” as well. The sync information will be forwarded
to all EWS88 systems.
Colors.
Here you can configure perhaps the most vital system settings within the EWS ControlPanel.
No matter where you look, our days are filled with color. After all, life is beautiful, and there's
nothing like pink buttons and delicate green reflections to breathe life and good cheer into
your boring Windows desktop. Have fun...! ;-)
But seriously, folks - this section contains a number of truly useful settings that not only beautify your EWS ControlPanel, but which improve the overview of its display:
A click on the Background, Text, Static Controls and Peakmeter buttons opens the Windows
dialog to change the colors.
The “Reflections off” option disables the attractive reflections of the elements. This can be
helpful for slower systems.
Test the settings made above in the right-hand part of the window and save them when you're
satisfied.
38 MIC 2/8 (English)
Page 39

Once saved, you can find your personal color settings in the dropdown menu, which already
contains a number of examples. The “Windows System” color set uses only colors that display correctly at an 8-bit color depth.
ASIO & GSIF
Programs that support Steinberg's ASIO or Tascam's GSIF (GigaStudio) feature dialogs containing special settings for these drivers. The properties of the EWS hardware can be set up in
the ASIO ControlPanel. For further information on the various drivers, please see page 25.
The ASIO buffer size has a direct effect on the latency (“speed”) of the ASIO driver; if the
value is too low it may impair the overall performance of your system, however. On fast systems (1 GHZ or higher), you should be able to set values of less than 512 samples/buffer (this
corresponds to a latency of less than 5 ms at 96 kHz) without problems.
“Without problems” means that you will not detect any dropouts during audio recording or
playback. If such dropouts occur, increase the number of buffers.
Tip: The “conversion” into time values is displayed just below the menu.
GSIF/ASIO multi-client.
Activate GSIF/ASIO multi-client mode in order to simultaneously use applications based on
the different driver models, such as GigaStudio with Cubase SX. Two programs can thus share
access to the hardware while you decide which output will be used by which application.
· GSIF resolution. Choose whether you prefer playback with 16- or 20/24-bit dynamics here.
The bit depth you select here applies to ASIO as well as GSIF applications.
· Buffer size. Depending on the performance of your system, you can choose between
small, standard and large buffers here. Select the buffer sizes “by ear” as described
above - do dropouts occur, or do all of your applications work correctly?
· Output selection. Allocate the outputs to their respective drivers here.
Cascading of multiple EWS systems and synchronization.
Up to 4 AudioSystems of the types EWS MIC2+, MIC8+, EWS88 MT and EWS88 D can be installed in a single computer and operated together. You can therefore conveniently increase
MIC 2/8 (English) 39
Page 40

the number of input and output channels which can also access directly from most Windows
applications. A fully loaded system containing four EWS models thus features a total of 40
inputs and outputs - and all of that with virtually the same low latency!
Before installing the individual PCI systems, you should give some thought to their future use.
If you intend to use multiple systems together within a single application, for example under
an ASIO and/or GSIF driver, these systems must be synchronized with one another. Synchronization means that the system clock of one card (master) controls all of the other cards
(slaves). Please note that the sync input of an EWS88 MT/D system used as a slave has a
fixed cable connection (EWS-Connect) to the master card or a further slave card. The onboard
digital input of the EWS88 MT/D can no longer be used in this configuration (nor in independent mode). When deploying multiple EWS MIC2/8+ systems, synchronize them via the WordClock port. The Sync-In on the associated EWS88 PCI card is therefore not connected. The
advantage of this is that the digital inputs of all MIC modules are available separately in independent mode. Additional EWS88 MT/D systems must be internally connected to the master card via the EWS-Connect (see the illustration “Master/slave operation - synchronizing
multiple EWS systems”).
As only the master card can be synchronized externally in a master/slave configuration, it is
preferable in most cases to select the EWS PCI card of a MIC module as the system master.
If you would like to use the systems in a variety of applications (such as an EWS MIC2/8 system under ASIO in Cubase SX, and an EWS88 MT system under an MME application such as
CoolEdit) we recommend not synchronizing the systems via hardware connections. Master/slave operation would not be suitable in this case. As mentioned earlier however, all of
the digital inputs of the individual systems are once again available in independent mode.
40 MIC 2/8 (English)
Page 41

Master/slave operation - synchronizing multiple EWS systems
MIC 2/8 (English) 41
Page 42

The ControlPanel.
The EWS ControlPanel now automatically handles the settings of the master clock on the Settings page, as the cards are now digitally synchronized with one another. The clock of the first
(master) card is now set to “Internal”. All additional cards (you can select the models on the
right-hand side of the ControlPanel with “Select Card#”) are now set to external synchronization.
All AudioSystems will now run using the sampler frequency set on the master. If you would
like to use an external clock for the first (system master) card as well (using a DAT recorder,
for example), also set its master clock to “External”. The sync information will be forwarded to
all connected slaves.
Synchronization via WordClock.
The 19" MIC2 and MIC8 modules can communicate with one another (and of course with other
compatible devices) via WordClock. Only connect the WordClock-Out to control external devices as slaves. When using the MIC system as a slave, please use the included T adapter as
shown in Fig. “Master/slave operation - synchronizing multiple EWS systems”. To synchronize
further devices on the WordClock chain, connect them to the T adapter of the slave system as
well. If no further devices are to be connected, attach the included 75 Ohm terminator to the
free connection of the T adapter.
Synchronization in stand-alone mode.
When using the AudioSystem EWS MIC8(2) without an EWS88 PCI card, three external synchronization sources may be used - WordClock, ADAT or S/PDIF. ADAT and S/PDIF signals use
the same optical interface and are therefore mutually exclusive. If an ADAT or S/PDIF is available, the MIC module will synchronize itself with it. If a WordClock signal is applied to the
input of the EWS MIC8(2) system by an external device, the system will synchronize itself with
it. If both WordClock and ADAT (or S/PDIF) clock information is available, the WordClock signal will be given priority. As a rule, if an external clock is available, the MIC module will automatically be the slave.
42 MIC 2/8 (English)
Page 43

Practical section.
Sample applications.
In the following section we would like to describe a number of sample applications that may
help you in planning your recording setup, or which might present you with new application
perspectives.
Set A - Studio recording.
Our first example is based on the use of a mid-sized mixing desk as can be found in most
home recording studios. 16 to 24 channels with connected instruments ranging from synthesizers to guitar effects, and the mixer features eight external busses to send signals to a multitrack recorder. The microphone preamps of the mixer are, as is often the case, of barely
adequate quality.
While the Alesis ADAT was once the multitrack recorder of choice, it has been supplanted by
the PC, which also can serve as a convenient audio editor and as an additional audio source
(sampler, synth, etc.). That doesn't mean that tape decks are obsolete, however, they're simply integrated into the current setup - to transfer old recording to the PC or for additional audio tracks.
In our example, the “final” mix is recorded either on a DAT or 24-bit master recorder (e.g. Alesis ML-9600), or on good, “fat” audio tape. Depending on your computer's performance it's
also possible to make the final recording on the PC. Just be sure to avoid feedback loops.
Setup A - Mixer and PC are at the center of attention, on “equal terms”.
MIC 2/8 (English) 43
Page 44

[1] In our example, six of the (as a rule) eight output signal paths of the mixer to the computer,
i.e.: to inputs 1 – 6 of the EWS MIC system. Normally these outputs are labeled on the mixer
as TAPE-OUT, REC-OUT, DIRECT-OUT or AUX-Send (not to be confused with effect sends).
[2] Two microphones are connected directly to the EWS MIC rack (inputs 7+8), and can be
supplied with phantom power as needed. The quality of the analog preamps is very high, so
as a rule you should choose them over the preamps integrated in a mid-class mixer. However,
if you would like to use analog outboard equipment (compressor, de-esser, EQ) BEFORE recording, then there's no alternative to a “traditional” setup via the insert points of the mixer.
[3] Connect the eight outputs of the EWS MIC rack with the inputs of the mixer. The mix is run
via the console, with the PC handling all tasks related to recording and editing. Depending on
the application, eight fully-featured mixer channels - or TAPE returns, if present - can be used,
although the latter generally have very restricted sound control options or none at all. This
isn't really a problem, however, as these channels can also be edited in the computer.
[4] The digital recorder (an ADAT machine in this example) is integrated via the ADAT interfaces of the EWS MIC system. In this example only the ADAT output of the digital recorder is
used. The optical output of the EWS MIC rack is thus available as a digital S/PDIF output for
mastering to a DAT recorder. If the external digital devices have WordClock interfaces, connect them to the appropriate interface of the EWS MIC module. If the ADAT machine does not
have a WordClock I/O, use it as the master for the MIC module and all other digital devices. In
this case, ensure that the EWS MIC system (in the case of cascaded systems, the system master) is set to external synchronization in the ControlPanel and the clock source is set to
“ADAT”.
[5] To put your audiophile masterpiece on tape, our example uses any 2-track recorder - in this
case, a DAT recorder. Naturally you can also reconnect the ADAT machine (or any other ADAT
or S/PDIF device) to the optical digital output.
Setup B - Live recording without a PC.
The EWS MIC 8 rack is also very suitable for live recordings without a PC or mixer(!). In this
case, the high-quality microphone preamps of the EWS rack module are used in conjunction
with a stand-alone multitrack system (ADAT).
Setup B - The EWS MIC8 system as a high-quality mixer replacement for live recordings.
44 MIC 2/8 (English)
Page 45

[1] Up to eight microphones can be connected to an EWS rack. The gain can be adjusted individually and the signals are available in digital form at the ADAT output of the module (see
connection [2]). When the DIRECT switches on the EWS rack front panels are pressed, the
channels are switched additionally (!) to the analog outputs.
Set C - The PC as a digital mixer.
Our third example will certainly be very appealing for many users - the use of the PC as a complete replacement for a mixer. Thanks to the low latencies possible with the EWS MIC system
and the option of cascading up to 4 EWS MIC2/8 systems, a powerful PC running the appropriate software can serve as a 40-channel digital mixer and recorder. External hardware controllers make the deployment of such a system completely feasible for the day-to-day production work of a medium-sized project studio.
An example for a full-featured “PC digital mixer” with a wide range of analog and digital sources.
MIC 2/8 (English) 45
Page 46

Up to four EWS MIC-2/8 can be cascaded or linked in a single PC. The synchronization is handled (in this example) via a WordClock connector cable.
[1] A total of 32 analog signals are distributed in the example across the four used EWS-MIC
modules. A possible combination is one MIC8, which is initially used for 8 microphones,
while three MIC2 24 handle additional line sources (e.g. 16 channels from a variety of audio
sources plus 8 returns from external effects processors). Depending on the specifications of
the audio sources and effects devices, the ADAT interfaces can also be used as an alternative
to the analog inputs of the modules.
[2] Two of the modules (here: top and bottom) each return eight audio channels to the outputs: while the MIC2 module shown below provides eight SEND paths for outboard equipment
(effects), the upper MIC8 provides the output signals for monitoring (5.1 + 2) and/or master
recorders.
[3] Needless to say, the PC with the EWS control software and sequencer is the center of attention in our example. If you are going to use the system professionally - and we're assuming
that you will - careful planning and configuration of the software is essential to prevent wasting valuable production time repeatedly setting up new routings. No matter what shape your
setup finally takes - the combination of modern audio software from the leading manufacturers and our hardware will convert your PC into a powerful, open mixer system.
Multiple audio cards in a single system.
Modern PC systems can accommodate multiple audio cards from a variety of manufacturers
and can run them in parallel. The extent to which the audio interfaces can be combined in
practice depends on the software used.
A wide range of combination options are available when using multiple TerraTec AudioSystems. In short, all PCI cards of the EWS and EWX series can be combined with one another in a
single computer. The consumer products DMX 6fire 24/96 and 6fire LT can also be used simultaneously.
In addition PCI AudioSystems of the EWS series (at the time of printing: EWS88 MT, EWS88 D,
EWS MIC2+ and EWS MIC8+) can be synchronized via an internal cable connection or WordClock and can be configured using a shared ControlPanel application. In an ASIO environment, the system is then displayed as a single device with up to 40 inputs and outputs. For
more information on this topic, see page 39.
Always right on time - digital synchronization.
When recording via the S/PDIF interface, ensure that the so-called sample frequency (clock) of
the card is synchronized with the source device. To ensure the trouble-free synchronization of
the devices, set the MasterClock to “External” in the ControlPanel (also see page 31). This
only is neccessary if the external S/PDIF unit can not handle WordClock synchronisation
(which is hard to find anyway).
46 MIC 2/8 (English)
Page 47

If you forget this step, audible errors such as dropouts and clicks may occur during recording and already when monitoring the signal. Naturally, you should also pay attention to the settings of your periphery in the reverse situation (synchronizing an external device with the audio system). In that case, set the EWS ControlPanel to “Internal”, as it also would be when
you are not using external digital devices. If the devices are to be permanently connected to
one another in both directions, you must decide which device will provide the clock signal.
The digital interfaces of the EWS MIC2 and MIC8 support all bit resolutions between 8 and 24
bits, as well as all sample rates between 8 and 96 kHz. Please note that not all devices can
process sample rates higher than 48 kHz. To transfer a signal recorded at 96 kHz to a DAT
recorder, it's necessary to use suitable software to convert the file(s) to 44.1 kHz or 48 kHz
first.
Dolby AC3 and DTS.
The digital interfaces of the EWS MIC system can also be used independently of the ADAT or
S/PDIF standards (S/PDIF-Out to “Non-Audio”). Various manufacturers of software DVD players support the playback of DVD audio material via the audio systems by TerraTec. Signals in
Dolby AC3 or DTS format can therefore also be transferred using the digital interfaces.
Useful information about digital cables (optical waveguides and AES/EBU).
Even when transmitting audio data via optical fibers, a few, usually inaudible, errors may occur. You should therefore be sure to use high-quality cables that are not too long: flexible
plastic cables should have a maximum length of 1.5 m, the less-flexible glass fiber cables may
be up to 5 m long and more.
Audio differences with digital cables seem improbable at first glance, but they can happen
nevertheless. This is due to the fact that error correction algorithms are obviously used more
frequently at some times than at others to compensate for quality differences between individual cables. However, these audio losses are usually so minimal that you need to be careful
not to mix up the myth with the reality. If you're interested, there are a number of somewhat
entertaining militant newsgroups dealing with this subject on the Internet ;-).
Devices with AES/EBU interfaces cannot normally be used on S/PDIF interfaces - ambitious
tinkering with simple adapter plugs will not get you anywhere. As the AES/EBU protocol is
nearly identical to S/PDIF and the transmission essentially only differs in the signal strength,
you can make your own converter with a bit of soldering.
MIC 2/8 (English) 47
Page 48

Appendix
Block diagram: EWS MIC2 analog section
48 MIC 2/8 (English)
Page 49

Block diagram: EWS MIC8 analog section
MIC 2/8 (English) 49
Page 50

Technical Details
EWS MIC2 / MIC8
General
· 19" rack mounted external module for EWS88 MT PCI interface or ADAT interface cards
· 2 XLR/TRS combo plugs on front side, alternatively to input 7 and 8 on back side (auto
priority)
· 8 (2 with MIC2) high quality class A microphone amplifiers, developed in co-operation
with SPL™ Germany
· Direct out setting on front side for all analog channels (monitoring)
· High quality headphone DAC and amplifier for monitoring the mixed signal
· 2 separate MIDI-interfaces with 32 MIDI channels (only with EWS88 Vers. 2.0 PCI card)
· Stand-alone operation mode (microphone pre-amp, ADAT interface)
· Ground-Lift switch
· Internal switch power supply for 240Volt/115Volt – 50Hz/60Hz
· Weight: 3.435 kg -> MIC Module, 100 g -> EWS88 PCI card.
· Dimensions: 482 x 44 x 245 mm
Analog
· 8 channel balanced analog inputs, XLR and 6,3 mm stereo jack
· 8 channel balanced analog outputs, 6,3 mm stereo jack
· 8 gain controls on front side for analog inputs
· Input gain range, -17,8 dBu (100 mV) to +15 dBu (4,35 V)
· 8 blue input signal LEDs on front side
· 8 red clipping LEDs on front side (clipping at –1 dB full range)
· 24 bit/96 kHz A/D converters with 105 dB (A) SNR
· 24 bit/96 kHz D/A converters with 106 dB (A) SNR
· Analog output +4dBu (max 20 dBu) / -10 dBv (max. 6dBu) setting
· Line/Instrument input impedance, 100 kOhm (unbalanced), 200 kOhm (balanced)
· Output impedance: 75 Ohm
Microphone Pre-Amplifier
· Phase, low-cut and mute settings for each microphone channel
· Low-Cut at 50 Hz, 40 dB / octave
· 48 Volt DC phantom power for each microphone channel
· Input gain range, -37 dBu (10 mV) to +17 dBu (5,5 V)
· Input impedance, 10 kOhm
50 MIC 2/8 (English)
Page 51

Digital
· Integrated ADAT
· TOS-Link interface for ADAT
TM
interface (Light-Pipe)
TM
or S/PDIF
· 44,1 kHz / 48 kHz setting for stand alone operation
· Auto-Slave when external clock is detected in stand-alone operation mode
· Auto-Priority when external clock is detected in stand-alone operation mode
(1. WordClock, 2. ADAT/SPDIF)
· Variable routing possibilities for ADAT
TM
, S/PDIF and analog channels
· WordClock I/O with “signal present” LED
EWS88 Version 2.0 PCI card
Hardware
· PCI-board
· Bus master transfer supports ‚24bit 4byte mode‘ (32bit)
· 10 x 24/96 inputs and 10 x 24/96 outputs in total (without System-Out part)
· Simultaneous recording and playback of all channels with up to 24bit/96kHz
· Digital Input with 2 channels (S/PDIF, coax with up to 24bit/96kHz)
· Digital Output with 2 channels (S/PDIF, coax with up to 24bit/96kHz)
· Hardware mixer with internal resolution of 36bit
· EWS-Connect**
· „None-Audio“ mode for transmission of AC3 and DTS streams via digital interface
· VU-meter in control panel (hardware based)
· Analog stereo output with 18bit/48kHz converter (3,5mm stereo jack) for e.g. System-
Sounds
· 2 internal stereo inputs with 18bit/48kHz converter (Molex)***
· 4 meter cable to connect the EWS MIC2/8 unit
Software
· WDM driver for Windows 98SE/ ME/2000 and Windows XP
· Supports ASIO 2.0 and GSIF (GigaSampler/Studio)
· ASIO/GSIF multi-client mode
· WDM Kernel Streaming (e.g. for Sonar ™)
· MME- and DirectSound
· ControlPanel for Windows 98SE/ME/2000 and Windows XP
MIC 2/8 (English) 51
Page 52

System Requirements
· Pentium II 450 or higher
· VGA graphic card, 800x600 / 256 colours
· 128 MB RAM
· Windows 98SE/ME/2000 or Windows XP
System Recommendation
· Intel Pentium III 1 GHz, Celeron 900 MHz or AMD K7 Athlon 1 GHz
· ULTRA DMA or SCSI Controller
· VGA graphic card, 1024x768 / HiColor
· 256 MB RAM
Measurements:
Rohde & Schwarz Audio Analyzer 10 Hz ... 110 kHz . UPL
Calibration: 02.07.2002, Re-No.: 900229/000
Input voltage: +4dBu, gain setting to achieve 0 dBu FS
D/A Conversion - WavePlay at 48 kHz
Dynamic Range: 109,59 dBr (A-weighted),
THD +N: -102.91 dBr
D/A Conversion – WavePlay at 96 kHz
Dynamic Range: 102,30 dBr (A-weighted)
THD +N: -99,10 dBr
A / D Conversion –WaveRec at 48 kHz Sample-Rate
Dynamic Range: 106,21 dBr (A-weighted)
THD +N: -99.96 dBr
A / D Conversion – WaveRec at 96 kHz Sample-Rate
Dynamic Range: 102,30 dBr (A-weighted)
THD +N: -99,10 dBr
Microphone Input – A/D Conversion at 44,1 kHz
Dynamic Range: 105,99 dBr (A-weighted)
THD +N: -99,30 dBr
52 MIC 2/8 (English)
Page 53

THD+N (Total Harmonic Distortion + Noise) – D/A conversion, WavePlay at 48 kHz
Frequency Response – D/A conversion, WavePlay at 96 kHz
Line/Instrument Input Dynamic Range – A/D conversion, WaveRec at 48 kHz
MIC 2/8 (English) 53
Page 54

Microphone Input Dynamic Range – A/D conversion, WaveRec at 44,1 kHz
Microphone Input THD + N – A/D conversion, WaveRec at 44,1 kHz
54 MIC 2/8 (English)
Page 55

Service at TerraTec.
Sometimes, no matter how good the weather is, things do not always work as they should.
Problems can arise in the best computer systems. In such a case, the TerraTec Team is always
ready to provide service and support.
Hotline, Mailbox, Internet.
In case of a serious problem - where you can neither solve the problem on your own nor with
the guided help found in this manual, nor with the help of your dealer - please contact us directly.
The first way should be the Internet: under http://www.terratec.com/
find current answers to frequently asked questions (FAQ) and the latest drivers. All of that is
also accessible via our mailbox system. To call us: +49-(0)2157-8179-24 (analog) and
+49-(0)2157-8179-42 (ISDN).
If these options do not provide the necessary help, please contact our phone hotline. You can
also reach us online.
To do so, visit us under http://www.terratec.com/support.htm
you will always
.
In both cases, please have the following information handy:
· your registration number
· this documentation.
In addition, it would be helpful to our technicians if you are at your device during the phone
call to directly carry out tips and tricks. Please do not forget to write down the name of the
respective support technician if you contact our Support Team. You will need this name if a
defect is present and your device needs to be mailed to us.
MIC 2/8 (English) 55
 Loading...