

Page 1

Integra128-T
featured by TerraTec
Quick reference
Page 2

2 Integra128-T
CE declaration
Hereby is declared that the product:
Integra128-T
to which this declaration refers is in compliance with the following standards or standardizing documents:
1. EN 55022
2. EN 50082-1
The following are the stipulated operating conditions and environmental conditions for said compliance:
Residential, business and commercial environments and small-company environments.
Alle genannten Firmennamen oder Warenzeichen sind in der Regel eingetragene Waren- und Markenzeichen der jeweiligen Eigentümer und unterliegen als solche den gesetzlichen Bestimmungen. Technische Änderungen ohne vorherige Ankündigung
vorbehalten. Druckfehler vorbehalten.
Alle Texte der vorliegenden Dokumentation sind urheberrechtlich geschützt. Alle Rechte vorbehalten. Kein Teil diesesr Dokumentation darf ohne schriftliche Genehmigung der Autoren in irgendeiner Form durch Fotokopie, Mikrofilm oder andere Verfahren reproduziert oder in eine für Computer verwendbare Sprache/Form übertragen werden. Auch die Rechte der Wiedergabe
durch Vortrag, Funk und Fernsehen sind vorbehalten.
As a rule, all names of companies or trademarks are registered trademarks and brand names of the respective holder. Subject
to technical changes without prior notice. Printing errors excepted.
All text passages in this documentation are copyrighted. All rights reserved. No part of this documentation may be reproduced
in any form whatsoever, by photography, microfilming or other process or rendered into a language/form usable by computers
without the prior, written consent of the authors. All rights for use and propagation by presentation, radio and television are
also reserved.
Page 3
Integra128-T 3
Quick Reference English
Dear Customer,
In the following Quick Reference Guide, replace the <CD> symbol with the drive letter assigned
to your CD-ROM.
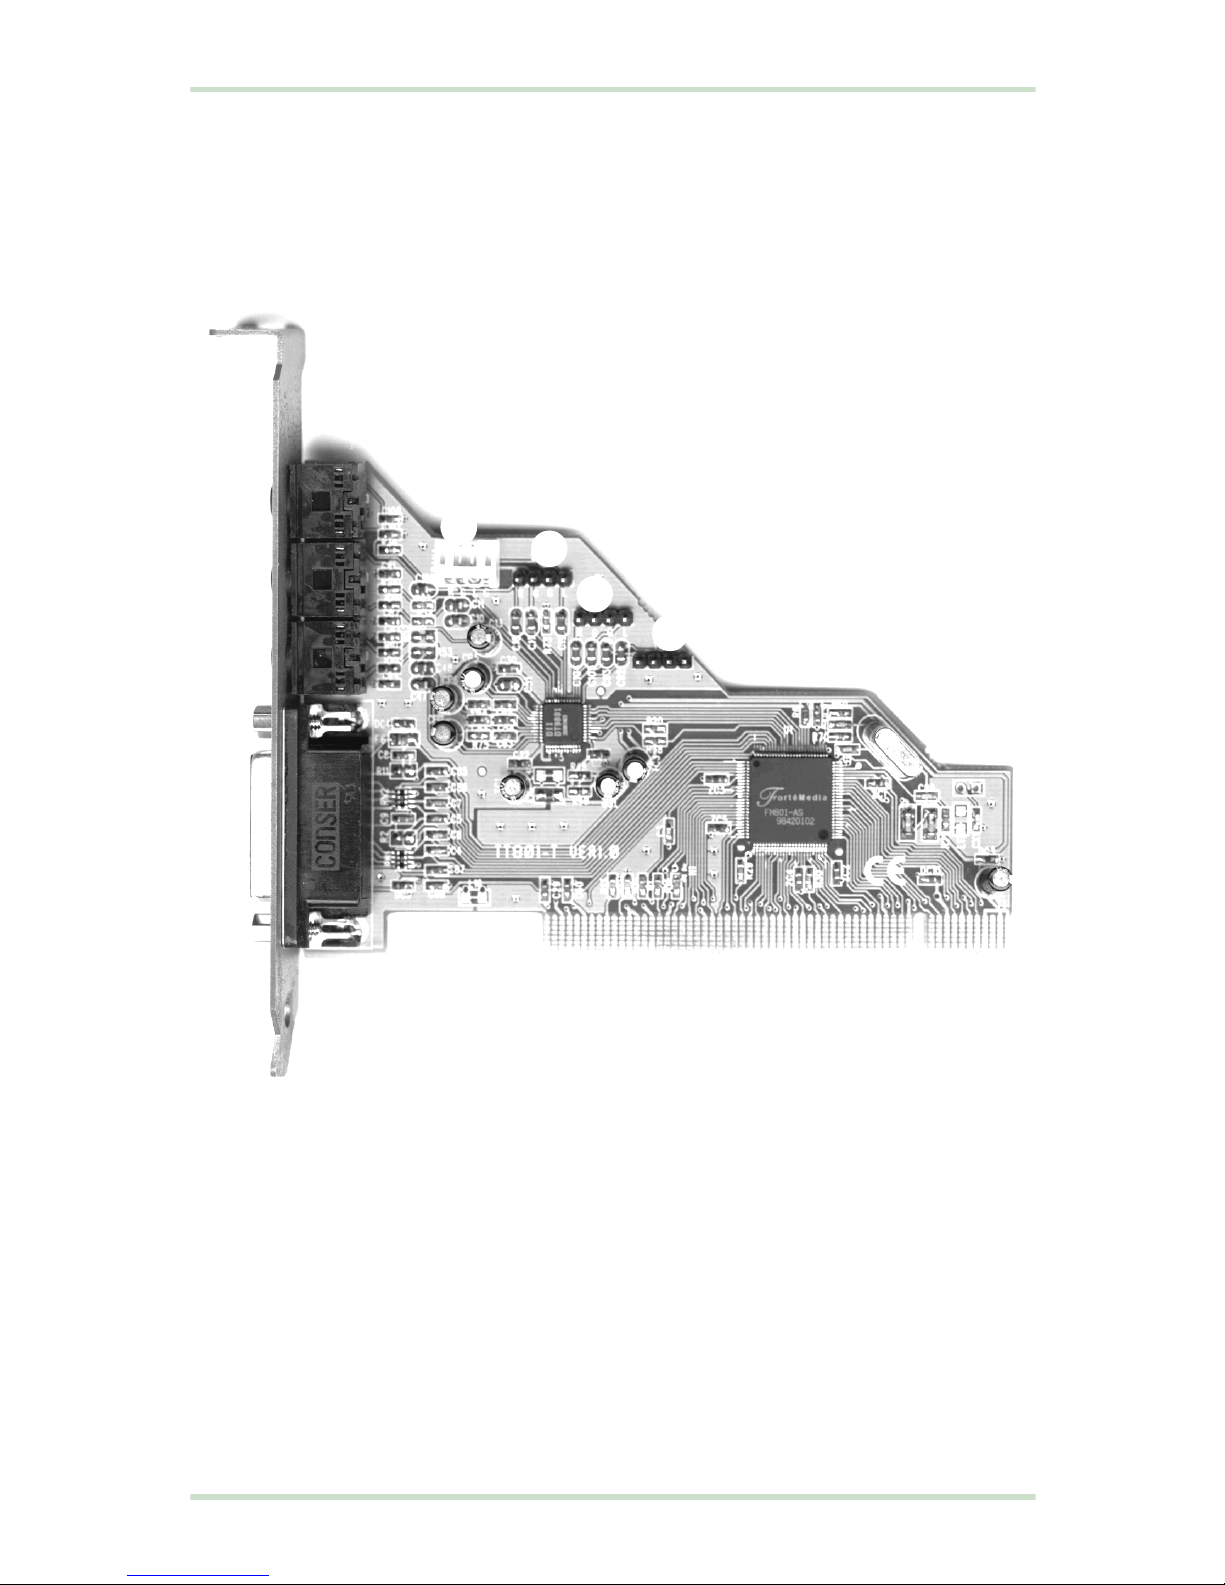
d Line Out
e Line In
f Mic In, Mono
g MIDI / Joystick Interface
h Internal CD audio connector IDE (White: right - ground - left - ground)
i Internal CD audio connector (SONY) (right - ground - ground - left)
j Internal Aux In (right - ground - ground - left)
k Internal TAD connector (mono out - ground - ground - mono in)
d
e
f
g
h
i
j
k
Page 4

4 Integra128-T
Technical data.
Key Features
•QSound Positonal 3D Audio
• Real-Mode DOS SoundBlaster/Pro-compatible
• 128 voice XG wavetable
*
• Enhanced Full Duplex
Compatibility
•QSound 3D
• Microsoft DirectSound
• Microsoft DirectSound 3D
• MPU-401 compatible
•SoundBlaster/PRO
• OPL3 compatible hardware FM synthesis
Digital Audio
•QSound 3D
• 8/16-bit audio stereo/mono for recording and playback with up to 48 kHz
• Enhanced Full Duplex
Wavetable synthesizer*
• 128 voice XG wavetable
• High quality Yamaha sample set
• GM, GS and XG compatiblel
* Not available on Cyrix 686 machines
Page 5

Integra128-T 5
Audio mixer
• Individual level controls for all audio sources
MIDI/joystick interface
•DirectInput compatible
• MPU-401 (UART mode) compatible
• SoundBlaster MIDI interface
• Standard dual gameport (Y-cable)
External connections
• Line Out (3.5 mm jack)
•Line In (3.5 mm jack)
• Mic In (3.5 mm jack)
• MIDI/joystick interface (IBM 15-pin Sub-D)
Onboard connections
• IDE/Sony CD audio connectors
• TAD connector
• Aux In, stereo
Driver
• MS-DOS 7.0, Windows 95/98, Windows NT 4.0
System requirements
• One free PCI 2.1 compliant PCI slot
• Intel P166, P200 MMX recommended
• 16MB system ram, 32MB system ram recommended
• CD-ROM drive for the "Software & Driver CD"
• 15 MB free hard disk space
• Active speakers or headphones
• Windows 95, Windows 98 with DirectX 5.0 or higher or Windows NT 4.0 with Service
Pack 3 or higher
Page 6

6 Integra128-T
Driver & software installation.
Please note, that the automatic driver installation (easiest way to install) via the setup program is only possible, when the sound card is not already plugged in your system! This restriction does not apply for Windows NT 4.0.
For maximum performance and functionality of the sound card under Windows 95/98
DirectX 6.0 or higher is required. For Windows NT 4.0 ServicePack 3 is required!
Windows 95/98.
Insert the CD-ROM in your CD-ROM drive. Change to the folder <CD>:\WIN9X and start the
setup.exe program. Follow the instructions of the installation program. After the installation
program succeeded shut down your PC and plug the sound card into your system as described
in the chapter Hardware installation.
Windows NT 4.0 (min. Service Pack 3)
Please ensure that you are logged on as Administrator when installing the drivers.
Plug the sound card into your system as described in the chapter Hardware installation.
Insert the CD-ROM in your CD-ROM drive. Change to the folder <CD>:\WINNT40 and start the
setup.exe program. Follow the instructions of the installation program. After the installation
program succeeded shut down and reboot your PC. and plug the sound card into your system as
described in the chapter Hardware installation.
Yamaha S-YXG50 software wavetable.
Windows 95/98:
Insert the CD-ROM in your CD-ROM drive. Change to the folder <CD>:\YAMAHAXG\WIN9X
and start the setup.exe program. Follow the instructions of the installation program.Plug the
sound card into your system as described in the chapter Hardware installation.
Windows NT 4.0:
Insert the CD-ROM in your CD-ROM drive. Change to the folder <CD>:\YAMAHAXG\WINNT40
start the setup.exe program. Follow the instructions of the installation program.
AudioRack software EzAudio.
Insert the CD-ROM in your CD-ROM drive. Change to the folder <CD>:\EZAUDIO and start the
setup.exe program. Follow the instructions of the installation program.
Page 7

Integra128-T 7
Hardware installation.
Before installing the sound card, please take note of any special points pertaining to the configuration of your computer. Also refer to the handbook of your computer and other expansion
cards for their settings.
Please observe the following instructions to ensure a trouble-free installation.
If difficulties arise nevertheless, please reread the relevant chapter in this handbook carefully.
WARNING! – Before opening the case, unplug the mains cable from the wall socket as
well as from the PC.
ESD (electrostatic discharge) may damage disk drives, add-on boards and other components.
The steps described should only be carried out at an ESD workstation. If one is not available,
you can prevent electrostatic discharge by wearing an antistatic arm band and holding it to a
metal part of the system housing.
Please note that opening the housing in no way breaches the conditions of guarantee provided
that you do not carry out any modifications to the hardware components inside. Any unauthorized expansion of the PC may however affect your rights under the terms of the guarantee. Any
such work should be discussed beforehand with your specialist dealer.
Now it’s time to arm yourself with a Phillips screwdriver.
And here’s what to do, step by step:
• Switch off your PC and all connected periphery, in other words printer, monitor and so on.
Leave the AC cord connected for the time being, so that your computer is still grounded.
• Touch the metal chassis at the rear of the PC to ground yourself and discharge static. Now unplug the cord from the AC mains socket.
• Remove the cover from the case of your PC.
• Look for a free PCI expansion slot, remove the screw holding the slot blanking plate and remove the plate. To ensure the optimal function of your sound card, look for an expansion slot
that is not immediately next to an already-installed card. Some cards, such as video adapters,
can send out signals which can interfere with the sound card.
• Carefully remove the sound card from its packaging and pick it up by the edges with one hand
while your other hand is resting on the metal of the PC case.
• This will ensure that your body is completely discharged via your computer without affecting
the sound card. Do not touch the components of the card under any circumstances.
• Align the holder at the rear of the sound card in the expansion slot in such a way that the
card’s connectors are directly in line with the slot’s socket.
• Carefully seat the card in the slot. You might have to press the card firmly into the slot to make
a good contact. Take care to ensure that the contacts are precisely in line, in order to avoid
damaging the sound card or the motherboard in your PC.
• Insert and tighten the screw from the slot cover to secure the sound card in its slot.
Page 8

8 Integra128-T
• Connect the CD-ROM drive to the sound card with the audio cable. (In general, this cable is
provided with the CD-ROM drive).
• Reinstall the cover of your PC case.
• Connect your speakers or hifi stereo system to the sound card.
• Reconnect the mains and all other cables. Make sure that your speakers or hifi system is set
to low volume. Start your computer.
 Loading...