

Page 1
Lieferumfang
Überprüfen Sie bitte zunächst die Vollständigkeit des von Ihnen erworbenen Pakets.
Der Lieferumfang der DMX 6Fire USB umfasst mindestens:
■ 1 DMX 6Fire USB (die Hardware)
■ 1 Netzadapter
■ 1 Adapter (6,3 mm -> 3,5 mm, Stereo)
■ 1 Adapter (6,3 mm -> 3,5 mm, Mono)
■ 1 USB Kabel (1,8 m)
■ 1 Installations-CD (mit ausführlichem Handbuch)
■ 1 Quick Start Guide
■ 1 Service-Begleitschein
■ 1 Registrierungskarte mit Seriennummer
Die Windows-Installation - Schritt für Schritt
Bitte befolgen Sie die Schritte genau in der angegebenen Reihenfolge und verbinden Sie die DMX 6Fire USB erst am beschriebenen Installationspunkt mit dem Rechner.
Welches Betriebssystem?
Die DMX 6Fire USB kann ausschließlich unter Windows XP (Service Pack 2) und
Windows Vista eingesetzt werden. Ältere Windows-Versionen werden nicht unterstützt.
Achten Sie darauf, dass sich Ihre Windows-Installation auf dem jeweils letzten Stand der
Microsoft Service Packs / Updates befindet.
Stromversorgung
Die DMX 6Fire USB lässt sich nicht ohne Netzteil betreiben, ist also nicht „Bus-Powered“.
Die Stromversorgung via USB-Kabel ist nur bei kleineren USB-Geräten machbar,
aufwändigere Systeme – wie die DMX 6Fire USB – benötigen einen separaten Stromanschluss. Auch liefert ein Netzteil einen weitaus „sauberen“ Strom im Vergleich zu einem
USB Port, was sich in der Klangqualität durchaus bemerkbar macht. Verbinden Sie bitte
daher die 6Fire mit dem beiliegenden Netzteil.
Page 2
Installation des DMX 6Fire USB Treibers unter Windows XP
1. Bevor Sie starten, überprüfen Sie bitte, ob Ihre Windows XP Version auf dem aktuellen Stand ist. Klicken Sie dazu mit der rechten Maustaste auf das Symbol „Arbeitsplatz“ und wählen Sie dann den Menüpunkt „Eigenschaften“. Falls Sie aber noch das
Teletuby-Land Hintergrundbild von XP haben, erreichen Sie diese Information über
den folgenden Pfad: Start -> Einstellungen -> Systemsteuerung -> System. Wichtig ist,
dass auf Ihrem PC das Windows XP Servicepack 2 – kurz SP2 – oder Windows Vista
installiert ist. Sollte das nicht der Fall sein, wenden Sie sich bitte an Microsoft
(www.microsoft.com
im Allgemeinen kostenfrei.
2. Nachdem Sie die mitgelieferte Installations-CD eingelegt haben, öffnet sich automatisch die Autostarter-Software. Sollte sich der Autostarter nicht öffnen, starten Sie ihn
manuell durch einen Doppelklick auf „Autorun.exe“ im Root-Verzeichnis der CD.
Der Button „Installation“ im Autostarter installiert den DMX 6Fire USB Treiber und das
Control Panel in Ihr Betriebssystem.
), um Ihr System zu aktualisieren. Im Fall von Windows ist das
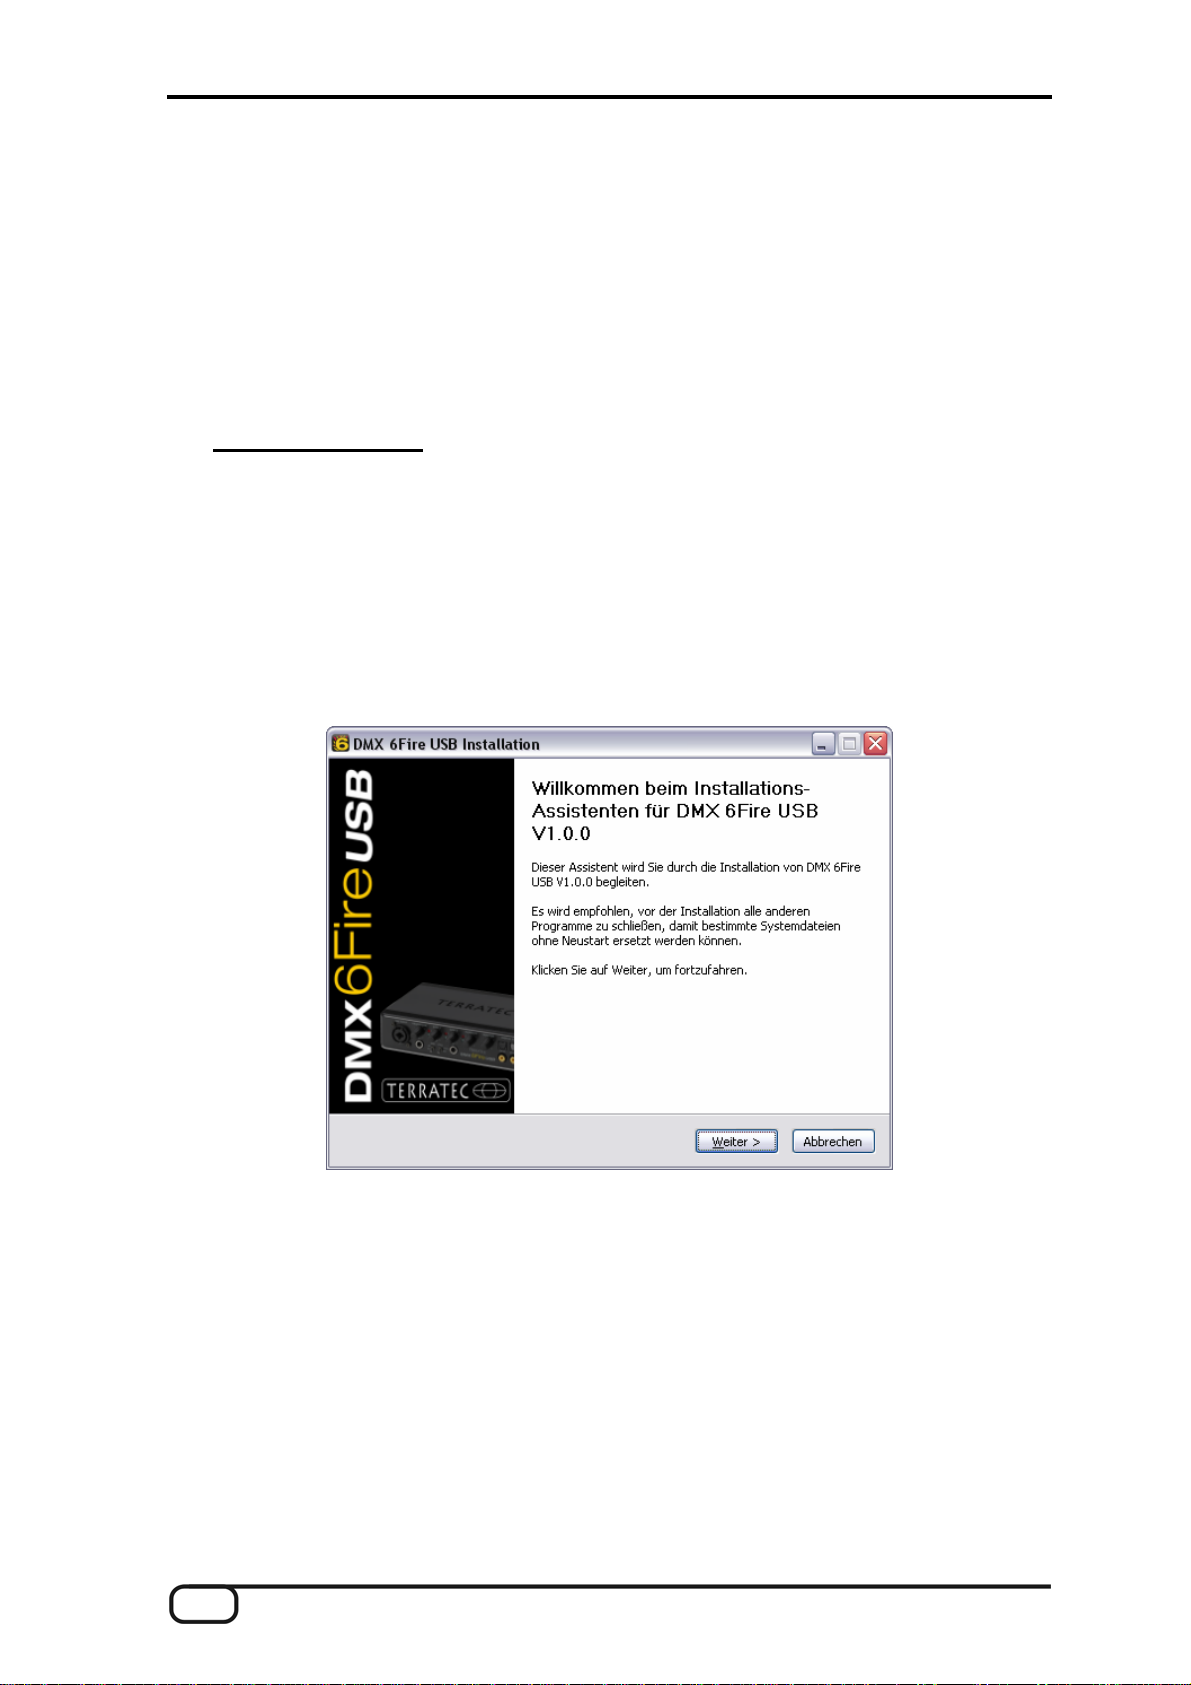
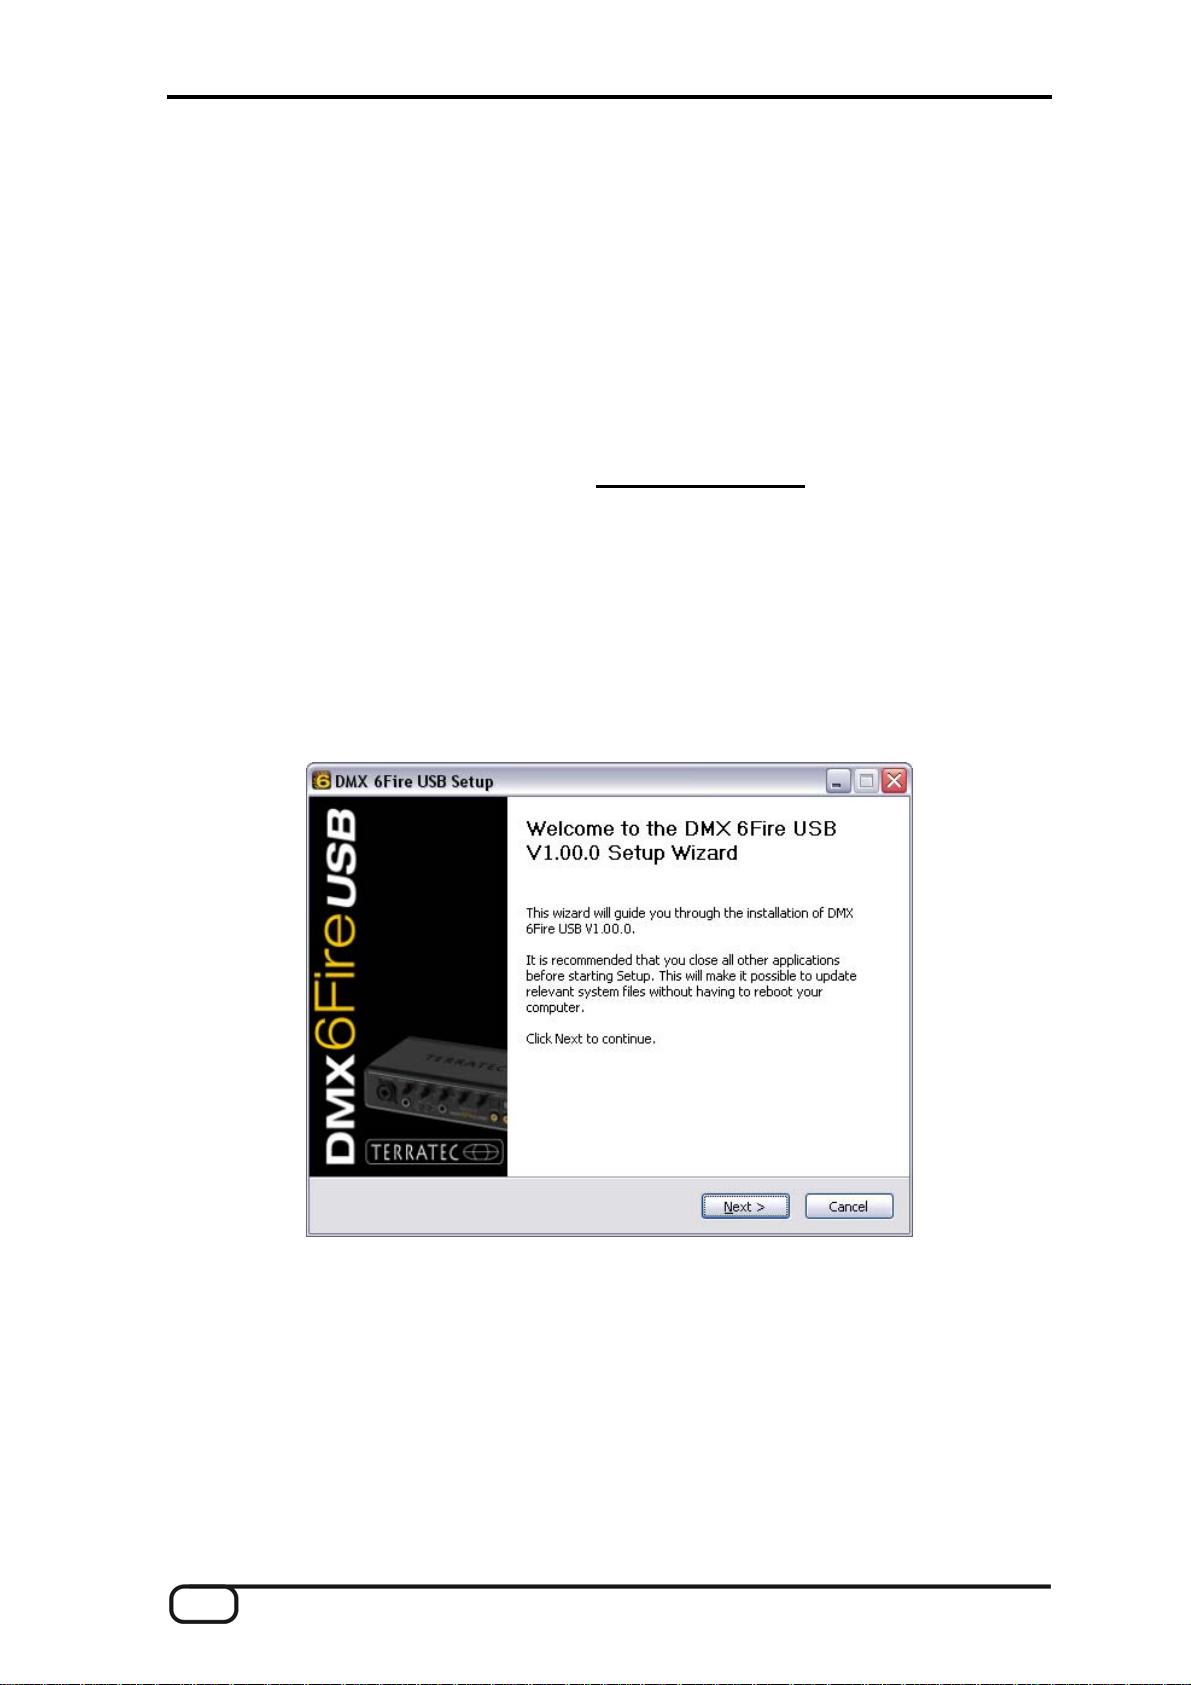
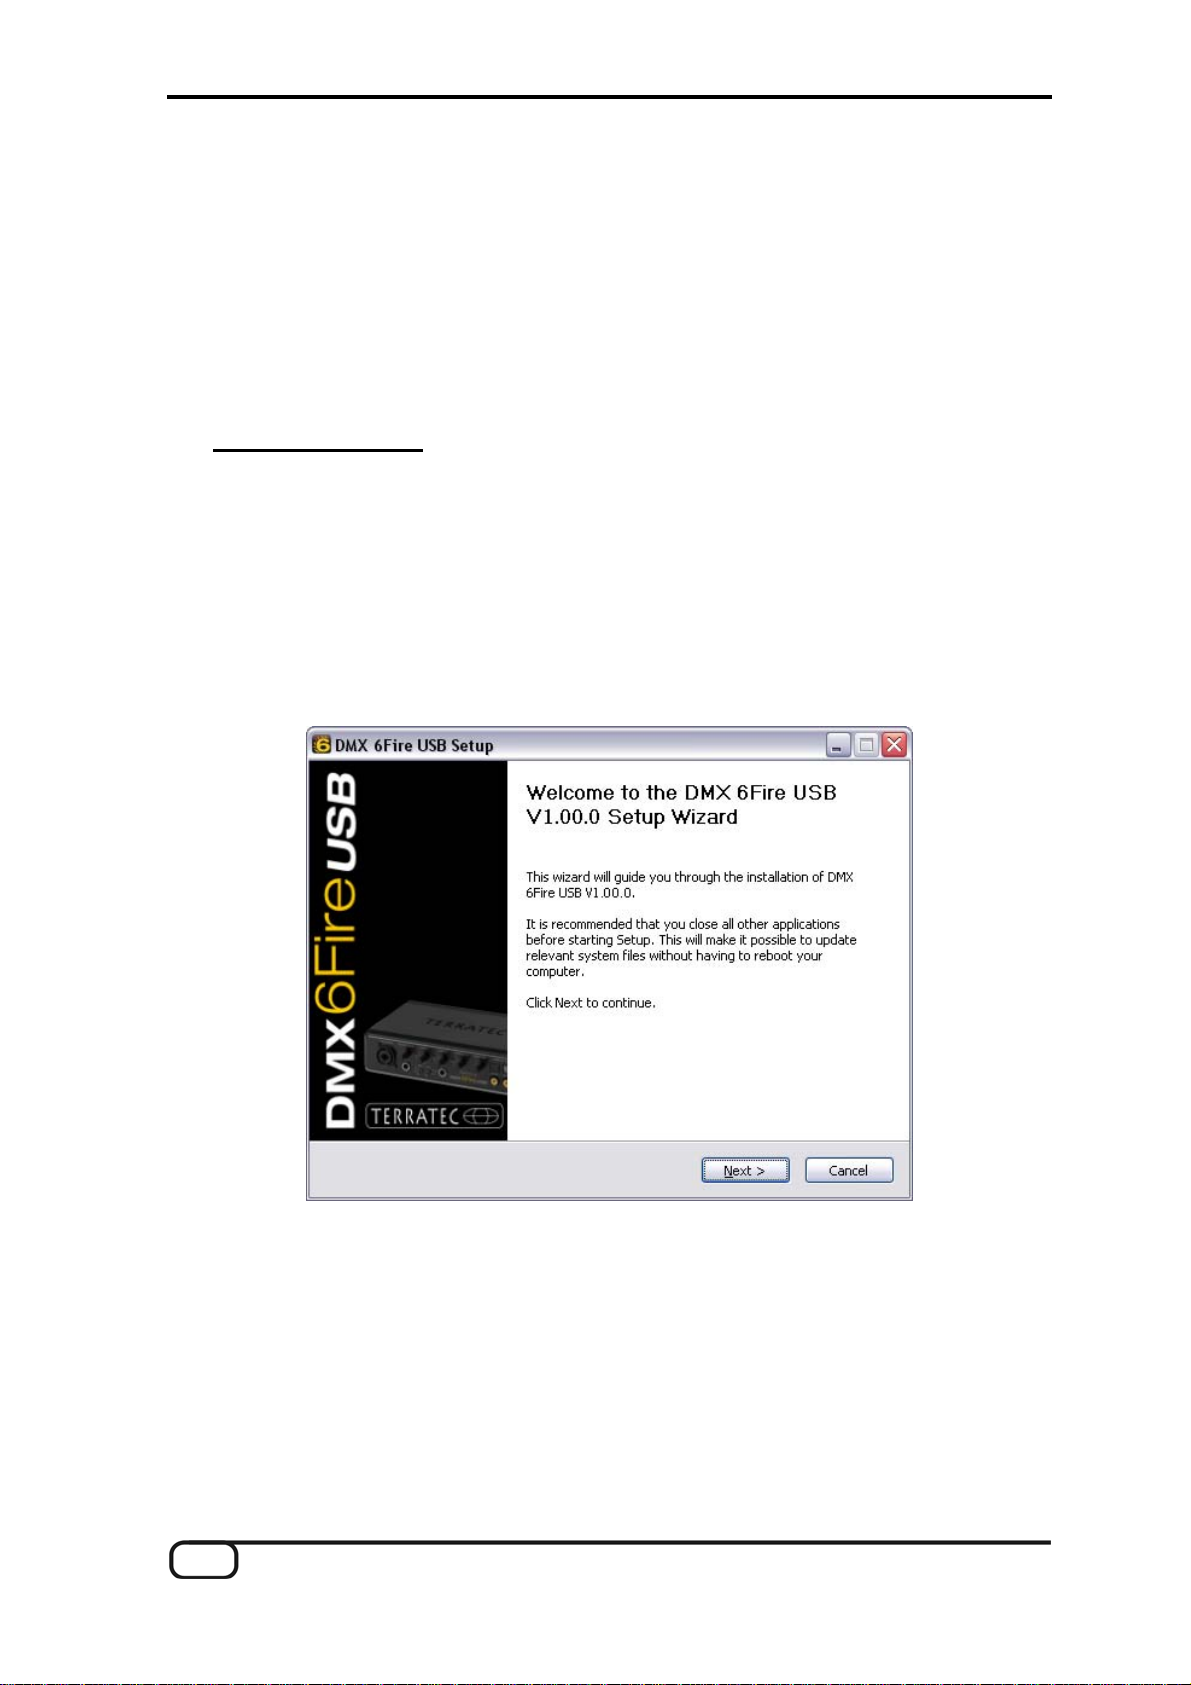
3. Der Installationsassistent meldet nun, dass er bereit zur Installation ist.
2 DMX 6Fire USB (Deutsch)
Page 3
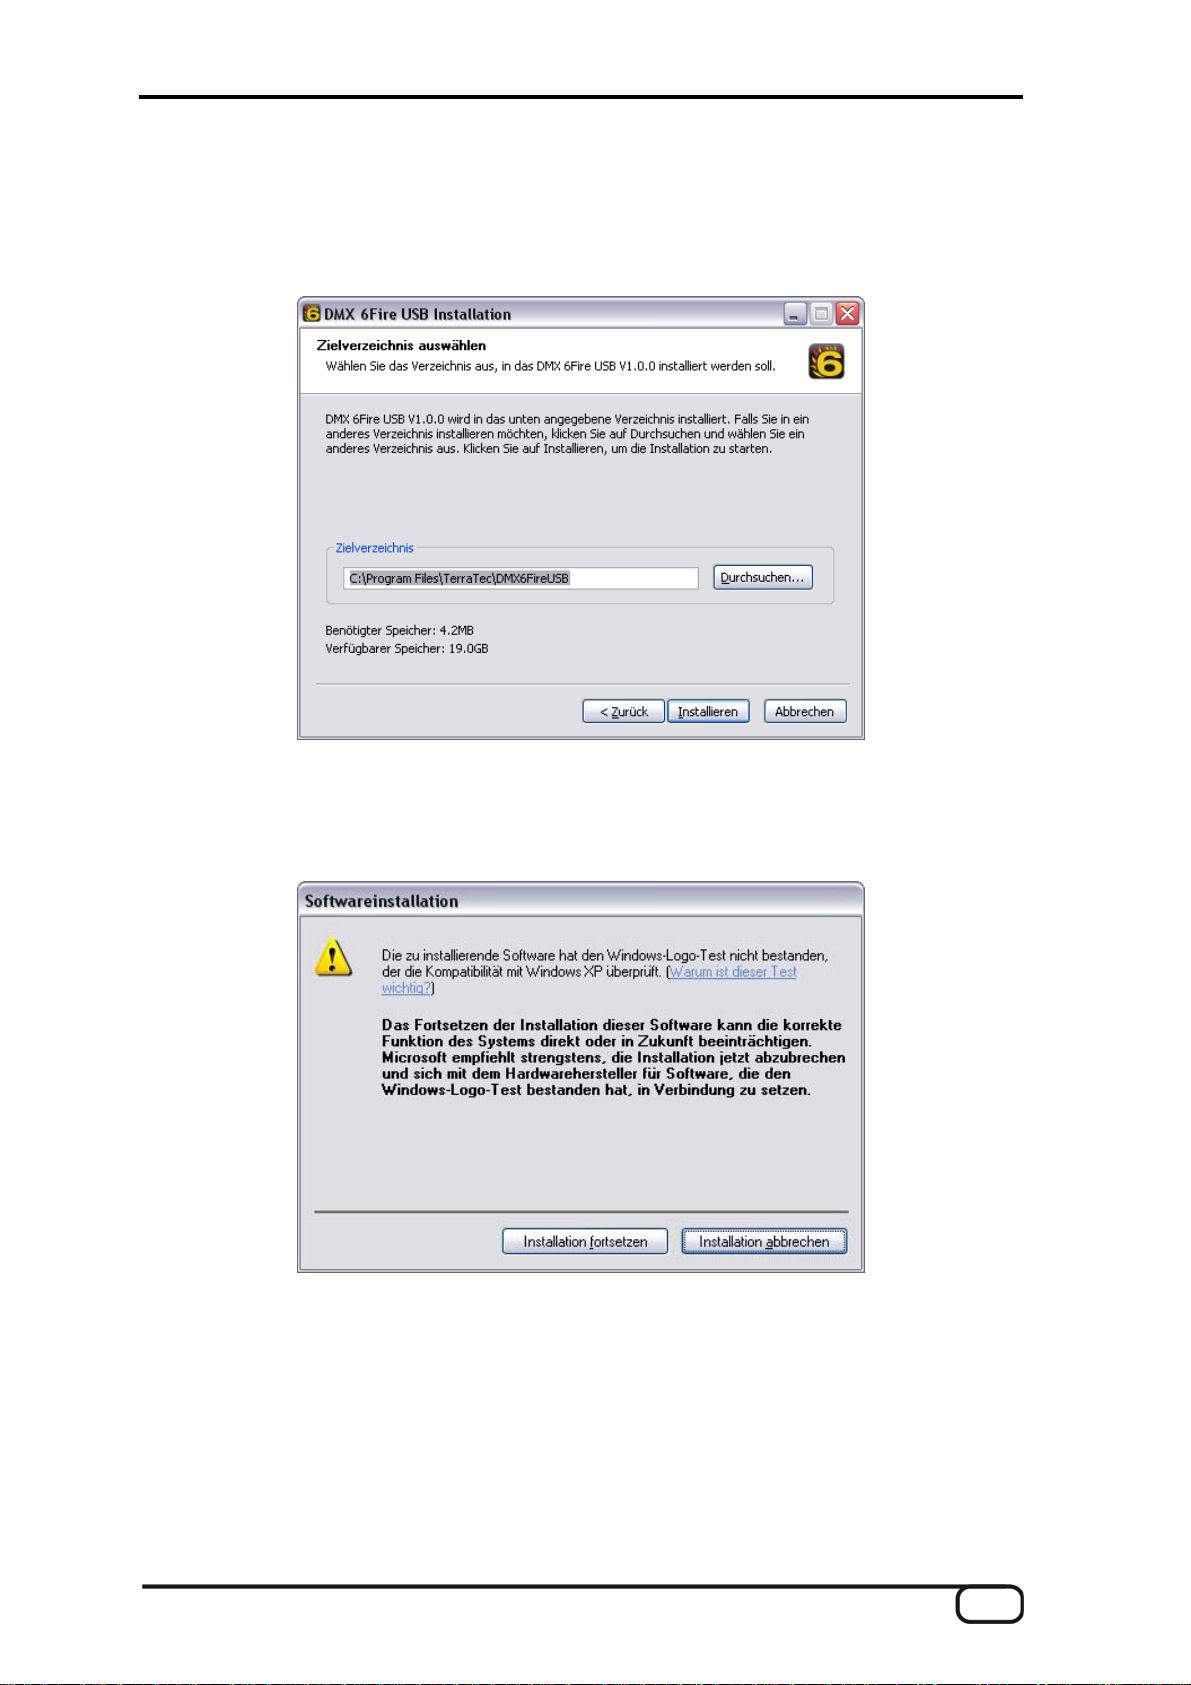
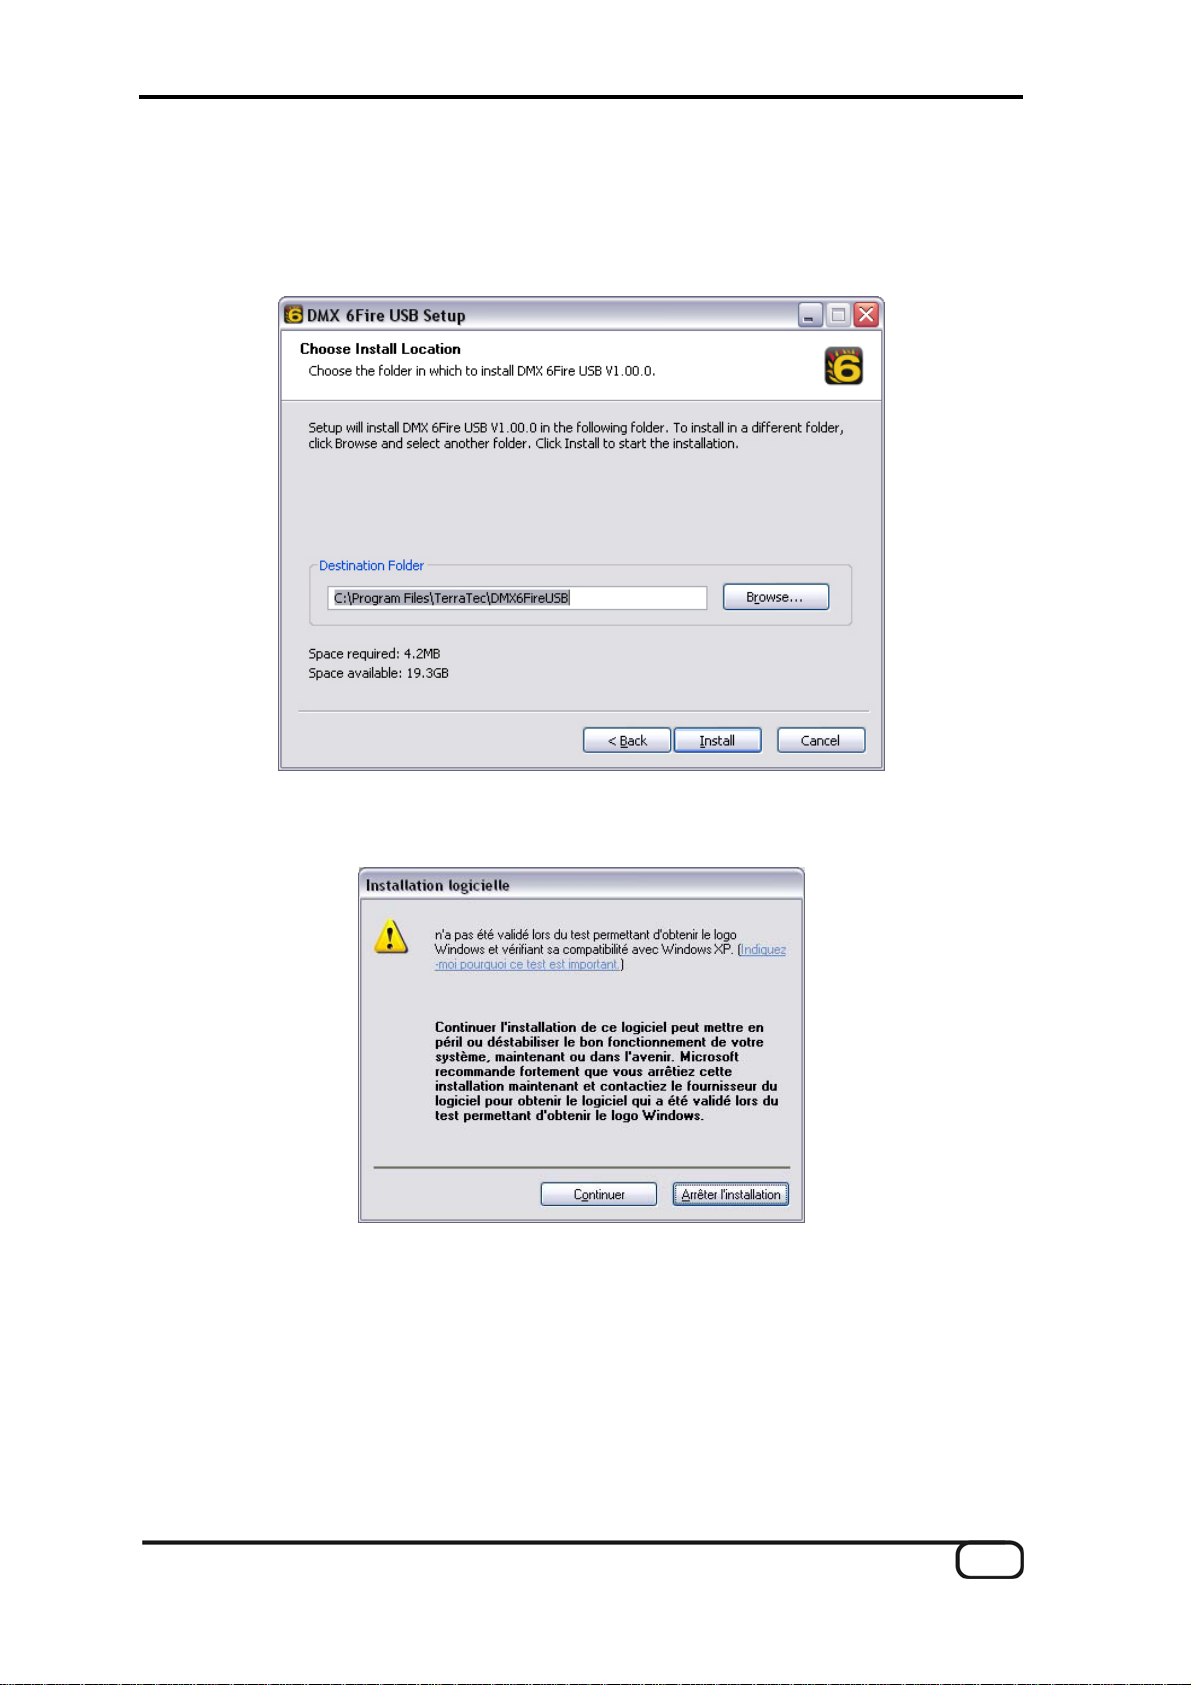
4. Im folgenden Fenster wird der Zielpfad für die Installation bestimmt. Sollten Sie einen
anderen Ordner vorziehen, wählen Sie bitte „Durchsuchen“ und verweisen auf das
entsprechende Verzeichnis. Danach klicken Sie bitte auf „Installieren“.
5. Den folgenden Sicherheitshinweis können Sie ruhigen Gewissens übergehen. Klicken
Sie dazu bitte auf den Button „Installation fortsetzen“.
DMX 6Fire USB (Deutsch) 3
Page 4
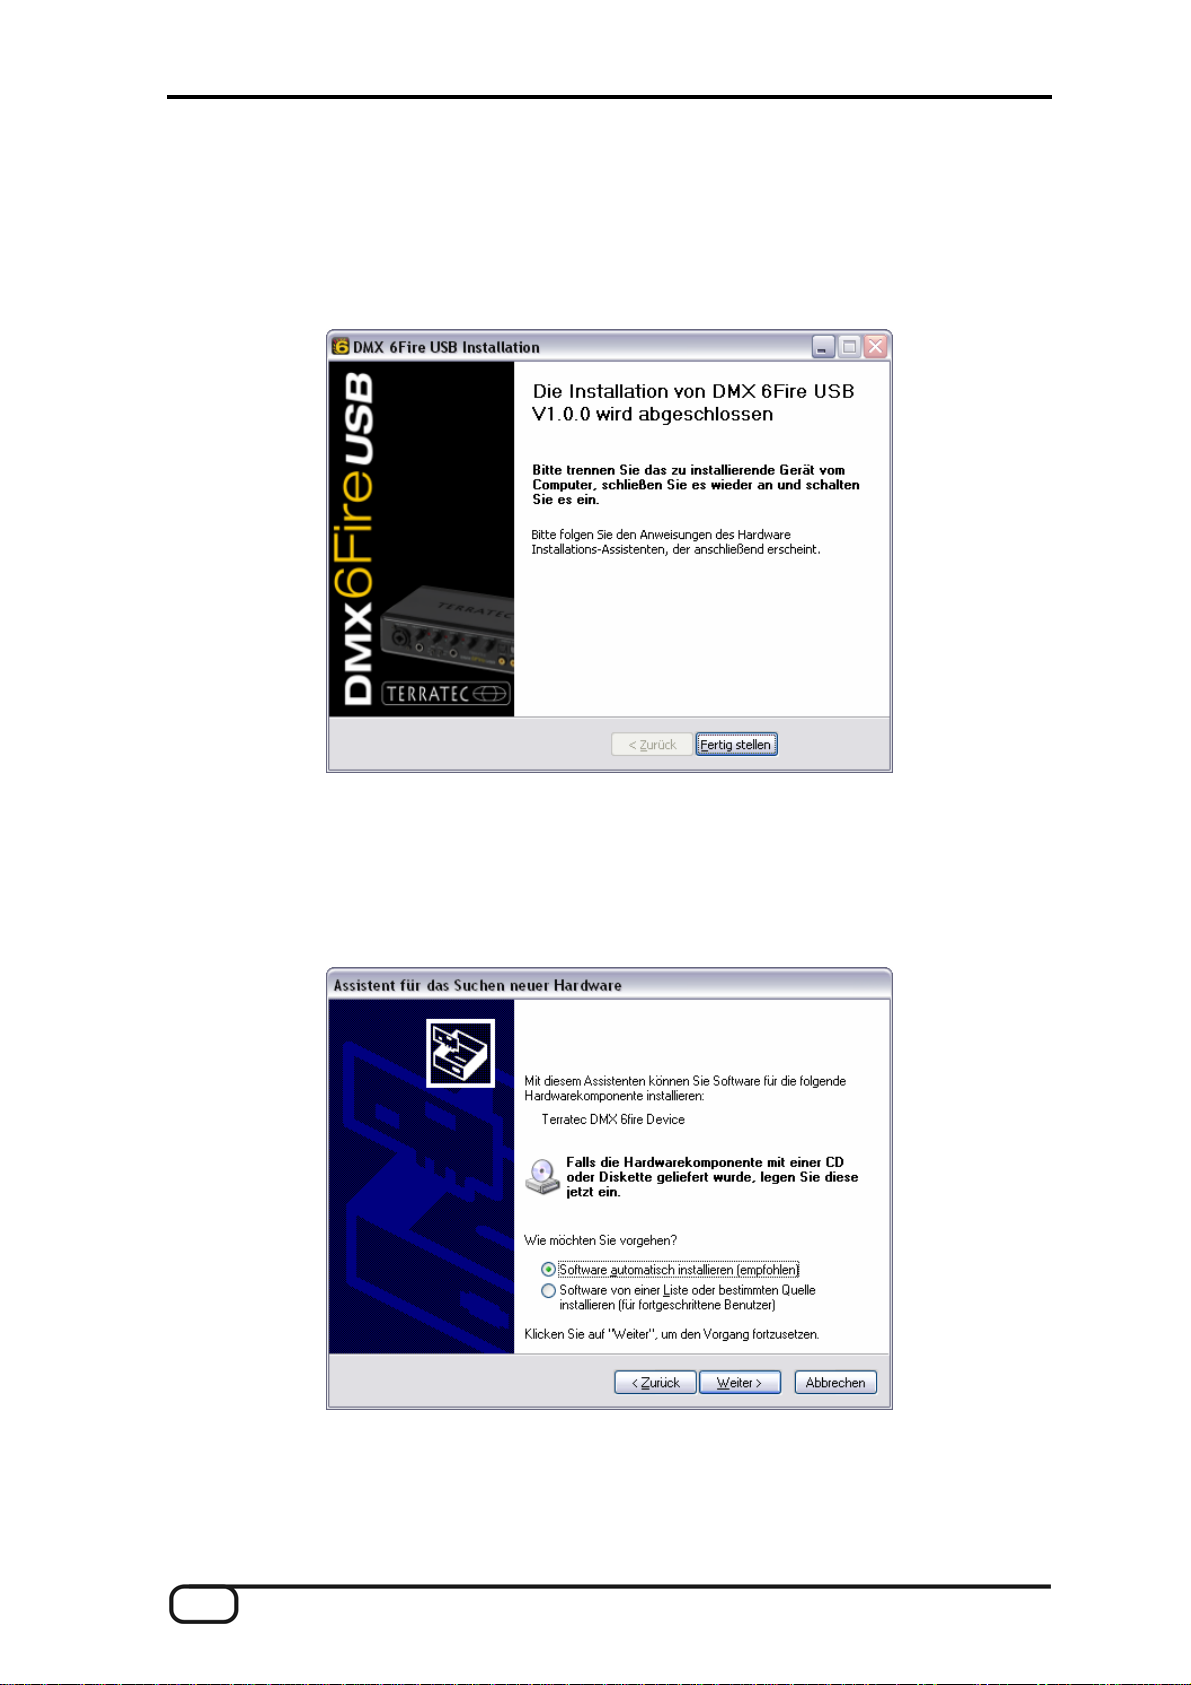
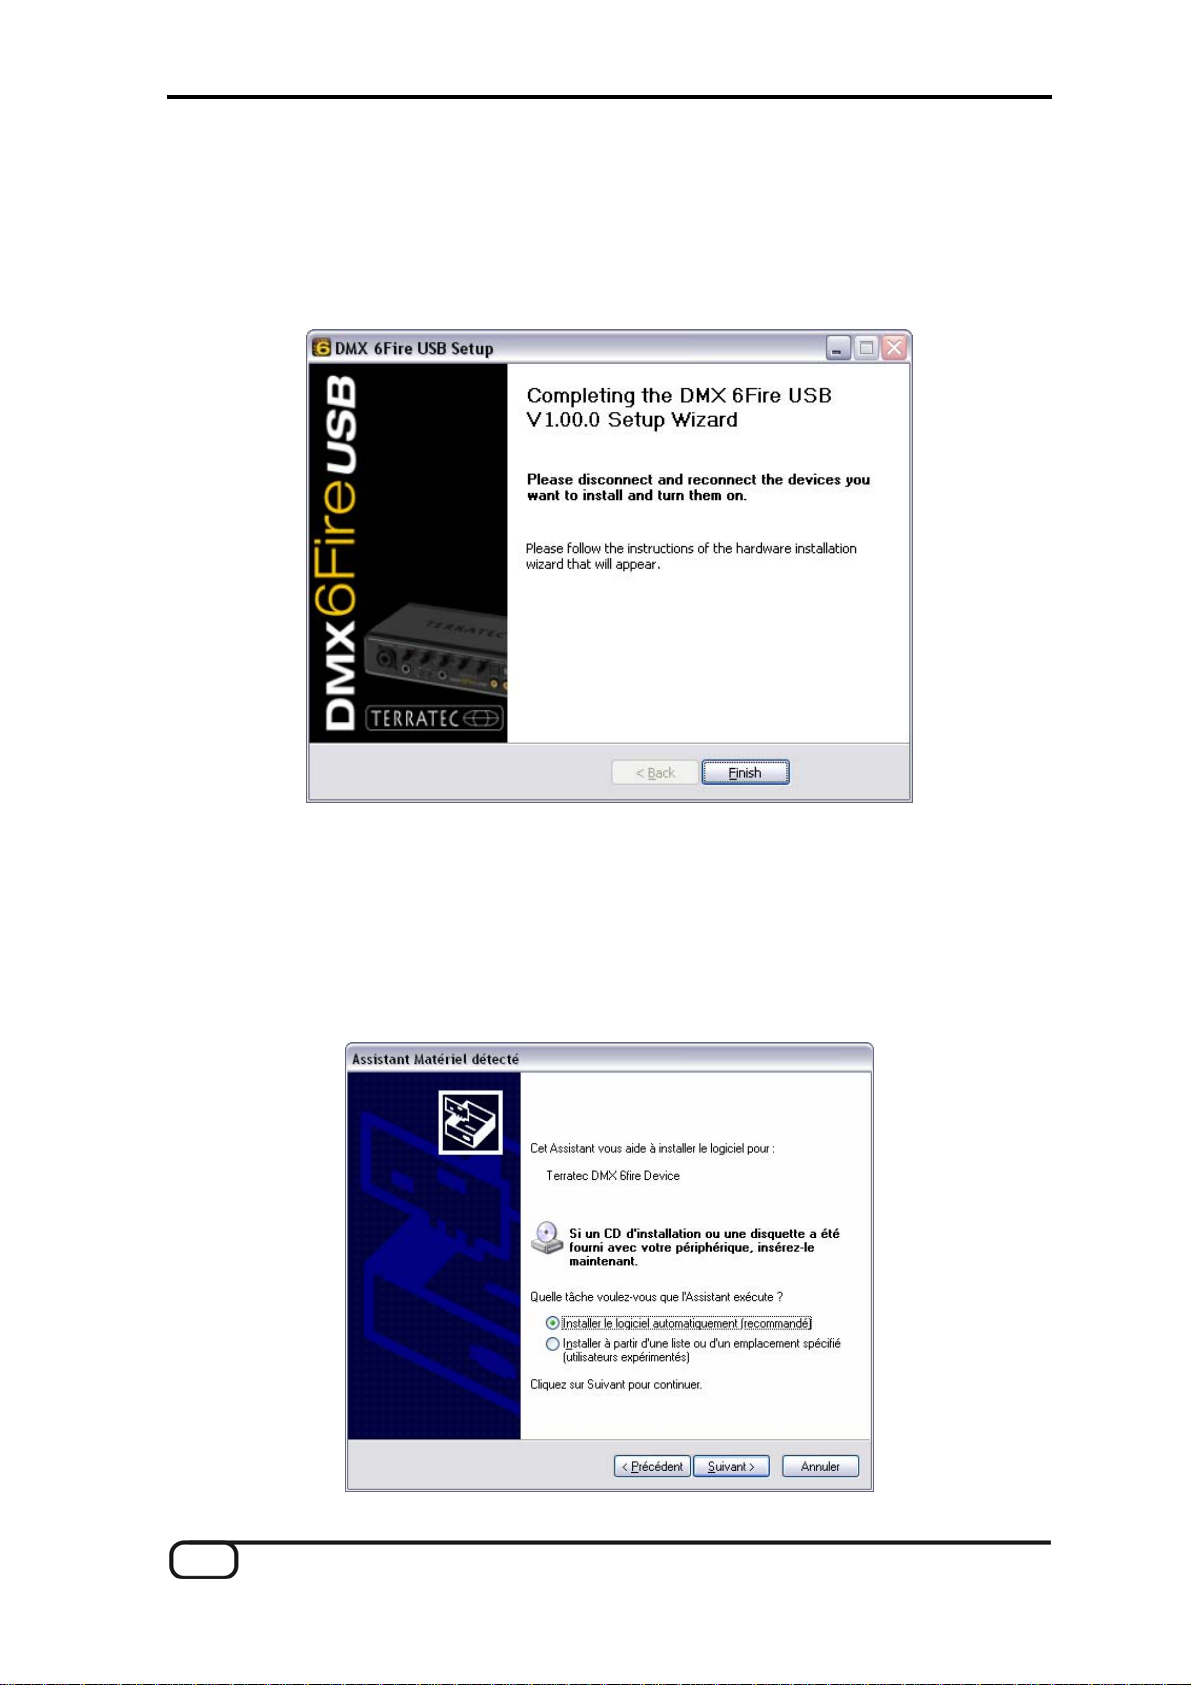
6. Nun ist der Treiber im System installiert und Sie können, sobald die untenstehende
Meldung erscheint, die DMX 6Fire USB mit dem beiliegenden Kabel an den USB 2.0
Anschluss Ihres PCs anschließen. Windows XP wird das neue Gerät automatisch als
neue Hardware erkennen und den Dialog zur Treiber-Installation starten.
7. Der Windows „Assistent für das Suchen neuer Hardware“ fragt nach einem Treiber für
die neue Hardwarekomponente. Diese müssen Sie nicht online suchen lassen. Im
nächsten Fenster wird nach dem Treiber für die Hardware DMX 6Fire USB gefragt.
Wählen Sie „Software automatisch installieren (empfohlen)“ und bestätigen Sie mit
„Weiter“.
4 DMX 6Fire USB (Deutsch)
Page 5
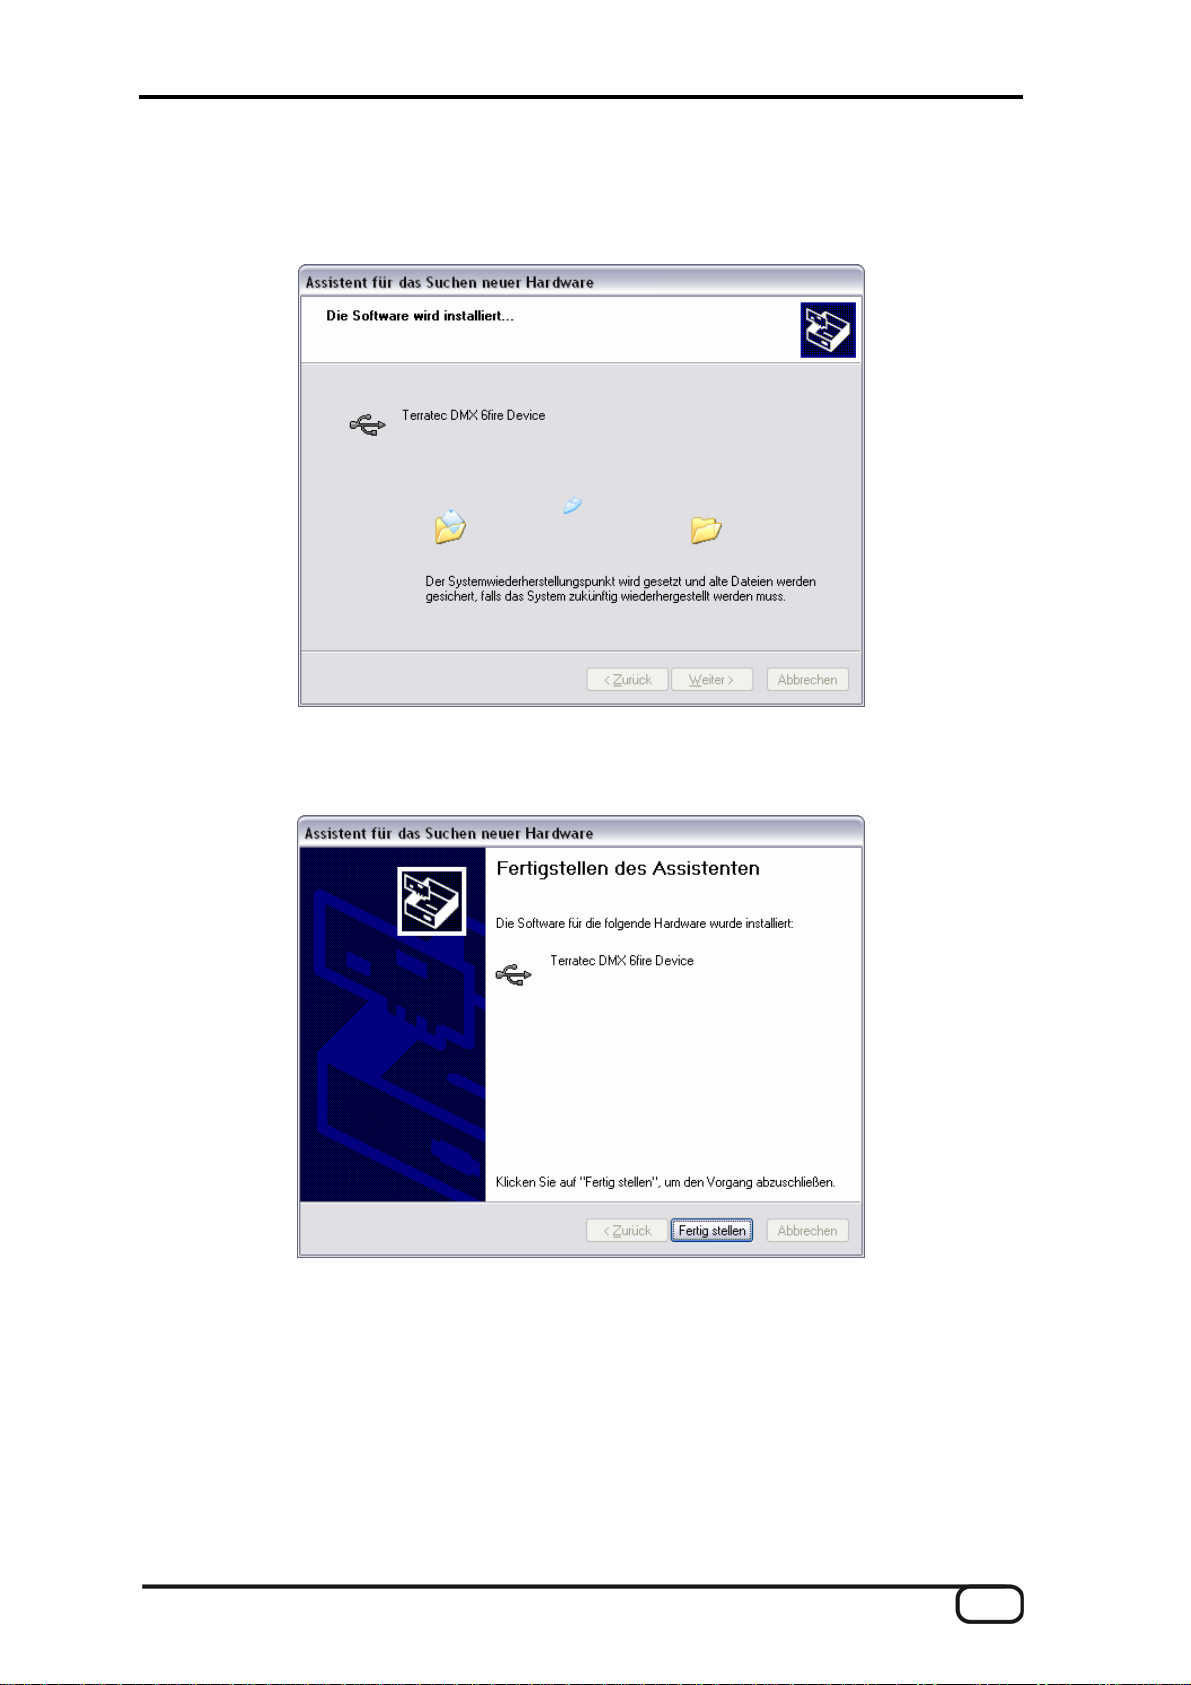
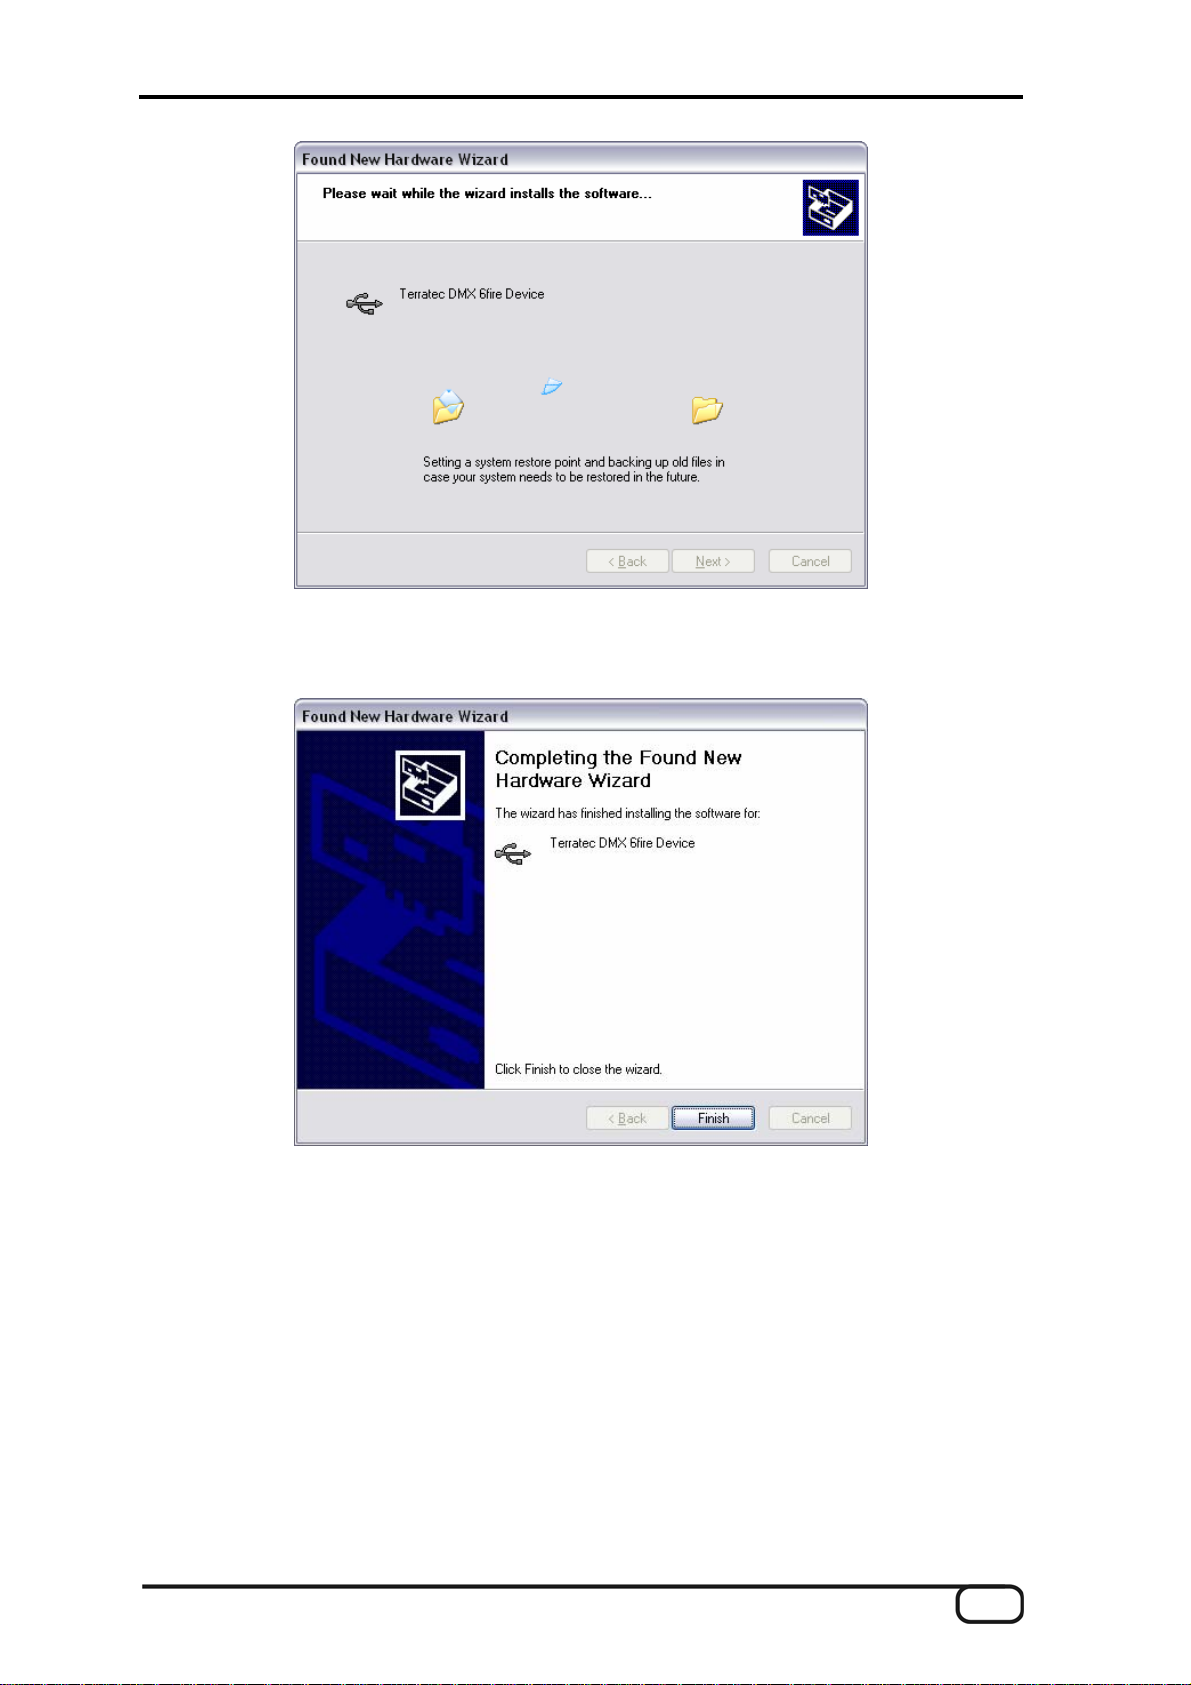
8. Anschließend wird sicherheitshalber ein neuer Systemwiederherstellungspunkt
gesetzt. Kein Grund zur Besorgnis – das ist eine Standard-Vorsichtsmaßnahme.
9. Teil 1 der Installation ist damit beendet. Klicken Sie daher auf „Fertig stellen“.
DMX 6Fire USB (Deutsch) 5
Page 6
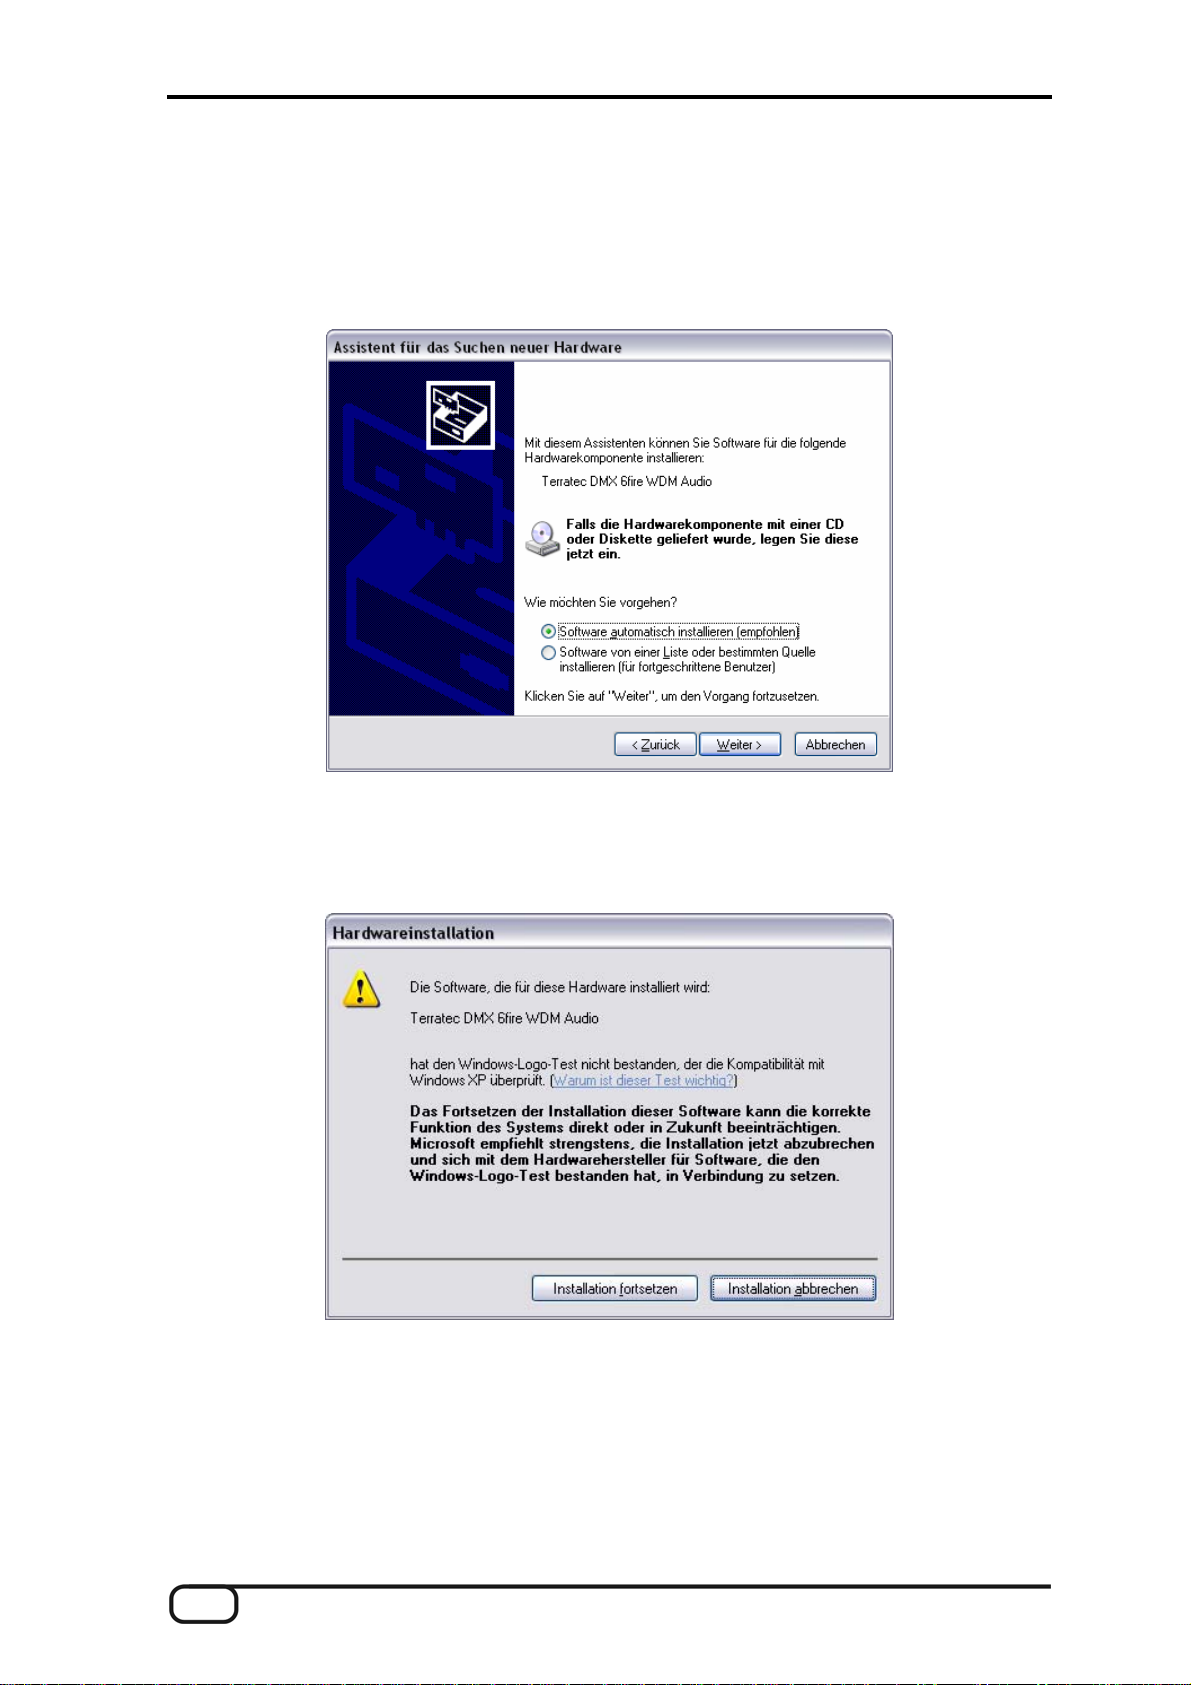
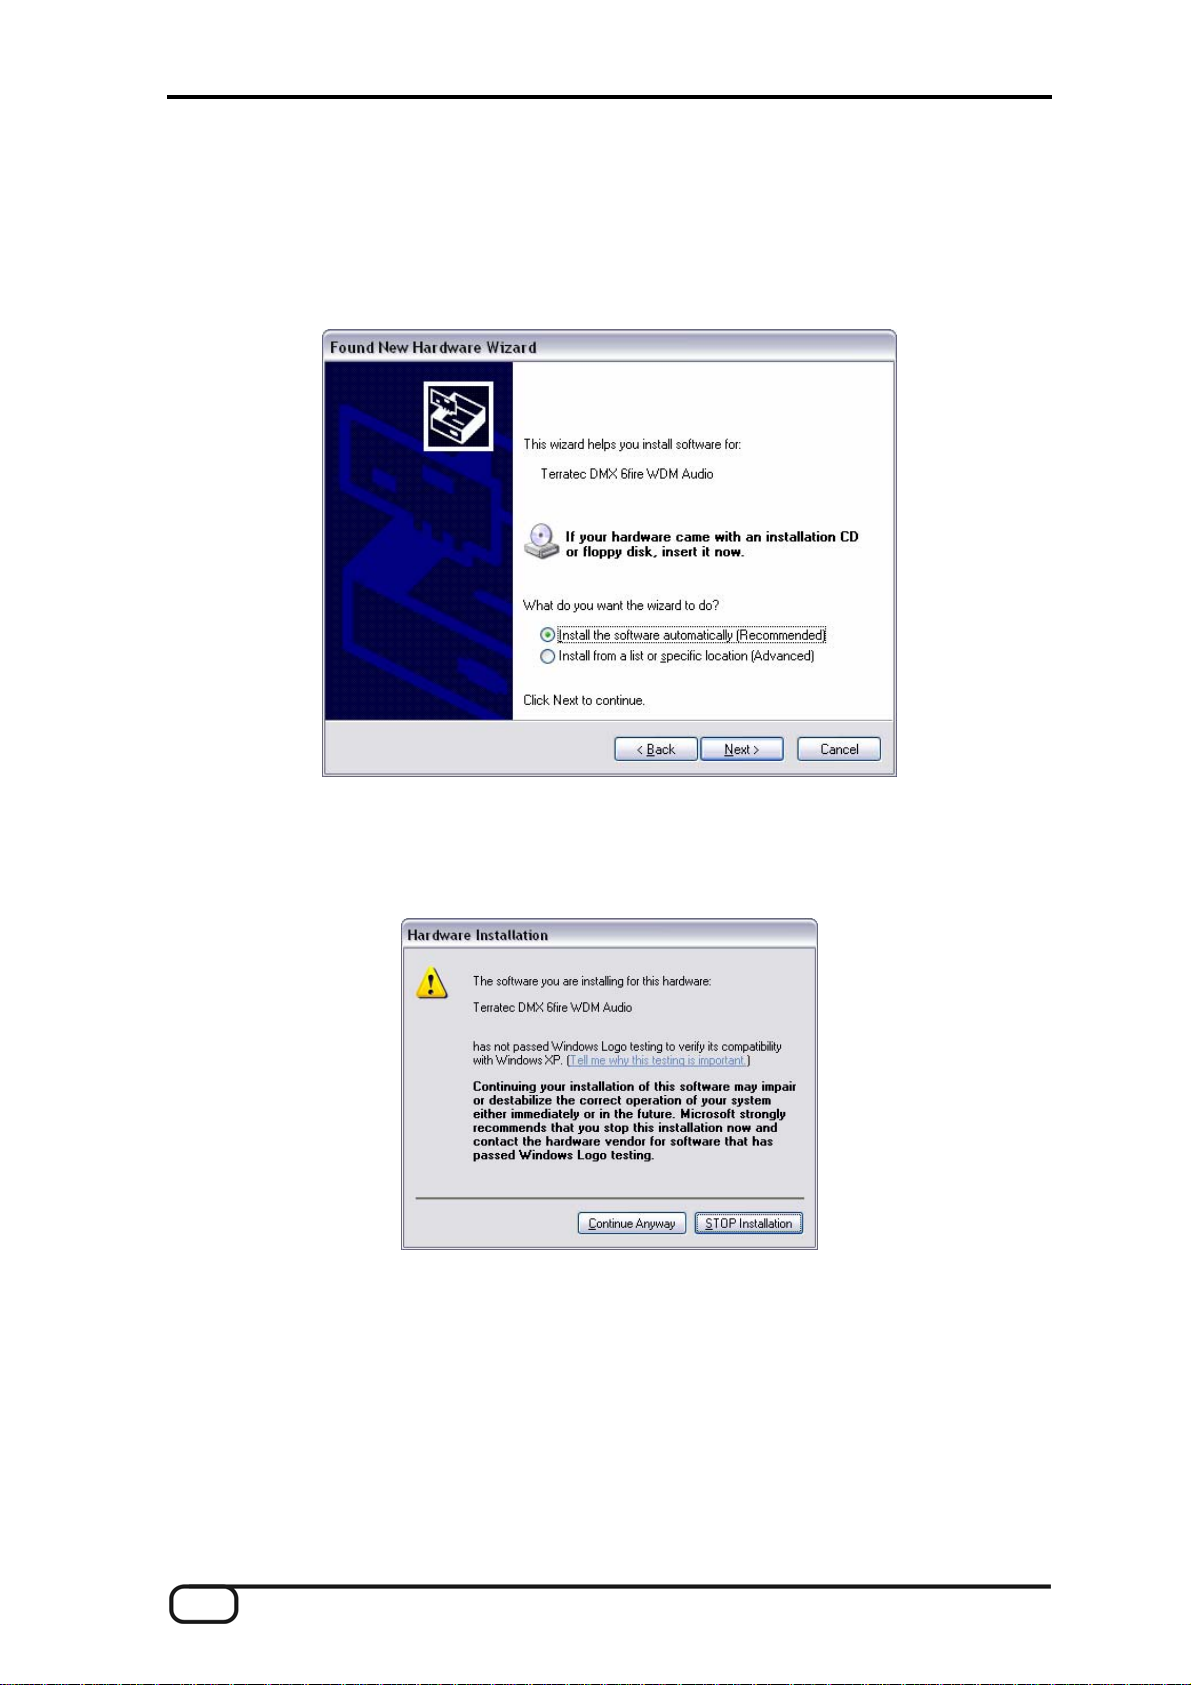
10. Worauf sich noch einmal der Installations-Assistent meldet, da bisher nur die Treiber
für den USB Controller installiert wurden, nun folgt die Installation der Treiber, welche
aus diesem ein USB Audio Device machen. Wählen Sie auch hier „Software automatisch installieren“, um den zweiten Schwung an Treibern zu installieren.
11. Auch hier können Sie die anschließend auftauchende Meldung, dass die Software den
Windows-Logo-Test nicht bestanden habe, getrost ignorieren.
6 DMX 6Fire USB (Deutsch)
Page 7
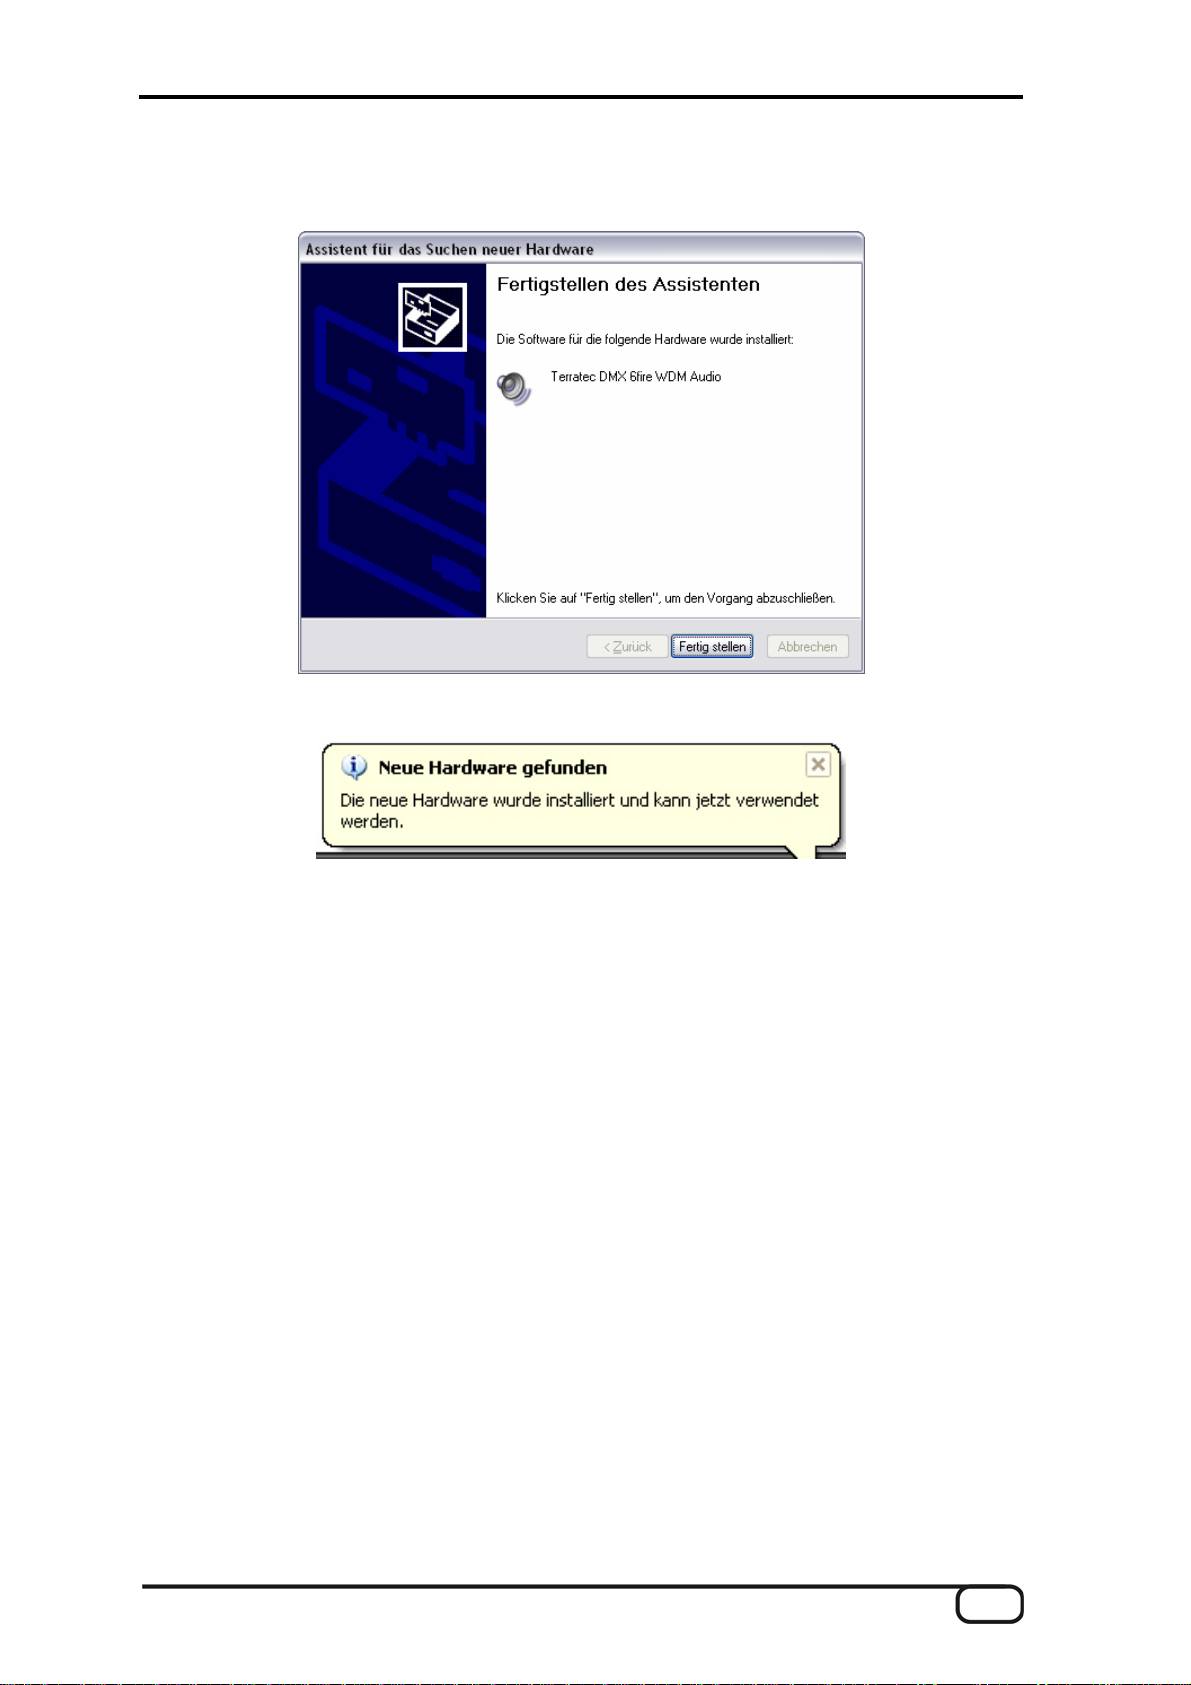
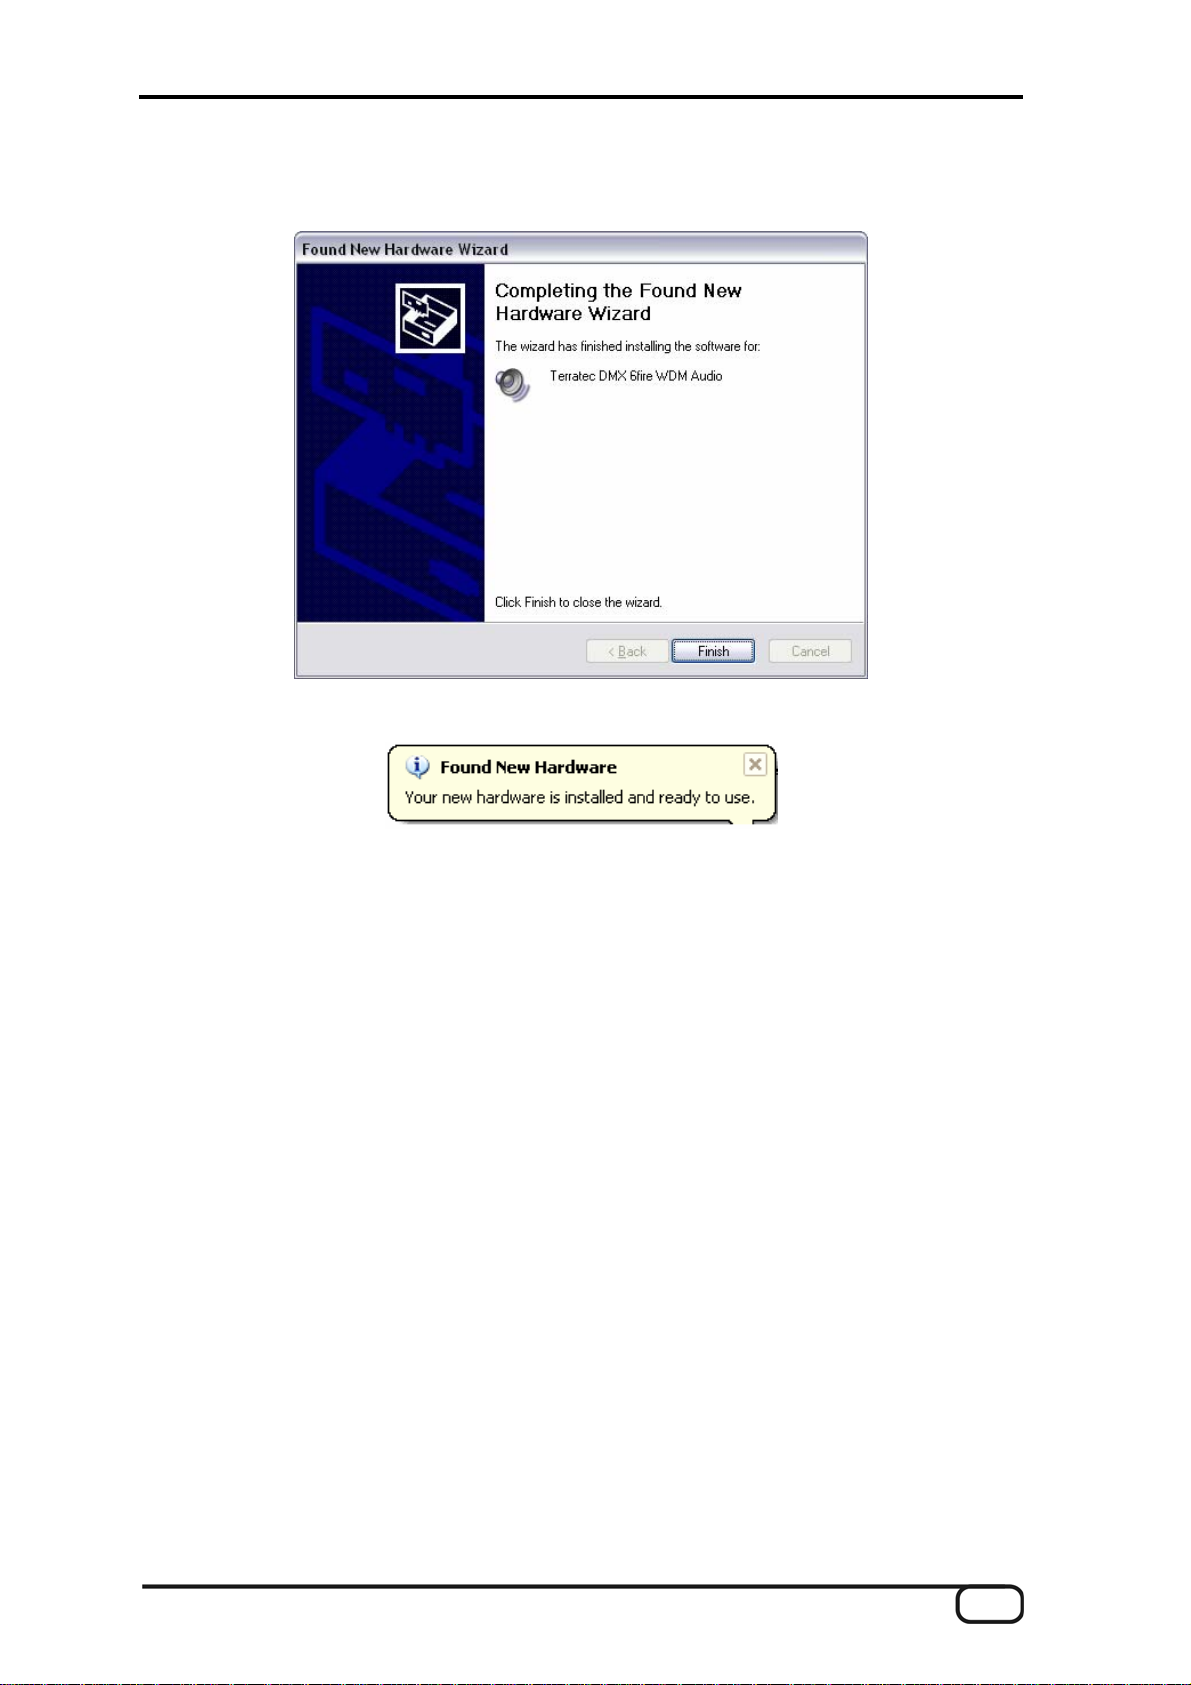
12. Durch „Fertig stellen“ ist die Installation der Treiber abgeschlossen.
Installation des DMX 6Fire USB Treibers unter Windows Vista
1. Nachdem Sie die mitgelieferte Installations-CD eingelegt haben, öffnet sich automatisch die Autostarter-Software. Sollte sich der Autostarter nicht öffnen, starten Sie ihn
manuell durch einen Doppelklick auf „Autorun.exe“ im Root-Verzeichnis der CD.
Der Button „Software Installation“ im Autostarter installiert den DMX 6Fire USB Treiber
und das Control Panel in Ihr Betriebssystem.
DMX 6Fire USB (Deutsch) 7
Page 8
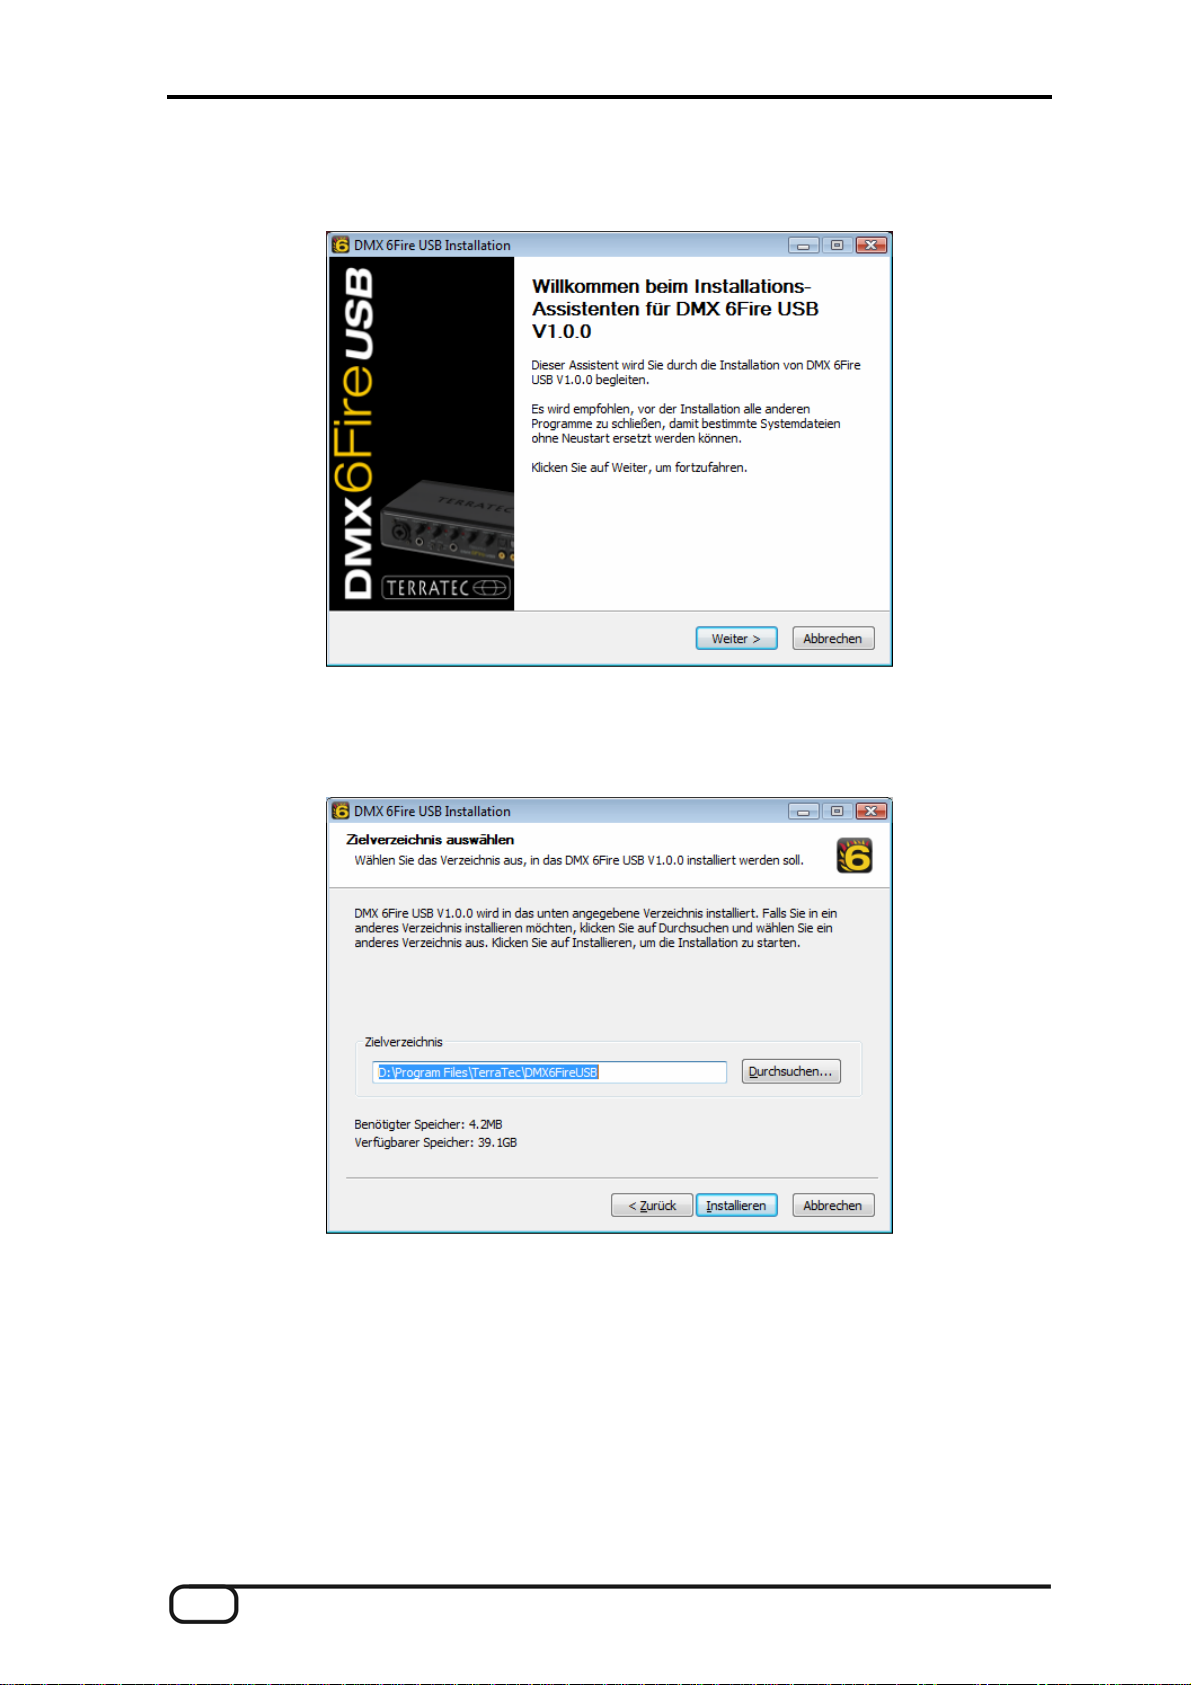
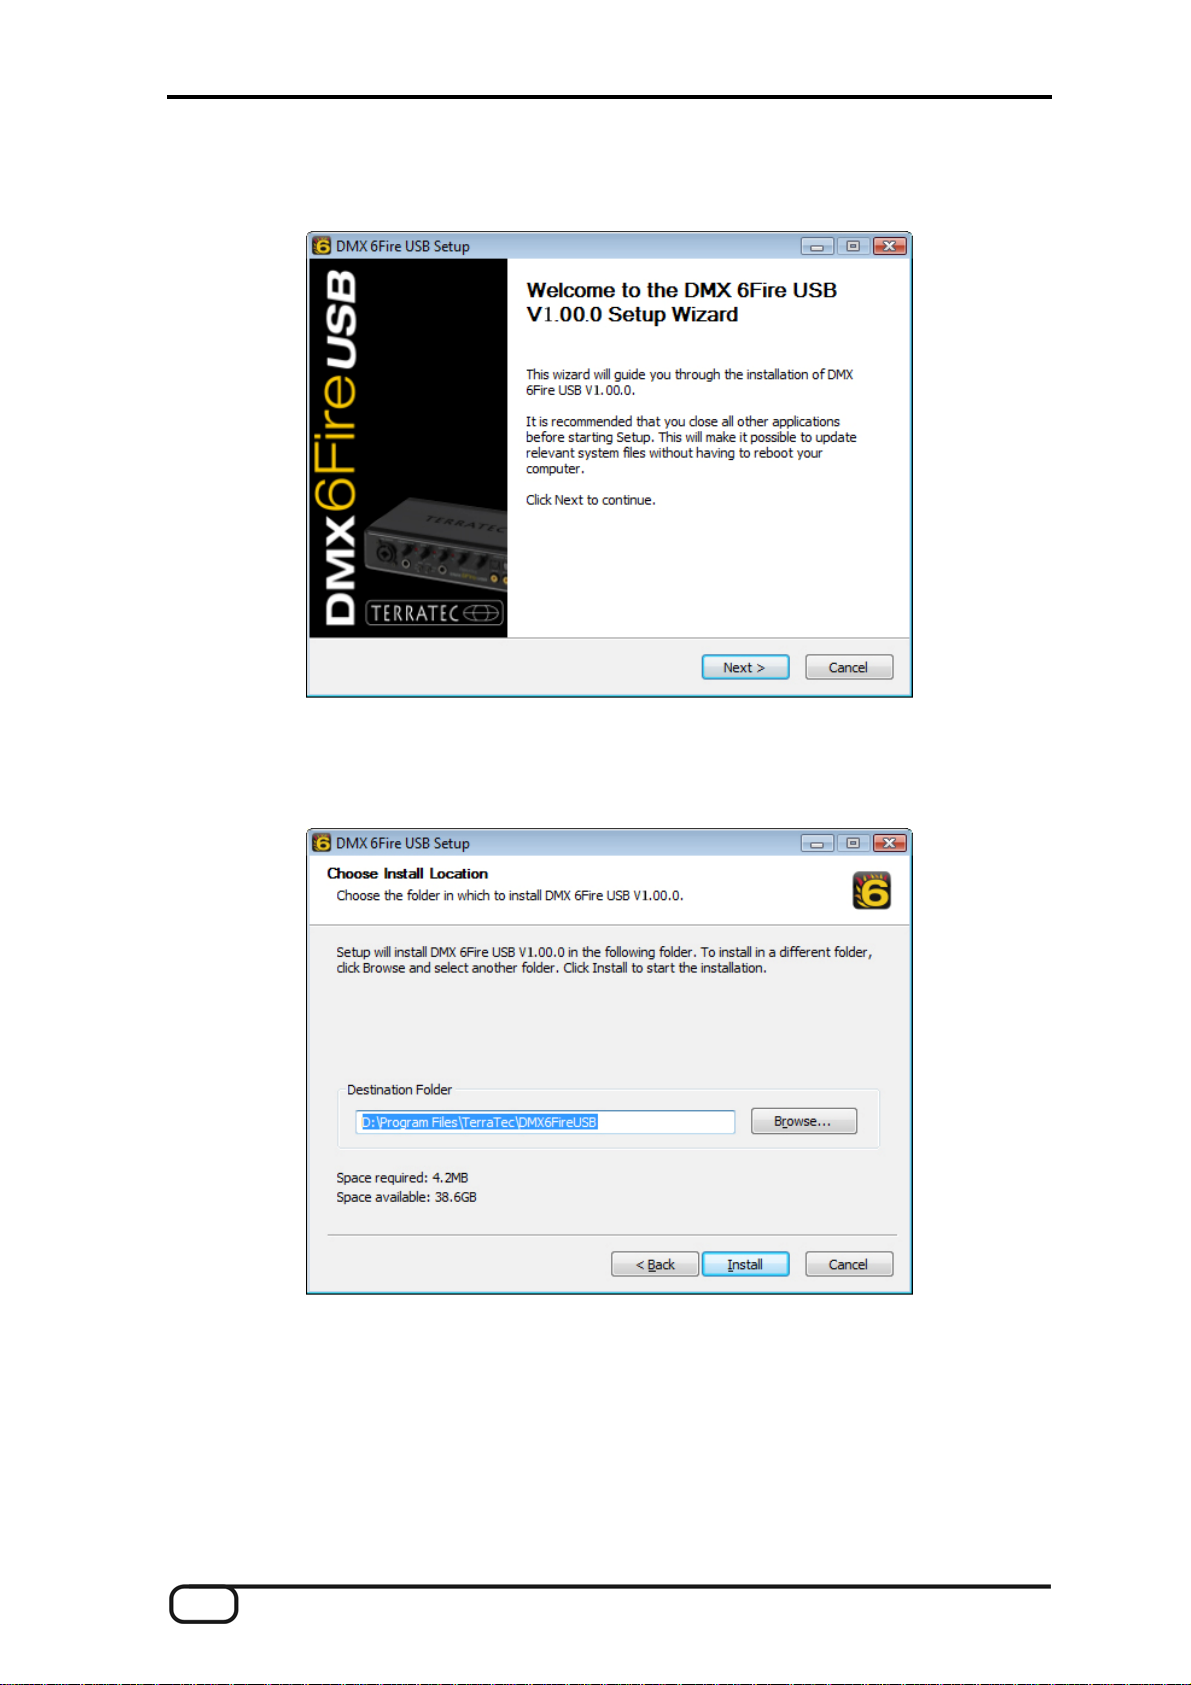
2. Der Installationsassistent meldet nun, dass er bereit zur Installation ist.
3. Im folgenden Fenster wird der Zielpfad für die Installation bestimmt. Sollten Sie einen
anderen Ordner vorziehen, wählen Sie bitte „Durchsuchen“ und verweisen auf das
entsprechende Verzeichnis. Danach klicken Sie bitte auf „Installieren“.
4. Nun ist der Treiber im System installiert und Sie können, sobald die untenstehende
Meldung erscheint, die DMX 6Fire USB mit dem beiliegenden Kabel an den USB 2.0
Anschluss Ihres PCs anschließen. Windows Vista wird das neue Gerät automatisch
als neue Hardware erkennen.
8 DMX 6Fire USB (Deutsch)
Page 9
Scope of delivery
Start by making sure that the contents of the package are complete.
The DMX 6Fire USB package should contain the following items:
■ 1 DMX 6Fire USB (the hardware)
■ 1 network adapter
■ 1 adapter (6.3 mm -> 3.5 mm, stereo)
■ 1 adapter (6.3 mm -> 3.5 mm, mono)
■ 1 USB cable (1.8 m)
■ 1 installation CD (with detailed manual)
■ 1 Quick Start Guide
■ 1 customer service card
■ 1 registration card with the serial number
Windows installation—step by step
Please follow the steps in the same exact order they appear here.
Do not connect the DMX 6Fire USB to the computer until the point
specified in the installation.
Which operating system?
The DMX 6Fire USB can be used with Windows XP (Service Pack 2) and Windows Vista
only. Older Windows versions are not supported. Please ensure that you have applied the
current service packs and updates to your Windows installation.
Power supply
The DMX 6Fire USB is not bus-powered and thus cannot be used without a power
adapter. Power supply via USB cable is feasible only for smaller USB devices; more
complex systems like the DMX 6Fire USB require a separate power connection. Moreover, a power adapter provides much "cleaner" power than a USB port, which has a
noticeable effect on sound quality. Therefore, connect the 6Fire to the power adapter
provided.
Page 10
Installing the DMX 6Fire USB driver in Windows XP
1. Before you start, ensure that your Windows XP version is up to date. Rightclick the "My Computer" icon and choose "Properties" from the context menu.
If you still have the default "Teletubbyland" desktop background image for XP,
the following path will take you to the information you need: Start -> Settings ->
Control Panel -> System. It is important for Windows XP Service Pack 2 (SP2
for short) or Windows Vista to be installed on your computer. If this is not the
case, please contact Microsoft (www.microsoft.com
For Windows, this is generally free of charge.
2. After you insert the installation CD provided, the AutoStart program starts
automatically. If AutoStart does not open, start it manually by double-clicking
"Autorun.exe" in the CD's root directory. The "Installation" button in
AutoStart installs the DMX 6Fire USB driver and the Control Panel in your operating system.
) to update your system.
3. The installation wizard will now display its welcome message.
2 DMX 6Fire USB (English)
Page 11
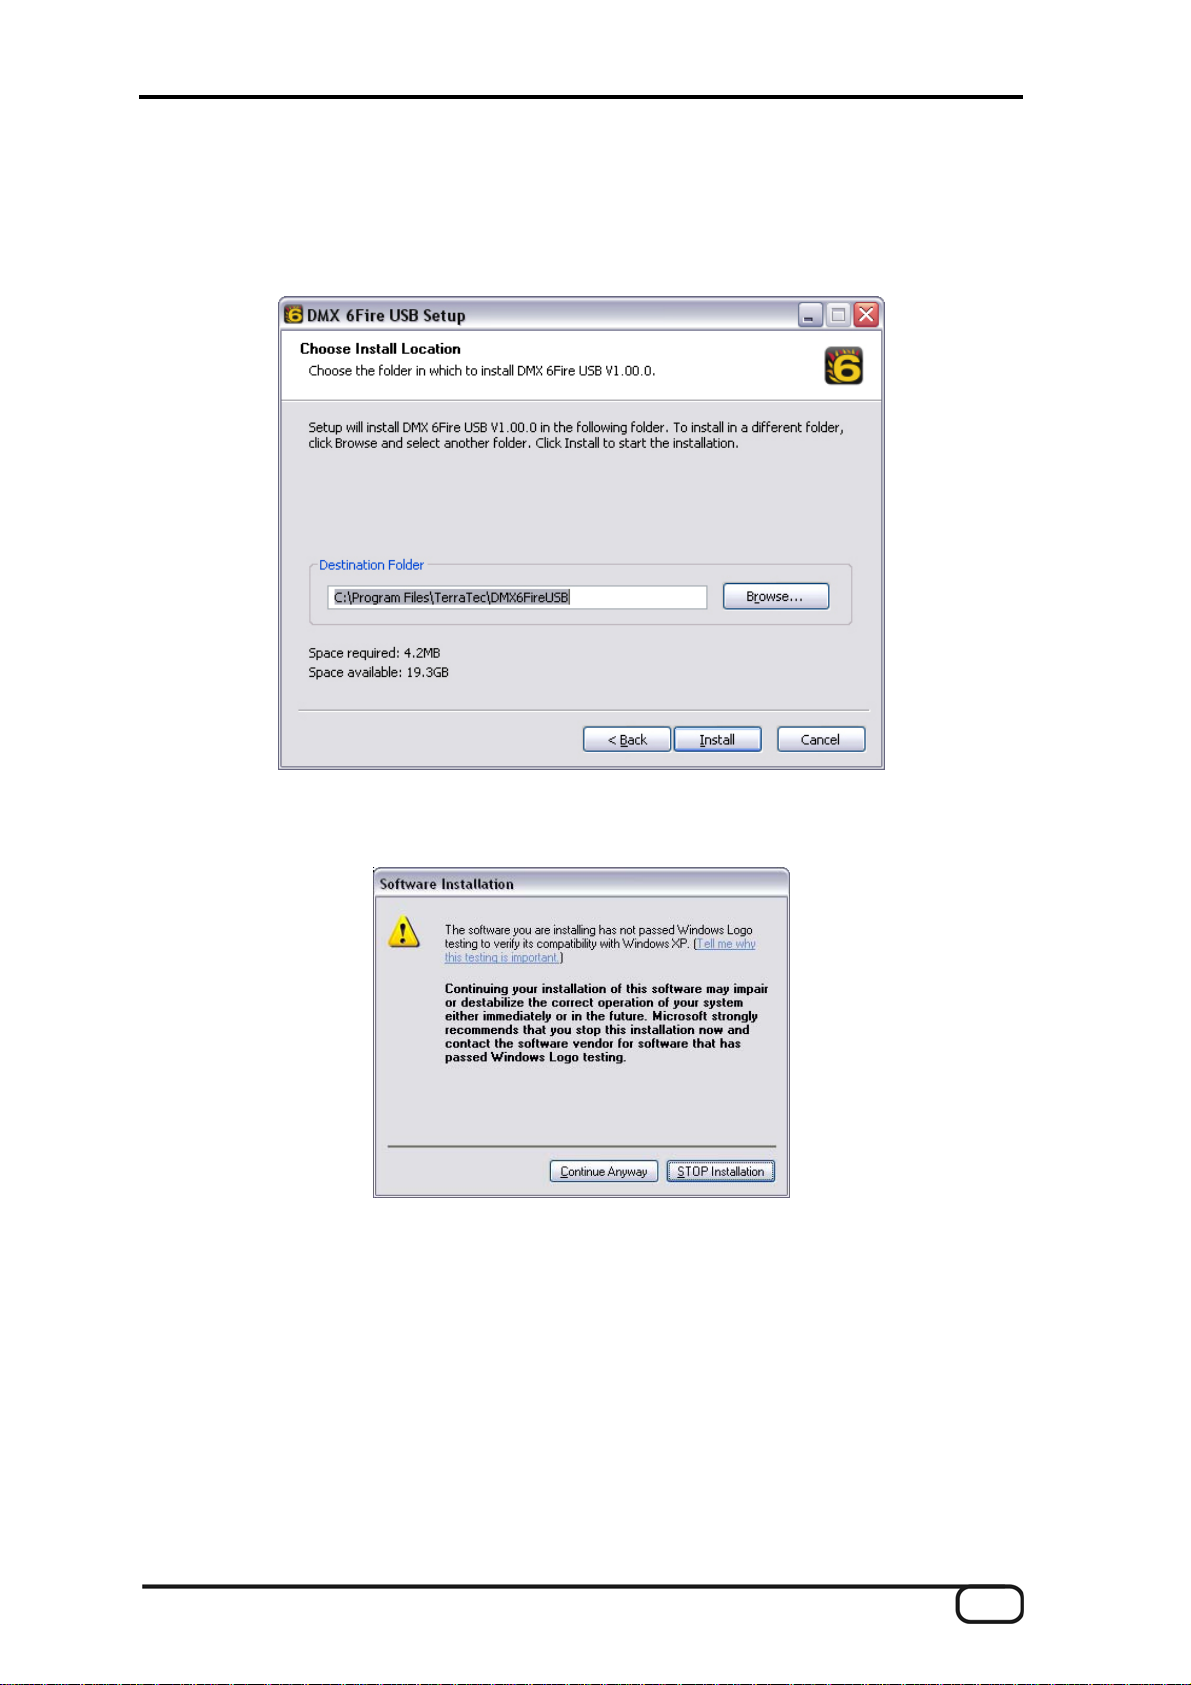
4. The default destination for the installation is specified in the following window.
If you prefer another folder, select "Browse..." and choose the corresponding
directory. Then, click "Install".
5. You can disregard the following safety warning without concern. Click "Continue Anyway" to continue.
DMX 6Fire USB (English) 3
Page 12
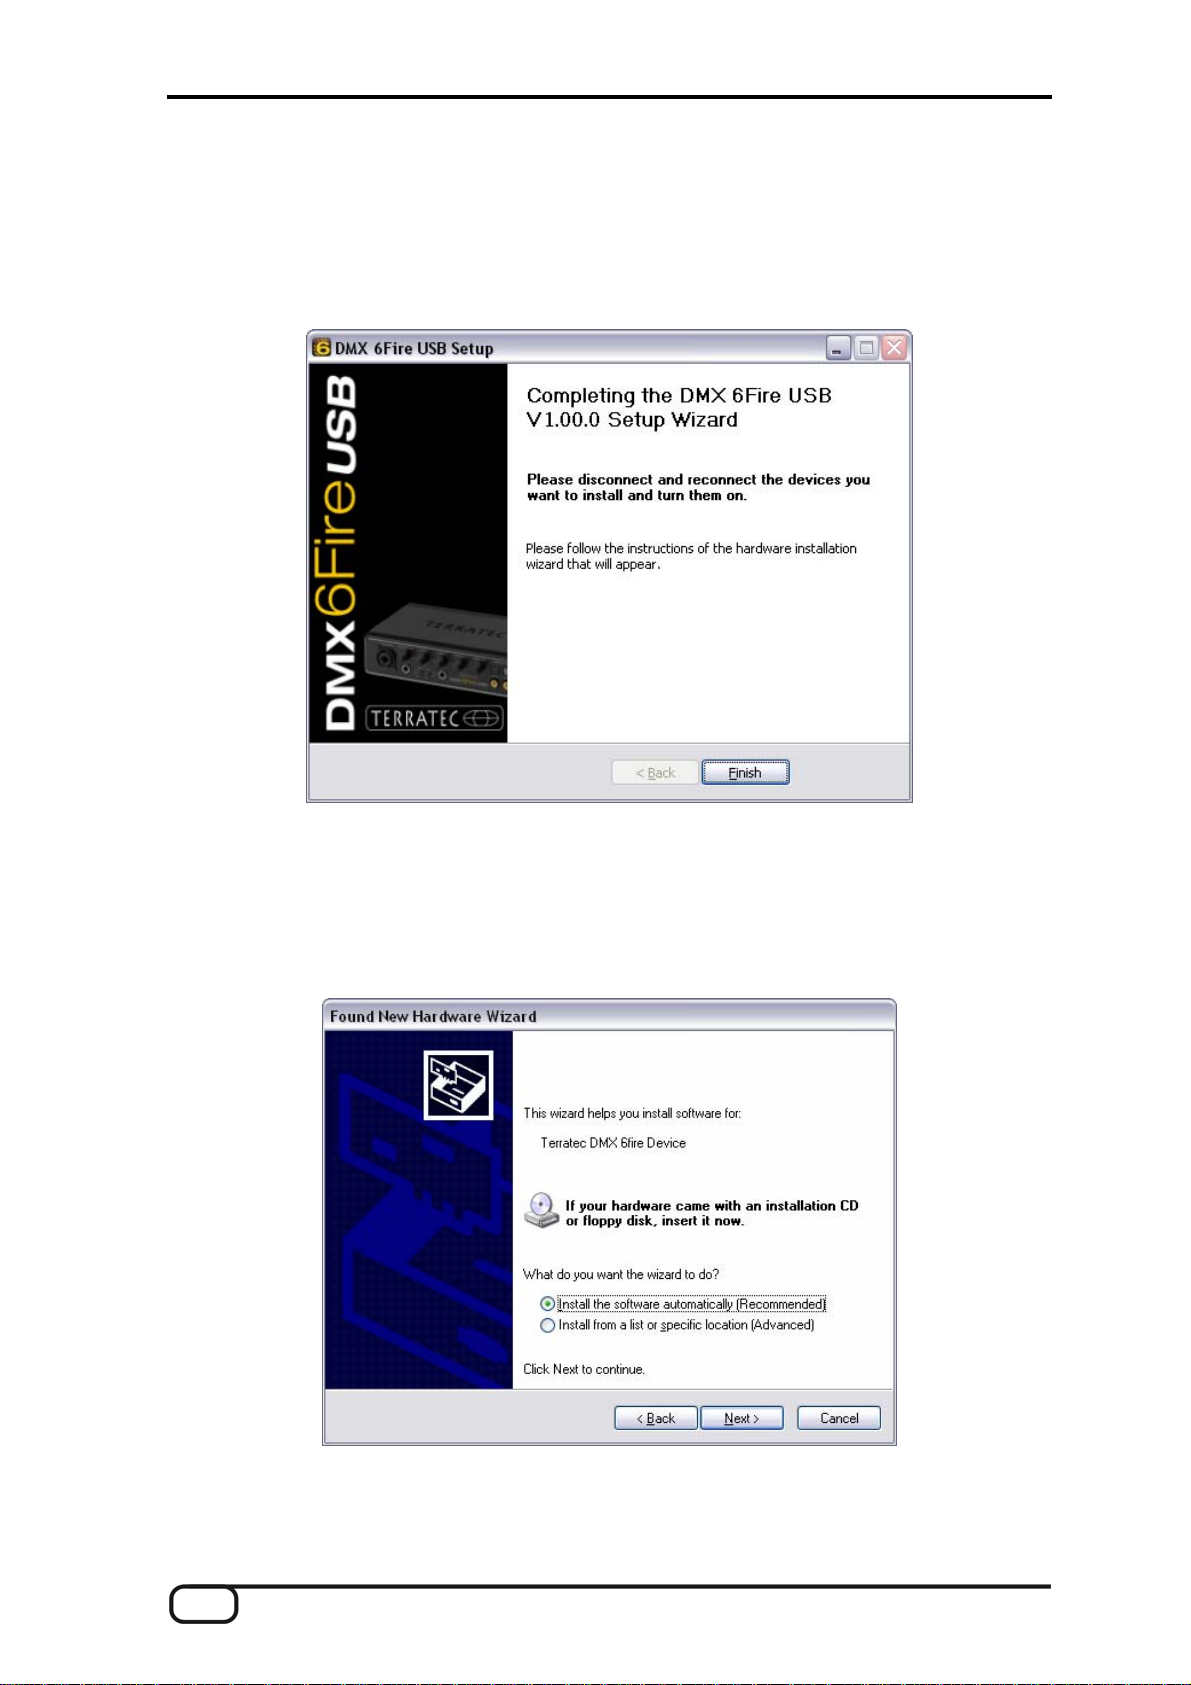
6. The driver is now installed in the system, and as soon as the message below
appears, you can connect the DMX 6Fire USB to your computer's USB 2.0 port
using the cable provided. Windows XP will automatically recognise the device
as new hardware and open the driver installation dialogue.
7. The Windows "Found New Hardware Wizard" asks what driver to use for the
new hardware component. You do not have to search for the driver online. The
next window asks about the driver for the DMX 6Fire USB hardware. Next, select "Install the software automatically [Recommended]" and confirm with
"Next".
8. Then, just to be safe, a new system restore point is set. Nothing to be concerned about—this is a standard precaution.
4 DMX 6Fire USB (English)
Page 13
9. This concludes part 1 of the installation, so click "Finish".
DMX 6Fire USB (English) 5
Page 14
10. This returns you to the installation wizard, as only the drivers for the USB controller have been installed; now, the drivers that make the controller a USB audio device are installed. Here, too, select "Install the software automatically" to
install the second batch of drivers.
11. Again, you can safely ignore the message that the software did not pass the
"Windows Logo test".
6 DMX 6Fire USB (English)
Page 15
12. Click "Finish" to complete the installation of the drivers.
Installing the DMX 6Fire USB driver in Windows Vista
1. After you insert the installation CD provided, the AutoStart program starts auto-
matically. If AutoStart does not open, start it manually by double-clicking "Auto-
run.exe" in the CD's root directory. The "Software Installation" button in AutoStart
installs the DMX 6Fire USB driver and the Control Panel in your operating system.
DMX 6Fire USB (English) 7
Page 16
2. The installation wizard will now display its welcome message.
3. The default destination for the installation is specified in the following window. If
you prefer another folder, select "Browse..." and choose the corresponding directory. Then, click "Install".
4. The driver is now installed in the system, and as soon as the message below appears, you can connect the DMX 6Fire USB to your computer's USB 2.0 port using
the cable provided. Windows Vista will automatically recognise the device as new
hardware.
8 DMX 6Fire USB (English)
Page 17
Contenu du coffret
Pour commencer, vérifiez que le contenu du paquet soit complet.
Le coffret du DMX 6Fire USB devrait contenir les composants suivants :
■ 1 DMX 6Fire USB (le matériel)
■ 1 bloc d'alimentation
■ 1 adaptateur (jack 6,3 mm -> 3,5 mm, stéréo)
■ 1 adaptateur (jack 6,3 mm -> 3,5 mm, mono)
■ 1 câble USB (1,8 m)
■ 1 CD d'installation (contenant le manuel intégral)
■ 1 guide de démarrage rapide
■ 1 carte de service
■ 1 carte d'enregistrement avec numéro de série.
L'installation sous Windows – Etape par étape
Suivez les explications dans l'ordre indiqué. Attendez de connecter
le DMX 6Fire USB à l'ordinateur jusqu'à ce que vous y soyez
invité.
Quel système d'exploitation ?
Le DMX 6Fire USB est mis en œuvre exclusivement sous Windows XP (Service Pack 2)
et Windows Vista. Les anciennes versions de Windows ne sont pas prises en charge.
Assurez-vous que les derniers Service Packs et correctifs de Microsoft soient installés sur
votre système d'exploitation.
Alimentation électrique
Le DMX 6Fire USB ne fonctionne pas sans bloc d'alimentation externe, il n'est donc pas
alimenté par le bus USB. L'alimentation via le câble USB n'est réalisable qu'avec des
périphériques USB de petite taille, les appareils ayant une consommation supérieure –
comme le DMX 6Fire USB – ont besoin de leur propre alimentation. En plus, un bloc
d'alimentation délivre un courant plus « propre » qu'avec le port USB, ce qui se répercute
tout à fait sur la qualité du son. N'oubliez donc pas de relier le 6Fire au bloc d'alimentation
joint.
Page 18
Installation du pilote du DM 6Fire USB sous Windows XP
1. Avant de commencer, vérifiez que votre version de Windows XP soit à jour. Cliquez
avec le bouton droit de la souris sur l'icône « Poste de travail » du bureau, puis sélectionnez « Propriétés ». Si votre image de fond est encore l'image de fond standard de
Windows XP, vous pouvez accéder à cette information en passant par : Démarrer ->
Paramètres -> Panneau de configuration -> Système. Il importe que le Service Pack 2,
aussi appelé SP2, soit installé sous Windows XP ou que votre système d'exploitation
soit Windows Vista. Si ce n'est pas le cas, veuillez vous adresser à Microsoft
(www.microsoft.com
Windows est gratuite.
2. Quand vous avez insérez le CD d'installation fourni, l'assistant d'installation démarre
automatiquement. Si l'assistant n'est pas exécuté au bout de quelques secondes,
vous pouvez le lancer manuellement en double-cliquant sur « Autorun.exe » dans
le répertoire racine du CD. Le bouton « Installation » installe le pilote et le panneau de
contrôle du DMX 6Fire USB sur votre disque dur.
) pour mettre votre système à jour. En général, la mise à jour de
3. L'assistant d'installation vous avertit qu'il est prêt à procéder à l'installation.
2 DMX 6Fire USB (Français)
Page 19
4. La fenêtre suivante permet d'indiquer le répertoire de destination pour l'installation.
Pour installer le pilote dans un répertoire différent, cliquez sur « Parcourir » et sélectionnez le répertoire de destination voulu. Cliquez ensuite sur « Installer ».
5. Vous pouvez ignorer le message de sécurité en bonne conscience. Cliquez sur le
bouton « Continuer ».
DMX 6Fire USB (Français) 3
Page 20
6. Le pilote est à présent installé et vous pouvez connecter votre DMX 6Fire USB au port
USB 2.0 avec le câble fourni dès que le message ci-dessous est affiché. Windows XP
détecte le nouveau périphérique automatiquement comme ajout de nouveau matériel
et ouvre la fenêtre d'installation du pilote.
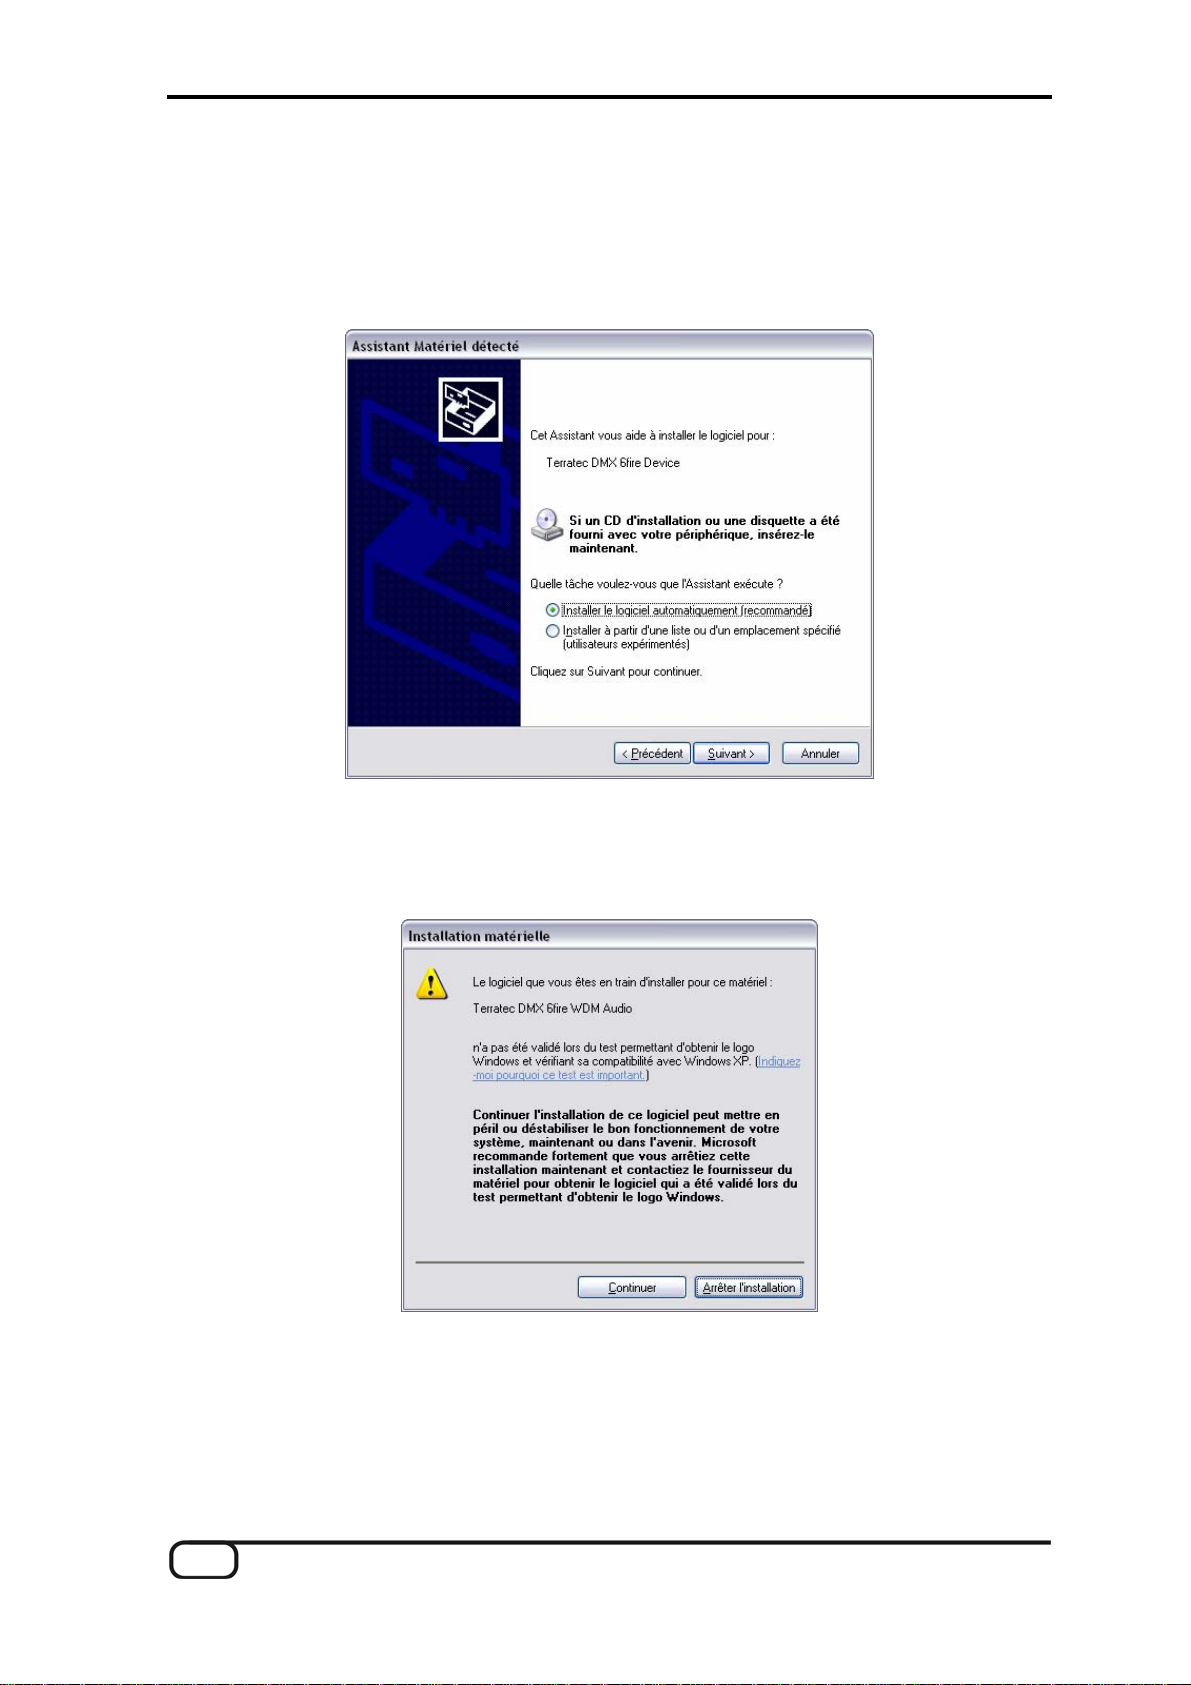
7. L'assistant d'ajout de matériel détecté de Windows réclame un pilote pour le composant détecté. Il n'est pas nécessaire de le rechercher en ligne. Windows vous demande comment le pilote du DMX 6Fire USB doit être recherché. Sélectionnez « Installer le logiciel automatiquement (recommandé) » et confirmez en cliquant sur « Suivant ».
4 DMX 6Fire USB (Français)
Page 21
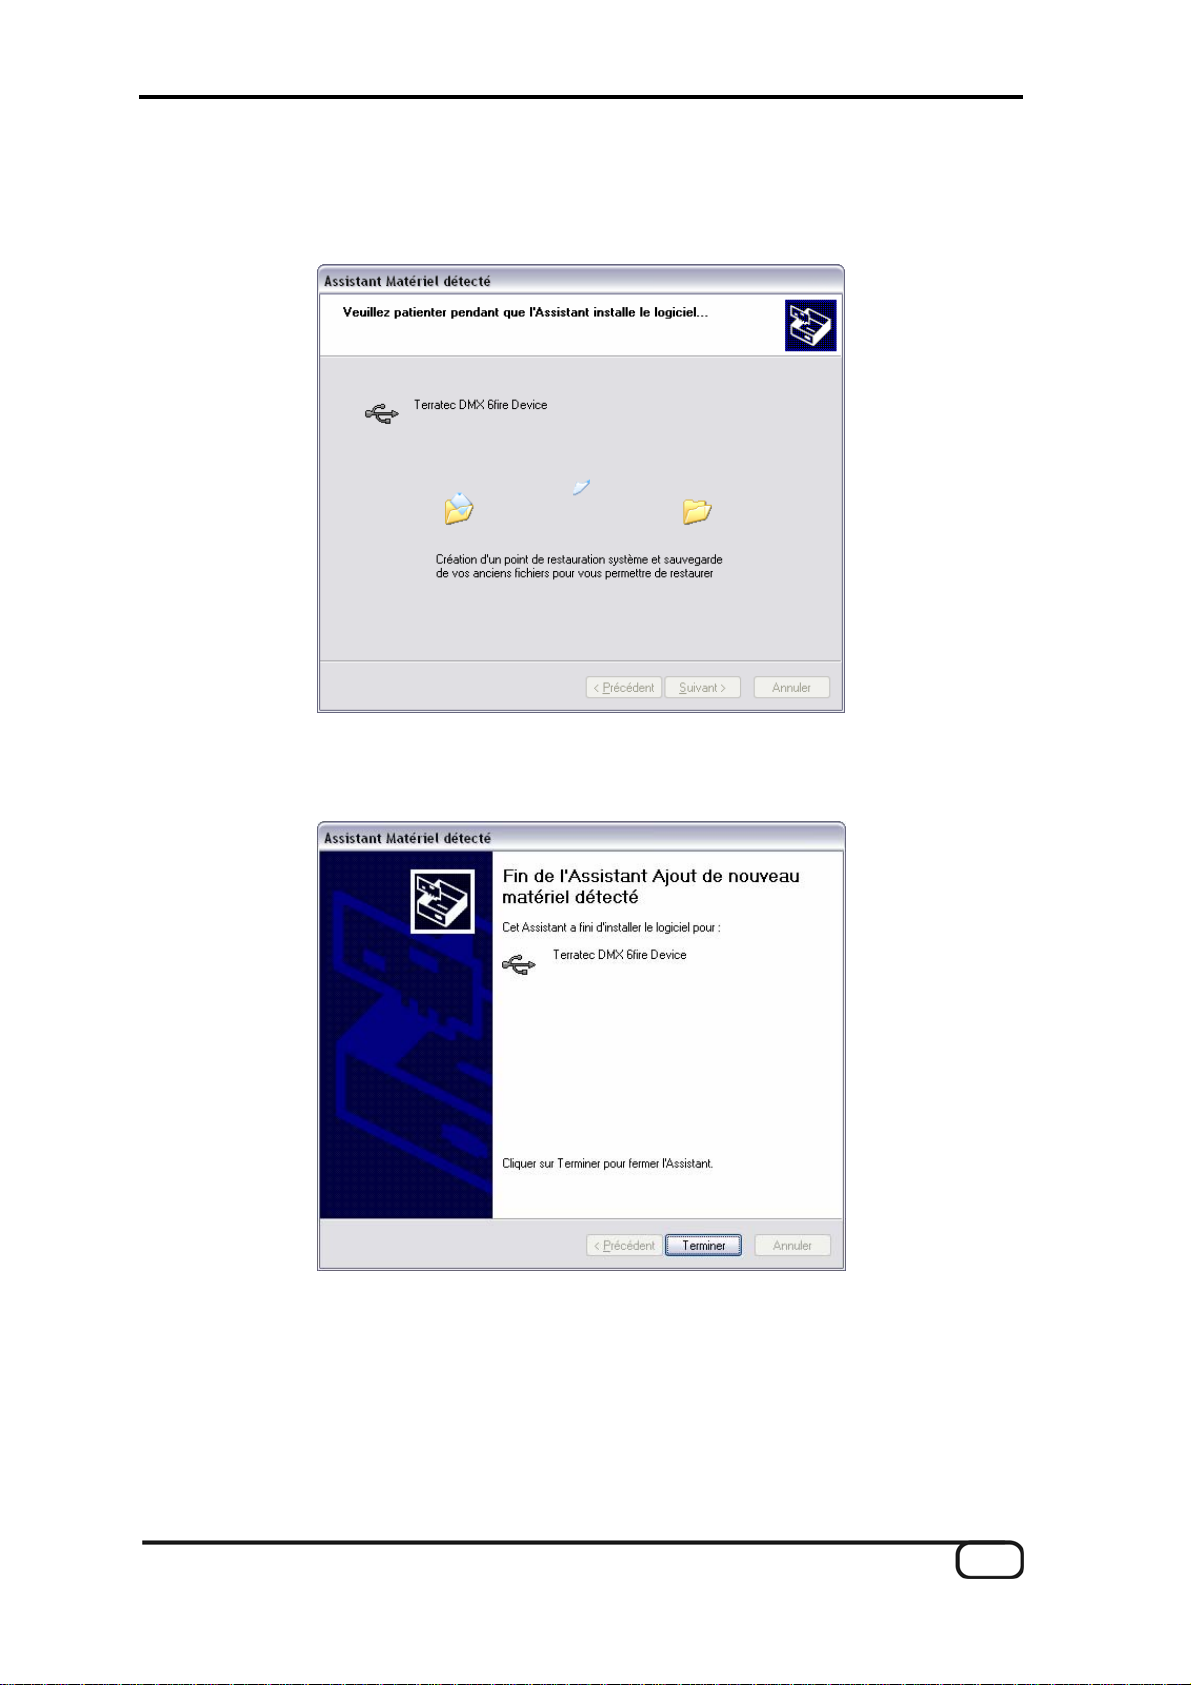
8. Par mesure de sécurité, Windows crée automatiquement un nouveau point de
restauration. Pas de panique – il s'agit d'une mesure de sécurité par défaut.
9. La première partie de l'installation est terminée. Cliquez donc sur « Terminer ».
DMX 6Fire USB (Français) 5
Page 22
10. L'assistant d'installation s'affiche une deuxième fois puisque seul le pilote du contrôleur USB a été installé. Il s'agit maintenant d'installer les pilotes qui en font un périphérique audio USB. Sélectionnez une nouvelle fois « Installer le logiciel automatiquement (recommandé) » pour installer le deuxième paquet de pilotes.
11. Vous pouvez également ignorer le message ci-dessous informant que le logiciel n'a
pas validé lors du test permettant d'obtenir le logo Windows.
6 DMX 6Fire USB (Français)
Page 23

12. Cliquez sur « Terminer » pour conclure l'installation des pilotes.
Installation du pilote du DMX 6Fire USB sous Windows Vista
1. Quand vous avez insérez le CD d'installation fourni, l'assistant d'installation démarre
automatiquement. Si l'assistant n'est pas exécuté au bout de quelques secondes,
vous pouvez le lancer manuellement en double-cliquant sur « Autorun.exe » dans
le répertoire racine du CD. Le bouton « Installation de logiciel » installe le pilote et le
panneau de contrôle du DMX 6Fire USB sur votre disque dur.
DMX 6Fire USB (Français) 7
Page 24

2. L'assistant d'installation vous avertit qu'il est prêt à procéder à l'installation.
3. La fenêtre suivante permet d'indiquer le répertoire de destination pour l'installation.
Pour installer le pilote dans un répertoire différent, cliquez sur « Parcourir » et sélectionnez le répertoire de destination voulu. Cliquez ensuite sur « Install ».
4. Le pilote est à présent installé et vous pouvez connecter votre DMX 6Fire USB au port
USB 2.0 avec le câble fourni dès que le message ci-dessous est affiché. Windows
Vista détecte automatiquement que le nouveau périphérique est un nouveau matériel.
8 DMX 6Fire USB (Français)
Page 25

Parti fornite
Controllate che la confezione acquistata sia al completo.
Le parti fornite della DMX 6Fire USB comprendono almeno:
■ 1 DMX 6Fire USB (l'hardware)
■ 1 alimentatore
■ 1 adattatore (6,3 mm -> 3,5 mm, stereo)
■ 1 adattatore (6,3 mm -> 3,5 mm, mono)
■ 1 cavo USB (1,8 m)
■ 1 CD di installazione (con dettagliato manuale)
■ 1 guida Quick Start
■ 1 foglio informativo di assistenza
■ 1 scheda di registrazione con numero di serie
L'installazione in Windows - passo per passo
Seguite le operazioni esattamente nell'ordine indicato e collegate
la DMX 6Fire USB al PC solo nel momento in cui vi sarà chiesto di
farlo.
Quale sistema operativo?
La DMX 6Fire USB può essere impiegata esclusivamente in Windows XP (Service Pack
2) e in Windows Vista. Le versioni meno recenti di Windows non vengono supportate.
Fate attenzione a che le vostra installazione di Windows disponga degli ultimi Service
Pack/aggiornamenti del servizio Microsoft.
Alimentazione
La DMX 6Fire USB non può essere utilizzata senza alimentatore, essa non è quindi "BusPowered“. L'alimentazione tramite cavo USB è realizzabile solo con piccoli apparecchi
USB. In sistemi più complessi, come la DMX 6Fire USB, è necessario un alimentatore a
parte. L'alimentatore, inoltre, fornisce una corrente ben più "pulita" di quella di una porta
USB e il risultato lo si nota nella qualità acustica. Utilizzate quindi la 6Fire con alimentatore accluso.
Page 26

Installazione del driver DM 6Fire USB in Windows XP
1. Prima di avviare, controllate che la vostra versione di XP sia correttamente aggiornata. Cliccate a tale scopo con il tasto destro del mouse sul simbolo "Risorse del computer" e scegliete quindi il punto di menù "Proprietà“. Se avete
però ancora come sfondo XP il paese dei Teletubby, questa informazione viene raggiunta tramite: Start -> Impostazioni> Pannello di controllo> Sistema. È
importante che nel vostro PC sia installato Windows XP Servicepack 2 – brevemente SP2 – o Windows Vista. In caso contrario, rivolgetevi a Microsoft
(www.microsoft.com
ciò è in genere gratuito.
2. Dopo aver inserito il CD di installazione fornito nell'unità CD-ROM, si apre automaticamente l'autoplay del software. Se ciò non dovesse avvenire, avviatelo
manualmente con un doppio clic su "Autorun.exe" nella cartella principale
del CD. Il pulsante "Installazione" nell'autoplay installa il driver DMX 6Fire USB
e il Control Panel nel sistema operativo.
) per aggiornare il vostro sistema. Nel caso di Windows
3. La gestione guidata segnala adesso di essere pronto per l'installazione.
2 DMX 6Fire USB (Italiano)
Page 27

4. Nella finestra che segue viene stabilito il percorso per l'installazione. Se deciderete di scegliere una cartella diversa, scegliete "Sfoglia" e portatevi sulla cartella corrispondente. A questo punto cliccate su "Install“.
5. L'avvertenza di sicurezza che segue può essere tranquillamente ignorata.
Cliccate a tale scopo sul pulsante "Continua“.
DMX 6Fire USB (Italiano) 3
Page 28

6. Adesso il driver è installato nel sistema e non appena compare il messaggio
sotto riportato potete collegare la DMX 6Fire USB con il cavo accluso alla porta
USB 2.0 del vostro computer. Windows XP riconoscerà il nuovo apparecchio
automaticamente come nuovo hardware e avvierà il dialogo relativo all'installazione del driver.
7. L'„Installazione guidata nuovo hardware" di Windows chiede un nuovo driver
per il nuovo componente hardware. Esso non deve essere ricercato online.
Nella finestra che segue viene richiesto anche il driver per l'hardware DMX
6Fire USB. Scegliete "Installa il software automaticamente (scelta consigliata)“
e confermate con "Avanti“.
4 DMX 6Fire USB (Italiano)
Page 29

8. Quindi viene creato per motivi di sicurezza un nuovo punto di ripristino del sistema. Non c'è motivo di preoccuparsi, si tratta di una misura preventiva standard.
9. La prima parte dell'installazione è così terminata. Cliccate quindi su "Fine“.
DMX 6Fire USB (Italiano) 5
Page 30

10. A questo punto l'istallazione guidata segnala che finora sono stati installati solo
i driver per il controller USB, adesso segue l'installazione dei driver che trasformano questo in un apparecchio audio USB. Scegliete anche qui "Installa il
software automaticamente" per installare il secondo gruppo di driver.
11. Anche qui potete ignorare il messaggio che compare relativo al fatto che il test
del logo Windows non è stato superato.
6 DMX 6Fire USB (Italiano)
Page 31

12. Con "Fine" l'installazione dei driver sarà conclusa.
Installazione del driver DMX 6Fire USB in Windows Vista
1. Dopo aver inserito il CD di installazione fornito nell'unità CD-ROM, si apre automaticamente l'autoplay del software. Se ciò non dovesse avvenire, avviatelo manualmente con un doppio clic su "Autorun.exe" nella cartella principale del CD. Il pulsante "Installazione software" nell'autoplay installa il driver DMX 6Fire USB e il
Control Panel nel sistema operativo.
DMX 6Fire USB (Italiano) 7
Page 32

2. La gestione guidata segnala adesso di essere pronto per l'installazione.
3. Nella finestra che segue viene stabilito il percorso per l'installazione. Se deciderete
di scegliere una cartella diversa, scegliete "Sfoglia" e portatevi sulla cartella corrispondente. A questo punto cliccate su "Install“.
4. Adesso il driver è installato nel sistema e non appena compare il messaggio sotto
riportato potete collegare la DMX 6Fire USB con il cavo accluso alla porta USB 2.0
del vostro computer. Windows Vista riconoscerà il nuovo apparecchio automaticamente come nuovo hardware.
8 DMX 6Fire USB (Italiano)
Page 33

Volumen de suministro
Compruebe que el sistema que ha adquirido está completo.
El volumen de suministro del DMX 6Fire USB incluye como mínimo:
■ 1 DMX 6Fire USB (el hardware)
■ 1 adaptador de red
■ 1 adaptador (6,3 mm -> 3,5 mm, estéreo)
■ 1 adaptador (6,3 mm -> 3,5 mm, mono)
■ 1 cable USB (1,8 m)
■ 1 CD de instalación (con manual detallado)
■ 1 guía rápida de inicio
■ 1 documento de seguimiento postventa
■ 1 tarjeta de registro con el número de serie
La instalación en Windows paso a paso
Por favor, siga los pasos exactamente en la secuencia indicada;
conecte el DMX 6Fire USB al ordenador en el punto descrito de la
instalación y no antes.
¿Qué sistema operativo?
El DMX 6Fire USB se puede instalar exclusivamente en los sistemas operativos Windows
XP (Service Pack 2) y Windows Vista. No es compatible con las versiones anteriores de
Windows. Asegúrese de que su sistema Windows está instalado con la última versión del
Service Pack / Actualización (Updates) de Microsoft correspondiente.
Suministro de corriente
El DMX 6Fire USB no puede funcionar sin la unidad de alimentación, es decir, no se
alimenta a través del bus USB ("Bus-Powered"). El suministro de corriente vía cable USB
sólo se puede realizar con aparatos pequeños USB mientras que sistemas más
complejos, como el DMX 6Fire USB, necesitan una toma de corriente por separado. La
unidad de alimentación también proporciona una corriente mucho más "limpia" en
comparación con la suministrada por USB, lo que se nota especialmente en la calidad del
sonido. Por eso conecte la 6Fire con la unidad de alimentación adjunta.
Page 34

Instalación del controlador del DM 6Fire USB en Windows XP
1. Antes de empezar, compruebe si su versión de Windows XP está actualizada. Para
ello, haga clic con el botón derecho del ratón en el símbolo "Puesto de trabajo" y
seleccione a continuación la opción de menú "Propiedades". Pero si aún tiene como
fondo de escritorio de XP la imagen del país de los Teletubbies, puede obtener esta
información en Inicio -> Configuración -> Panel de control -> Sistema. Es importante,
que en su PC esté instalado el Windows XP Servicepack 2 (SP2) o Windows Vista. Si
éste no fuera el caso, diríjase a Microsoft (www.microsoft.com
sistema. En el caso de Windows el SP2 suele estar disponible de forma gratuita.
2. Una vez introducido el CD de instalación suministrado en la unidad, se ejecuta
automáticamente el software de arranque automático. Si no se efectúa el arranque
automático, ejecútelo manualmente haciendo doble clic en "Autorun.exe", situado
en el directorio raíz del CD. El botón "Instalación“ en el arranque automático instala el
controlador DMX 6Fire USB y el panel de control en su sistema operativo.
) para actualizar su
3. El asistente para la instalación indica que está listo para la instalación.
2 DMX 6Fire USB (español)
Page 35

4. En la ventana siguiente se determina la ruta de instalación. Si prefiere otro directorio,
elija "Examinar" y navegue hasta el directorio correspondiente. Después haga clic en
"Install".
5. Puede saltarse tranquilamente la indicación de seguridad siguiente. Para ello, haga
clic en el botón "Continuar".
DMX 6Fire USB (español) 3
Page 36

6. Ahora ya está instalado el controlador en el sistema y, cuando aparezca el mensaje
inferior, puede conectar el DMX 6Fire USB al puerto USB 2.0 de su PC con el cable
suministrado. Windows XP reconoce automáticamente el equipo como nuevo
hardware e inicia la ventana de instalación del controlador.
7. El "Asistente para hardware nuevo encontrado“ de Windows le pregunta por el
controlador para el nuevo componente de hardware. No es necesario buscarlo online.
En la ventana siguiente se pregunta por el controlador para el hardware DMX 6Fire
USB. Elija "Instalar automáticamente el software (recomendado)“ y confirme con
"Continuar".
4 DMX 6Fire USB (español)
Page 37

8. A continuación se configura, para mayor seguridad, un punto de restauración del
sistema. No existe razón para preocuparse: ésta es una medida de seguridad
estándar.
9. Con ello se finaliza la parte 1 de la instalación. A continuación haga clic en "Finalizar".
DMX 6Fire USB (español) 5
Page 38

10. Ahora aparece de nuevo el asistente para la instalación, ya que hasta ahora sólo se
ha instalado el controlador del bus USB. A partir de este punto se procede a la
instalación de controladores adicionales, que convierten al controlador inicial en un
dispositivo USB de audio. Elija también aquí la "Instalación automática de software",
para instalar el segundo bloque de controladores.
11. El mensaje que aparece a continuación, y que comunica que el software no ha
superado la comprobación del logotipo de Windows, también se puede ignorar
tranquilamente.
6 DMX 6Fire USB (español)
Page 39

12. La instalación de los controladores concluye con "Finalizar".
Instalación del controlador del DMX 6Fire USB en Windows Vista
1. Una vez introducido el CD de instalación suministrado en la unidad, se ejecuta
automáticamente el software de arranque automático. Si no se efectúa el arranque
automático, ejecútelo manualmente haciendo doble clic en "Autorun.exe", situado
en el directorio raíz del CD. El botón "Instalación del software“ en el arranque
automático instala el controlador DMX 6Fire USB y el panel de control en su sistema
operativo.
DMX 6Fire USB (español) 7
Page 40

2. El asistente para la instalación indica que está listo para la instalación.
3. En la ventana siguiente se determina la ruta de instalación. Si prefiere otro directorio,
elija "Examinar" y navegue hasta el directorio correspondiente. Después haga clic en
"Install".
4. Ahora ya está instalado el controlador en el sistema y, cuando aparezca el mensaje
inferior, puede conectar el DMX 6Fire USB al puerto USB 2.0 de su PC con el cable
suministrado. Windows Vista reconoce automáticamente el equipo como nuevo
hardware.
8 DMX 6Fire USB (español)
Page 41

Leveringsomvang
Controleer a.u.b. eerst de volledigheid van het door uw aangeschafte pakket.
De leveromvang van de DMX 6Fire USB omvat ten minste:
■ 1 DMX 6Fire USB (hardware)
■ 1 netvoedingsadapter
■ 1 adapter (6,3 mm -> 3,5 mm, stereo)
■ 1 adapter (6,3 mm -> 3,5 mm, mono)
■ 1 USB kabel (1,8 m)
■ 1 installatie-CD (met uitvoerig handboek)
■ 1 Quick Start Guide
■ 1 servicekaart
■ 1 registratiekaart met serienummer
De Windows-installatie - stap voor stap
Volg a.u.b. de stappen nauwkeurig in de opgegeven volgorde op
en verbindt de DMX 6Fire USB pas op het beschreven punt van de
installatie met de computer.
Welk besturingssysteem?
De DMX 6Fire USB kan uitsluitend onder Windows XP (Service Pack 2) en Windows
Vista worden gebruikt. Oudere versies van Windows worden niet ondersteund. Let erop,
dat uw Windows-installatie zich op de laatste stand van de Microsoft Service Packs /
Updates bevindt.
Voedingsspanning
De DMX 6Fire USB kan niet zonder netadapter worden gebruikt en is dus niet „BusPowered“. De voeding via USB-kabels is alleen bij kleinere USB-apparaten uitvoerbaar,
ingewikkelder systemen, zoals de DMX 6Fire USB, hebben een eigen voedingsaansluiting
nodig. Ook levert een voeding een "schonere" stroom in vergelijking met een USB-poort,
wat duidelijk merkbaar is in de geluidskwaliteit. Sluit daarom de 6Fire aan op de
meegeleverde adapter.
Page 42

Installatie van de DM 6Fire USB driver onder Windows XP
1. Voordat u start, controleert u of uw Windows XP versie op de meest actuele
stand is. Klik daarvoor met de rechtermuisknop op het pictogram "Deze
computer" en kies het menupunt "Eigenschappen“. Indien u echter nog het
Teletubby-land als achtergrond van XP heeft, bereikt u deze informatie via het
volgende pad: Start -> Instellingen -> Configuratiescherm -> Systeem.
Belangrijk is dat op uw PC Windows XP Servicepack 2 – afgekort SP2 – of
Windows Vista is geïnstalleerd. Wanneer dit niet het geval is, neem dan
contact op met Microsoft (www.microsoft.com
actualiseren. Bij Windows is dat over het algemeen gratis.
2. Nadat u de meegeleverde installatie-CD heeft geplaatst, wordt automatisch de
Autostarter-software gestart. Wanneer de Autostarter niet wordt geopend, kunt
u handmatig starten door op „Autorun.exe“ in de root-directory van de CD te
dubbelklikken. De knop „Installatie“ in de Autostarter installeert de DMX 6Fire
USB driver en het control panel in uw besturingssysteem.
), om uw systeem te
3. De installatie-assistent meldt nu, dat deze gereed is voor installatie.
2 DMX 6Fire USB (Nederlands)
Page 43

4. In het volgende venster wordt de doelmap voor de installatie bepaald.
Wanneer u een andere map wilt instellen, kies dan "Zoeken" en verwijs naar
de betreffende map. Daarna klikt u op "Install“.
5. De volgende waarschuwing kunt u met een gerust hart negeren. Klik daarvoor
a.u.b. op de knop "Toch doorgaan“.
DMX 6Fire USB (Nederlands) 3
Page 44

6. Nu is de driver in het systeem geïnstalleerd en u kunt, zodra de onderstaande
melding verschijnt, de DMX 6Fire USB met de meegeleverde kabel op de USB
2.0 aansluiting van uw PC aansluiten. Windows XP zal het nieuwe apparaat
automatisch als nieuwe hardware herkennen en de dialoog voor de driverinstallatie starten.
7. De Windows „Assistent voor het zoeken naar nieuwe hardware“ vraagt naar
een driver voor de nieuwe hardware-component. Deze hoeft u niet online laten
zoeken. In het volgende venster wordt naar de driver voor de hardware DMX
6Fire USB gevraagd. Kies "Software automatisch installeren (aanbevolen)“ en
bevestig dit met „Volgende“.
4 DMX 6Fire USB (Nederlands)
Page 45

8. Aansluitend wordt veiligheidshalve een nieuw systeemherstelpunt geset. Geen
reden tot bezorgdheid, dit is een standaard veiligheidsmaatregel.
9. Deel 1 van de installatie is daarmee afgerond. Klik daarom op "Voltooien".
DMX 6Fire USB (Nederlands) 5
Page 46

10. Waarna zich nogmaals de installatie-assistent meldt, omdat tot nu toe alleen
nog maar de driver voor de USB-controller werd geïnstalleerd; nu volgt de
installatie van de drivers, die hiervan een USB Audio Device maken. Kies ook
hier „Software automatisch installeren“, om de tweede serie drivers te
installeren.
11. Ook hier kunt u de aansluitend optredende waarschuwing, dat de software de
Windows-logo-test niet heeft doorstaan, met een gerust hart negeren.
6 DMX 6Fire USB (Nederlands)
Page 47

12. Via „Voltooien“ is de installatie van de drivers afgesloten.
Installatie van de DMX 6Fire USB driver onder Windows Vista
1. Nadat u de meegeleverde installatie-CD heeft geplaatst, wordt automatisch de
Autostarter-software gestart. Wanneer de Autostarter niet wordt geopend, kunt u
handmatig starten door op „Autorun.exe“ in de root-directory van de CD te
dubbelklikken. De knop „Software installatie“ in de Autostarter installeert de DMX
6Fire USB driver en het control panel in uw besturingssysteem.
DMX 6Fire USB (Nederlands) 7
Page 48

2. De installatie-assistent meldt nu, dat deze gereed is voor installatie.
3. In het volgende venster wordt de doelmap voor de installatie bepaald. Wanneer u een
andere map wilt instellen, kies dan "Zoeken" en verwijs naar de betreffende map.
Daarna klikt u op "Installeren“.
4. Nu is de driver in het systeem geïnstalleerd en u kunt, zodra de onderstaande melding
verschijnt, de DMX 6Fire USB met de meegeleverde kabel op de USB 2.0 aansluiting
van uw PC aansluiten. Windows Vista zal het nieuwe apparaat automatisch als
nieuwe hardware herkennen.
8 DMX 6Fire USB (Nederlands)
Page 49

Scope of delivery
Start by making sure that the contents of the package are complete.
The DMX 6Fire USB package should contain the following items:
■ 1 DMX 6Fire USB (the hardware)
■ 1 network adapter
■ 1 adapter (6.3 mm -> 3.5 mm, stereo)
■ 1 adapter (6.3 mm -> 3.5 mm, mono)
■ 1 USB cable (1.8 m)
■ 1 installation CD (with detailed manual)
■ 1 Quick Start Guide
■ 1 customer service card
■ 1 registration card with the serial number
Windows installation—step by step
Please follow the steps in the same exact order they appear here.
Do not connect the DMX 6Fire USB to the computer until the point
specified in the installation.
Which operating system?
The DMX 6Fire USB can be used with Windows XP (Service Pack 2) and Windows Vista
only. Older Windows versions are not supported. Please ensure that you have applied the
current service packs and updates to your Windows installation.
Power supply
The DMX 6Fire USB is not bus-powered and thus cannot be used without a power
adapter. Power supply via USB cable is feasible only for smaller USB devices; more
complex systems like the DMX 6Fire USB require a separate power connection. Moreover, a power adapter provides much "cleaner" power than a USB port, which has a
noticeable effect on sound quality. Therefore, connect the 6Fire to the power adapter
provided.
Page 50

Instalar o driver da DMX 6Fire USB em Windows XP
1. Antes de iniciar asegure-se que a sua versão de Windows XP seja a mais actual.
Faça um clique á direita no ícono "My Computer" e selecione "Properties" do menu de
contexto. Se ainda tiver no fundo de área de trabalho a imagem "Teletubbyland" para
XP, o caminho seguinte o levará á informação que precisa: Inicio -> Configurações ->
Painel de Controlo -> Sistema.
ou Windows Vista esteja instalado no seu computador. Se isto não for o caso, por
favor contacte Microsoft (www.microsoft.com
Windows, isto geralmente é gratuito.
2. Depois de inserir o CD de instalação, o programa AutoStart iniciará automaticamente.
Se AutoStart não abrir, inicie-o manualmente com um clique duplo em
"Autorun.exe" no directório de raíz do CD. O botão "Installation" no AutoStart
instalará o driver da DMX 6Fire USB e o painel de controlo no seu sistema operador.
É importante que Windows XP Service Pack 2 (SP2)
) para actualizar o seu sistema. Para
3. O assistente de instalação mostrará a sua mensagem de boas-vindas.
2 DMX 6Fire USB (portugués)
Page 51

4. O padrão de destinação para a instalação é especificada na janela seguinte. Se
preferir outro ficheiro seleccione "Browse..." e elija o directório correspondente.
Depois clique "Install".
5. Pode ingnorar a mensagem de aviso seguinte sem dúvidas. Clique "Continue
Anyway" para continuar.
DMX 6Fire USB (portugués) 3
Page 52

6. Agora o driver está instalado no sistema e assim que apareça a mensagem indicada
embaixo pode ligar a DMX 6Fire USB ao porto USB 2.0 do seu computador utilizando
o cabo que vem incluído. Windows XP reconhecerá automaticamente o dispositivo
como hardware novo e abrirá o diálogo da instalação de driver.
7. O "Found New Hardware Wizard" de Windows preguntará cual driver deve ser
utilizado para a nova componente de hardware. Não é preciso procurar o driver
online. A janela seguinte preguntará pelo driver para o hardware da DMX 6Fire USB.
Em seguida seleccione "Install the software automatically [Recommended]" e confirme
com "Next".
8. Depois, só por motivos de segurança é posto um ponto de restauração novo. Não se
preocupe – isto é uma precaução estándar.
4 DMX 6Fire USB (portugués)
Page 53

9. Isto conclui parte 1 da instalação, por isso clique "Finish".
DMX 6Fire USB (portugués) 5
Page 54

10. Isto leva-o de volta ao assistente de instalação como só foram instalados os drivers
para o controlador USB; agora estão instalados os drivers que fazem do controlador
um dispositivo de audio USB. Aqui, de novo, seleccione "Install the software
automatically" para instalar o segundo lote de drivers.
11. De novo poderá ignorar a mensagem que o software não passou o "Windows Logo
test".
6 DMX 6Fire USB (portugués)
Page 55

12. Clique "Finish" para completar a instalação dos drivers.
Instalar o driver da DMX 6Fire USB em Windows Vista
1. Depois de inserir o CD de instalação, o programa AutoStart iniciará automaticamente.
Se AutoStart não abrir, inicie-o manualmente com um clique duplo em
"Autorun.exe" no directório de raíz do CD. O botão "Software Installation" no
AutoStart instalará o driver da DMX 6Fire USB e o painel de controlo no seu sistema
operador.
DMX 6Fire USB (portugués) 7
Page 56

2. O assistente de instalação mostrará a sua mensagem de boas-vindas.
3. O padrão de destinação para a instalação é especificada na janela seguinte. Se
preferir outro ficheiro seleccione "Browse..." e elija o directório correspondente.
Depois clique "Install".
4. Agora o driver está instalado no sistema e assim que apareça a mensagem indicada
embaixo pode ligar a DMX 6Fire USB ao porto USB 2.0 do seu computador utilizando
o cabo que vem incluído. Windows Vista reconhecerá automaticamente o dispositivo
como hardware novo.
8 DMX 6Fire USB (portugués)
Page 57

Scope of delivery
Start by making sure that the contents of the package are complete.
The DMX 6Fire USB package should contain the following items:
■ 1 DMX 6Fire USB (the hardware)
■ 1 network adapter
■ 1 adapter (6.3 mm -> 3.5 mm, stereo)
■ 1 adapter (6.3 mm -> 3.5 mm, mono)
■ 1 USB cable (1.8 m)
■ 1 installation CD (with detailed manual)
■ 1 Quick Start Guide
■ 1 customer service card
■ 1 registration card with the serial number
Windows installation—step by step
Please follow the steps in the same exact order they appear here.
Do not connect the DMX 6Fire USB to the computer until the point
specified in the installation.
Which operating system?
The DMX 6Fire USB can be used with Windows XP (Service Pack 2) and Windows Vista
only. Older Windows versions are not supported. Please ensure that you have applied the
current service packs and updates to your Windows installation.
Power supply
The DMX 6Fire USB is not bus-powered and thus cannot be used without a power
adapter. Power supply via USB cable is feasible only for smaller USB devices; more
complex systems like the DMX 6Fire USB require a separate power connection. Moreover, a power adapter provides much "cleaner" power than a USB port, which has a
noticeable effect on sound quality. Therefore, connect the 6Fire to the power adapter
provided.
Page 58

Installation av DMX 6Fire USB drivrutiner i Windows XP
1. Innan du börjar, försäkra dig om att din version av Windows är väl uppdaterad.
Kontrollera i Start -> Kontrollpanelen -> System. Det är viktigt att du har installerat
Windows XP Service Pack 2 (SP2 kort och gott) eller Windows Vista på datorn. Om
inte, gå till Microsoft (www.microsoft.com
är vanligtvis uppgraderingarna gratis.
2. När du satt in den medföljande CDn startas normalt programmet AutoStart. Om inte
gå till CDn i utforskaren och dubbelklicka "Autorun.exe". Knappen "Installation" i
AutoStart installerar DMX 6Fire USB drivrutiner och kontrollpanelen I ditt
operativsystem.
3. Installationsprogrammet visar nu sitt hälsningsmeddelande.
) för att uppdatera systemet. För Windows
2 DMX 6Fire USB (Swenska)
Page 59

4. Installationskatalogen visas i nedanstående fönster. Vill du installera i annan katalog
på din dator så väljer du plats med ”Bläddra”. Klicka sedan “Install”
5. Du kan lugnt ignorera säkerhetsvarningen och gå vidare. Klicka "Continue Anyway" för
att fortsätta.
DMX 6Fire USB (Swenska) 3
Page 60

6. Drivrutinen är ni installerad i systemet, och så fort det här meddelande kommer fram
kan du ansluta din nya DMX 6Fire USB till datorns USB 2.0 port med hjälp av den
medföljande kabeln. Windows XP kommer automatiskt att identifiera enheten som ny
hårdvara och öppna dialogfönstret för installation av drivrutiner.
7. Windows assistent för ny hårdvara kommer att fråga vilka drivrutiner som skall
användas för den nya enheten. Du behöver inte söka på Internet för drivrutinerna. I
nästa fönster frågas efter drivrutinerna DMX 6Fire USB enheten. Välj sedan "Installera
mjukvaran automatiskt” och tryck på “Nästa”
8. För att vara på säkra sidan kommer en systemåterställningspunkt att skapas. Inget att
oroa sig över, det är en standardiserad försiktighetsåtgärd av Windows.
4 DMX 6Fire USB (Swenska)
Page 61

9. Detta avslutar del 1 av installationen. Klicka “Slutför”
DMX 6Fire USB (Swenska) 5
Page 62

10. Nu återgår du till installationsprogrammet eftersom det bara är själva USB kontrollen i
enheten som installerats så här långt. Drivrutinerna som styr ljudenheten skall också
installeras. Välj “Installera automatiskt” även här för att gå vidare med andra
laddningen av drivrutiner.
11. Du kan återigen strunta i varningen om att mjukvara inte har genomgått "Windows
Logo test".
6 DMX 6Fire USB (Swenska)
Page 63

12. Klicka ”Slutför” för att göra klart installationen av drivrutinerna.
Installation av DMX 6Fire USB drivrutiner i Windows Vista
När du satt in den medföljande CDn startas normalt programmet AutoStart. Om inte gå till
CDn i utforskaren och dubbelklicka "Autorun.exe". Knappen "Installation" i AutoStart
installerar DMX 6Fire USB drivrutiner och kontrollpanelen I ditt operativsystem.
DMX 6Fire USB (Swenska) 7
Page 64

1. Installationsprogrammet visar nu sitt hälsningsmeddelande.
2. Installationskatalogen visas i nedanstående fönster. Vill du installera i annan katalog
på din dator så väljer du plats med ”Bläddra”. Klicka sedan “Install”
3. Drivrutinen är ni installerad i systemet, och så fort det här meddelande kommer fram
kan du ansluta din nya DMX 6Fire USB till datorns USB 2.0 port med hjälp av den
medföljande kabeln. Windows Vista kommer automatiskt att identifiera enheten som
ny hårdvara och öppna dialogfönstret för installation av drivrutiner.
8 DMX 6Fire USB (Swenska)
Page 65

Scope of delivery
Start by making sure that the contents of the package are complete.
The DMX 6Fire USB package should contain the following items:
■ 1 DMX 6Fire USB (the hardware)
■ 1 network adapter
■ 1 adapter (6.3 mm -> 3.5 mm, stereo)
■ 1 adapter (6.3 mm -> 3.5 mm, mono)
■ 1 USB cable (1.8 m)
■ 1 installation CD (with detailed manual)
■ 1 Quick Start Guide
■ 1 customer service card
■ 1 registration card with the serial number
Windows installation—step by step
Please follow the steps in the same exact order they appear here.
Do not connect the DMX 6Fire USB to the computer until the point
specified in the installation.
Which operating system?
The DMX 6Fire USB can be used with Windows XP (Service Pack 2) and Windows Vista
only. Older Windows versions are not supported. Please ensure that you have applied the
current service packs and updates to your Windows installation.
Power supply
The DMX 6Fire USB is not bus-powered and thus cannot be used without a power
adapter. Power supply via USB cable is feasible only for smaller USB devices; more
complex systems like the DMX 6Fire USB require a separate power connection. Moreover, a power adapter provides much "cleaner" power than a USB port, which has a
noticeable effect on sound quality. Therefore, connect the 6Fire to the power adapter
provided.
Page 66

DMX 6Fire USB ajurien asennus Windows XP järjestelmään
1. Ennenkuin aloitat, varmistaudu siitä, että Windows versiosi on kunnolla päivitetty.
Tarkista asia Käynnistä -> Ohjauspaneeli -> Järjestelmä. On tärkeää, että olet
asentanut koneeseesi Windows XP Service Pack 2 (lyhyesti SP2) tai Windows Vista.
Ellei näin ole, mene Microsoft (www.microsoft.com
Windows päivitykset ovat tavallisesti ilmaiset.
2. Kun olet asettanut mukana seuraavan CDn käynnistyy normaalisti ohjelma AutoStart.
Ellei näin tapahdu, valitse CD Explorerin kautta ja kaksoisnapsauta "Autorun.exe".
Näppäin "Asenna" automaattikäynnistyksessä AutoStart asentaa DMX 6Fire USB
ajurit ja ohjauspaneelin käyttöjärjestelmääsi.
3. Asennusohjelma näyttää nyt tervehdystiedotuksensa.
) josta päivität järjestelmän.
2 DMX 6Fire USB (Suomi)
Page 67

4. Asennusluettelo näkyy alla olevassa ikkunassa. Mikäli haluat asentaa toisen luettelon
tietokoneeseesi, valitset paikan napsauttamalla ”Selaa”. Napsauta sen jälkeen
”Asenna”
5. Voit huoletta ohittaa varmuusvaroituksen ja edetä napsauttamalla "Jatka kuitenkin" .
DMX 6Fire USB (Suomi) 3
Page 68

6. Ajuri on nyt asennettu järjestelmään ja kun saat tämän tiedotuksen, voit liittää uuden
DMX 6Fire USB tietokoneen USB 2.0 porttiin mukana seuraavan kaapelin avulla.
Windows XP tunnistaa automaattisesti yksikön uutena laitteistona ja avaa
valintaikkunan ajurien asennukseen.
7. Windows apuohjelma uudelle laitteistolle kysyy, mitä ajureita käytetään uudessa
yksikössä. Ajureita ei tarvitse hakea Internetistä. Seuraavassa ikkunassa kysytään
DMX 6Fire USB yksikön ajureita. Valitse sitten "Asenna ohjelmisto automaattisesti” ja
napsauta “Seuraava” .
4 DMX 6Fire USB (Suomi)
Page 69

8. Varmuuden vuoksi luodaan järjestelmän palauttamispiste. Siitä ei pidä huolestua, sillä
se on standardisoitu Windows-varotoimenpide.
9. Tämä päättää asennuksen ensimmäisen osan. Napsauta “Lopeta”.
DMX 6Fire USB (Suomi) 5
Page 70

10. Nyt palaat asennusohjelmaan, koska tähän asti on vain asennettu yksikön USB
halinta. Ääniyksikön ajurit pitää myös asentaa. Valitse “Asenna automaattisesti” myös
tässä ja etene ajurien toiseen lataukseen.
11. Voit jälleen jättää huomiotta varoituksen siitä, että ohjelma ei ole tehnyt "Windows
Logo testiä".
6 DMX 6Fire USB (Suomi)
Page 71

12. Viimeistele ajurien asennus napsauttamalla ”Lopeta” .
DMX 6Fire USB ajurien asennus Windows Vista järjestelmään
1. Kun olet asettanut mukana seuraavan CDn käynnistyy normaalisti ohjelma
AutoStart. Ellei näin tapahdu, valitse CD Explorerin kautta ja kaksoisnapsauta
"Autorun.exe". Näppäin "Asenna" automaattikäynnistyksessä AutoStart asentaa
DMX 6Fire USB ajurit ja ohjauspaneelin käyttöjärjestelmääsi.
DMX 6Fire USB (Suomi) 7
Page 72

2. Asennusohjelma näyttää nyt tervehdystiedotuksensa.
3. Asennusluettelo näkyy alla olevassa ikkunassa. Mikäli haluat asentaa toisen
luettelon tietokoneeseesi, valitset paikan napsauttamalla ”Selaa”. Napsauta sen
jälkeen ”Asenna”
4. Ajuri on nyt asennettu järjestelmään ja kun tämä tiedotus tulee näkyviin voi liittää
uuden DMX 6Fire USB tietokoneen USB 2.0 porttiin mukana seuraavalla
kaapelilla. Windows Vista tunnistaa automaattisesti yksikön uutena laitteistoja ja
avaa valintaikkunan ajurien asennukseen.
8 DMX 6Fire USB (Suomi)
 Loading...