

Page 1

Correctly Installing PCI Soundcards
(c) 2003 Terratec Electronic GmbH, M.Dreese
First...
This document is designed for users who want to check their knowledge
of PCI card installation routines and possibly even learn something new
along the way :-)
This document will follow a step-by-step installation for a soundcard. This
is of course applicable for TV cards or other PCI hardware as well.
Please be aware, TerraTec cannot be held responsible for possible
damage that may result from using this information.
Before the Installation
Even if you already have itchy fingers to get cracking on your new
audio composition, it pays to remain calm and keep your wits about
you. The few minutes before installing the new card will determine the
success of the installation and quite possibly affect the quality of the
newly installed product.
Because soundcards are particularly sensitive to improper
configurations, we recommend you take the following steps:
Open the package and check the contents
In particular, the PCI card itself should be checked for
mechanical integrity. It is also recommended to check the
contents list from the manual to make sure all the components
are present.
Driver CD version/age verification – driver update
Unlike the common handbook allergy many suffer from, an
allergy against old driver CDs can generally be viewed as positive
:-) This „condition“ leads one to always demand the newest
driver/software versions and update CDs.
This is not strictly necessary, but it is generally recommend to use
the newest drivers and software available for your devices. These
are best downloaded directly from our website under
www.terratec.com and installed according to the following
instructions.
Uninstalling old soundcards
This is particularly important for onboard soundcards, which are
commonly integrated directly on newer mainboards. It is likely
because the quality and functionality of these chips is often less
than desirable that you are holding a new PCI soundcard in your
hand at this very moment :-).
Page 2
Best is to uninstall the old soundcard drivers and then remove the
old card before you even open the anti-static bag on the new
card.
Should you have questions about the proper method of
achieving this goal please co ntact your mainboard or soundcard
manufacturer, who should be very familiar with every last detail of
their components.
Due to the fact that modern mainboards come in many flavors
and revisions, it is impossible for TerraTec to provide you with
adequate information regarding proper deactivation of
integrated devices. Consult your mainboard manual or contact
the manufacturer for specific information.
RTFM (read the f… manual :-)
Commonly decreed in a somewhat louder tone, this desperate
pleading to pay attention to the documentation should not be
ignored. Sometimes a brief glance at the handbook can provide
insight into unresolved issues.
Step One: Preparing the Driver
Many manufacturers, us included, tend to view their hardware as
lovable new additions to the PC family - and like a newborn they
require an adequately prepared nest to develop properly. The simplest
manner of fulfilling these obligations is to install or prepare the driver
before actually installing the soundcard.
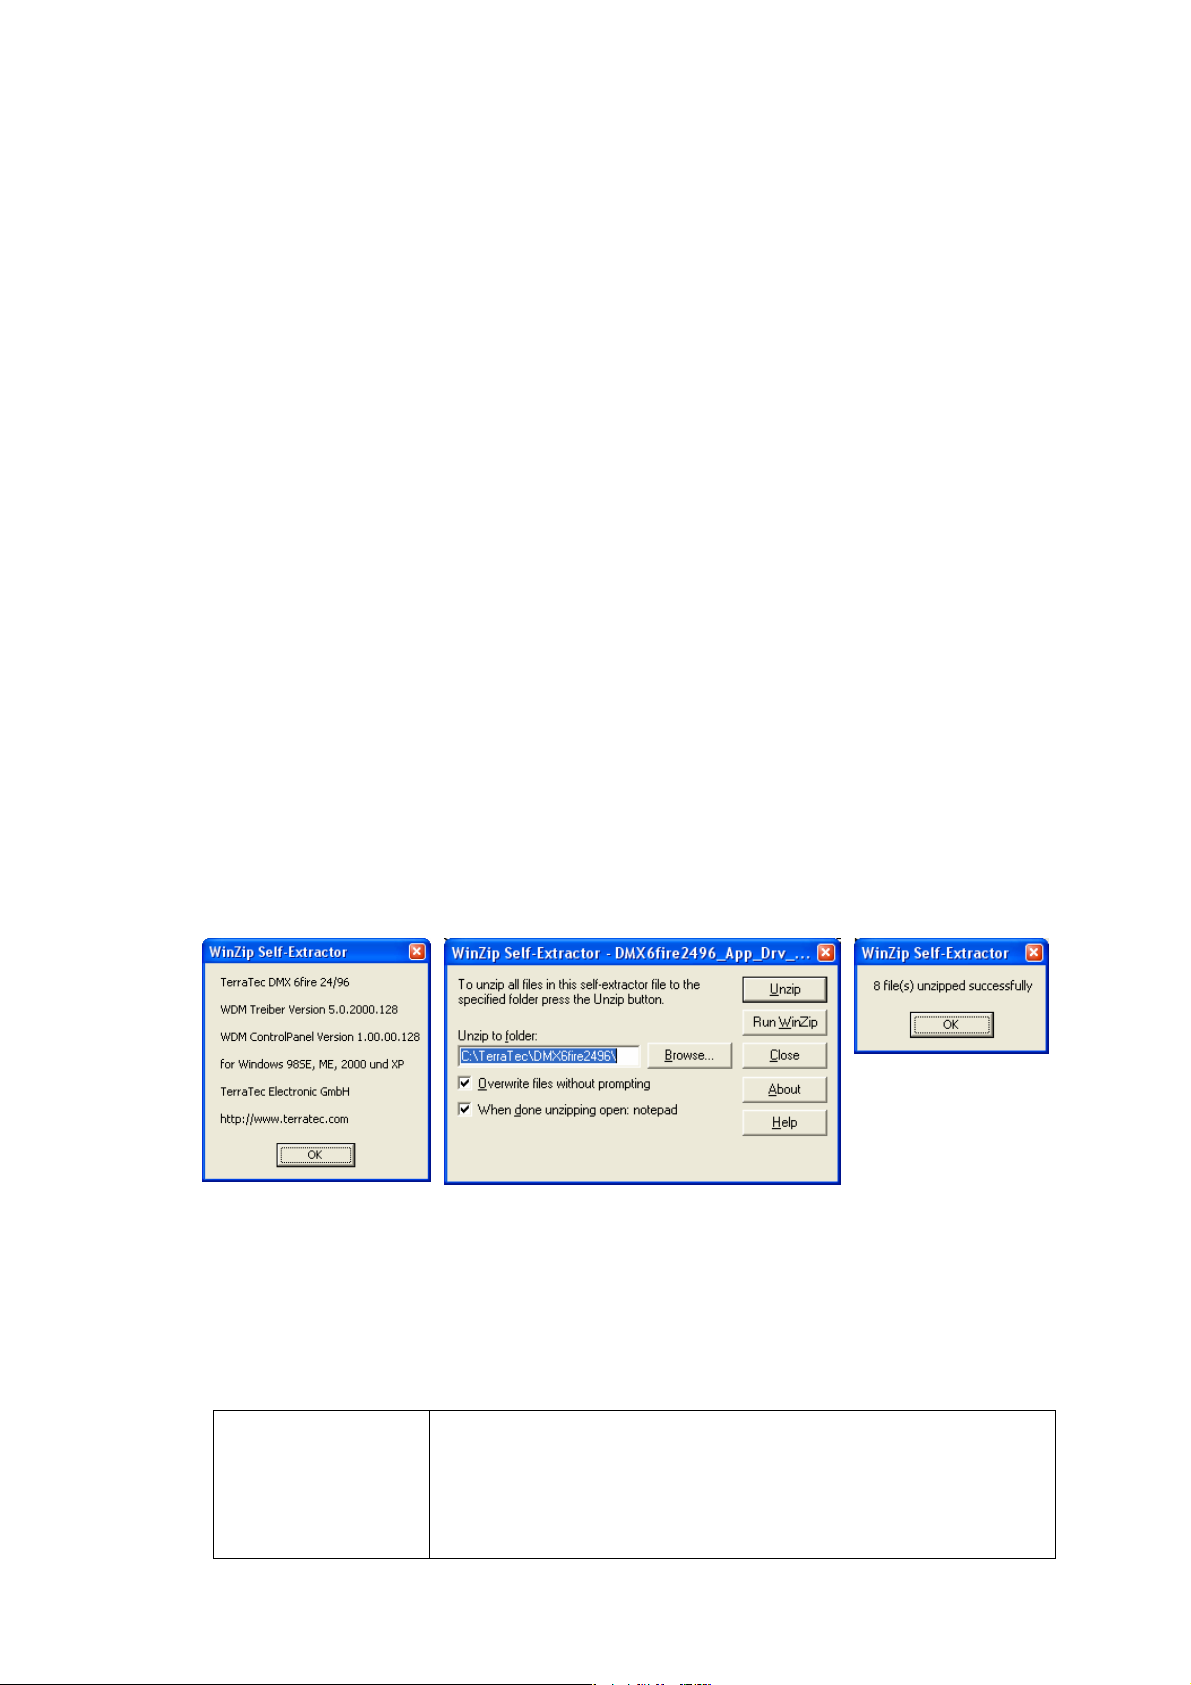
Start message from
update.exe with version info.
Main window with target menu for decompressing
files. Action confirmed with „Unzip“
Unzip confirmation with
the number of
successfully unpacked
files.
We are assuming here that you have downloaded the newest driver
from our website. This is generally „update.exe“ or two *.exe files with
two essential components :
Driver
(Short DRV)
The driver is the most important part of the
installation process. Without the driver nothing is
possible. The card cannot be integrated into the
system, will not function, and cannot be used in
conjunction with any software.
Page 3

Control Panel or
Software
(Short APP or
software)
This type of software must be installed in the aforementioned order:
software -> driver. Run the update.exe or DRV files. The so-called SFX
(Self – Extracting – Executable) will appear, much like an executable ZIP
file, and ask for an extraction destination. Using „c:\driver\soundcard“
as example, make note of the path and start the decompression, which
is typically achieved by pressing the „OK“, „Unzip“, or „Install“ button.
After having successfully run update.exe, access the folder used above
in Explorer and start the software installation waiting in the Control
Panel/Software/Application folder. As soon as the installation is finished,
shut the PC off completely.
Step Two: All Aboard!
in any case a much better idea to completely disconnect the PC and
place it on a flat surface such a table. Take a moment to impress
yourself with the technology :). This time can be used to prepare
yourself for a safe installation process.
Be careful to discharge any static electricity by first touching a
grounded part of the PC case or some other well grounded metal
object such as a heating system radiator.
The right PCI Slot
Although the PCI slots all look the same, there are invisible
differences in the electrical and electronic properties. The slots
are usually bound physically to a so-called IRQ (Interrupt
Request), a technology that regulates the communication timing
between PCI cards and the processor.
It often takes two or three tries to find the optimal slot, but a basic
rule is to avoid the last slot (from the top) as well as the slot right
below the graphic card (PCI slot 1).
This software compliments the driver implementation
in your system. It communicates with the driver and
regulates the basic hardware configuration (i.e.
volume, digital ports, frequency, or shoe size :)
First a warning. Your PC runs on
electricity, and even though the
critical components are well
shielded, do not forget that
playing with electrical devices
can be dangerous.
Even when the freaks swear by it,
leaving the power supply cable
connected to the PC as a ground
cannot be recommended,
particularly not for beginners. It is
Page 4

This is because soundcards don’t like being installed in slots that
must share IRQs as soundcards are particularly sensitive to
distortion.
Tip: Further information on this theme can be found in the Audio
Tweaks tutorial available at www.terratec.com.
After the installation the PC’s IRQ allocation should be checked
for conflicts in the Windows Device Manger or the BIOS PCI
Device Listing (important for 2000/XP), which is displayed briefly
during boot-up.
Windows
98SE/ME
Windows 2000 /
XP
After removing the card from the ESD (Electro-Static-Device) bag
simply insert it as shown above in the chosen PCI slot and screw it
down. The PC is not running during any of this of course :).
The First Test Run
In general after installing a new device, only the necessary
peripheral devices should be re-connected to the PC before
restarting it. As soon as the system boots it should announce that
new hardware has been found.
Device Manger -> Computer -> Model by
Connection -> Interrupt Request (IRQ)
Device Manger -> View-> Resources by Type > IRQ
Select to choose the driver yourself, which is normally the second
option „Install from a list or specific location (Advanced)“ or „No, I
want to select the hardware from a list “. In the dialogue that
follows choose the path in which you unpacked the DRV file(s).
By „update.exe“ packets point to the driver sub-folder inside the
destination folder.
This is best done using the „Browse“ function.
For Windows 2000 or XP Users
A window may appear warning you that the driver indicated
Page 5

lacks a digital signature from Microsoft (LOGO-Test) and the
installation is not recommended by Microsoft.
Driver signatures are a Microsoft innovation that many hardware
manufacturers - having devices with short driver lives,
undergoing constant functional improvement, - simply cannot
fulfil due to technical, economic, and organizational reasons.
Accordingly, this message is likely to appear regularly when
installing devices and can be overridden by pressing the
„Continue Anyway“ button without worry :).
The installation routine may cycle through several times as many
soundcards are designed as multi-function cards and require
additional drivers. The TerraTV cards, for example, are quite
complex – requiring a total of four drivers to be installed before
the card can be used correctly. Buy 1, get 3 free! :-).
After the installation it should be possible to start the card’s
control panel (which was installed within the framework given
above) and use the soundcard.
The same of course applies for TV cards, etc…
And if it doesn’t work?
In such cases the error can usually be localized according to the
parameters given in the steps above. Typically one would
continue as follows:
a. Is the card listed in the Device Manager?
The Device Manager is a practical tool to install hardware and
check its functionality. It can be accessed through the Windows
Control Panel under the System icon. Under Windows 2000/XP the
tabs Hardware -> Device Manager must be selected additionally.
Page 6

Only when the card appears here without any question or
exclamation marks is it fully functional. In case the card should
display errors here the software installation should be checked.
Should the card not appear in the Device Manger, check if there
is a menu listing called „Unknown Device“ or „Other Component“
directly under the computer name at the top of the list. If the submenu listing here is labelled „Audio controller for Multimedia“ (by
soundcards),then the driver is not properly installed. Here one
should carry out the installation routine again by right-clicking on
the device and selecting to reinstall the driver.
b. Is the card included in the PCI Device Listing menu?
If the card is not displayed in the Device Manager, the PCI
Device Listing should be controlled. This is displayed by the PC
BIOS directly, and very briefly, after the POST (Power On Self Test
i.e. RAM test, HDD detection, etc...) and can be paused on
screen by using the pause button. The right moment is quite
difficult to hit, as it is usually less than one second long. Here,
manufacturer and configuration information is displayed for all
installed devices. Should a Multimedia Controller be listed here,
make note of the manufacturer and device ID as well as the IRQ
number reported and contact the technical support department.
Should the card not appear in this list then the physical mounting
should be checked. If no error is found here (i.e. card fell out,
crooked, etc...)
the technical support should be contacted as well.
And that successfully concludes the TerraTec card installation, after
which you may begin exploring the many functions and Easter eggs :).
Furthermore, we invite you visit our website at www.terratec.com where
you can find further information about your hardware.
Enjoy!
 Loading...