

English Manual
Version 01.12.02
CE Declaration
We:
TerraTec Electronic GmbH, Herrenpfad 38, D-41334 Nettetal, Germany
hereby declare that the product:
SoundSystem Aureon 7.1 Space
to which this declaration refers is in compliance with the following standards or standardizing documents:
1. EN 55022 Class B
2. EN 55024
The following are the stipulated operating and environmental conditions for said compliance:
residential, business and commercial environments and small-company environments.
This declaration is based on:
Test report(s) of the EMC testing laboratory
The information in this document is subject to change without notice and shall not be deemed as a warranty by the
seller. No warranties, express or implied, are made with regard to the quality, suitability or accuracy of this document. The manufacturer reserves the right to change the contents of this document and/or the associated products
at any time without the provision of prior notice to specific persons or organizations. The manufacturer shall not be
held liable for damages of any kind arising from the use, or the inability to use this product or its documentation,
even if the possibility of such damage is known. The information in this document is subject to copyright. All rights
are reserved. No part of this manual may be reproduced or transmitted in any form or for any purpose without the
express written permission of the copyright holders. Product and brand names contained in this document are used
for identification purposes only. All registered trademarks, product designations or brand names used in this
document are the registered property of their respective owners.
®
©TerraTec
Electronic GmbH, 1994-2002. All rights reserved (01.12.02).
2 SoundSystem Aureon 7.1 Space (English)

Contents
Welcome! ................................................................................................................................4
From opening the package to installation. .............................................................................. 6
Short and to the point for busy pros. ....................................................................................7
The connectors of the Aureon 7.1 Space PCI card ................................................................. 8
Installation—step by step. ......................................................................................................9
Installing the driver software. .............................................................................................10
The connections and their uses. ............................................................................................24
Overview. ...........................................................................................................................24
The software. ........................................................................................................................ 26
The Aureon ControlPanel. ...................................................................................................27
WaveLab Lite 2.0 ................................................................................................................32
MusicMatch Jukebox. .........................................................................................................32
Cyberlink PowerDVD ...........................................................................................................33
Emagic Logic Fun................................................................................................................33
The HOTSTUFF folder. .........................................................................................................34
Practice. ................................................................................................................................35
The digital interfaces of the Aureon 7.1 Space. ...................................................................35
Stuff worth knowing. ..........................................................................................................37
Appendix. ..............................................................................................................................38
FAQ—frequently asked questions and their answers. .........................................................38
SoundSystem Aureon 7.1 Space (English) 3
Welcome!
We're pleased that you have chosen a TerraTec SoundSystem and would like to congratulate
you on this decision. You've purchased a sophisticated product representing the state of the
art of audio technology, and we're convinced that our product will prove extremely useful to
you in the coming years and provide you with a great deal of entertainment.
This manual covers the SoundSystem Aureon 7.1 Space and its uses in great detail.
But first, here's a quick overview:
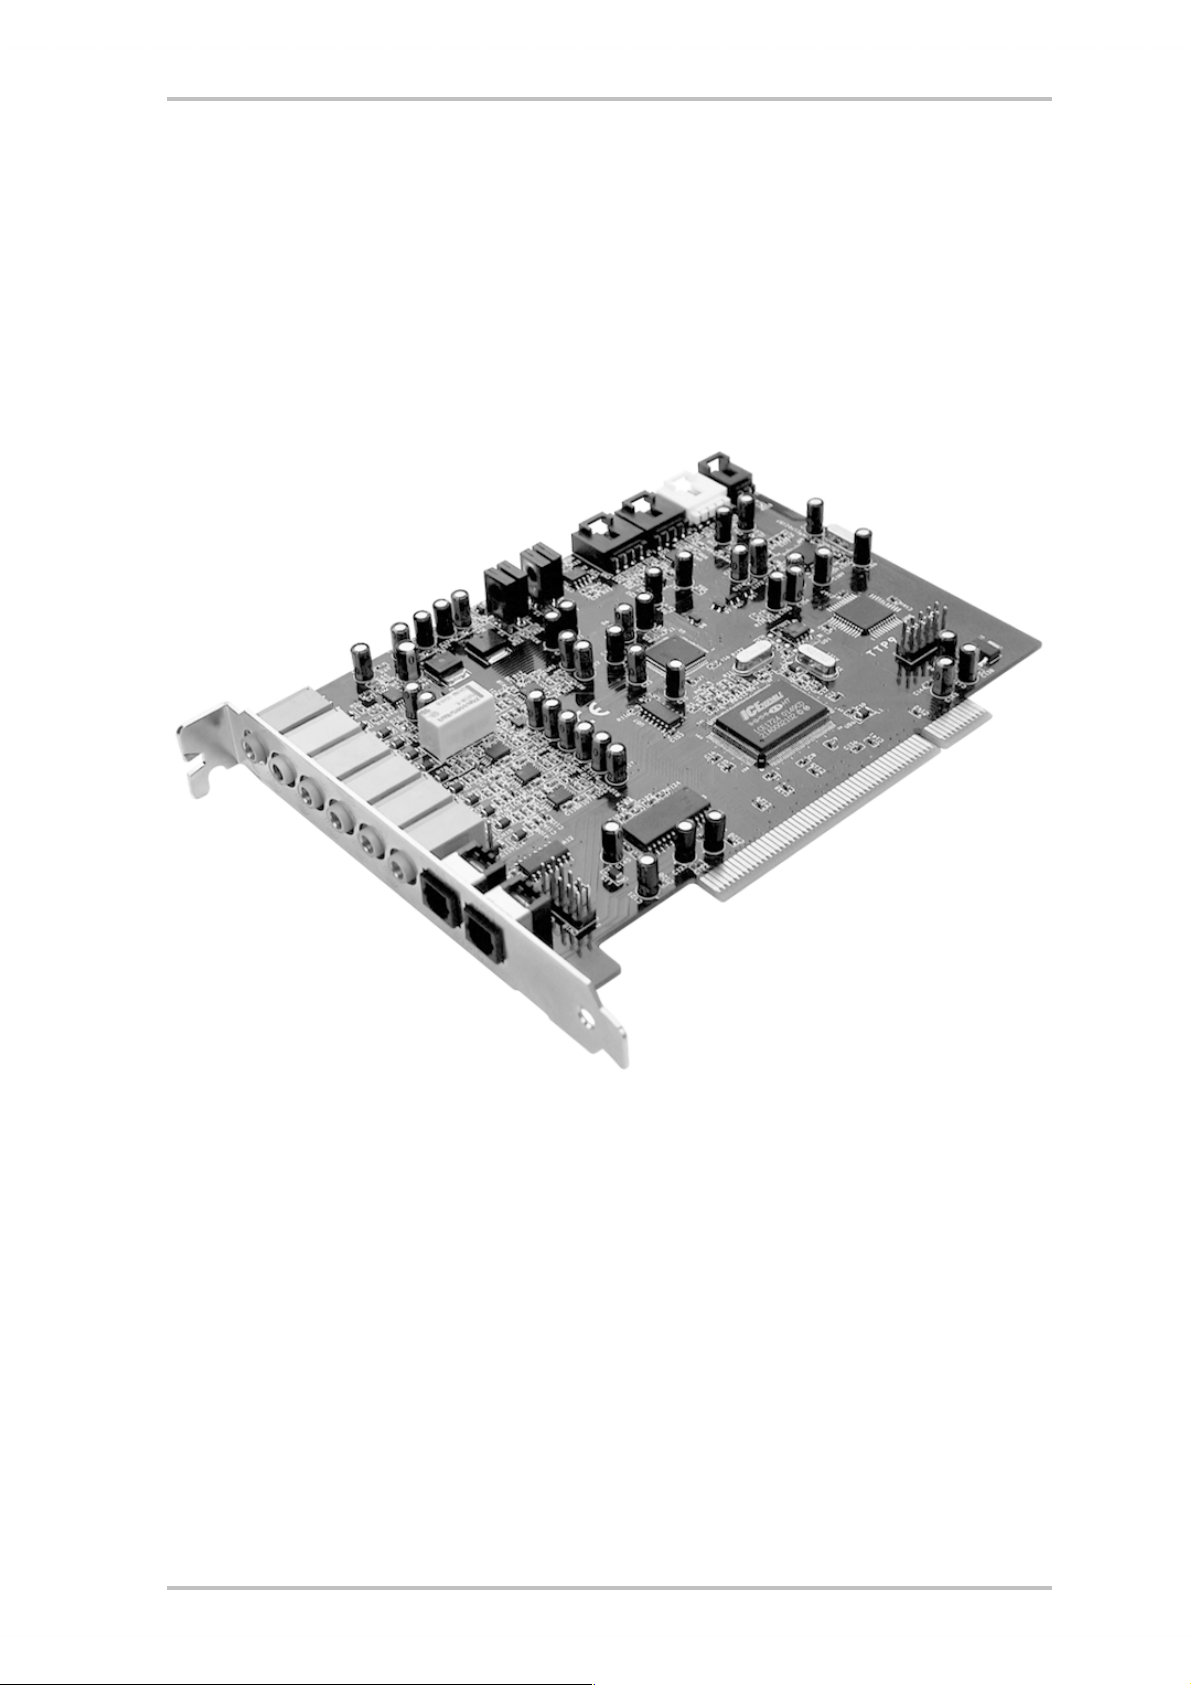
SoundSystem Aureon 7.1 Space PCI card
A broad range of connections.
The SoundSystem Aureon 7.1 Space is the result of our many years of experience in the PC
audio sector and reflects the continuous evolution of audio and multimedia software for the
PC. The SoundSystem Aureon 7.1 Space offers you a wide range of interconnection options
with other audio devices such as hifi surround systems, MiniDisc or CD players with analog or
digital outputs, headphones and microphones.
High-quality audio characteristics.
The SoundSystem Aureon 7.1 Space provides extremely high quality for analog recording and
playback of analog material. The card features studio-quality 24-bit/96 kHz technology. Using
Windows XP with Service Pack 1, playback at no less than 24-bit/192 kHz becomes possible.
4 SoundSystem Aureon 7.1 Space (English)

As a result, the Aureon 7.1 Space achieves a S/N ratio of well over -100 dB(A) on its analog
inputs and outputs!
Recording and playback of audio material at the purely digital level.
The SoundSystem Aureon 7.1 Space features an optical input and output in 24-bit S/PDIF format. You can therefore transfer already digitized recordings from a CD, DAT or MiniDisc player
(or recorder) to the PC without losses. In addition, you have the choice of all commonly-used
sampler rates, as well as access to settings such as copy protection. The interface can even
be used for raw data streams such as AC-3 and DTS. And as the icing on the cake, a 1.0 m
TOS-Link cable is included with the Aureon 7.1 Space.
Software à la carte.
The software side features a generous package, including Cyberlink PowerDVD with Dolby
Digital EX, the Wavelab Lite 2.0 audio editor, the Emagic Logic Fun composing application,
and Musicmatch Jukebox for your MP3s.
WDM drivers for Windows 98SE / ME / 2000 and XP quietly do their job behind the scenes.
The control panel gives you convenient access to configure the card's broad range of functions. Its carefully thought-out user interface and intuitive control of all card settings will
make your day-to-day work with the SoundSystem a breeze.
Last but not least.
We hope you enjoy your SoundSystem Aureon 7.1 Space and would like to suggest that you
browse this hopefully entertaining manual when you get the chance. In addition to the important information about its technology, we have outlined a number of typical applications
wherever appropriate. We're convinced that even experienced users will profit from this guide.
Thanks for your attention—enjoy!
...your TerraTec Team
SoundSystem Aureon 7.1 Space (English) 5

From opening the package to installation.
Before installing the sound card in your computer, please note the details of your computer's
configuration. Also refer to the manual of your computer and other expansion cards for their
settings.
Please observe the following instructions to ensure a trouble-free installation.
If difficulties arise nevertheless, please reread the relevant chapter in this manual carefully.
If you are still having problems, please call our service hotline. The phone numbers and hours
of the hotline can be found in the Appendix of this documentation.
Start by making sure that nothing is missing.
The scope of delivery of the SoundSystem Aureon 7.1 Space includes at least the following:
· 1 PCI sound card TerraTec SoundSystem Aureon 7.1 Space
· 1 installation and driver CD
· 1 TOS-Link cable (1.0 m)
· 1 Quick reference
· 1 customer service card
· 1 TerraTec registration card with the serial number
Please return the registration card to us at the earliest possible opportunity or register online
at http://www.terratec.com/register.htm
line services.
. This is important for support and hot-
6 SoundSystem Aureon 7.1 Space (English)

Note!
Even if you're a seasoned pro, you should still at least skim the The software. chapter starting
on page 26. The information on drivers and the first sections on the ControlPanel are important for your overall understanding of the system. Thank you.
Note!
Due to restrictions in Windows98SE, Windows Me and Windows 2000, only six channels can
be used in these operating systems.
All 8 channels are available for playback in Windows XP. Service Pack 1 also supports 24bit/192 kHz playback in addition to 24-bit/96 kHz. We urgently recommend that Windows
2000 users install Service Pack 3.
Short and to the point for busy pros.
· The SoundSystem Aureon 7.1 Space is a PCI card that supports Busmastering. Please
choose a PCI slot which is far away from the graphics card(s) or SCSI/RAID controllers—i.e.
as close to the “bottom” as possible in most installations.
· You will also need a number of free address ranges (generally no problem).
· The driver installation under Windows (98SE to XP) follows the Microsoft guidelines. The
drivers can be found on the included CD-ROM.
· After installing the drivers, open the Device Manager and check for yellow exclamation
marks. If you find any, please see the Appendix (page 38) for our suggested solutions.
· You must install the ControlPanel. The full functionality of the SoundSystem cannot be
controlled using the Windows Mixer.
· So much for the summary. The following is a detailed, illustrated description of the installation.
SoundSystem Aureon 7.1 Space (English) 7
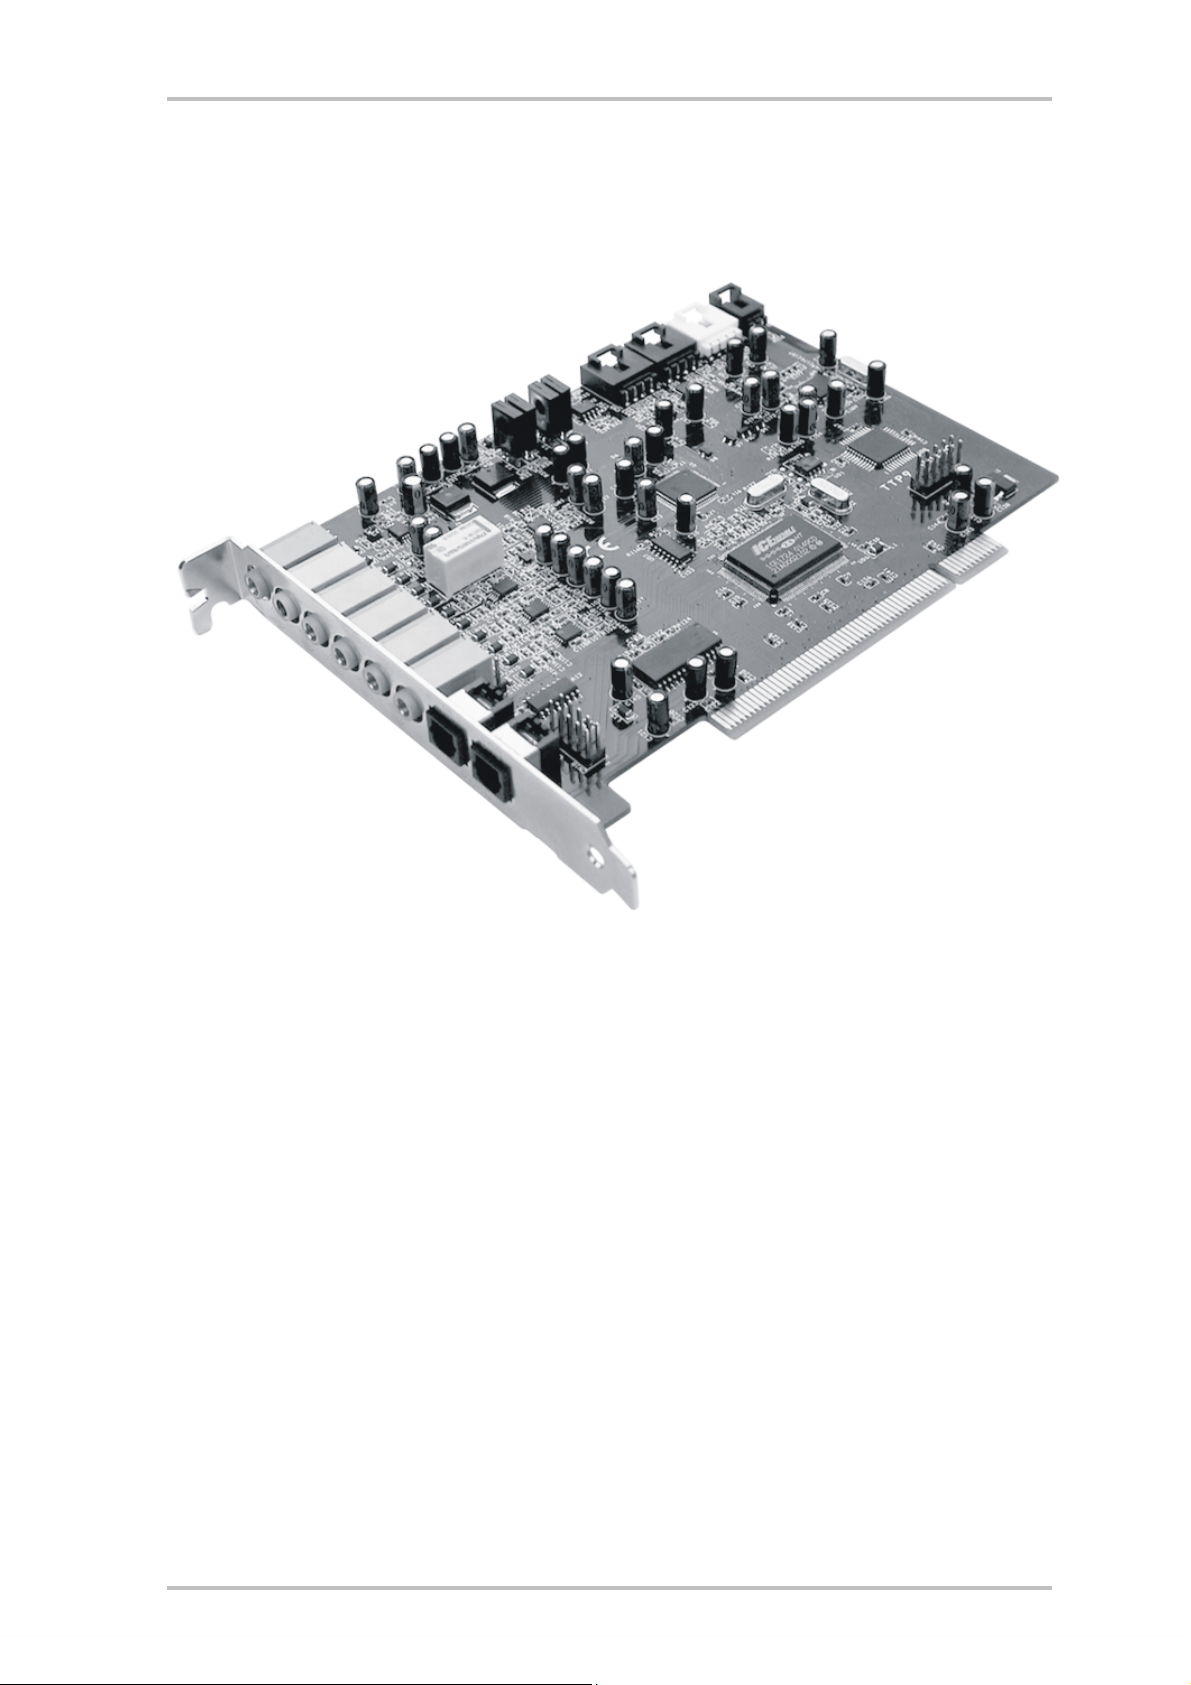
The connectors of the Aureon 7.1 Space PCI card
12
11
10
9
1
2
3
4
5
6
7
8
1. Analog microphone audio input (3.5 mm jack)
2. Analog stereo audio input (3.5 mm jack)
3. Analog stereo audio output “Front” (3.5 mm jack)
4. Analog stereo audio output “Rear” (3.5 mm jack)
5. Analog stereo audio output “Center-LFE”, Left = Center, Right = LFE/Subwoofer (for 3.5
mm mini-jack)
6. Analog stereo audio output “Back-Surround” (3.5 mm jack)
7. Optical digital input
8. Optical digital output
9. Onboard CD-audio input 1 (stereo)
10. Onboard CD-audio input 2 (stereo)
11. Onboard audio input (AUX, stereo)
12. Onboard CD-ROM digital audio input (TTL)
8 SoundSystem Aureon 7.1 Space (English)

Installation—step by step.
Safety note.
Before opening the case, unplug the AC power cable from the wall socket as well as from the PC.
· Switch off your PC and all connected peripheral devices such as your printer and monitor.
Leave the AC cable connected for the time being, so that your computer is still grounded.
· Touch the metal chassis at the rear of the PC to ground and to discharge static. Now unplug the cord from the AC socket.
· Remove the cover from the case of your PC.
Installing the PCI card.
· Find a free PCI slot, remove the screw securing the metal cover over the slot and remove
the cover itself. Should it be necessary to break a plate out of the case, do so with great
care to avoid injury.
· To ensure the optimal function of your SoundSystem, look for an expansion slot that is
not immediately next to an already-installed card. Some cards, such as video or
SCSI/RAID adapters, can send out signals which can interfere with the sound card.
We also recommend a slot as close to the bottom of the computer as possible, as you can
connect up to 7 audio cables directly to the card itself. Due to certain physical properties
of our planet, it is very likely that these cables will dangle downward. ;-)
· Carefully remove the PCI card from its packaging. Pick it up by the edges with one hand
while your other hand is resting on the metal of the PC case. This will ensure that your
body is completely discharged (no joke) via your computer without affecting the card.
Please do not touch the components of the board.
· Next, connect the internal cables (e.g. from the CD drive). For further information on the
various connections, please see page Fehler! Textmarke nicht definiert..
· Align the audio card so that the strip with the golden connector pins is located exactly
over the PCI slot. Insert the card into the slot. You might have to press the card firmly into
the slot to make good contact. Take care to ensure that the contacts are precisely in line
in order to avoid damaging the audio card or the motherboard in your PC.
· Secure the card with the screw from the slot blanking plate (these screws are generally
also included with PC cases).
Finishing up.
· Reinstall the cover of your PC case.
· Connect your audio peripherals (hifi amp, active speakers, mixer, etc.) to the Aureon 7.1
Space (also see chapter “The connections and their uses.” starting on page 24).
· Reconnect the AC power cable as well as all other cables and turn your PC on. Make sure
that your speakers or hifi system is set to low volume.
· Start your computer. The installation of the driver software is the next step.
SoundSystem Aureon 7.1 Space (English) 9

Installing the driver software.
The SoundSystem Aureon 7.1 Space currently comes with drivers for Windows 98 SE, Windows ME, Windows 2000 and Windows XP. The card cannot be used under Windows 95 and
Windows NT 4. You should therefore determine which operating system you are using before
installing the card.
For information on your operating system and its version number, please check the “System”
dialog in the Windows control panel.
Here you can see which Windows Service Pack version you are using, for example.
In the following driver installation descriptions, <CD> stands for the drive letter of the CD-
ROM drive containing the driver CD of the SoundSystem Aureon 7.1 Space .
10 SoundSystem Aureon 7.1 Space (English)
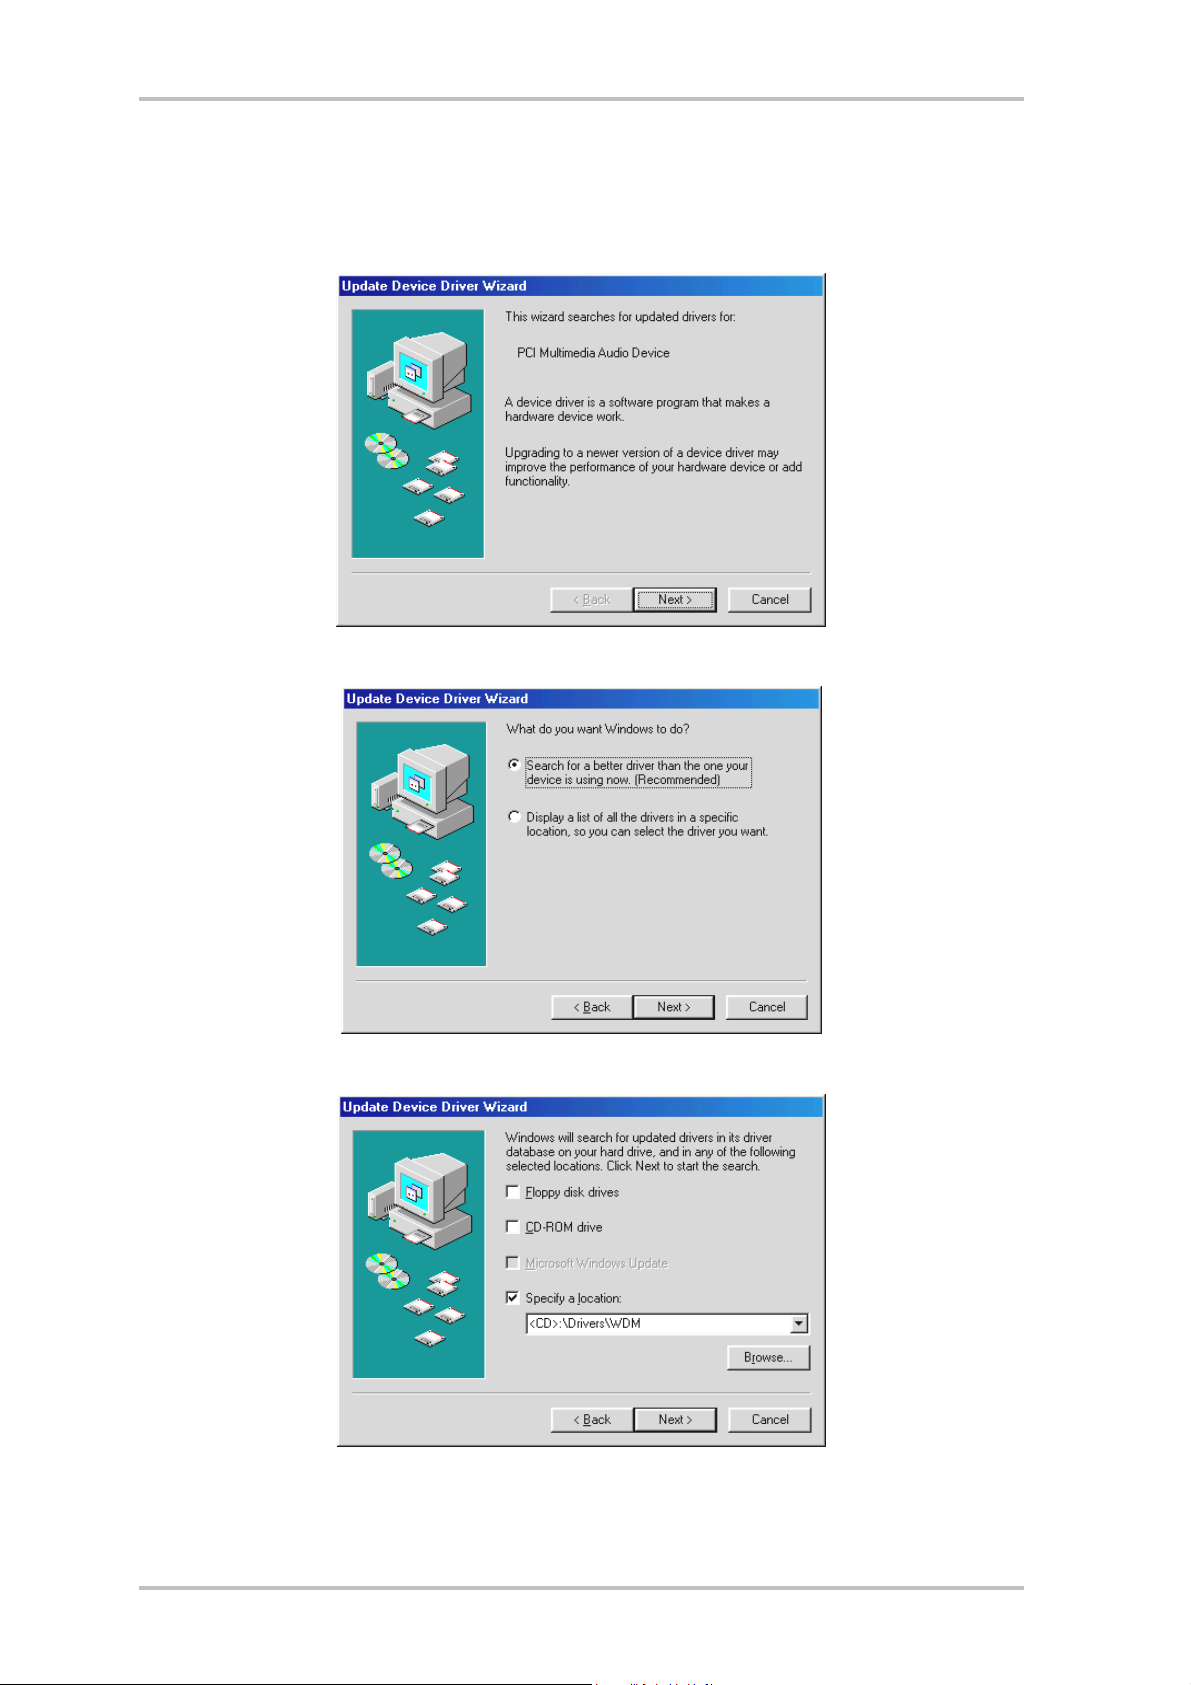
Driver installation under Windows 98 SE
After the SoundSystem Aureon 7.1 Space is installed, Windows 98SE recognizes the card as a
new hardware component and displays the following window.
Click “Next”.
Select here the “Search for the best driver for my device (Recommended)” item and click “Next”.
Enter the path
SoundSystem Aureon 7.1 Space (English) 11
<CD>:\Drivers\WDM\ and click “OK”. Alternatively, you can also select the path to
the best driver of your Aureon 7.1 Space using the mouse by clicking “Browse...”.
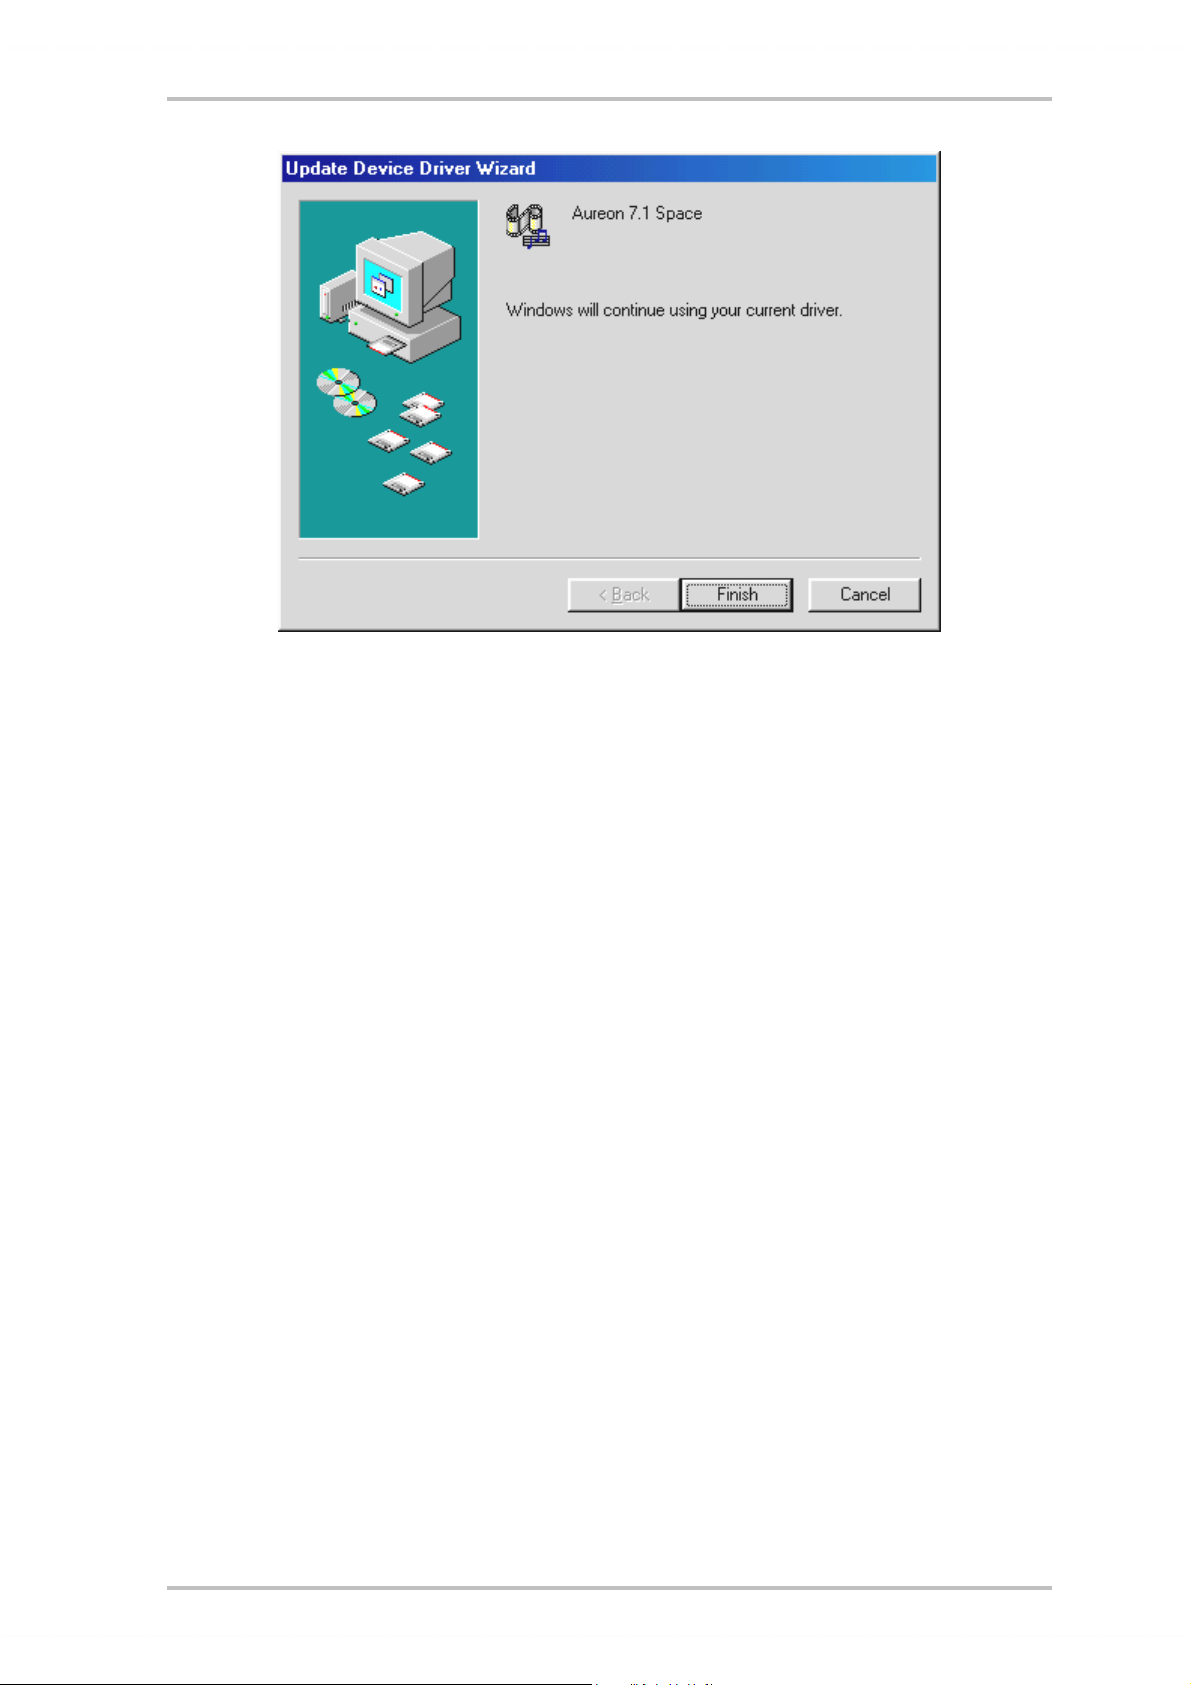
At the conclusion, click “Finish”.
Windows now performs the driver installation and acknowledges the process with several
windows that can be viewed. Nothing else should be required at this time. If contrary to all
expectations a request should appear for you to perform some action and you are not sure
about it, then pressing the Enter key is generally a safe action.
If Windows requests a second driver file, please refer to the aforementioned directory on the
Aureon 7.1 Space CD-ROM. It is also possible (e.g. if this is the first sound card installation in
your system) that some additional Windows extensions have to be installed. Please have your
Windows CD ready for this purpose.
Once the drivers have been installed successfully, install the ControlPanel via the autostarter,
then the bundled software.
To do so, execute <CD>:\autorun.exe
Follow the instructions of the individual installation programs, and there's not really a lot that
can go wrong. A particular bundled software can also easily be removed from your system. For
this purpose, call up “Control Panel -> Software” and locate the programs to be removed. Select the various programs and click “Add/Remove Programs...”.
12 SoundSystem Aureon 7.1 Space (English)

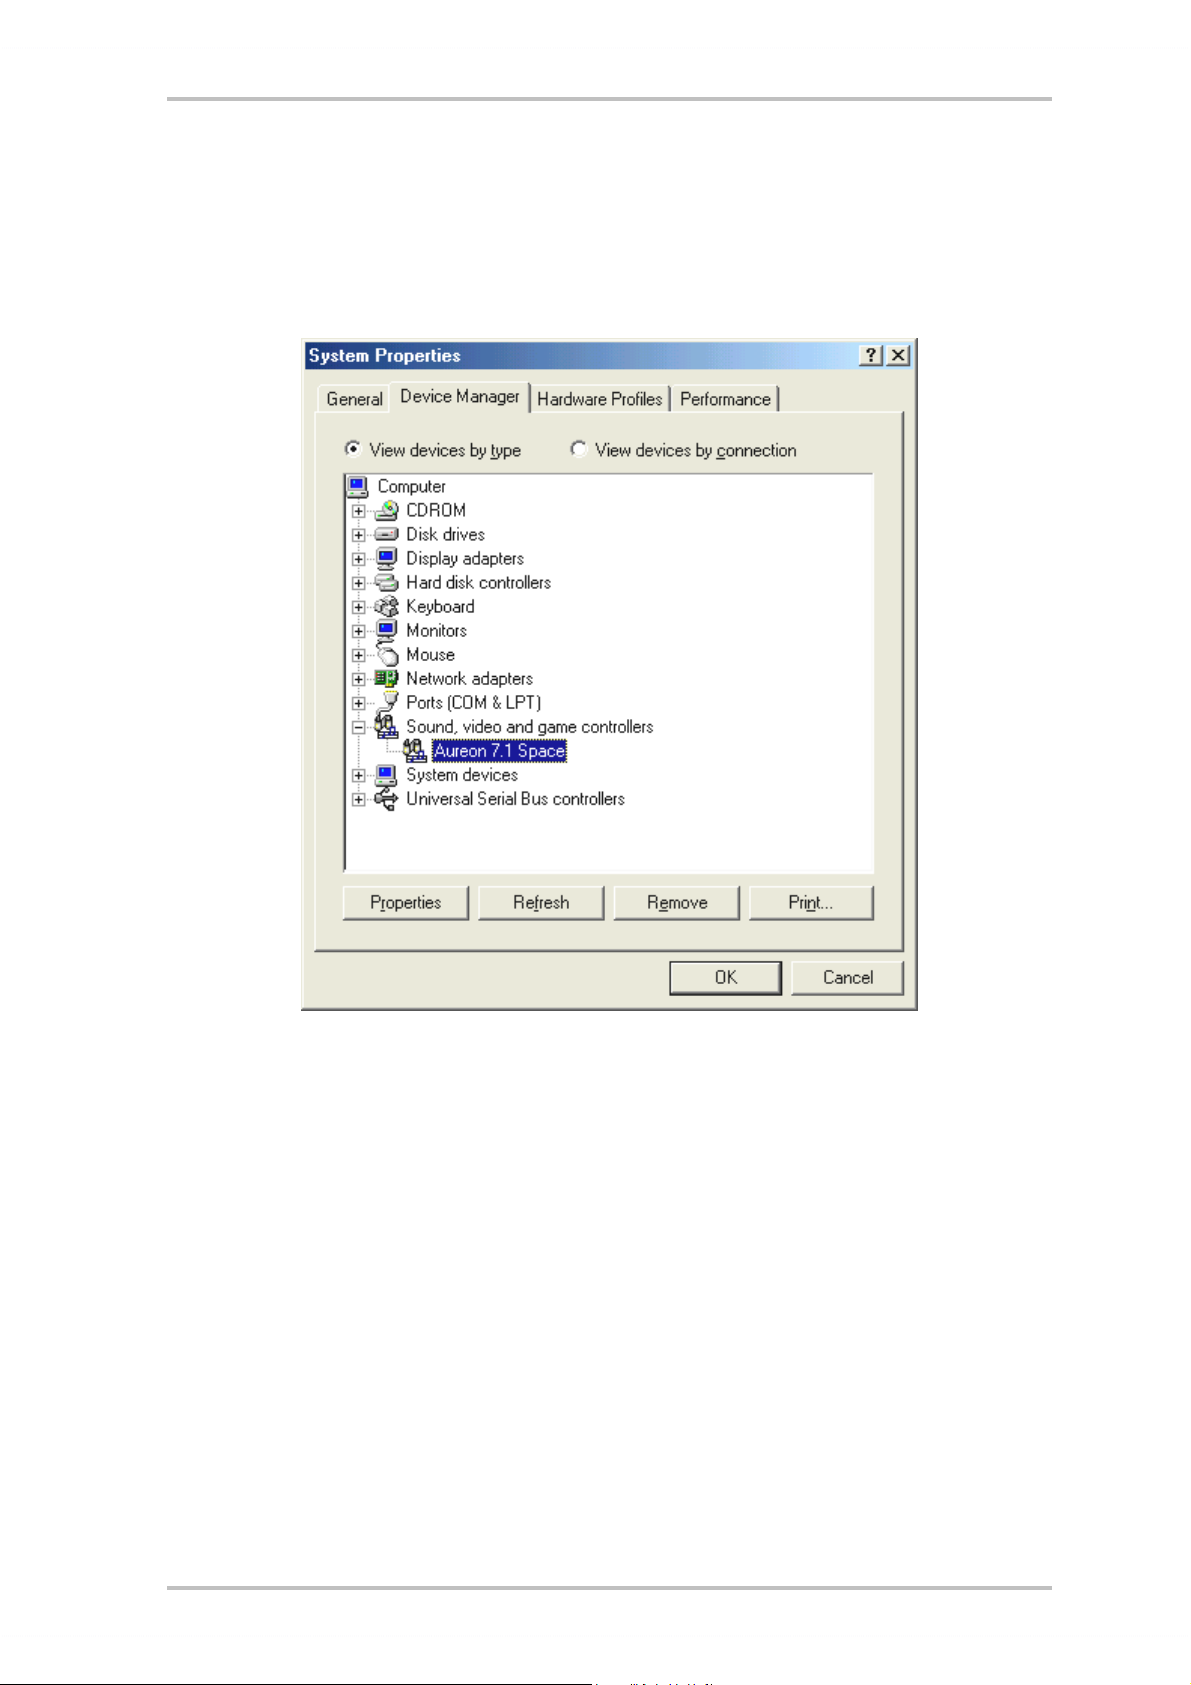
Installed drivers should look like this.
After a successful driver installation, you should verify the correct condition of your Windows
98SE system. The Device Manager presents an overview of installed and recognized hardware
components of your computer. The Device Manager can be found on the Control Panel under
“System”.
If everything is correctly set up, the window should look like this. The figure shows the expanded view of
the “Sound, video and game controllers” branch. To obtain this view, simply click the “+” symbol on the
left side.
SoundSystem Aureon 7.1 Space (English) 13

Driver installation under Windows ME.
After the computer restarts and Windows ME detects the new hardware using the Add New
Hardware Wizard, the following window displays.
Select “Specify the location of the driver (Advanced)” and click “Next”.
Activate the checkbox “Specify a location:”, enter the path <CD>:\Drivers\WDM\ and click “Next”.
Alternatively, you can change to the respective directory by clicking on “Browse...”.
14 SoundSystem Aureon 7.1 Space (English)

This screen should be acknowledged by clicking on “Next”.
At the conclusion, click “Finish”.
Once the drivers have been installed successfully, install the ControlPanel via the autostarter,
then the bundled software.
To do so, execute <CD>:\autorun.exe
Follow the instructions of the individual installation programs, and there's not really a lot that
can go wrong. A particular software can also easily be removed from your system. For this
purpose, call up “Control Panel -> Software” and locate the programs to be removed. Select
the various programs and click “Add/Remove Programs...”.
SoundSystem Aureon 7.1 Space (English) 15
Installed drivers should look like this.
After a successful driver installation, you should verify the correct condition of your Windows
ME system. The Device Manager presents an overview of installed and recognized hardware
components of your computer. The Device Manager can be found on the Control Panel under
“System” > “Hardware”. Then click the “Device Manager” button.
If everything is correctly set up, the window should look like this. The figure shows the expanded view of
the “Sound, video and game controllers” branch. To obtain this view, simply click the “+” symbol on the
left side.
16 SoundSystem Aureon 7.1 Space (English)

Installation under Windows 2000.
Caution:
Service Pack 3 is required for 24-bit playback.
Once the computer has been restarted, you have logged on as the administrator and the new
hardware has been detected by the Windows 2000 hardware wizard, the following window
will appear.
Click “Next”.
Select the “Search for a suitable driver for my device (Recommended)” item and click “Next”.
SoundSystem Aureon 7.1 Space (English) 17

Activate the checkbox “CD-ROM drives” and click “Next”.
This screen should be acknowledged by clicking on “Next”.
18 SoundSystem Aureon 7.1 Space (English)

Continue the installation by clicking on “Yes”.
It is possible that such a dialog window appears again in the course of the installation. If this
is the case, simply click “Yes”.
Windows now performs the driver installation and acknowledges the process with several
windows that can be viewed. Nothing else should be required at this time. If contrary to all
expectations a request should appear for you to perform some action and you are not sure
about it, then pressing the Enter key is generally a safe action.
If Windows requests a second driver file, please refer to the aforementioned directory on the
Aureon 7.1 Space CD-ROM.
Once the drivers have been installed successfully, install the ControlPanel via the autostarter,
then the bundled software.
To do so, execute <CD>:\autorun.exe
Follow the instructions of the individual installation programs, and there's not really a lot that
can go wrong. A particular software can also easily be removed from your system. For this
purpose, call up “Control Panel -> Software” and locate the programs to be removed. Select
the various programs and click “Add/Remove Programs...”.
SoundSystem Aureon 7.1 Space (English) 19

Installed drivers should look like this.
After a successful driver installation, you should verify the correct condition of your Windows
2000 system. The Device Manager presents an overview of installed and recognized hardware
components of your computer. The Device Manager can be found on the Control Panel under
“System” > “Hardware”. Then click the “Device Manager” button.
If everything is correctly set up, the window should look like this. The figure shows the expanded view of
the “Sound, video and game controllers” branch. To obtain this view, simply click the “+” symbol on the
left side.
20 SoundSystem Aureon 7.1 Space (English)

Installation under Windows XP.
Caution:
Service Pack 1 is required for 192-bit playback.
Once the computer has been restarted, you have logged on as the administrator and the new
hardware has been detected by the Windows XP hardware wizard, the following window will
appear.
Select “Specify a location (advanced)” and click “Next”.
Select “Search this path” and enter “<CD>:\Drivers\WDM”. Now click “Next”.
SoundSystem Aureon 7.1 Space (English) 21

Don't panic, everything's going to be fine:
this message is displayed for all hardware and software components that have not been certified by Microsoft. It has no bearing whatsoever on the quality of the components, however. In
some cases, 100% compliance with Microsoft's criteria may even result in a loss of performance. In addition, a new certification is necessary every single driver update, so they can't
simply be made available on the Internet as soon as it's finished.
We therefore do not recommend canceling the installation at this point. We subject all of our
products to a rigorous test program, so all functions have been tested in all of the supported
operating systems. You can therefore continue the installation with absolute peace of mind.
Click “Finish”.
It is possible that such a dialog window appears again in the course of the installation. If this
is the case, simply click “Yes”.
Windows now performs the driver installation and acknowledges the process with several
windows that can be viewed. Nothing else should be required at this time. If contrary to all
22 SoundSystem Aureon 7.1 Space (English)

expectations a request should appear for you to perform some action and you are not sure
about it, then pressing the Enter key is generally a safe action.
If Windows requests a second driver file, please refer to the aforementioned directory on the
Aureon 7.1 Space CD-ROM.
Once the drivers have been installed successfully, install the ControlPanel via the autostarter,
then the bundled software.
To do so, execute <CD>:\autorun.exe
Follow the instructions of the individual installation programs, and there's not really a lot that
can go wrong. A particular software can also easily be removed from your system. For this
purpose, call up “Control Panel -> Software” and locate the programs to be removed. Select
the various programs and click “Add/Remove Programs...”.
Installed drivers should look like this.
After a successful driver installation, you should verify the correct condition of your Windows
XP system. The Device Manager presents an overview of installed and recognized hardware
components of your computer. The Device Manager can be found on the Control Panel under
“System” > “Hardware”. Then click the “Device Manager” button.
If everything is correctly set up, the window should look like this. The figure shows the expanded view of the “Sound, video and game controllers” branch. To obtain this view, simply
click the “+” symbol on the left side.
SoundSystem Aureon 7.1 Space (English) 23

The connections and their uses.
After the successful installation of your sound card, we are now coming to the most important
part: the connection of external devices and appropriate software settings for the devices.
Safety note.
When connecting analog devices, ensure that the power is off to protect your speakers and
your hearing from sudden peaks. For digital devices, be sure to at least reduce the volume of
your playback equipment.
Overview.
The SoundSystem Aureon 7.1 Space is blessed with a wealth of internal and external connection options. We would like to introduce them to you briefly below:
Internal, onboard: CD audio, AUX and TTL. The PC board of the Aureon 7.1 Space features
three plug connectors for analog connections to CD-ROM drives (CD1 and CD2), or other cards
such as TV or video expansion modules (AUX). The required cables and plugs are standardized and are generally included with branded products.
An internal digital input is also available. An external S/PDIF signal with a so-called TTL level
(+5 V), as provided by most CD-ROM drives, can be applied to the connector marked CN11.
The analog CD-ROM connections are electrically independent (decoupled) and can be used
simultaneously. The Aureon ControlPanel software represents both CD signals as a single
source, however.
From the back, analog: 4 out, 2 in. Six sockets reside on the golden slot plate of your
SoundSystem, each waiting for a 3.5 mm stereo mini-jack. The first four (green; F, R, C/W, BS)
are the outputs for eight audio channels and are designed for use with a suitable (surround)
amplifier or an active speaker system.
The outputs are laid out in the format that you probably already know from 7.1 hifi applications:
F for the two front speakers (Front, Left and Right)
R for the two rear side speakers (Rear, Left and Right)
C/W for the center speaker (mono) and the subwoofer signal, the so-called LFE channel
(also mono). The left channel hereof is the Center signal (usually a white or black plug
on the cable).
R for the two rear side speakers (Back-Surround, Left and Right)
An amplifier can also be activated in the ControlPanel for the front output (F), allowing it to be
used as a headphone output!
24 SoundSystem Aureon 7.1 Space (English)

Next, the blue socket (Line In) on the slot plate. This input is designed for recording from
sources with a normal, so-called line level. This is the input for connecting devices such as
cassette decks, mixers, dictaphones, studio effects devices, the record output of your hifi
system, etc. A signal applied to this input can later be selected for recording in the Aureon
ControlPanel.
Rounding out the analog connections there's the pink socket (Mic In) on the slot plate. This is
the microphone input of the SoundSystem Aureon 7.1 Space . This connection is suitable for
condenser microphones.
From the back, digital – 1 out, 1 in.
The two sockets (TOS-Link) positioned next to one another are the digital input and output
(Digital In and Digital Out) of the system. The output complies with the S/PDIF standard; an
AC3 or DTS signal can also be transferred. A variety of additional information can be added to
the signal or filtered out during recording (or when looping a signal through the system). An
optical fiber cable (optical waveguide) is used here to connect digital equipment (many MiniDisc players use this connection type). A cable of this type is included with the Aureon 7.1
Space, so you can get started right away.
Connecting a joystick.
Maybe you still remember: sound cards have always accommodated joysticks, steering
wheels, and the like. Why this should necessarily be the case is a completely different question—after all, nobody expects to find a printer port on a graphics card, no matter how sophisticated it might be. Modern joysticks tend to use the faster USB port, which has the additional
advantage of accommodating multiple input devices.
Having said that about tradition, we're choosy about the traditions to which we're obligated—
and after all, somebody had to make the first step. We're certain that you'll see other manufacturers drop the joystick ports from their sound cards as well in the near future as a result.
Viva la Innovación! ;-)
SoundSystem Aureon 7.1 Space (English) 25

The software.
Your TerraTec Team spared virtually no expense and left no mountains unmoved to present
you a truly stunning software package. It contains programs with which you can:
· set up and control the SoundSystem Aureon 7.1 Space,
· listen to all major (and a couple of minor) audio file formats,
· edit recorded and imported audio data,
· do professional-quality sequencing, and have fun in many other ways as well.
· enjoy DVDs in certified Dolby and DTS multichannel sound, and much more.
One could say it's complete. And the best thing about it: the programs are powerful enough to
deliver professional results in all areas. Solid tools, no frills. Well, almost: if it's goodies
you're looking for, you'll also find them on the SoundSystem Aureon 7.1 Space CD. We've
filled the “HOTSTUFF” folder—a TerraTec tradition—with a collection of what we consider to be
the choicest audio shareware and freeware programs. It'll keep you busy for hours, at work
and at play.
But let's get back on track. After you've installed the software—and assuming you've selected
all programs for installation—you'll find the following programs on your system, which we'll
be covering in the following overview. For further information, please see the help files of the
individual applications. Enjoy!
26 SoundSystem Aureon 7.1 Space (English)

The Aureon ControlPanel.
The appearance of the Aureon ControlPanel can vary slightly from the following illustrations
depending on your operating system, color depth and other selections.
The “Playback” window.
Here you can set the levels of the individual speakers. The fader marked “Front” is likely to
see a lot of wear and tear. It sets the levels of the front speaker pair. Each speaker can be
muted individually by clinking on its MUTE button.
Adjust the position of the stereo image with the balance faders below the level faders.
The “Sources” window.
Here you can set the levels of the individual signal sources.
Each signal source can be muted individually by clinking on its MUTE button. Mutes playback
sources are recorded nevertheless. The settings in the Record window affect whether or not a
source is recorded. Adjust the position of the stereo image with the balance faders below the
level faders.
SoundSystem Aureon 7.1 Space (English) 27

The “Record” window.
Use this window to select the signal sources to be recorded by an application via the Aureon
7.1 Space Record driver. The “Mix” source supports the simultaneous recording of all analog
sources in, as the name says, stereo mix. If you have selected “Analog In” as the source for
the digital output in the “Digital” window, the analog source selected in the “Record” window
will be used.
The “Digital” window.
The “Digital” window contains the settings for the digital input and output.
The Master Clock.
Here we're dealing with the sample rate used by your SoundSystem Aureon 7.1 Space. This
is—depending on the application—a very important point, as the card can be (and in some
cases, must be) controlled by an external signal (from a MiniDisc recorder, for example), or it
can specify a rate for itself internally and can share this signal via the digital interfaces with
other devices being used for recording.
28 SoundSystem Aureon 7.1 Space (English)

If a valid S/PDIF signal is being applied to a digital input, its sample rate will be displayed in
the Aureon ControlPanel, and the SoundSystem can and should be set to this external sample
rate (External). If you forget this step, audible errors such as dropouts and clicks may occur
during recording—and already when monitoring the signal.
Naturally, you should also pay attention to the settings of your periphery in the reverse situation (synchronizing an external device with the Aureon). In that case, set the Aureon ControlPanel to “Internal”, as it also would be when you are not using external digital devices. If the
devices are to be permanently connected to one another in both directions, you must decide
which device will provide the clock signal.
The digital interfaces of the Aureon 7.1 Space support all bit resolutions between 8 and 24
bits, as well as all sample rates between 8 and 96 kHz. 192 kHz can even be used in Windows
XP with Service Pack 1. Please note that not all devices can process sample rates higher than
48 kHz. For example, if you would like to transfer a signal recorded at 96 kHz to a MiniDisc
player, you will need to convert the file(s) to 44.1 kHz or 48 kHz first. You can use the included
WaveLab 2.0 Lite for this.
S/PDIF Out.
The Aureon ControlPanel lets you choose from a variety of sources for digital audio output.
The following source settings are available in the “S/PDIF Source” field:
· Digital In sends the signal applied to the digital input directly to the digital output without
losses.
· Analog In sends the signal of the analog source you have selected in the “Record” win-
dow.
· Wave Playback delivers the signal output of an audio application directly to the digital
output. This setting is necessary to transfer audio data or raw data such as an AC-3 or DTS
stream. The audio signal is “bit-true”.
In addition, the following parameters can be selected in all three positions:
· Copyright adds a copy-protection ID to the signal or filters it out when deactivating copy
protection. This function sets the so-called “copy protection bit” which ensures that no
digital copies can be made of the signal.
· Non-Audio sets a flag in the data stream as a signal to the recipient that it is receiving raw
data. Activate the “Non-Audio” mode when transferring AC3 or DTS streams from a software DVD player - such as the included Cyberlink PowerDVD - to an external audio device
for further processing.
SPDIF Input.
· DigIN Monitor lets you monitor the signal applied to the digital input using the front
speakers.
· Opt. Input selects the external optical digital input as the digital input source.
· Dig. CD Input selects the internal digital CD input as the digital input source.
SoundSystem Aureon 7.1 Space (English) 29

AC3 and DTS.
It is also possible to use the interfaces independently of the S/PDIF standard. The included
Cyberlink PowerDVD application supports the transfer of AC-3 or DTS streams via the digital
output. The following points must be observed in this regard:
· “Digital” tab:
”S/PDIF active” must be enabled and “Wave Playback” must be selected as the source for
the digital output. The “Non-Audio” flag may be required depending on the audio component used to process the AC-3 or DTS signal.
· In Windows98SE, Sensaura must also be disabled. If Sensaura is active, it must be disabled in the Speaker” window. You must restart your system after changing the Sensaura
support setting. A message will be displayed to this effect under the button.
The “Speaker” window.
The “Speaker” window lets your configure the 3D capabilities of your Aureon 7.1 Space.
Important!
”7.1 Mode” can only be used in Windows XP and with Sensaura support disabled. If you are
using Windows XP and the “7.1 Mode” entry does not appear in the selection, disable “Sensaura”.
In Windows 98SE, AC3 or DTS streams can only be looped with Sensaura disabled. You must
restart your system after changing the Sensaura support setting. A message will be displayed
to this effect under the button.
The correct speaker configuration is especially important. It is essential to guarantee that the
applied 3D algorithm delivers optimum results. The selected speaker configuration can be
tested immediately. Click on a speaker in the display on the right. The speaker icon will
change color and a continuous test tone will be sent to the speaker on that channel. Click
again to turn the test signal off.
30 SoundSystem Aureon 7.1 Space (English)

Output Front (1/2) Regardless of the selected speaker configuration, the front output can be
used as a line or headphone output. Thanks to the ControlPanel and state-of-the-art electronics, there's no need for fiddling around with jumpers on the card J.
3D Sound Support Enable and disable Sensaura 3D audio here. You must restart your system
after changing the Sensaura support setting. A message will be displayed to this effect under
the button.
The “Misc” window.
The “Misc” window contains a number of functions not directly related to the Aureon 7.1
Space, but which affect the ControlPanel itself. These include the loading and saving of mixer
presets, the display of the taskbar icon, as well as the colors and language of the ControlPanel.
“Load” and “Save”.
“Load” and “Save” give you a convenient way of saving and reproducing configurations. You
could, for example, to save special settings for the digital inputs and outputs on an application-specific basis and load them whenever you need them.
SoundSystem Aureon 7.1 Space (English) 31

WaveLab Lite 2.0
WaveLab, Steinberg's sample editor, has received many awards and is especially suitable for
recording and editing large audio files. Recordings in 24-bit/96 kHz format, or even 192 kHz in
Windows XP with Service Pack 1 are no problem for this application.
Precise zoom functions and a wide range of tools for fast editing do an excellent job of rounding out the software side of your SoundSystem.
As WaveLab will probably be the program you'll use the most, here's a quick-start guide for
your own first recording:
· Start the program.
· Open the “Options” menu, select “Preferences” and go to “Sound Card” on the settings
page (you can also press CTRL+P).
· Select the Aureon 7.1 Space recording and playback driver: “Aureon Wave”
· Close the dialog with “OK”.
· Press the red record button or the “ * “ key on your numeric keypad to open the recording
dialog.
· Select a sample rate (this must correspond to the card's clock—see ControlPanel) and bit
rate and start the recording.
· The application will continue recording to the hard drive until you stop the recording or
the system indicates that the drive is full.
· Next, you can edit and save your new file.
MusicMatch Jukebox.
Just as all beginning programmers have their first programs greet them the line “Hello World”,
all sound cards traditionally come with so-called media players in their software bundles. :-)
The MusicMatch Jukebox is much more, however—and that's why it's included in the TerraTec
package: in addition to playing a variety of audio file formats, the program supports simple,
digital ripping of audio CDs. If desired, it writes the data to the hard drive in MP3 format, including title information, using the original Fraunhofer codec for the highest-quality MP3 results.
32 SoundSystem Aureon 7.1 Space (English)
Cyberlink PowerDVD
This application is a further highlight in the package. Use it with your DVD ROM drive to play
DVD movies and send multichannel audio (e.g. Dolby Digital) to the analog outputs of your
Aureon 7.1 Space. With Windows XP a Dolby Digital EX DVD, you can even enjoy audio output
on all 8 channels! Pure surround sound...
For a detailed description of the application, please see the online documentation.
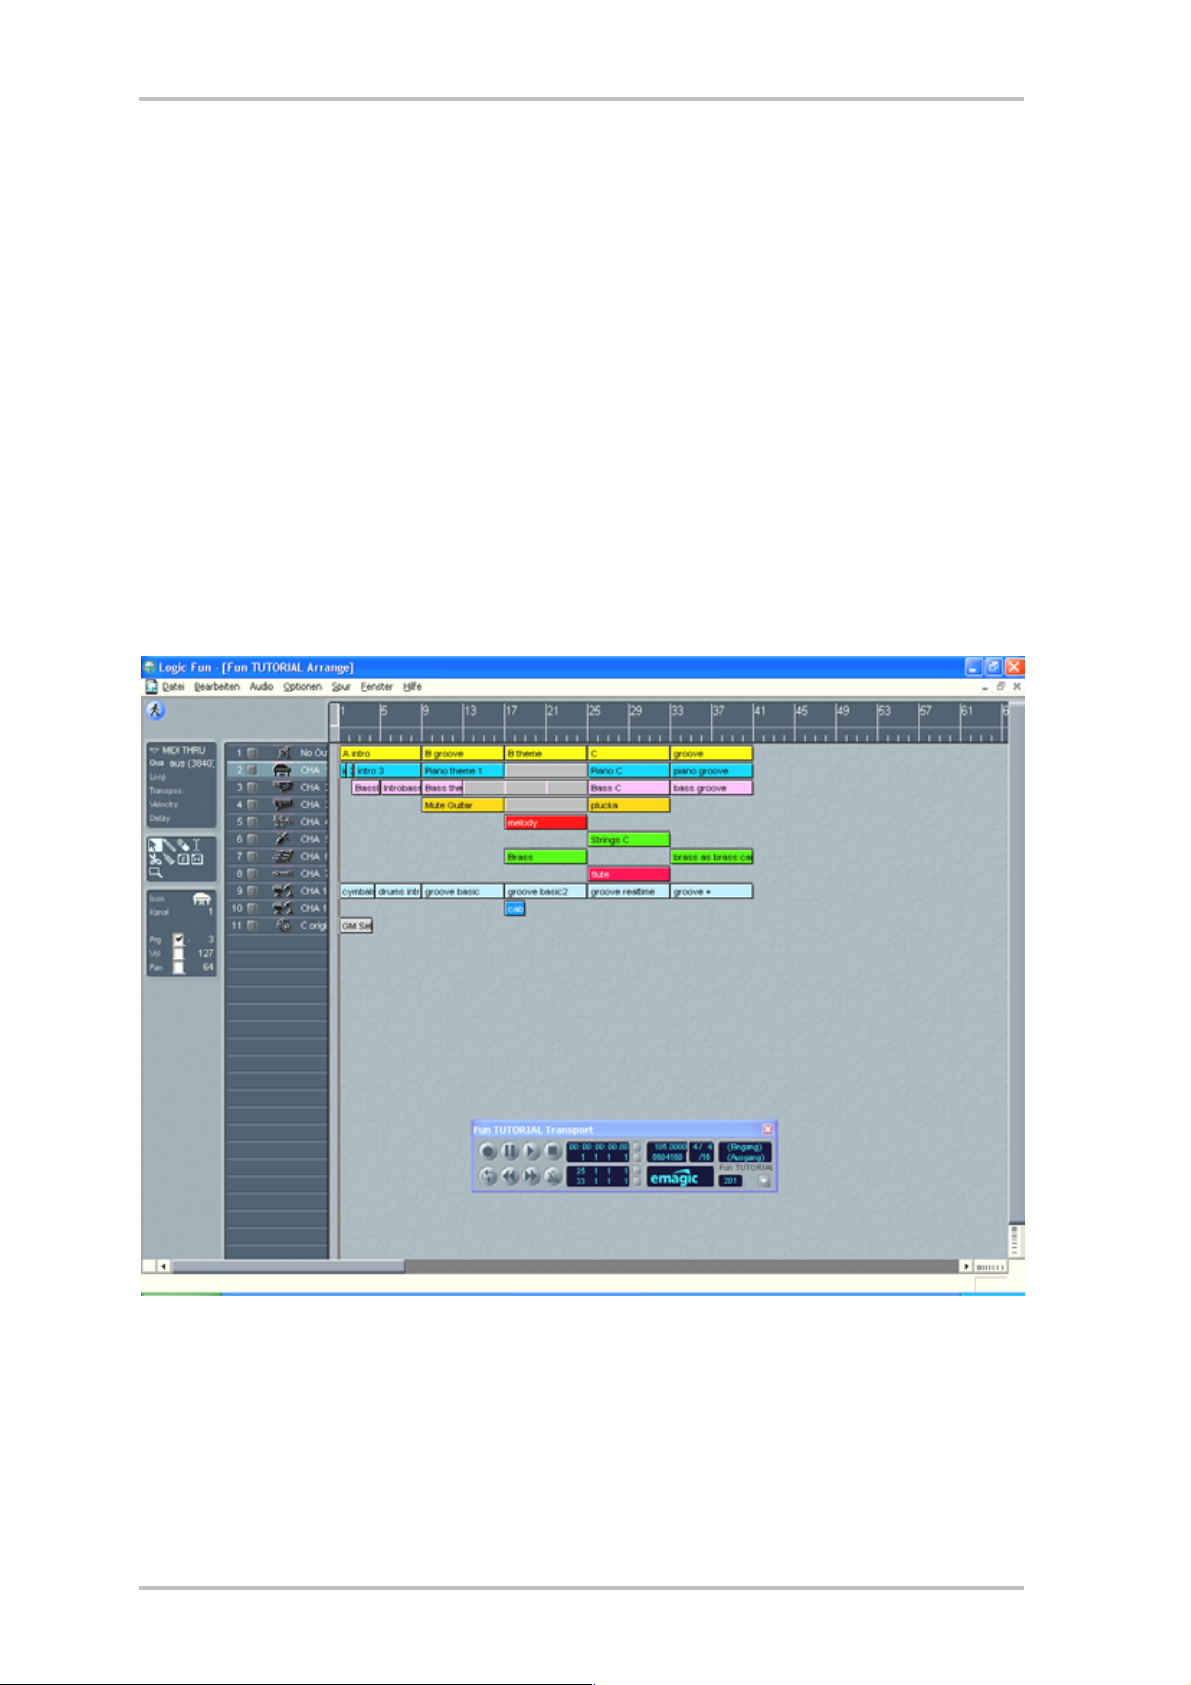
Emagic Logic Fun.
With Emagic Logic Fun, we're proud to present a modern, powerful audio/MIDI sequencer as a
part of our package. It supports the recording and convenient editing of MIDI and audio files.
In addition, Logic offers you a musical notation view, a range of MIDI and audio editors, and
the integration of videos for dubbing purposes.
Here you can set the levels of the individual signal sources.
For a detailed description of the application, please see the online documentation.
SoundSystem Aureon 7.1 Space (English) 33

The HOTSTUFF folder.
We've put together quite a collection of additional programs, tools and files on the SoundSystem Aureon 7.1 Space CD-ROM. This folder is definitely worth a closer look.
Many of the programs in the folder are shareware. Please support the shareware principle and
pay the authors for the programs you enjoy and use regularly. Thank you.
34 SoundSystem Aureon 7.1 Space (English)

Practice.
The digital interfaces of the Aureon 7.1 Space.
Devices that send or receive the S/PDIF protocol can be connected to the optical interfaces of
the Aureon 7.1 Space. These include DAT and MiniDisc recorders, for example. The interface
supports the bit-true transfer of digital signals in all relevant resolutions. In addition, it supports raw data streams such as AC-3 or DTS.
Connections and ControlPanel settings.
Use the digital interface of your Aureon 7.1 Space to transfer music digitally from your computer to other devices, or to record audio data with your PC. One socket each is available to
connect optical waveguides (optical fiber) for recording and playback. A cable of this type is
included with the Aureon 7.1 Space. As a rule, the devices to be connected will have one input
and output socket (IN and OUT) each. Optical OUT sockets can be identified—in addition to
the label—by the red light visible inside them. Simply connect the S/PDIF input of the Aureon
7.1 Space with the S/PDIF output of the desired device - and vice versa, if required.
The “Digital” window of the Aureon ControlPanel lets you choose from a variety of sources for
digital audio output. The “SPDIF Out” field contains the following options:
At the click of the mouse: signal sources and S/PDIF filters.
Digital In sends the signal applied to the digital input directly to the digital output without
losses.
Analog In sends the signal of the analog source you have selected in the “Record” window.
Wave Playback delivers the signal output of an audio application directly to the digital output.
This setting is necessary to transfer audio data or raw data such as an AC-3 or DTS stream. The
audio signal is “bit-true”.
In addition, the following parameters can be selected in all three positions:
Copyright adds a copy-protection ID to the signal or filters it out when deactivating copy protection. This function sets the so-called “copy protection bit” which ensures that no digital
copies can be made of the signal.
Non-Audio sets a flag in the data stream as a signal to the recipient that it is receiving raw
data. Activate the “Non-Audio” mode when transferring AC3 or DTS streams from a software
DVD player - such as the included Cyberlink PowerDVD - to an external audio device for further
processing.
SoundSystem Aureon 7.1 Space (English) 35

AC3 and DTS.
It is also possible to use the interfaces independently of the S/PDIF standard. The included
Cyberlink PowerDVD application supports the transfer of AC-3 or DTS streams via the digital
output. The following points must be observed in this regard:
· “Digital” tab: “S/PDIF active” must be enabled and “Wave Playback” must be selected as
the source for the digital output. The “Non-Audio” flag may be required depending on the
audio component used to process the AC-3 or DTS signal.
· In Windows98SE, Sensaura must also be disabled. If Sensaura is active, it must be disabled in the “Speaker” window. You must restart your system after changing the Sensaura
support setting. A message will be displayed to this effect under the button.
36 SoundSystem Aureon 7.1 Space (English)

Stuff worth knowing.
Digital cables.
Even when transmitting audio data via optical fibers, a few, usually inaudible, errors may occur. You should therefore be sure to use high-quality cables that are not too long: flexible
plastic cables should have a maximum length of 1.5 m, the less-flexible glass fiber cables may
be up to 5 m long.
Audio differences with digital cables seem improbable at first glance, but they can happen
nevertheless. This is due to the fact that error correction algorithms are obviously used more
frequently at some times than at others to compensate for quality differences between individual cables. However, these audio changes are usually so minimal that you need to be careful not to mix up the myth with the reality. If you're interested, there are a number of somewhat entertaining militant newsgroups dealing with this subject on the Internet ;-).
AES/EBU.
Devices with AES/EBU interfaces cannot normally be used on S/PDIF interfaces—ambitious
tinkering with simple adapter plugs will not get you anywhere. As the AES/EBU protocol is
nearly identical to S/PDIF and the transmission essentially only differs in the signal strength,
you can make your own converter with a bit of soldering.
SoundSystem Aureon 7.1 Space (English) 37

Appendix.
FAQ—frequently asked questions and their answers.
An FAQ (Frequently Asked Questions) for initial problem-solving can
be found on the installation CD and on the Internet at
www.terratec.net/ttus/support.htm
.
!
38 SoundSystem Aureon 7.1 Space (English)
 Loading...