

Terayon Communication System WX54G Users Manual
:LUHOHVV$FFHVV([WHQVLRQ
)NSTANTLYADDWIRELESSCAPABILITYTOANY4*XCABLEMODEM
8VHU·V*XLGH
¥4ERAYON#OMMUNICATION3YSTEMS)NC!LLRIGHTSRESERVED

Copyright
Copyright © 2000, 2001, 2002, 2003, 2004 Terayon Communication Systems.
All rights reserved.
Printed in U.S.A.
This publication is protected by federal copyright law. No part of this publication may
be copied or distributed, transmitted, transcribed, stored in a retrieval system, or
translated into any human or computer language in any form or by any means
(electronic, mechanical, magnetic, manual, or otherwise); or disclosed to third parties
without the express written permission of Terayon Communication Systems.
Terayon Communication Systems makes no representation or warranties with respect
to the contents hereof, and specifically disclaims any warranties, merchantability, or
fitness for any particular purpose. Furthermore, Terayon Communication Systems
reserves the right to revise this publication and to make changes from time to time in
the contents hereof without obligation of Terayon Communication Systems to notify
any person of such revisions or changes.
&(
FCC Compliance
This equipment has been tested and found to comply within the limits for a Class A
digital device, pursuant to Part 15 of the FCC Rules. These limits are designed to
provide reasonable protection against harmful interference when the equipment is
operated in a commercial environment. This equipment generates, uses, and can
radiate radio frequency energy, and, if not installed and used in accordance with the
instruction manual, may cause harmful interference to radio communications.
Operation of this equipment in a residential area is likely to cause harmful
interference in which case users will be required to correct the interference at their
own expense.
Manufacturer warrants to buyer that products are free from substantial defect in
materials and workmanship under normal usage, given proper installation and
maintenance for the specified warranty period.
Buyer will promptly notify Manufacturer of any defect in the product. Manufacturer or
its agents will have the right to inspect the product or workmanship on buyer’s or
buyer’s customer’s premises. Manufacturer has the option of (a) repairing, replacing, or
servicing, at its factory or on the premises, the product or workmanship found to be
defective; or (b) crediting buyer for the product in accordance with Manufacturer’s
depreciation policy. Refurbished material may be used to repair or replace the product.
Products returned to Manufacturer for repair, replacement, or credit will be shipped
prepaid by buyer.
WX-54G User’s Guide
Document No. 9000862
December 2004, Rev A
i WX-54G Access Point User ’s Guide

Contacting Terayon Communication Systems
You can contact Terayon Communication Systems as follows:
•
Telephone: (866) 483-7296 or (408) 235-500
• Fax: (408) 235-5500
• Postal mail:
Terayon Communications
4988 Great America Parkway
Santa Clara, CA 95054, U.S.A.
•
e-mail: data-support@terayon.com (for technical support)
marketing@terayon.com (for product information)
• Feedback and suggestions to Technical Publications Group:
techpubs@terayon.com
• Worldwi de Web: http://www.terayon.com
WX-54G Access Point User’s Guide ii

Table of Contents
Chapter 1 Introduction 1-1
System Requirements - - - - - - - - - - - - - - - - - - - - - - - - - 1-1
Package Contents - - - - - - - - - - - - - - - - - - - - - - - - - - - 1-2
Wireless Performance - - - - - - - - - - - - - - - - - - - - - - - - - 1-2
Site Topography - - - - - - - - - - - - - - - - - - - - - - - - - - - - - - - - - - - - - - - - - - - - - - - 1-2
Range - - - - - - - - - - - - - - - - - - - - - - - - - - - - - - - - - - - - - - - - - - - - - - - - - - - - - - 1-2
WX-54G Status Indicators - - - - - - - - - - - - - - - - - - - - - - - - - - - - - - - - - - - - - - - - 1-3
Power Requirements- - - - - - - - - - - - - - - - - - - - - - - - - - - - - - - - - - - - - - - - - - - - 1-3
Chapter 2 Hardware Installation 2-1
System Requirements - - - - - - - - - - - - - - - - - - - - - - - - - 2-1
Package Contents - - - - - - - - - - - - - - - - - - - - - - - - - - - 2-1
WX-54G Status Indicators - - - - - - - - - - - - - - - - - - - - - - 2-2
Power Requirements - - - - - - - - - - - - - - - - - - - - - - - - - 2-2
Hardware Installation Procedure: - - - - - - - - - - - - - - - - - - - 2-3
Attaching the Coax Cable Antenna- - - - - - - - - - - - - - - - - - - - - - - - - - - - - - - - - - 2-7
Chapter 3 Software Installation 3-1
Software Installation Procedure - - - - - - - - - - - - - - - - - - - - 3-1
Chapter 4 Configuring the Terayon WX-54G 4-1
Advanced IP Settings - - - - - - - - - - - - - - - - - - - - - - - - - 4-2
Chapter 5 Terayon WX-54G Utilities 5-1
Connecting to the Terayon WX-54G Web Manager - - - - - - - - - - 5-1
Wired Ethernet Connection - - - - - - - - - - - - - - - - - - - - - - - - - - - - - - - - - - - - - - - 5-1
Wireless Connection - - - - - - - - - - - - - - - - - - - - - - - - - - - - - - - - - - - - - - - - - - - - 5-1
Device Discovery - - - - - - - - - - - - - - - - - - - - - - - - - - - 5-1
Manually Entering the IP Address- - - - - - - - - - - - - - - - - - - - - - - - - - - - - - - - - - - 5-2
Logging In - - - - - - - - - - - - - - - - - - - - - - - - - - - - - - - 5-4
WX-54G Access Point User’s Guide i-i

Displaying the Home Page - - - - - - - - - - - - - - - - - - - - - - 5-5
Using Quick Setup - - - - - - - - - - - - - - - - - - - - - - - - - - 5-5
Selecting the Time Zone - - - - - - - - - - - - - - - - - - - - - - - - - - - - - - - - - - - - - - - - - 5-6
Configuring Wireless Access and Security- - - - - - - - - - - - - - - - - - - - - - - - - - - - - 5-7
Configuring Advanced Wireless Parameters - - - - - - - - - - - - - 5-9
Configuring Interface Parameters - - - - - - - - - - - - - - - - - - - - - - - - - - - - - - - - - - 5-9
Relationship Among Keys - - - - - - - - - - - - - - - - - - - - - - - - - - - - - - - - - - - 5-12
Setting Up Access Control- - - - - - - - - - - - - - - - - - - - - - - - - - - - - - - - - - - - - - - 5-13
Adding or Removing a MAC Address in the Access Control List- - - - - - - - - 5-14
Setting Advanced Parameters - - - - - - - - - - - - - - - - - - - - - - - - - - - - - - - - - - - - 5-14
Configuring the IP WAN and LAN- - - - - - - - - - - - - - - - - - - - - - - - - - - - - - - - - - 5-16
Configuring NAT Settings - - - - - - - - - - - - - - - - - - - - - - - - - - - - - - - - - - - - - - - 5-17
Configuring the NAT Port Trigger - - - - - - - - - - - - - - - - - - - - - - - - - - - - - - 5-18
Configuring the NAT Virtual Server - - - - - - - - - - - - - - - - - - - - - - - - - - - - - 5-19
Configuring the NAT Virtual Data Management Zone (DMZ) - - - - - - - - - - - 5-20
Setting up the Internet Firewall- - - - - - - - - - - - - - - - - - - - - - - - - - - - - - - - - - - - 5-21
Configuring the Internet Firewall Basics - - - - - - - - - - - - - - - - - - - - - - - - - - 5-21
Configuring the WAN and LAN Filter for the Internet Firewall - - - - - - - - - - - 5-22
Configuring the URL Filter for the Internet Firewall - - - - - - - - - - - - - - - - - - 5-24
System Setup- - - - - - - - - - - - - - - - - - - - - - - - - - - - - - - - - - - - - - - - - - - - - - - - 5-25
Changing the Password - - - - - - - - - - - - - - - - - - - - - - - - - - - - - - - - - - - - - 5-25
Upgrading the Firmware- - - - - - - - - - - - - - - - - - - - - - - - - - - - - - - - - - - - - 5-26
Saving Current Settings to a File or Loading Settings from a File - - - - - - - - 5-27
Restoring Factory Default Settings - - - - - - - - - - - - - - - - - - - - - - - - - - - - - 5-28
Displaying System Status and Logging - - - - - - - - - - - - - - - - - - - - - - - - - - - - - - 5-29
System Time- - - - - - - - - - - - - - - - - - - - - - - - - - - - - - - - - - - - - - - - - - - - - 5-30
Displaying Wireless Status - - - - - - - - - - - - - - - - - - - - - - - - - - - - - - - - - - - 5-31
Displaying DHCP Lease Status- - - - - - - - - - - - - - - - - - - - - - - - - - - - - - - - 5-32
Displaying Port Forwarding Status- - - - - - - - - - - - - - - - - - - - - - - - - - - - - - 5-33
Displaying the Routing Table - - - - - - - - - - - - - - - - - - - - - - - - - - - - - - - - - 5-34
Displaying the System Log - - - - - - - - - - - - - - - - - - - - - - - - - - - - - - - - - - - 5-35
Chapter 6 Troubleshooting 6-1
Common Problems and Solutions - - - - - - - - - - - - - - - - - - 6-1
Default Factory Settings - - - - - - - - - - - - - - - - - - - - - - - - - - - - - - - - - - - - - - - - - 6-4
Appendix A Specifications and Safety Information A-1
Notices - - - - - - - - - - - - - - - - - - - - - - - - - - - - - - - - - - - - - - - - - - - - - - - A-1
Federal Communications Commission Statement - - - - - - - - - - - - - - - - - - - - - - - A-1
Safety Statements - - - - - - - - - - - - - - - - - - - - - - - - - - - - - - - - - - - - - - - A-2
Regulatory Information/Disclaimers - - - - - - - - - - - - - - - - - - - - - - - - - - - - - - - - -A-2
Safety Information - - - - - - - - - - - - - - - - - - - - - - - - - - - - - - - - - - - - - - - - - - - - -A-2
MPE Statement - - - - - - - - - - - - - - - - - - - - - - - - - - - - - - - - - - - - - - - - - - - - - - -A-3
i-ii WX-54G Access Point User ’s Guide

FCC Radio Frequency Exposure - - - - - - - - - - - - - - - - - - - - - - - - - - - - - - - - - - -A-3
RF Exposure - - - - - - - - - - - - - - - - - - - - - - - - - - - - - - - - - - - - - - - - - - - - - - - - -A-3
Glossary G-1
WX-54G Access Point User’s Guide i-iii

i-iv WX-54G Access Point User ’s Guide

Chapter 1
Introduction
The Terayon WX-54G is an Access Point designed to be fully compliant with
IEEE pre802.11g and 802.11b standards. 802.11g is a new extension to 802.11b
(used in the majority of wireless LANs today) that broadens 802.11b’s data rates
to 54 Mbps within the 2.4 GHz band using Orthogonal Frequency Division Multiplexing (OFDM) technology. 802.11g allows backward compatibility with 802.11b
devices but only at 11 Mbps or lower, depending on the range and whether
obstructions are present. Wireless LANs are complementary extensions to existing wired LANs, offering complete mobility while maintaining continuous network connectivity to both corporate and home Intranets. Wireless LANs add a
new level of convenience for LAN users; PC users stay connected to the network
throughout a building without being bound by wires.
The WX-54G has a built-in Internet gateway capability, which allows you to
share a broadband modem and one ISP account simultaneously and wirelessly.
System Requirements
To use the Terayon WX-54G, your system must have the following minimum
requirements:
• A Terayon TeraJet 700 Series cable modem
• An Ethernet (10Base-T or 10/100Base-TX) adapter for wired clients
• At least one 802.11g (54Mbps) or one 802.11b (11Mbps) wireless adapter for
wireless mobile clients
• TCP/IP and an installed Internet browser
WX-54G Access Point User’s Manual 1-1

Package Contents
Package Contents
Your Terayon WX-54G package should contain:
• One Terayon WX-54G Wireless Access Extension
• One Terayon WX-54G Quick Start Guide
• Two antennas
• One support CD (utilities and user’s manual)
Wireless Performance
This section provides the user with ideas for how to improve the performance of a Terayon WLAN network, and covers the following topics:
• Site Topography
• Range
• WX-54G Status Indicators
• Power Requirements
Site Topography
For optimal performance, locate wireless mobile clients and the Terayon WX-54G away
from transformers, heavy-duty motors, fluorescent lights, microwave ovens,
refrigerators, and other industrial equipment. Signal loss can occur when metal,
concrete, walls or floors block transmission.
NOTE
"
Microwave ovens operate in the same frequency band as the WX-54G. Therefore,
if you use a microwave within range of the WX-54G you may notice network
performance degradation. However, both your microwave and your the WX-54G
will continue to function.
Range
Every environment is unique and presents different obstacles. Therefore, it is difficult
to determine the exact range that can be achieved without testing. However, Terayon
has developed some guidelines to estimate the range that you will see when you install
the WX-54G, but there are no hard and fast specifications.
Radio signals may reflect off of some obstacles or be absorbed by others depending on
their construction. For example, with two 802.11b units, you may achieve up to 1000’ in
1-2 WX-54G Access Point User ’s Manual
Wireless Performance
open space where two devices have a line of sight. However, the same two units may
only achieve up to 300’ of range when used indoors.
By default, the Terayon WX-54G will automatically adjust the data rate to maintain a
usable radio connection. Therefore, a client that is close to the WX-54G may operate at
higher speeds while a client that is on the fringe of coverage may operate at lower
speeds.
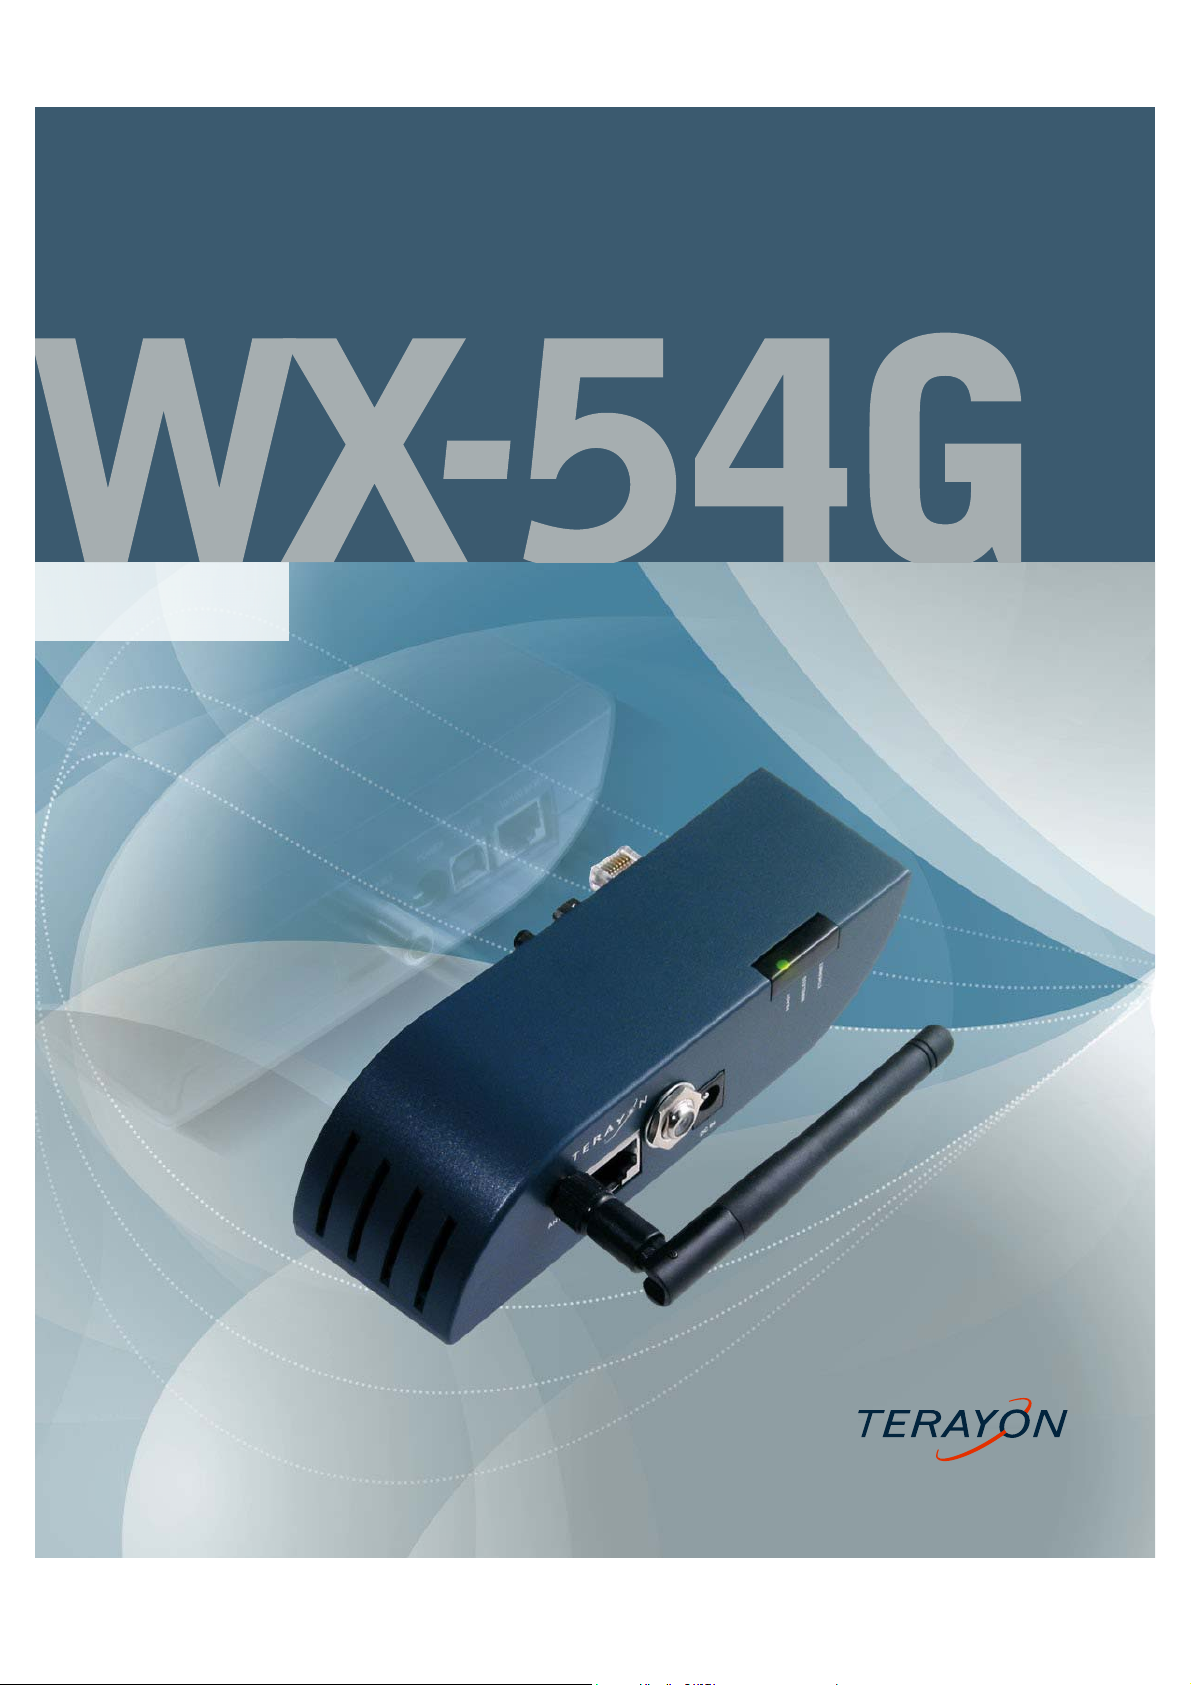
WX-54G Status Indicators
There are three LEDs on the front of the Terayon WX-54G AP, as shown here:
Ready LED OFF: No power or performing boot sequence
ON: System ready
Blinking: Firmware upgrade failed
Wireless LED OFF: No Power
ON: Wireless function ready
Blinking: Transmitting or receiving data (wireless)
Ethernet LED OFF: No Power
ON: Has physical connection to an Ethernet network
Blinking: Transmitting or receiving data (through Ethernet cable)
Power Requirements
The Terayon WX-54G requires power from the external power supply that is provided
with the TeraJet 700 Series cable modem.
WX-54G Access Point User’s Manual 1-3

Wireless Performance
1-4 WX-54G Access Point User ’s Manual

Chapter 2
Hardware Installation
This chapter describes the hardware installation procedures for the Terayon WX54G Wireless Access Extension.
System Requirements
To use the Terayon WX-54G, you must have the following minimum requirements:
• A Terayon TeraJet 700 Series Cable Modem
• An Ethernet (10Base-T or 10/100Base-TX) adapter for wired clients
• At least one 802.11g (54Mbps) or one 802.11b (11Mbps) wireless adapter for
wireless mobile clients
• TCP/IP and an installed internet browser
Package Contents
Each Terayon WX-54G comes with:
• One Terayon WX-54G Wireless Access Extension
• One Terayon WX-54G Quick Start Guide
• Two external antennas
• One support CD (utilities and user’s manual)
WX-54G Access Point User’s Manual 2-1
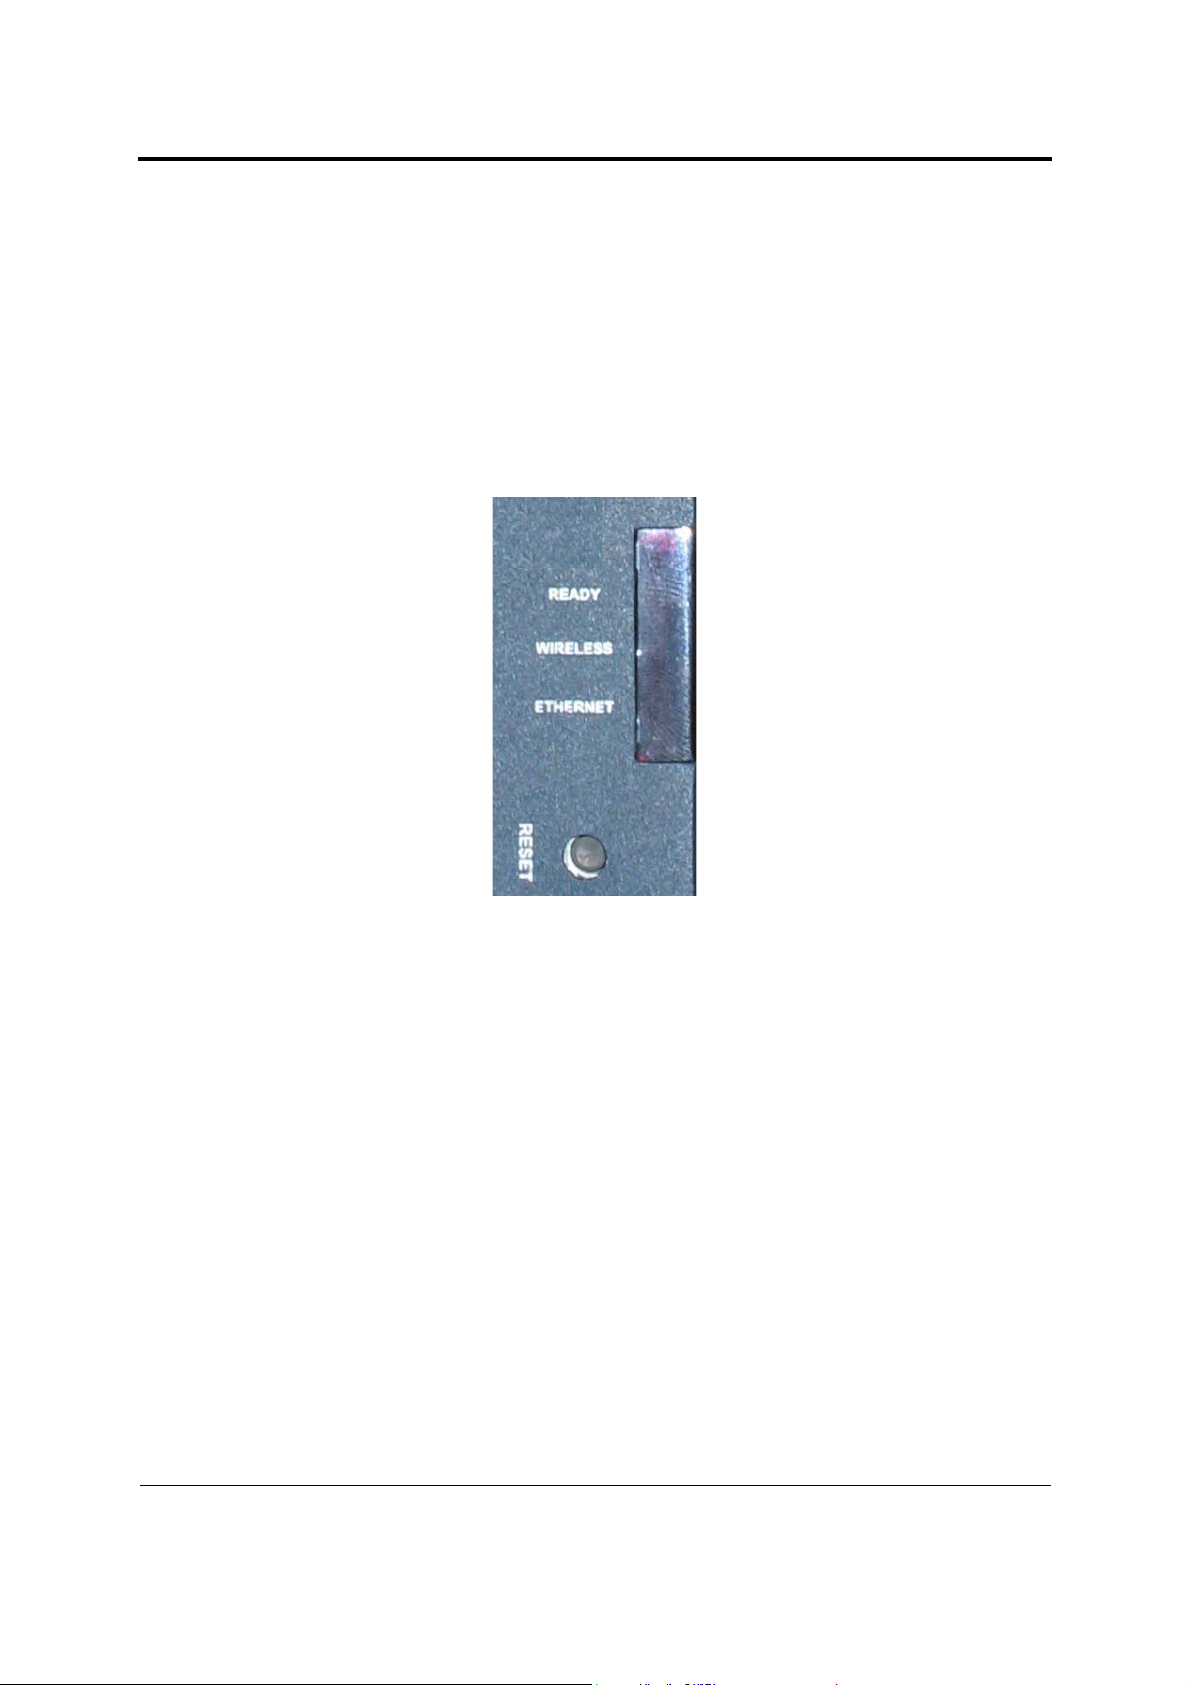
WX-54G Status Indicators
WX-54G Status Indicators
There are three LEDs on the front of the Terayon WX-54G, as shown here:
Ready LED OFF: No power or performing boot sequence
ON: System ready
Blinking: Firmware upgrade failed
Wireless LED OFF: No Power
ON: Wireless function ready
Blinking: Transmitting or receiving data (wireless)
Ethernet LED OFF: No Power or not connected to an Ethernet network
ON: Has physical connection to an Ethernet network
Blinking: Transmitting or receiving data (through Ethernet cable)
Power Requirements
The Terayon WX-54G requires power from an external power supply that is provided
with the TeraJet 700 Series cable modem.
2-2 WX-54G Access Point User ’s Manual
Hardware Installation Procedure:
Hardware Installation Procedure:
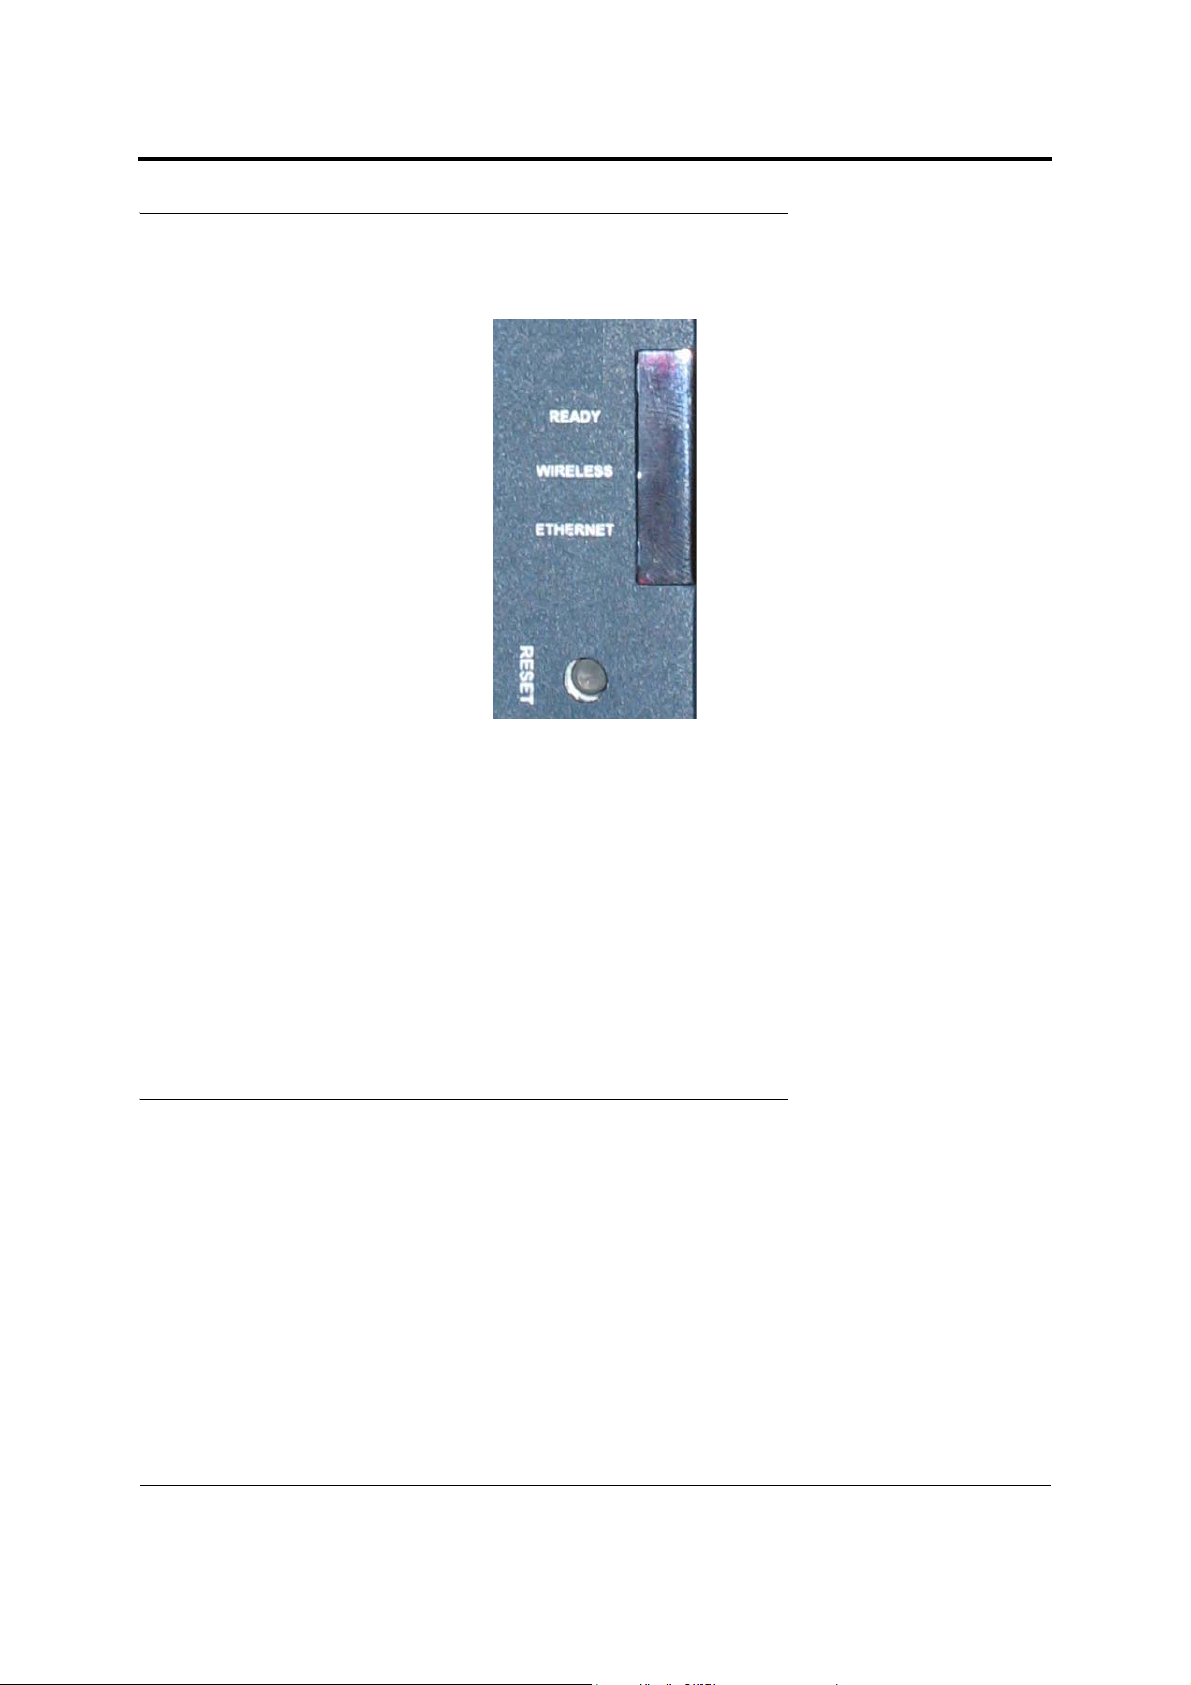
Follow these steps to install the Terayon WX-54G
1. Before installing the WX-54G, verify that your modem is working. The Power, Cable, and PC LEDs should all be solid, and
the Data light will blink if data is being transferred.
2. Determine the best location for the Terayon WX-54G. Keep in
mind the following considerations:
- Centrally locate the WX-54G or its antenna so that it will provide coverage to all of the wireless mobile devices in the area.
- Use only the power supply that came with your modem. Other
power supplies may fit but the voltage and power may not be
compatible.
Make sure that you keep your modem and the WX-54G in an upright
-
position. Laying the modem and WX-54G on their sides will block
the vents and may cause the WX-54G to overheat.
"
NOTE
It is the responsibility of the install er and users of the WX-54G to guarantee that
the antenna is operated at least 20 centimeters from any person. This is
necessary to insure that the product is operated in accordance with the RF
Guidelines for Human Exposure that have been adopted by the Federal
Communications Commission.
WX-54G Access Point User’s Manual 2-3
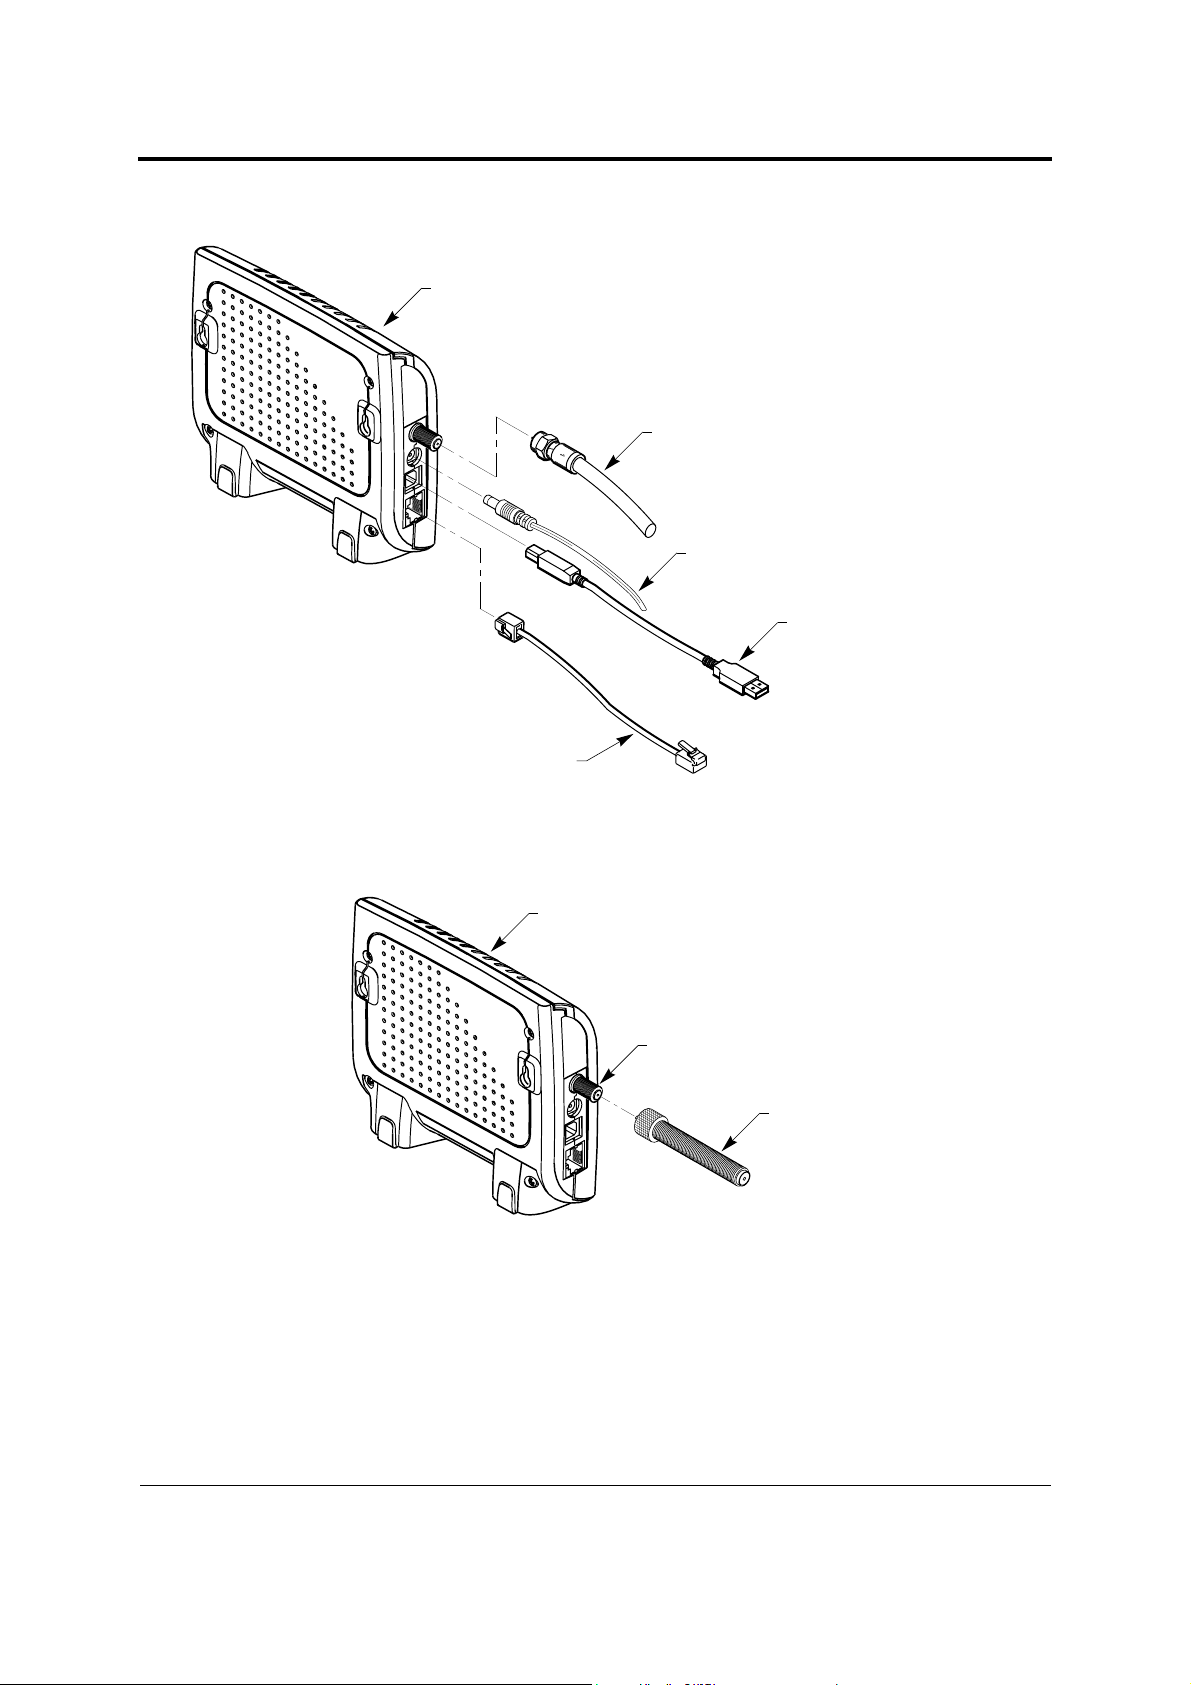
3. Disconnect all cables from the TJ700x cable modem.
700x SERIES MODEM
RF CABLE
AC POWER ADAPTER DC OUTPUT CABLE
Hardware Installation Procedure:
USB CABLE
10 BASE-T
ETHERNET CABLE
4. Attach the "RF coax extender" to the RF connector on the rear of the cable modem.
Leave the hex nut and washer off at this time.
700x SERIES MODEM
RF CONNECTOR
RF EXTENDER
2-4 WX-54G Access Point User ’s Manual
Hardware Installation Procedure:
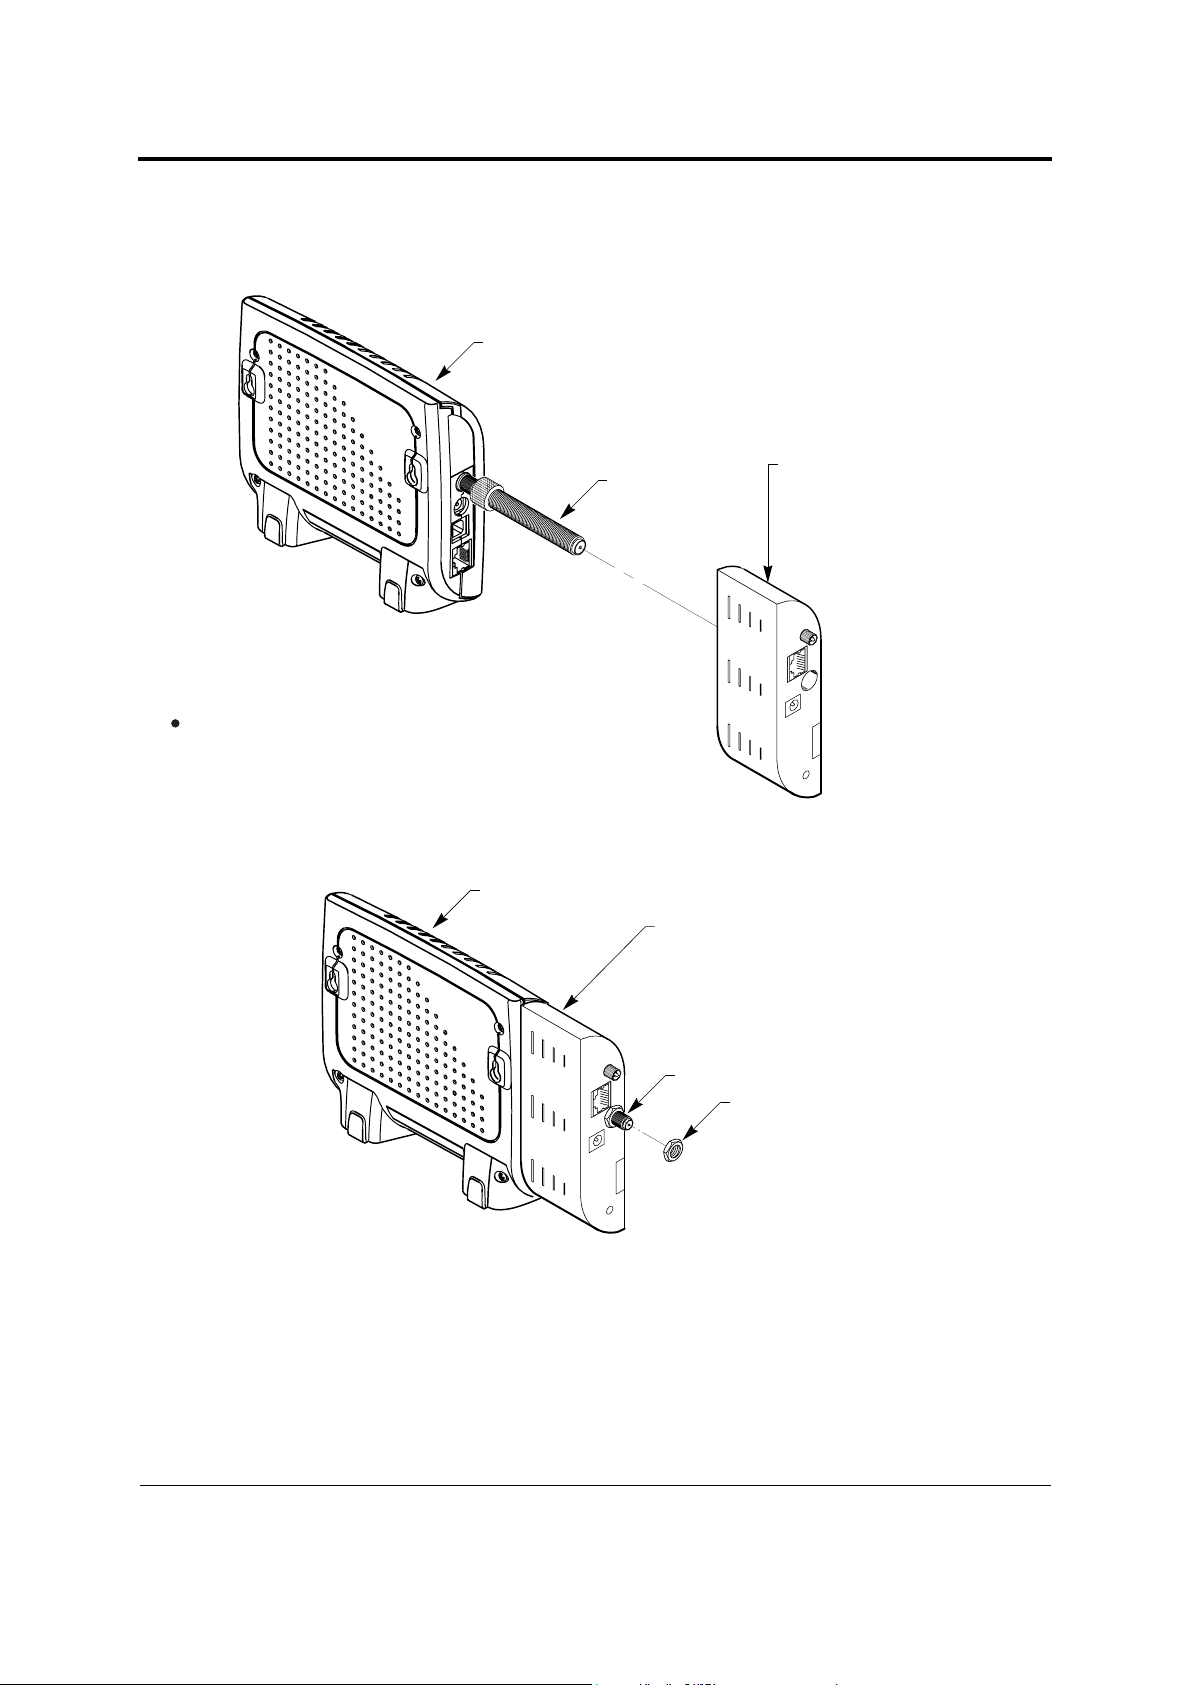
5. Attach the WX-54G extension to the rear of the TJ700x cable modem, sliding the
"RF coax extender" through the hole in the WX-54G. Align the power and Ethernet
connectors with their mates on the rear of the cable modem.
700x SERIES MODEM
RF EXTENDER
Attach the WX-54G extension to the rear of the modem
by sliding the RF Extender through the hole in the back
panel of the WX-54G.
WX-54G WIRELESS EXTENSION
ANTENNA
LAN
CABLE
DC IN
Y
D
A
E
R
S
S
E
L
E
IR
W
T
E
N
R
E
H
T
E
RESET
6. Place the washer and hex nut onto the "RF coax extender" and finger tighten to
secure the WX-54G to the cable modem.
700x SERIES MODEM
WX-54G WIRELESS EXTENSION
ANTENNA
LAN
CABLE
DC IN
Y
D
A
RE
S
S
E
L
E
R
I
W
T
E
N
R
E
H
T
E
RESET
RF EXTENDER
HEX NUT
WX-54G Access Point User’s Manual 2-5
Hardware Installation Procedure:
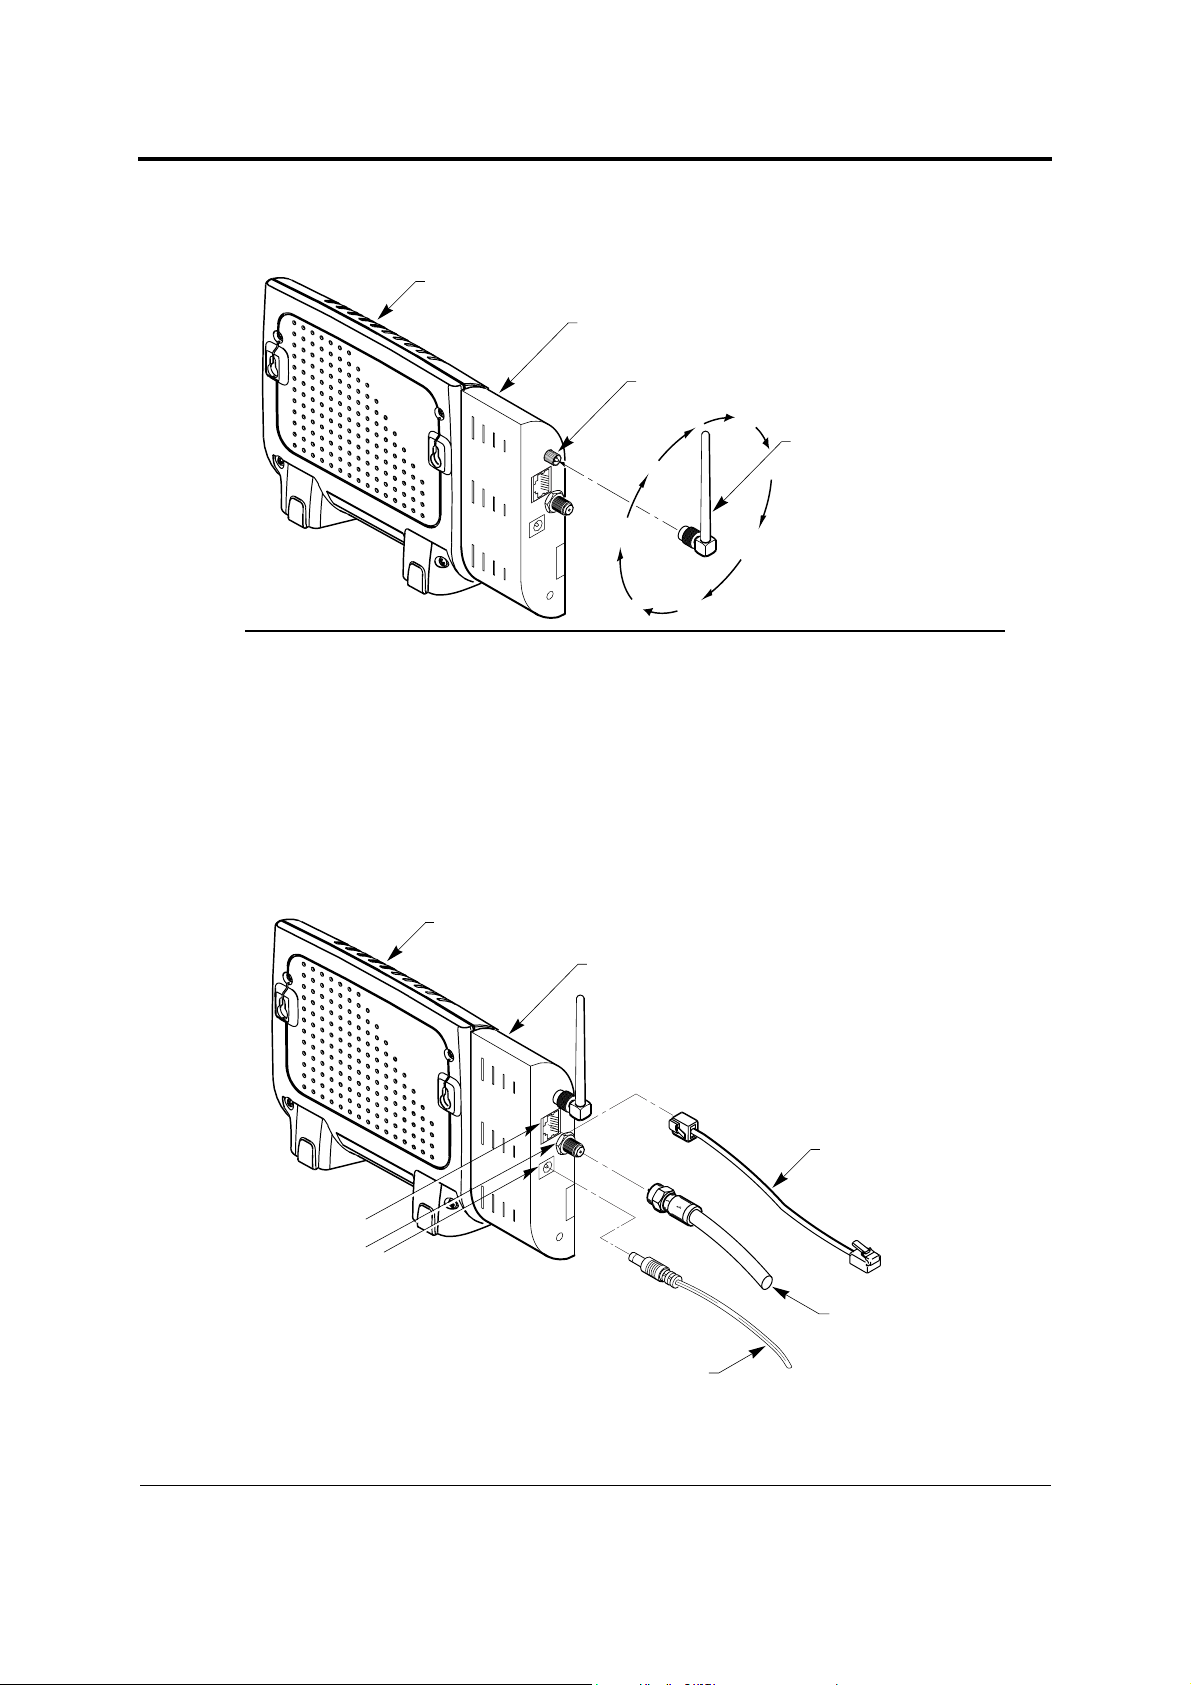
- Thread the compact antenna on to the WX-54G by threading it onto the Antenna
connector:
700x SERIES MODEM
WG-54G WIRELESS EXTENSION
ANTENNA CONNECTOR
ANTENNA
LAN
CABLE
DC IN
Y
D
A
E
R
S
S
E
L
E
IR
W
T
E
N
R
E
H
T
E
RESET
SHORT ANTENNA
CAUTION
"
You may tighten the compact antenna by rotating it as shown above, but
only if the WX-54G is not yet attached to the modem. If the WX-54G is
attached to the modem, then tighten the compact antenna by turning the
nut at the antenna connector, and not the antenna itself. You could
damage the antenna if you try to bend it around the RF coax extender.
7. Attach the RF coax, Ethernet, and DC power cables to the WX-54G.
700x SERIES MODEM
WG-54G WIRELESS EXTENSION
ANTENNA
RJ-45 CONNECTOR
RF CONNECTOR
LAN
CABLE
DC IN
Y
D
A
E
R
S
S
E
L
E
R
I
W
T
E
N
R
E
H
T
E
RESET
10 BASE-T
ETHERNET CABLE
RF CABLE
DC POWER INPUT JACK
AC POWER ADAPTER DC OUTPUT CABLE
2-6 WX-54G Access Point User ’s Manual

Hardware Installation Procedure:
8. Attach one end of an RJ-45 Ethernet cable to the WX-54G and attach the other end
to the RJ-45 10Base-T port of a network hub, switch, router, or patch panel.
9. Apply power to the WX-54G, which will also power the cable modem and cause it to
connect to the cable network.
10. The WX-54G should boot and the cable modem successfully connect to the cable network within 60 seconds. If the modem does not connect within five minutes, follow
the directions in “Attaching the Coax Cable Antenna” below.
The Ready LED on the front of the WX-54G will light up when the modem is powered
ON. In addition, the orange Ethernet LED will turn ON to indicate that the WX-54G
has a physical Ethernet network connection.
Attaching the Coax Cable Antenna
A small number of cable modems experience interference from the compact antenna on
the WX-54G. If this is the case, your cable modem may not be able to connect with the
cable network or may experience poor performance. To remedy this, you should use the
coax cable antenna supplied with the the WX-54G.
The coax cable antenna can also extend the range of the WX-54G wireless signal
because it allows you to place the antenna in a location that provides good wireless coverage in your home.
To install the cable antenna (and troubleshoot any connectivity problems):
1. To remove the compact antenna, it will be necessary to remove all the cables from
the WX-54G. It may also be necessary to remove the WX-54G from the cable
modem to prevent bending the antenna when unscrewing it from the antenna connector.
2. Once the antenna is removed, check to see if your modem registers with the cable
network. This should take approximately 60 seconds. If the modem still does not
register, unplug and then replug in the power supply. The modem should register
and become operational within 30 seconds.
WX-54G Access Point User’s Manual 2-7
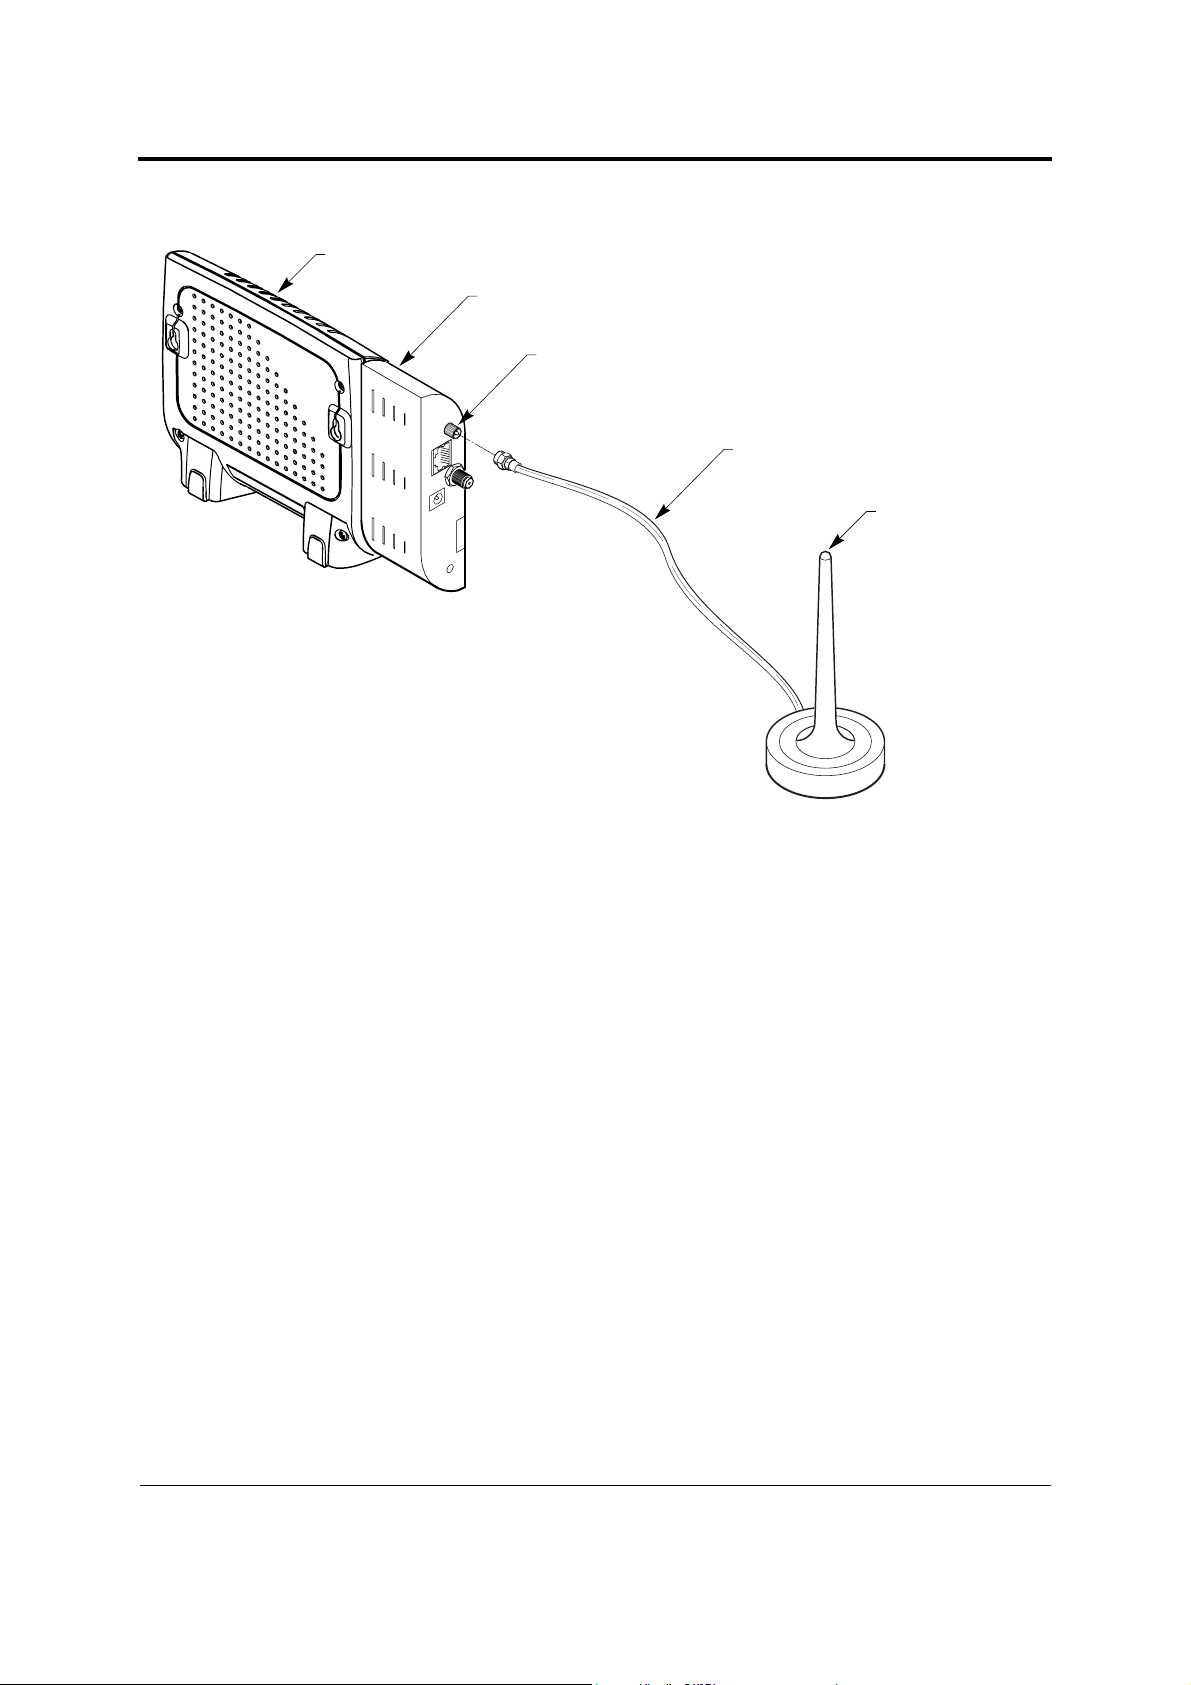
3. Thread the coax cable antenna onto the antenna nut.
700x SERIES MODEM
WG-54G WIRELESS EXTENSION
ANTENNA CONNECTOR
ANTENNA
LAN
CABLE
DC IN
DY
A
E
R
S
S
E
L
E
R
I
W
T
NE
R
E
H
T
E
RESET
Hardware Installation Procedure:
ANTENNA CABLE
CABLE ANTENNA
Cable antenna must be placed a minimum of 2 feet (60.9 cm)
away from the WX-54G Wireless Extension.
4. Make sure there is at least two feet of separation between the antenna and the
modem.
5. Power up the modem and check for connectivity. The modem should register with
the cable network in approximately 60 seconds. When the modem is working, the
Power, Cable, and PC LEDs should be solid, while the Data LED should blink as
data is being transferred.
2-8 WX-54G Access Point User ’s Manual
Chapter 3
Software Installation
This chapter describes the software installation procedure for the Terayon WX54G Wireless Access Extension.
Software Installation Procedure
Follow these steps to install the Terayon WX-54G Utilities in Microsoft Windows:
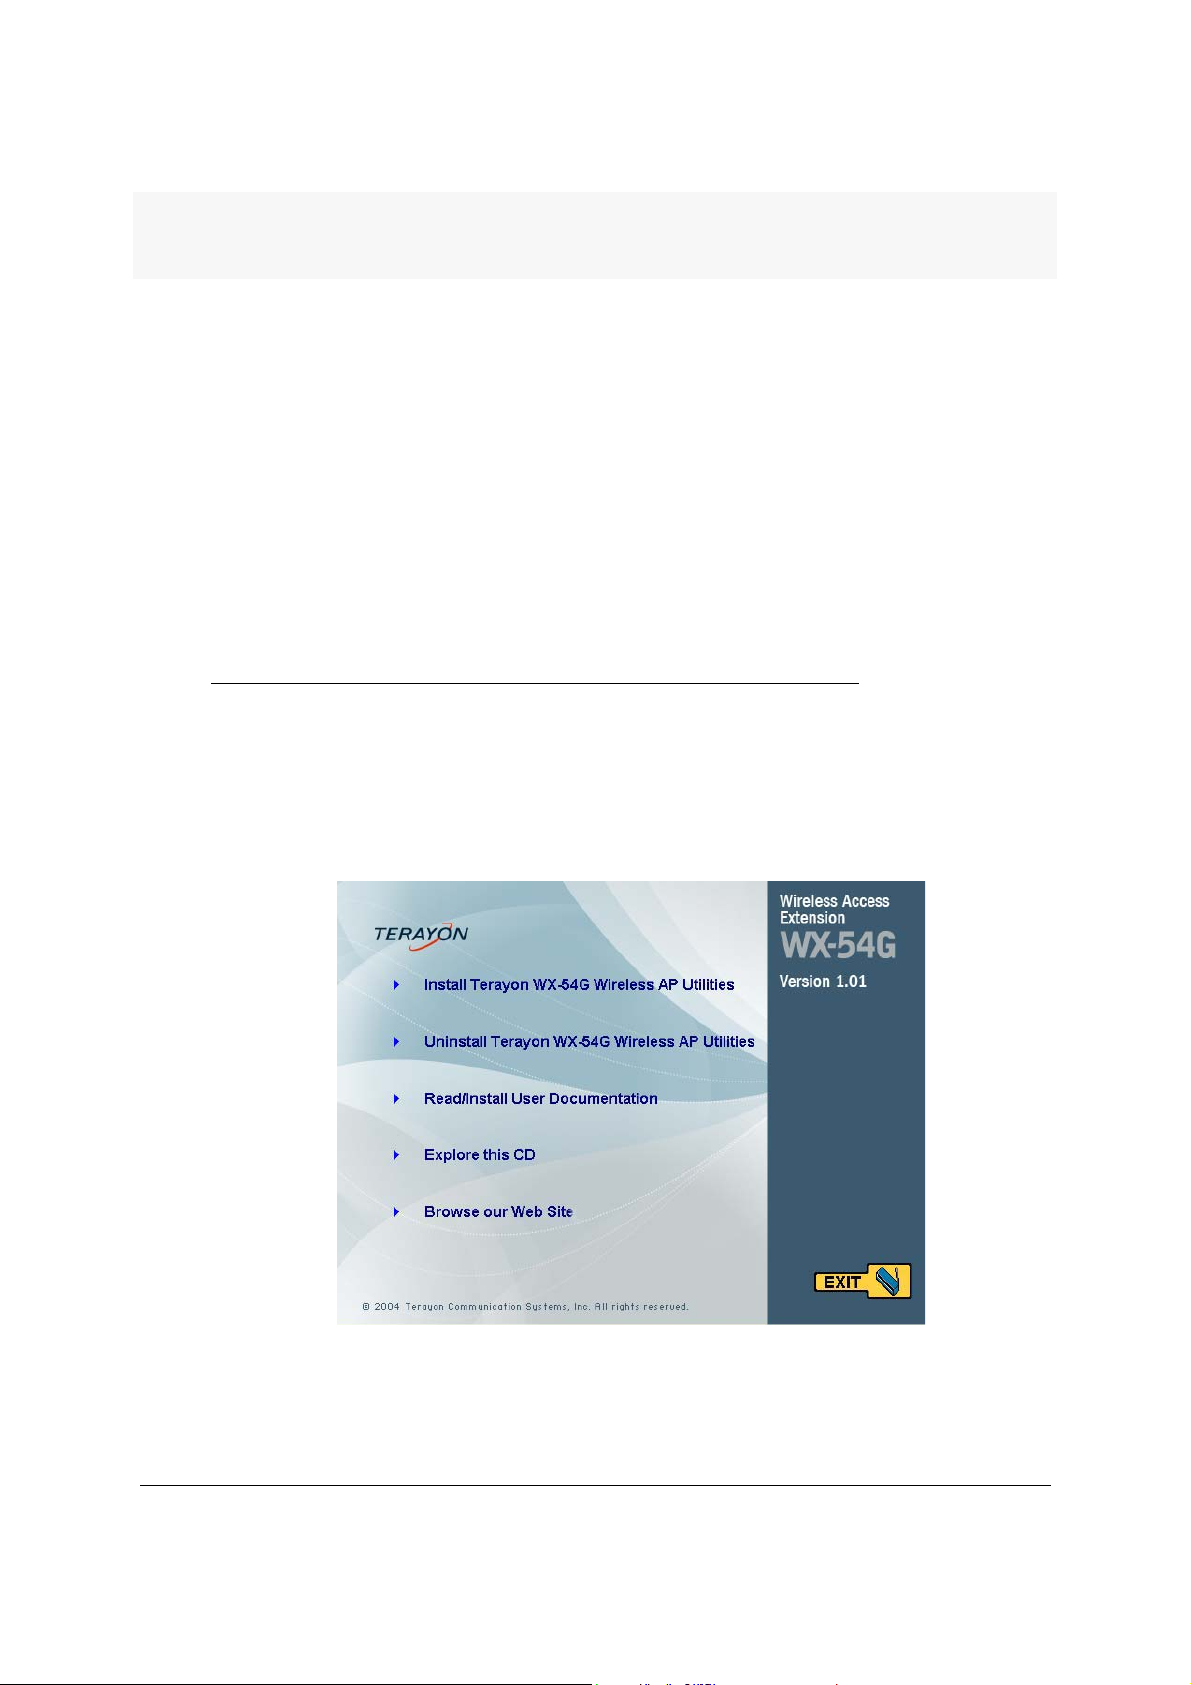
1. Insert the support CD. If your CD auto-run has been disabled, double-click
setup.exe application in the root directory of the support CD. The fol-
the
lowing screen appears:
WX-54G Access Point User’s Manual 3-1
Software Installation Procedure
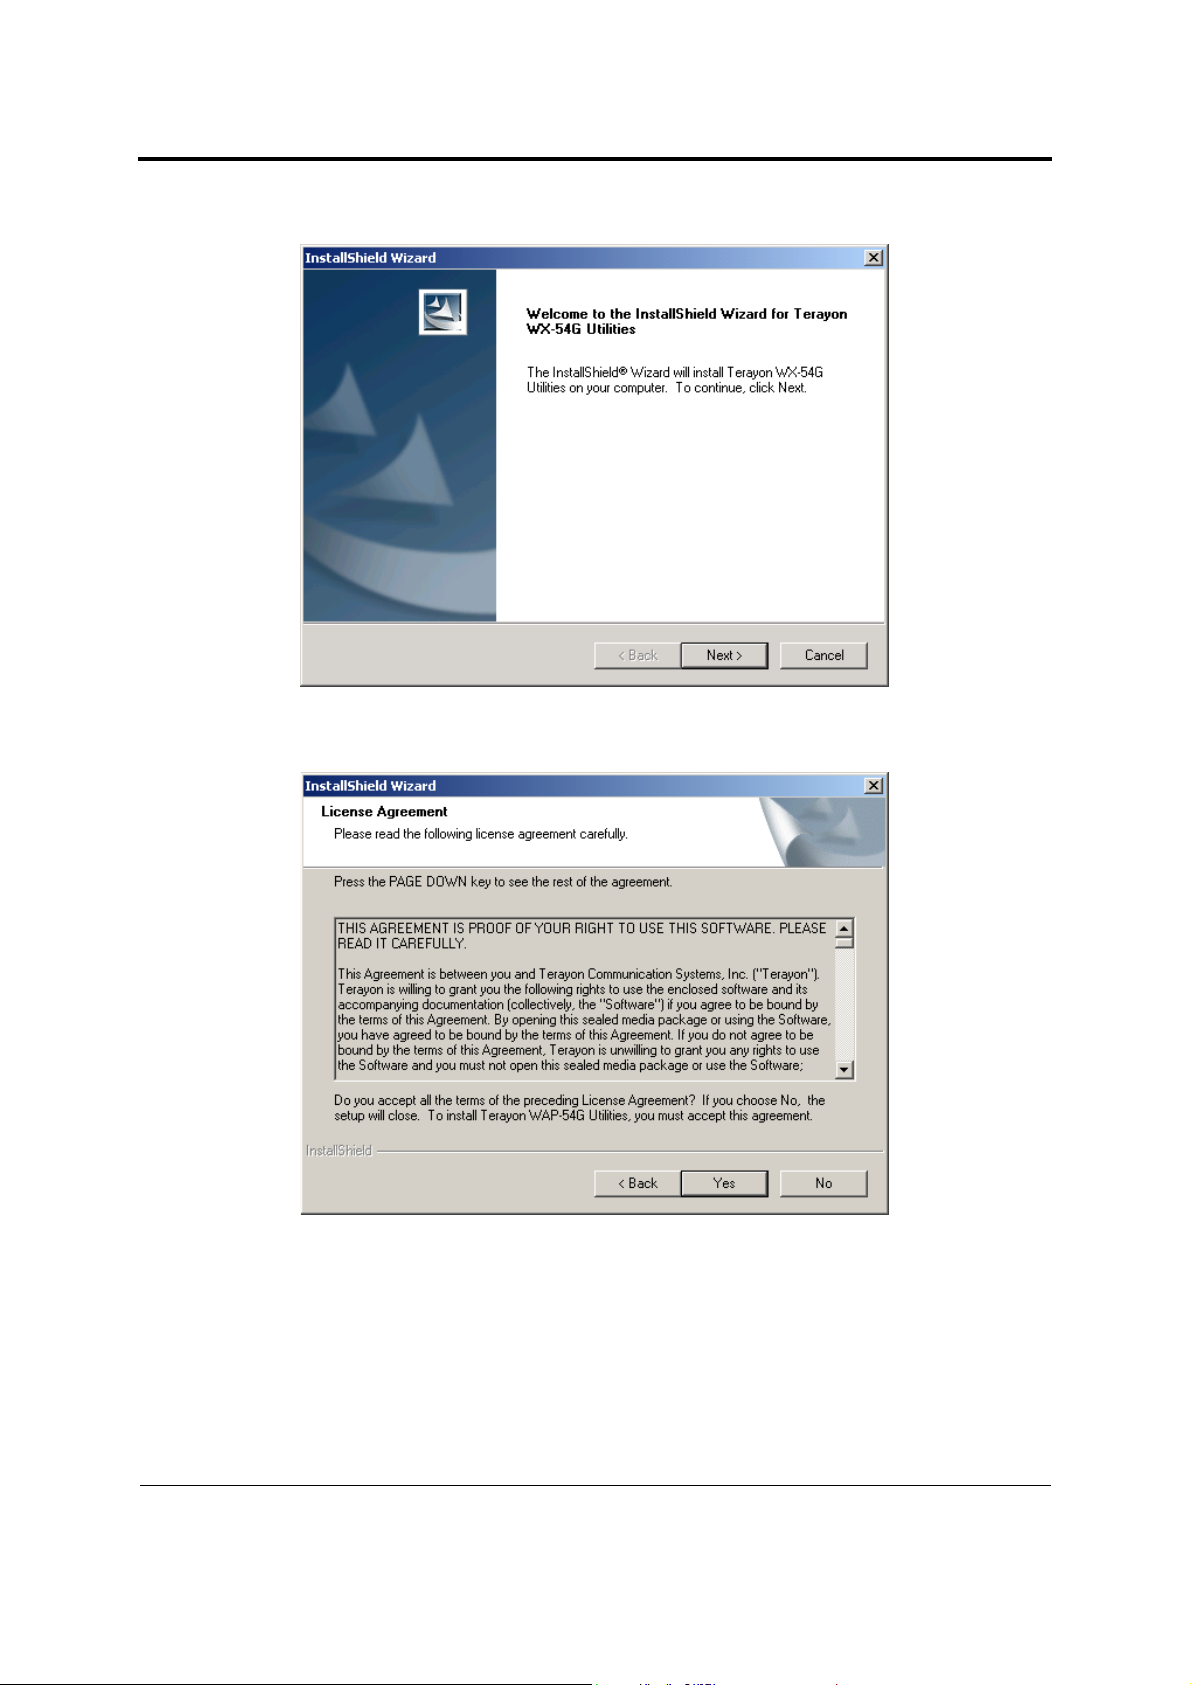
2. Click Install WX-54G Utilities. The Welcome screen appears:
3. Click Next after reading the Welcome screen. The license agreement screen is
shown:
3-2 WX-54G Access Point User ’s Manual
Software Installation Procedure
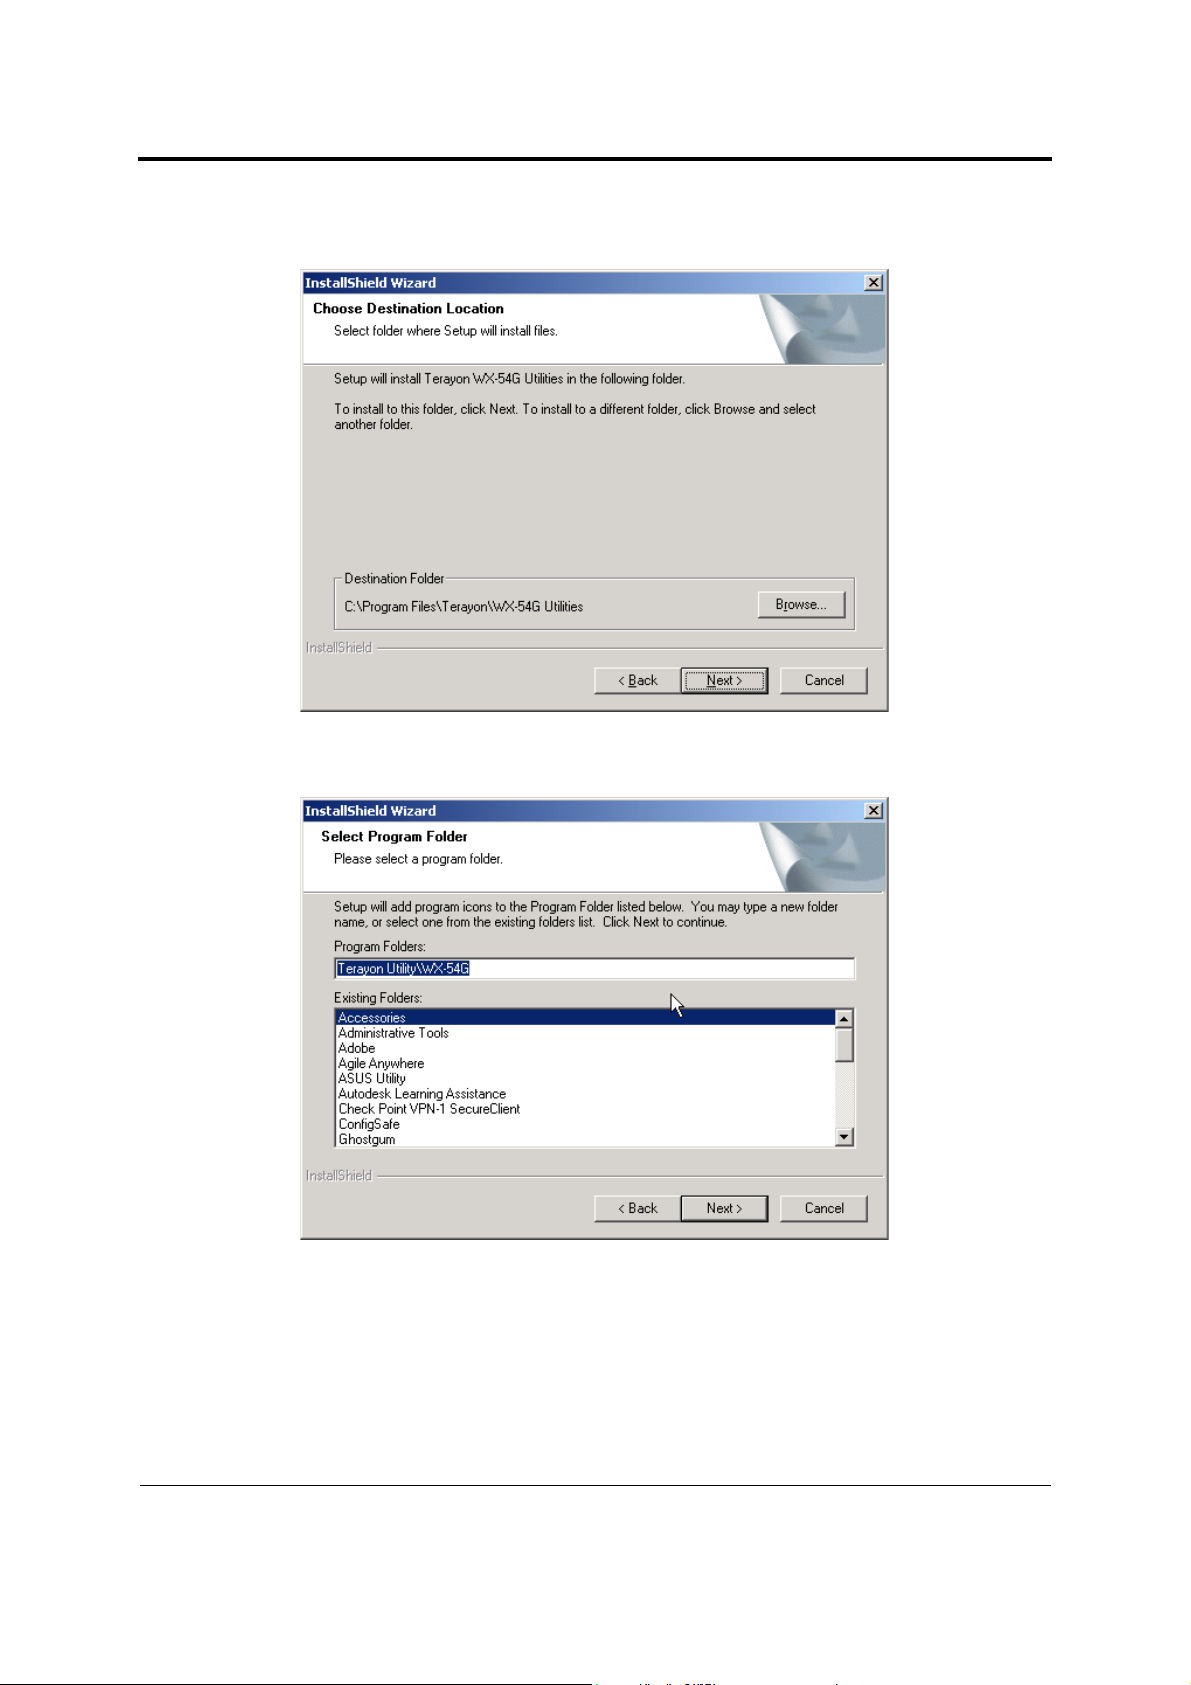
4. Click Ye s after reading the license agreement. The Destination Folder screen is
shown:
5. Click Next to accept the default program folder or click Browse and select another
destination folder. The Select Folder Screen is displayed:
WX-54G Access Point User’s Manual 3-3
Software Installation Procedure
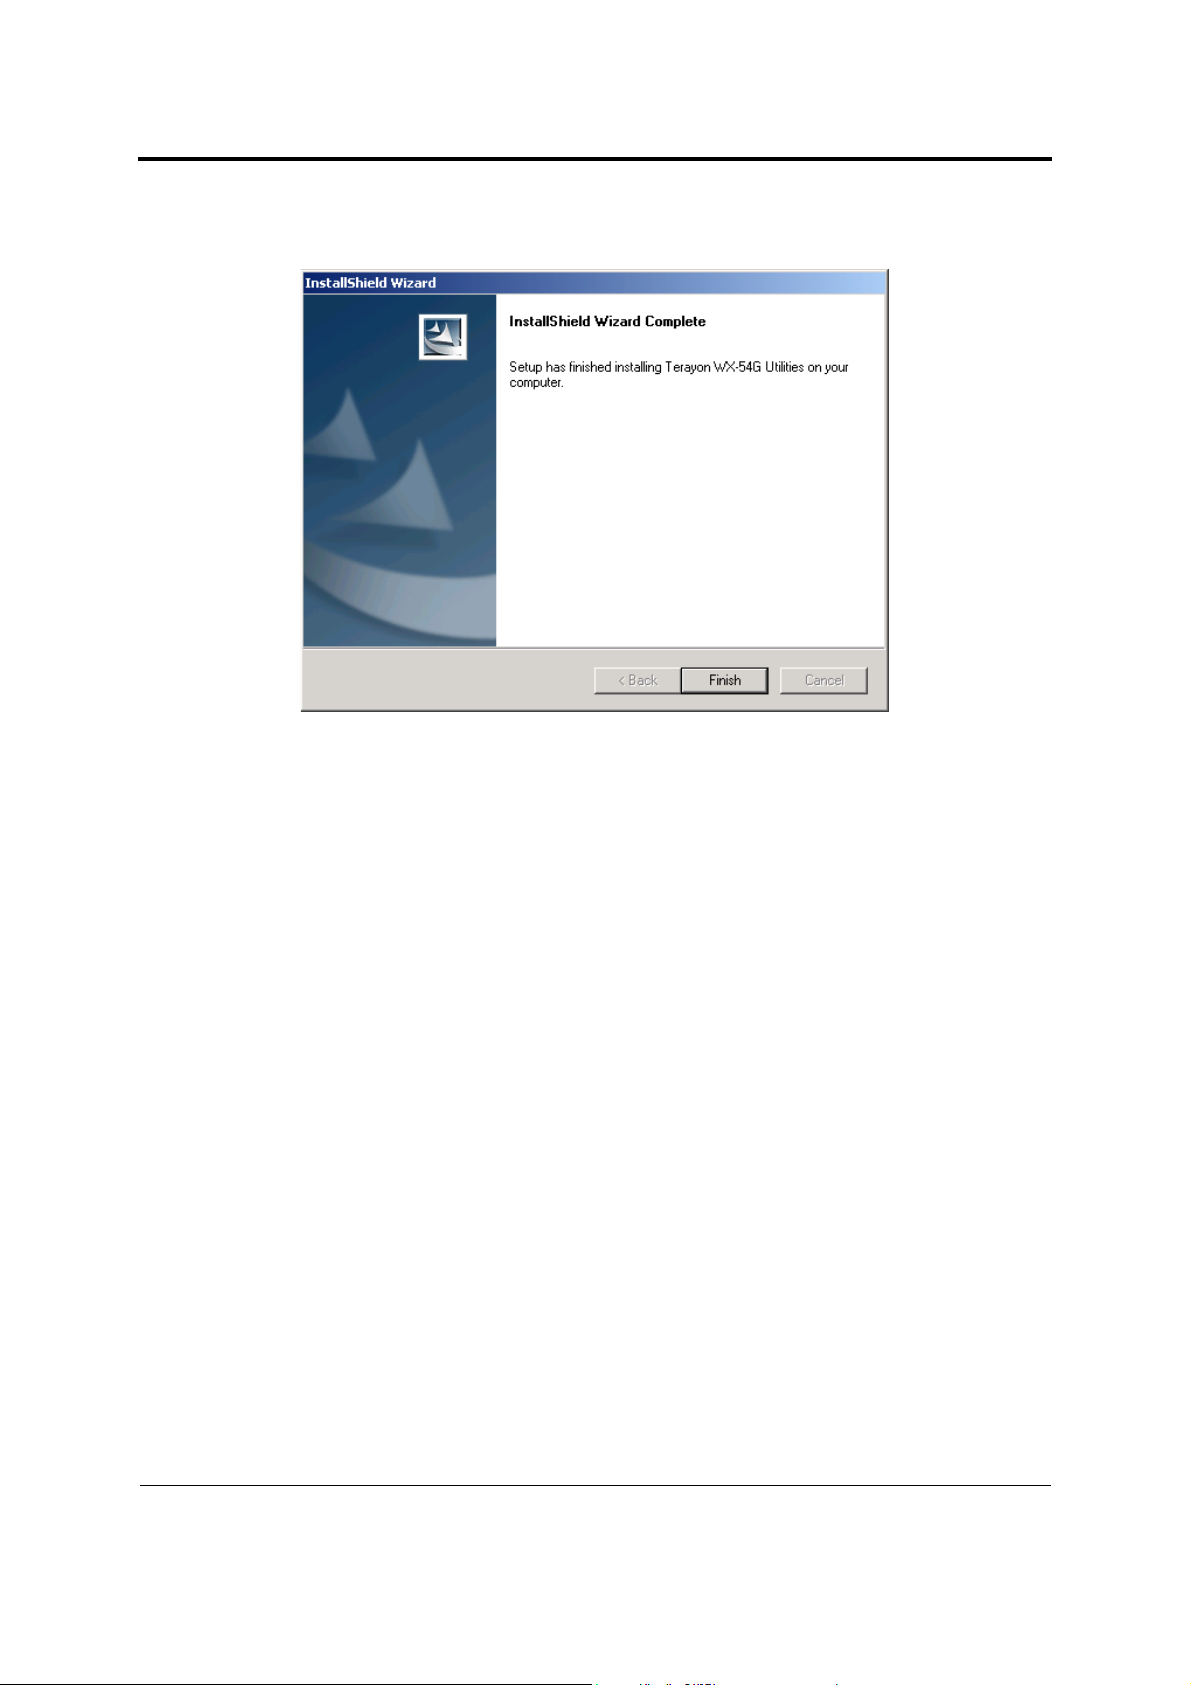
6. Click Next to accept the default destination folder or click Browse to specify
another path. The Setup Complete screen is displayed:
7. Click Finish to complete the software installation.
3-4 WX-54G Access Point User ’s Manual

Chapter 4
Configuring the Terayon WX-54G
The Terayon WX-54G can be configured for various uses. Some of the factory
default settings may suit your needs; however, others may need changing. Prior
to using the Terayon WX-54G, you should check the basic settings to guarantee it
will work in your environment.
Configuring the Terayon WX-54G is done through a web browser. You need a
notebook PC or desktop PC connected to the Terayon WX-54G (either directly or
through a hub) and running a web browser as a configuration terminal. The connection can be wired or wireless. For the wireless connection, you need an IEEE
802.11g/b compatible device, for example a Terayon WLAN Card (WLA-54G),
installed in your notebook PC. You should also disable WEP and set the SSID to
"default" for your wireless LAN device.
If you want to configure the Terayon WX-54G or want to access the Internet
through the WX-54G, your TCP/IP settings must be correct. Normally, the TCP/
IP setting should be on the IP subnet of the WX-54G unit.
NOTE
"
Changing TCP/IP settings may require rebooting your PC. When
rebooting, the Terayon WX-54G should be switched ON and in the ready
state.
WX-54G Access Point User’s Manual 4-1
 Loading...