


Terason t3000™ / Echo™
Ultrasound System User Guide

Terason Ultrasound System User Guide
™
Copyright © 1999-2009 by Terason
, a division of Teratech Corporation. All
rights reserved.
Information in this document is subject to change without notice and should not
be construed as a commitment by Terason.
Terason
trademarks are property of their respective holders. FireWire
™
is a trademark. Other trade names, trademarks, or registered
®
is a registered
trademark of Apple Computer, Inc.
Reproduction, adaptation, or translation without prior written permission is
prohibited, except as allowed under copyright laws.
November 2009
Part number 16-3031-12
Terason, a Division of Teratech Corporation
77–79 Terrace Hall Avenue
Burlington, MA 01803
U.S.A.

Contents
Preface Before You Begin ...................................................................................10
About this Guide ..................................................................................................... 10
Online User Guide ........................................................................................... 11
Warnings, Cautions, and Notes ..................................................................... 11
Links .................................................................................................................. 11
Printing the User Guide ...................................................................................12
Terason Online Help .............................................................................................. 12
Prerequisites ........................................................................................................... 12
Safety Cautions and Warnings ............................................................................. 13
Cautions ............................................................................................................ 13
Warnings ........................................................................................................... 15
Labels ...................................................................................................................... 18
Shipping Label Icons ....................................................................................... 19
Getting Help ............................................................................................................ 20
Terason Online Help ........................................................................................ 20
Terason Ultrasound System User Guide ...................................................... 20
Windows Online Help ...................................................................................... 20
Your Laptop or Desktop Computer ................................................................ 20
Contacting Terason ..........................................................................................21
Chapter 1 About the Terason Ultrasound System
About Ultrasound Modes ....................................................................................... 22
2D Mode ............................................................................................................23
M-Mode (Motion Mode) ...................................................................................23
Power Doppler .................................................................................................24
Color Doppler ...................................................................................................25
Directional Power Doppler .............................................................................. 26
Pulsed-Wave Doppler ..................................................................................... 27
Continuous-Wave Doppler ............................................................................. 28
Triplex ................................................................................................................ 28
Te ra Vi s io n ......................................................................................................... 29
Support for Medical Procedures .......................................................................... 29
Terason Transducers ............................................................................................. 30
About the Terason Main Screen ...........................................................................32
Terason Explorer Window ............................................................................... 33
Image Display, Patient Info, and Review Windows ..................................... 33
Toolbars ............................................................................................................. 33
Image Control Bar/Measure Tabs .................................................................. 34
The Terason Console ............................................................................................. 34
Console Controls ............................................................................................. 35
Chapter 2 Installing Software
Installing Terason Software ................................................................................... 37
Upgrading Terason Software ................................................................................ 39
Terason t3000 / Echo Ultrasound System User Guide 3

Contents
Uninstalling Terason Software .............................................................................. 41
Installing the FireWire Terason Transducer Driver ............................................ 42
Installing the Terason DICOM Utility .................................................................... 44
Installing the DICOM Utility ............................................................................ 44
Configuring the DICOM Utility ........................................................................ 47
Licensing the Terason Software ...........................................................................50
Entering the License or Evaluation Unlock Code ........................................ 51
Extending the Evaluation Period ................................................................... 52
Transferring the License ................................................................................. 52
Upgrading the License ....................................................................................54
Chapter 3 Setting Up Patient Information
Using the Patient Info Window ............................................................................. 57
Adding a New Patient ............................................................................................ 57
Preparing Patient Info for an Exam ..................................................................... 60
Updating Patient Information ................................................................................ 61
Deleting a Patient Folder ....................................................................................... 61
Chapter 4 Acquiring Images
Powering the Laptop On and Off ......................................................................... 63
Starting and Exiting the Software ......................................................................... 63
Connecting a Transducer ...................................................................................... 64
Switching Transducers .......................................................................................... 65
Conducting an Ultrasound Exam .........................................................................65
Using the Console ...........................................................................................65
Choosing a Scan Mode ...................................................................................66
Conducting a 2D, M-Mode, or Color Doppler Exam ................................... 66
Special Controls Used With the 4V2A Transducer ..................................... 68
Conducting a PWD Exam ...............................................................................68
Conducting a CWD Exam ............................................................................... 68
Conducting an Exam in Triplex Mode ........................................................... 69
Freezing Images ..................................................................................................... 70
Working with Image Loops ....................................................................................70
Saving Prospective and Retrospective Loops ............................................. 71
Determining Image Status .....................................................................................72
Adjusting the Displayed Image ............................................................................. 73
Enlarging an Area of the Image .....................................................................73
Resizing the Window ....................................................................................... 74
Displaying the Image in Full Screen ............................................................. 75
Hiding Windows ............................................................................................... 75
Enhancing the Image Using TeraVision™ Optimization .............................76
Adding Guides to the Image Display ................................................................... 77
Changing the Text Size .........................................................................................78
Using Split Screen Mode ....................................................................................... 79
Working with Annotations ...................................................................................... 81
Working with Text ............................................................................................. 81
Using Body Markers ........................................................................................86
Chapter 5 Working With Scan Modes
Scan Modes Overview ........................................................................................... 89
Terason t3000 / Echo Ultrasound System User Guide 4

Contents
Using 2D and I.Q. Controls ............................................................................ 90
Controls on the I.Q. Image Control Window .............................................. 100
Using the Console .........................................................................................105
Using M-Mode Image Controls ..........................................................................105
Adjusting the Sweep Speed ......................................................................... 106
Adjusting the Ultrasound Cursor Position .................................................. 106
Using Anatomical M-Mode ........................................................................... 107
Using the Console .........................................................................................108
Using Spectral Doppler Image Controls ............................................................ 109
Adjusting the Sweep Speed ........................................................................ 109
Setting the Velocity Display Units ................................................................ 110
Adjusting Pulse Repetition Frequency (PRF) ............................................ 110
Adjusting the Wall Filter ................................................................................ 111
Adjusting the Steering Angle ........................................................................ 112
Adjusting the Correction Angle .................................................................... 112
Inverting the Waveform ................................................................................. 113
Adjusting the Ultrasound Cursor Position .................................................. 113
Adjusting the Sample Volume (SV) Size and Depth ................................. 114
Setting the PWD Gate Position .................................................................... 114
Adjusting Spectral Gain ................................................................................ 115
Compression .................................................................................................. 115
Adjusting Noise Rejection ............................................................................. 116
Adjusting the Baseline .................................................................................. 116
Adjusting the Sound Volume ........................................................................ 116
Updating the Displays ................................................................................... 117
Using the Console ......................................................................................... 118
Using Color and Power Doppler Image Controls ............................................. 118
Adjusting the Scan Area ............................................................................... 119
Adjusting Pulse Repetition Frequency (PRF) ............................................ 120
Inverting the Doppler Display (Color Invert) ............................................... 121
Adjusting the Wall Filter ................................................................................122
Adjusting the Color Gain ............................................................................... 122
Adjusting the Color Priority ........................................................................... 123
Adjusting the Color Persistence ..................................................................123
Adjusting the Color Baseline ........................................................................ 124
Choosing a Color Map .................................................................................. 125
Special Cardiac Image Controls .................................................................. 125
Using the Console .........................................................................................125
Scanning in Triplex Mode ....................................................................................126
Region of Interest .......................................................................................... 127
Image Controls ............................................................................................... 127
Updating the Displays ................................................................................... 127
Chapter 6 Working With Image Files
Storing Images and Loops .................................................................................. 131
Monitoring Disk Space ..................................................................................131
Selecting File Types ......................................................................................132
Saving Images and Loops ............................................................................ 133
Exporting a File ..............................................................................................135
Finding Stored Images and Loops ..................................................................... 136
Terason t3000 / Echo Ultrasound System User Guide 5

Contents
Finding Files in the Terason Explorer ......................................................... 136
Finding Files in the Review Window ........................................................... 139
Browsing to Find Files ................................................................................... 140
Managing Files ..................................................................................................... 141
Copying Files ..................................................................................................141
Backing Up Files on a CD ............................................................................ 142
Moving Files ................................................................................................... 142
Renaming Files .............................................................................................. 143
Deleting Files ..................................................................................................143
Editing Images and Loops ..................................................................................145
Printing Images ..................................................................................................... 146
Printing the Displayed Image ....................................................................... 146
Printing from the File Menu .......................................................................... 147
Printing from the Review Window ............................................................... 147
Printing from the Print Preview Window ..................................................... 148
Printing in Split Screen Mode ....................................................................... 149
Chapter 7 Working With Measurements
Measuring in the 2D Window ..............................................................................151
Measuring Distances ..................................................................................... 151
Measuring Volume .........................................................................................153
Measuring Elliptical Circumference and Area ............................................154
Tracing Areas on the Image .........................................................................155
Calculating Percent Stenosis .......................................................................157
Working with Measurements on an Obstetrical Exam .............................. 158
Making Gynecological Measurements ........................................................164
Measuring in the M-Mode Window .................................................................... 165
Making M-Mode Measurements .................................................................. 165
Measuring in the Spectral Doppler Modes ........................................................ 166
Measuring Vessel Blood Velocities .............................................................171
Calculating Arterial Ratios ............................................................................172
Measuring Heart Rate and Rise Time ......................................................... 173
Measuring Flow Volume ............................................................................... 174
Measuring Vascular Exams ................................................................................ 175
Vascular Measurement Lists ........................................................................ 175
Available Vascular Measurements .............................................................. 180
Working with Vascular Reports ....................................................................181
Measuring Cardiac Exams ..................................................................................184
Cardiac Measurement Groups ..................................................................... 184
Available Cardiac Measurements ................................................................ 188
Formulas Used in Echocardiography Measurements .............................. 191
Working With Cardiac Reports ..................................................................... 196
Selecting Measurements ..................................................................................... 200
Deleting Measurements ......................................................................................201
Restoring All Measurement Groups to Defaults .............................................. 201
Stress Echo ........................................................................................................... 202
Performing a Stress Echo Study ..................................................................202
Closing a Stress Echo Study ........................................................................207
Saving and Sending Studies ........................................................................ 208
Pausing and Resuming a Stress Study ...................................................... 208
Terason t3000 / Echo Ultrasound System User Guide 6

Contents
Editing Stress View Labels ...........................................................................208
Features of the Stress Echo Scanning Window ........................................209
Features of the Stress Echo Review Window ............................................ 210
Chapter 8 Working With Exams
About Exams .........................................................................................................212
Opening an Exam ................................................................................................ 215
Creating Custom Exams ..................................................................................... 215
Creating a New Exam ...................................................................................216
Creating Size-Specific Versions ...................................................................216
Deleting Custom Exams ......................................................................................216
Chapter 9 Performing Medical Procedures
Equipment Description .................................................................................. 218
Performing a Biopsy ............................................................................................. 219
Assembling the Bracket and Guide ............................................................. 222
Biopsy Procedure .......................................................................................... 222
Verifying the Alignment ........................................................................................224
Setting the Error Correction ................................................................................224
Correcting Needle Guide Positioning for Biopsies ....................................225
Cleaning the Transducers and Brackets ...........................................................225
Chapter 10 Working With DICOM
Using Images with a DICOM Printer or Server ................................................ 227
Printing Files to a DICOM Printer ................................................................ 227
Sending Files to a DICOM Server ...............................................................228
Using DICOM Worklist ......................................................................................... 228
Worklist Queries ............................................................................................. 229
Configuring Worklist ...................................................................................... 229
Configuring Broad Queries ...........................................................................230
Making a Query .............................................................................................. 232
Applying a Patient Info Set ........................................................................... 234
Customizing the Worklist ..............................................................................234
DICOM Network Service ...............................................................................236
Chapter 11 Using System Tools
Testing the Monitor Display .................................................................................237
Correcting the Position of the Needle Guides .................................................. 241
Restoring the Default Layout .............................................................................. 241
Keeping the Terason Software on Top .............................................................. 242
Setting a Time-Out Value ....................................................................................242
Enabling or Disabling the Color Doppler Message .......................................... 243
Specifying Optional Settings ............................................................................... 243
Setting Image Save and Print Defaults ....................................................... 243
Changing the Display Mode Defaults ..........................................................247
Setting Measurement Defaults ................................................................... 250
Adding Custom Text to the Annotation Window ........................................ 251
Chapter 12 System Safety and Maintenance
Safety Standards .................................................................................................. 252
Terason t3000 / Echo Ultrasound System User Guide 7

Contents
Ultrasound Safety .......................................................................................... 253
Electrical Safety .............................................................................................253
Surface Heating of Invasive Transducers .................................................. 253
Indications For Use ..............................................................................................254
Acoustic Output Indices ....................................................................................... 268
General Description of Indices ..................................................................... 268
MI: The Mechanical Index ............................................................................269
TIS: The Soft Tissue Thermal Index ........................................................... 269
TIB: The Bone Tissue Thermal Index ......................................................... 269
TIC: The Cranial (Bone) Thermal Index ..................................................... 270
Relevant Acoustic Output Indices ............................................................... 270
Acoustic Output Index Displays ...................................................................271
Relationship of Index to Display Accuracy ....................................................... 278
Display Precision of TI Values .....................................................................278
Display Precision of MI Values .....................................................................278
Acoustic Output Tables ........................................................................................ 280
Accuracy Measures ............................................................................................. 281
Distance Accuracy ......................................................................................... 281
Area ................................................................................................................. 281
Circumference ................................................................................................281
Volume ............................................................................................................282
Processing Terason Transducers Between Uses ............................................ 282
General Cleaning ........................................................................................... 283
Precleaners and Low-Level Disinfectants ..................................................284
High-Level Disinfectants ............................................................................... 284
Compliance and Approvals ................................................................................. 285
System Warranty .................................................................................................. 285
Recommended Maintenance ..............................................................................286
Equipment List ...................................................................................................... 286
System Specifications ..........................................................................................288
Optional ........................................................................................................... 289
Environmental Protection .................................................................................... 289
Product Recycling and Disposal .................................................................. 289
Caring for Batteries ........................................................................................ 290
Recycling Batteries ........................................................................................290
Disposing of the Packaging Materials ......................................................... 291
Disposing of Components and Accessories .............................................. 291
Energy Conservation ..................................................................................... 291
Appendix A Working With Microsoft Windows.......................................293
The Windows Desktop ......................................................................................... 293
Application Windows ............................................................................................ 295
Windows Terms .................................................................................................... 296
Using the Touchpad or a 2-Button Mouse ........................................................297
Starting/Exiting Programs .................................................................................... 298
Resizing Windows ................................................................................................ 299
Moving Windows and Toolbars .......................................................................... 300
Appendix B Menu and Toolbar Reference .................................................. 301
Shortcut Keys .......................................................................................................301
Terason t3000 / Echo Ultrasound System User Guide 8

Contents
Menu Reference ...................................................................................................302
Shortcut Menu Reference ................................................................................... 309
Toolbar Reference ................................................................................................313
Appendix C Solving Problems.................................................................................. 315
Installation Problems ........................................................................................... 315
Problems with Scanning ......................................................................................315
Plugging in the Transducer ........................................................................... 316
Reconnecting the Components ................................................................... 316
Determining if the Driver Is Installed ...........................................................316
Interference on the Scan .....................................................................................318
Printing Problems .................................................................................................318
Print Quality .................................................................................................... 318
The Print Output is Too Small ...................................................................... 318
Display Problems ................................................................................................. 319
VCR/TV Problems ................................................................................................ 319
CD Writing or Reading Problems ....................................................................... 319
Network Problems ................................................................................................ 320
Contacting Terason Technical Support .............................................................. 320
Appendix D Gestational Tables ............................................................................. 322
Appendix E Electromagnetic Compatibility Tables......................... 329
Compatibility for All Equipment .......................................................................... 329
Compatibility for Non-Life-Supporting Equipment ........................................... 331
Appendix F Acoustic Output Reporting for Track 3........................ 333
Acoustic Output Tables for t3000 Transducers ................................................334
Acoustic Output Tables for Echo Transducers ................................................. 385
Index .................................................................................................................................................. 411
Terason t3000 / Echo Ultrasound System User Guide 9

Preface Before You Begin
Before you start using the Terason Ultrasound System, you should review this preface,
which includes the following topics:
• About this Guide on page 10
• Terason Online Help on page 12
• Prerequisites on page 12
• Safety Cautions and Warnings on page 13
• Labels on page 18
• Shipping Label Icons on page 19
• Getting Help on page 20
For an introduction to the Terason Ultrasound System, see Chapter 1, About the Terason
Ultrasound System, on page 22.
About this Guide
This guide describes how to use the Terason software to conduct an ultrasound exam using
a Terason transducer, and defines how to use the software to control and capture the
ultrasound image. This guide does not:
• Teach how to perform an ultrasound exam or any other medical procedures
• Present medical protocols for ultrasound exams or medical procedures
• Discuss interpretation of acquired scans
You must follow the required clinical procedure for the specific exam you need to
conduct.
The figures in this guide that show scanned images were captured using a variety of
transducers. Depending on the transducer you use, the images on your computer may
differ from the ones in this book.
This guide applies to both the Terason t3000 and Terason Echo families of ultrasound
systems and accessories. Where a section refers to the t3000, the feature discussed does
not apply to Echo systems. Where a section refers to the Echo, the feature discussed does
not apply to t3000 systems.
The Terason software runs on both the Windows 2000 and the Windows XP operating
systems. In this book, “Windows” refers to both of these operating systems.
In this manual, the name for two-dimensional imaging is 2D; the term “B-Mode” is not
used.
Terason t3000 / Echo Ultrasound System User Guide 10

Preface Before You Begin About this Guide
In this section:
• Online User Guide on page 11
• Warnings, Cautions, and Notes on page 11
• Links on page 11
• Printing the User Guide on page 12
Online User Guide
If you are reading this guide from a printed copy, you, can also read the User Guide online
using Adobe Reader.
To read the Terason Ultrasound User Guide online, complete these steps:
1. Click the Start button in the lower left of the screen.
2. Select Programs
> Ter a so n > Terason User Guide.
The computer opens the User Guide in the Adobe Reader software.
3. Click the Bookmarks tab to view a list of topics, or use the Guide’s table of contents or
index to locate topics.
For information on using Adobe Reader or Acrobat Reader, select Help
Guide (for Acrobat Reader 4.0) or Help
> Reader Help (for Adobe Reader) from the
> Reader
menu bar.
Warnings, Cautions, and Notes
This Guide uses graphic symbols and special text to alert you to important information.
Warning: Warnings are notices describing actions or conditions that are
very likely to cause damage to equipment, injury, or death.
Caution:Cautions are notices describing actions or conditions that may damage
equipment or cause injury.
Note: Notes are messages containing useful information that can save time or avoid
errors.
Links
If you are viewing this User Guide online, you can click any blue text, or any page number
in the text, Table of Contents, or Index to go directly to that topic.
Terason t3000 / Echo Ultrasound System User Guide 11

Preface Before You Begin Terason Online Help
Printing the User Guide
Terason delivers the User Guide as a Portable Document Format (PDF) file. Please note
that color is key for understanding some of the graphics, and these graphics may be
difficult to interpret when printed on a black-and-white printer.
To print the User Guide, you must connect your laptop to a printer, or to a network that
connects to a printer. This PDF document is set up for single-sided printing to
accommodate the greatest number of users, but can also be printed double-sided.
Caution:A printer installed within the patient environment may result in non-
conformance to safety standards. Use of non-medical grade peripherals
will result in non-compliance of safety and EMI standards. Nonconformance to these standards can result in risks to the patient and
operator of this equipment.
®
To print a paper copy of the guide from Adobe Reader
, complete these steps:
1. Select
2. Select a printer from the N
3. Change any print settings that you want (optional), including which pages to print (or
4. Click
File > Print.
you can print the entire user guide).
OK.
Terason Online Help
To access the help, select the Help > Help Topics menu. The Help window has three tabs
on the left used to view information on the right:
Contents Double-click a book ( ) to open it. Click on a topic ( ) to view it.
Index Enter the entry you want, or scroll to find a topic, then double-click a
selection.
Search Enter the word to search for, press Enter, and double-click a topic.
Prerequisites
Before you use the Terason Ultrasound System, you should be trained in clinical
procedures for conducting ultrasound exams. This guide does not provide guidelines for
the clinical aspects of performing exams or for interpreting ultrasound images.
ame: menu.
You also need to know how to use the laptop or desktop computer. If you are new to the
Windows 2000 or XP operating system, Appendix A, “Working With Microsoft
Windows,” on page 293 describes the Windows features used with the Terason software.
Terason t3000 / Echo Ultrasound System User Guide 12
Preface Before You Begin Safety Cautions and Warnings
Safety Cautions and Warnings
Cautions
Closely review the following cautions before using the Terason Ultrasound System for the
first time.
Sale and Use
The Terason Ultrasound System is designed for medical ultrasound imaging. Federal law
restricts this device to sale by or on the order of a physician. The Terason system should
only be used in a medical facility under the supervision of a trained physician.
Caution:Do not use the Terason Ultrasound System during an MRI exam or when
using a defibrillator.
Terason Transducers
Each transducer model has indications for use (see Indications For Use on page 254)
concerning specific applications.
Laptop
Always position the laptop on a stable surface where it cannot fall on the patient.
Caution:Do not lift the laptop by the power cable or transducer. If either
disconnects, the laptop could fall on the patient.
Allergies
Metals used in some of the decorative exterior plates may contain nickel. If persons using
the system are allergic to nickel, avoid handling the exterior decorative metal.
System Covers
Do not remove any system covers or cables. Only qualified Terason personnel should
service the Terason Ultrasound System.
Electrical Shock Hazard
Transducer cables have strain relief at terminations. Inspect cables regularly, to detect
damaged, frayed, or broken cables that might contact a patient.
Caution:Do not use a transducer if the transducer or cable is damaged. Return
damaged equipment to Terason for replacement. See Contacting
Te ra so n on page 21 for instructions on contacting Terason Support.
Terason t3000 / Echo Ultrasound System User Guide 13

Preface Before You Begin Safety Cautions and Warnings
Shock hazards exist if the AC power adapter is damaged or is not properly grounded. Use
only the supplied medical grade power cord and power adapter, and connect the adapter
only to a receptacle marked “Hospital Only”, “Hospital Grade,” or equivalent.
Caution:Do not remove or try to circumvent the grounding wire. If the protective
grounding of the system is questionable, disconnect the laptop from the
power source and run it on its internal battery.
Before cleaning the system, always disconnect the AC power adapter from the system.
The Terason Ultrasound System is a Type BF Class I product suitable for continuous
operation when connected as a system to a Medical Grade AC/DC Power Adapter or
operated from the laptop battery.
Caution:Use only Medical-Grade peripherals in the patient environment. See
Intended Use on page 15 for a diagram of the patient environment.
Caution:Failure to follow the warnings in this guide may cause the system to no
longer comply with regulatory requirements.
Electrical Fast Transients (EFT)
The FireWire components used to connect the Terason ultrasound transducer to the
computer are susceptible to electrical fast transients on the power line. If these
components are subjected to transients, it may cause the FireWire hub and repeaters to
lock up and no longer operate as specified. If that happens, communications between the
computer and the transducer will fail. To remedy this situation, remove power from the
FireWire hub by unplugging the medical-grade power adaptor for a few seconds. When
the power supply is plugged back in, the FireWire components reset and begin to function
normally. You must also exit the Terason software and restart it.
Surges to AC Power Mains
If the system is powered from AC mains that could experience surges above 1 Kv (for
example, from extreme lightning conditions), additional surge suppression is
recommended.
RF Interference
The unit should be operated in a location that is no closer than listed in Compatibility for
Non-Life-Supporting Equipment on page 331 to any part of RF communications
equipment that may disturb its functions. If abnormal performance is observed, additional
measures may be necessary, such as re-orienting or relocating the equipment. The Terason
Ultrasound System should be separated by at least the distances specified in the table
referenced above.
The Terason Ultrasound System is intended for use in an electromagnetic environment
where radiated RF disturbances are controlled. The customer or the user of the Terason
Ultrasound System can help prevent electromagnetic interference by maintaining a
minimum distance between portable and mobile RF communications equipment
Terason t3000 / Echo Ultrasound System User Guide 14

Preface Before You Begin Safety Cautions and Warnings
(transmitters) and the Terason Ultrasound System according to the maximum output
power of the communications equipment. See Appendix E, “Electromagnetic
Compatibility Tables,” on page 329 for recommended separation distances.
Explosive
This equipment is not suitable for use in the presence of FLAMMABLE ANESTHETIC
MIXTURE WITH AIR OR WITH OXYGEN OR NITROUS OXIDE.
Battery Pack Usage/Disposal
Lithium-ion battery packs are labeled with cautions indicating that the device could
present a fire or chemical burn hazard if mistreated.
Caution:Do not disassemble, heat above 60ºC (140ºF), crush, puncture, short
external contacts, or incinerate the battery pack.
Caution:Keep the battery pack away from children. Dispose of used battery
packs according to the manufacturer's instructions. For safety
information, refer to the user guide that was shipped with your computer.
Recycling/Disposal After Useful Life
This equipment can contain environmentally hazardous materials such as, but not limited
to: heavy metals, general recyclable metals, and plastics. This product should be recycled
according to local and national guidelines for recycling electronic equipment.
Warnings
Observe the following safety precautions when using the Terason Ultrasound System.
Intended Use
The Terason Ultrasound System is designed for use as a diagnostic tool and should only be
operated by someone who has received proper training in the use and operation of an
ultrasound system. This system produces images derived from sound echoes; those images
must be interpreted by a qualified medical professional. This system in no way interprets
these images or provides a medical diagnosis of the patient being examined.
The Terason Ultrasound System has successfully completed compliance tests for IEC
60601-1, IEC 60601-1-1 2nd edition, IEC 60601-1-2, and IEC 60601-2-37 medical
standards for the configuration as originally installed. To maintain compliance with the
stated safety and EMI standards, Terason recommends use of MEDICAL GRADE
PERIPHERALS ONLY. Use of non-medical grade peripherals will result in noncompliance of safety and EMI standards. Non-conformance to these standards can
produce risks to the patient and operator of this equipment. Terason cannot be held liable
for changes to the system topology that no longer conform to the stated safety and EMI
standards. Changes to the system topology may make it necessary to retest the complete
system for compliance to these standards. The Terason Ultrasound System User Guide
refers to the potential for connecting the Terason Ultrasound System to peripherals such as
VCRs, TVs, and printers. Note that Terason has not performed compliance tests to the
Terason t3000 / Echo Ultrasound System User Guide 15
Preface Before You Begin Safety Cautions and Warnings
Patient Table
1.50 m
Overhead view
Side view
2.50m
1.50m
1.50m
stated standards with these types of devices connected to the system. Any peripheral
device, such as a network connection, etc. connected to the Terason Ultrasound System
must conform to the IEC standards outlined above (i.e., IEC 60601-1, IEC 60601-1-1 2nd
edition, IEC 60601-1-2, and IEC 60601-2-37).
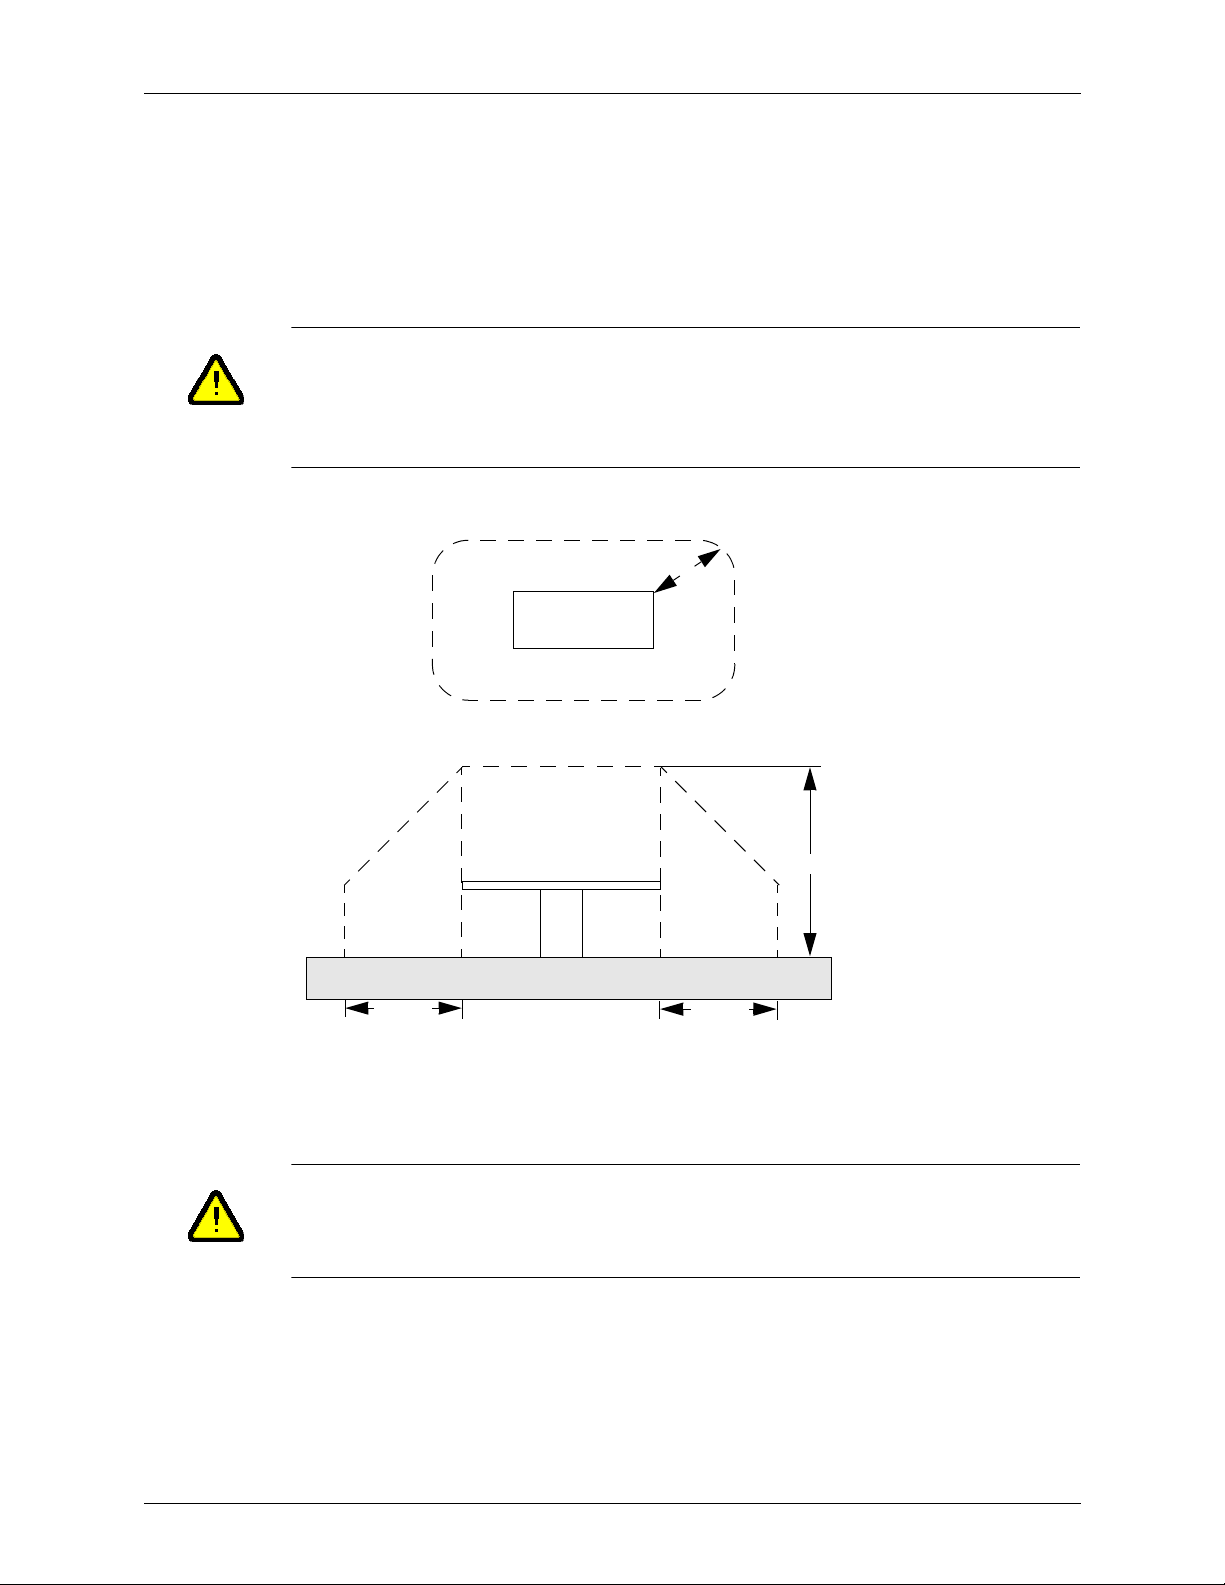
The Terason Ultrasound System (without peripherals) is suitable for use within the patient
environment, as defined by the following:
Warning: The user should never simultaneously make contact with the
patient and the inside of any equipment where a protective cover
of any kind is removed. This includes the protective covers for
the probe holders containing the ultrasound probe and power
modules located at the patient table.
The patient environment is defined as shown in the following figure.
Patient Environment
Portable and mobile RF communications equipment can affect medical electrical
equipment such as the Terason Ultrasound System and should not be used in the patient
environment.
Caution:The Terason Ultrasound System should not be used adjacent to or
stacked with other equipment. If adjacent or stacked use is necessary,
the system should be observed to verify normal operation in the
configuration in which it will be used.
Electromagnetic Interference (EMI)
Medical electrical equipment such as the Terason Ultrasound System requires special
precautions regarding electromagnetic compatibility, and must be installed and put into
service according to the tables in Appendix E, Electromagnetic Compatibility Tables.
Terason t3000 / Echo Ultrasound System User Guide 16

Preface Before You Begin Safety Cautions and Warnings
To limit exposure to electromagnetic interference from nearby equipment that can degrade
image quality, you should operate the Terason Ultrasound System under EMI conditions
that minimize power supply transients, mechanical interactions, vibration, and thermal,
optical, and ionizing radiation.
Electrostatic Discharge (ESD)
ESD, or static shock, is caused by rapid discharge of electrical energy from one body to another.
ESD is common in conditions of low humidity, such as those resulting from heating or air
conditioning. To avoid damage to transducers, electronics or system, use anti-static spray on
carpets and linoleum, and anti-static mats.
The Terason Ultrasound System complies to a level of ± 2kV ESD. The latch for locking
the ultrasound transducer and the FireWire port is sensitive to ESD and should not be
touched when operating the system. In cases where an ESD shock discharges to one of
these points, the computer program may freeze or windows may open unexpectedly. In
these cases, the Terason software may require restarting, and you may have to close extra
windows. In extreme cases, the computer may require restarting. These events are not
dangerous to the patient or to the operator.
Liquids
The Terason transducer, electronics envelope, and computer are not protected from spilled
liquids. The transducer array is watertight up to the strain relief, as specified in Pre-
Cleaning on page 284. If the computer is exposed to liquids or moisture, purchase a
keyboard drape. In addition, the Terason Ultrasound System electronics must be draped if
exposed to liquids or moisture.
Couplants
Use only couplants specifically designed for ultrasound examinations. Do not use mineraloil or vegetable-based couplants, which can damage transducers.
Heat
Do not expose transducers to direct heat such as strong sunlight or local heat sources. Heat
ages the crystal and causes loss of sensitivity.
Latex
Terason strongly recommends that health-care professionals identify their latex-sensitive
patients, and refer to the FDA’s March 29, 1991 Medical Alert on Latex products. Be
prepared to treat allergic reactions promptly.
Terason t3000 / Echo Ultrasound System User Guide 17

Preface Before You Begin Labels
Care
Ultrasound transducers and your Terason Ultrasound System are fragile. Handle with care.
If the transducer appears damaged, or misuse of the electronics envelope causes a
malfunction, please return the equipment to Terason for service or replacement.
Warning: Do not drop the ultrasound transducer! If you accidentally drop
the transducer, check it carefully for damage. Perform a sample
scan to make sure it operates correctly. If not, contact Terason for
service or replacement.
Immersion
Do not immerse the transducer connector. If the cable connector is immersed, do not plug
the connector into the system. Rinse the connector under running water and dry it
thoroughly. If necessary, contact Terason for service.
HF (High Frequency) Surgical Equipment
Warning: The Terason Ultrasound System is not approved for use with HF
surgical equipment. Use of the Terason Ultrasound System in HF
surgical procedures could result in failure of the electrical
isolation, resulting in injury or death.
Labels
Several labels are attached to the Terason system. The following sections describe what
each label means.
Refer to the laptop user guide for information about its labels and regulatory compliance.
Type BF Equipment Applied Part
Terason Ultrasound System Emits Ultrasound Energy
Indoor Use Only
The Terason Ultrasound System provides protection against electric shock. It is a
Type BF applied part that has a lower leakage current than for non-BF applied
parts.
This device complies with FDA Track 3 guidelines on acoustic output labeling
for the intended uses of the transducers.
This device is intended for indoor use only.
Terason t3000 / Echo Ultrasound System User Guide 18

Preface Before You Begin Labels
CE Mark
The Terason Ultrasound System conforms to all applicable European Directives
- specifically, the Council Directive Concerning Medical Devices 93/42/EEC.
The number adjacent to the CE marking (0413) is the number of the EU-notified
body that certified meeting the requirements of Annex II of the Directive.
U.S. and Canada Safety Standards
This certification mark indicates that the Terason Ultrasound System has been
tested to and meets the minimum requirements of widely recognized U.S. and
Canadian product safety standards. It also means that the manufacturing site has
been audited, and that Terason has agreed to a program of periodic factory
follow-up inspections to verify continued conformance.
See User Guide
This label indicates that the user should refer to the User Guide for information
on using this equipment.
Shipping Label Icons
The following symbols appear on the shipping label.
Environmental
The Terason Ultrasound System must be stored in the original shipping
container in environments with 15% to 90% relative humidity and noncondensing.
Air Pressure
The Terason Ultrasound System must be stored in the original shipping
container in environments between 63 kPa (472.5 mmHg) and 101.3 kPa (759.8
mmHg) air pressure.
Temperature
The Terason Ultrasound System must be stored in the original shipping
container in environments between 0º and 40º C (32º and 104ºF).
Terason Transducers
Each Terason transducer has a label that indicates its model and serial numbers: The
following figure is an example of a transducer label.
Terason t3000 / Echo Ultrasound System User Guide 19

Preface Before You Begin Getting Help
Example Transducer Label
Getting Help
Terason Online Help
To access the help, select the Help > Help Topics menu. The Help window has three tabs
on the left used to view information on the right:
Contents Click a book ( ) to open it. Click on a topic ( ) to view it.
Index Enter the subject you want, or scroll to find a topic, then double-click a
selection.
Search Enter the word to search for, press Enter, and double-click a topic.
Terason Ultrasound System User Guide
If you are reading this guide from a printed copy, you, can also read the User Guide online
using Adobe Reader.
To read the User Guide online, complete these steps:
1. Click the Start button in the lower left of the screen.
2. Select Programs > Terason > Documentation > English > Terason User Guide.
The computer opens the User Guide in the Adobe Reader software.
3. Click the Bookmarks tab to view a list of topics, or use the Guide’s table of contents or
index to locate topics.
For information on using Adobe Acrobat Reader, select Help
Acrobat Reader 4.0) or Help
bar.
> Reader Help (for Acrobat Reader 5.0) from the menu
> Reader Guide (for
Windows Online Help
For help with the Windows operating system, click the Start button in the lower left of the
screen, and click
Terason Online Help; see page 12.
Help. The Windows Help system opens. This help works the same as the
Your Laptop or Desktop Computer
If you have questions or need more information about the computer itself, refer to the user
guide that came with your specific system.
Terason t3000 / Echo Ultrasound System User Guide 20

Preface Before You Begin Getting Help
Contacting Terason
If you have questions about the Terason Ultrasound System, you can contact Terason
support:
By Mail
Terason™, a Division of Teratech Corporation
77–79 Terrace Hall Avenue
Burlington, MA 01803 U.S.A.
By Telephone
Voice in the U.S.A.: 1-866-TERASON (1-866-837-2766) Ext. 1048
Voice from outside the U.S.A.: 781-270-4143 Ext. 1048
By FAX
1-781-270-4145
By Email
techsupport@terason.com
You can view contact information by selecting Help > Technical Support.
On The Web
For more information, you can visit our web site at:
www.terason.com
Terason t3000 / Echo Ultrasound System User Guide 21

1 About the Terason Ultrasound System
The Terason Ultrasound System is an easy-to-use, portable ultrasound system that
produces high resolution images.
The microminiaturized ultrasound system runs under the standard Windows interface for
easy navigation. The Terason software can run on a desktop or laptop computer. You can
also connect the computer to a VCR or a printer for image output.
This section of the Terason User’s Guide includes the following topics:
• About Ultrasound Modes on page 22
• Support for Medical Procedures on page 29
• Terason Transducers on page 30
• About the Terason Main Screen on page 32
• The Terason Console on page 34
About Ultrasound Modes
Ultrasound is primarily an operator-dependent imaging technology. The quality of images
and the ability to make a correct diagnosis based on scans depend on precise image
adjustments and adequate control settings applied during the exam. The Terason software
provides tools to optimize the image quality during a patient scan for all image modes.
The Terason Ultrasound System can be licensed with different levels of features. The
following table lists which scan modes come with each version.
Terason Scan Mode Availability
Mode Standard Advanced Optional
2D Mode XX
M-Mode (Motion Mode)
Directional Power Doppler XX
Power Doppler
Color Doppler
Pulsed-Wave Doppler
Continuous-Wave Doppler X
Triplex X
Te ra Vi si o n X
Omni Beam X
XX
XX
X
X
Terason t3000 / Echo Ultrasound System User Guide 22

Chapter 1 - About the Terason Ultrasound System About Ultrasound Modes
2D Mode
The Terason Ultrasound System delivers 2-dimensional digital imaging using 256 digital
beam-forming channels. This imaging mode delivers excellent image uniformity, tissue
contrast resolution, and steering flexibility in frequencies from 2 MHz to 12 MHz. The
high channel count supports true phased array and high-element count imaging
transducers.
The 2D scan data displays in the 2D Image Display window. The figure below shows a
sample 2D obstetrical scan.
Example 2D Scan
To use 2D, see:
• Acquiring Images on page 63
• Using 2D and I.Q. Controls on page 90
• Measuring in the 2D Window on page 151
M-Mode (Motion Mode)
The Terason Ultrasound System provides simultaneous 2-dimensional (B-Mode) and MMode imaging. This combination is valuable for the efficient assessment of moving
structures.
Use M-Mode to determine patterns of motion for objects within the ultrasound beam.
Typically, this mode is used for viewing motion patterns of the heart.
M-Mode displays scan data of the anatomy in the 2D Image Display window, and the
motion scan in the Time Series window. The following figure shows a sample M-Mode
scan.
Terason t3000 / Echo Ultrasound System User Guide 23

Chapter 1 - About the Terason Ultrasound System About Ultrasound Modes
Example M-Mode Scan
For more information on using M-mode, see:
• Acquiring Images on page 63
• Using M-Mode Image Controls on page 105
• Measuring in the M-Mode Window on page 165
When using a 4V2 transducer in a Cardiac exam, a special M-Mode feature is available.
See Using Anatomical M-Mode on page 107.
Power Doppler
Conventional Power Doppler shows blood flow by displaying the density of red blood
cells, as opposed to their velocity. Large amplitude signals are assigned a bright hue, and
weak signals are assigned a dim hue. For example, the jugular vein is shown in brighter
colors than the carotid artery because the jugular vein contains more red blood cells at any
given time than does the carotid artery. All flows display in shades of the same color; no
directional information is provided. You also can choose to apply a high frame rate or high
resolution to control the quality of the scan.
In general, Power Doppler is more sensitive than Color Doppler. Amplitude estimation is
less noisy than a mean frequency estimate. Therefore, Power Doppler detects and displays
more real signal. Power Doppler is more sensitive to low flow than Color or Directional
Power Doppler. The increased sensitivity means that Power Doppler is less angledependent than Color Doppler, and does not alias.
Power Doppler is the preferred mode to show perfusion and contour of vessel lumen.
The Power Doppler scan data displays in the 2D Image Display window as shown in the
following figure.
Terason t3000 / Echo Ultrasound System User Guide 24

Chapter 1 - About the Terason Ultrasound System About Ultrasound Modes
Example Power Doppler Scan
For more information on using Power Doppler mode, see:
• Acquiring Images on page 63
• Using Color and Power Doppler Image Controls on page 118
Color Doppler
Color Doppler mode is used to detect the presence, direction, and relative velocity of
blood flow by assigning color-coded information to these parameters. The color is
depicted in a region of interest (ROI) that is overlaid on the 2D image. Non-inverted flow
towards the transducer is assigned shades of red, and flow away from the transducer
displays in shades of blue. The mean Doppler shift is then displayed against a grayscale
scan of the structures.
All forms of ultrasound-based imaging of red blood cells are derived from the received
echo of the transmitted signal. The primary characteristics of this echo signal are its
frequency and its amplitude (or power). The frequency shift is determined by the
movement of the red blood cells relative to the transducer – flow towards the transducer
produces a higher-frequency signal than flow away from the transducer. Amplitude
depends on the amount of moving blood within the volume sampled by the ultrasound
beam. You can also apply a high frame rate or high resolution to control the quality of the
scan.
Higher frequencies generated by rapid flow are displayed in lighter colors, and lower
frequencies in darker colors. For example, the proximal carotid artery is normally
displayed in bright red and orange, because the flow is toward the transducer, and the
frequency (velocity) of flow in this artery is relatively high. By comparison, the flow in
the jugular vein displays as blue because it flows away from the transducer.
The Color Doppler scan data displays in the 2D Image Display window. The following
figure shows a sample Color Doppler scan.
Terason t3000 / Echo Ultrasound System User Guide 25

Chapter 1 - About the Terason Ultrasound System About Ultrasound Modes
Example Color Doppler Scan
For more information on using Color Doppler, see:
• Acquiring Images on page 63
• Using Color and Power Doppler Image Controls on page 118
Directional Power Doppler
Directional Power Doppler (DirPwr) is a combination of some features of conventional
Power Doppler and of Color Doppler. It provides the increased sensitivity of conventional
Power Doppler, plus the directional information derived from Color Doppler.
Directional Power Doppler does not provide an estimate of blood flow velocity. The color
palette is proportional to the strength of the Doppler signal. This mode allows you to
obtain good-quality images of deep arteries and other tissue. You can also apply a high
frame rate or high resolution to control the quality of the scan.
The Directional Power Doppler scan data displays in the 2D Image Display window.
Terason t3000 / Echo Ultrasound System User Guide 26

Chapter 1 - About the Terason Ultrasound System About Ultrasound Modes
Example Directional Power Doppler Scan
For more information on using Directional Power Doppler, see:
• Acquiring Images on page 63
• Using Color and Power Doppler Image Controls on page 118
Pulsed-Wave Doppler
A Pulsed-Wave Doppler (PWD) scan produces a series of pulses used to study the motion
of blood flow in a small region along a desired ultrasound cursor, called the sample
volume or sample gate.
The X-axis of the graph represents time, and the Y-axis represents Doppler frequency
shift. The shift in frequency between successive ultrasound pulses, caused mainly by
moving red blood cells, can be converted into velocity and flow if an appropriate angle
between the insonating beam and blood flow is known.
Shades of gray in the spectral display represent the strength of the signal. The thickness of
the spectral signal is indicative of laminar or turbulent flow (laminar flow typically shows
a narrow band of blood flow information).
In the Terason Ultrasound System, Pulsed-Wave Doppler and 2D are shown together in a
mixed-mode display. This combination lets you monitor the exact location of the sample
volume on the 2D image in the 2D Image Display window, while acquiring Pulsed-Wave
Doppler data in the Time Series window.
Terason t3000 / Echo Ultrasound System User Guide 27
Chapter 1 - About the Terason Ultrasound System About Ultrasound Modes
Example Pulsed-Wave Doppler Scan
In the 2D scan, the long line lets you adjust the ultrasound cursor position, the two parallel
lines (that look like =) let you adjust the sample volume (SV) size and depth, and the line
that crosses them lets you adjust the correction angle.
For more information on using Pulsed Wave Spectral Doppler, see:
• Acquiring Images on page 63
• Using Spectral Doppler Image Controls on page 109
• Measuring in the Spectral Doppler Modes on page 166
Continuous-Wave Doppler
Continuous-Wave Doppler scans display all velocities present over the entire length of the
ultrasound cursor. This is useful for imaging very high velocities such as those resulting
from a leaking heart valve.
As with Pulsed-Wave Doppler scans, the X-axis of the graph represents time, and the Y-
axis represents Doppler frequency shift.
For more information on using Continuous-Wave Spectral Doppler, see:
• Acquiring Images on page 63
• Using Spectral Doppler Image Controls on page 109
• Measuring in the Spectral Doppler Modes on page 166
Triplex
Triplex scan mode is available only with the AD version. Triplex scan mode combines
simultaneous or non-simultaneous Doppler imaging (Color Doppler, Directional Power
Doppler, or Power Doppler) with Pulsed-Wave Doppler imaging to view arterial or venous
velocity and flow data. Triplex allows you to perform range-gated assessment of flow.
Terason t3000 / Echo Ultrasound System User Guide 28

Chapter 1 - About the Terason Ultrasound System Support for Medical Procedures
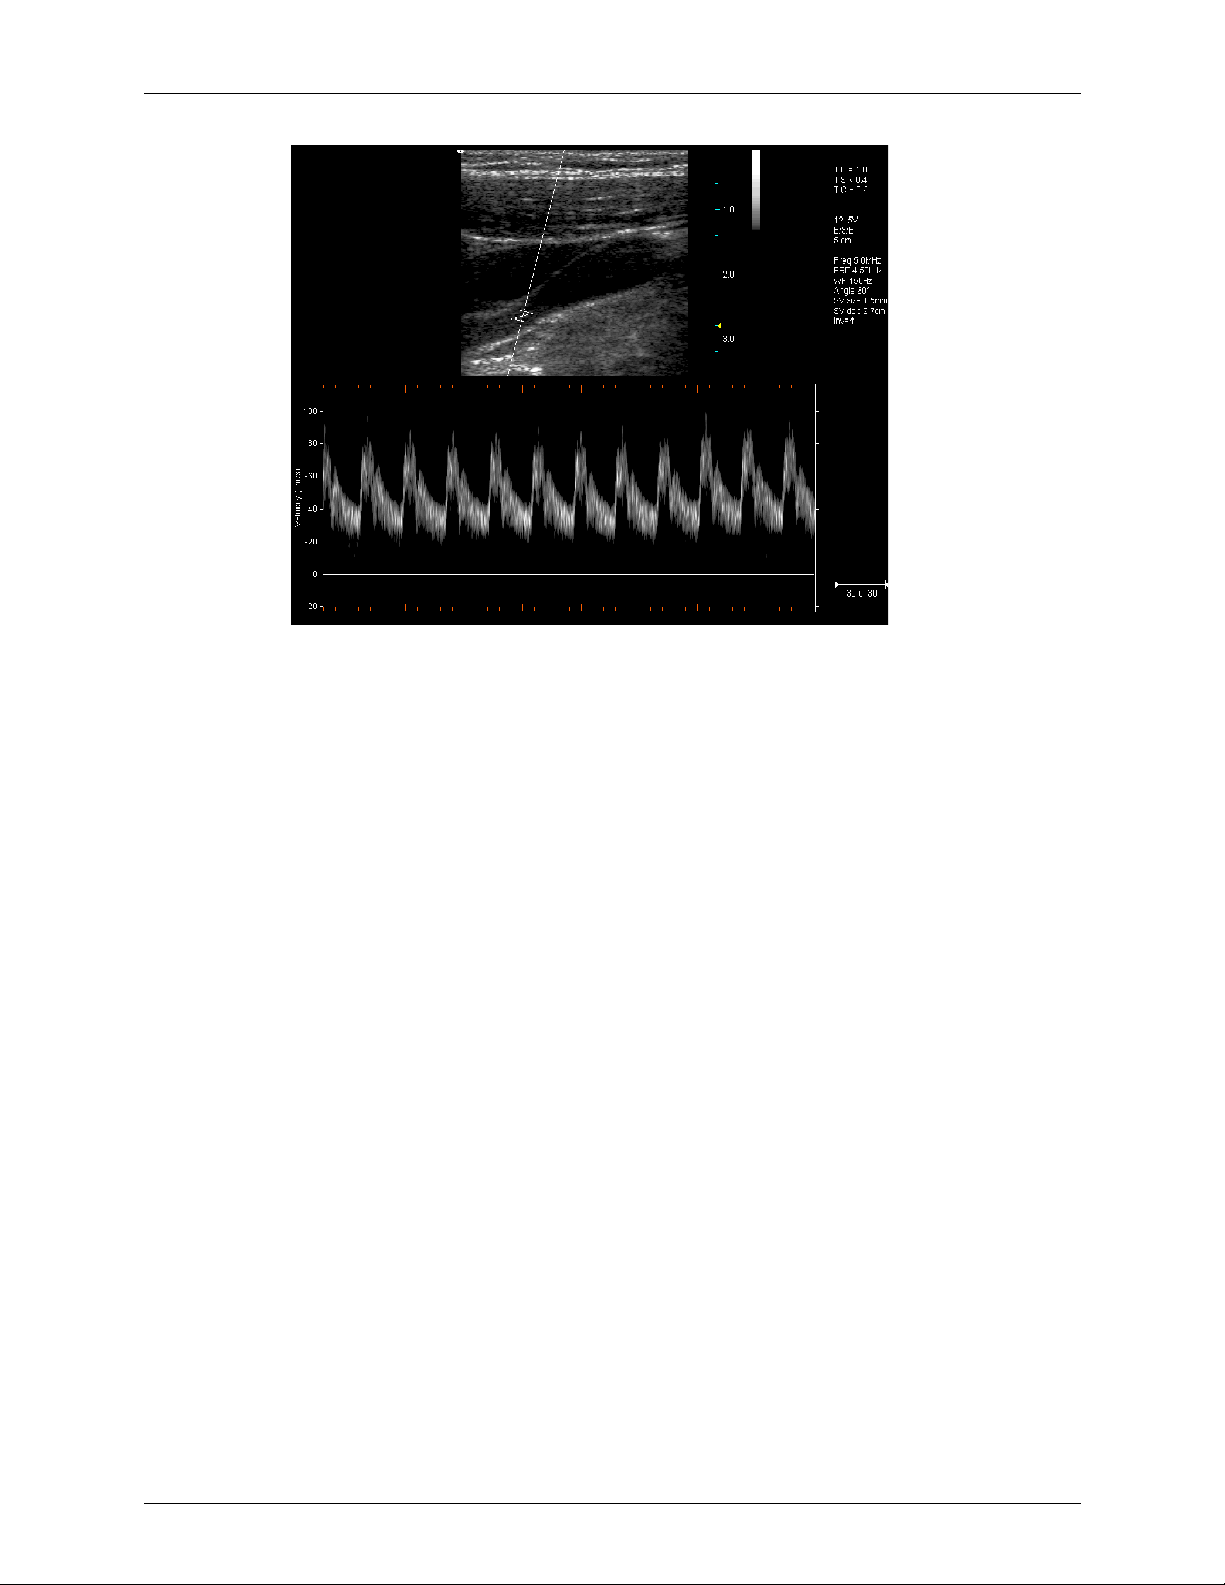
Triplex applications include vascular studies, phlebology, perinatal, and radiology. The
following triplex image example shows the greater saphenous vein.
Example Triplex Scan
For more information on using Triplex mode, see:
• Acquiring Images on page 63
• Scanning in Triplex Mode on page 126
•
TeraVision
TeraVision is an optional image-optimization package that sharpens images produced by
the Terason Ultrasound system.
See Enhancing the Image Using TeraVision™ Optimization on page 76
Support for Medical Procedures
The Terason Ultrasound System can be configured with needle guides used for tissue
biopsy, fluid aspriation, amniocentesis, and catheter placement. The system can also be
incorporated into cryoablation (or targeted ablation) and brachytherapy products from
other vendors. The Terason Ultrasound System scans the anatomy or vessel for size,
location, and patency, and provides guide lines between which the needle will appear.
For biopsy and vascular puncture applications, a needle guide kit directs needles to the
proper location for percutaneous vascular punctures and nerve blocks. The needle guide
allows you to direct the needle into the center of a vessel or tissue mass, helping to avoid
adjacent vital tissue. You can see the anatomy in real time before, during, and after the
procedure, and can save images and Cine loops for future reference.
Terason t3000 / Echo Ultrasound System User Guide 29

Chapter 1 - About the Terason Ultrasound System Terason Transducers
For cryoablation or brachytherapy applications, the system may include an insertion
template and a stepper or stabilizer. The procedure for these applications is defined by the
company that provides those systems. The Terason software displays the insertion grid and
needles on the scan to show the progress of the procedure.
You can use the needle guides in the following modes:
• 2D Mode, see page 23
• Color Doppler, see page 25
• Directional Power Doppler, see page 26
• M-Mode (Motion Mode), see page 23
See Performing Medical Procedures on page 218 for information on using the Terason
Ultrasound System to perform biopsies.
Terason Transducers
The Terason Ultrasound System consists of the transducer, electronics envelope, and the
Terason software. All of the Terason transducers can be used with all scan modes.
The following table describes the supported transducers. Also see System Specifications
on page 288, and Indications For Use on page 254.
Terason Transducer Specifications
Transducer Elements Description Applications
PDOF
(Echo only)
4V2S
(t3000 only)
4V2A
5C2A 128 Curved linear array
7L3V
1 Single-element transducer
with a maximum depth of
340 mm and a single-point
field-of-view
64 Phased-linear array
transducer with a
maximum depth of
240 mm and a usercontrollable field-of-view
64 Phased-linear array
transducer with a
maximum depth of
240 mm and a usercontrollable field-of-view
transducer with a
maximum depth of
200 mm and a usercontrollable field-of-view
128 Linear wideband array
transducer with a
maximum depth of
130 mm and a usercontrollable field-of-view
Cardiac
Adult abdominal
OB/GYN
Cardiac
Adult abdominal
OB/GYN
Cardiac
Adult abdominal
OB/GYN
Fetal heart
Dialysis access
Small parts
Muscoloskeletal
Peripheral
vascular
Abdominal vascular
Fetal heart
Renal
Abdominal vascular
Fetal heart
Renal
Abdominal vascular
Renal
Cerebrovascular
Medium depth arterial
and venous studies
Breast
8BP4
(t3000 only)
Terason t3000 / Echo Ultrasound System User Guide 30
128 X 128 Biplanar: Curvilinear and
linear
Prostate (cryoablation and brachytherapy
therapeutic procedures)

Chapter 1 - About the Terason Ultrasound System Terason Transducers
Terason Transducer Specifications (Continued)
Transducer Elements Description Applications
8EC4A
8MC3
(t3000 only)
10V5S
(t3000 only)
12HL7 128 Angled-head linear
12L5V
128 Convex-linear endocavity
array transducer with a
maximum depth of 140
mm and a 130° field-ofview
128 Curved-linear transducer
with a maximum depth of
160 mm
96 Phased-array-sector
transducer with a
maximum depth of
120 mm and a 90° field of
view
wideband array transducer
with a maximum depth of
70 mm and a usercontrollable field of view
128 Linear wideband array
transducer with a
maximum depth of 80 mm
and a user-controllable
field of view
Endovaginal
Infertility
Early OB
Fetal
Pediatric
Small Organ
Peripheral
vascular
Vascular access
Intra-operative
Vascular
Intra-operative
(Neuro)
Laparoscopic
Dialysis access
Small parts
Muscoloskeletal
Peripheral
vascular
General GYN
Prostate
Neonatal Cephalic
Adult Cephalic
Cardiac
Pediatric
Small Organ
Extracranial vascular
Medium depth arterial
and venous studies
Breast
The Terason Ultrasound System also allows you to connect more than one transducer to a
hub, and then connect the hub to a laptop or desktop computer. This configuration lets you
switch transducers without having to disconnect any cables. Refer to the Configuration
Guide that came with your system for instructions.
Terason t3000 / Echo Ultrasound System User Guide 31

Chapter 1 - About the Terason Ultrasound System About the Terason Main Screen
Thumbnail
Window
Patient Info
Window
Image Control/
Measure tabs
File
Toolbar
Menubar
Review
Window
Image Display
Window
Patient
Data
Exam
Date
Explorer
Button
Split View
button
Frame
Rate
Image
Display
Status
Tools
Toolbar
Playback
Toolbar
Live/Freeze
Button
Scan
Mode
To ol b ar
Report
Window
Orientation Logo
Acquire
Button
Stress
Button
MI & TI
display
Connected
Transducer
About the Terason Main Screen
When you start the Terason software, the main screen displays.
Terason Main Screen
If a control, button, or menu shows in gray, it usually means that the function is not
available for the current circumstances. For example, you cannot use the save, print, or
playback tools with a live image, so those items are gray. You can add additional toolbars
to the window using
View on the Toolbars menu.
Note: The gray-unavailable condition does not apply to the tabs at the bottom of the
Image Control window; visible tabs are always available. The tabs are gray when
they are not selected.
For complete descriptions of the menus and toolbars available in the Terason software, see
Appendix B - Menu and Toolbar Reference.
Terason t3000 / Echo Ultrasound System User Guide 32

Chapter 1 - About the Terason Ultrasound System About the Terason Main Screen
Terason Explorer Window
The Terason Explorer window lets you find patient or image files. This window shows
the directory structure of the Patient and Image folders that store all patient information
files and saved images and image loops.
To open the Terason Explorer window, click the Explorer
button .
The files listed in Terason Explorer window are stored at the
following default location on your computer’s hard disk:
C:\Program Files\Teratech\Terason 3000
This directory includes the following folders:
• Patient
•Image
To expand a folder and view its contents, click the . The changes to a and shows a
list of files. To hide the contents of a folder, click the . You can also double-click a folder
name to open or close it. For information on using the Terason Explorer window to locate
patient and image files, see Finding Files in the Terason Explorer on page 136.
Image Display, Patient Info, and Review Windows
These windows use the same space on the computer screen. Click a tab to open that
window. The tab for the Image Display window shows the name of the connected
transducer (
of this tab (if that transducer is connected). If you have more than one transducer
connected to the computer, there is a tab for each transducer.
The Image Display window consists of the 2D window above the Time Series window (if
the selected scan mode generates a Time Series window). The 2D window displays in all
scan modes; the Time Series window displays only when scanning in M-Mode, PWD
mode, CWD mode, or Triplex mode.
To use these windows, see:
• Working With Scan Modes on page 89
• Setting Up Patient Information on page 56
• Finding Stored Images and Loops on page 136
• Finding Files in the Review Window on page 139
4V2 in the example). You might see any Terason transducer model as the name
Toolbar s
The toolbar at the bottom of the Terason main screen provides quick access to menu items.
For example, there are buttons for selecting scan mode without using the Modes menu,
and for saving images and loops. See Toolbar Reference on page 313 for a quick
description of each toolbar control.
Terason t3000 / Echo Ultrasound System User Guide 33

Chapter 1 - About the Terason Ultrasound System The Terason Console
Image Control Bar/Measure Tabs
The Image Control bar shows tabs that let you configure settings to adjust the scanned
image and make measurements on frozen images.
Live Imaging Control Tabs
For live imaging, the Image Control bar shows the following tabs:
• 2D and I.Q. tabs for 2D imaging
• Additional tab for the selected scan mode
Frozen Image Control Tabs
When the image is frozen or when a ULT file is loaded, following the Image Control bar
tabs are available:
Tabs Displayed When Image Frozen or ULT File Loaded
Mode Tabs Available
I.Q.
2D
2D Measure
M-Mode
CWD
PWD
CD
Pwr
I.Q.
2D Measure
I.Q.
2D Measure
I.Q.
2D Measure
I.Q.
2D Measure
I.Q.
2D Measure
M Measure
CWD
CWD... (CWD Measure)
PWD
PWD... (PWD Measure)
CD
Pwr
For a loaded file in a format other than ULT, this window shows an Info tab. See Storing
Images and Loops on page 131 for information about viewing saved files.
For information about how the image controls for the scan modes work, see Chapter 5,
Working With Scan Modes, on page 89.
For information about using the Measure tabs, see Chapter 7, Working With
Measurements.
The Terason Console
A slide-out console houses controls that configure and operate the Terason Ultrasound
system without using a mouse.
Terason t3000 / Echo Ultrasound System User Guide 34

Chapter 1 - About the Terason Ultrasound System The Terason Console
Trackball
Live/Freeze button
Scan mode buttons
Left and right arrow buttons
Soft keys
TGC sliders
Gain control knob
ROI/ultrasound cursor
select button
Update button
Save loop button
Patient size buttons
Focus depth buttons
Scan depth buttons
Text button
Save image button
Left button
Right button
Terason Console
Console Controls
The controls on the console are arranged in three groups: left, center, and right.
Left Control Group
^
Soft Keys
V – Four sets of up and down arrow buttons control the settings displayed in
the four boxes at the left end of the onscreen Scan Mode toolbar.
Left and Right Arrow Buttons < > – A pair of left and right arrow buttons change the
parameters displayed in the four boxes at the left end of the onscreen Scan Mode toolbar.
Pressing one of the buttons populates the boxes with a different set of parameters.
Mode Buttons – Six buttons select the scan mode.
Center Control Group
Track bal l – The trackball in the middle of the console takes the place of a computer
mouse. It moves the onscreen cursor or a selected feature in the same way a mouse would.
Left Button – The button just to the left of the trackball performs the same functions as
the left button on a mouse. When the ultrasound cursor is selected, clicking this button
deselects the cursor.
Right Button – The button just to the right of the trackball performs the same functions as
the right button on a mouse. Clicking this button during live scanning selects the
ultrasound cursor.
Live/Freeze Button – The button just below the trackball toggles between live
imaging and frozen image.
Terason t3000 / Echo Ultrasound System User Guide 35

Chapter 1 - About the Terason Ultrasound System The Terason Console
ROI/Ultrasound Cursor Select Button – The button just above the trackball
moves the cursor to the ROI or the ultrasound cursor, and selects it. In PWD mode, it
selects the sample volume depth marker. When these features are selected, moving the
trackball manipulates them.
Save Loop Button –The button below and to the right of the Live/Freeze button
saves a loop to a file. This button is disabled during live imaging
Save Image Button –The button to the right of the Save Loop button saves a frozen
image to a file. This button is disabled during live imaging.
Text Button –The button just above the Save Image button toggles the text entry
functions on and off.
Update Button – The button to the left of the Live/Freeze button toggles the update
function on and off. See Updating the Displays on page 117.
Right Control Group
Gain Control Knob – The knob near the bottom right of the console controls gain. If the
selected scan mode has different gain functions, pushing the knob down toggles it to
control other available gain functions. A legend next to the gain knob icon at the
bottom right of the imaging display says which gain is currently controlled by the Gain
knob.
Example: in Color mode, the Gain knob normally controls color gain, and the onscreen
legend reads
legend reads
Color Gain. Pushing the button down changes the control to 2D gain, and the
BMode Gain.
When you press the Gain knob down for two seconds during live imaging, all settings
revert to the presets.
When the scan is frozen in Doppler modes, the Gain knob normally scrolls the TimeSeries loop, and the onscreen legend reads
to scroll the 2D loop, and the onscreen legend reads
Time Scroll. Pushing the knob down changes it
Frame Scroll.
Sliders – Eight sliders at the right end of the console control time gain compensation
(TGC) at various scan depths. See Adjusting Time Gain Compensation on page 96.
When you turn the system on, select an exam, or press the Gain knob to reset, the presets
are applied, independent of the slider positions. If you have a slider all the way to the right
or left when the presets are applied, you will only be able to adjust that TGC value in one
direction.
Patient Size Buttons – Two buttons just to the left of the TGC sliders select different
sets of presets, depending on the scan mode and exam type.
Focus Depth Buttons – Two buttons just to the left of the Frequency buttons set the
focus depth.
Scan Depth Buttons – Two buttons just to the left of the Focus Depth buttons set the
scan depth.
Terason t3000 / Echo Ultrasound System User Guide 36

2 Installing Software
When you purchase the Terason Ultrasound System, it comes with all the required
software already installed on the laptop. You may never need the information in this
chapter unless you upgrade your system, or if you want to install the Terason Ultrasound
System on a computer that was not provided by Terason.
If you must install, uninstall, or configure part of the Terason Ultrasound System,
instructions for the following operations are included in this chapter:
• Installing Terason Software on page 37
• Upgrading Terason Software on page 39
• Uninstalling Terason Software on page 41
• Installing the FireWire Terason Transducer Driver on page 42
• Installing the Terason DICOM Utility on page 44
• Licensing the Terason Software on page 50
For information on connecting hardware components, or if you must reinstall the
computer’s operating system, refer to the Configuration Guide that came with your
system.
Installing Terason Software
Terason Ultrasound System are shipped with all required software installed on the laptop.
You do not need to complete the following procedure unless you want to install the
Terason Ultrasound System on a computer that was not provided by Terason.
When ready, complete these steps:
1. Exit all applications including email, and unplug the Terason engine from the laptop
if it has already been installed.
2. Insert the Terason CD into the CD-RW drive. An InstallShield message displays as it
prepares to install the software, then the Welcome dialog box opens.
3. Click
4. Click
Next>. The License Agreement dialog box appears. Read the License
Information carefully.
Yes. The Choose Destination Location dialog box opens.
Terason t3000 / Echo Ultrasound System User Guide 37

Chapter 2 - Installing Software Installing Terason Software
InstallShield Wizard for Choosing the Destination
5. Click Next> to install the application in the default location. To select a different
location, click
Browse and navigate to a different directory (not recommended). The
wizard reminds you to unplug the Terason Transducer.
Reminder to Unplug the Transducer
6. Click OK. The installer copies files from the CD to the computer.
7. The Install shield opens again, to install the Sentinel Protection Installer. When the
Welcome dialog box opens, click
Sentinel Installer Welcome
Next >.
8. On the License dialog box, read the license agreement, then click the I accept... radio
button and
Next >.
Terason t3000 / Echo Ultrasound System User Guide 38

Chapter 2 - Installing Software Upgrading Terason Software
9. On the Setup Type dialog box, click Next >.
10. On the Ready to Install dialog box, click
Install.
When finished, the installer displays a setup complete message.
Installation Complete Message
If you see “Rebooting is required,” you must restart your computer before you use the
Terason software.
11. Click
Finish.
Upgrading Terason Software
When upgrading software, the Terason installer first removes the existing version, and
then installs the new version.
To upgrade to a newer version of the Terason software, complete these steps:
1. Exit all applications and unplug the Terason transducer from the engine.
2. Insert the Terason CD into the CD-RW drive. The Uninstall dialog opens.
Terason t3000 / Echo Ultrasound System User Guide 39
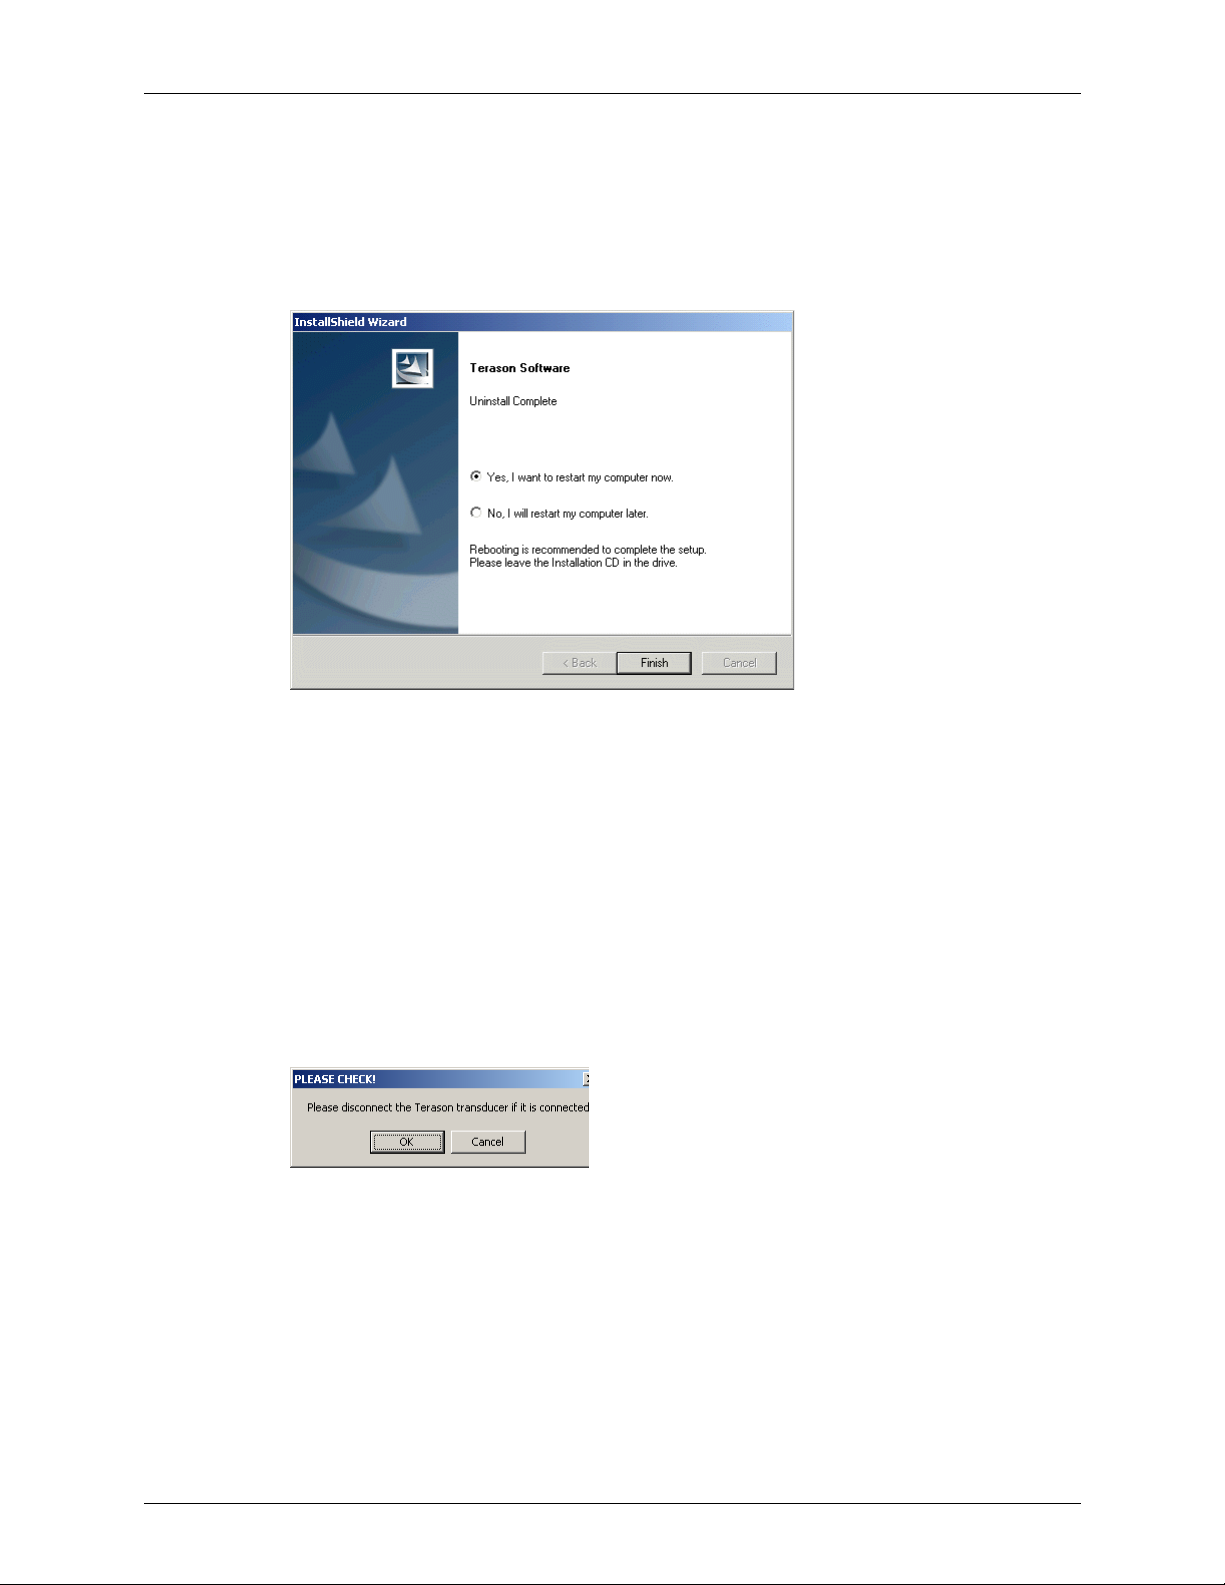
Chapter 2 - Installing Software Upgrading Terason Software
3. Click Next>. The Confirm Uninstall dialog box opens.
4. Click
OK to confirm. If you see a dialog box that includes a check box, select the Don’t
display this message again check box and click Yes.
The installer removes all of the previous Terason software and displays a completion
message, recommending that you reboot.
Uninstall Complete Dialog Box
5. Click Finish. Keep the Terason CD in the drive and wait while the computer reboots
(restarts).
After the computer finishes starting up, you may have to log on before proceeding.
When you are logged in, the Welcome dialog for the new Terason application opens.
6. Click
Next>. The License Agreement dialog appears. Read the License Information
carefully.
7. Click
8. Click
Yes. The Choose Destination Location dialog box opens.
Next> to install the application in the default location. You can click Browse to
select a different location (not recommended). The wizard reminds you to unplug the
Terason Transducer.
Reminder to Unplug the Transducer
9. Click OK. The installer copies the files to the selected location. When finished, the
installer displays a setup complete message.
Terason t3000 / Echo Ultrasound System User Guide 40

Chapter 2 - Installing Software Uninstalling Terason Software
Installation Complete Message
If you see “Rebooting is required,” you must restart your computer before you use the
Terason software.
10. Click
Finish.
Remember to connect the transducer.
Uninstalling Terason Software
You do not need to manually uninstall the current version of software when you upgrade
software. To permanently remove the Terason application, complete these steps:
1. Click
2. Select
3. Double-click
4. Scroll down the list of programs and click to select
Uninstalling the Terason Software
Start in the Windows task bar.
Settings > Control Panel. The Control Panel window opens.
Add/Remove Programs .
When you select an application, the listing expands to show the size of the files,
frequency of use and the date the program was last used.
Terason Software.
5. Click
6. Click
7. Click
8. Click
Terason t3000 / Echo Ultrasound System User Guide 41
Change/Remove.
Next> to proceed with the uninstall.
OK to confirm.
Finish to complete the uninstall process.
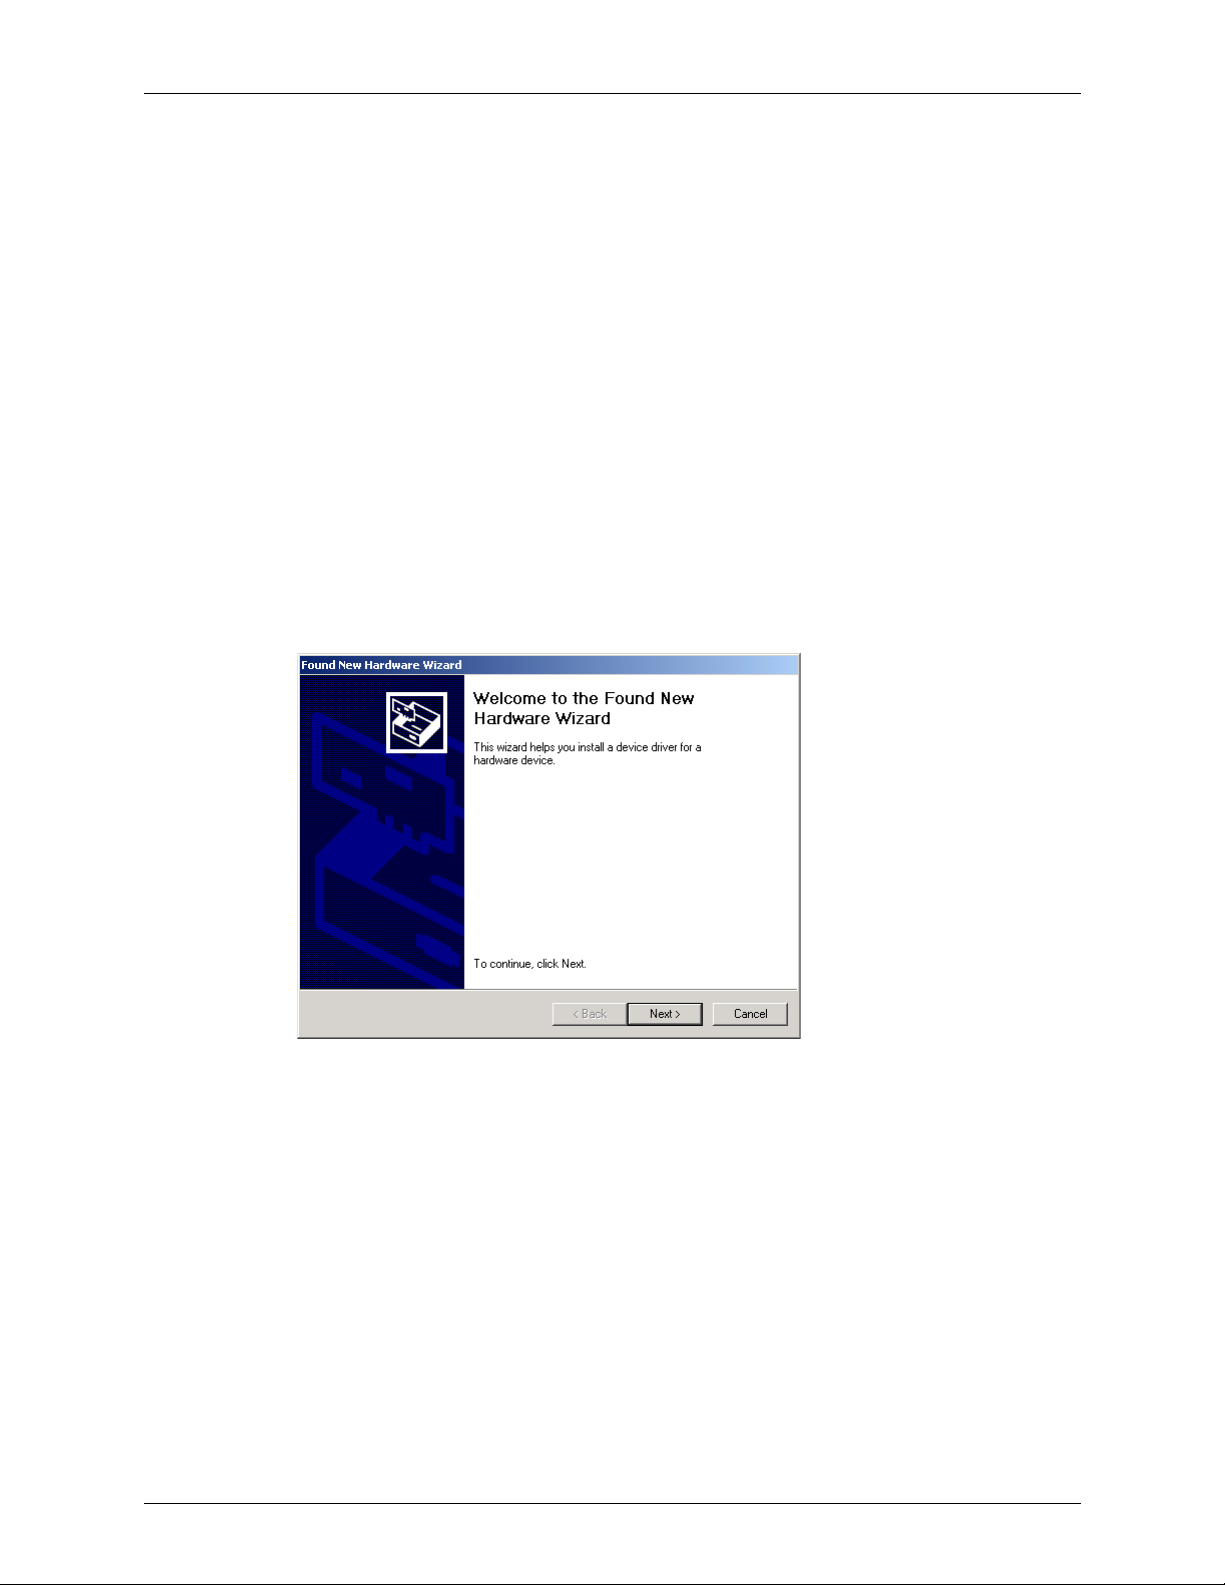
Chapter 2 - Installing Software Installing the FireWire Terason Transducer Driver
Installing the FireWire Terason Transducer Driver
If you purchased the laptop from Terason, all the required drivers are already installed and
you need not perform the procedure in this section. If you installed the Terason software
on a computer or laptop purchased from another source, the steps you must take vary,
depending on the system configuration of the specific computer.
If you start the Terason software and do not see any messages about the Terason
transducer, the driver software is already installed and you need not perform this
procedure. Complete this procedure only if you see a “
Hardware Found” message.
When the Terason transducer is connected to your PC, you may have to install the device
driver for the operating system to recognize the new hardware. After you plug in the
Terason transducer for the first time, make sure your computer is turned on, and wait
approximately one minute.
Use these guidelines to determine how to install the driver:
• If you do not see any messages about the Terason transducer, the driver is already
installed, and you can skip this procedure
• If you see a
Found New Hardware message box, start with Step 1, below.
Digital Signature Not Found” or “New
Found New Hardware Wizard
Complete these steps to install the driver (starting from the Found New Hardware
window):
1. Click
Next>.
The New Hardware Wizard window changes to allow you to install hardware device
drivers.
Terason t3000 / Echo Ultrasound System User Guide 42

Chapter 2 - Installing Software Installing the FireWire Terason Transducer Driver
Selecting From a List or Location
2. Select Install from a list or specific location (Advanced) and click Next>.
Including a Location
3. Clear the Search removable media (floppy, CD-ROM...) check box.
4. Select the
5. Click
Include this location in the search: check box.
Browse.
6. Navigate to the Program Files folder on the C:\ drive.
7. Double-click the Teratech folder, then double-click the Terason 3000 folder. The
complete path to the required folder is:
C:\Program Files\Teratech\Terason 3000\Drivers
8. Click the Drivers folder to select it, then click Open.
Terason t3000 / Echo Ultrasound System User Guide 43

Chapter 2 - Installing Software Installing the Terason DICOM Utility
Insert Disk With Path to Drivers
9. Click Next>. The drivers install.
10. Click
Finish.
Installing the Terason DICOM Utility
The Terason software must be installed before you can install the DICOM Send/Print
utility or use the DICOM Worklist utility. See Installing Terason Software on page 37 for
instructions on installing the Terason software.
After installing the driver, you must configure it to set up the destination DICOM server
and printer. After the utility is configured, follow the instructions in Printing Files to a
DICOM Printer on page 227 or Sending Files to a DICOM Server on page 228 to use the
DICOM print and export functions. See Using DICOM Worklist on page 228 for
instruction on using Worklist to retrieve patient information.
Installing the DICOM Utility
To install the DICOM utility, complete these steps:
1. If necessary, save the active image or image loop. See Saving Images and Loops on
page 133 for instructions.
2. Exit the Terason software using one of these methods:
• Click on the toolbar at the bottom of the window
• Click in the upper right corner of the window
• Select
File > Exit
3. Install the HASP Dongle Driver:
a. Insert the installation disk into the CD drive.
b. Open the HASP Dongle Driver folder.
Terason t3000 / Echo Ultrasound System User Guide 44

Chapter 2 - Installing Software Installing the Terason DICOM Utility
c. Double-click the hdd32.exe file. The Welcome box opens.
HASP Welcome
d. Click Next>. The installation program installs the driver and displays a status
message.
HASP Installing Message
When complete, the installation program displays the Finished message.
HASP Installation Finished Screen
e. Click Finish.
4. Install the DICOM Utility:
a. With the same installation disk in the CD drive, change to the Install Disk folder.
b. Double-click the Setup.exe file. The installation program prompts you to choose
where to install the utility.
Terason t3000 / Echo Ultrasound System User Guide 45
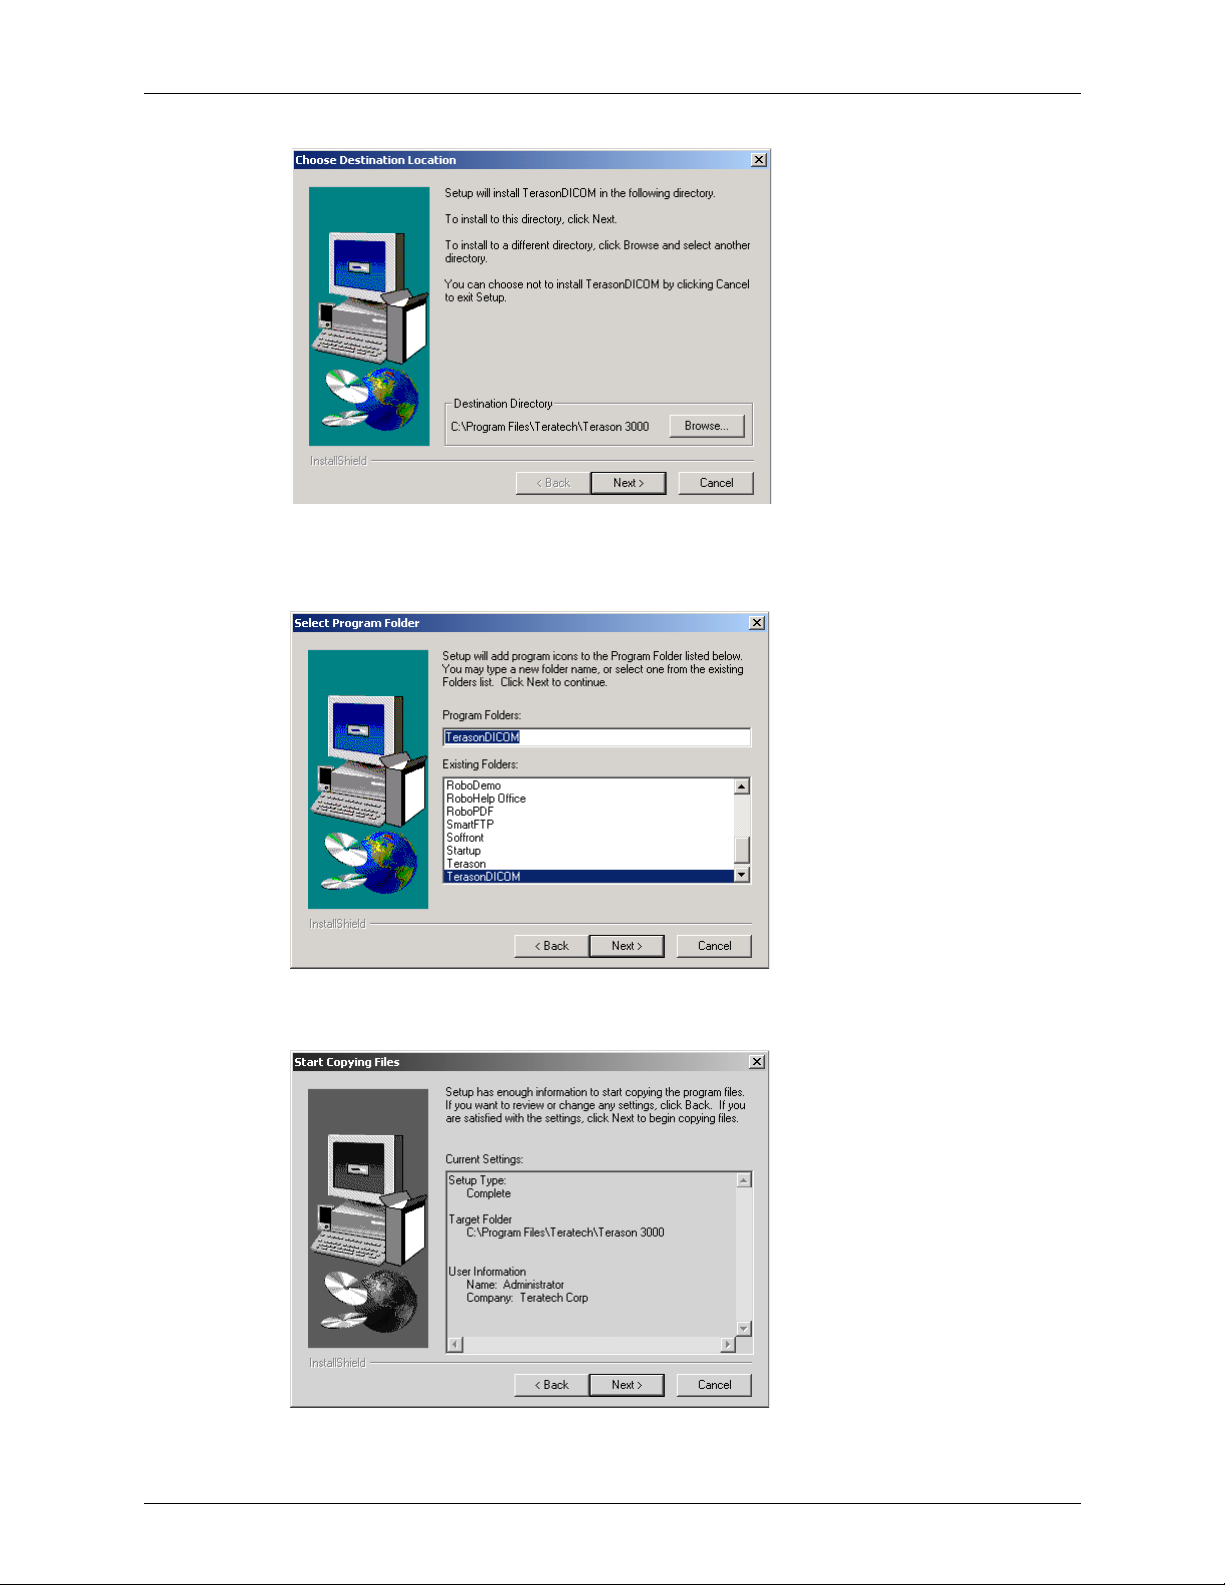
Chapter 2 - Installing Software Installing the Terason DICOM Utility
Choosing Directory for Installation
c. Click Next>. The installation program prompts you to select a program folder (for
using the Start button to access the application).
Selecting Program Folder (Accessed from the Start Button)
d. Click Next>. The installation program prompts you to confirm your choices.
Confirm Choices and Start Installation
Terason t3000 / Echo Ultrasound System User Guide 46
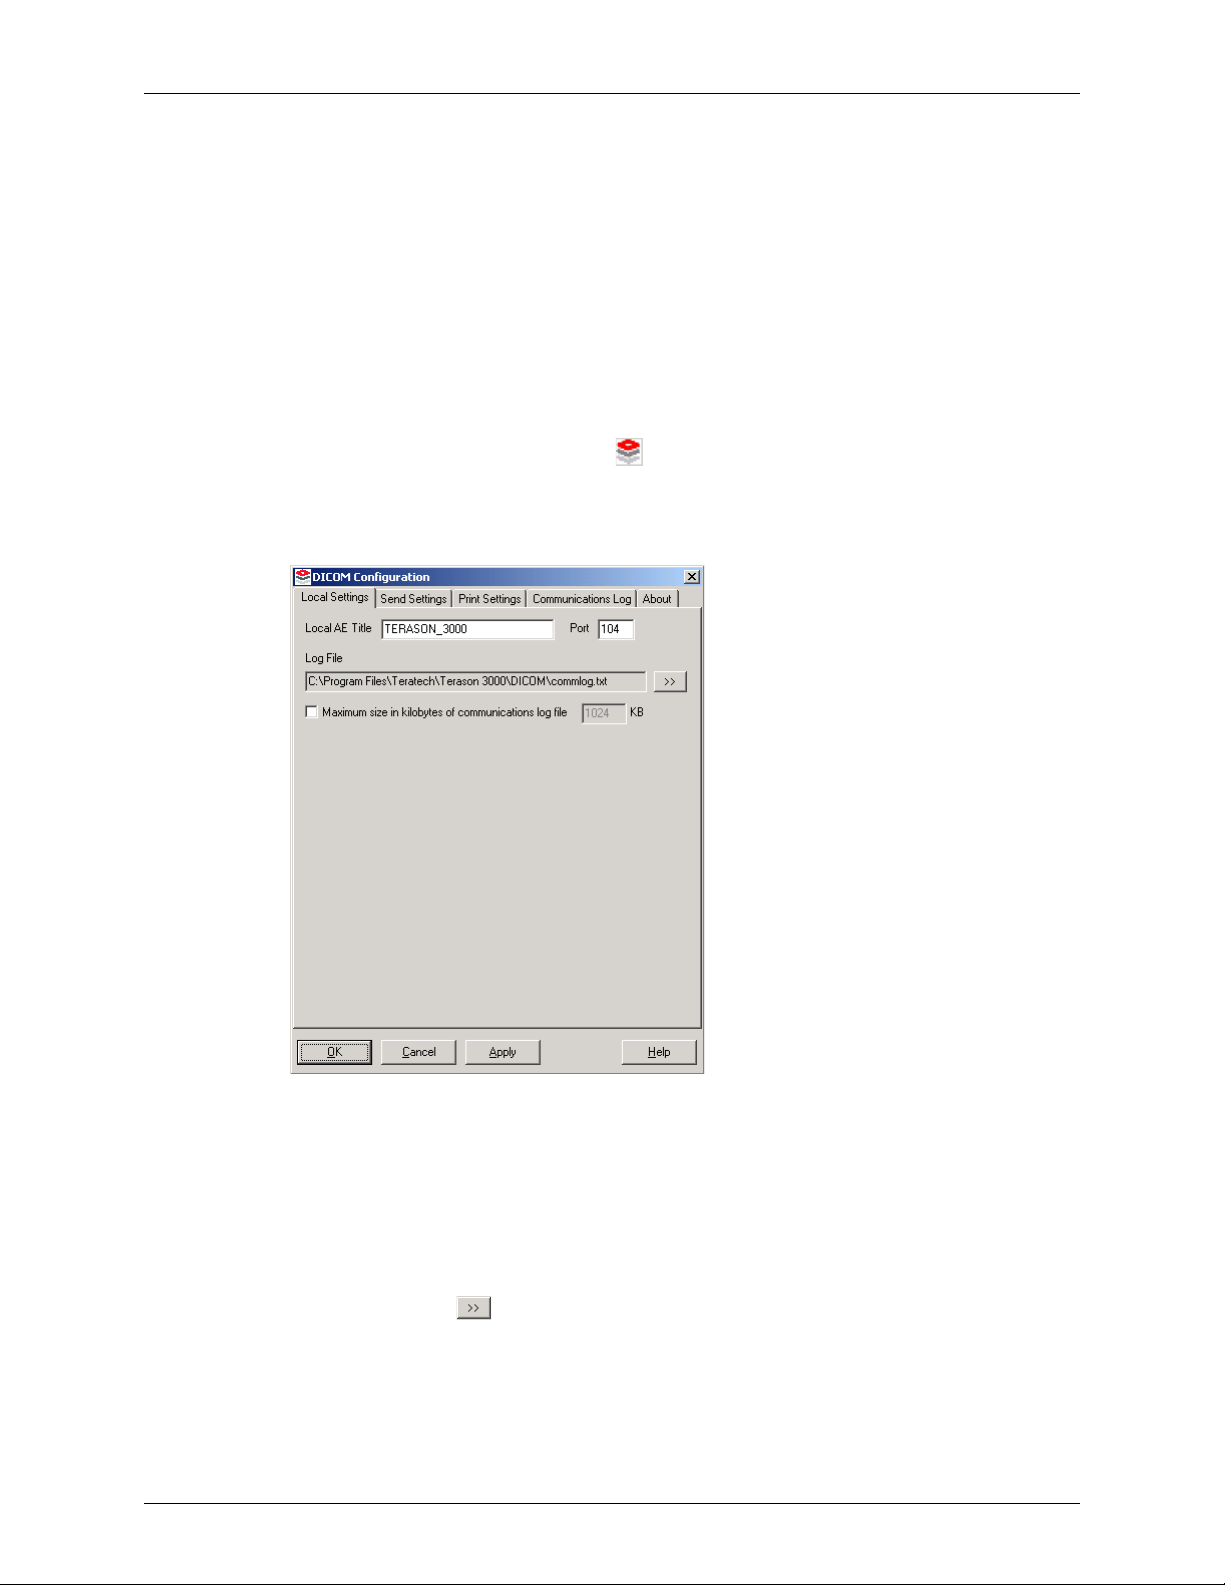
Chapter 2 - Installing Software Installing the Terason DICOM Utility
e. Click Next>. The installation program copies all required files, then exits.
5. Restart the computer.
When configuring the DICOM utility, you must enter network names, addresses, and other
network details. Contact your network system administrator to get the needed information.
Configuring the DICOM Utility
To configure the DICOM utility, complete these steps:
1. Start the configuration utility using one of these methods:
• Double-click the DICOM icon in the taskbar
• Select
Start > Programs > TerasonDICOM > Terason.
The system opens the DICOM Configuration Window.
DICOM Configuration Window / Local Settings Tab
2. Configure the Local Settings tab:
a. Verify that the Local AE Title and port number are correct for your DICOM server.
The default values are
TERASON_3000 and 104, respectively. Your server or network
configuration may require different values, especially if your facility has more than
one Terason Ultrasound System.
b. If necessary, select a different path and file name for the communication log by
clicking the button and using the Windows dialog boxes to select a different
location.
c. To limit the size of the communications log file, select the check box and enter a
value in the KB text box. When the maximum size is reached, the system overwrites
the oldest entries.
Terason t3000 / Echo Ultrasound System User Guide 47
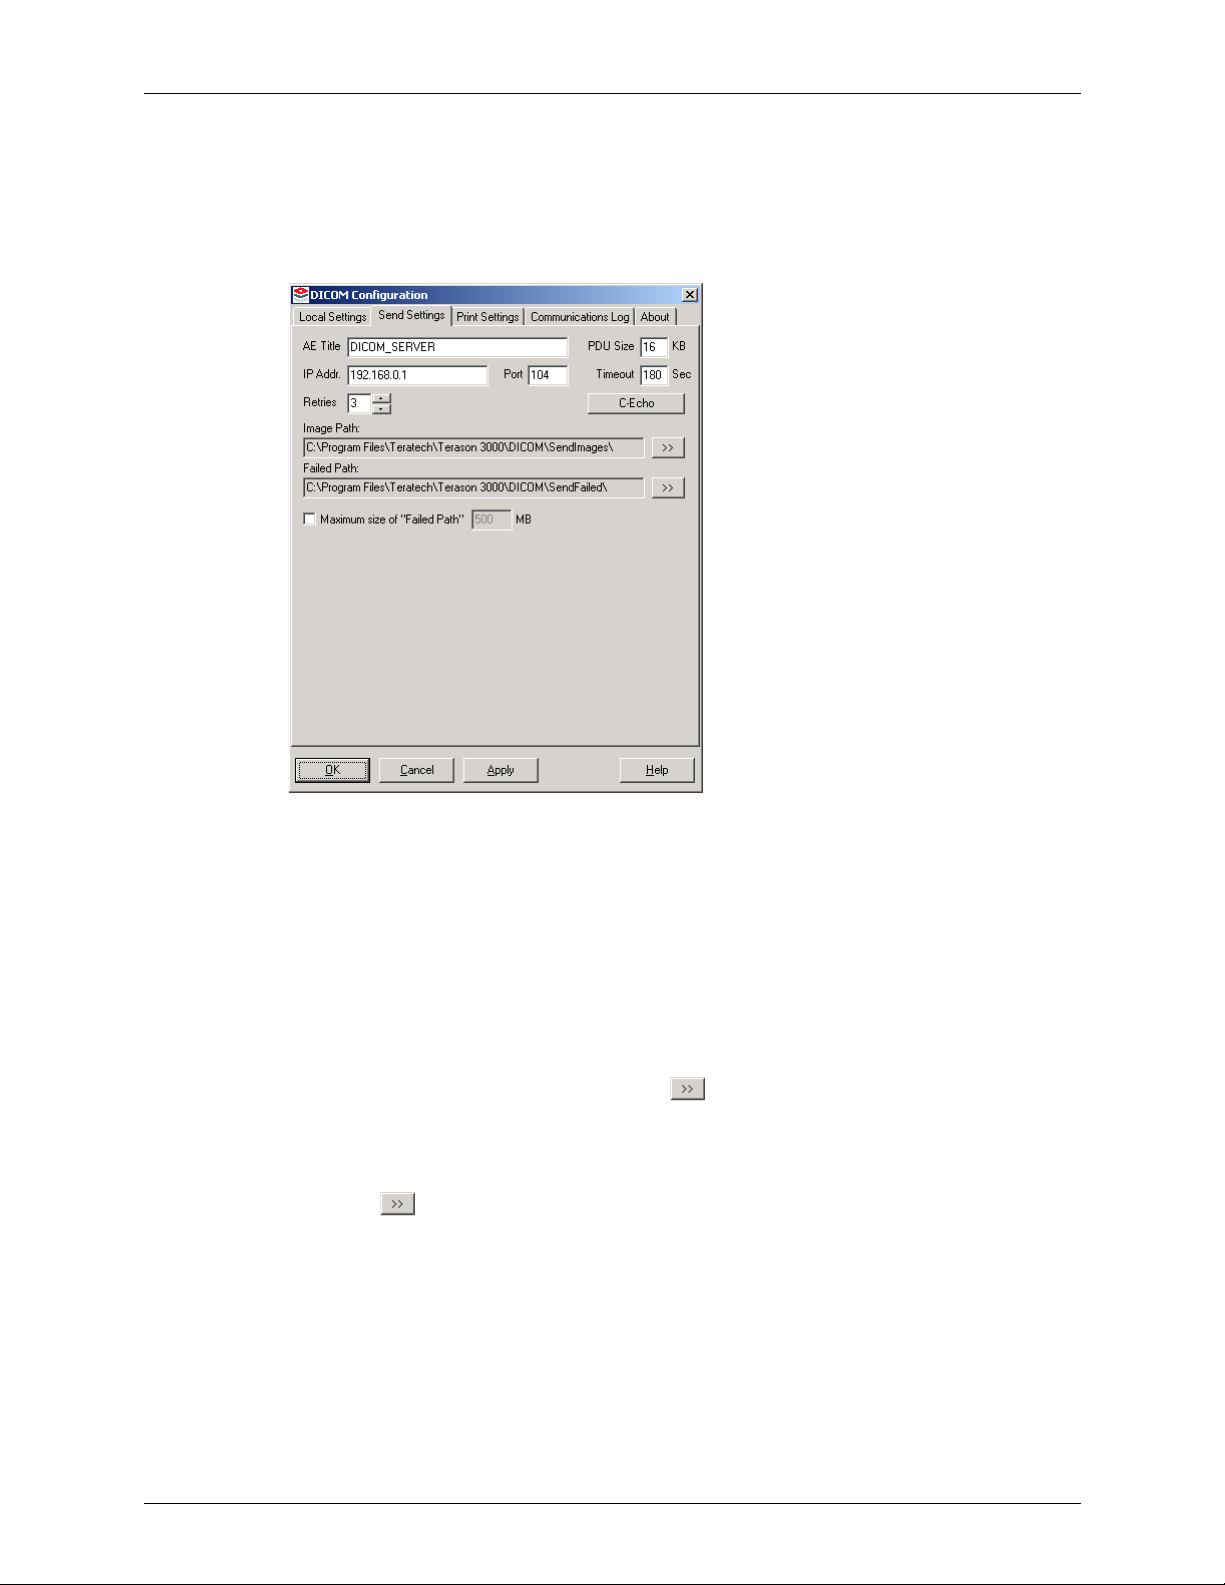
Chapter 2 - Installing Software Installing the Terason DICOM Utility
d. Click Apply.
3. Configure the Send Settings tab (settings apply to a server where DICOM files are
stored):
a. Click the Send Settings tab to bring it to the front.
DICOM Configuration Window / Send Settings Tab
b. Enter the name of your DICOM server in the AE Title field.
c. Enter the IP address or DNS node name of the DICOM server in the IP Addr. field.
d. Enter the DICOM server’s port number in the Port field.
e. If your DICOM server requires different values, edit the PDU size, Timeout, and
Number of Retries boxes as necessary.
f. Click the C-Echo button to test whether or not the server is active on the network.
g. If necessary, you can change the image path (where the computer temporarily
stores DICOM files) by clicking the button and browsing to a different
location.
h. If necessary you can change the failed path (where the DICOM files are moved if
they cannot be successfully sent after the indicated number of retries) by clicking
the button and browsing to a different location.
i. To limit the disk space consumed by DICOM files in the Failed Path, you can select
the check box and enter a MB value. If you do, the system overwrites oldest files
first when the maximum size is reached.
j. Click
Apply.
Terason t3000 / Echo Ultrasound System User Guide 48

Chapter 2 - Installing Software Installing the Terason DICOM Utility
4. Configure the Print Settings tab (settings apply to a printer that will print DICOM
files):
a. Click the Print Settings tab to bring it to the front.
DICOM Configuration Window / Print Settings Tab
b. Enter the name of your DICOM printer in the AE Title text box.
c. Enter the IP address or DNS node name of the DICOM printer in the IP Address
text box.
d. Enter the DICOM printer’s port number in the Port field.
e. If your DICOM printer requires different values, edit the PDU size, Timeout, and
Number of Retries boxes as necessary.
f. Click the C-Echo button to test whether or not the printer is active on the network.
g. If necessary, edit the number of copies to print (default value is 1).
h. If necessary, change the image path (where the computer temporarily stores
DICOM files) by clicking the button and browsing to a different location.
i. If necessary, change the failed path (where DICOM files are moved if they cannot
be successfully sent after the number of retries) by clicking the button and
browsing to a different location.
j. To limit the disk space consumed by DICOM files in the Failed Path, select the
check box and enter a MB value. If you do, the system overwrites oldest files first
when the maximum size is reached.
k. Change the default values for the Film Destination, Medium Type, Film
Orientation, File Size ID, Border Density, Empty Density, Magnification Type,
Configuration Information, and Print Priority to meet your requirements or if
needed by the DICOM printer.
Terason t3000 / Echo Ultrasound System User Guide 49

Chapter 2 - Installing Software Licensing the Terason Software
l. Do not change the “How to handle multi-frame images” setting (the Terason
software does not print multi-frame images).
m.Click
Apply.
5. Click OK.
You need not configure the Communications log. You can click the Communications Log
tab to review the contents of the log file:
DICOM Configuration Window / Communications Log Tab
Each line in log file contains this information about a file sent to a DICOM server or
printer:
•Date
•Time
• File name
• Destination
•Status
If you see Failed images in the Status column, you should use the Terason software to
resend those files to the server or printer, as appropriate. See Sending Files to a DICOM
Server on page 228 for instructions.
Licensing the Terason Software
When installed, the Terason software can be used for a 30-day evaluation period without
entering a license number. You can obtain the license number by phone or email. While
waiting for the number, you can use the Terason software, however, you must enter the
license number before the evaluation period expires.
Terason t3000 / Echo Ultrasound System User Guide 50

Chapter 2 - Installing Software Licensing the Terason Software
This section explains the following operations:
• Entering the License or Evaluation Unlock Code on page 51
• Extending the Evaluation Period on page 52
• Transferring the License on page 52
• Upgrading the License on page 54
Entering the License or Evaluation Unlock Code
To license the Terason software, complete these steps:
1. Start up the Terason software using either of these methods:
• Double-click the shortcut icon on your computer desktop
• Click the
Start button, and select Programs > Terason > Teras on.
The Ultrasound License dialog box opens.
Ultrasound License Dialog Box
2. To register by phone, call Terason at 1-866-TERASON (1-866-837-2766) and give
the Terason Support Representative the Serial Number shown in the dialog box.
3. To register by email, send an email message to techsupport@Terason.com and
provide these details:
• Serial number (see the Terason Ultrasound License Registration dialog box)
• Computer serial number (on a label on the bottom of the laptop)
• Company name
You will receive, by phone or return email, a 10-digit unlock code.
4. To use the software without entering the code, click
5. To enter the code, type the unlock code into the text field and click
Continue Ultrasound.
Unlock. The
Terason software updates the status to Licensed.
6. Click
Terason t3000 / Echo Ultrasound System User Guide 51
Continue Ultrasound. The Terason software starts up.

Chapter 2 - Installing Software Licensing the Terason Software
Extending the Evaluation Period
If your evaluation period expires and Terason has agreed to extend the evaluation period,
you must enter a new unlock code. To do so, complete these steps:
1. Contact Terason Technical Support at 1-866-837-2766. During this procedure, you
must give a serial number to Technical Support and receive a new unlock code.
2. Start up the Terason software using either of these methods:
• Double-click the shortcut icon on your computer desktop
• Click the
Start button, highlight Programs > Te rason > Ter aso n.
The Ultrasound License dialog opens.
Ultrasound License Dialog Box
3. Click in the option box for Extend Evaluation.
4. Read the new Serial Number to Terason Technical Support. Technical Support will
give you a new 10-digit unlock code.
5. Type the unlock code into the text field and click Unlock. The Terason software
updates the status to Evaluation.
6. Click Continue Ultrasound. The Terason software starts up.
Transferring the License
You can transfer the Terason software license from one computer to a second computer. In
this section, “first” refers to the computer where the software was initially installed and
“second” refers to the computer to which you will transfer the license.
Before you start this procedure, you must determine the serial number of the destination
PC. This number is not the serial number on the PC, but an application serial number
assigned by Terason.
To transfer the license, complete these steps:
1. On the second computer, install the Terason software as described in Installing
Terason Software on page 37.
Terason t3000 / Echo Ultrasound System User Guide 52

Chapter 2 - Installing Software Licensing the Terason Software
2. Double-click the Terason shortcut on the second computer’s desktop. The
Ultrasound License Registration window opens.
Ultrasound License Registration Window
3. Write down the Serial Number. Do not close the window.
4. On the first computer, start the Terason software.
5. Select
Help > License.
The Ultrasound License Registration window opens.
License Registration Window
6. Click the Transfer radio button.
7. Enter the number you wrote down in step 3 in the Transfer PC Serial Number field.
The Transfer button remains gray until you enter the correct number of digits in the
field.
8. Click
Terason t3000 / Echo Ultrasound System User Guide 53
Transfer. The Terason software displays this warning message:

Chapter 2 - Installing Software Licensing the Terason Software
Transferring the license to another computer will remove the license from this computer.
Ultrasound will no longer be able to run on this computer until the license is transferred back or
another license is purchased. Do you want to continue?
9. Click Yes. The Terason software displays this instruction:
Enter the unlock code on the transferred computer.
10. Click OK. The Terason software displays the unlock code you must enter on the
second computer.
Unlock Code to Transfer to a Second Computer
11. Write down the Unlock Code.
12. Click
Exit. The Terason software quits.
If you start the Terason software on the first computer again, you will see the License
dialog shown here. Note that the unlock code shown above will not enable the
software on this computer. You must contact Terason for a different unlock code.
13. On the second computer, enter the unlock code you wrote down in Step 11. The
Unlock button remains gray until you type the correct number of characters.
14. Click
Unlock.
You can no longer use the Terason software on the first computer. If you try to start it, you
will see the License Registration dialog box showing the License Status as transferred, and
you cannot run the software.
See Uninstalling Terason Software on page 41 for instructions on removing the Terason
software from the first computer.
Upgrading the License
You can purchase additional options for the Terason Ultrasound System. For example, if
you originally bought the ST (standard) version of the system, you can later upgrade to the
AD (advanced) version. To upgrade the software, you must contact Terason Technical
Support to obtain a new unlock code.
Terason t3000 / Echo Ultrasound System User Guide 54
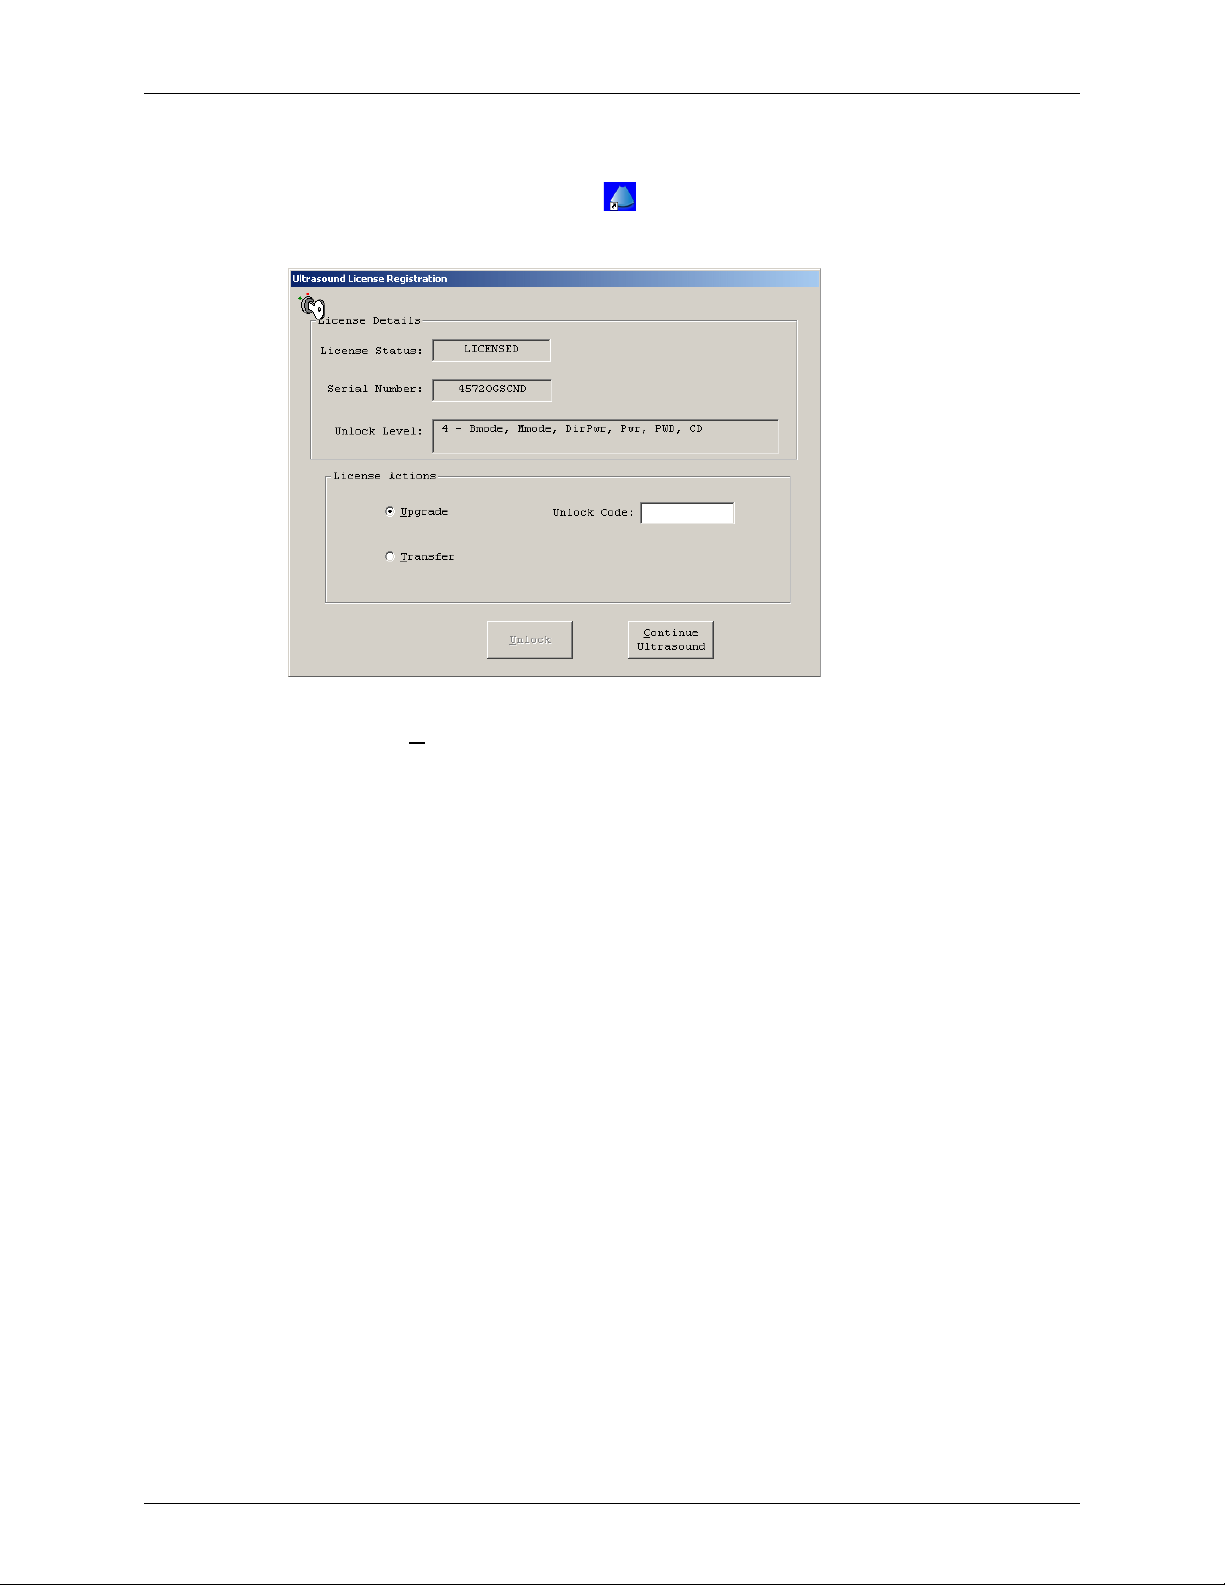
Chapter 2 - Installing Software Licensing the Terason Software
To upgrade the Terason Ultrasound System, complete these steps:
1. Double-click the short-cut icon on your computer desktop to start the application.
2. Select
Evaluation Period Dialog Box
Help > License. The software shows the license dialog box.
3. Click the Upgrade radio button.
4. Contact Terason Technical Support and read the serial number to the Support
Representative. The Representative will give you an unlock level number and an 10digit unlock code.
5. Enter the Unlock Code.
6. Click
Unlock. The Terason software upgrades the features of your Terason Ultrasound
System.
7. Click
Continue Ultrasound.
Terason t3000 / Echo Ultrasound System User Guide 55

3 Setting Up Patient Information
Although you can scan a patient without entering any information about that patient,
Terason recommends that you define the patient within the system. The patient data can be
displayed on the scan to avoid mix-ups and is used to organize saved images.
When you save an image, the Terason software puts it in a folder for the specific patient,
along with a patient information file. If you do not enter patient details, the image is stored
in a folder with other images and is not associated with a specific patient.
To work with patient information, you should understand:
• Using the Patient Info Window, see page 57
• Adding a New Patient, see page 57
• Preparing Patient Info for an Exam, see page 60
• Updating Patient Information, see page 61
• Deleting a Patient Folder, see page 61
To view the Patient Info window, click the Patient Info tab.
Patient Info Window
These examples show loaded information. Double-click the Patient Info file in any
patient’s folder to load existing data.
Terason t3000 / Echo Ultrasound System User Guide 56

Chapter 3 - Setting Up Patient Information Using the Patient Info Window
Patient information remains loaded until one of these events occurs:
• You load a different patient’s information
• You open an image or loop in the Image Display window for a different patient
• You click the New Patient button or select
File > New Patient
Using the Patient Info Window
When entering text in this window, you can use these Edit menu items:
Edit Menu Items for the Patient Info Window
Menu Name What it Does
Undo Undoes the most recent cut, text typing, or deletion
Cut Removes the selected text from the field and stores it in a
system clipboard. Clipboard text can be pasted into any field in
this window, or as text into another document
Copy Copies the selected text without removing it and stores it in a
system clipboard. Clipboard text can be pasted into any field in
this window, or as text into another document
Paste At the location of the text cursor, inserts the last text cut or
copied
Delete Removes the highlighted text
The buttons at the bottom of the window provide these functions:
Description of Buttons in the Patient Info Window
Button What It Does
Save Saves new or modified patient information
New Patient Clears the Patient Info window so you can add a new patient
Cancel Undoes any edits or entries you made
Help Provides access to the online Terason Help system
You can also use the File menu to access the
You can print the contents of the Patient Info window by clicking , or selecting
Print.
Save Patient and New Patient functions.
File >
If an exam of the patient was saved to a DICOM server that the Terason ultrasound system
has access to, you can use DICOM Worklist to automatically fill in the Patient Info
window fields. See Using DICOM Worklist on page 228.
Adding a New Patient
If you need to start the ultrasound exam immediately, the Terason software lets you skip
entering patient information. However, if you save the image it will not be associated with
this patient, and no patient information will be saved with or displayed on the scan. The
Terason t3000 / Echo Ultrasound System User Guide 57

Chapter 3 - Setting Up Patient Information Adding a New Patient
system saves unassociated scans in the Terason Explorer Image directory. You can enter
patient information after starting such an exam (by clicking the Patient Info tab), and
saved images will then be associated with the patient info file. You can also enter the
patient info later, after opening the saved image. When you save the image again, a copy is
associated with the patient info file. This only works with .ult-format images.
Caution:Do not save scans of two different patients without patient info on the
same day. That makes scans for both patients in that day’s directory, with
no indication of which scan is of which patient.
When you add a new patient, the Terason software creates a folder in the Patient folder
with the patient’s name. In that folder, the Terason software stores the Patient Info file and
all saved scans for that patient.
Patient Info File in the Terason Explorer Window
The folder in the Patient list for John Adams contains the Patient Info file and two dated
folders, each containing one or more scans that were saved on the indicated date. Starting
an exam after creating or opening a patient info file creates a new date folder and a report
file. The report file and any saved images are saved in the date folder.
The Terason software uses the Image folder to store all images that were saved without
entering patient information. Each folder in the Image folder contains all images that were
saved without patient information on the indicated date.
When you enter a patient name, the total number of characters of the first, last, and middle
name is limited to 64 characters. You can type up to 64 alphanumeric or special characters
in any one of these fields (not all special characters are supported). However, if the total of
the three fields exceeds 64 characters, the Terason software displays an error message
when you try to save the patient information.
To add a new patient, complete these steps:
1. Click the Patient Info tab.
2. Click
Terason t3000 / Echo Ultrasound System User Guide 58
New Patient.

Chapter 3 - Setting Up Patient Information Adding a New Patient
Clicking the Save button or clicking the Image Display tab saves entered information
and opens the scanning window.
Caution:The fields are not case-sensitive. Do not enter data that relies on case-
sensitive characters.
3. Enter the last name.
4. Enter the first name.
5. Enter the middle name.
6. Enter a patient ID (sometimes called a Medical Record Number).
You can enter up to 64 alphanumeric or special characters. You cannot use any of the
following characters in the Patient ID field:
* \ |: “< > /?
7. If appropriate, enter a study ID number using up to 16 alphanumeric characters.
8. If appropriate, enter the accession number from the Hospital Information System.
You can use up to 16 alphanumeric characters. You cannot use the ‘
\’ (backslash)
character.
9. Enter the patient’s date of birth in this format: MM/DD/YYYY.
a. Click the month field in the DOB display, and type the month as one or two
numerals.
01 displays as 1, 02 as displays as 2, etc.
b. Type t h e day as one or two numerals.
c. Typ e th e year as two or four numerals.
02 displays as 2002, 84 displays as 1984, etc.
10. Click in the check box for the patient’s gender:
M for male or F for female.
11. Enter the patient’s height and weight. To change the units of measurements used, see
Setting the Units for Patient Measurements on page 249.
12. Enter any comments. You can type directly in the field, or click Extended Comment
to type a longer comment.
13. In the Location: field, enter where the exam is taking place. You can enter up to 46
alphanumeric characters.
14. In the Clinician: field, enter the name of the clinician performing the exam. You can
enter up to 46 alphanumeric characters.
15. Click the Save button or click the Image Display tab to save the entered information
and open the scanning window.
The patient information is saved in a Patient Info file and displays in the Terason Explorer
window in a folder with that patient’s name. The Image Display window is ready for you
to conduct the exam.
Terason t3000 / Echo Ultrasound System User Guide 59
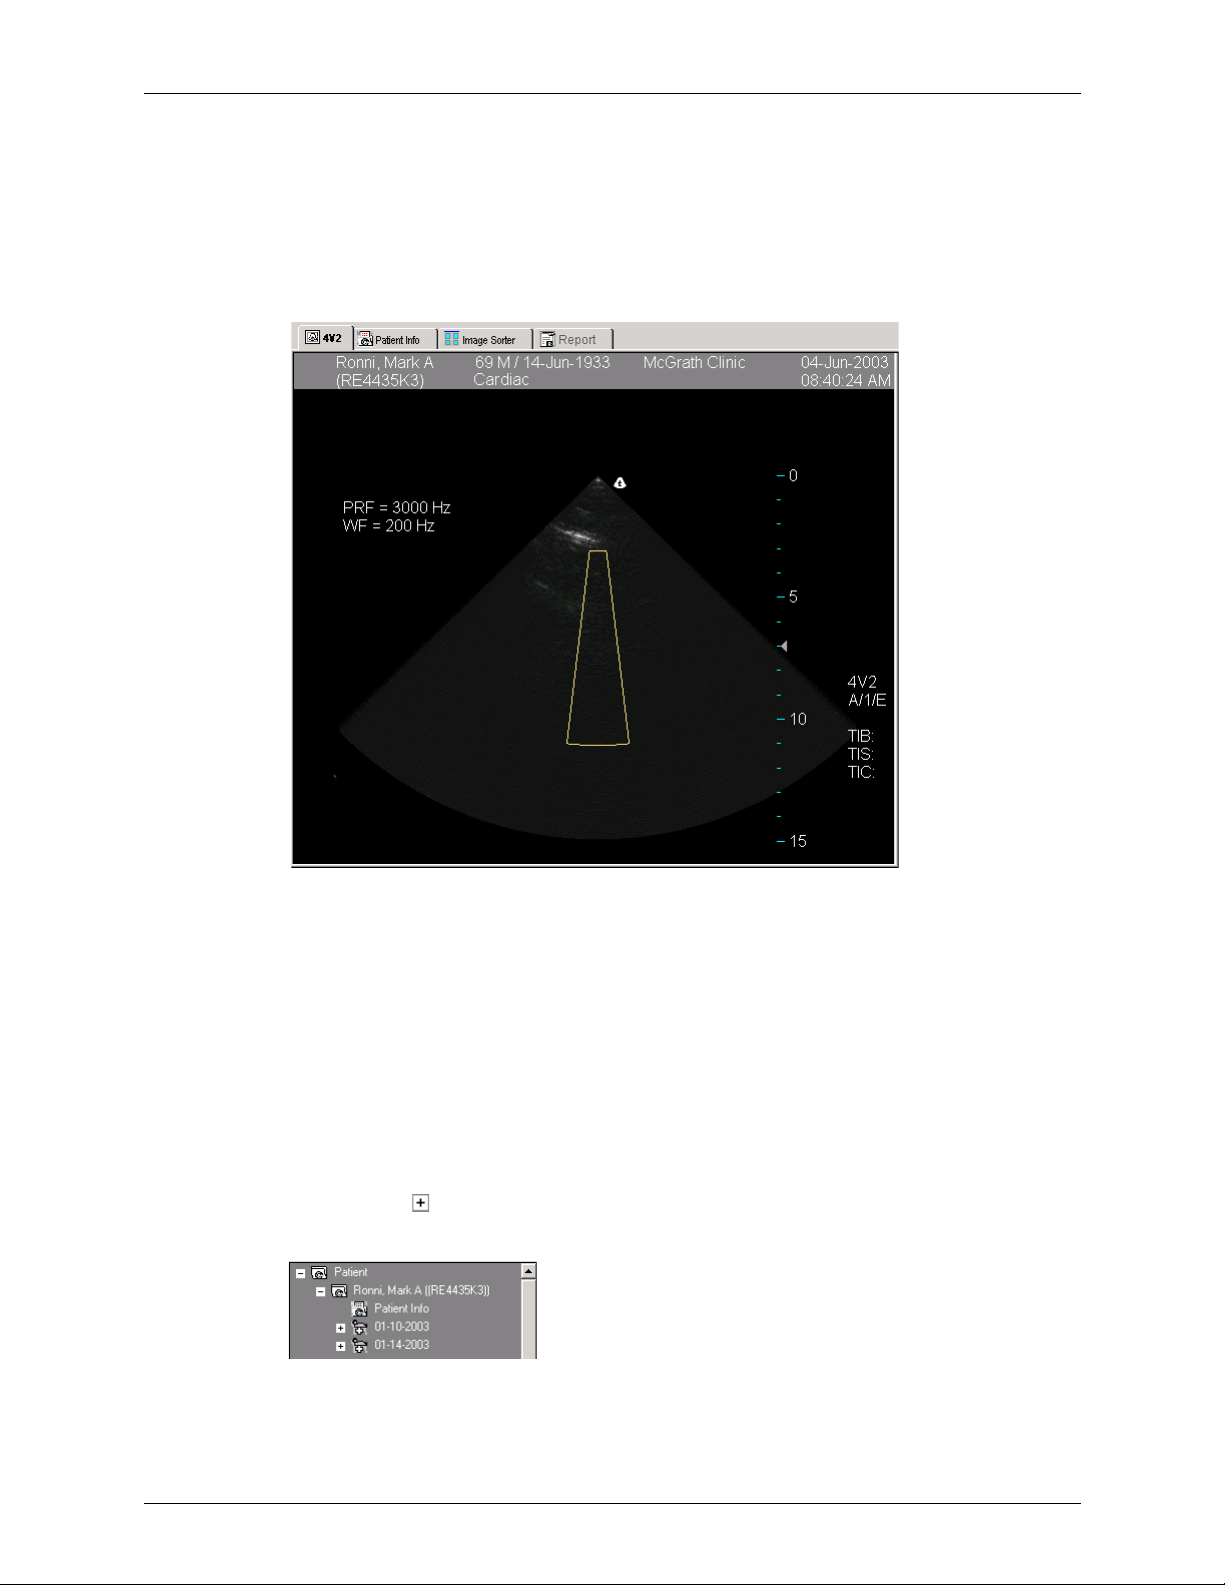
Chapter 3 - Setting Up Patient Information Preparing Patient Info for an Exam
The Terason software displays the patient information in the Image Display window, with
the last-used scanning mode still selected. The patient information is shown across the top
of the window and is saved with scanned images you create for the patient. The calculated
age of the patient shows in front of the sex (
M or F) indicator.
If you do not see the patient information, select
Information.
View > Image Display Properties > Patient
Patient Information at the Top of the Image Display Window
This scan shows an empty scan in Power Doppler mode. You are now ready to conduct the
ultrasound exam.
Preparing Patient Info for an Exam
Before you perform an ultrasound exam, you should load the patient information, and
enter details about the exam.
To prepare the Patient Info window for an exam, complete these steps:
1. Find the patient in the Terason Explorer window.
2. Click the in front of the patient’s name. The folder expands and you can see the
Patient Info file, and any image folders for that patient.
Patient Info File
Terason t3000 / Echo Ultrasound System User Guide 60

Chapter 3 - Setting Up Patient Information Updating Patient Information
3. Double-click the Patient Info file. The Terason software loads the saved patient
information into the Patient Info window and at the top of the Image Display window.
Caution:The fields in this window are not case-sensitive. Do not enter data that
relies on case-sensitive characters.
4. If necessary, click the Patient Info tab to make it active.
5. Optional: In the Location: field, enter where the exam is taking place. You can enter
up to 46 alphanumeric characters. If you previously entered a location for this patient,
you can click the down-arrow and choose an existing location (by default, the site for
the most recent exam displays in the field).
6. Optional: In the Clinician: field, enter the name of the clinician performing the exam.
You can enter up to 46 alphanumeric characters. If you previously entered a clinician
for this patient, you can click the down-arrow and choose an existing clinician (by
default, the clinician for the most recent exam displays in the field).
7. Enter any needed comments.
8. Click
You are now ready to scan the patient.
Save.
Updating Patient Information
To update a patient’s information, complete these steps:
1. Click in front of the patient’s name in the Patient folder in the Terason Explorer
window.
2. Double-click the Patient Info file.
3. If necessary, click the Patient Info tab to make it active.
4. Enter the new information in the appropriate fields.
5. To edit the comment, click
6. Click
Save.
Extended Comment and make any needed changes.
Deleting a Patient Folder
You cannot directly delete a Patient Info file, however, you can delete a patient’s folder
and the Terason software will delete all Patient Info files within that folder. If the folders
contain any saved images, those files are also deleted.
To archive the patient information file and its associated images before you delete them,
see Backing Up Files on a CD on page 142.
Note: You cannot recover files deleted using the Terason software as you can when using
Windows Explorer. Make sure you want to delete all the information in the folder,
including saved scans, before you perform this procedure.
Terason t3000 / Echo Ultrasound System User Guide 61

Chapter 3 - Setting Up Patient Information Deleting a Patient Folder
To delete a patient folder, complete these steps:
1. In the Terason Explorer window, locate the patient’s name.
2. Right-click the patient’s folder and select
Delete.
The Terason software prompts you to verify that you really want to delete the Patient
Info file.
3. Click
Yes.
The Terason software prompts you to verify that you really want to delete the folder
and all its contents.
4. Click
Yes.
Terason t3000 / Echo Ultrasound System User Guide 62

4 Acquiring Images
To support image acquisition, you must understand:
• Powering the Laptop On and Off on page 63
• Starting and Exiting the Software on page 63
• Connecting a Transducer on page 64
• Switching Transducers on page 65
• Conducting an Ultrasound Exam on page 65
• Freezing Images on page 70
• Working with Image Loops on page 70
• Determining Image Status on page 72
• Adjusting the Displayed Image on page 73
• Adding Guides to the Image Display on page 77
• Changing the Text Size on page 78
• Using Split Screen Mode on page 79
• Working with Annotations on page 81
To adjust the acquired scan data, see Chapter 5 - Working With Scan Modes.
Powering the Laptop On and Off
To power the laptop on, press the power button at the top right of the keyboard. This
does not power up the console; you must start the ultrasound software and extend the
console out from the system to power-on the console.
To power off the laptop, either press the power button or select
Windows Start menu. Using either method also shuts down the console.
Starting and Exiting the Software
You can use either of these methods to start up the Terason software:
• Double-click the Terason shortcut , on your computer desktop
• Select Start > Programs > Te rason > Terason
Note: When running a laptop on battery power, always check the amount of power left.
The system beeps when the battery is getting very low. For information on
checking the battery power status for your computer, refer to the computer manual
Shut Down from the
Terason t3000 / Echo Ultrasound System User Guide 63
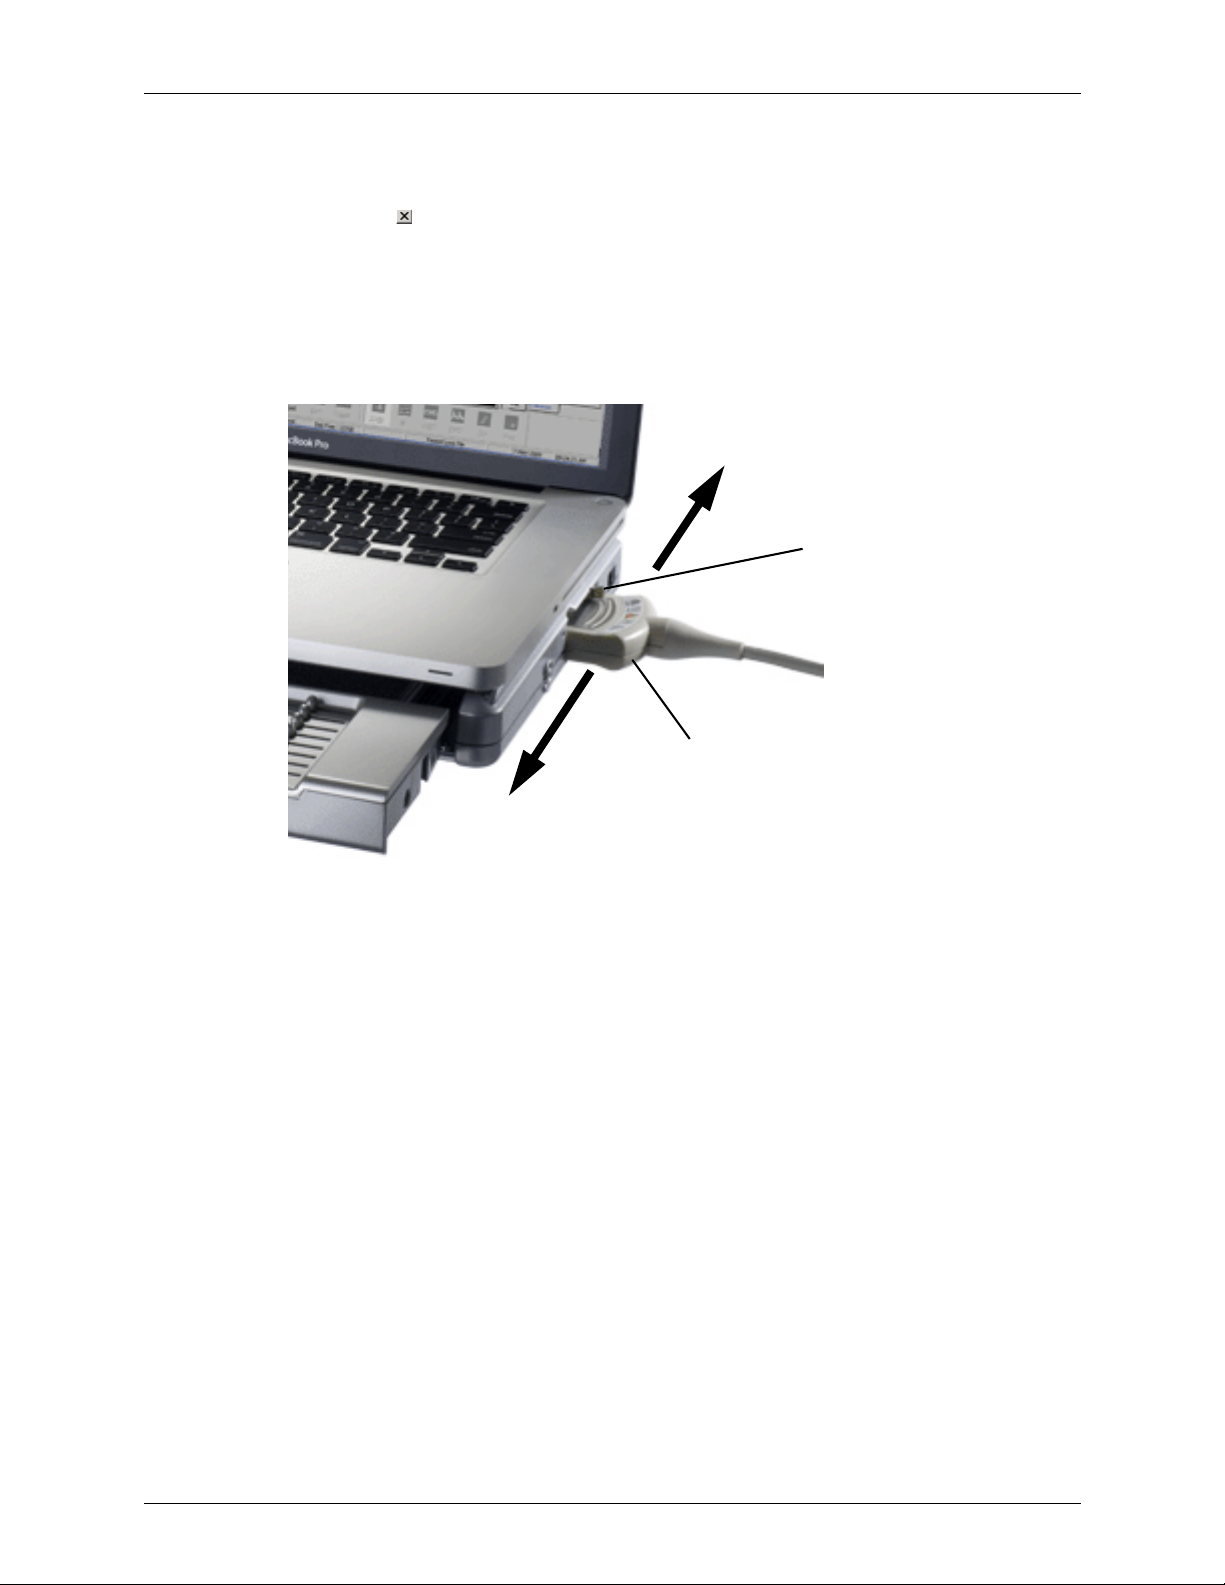
Chapter 4 - Acquiring Images Connecting a Transducer
Transducer connector
Locking lever
Locked
Unlocked
Make sure you save or print any images or loops before exiting the software. You can use
either of these methods to exit the Terason software:
• Click the icon at the top right of the menu bar
• Select
File > Exit from the menu bar
Connecting a Transducer
Supported transducers connect to the system through a special port on the right side of the
system.
To connect a transducer:
1. Make sure the locking lever is in the unlocked position.
2. Insert the transducer connector into the port as far as it will go.
3. Move the locking lever to the locked position.
If the Terason software is running, it detects the transducer and displays its name on
the imaging window. If the software is started after the transducer is connected, the
Terason software will detect and display the transducer name as soon as it starts.
To disconnect a transducer:
1. Move the locking lever to the unlocked position.
2. Pull the transducer connector straight out from the transducer port.
Terason t3000 / Echo Ultrasound System User Guide 64

Chapter 4 - Acquiring Images Switching Transducers
Switching Transducers
The Terason ultrasound system lets you change transducers without exiting the program.
Complete these steps to switch between transducers:
1. If necessary, save the active image or image loop. See Saving Images and Loops on
page 133 for instructions.
2. Rotate the locking lever to the unlocked position and carefully unplug the transducer.
3. Plug the new transducer in and move the locking lever to the locked position.
Conducting an Ultrasound Exam
In general, complete these steps to conduct an exam:
1. Load or create patient information.
2. Start live imaging.
3. Select an exam type.
(See Work i ng With E xams on page 212.)
4. Select a scan mode and adjust image controls.
(See Scan Modes Overview on page 89)
5. Freeze the image.
6. Add annotations or measurements.
(See Working With Measurements on page 150)
7. Save or print the image.
For more detailed instructions, complete the steps for the type of mode you use for the
exam. See the following sections:
• Conducting a 2D, M-Mode, or Color Doppler Exam on page 66
• Conducting a PWD Exam on page 68
• Conducting a CWD Exam on page 68
• Conducting an Exam in Triplex Mode on page 69
Using the Console
For information on using the console to control exam parameters, see The Terason
Console on page 34.
Terason t3000 / Echo Ultrasound System User Guide 65
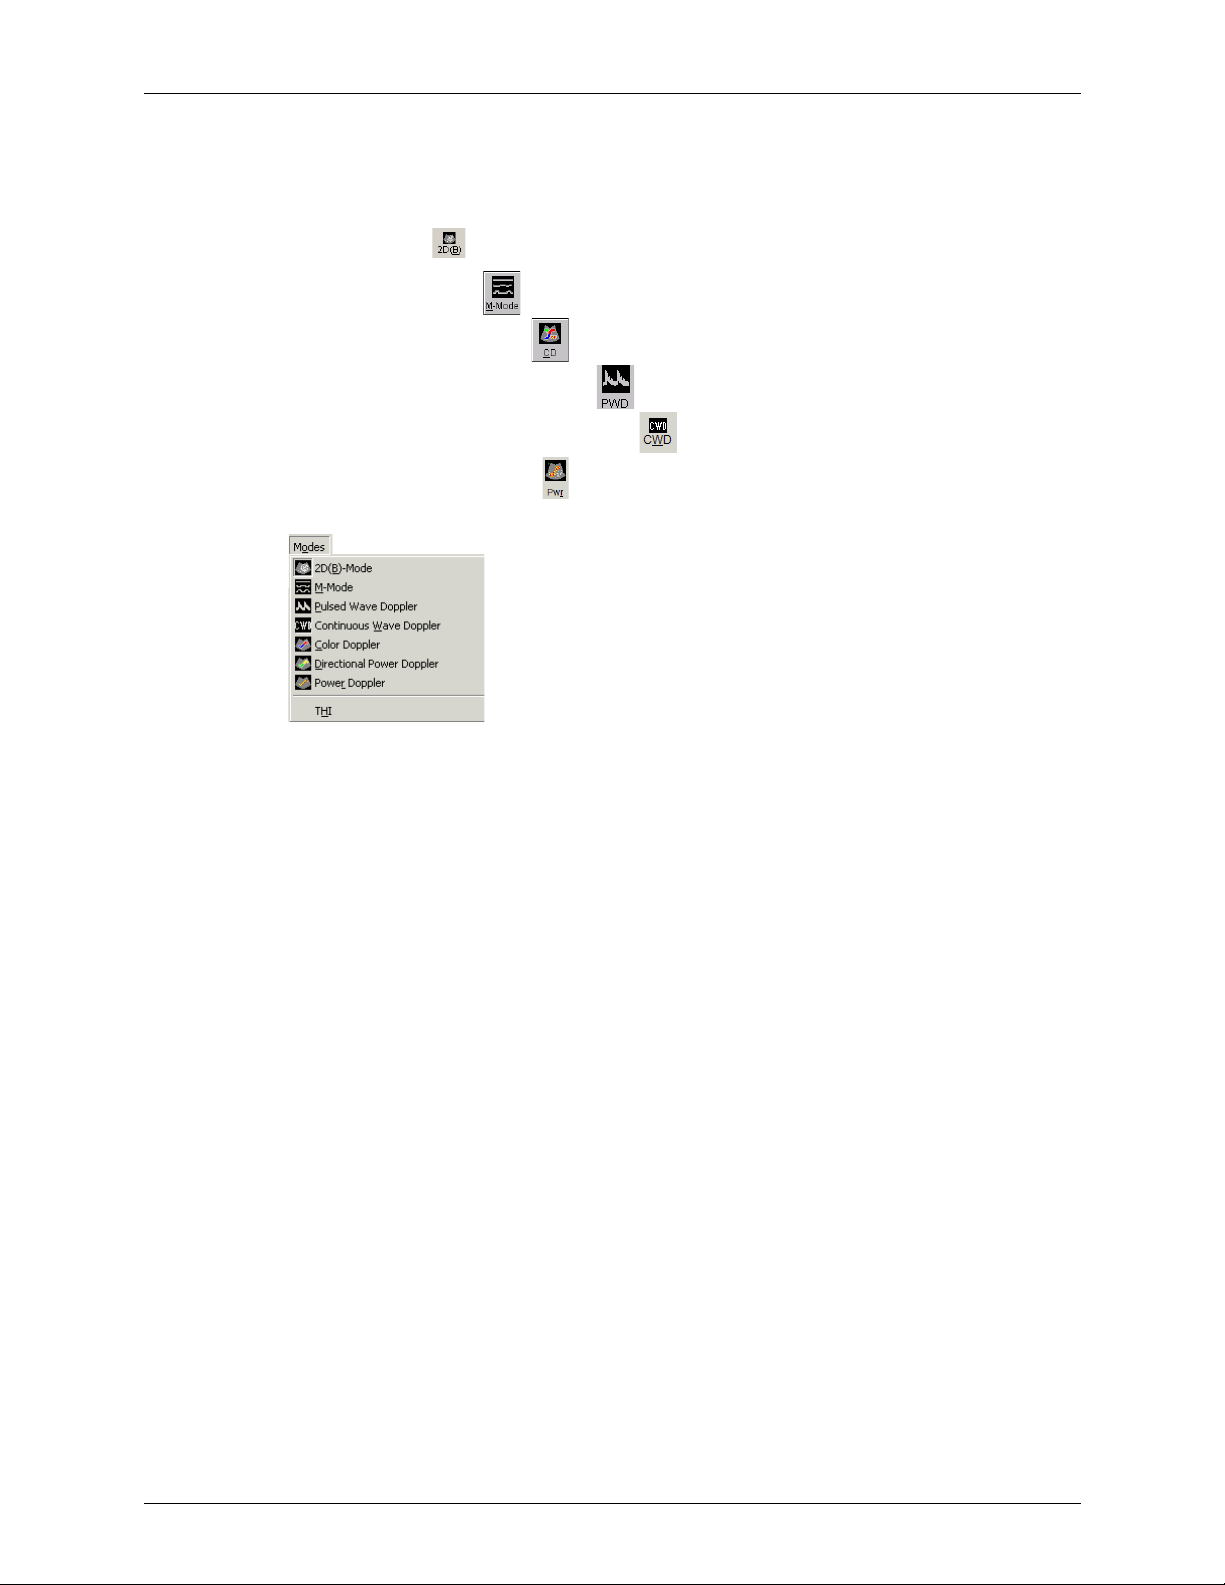
Chapter 4 - Acquiring Images Conducting an Ultrasound Exam
Choosing a Scan Mode
To choose a scan mode, click the appropriate button on the toolbar:
• For 2D, click
• For M-Mode, click
• For Color Doppler, click
• For Pulsed-Wave Doppler, click
• For Continuous-Wave Doppler, click
• For Power Doppler, Click
You can also select a scan mode from the Modes menu.
Scan Modes in the Modes Menu
You can also use shortcut keys to start scanning:
• B for 2D
• M for M-Mode
• C for Color Doppler
• P for Pulsed-Wave Doppler
• W for Continuous-Wave Doppler
• D for Directional Power Doppler
• R for Power Doppler
Conducting a 2D, M-Mode, or Color Doppler Exam
If you are using the 4V2A transducer in 2D mode, see Special Controls Used With the
4V2A Transducer.
To conduct an ultrasound exam in 2D, Color Doppler, Power Doppler, Directional Power
Doppler, or M-mode, complete these steps:
1. If you use more than one Terason transducer, click the Image Display tab for the
needed transducer.
2. Load or create the patient information. See Chapter 3, Setting Up Patient Information,
on page 56 for instructions.
3. Click the icon for the needed scan mode:
Terason t3000 / Echo Ultrasound System User Guide 66
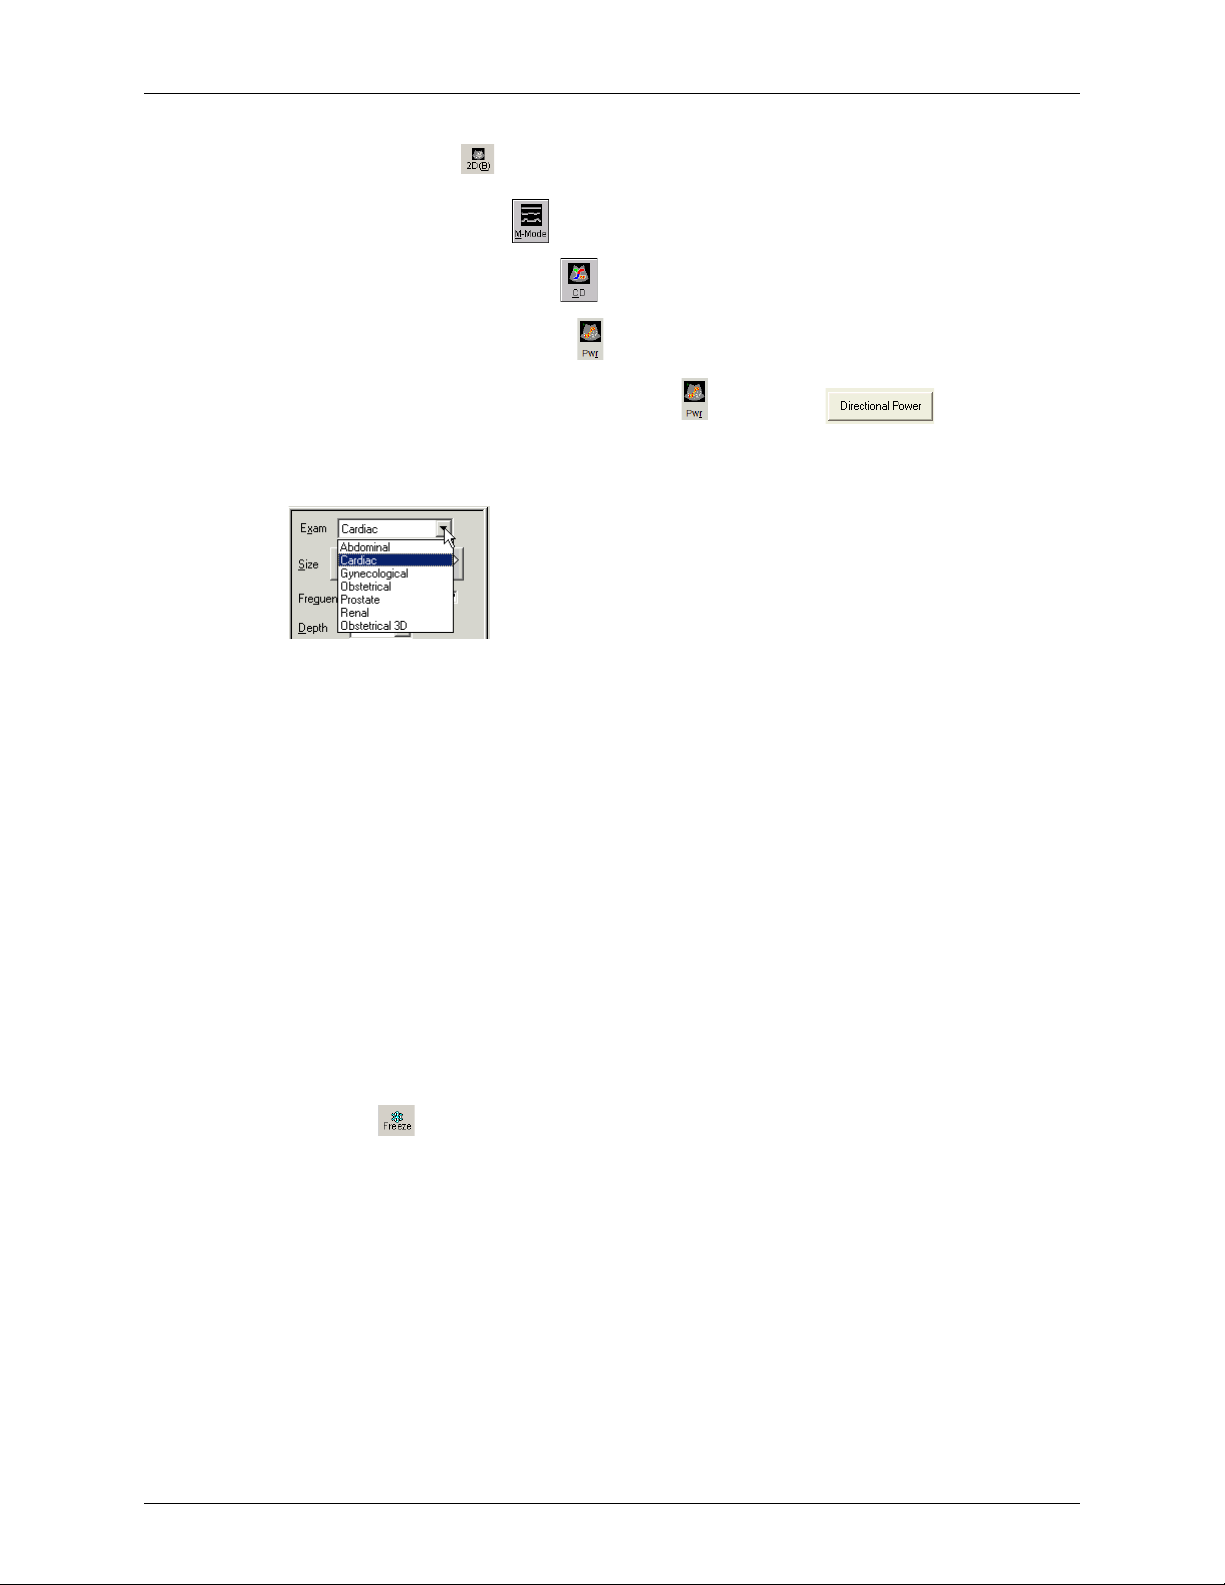
Chapter 4 - Acquiring Images Conducting an Ultrasound Exam
• For 2D, click
• For M-Mode, click
• For Color Doppler, click
• For Power Doppler, Click
• For Directional Power Doppler, Click , then click on the Pwr
Image Control window.
4. In the 2D Image Control tab, select an exam type from the Exam menu.
Choosing an Exam Type
The Terason software loads preset image control settings that are optimized for the
selected exam and the connected transducer. See Chapter 8, Working With Exams, on
page 212 for information about exam types and defining your own exams.
You can now use the transducer to conduct the ultrasound exam. Refer to the
appropriate clinical procedure for the exam you are conducting.
5. If necessary, adjust the 2D image controls. See Using 2D and I.Q. Controls on
page 90 for instructions.
6. If necessary, adjust the I.Q. image controls. See Controls on the I.Q. Image Control
Window on page 100 for instructions.
7. If necessary, adjust the image controls for the selected scan mode:
• For M-Mode, see Using M-Mode Image Controls on page 105.
• For Color Doppler and Power Doppler scan modes, see Using Color and Power
Doppler Image Controls on page 118.
8. Click . The Terason software automatically adds measure tabs to the Image
Control window. The measure tabs include measuring tools for the selected scan mode
(see Chapter 7, Working With Measurements, on page 150 for instructions on using
the measurement tools).
9. Add annotations (see Working with Annotations on page 81) as needed.
10. Save or print the ultrasound image. See Saving Images and Loops on page 133 and
Printing Images on page 146.
Terason t3000 / Echo Ultrasound System User Guide 67

Chapter 4 - Acquiring Images Conducting an Ultrasound Exam
Special Controls Used With the 4V2A Transducer
When conducting an exam in 2D mode with the 4V2A transducer connected, some special
controls are available.
Sector Position and Width Controls
To select the sector position handle at the bottom of the sector display, press the Select
button on the console two times. You can then drag the sector left or right using the
trackball. Press the Select button two more times to release the sector position handle.
To select the sector width handles, press the Select button on the console three times.
Rolling the trackball to the left then narrows the sector, while rolling it to the right widens
the sector. Press the Select button again to release the sector width handles.
Conducting a PWD Exam
To conduct an exam in Pulsed-Wave Doppler mode, complete these steps:
1. Conduct an exam in 2D mode, as described in Conducting an Ultrasound Exam on
page 65 (do not freeze the scan).
2. Position the Windows pointer in the 2D image where you want to set the range gate,
then double-click.
You can also use any of these methods:
• Click
• Select
• Right click and select Set PWD Gate
• Ty pe P when not in text mode
Click in the range gate and move it to the proper location.
3. Adjust any image control settings on the PWD tab as needed. See Using the Console
on page 108 for instructions.
4. Click . The Terason software automatically adds the 2D Measure and PWD
Measure tabs to the Image Control window (see Chapter 7, Working With
Measurements, on page 150 for instructions on using the measurement tools).
5. Add annotations (see Working with Annotations on page 81) as needed.
6. Save and/or print the ultrasound image. See Saving Images and Loops on page 133
and Printing Images on page 146.
Modes > Pulsed-Wave Doppler
Conducting a CWD Exam
To conduct an exam in Continuous-Wave Doppler mode, complete these steps:
1. Conduct an exam in 2D mode, as described in Conducting an Ultrasound Exam on
page 65 (do not freeze the scan).
Terason t3000 / Echo Ultrasound System User Guide 68

Chapter 4 - Acquiring Images Conducting an Ultrasound Exam
2. Go to CWD mode, using any of these methods:
• Click
• Select
Modes > Continuous Wave Doppler
• Ty pe W when not in text mode
Click in the range gate and move it to the proper location.
3. Adjust any image control settings on the CWD tab as needed. See Using Spectral
Doppler Image Controls on page 109 for instructions.
4. Click . The Terason software automatically adds the 2D Measure and CWD
Measure tabs to the Image Control window (see Chapter 7, Working With
Measurements, on page 150 for instructions on using the measurement tools).
5. Add annotations (see Working with Annotations on page 81) as needed.
6. Save and/or print the ultrasound image. See Saving Images and Loops on page 133
and Printing Images on page 146.
Conducting an Exam in Triplex Mode
To conduct an exam in Triplex mode, complete these steps:
1. Conduct an exam in Color Doppler, Directional Power Doppler, or Power Doppler
mode as described in Conducting an Ultrasound Exam on page 65 (do not freeze the
scan).
2. Position the Windows pointer in the 2D image where you want to set the range gate,
then double-click.
You can also use one of these methods:
• Click
• Select
Modes > Pulsed-Wave Doppler
• Ty pe P when not in text mode
Click in the range gate and move it to the proper location.
3. Adjust any image control settings on the PWD tab as needed. See Using Spectral
Doppler Image Controls on page 109 for instructions.
4. Click . The Terason software automatically adds the 2D Measure and PWD
Measure tabs to the Image Control window (see Chapter 7, Working With
Measurements, on page 150 for instructions on using the measurement tools).
5. Add annotations (see Working with Annotations on page 81) as needed.
6. Save or print the ultrasound image. See Saving Images and Loops on page 133 and
Printing Images on page 146.
Terason t3000 / Echo Ultrasound System User Guide 69
Chapter 4 - Acquiring Images Freezing Images
When you switch to Triplex mode, both the original 2D scan mode and PWD mode are
active. This depends on whether the options are set to simultaneous mode. See Using
Spectral Doppler Image Controls on page 109 for more information.
Freezing Images
Live images are recorded by frame and temporarily stored on the computer. Depending on
the mode you select, you record a certain number of frames. For example, 2D mode allows
you to capture up to 10 seconds in a Cine loop.
Pulsed-Wave Doppler (including Triplex) and M-Mode scans only save a single frame for
the 2D image, and you cannot save loops for these scan modes.
When you freeze a real-time image during a scan, all movement is suspended in the Image
Display window. The frozen frame can be saved as a single image file or an image loop.
For M-Mode, PWD, CWD, and Triplex modes, the software saves the Time Series data
and a single 2D image.
You can unfreeze the frame and return to the live image display at any time. If you click
Live without saving the image or image loop, you lose the temporarily-stored frames.
When performing an ultrasound scan, click to freeze the displayed image (or select
Image > Freeze from the menubar). You can then use the Playback toolbar or the arrow
keys to move through the frames acquired during the scan (see Working with Image Loops
on page 70).
To start a new scan, you can:
• Click
• Select
Image > Live
• Press the space bar
Note: If you do not save the frozen image or loop, the frame data is lost when new data is
acquired. When you start live imaging, all previous frames are erased. Make sure
you save or print any needed images before you acquire new scan data.
You can use the spacebar to freeze images and start live scanning when Text mode is not
active. See Typing Text on an Image on page 84 for information on Text mode.
Working with Image Loops
Reviewing an image loop is useful for focusing on images during short segments of a scan
session. When you freeze an image, you can use the buttons on the Playback toolbar or the
arrow keys to review an entire loop, frame by frame, to find a specific frame. You can also
use the Playback buttons when viewing a saved loop.
Playback Toolbar Buttons
Terason t3000 / Echo Ultrasound System User Guide 70

Chapter 4 - Acquiring Images Working with Image Loops
To select a specific frame to save as an image (not as a loop), make sure the image has
focus. To do this the image area should have a blue dot in the upper left hand corner of the
image area. Click or or the left and right arrow keys until the needed frame
displays, then click . You need not select a different frame to save the scan as a loop:
all acquired frames are saved in the loop when you click .
For 2D images the and are both active, and allow you to review the loop both
forwards and backwards. For Color Doppler modes, you can only move the image
forward.
To view a loop, click . The Play button changes to the Pause button. The loop plays
continuously until you click the Live or Pause buttons. You can track the frames and the
number of the current frame in the progress bar next to the Next button.
To stop a playing loop, click the Pause button.
You can also use the Image menu to implement the Play, Pause, Back, and Next functions.
Playback Functions on the Image Menu
Saving Prospective and Retrospective Loops
In 2D, Color, and Power Doppler modes, the Terason system can acquire loops either
prospectively or retrospectively. Prospective acquisition captures a loop of live scan
following the acquire command, while retrospective acquisition saves a loop of a frozen
scan.
Saving Prospective Loops
During live imaging, clicking the Save Loop button tells the system to acquire and save a
loop of the scan following the button click. The loop displays in the Thumbnail window at
the left of the Main Screen. The default length of the loop is 3 seconds, but this is
adjustable between 1 and 10 seconds on the Acquisition tab of the Options menu (
Options > Acquisition
Terason t3000 / Echo Ultrasound System User Guide 71
).
Tools >

Chapter 4 - Acquiring Images Determining Image Status
Acquisition Tab on Options Window
When the Beat radio button on the Acquisition tab of the Options window is selected (as
shown above), and the system detects an ECG signal, the acquired loop is a number of
heartbeats. The default is 2 beats, but this is adjustable between 1 and 10 beats on the
Acquisition tab. If no ECG signal is detected, the acquired loop is the length set in the
Time field, even if the Beat radio button is selected.
You can apply an R-wave delay in the Acquire window. You can also enable a beep that
sounds when the acquisition is complete.
Loops acquired in this way cannot be saved as .ult files. The default format for these loops
is .dcm, however, they can also be saved as any of the other available formats except .ult.
Use the Save Loop File Type menu on the Save tab (
different file format. (If .ult is selected, the system saves prospectively acquired loops as
.dcm.)
Saving Retrospective Loops
During live imaging, clicking the Freeze button then the Save Loop button tells the system
to acquire a loop of the frozen scan. The loop displays in the Thumbnail window at the left
of the Main Screen. The default length of the loop is 3 seconds, but this is adjustable
between 1 and 10 seconds on the Acquisition tab of the Options menu (
Acquisition
).
Retrospective loops are modified in the same way as prospective loops. They can be saved
as .ult files, or as .dcm or .avi files.
Determining Image Status
The Terason software continually displays an image status message at the bottom right of
the main window, next to the frame rate (if displayed) for the Image Display window. In
the example below, the message shows beneath the Modes toolbar. There is also a bar next
to the status message. When this bar is green, the image is live. When the bar is gray, the
image is frozen.
Tools > Options > Save) to choose a
Tools > Options >
Terason t3000 / Echo Ultrasound System User Guide 72

Chapter 4 - Acquiring Images Adjusting the Displayed Image
Location of Image Status Message
You could see any of the statuses in the following table:
Terason Status Messages
Image Display Window Status Description
Initializing... Starting up and verifying the connection to the transducer
Live Imaging Actively acquiring scan data from the transducer
Frozen Image Stopped acquiring data
Playing Loop An acquired loop is playing
Paused Loop An acquired loop was playing and is now paused
Single Image File A Terason format (ULT) image file has been loaded
Playing Loop File A loaded ULT file is playing
Paused Loop File A loaded ULT file was playing and is now paused
BMP Image File A bitmap file has been loaded
JPEG Image File A JPEG file has been loaded
TIFF Image File A TIFF file has been loaded
DICOM Image A DICOM file (image or loop) has been loaded
Playing DICOM Loop A loaded DICOM loop is playing
Paused DICOM Loop A loaded DICOM loop was playing and is now paused
Playing AVI Video Clip A loaded AVI file is playing
Paused AVI Video Clip A loaded AVI file is paused
Adjusting the Displayed Image
The Terason software lets you adjust the contents of the Image Display window. You can
perform the following operations:
• Enlarging an Area of the Image on page 73
• Resizing the Window on page 74
• Displaying the Image in Full Screen on page 75
• Hiding Windows on page 75
• Enhancing the Image Using TeraVision™ Optimization on page 76
Enlarging an Area of the Image
When you view a frozen or live image, you can use the Zoom tool to enlarge a region of
the 2D image. You cannot use the Zoom tool in the Time Series window.
Terason t3000 / Echo Ultrasound System User Guide 73

Chapter 4 - Acquiring Images Adjusting the Displayed Image
To zoom in on a portion of an image, complete these steps:
1. Click , click
Z, or select View > Zoom.
2. Move the target cursor to a corner of the area you want to magnify, click, move the
cursor to the diagonal corner, and click.
The selected area is magnified and a small reference image called a thumbnail appears on
the right to show which part of the image is enlarged.
Normal Image (Left) and Zoomed Image with Thumbnail (Right)
To return to the original image view, click again.
If you do not see the thumbnail or if you want to hide it, select
Properties > Zoom Thumbnail
hiding the thumbnail. The
. Clicking on this menu item toggles between showing and
Large Thumbnail option in this menu works with the Review tab,
View > Image Display
not with the zoom function.
Use the scroll bars if you must view obscured areas of the scan. Click the Zoom button to
return the image display to normal view.
Resizing the Window
You can change the size of the image by changing the size of the Image Display window.
You can increase the size of the Image Display window by hiding the Terason Explorer or
Image Control windows.
You can also drag the border between the Image Display window and an adjacent window
to show less of the other window.
Changing the Window Size
Terason t3000 / Echo Ultrasound System User Guide 74

Chapter 4 - Acquiring Images Adjusting the Displayed Image
When you place the Windows pointer exactly between the two windows, the pointer
changes to . You can then click the left mouse button and move that border in either
direction to change the relative sizes of the two windows. When you resize a window, the
Image Display window expands or contracts to fill the space available.
Displaying the Image in Full Screen
You can set the Image Display window to encompass the entire display area of your
monitor, including the area usually reserved for the menu and Windows task bar. You can
use any of these methods:
• Press the F11 key
• Select
View > Full Screen
To return the Image Display window to its original size, press the F11 key. Alternatively,
slide the Windows pointer to the extreme top of the window. The menus display and you
can select
View > Full Screen to revert the Image Display window to its original size.
Hiding Windows
When you show all of the Terason windows, you have access to all of the software’s
functions. You can locate a patient’s information, choose an image mode, save or print
images, and all of the other Terason functions.
However, the windows take up room. To have more room for the actual scanned image,
you can hide any of the windows. You do not lose access to those functions; you can use
the menus to select them.
For example, if you hide the Terason Explorer window, you can use
Open on the File
menu to open a saved image.
When you hide windows, the Image Display window expands to fill the additional area.
To hide or show the Status bar, select
View > Status Bar.
• Right-click in the Image Control window or on a toolbar and select the toolbar
You can hide windows using any of these methods:
• Click the at the top right corner of the window
•From the View menu, select
Explorer Window, Image Control Bar, or Thumbnail Window
• Right-click in the Image Control window or on a toolbar and select Terason Explorer or
Image Control
Terason t3000 / Echo Ultrasound System User Guide 75
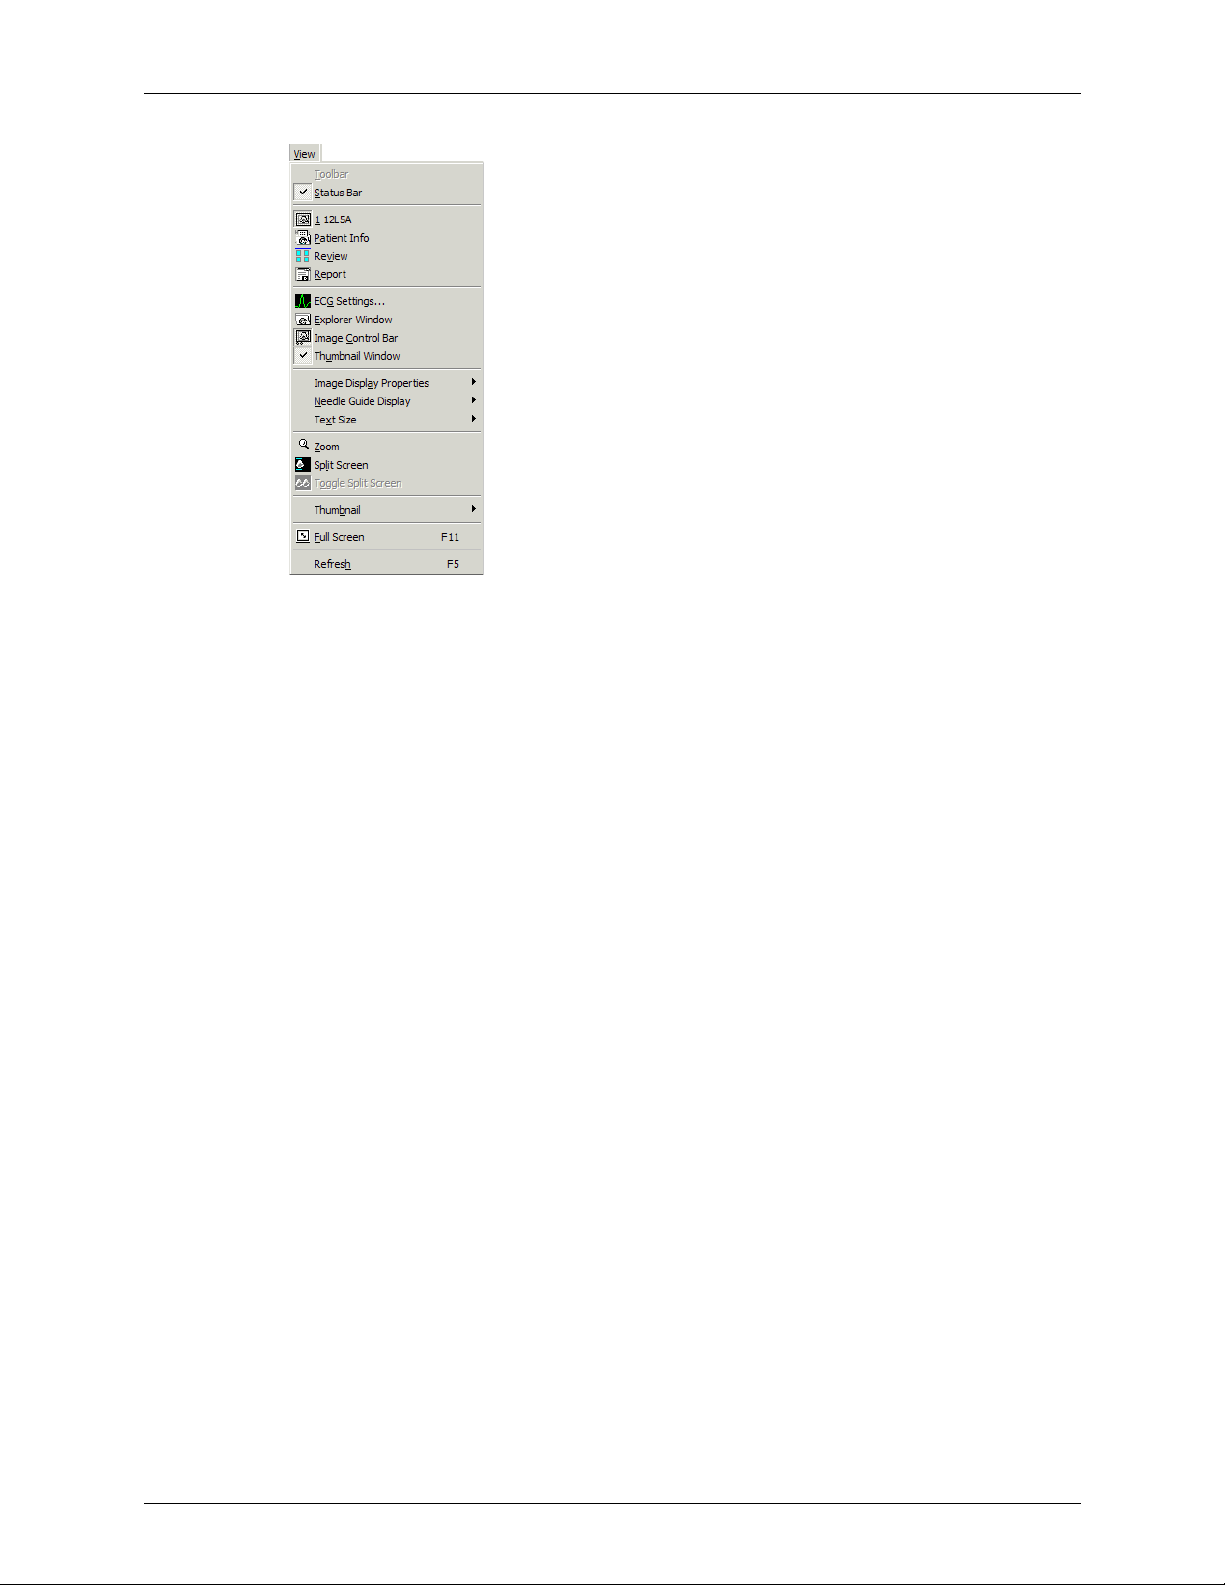
Chapter 4 - Acquiring Images Adjusting the Displayed Image
Showing or Hiding Windows
The menus work as toggles: each time you select or click it, the Terason software hides or
shows the window depending on its current state.
The Status Bar menu item hides or shows the status bar at the bottom of the imaging
window.
The Image Display (indicated by the transducer model number), Patient Info, Review
and Report menu items show the selected window in front of the other two windows; you
cannot close these windows.
Enhancing the Image Using TeraVision™ Optimization
TeraVision is an optional image-optimization package that sharpens images produced by
the Terason ultrasound system. TeraVision requires a license. See the TeraVision Image
Enhancement Installation Guide for instructions on installing the TeraVision software.
The default configuration starts TeraVision when the Terason ultrasound system starts. To
change this so the Terason system starts with TeraVision off, see Starting the System with
TeraVision Off on page 250.
The following figure shows the Image Control window with TeraVision installed.
Terason t3000 / Echo Ultrasound System User Guide 76

Chapter 4 - Acquiring Images Adding Guides to the Image Display
TeraVision levels control
I.Q. Controls With TeraVision Levels Control
If the system is not licensed for TeraVision, the TeraVision level control does not display.
If the control is present but grayed-out, the connected transducer is not supported by the
TeraVision software. If either of these conditions occurs, call Terason for assistance.
The TeraVision level numbers range from 0 to 6 or 8. All currently supported transducers
have level numbers 0 through 6, except for the 4V2, which has 0 through 8. The 0 setting
applies no image processing. The larger the number, the more processing is applied to the
image. With the 4V2, levels 7 and 8 are intended for cardiac imaging.
Adding Guides to the Image Display
Image Display Properties on the View menu lets you add several guides to the scanned
image. These properties provide details about the patient. transducer, and image control
settings. The figure below shows an image with all of the available guides.
Terason t3000 / Echo Ultrasound System User Guide 77

Chapter 4 - Acquiring Images Changing the Text Size
Image Control
settings for
selected scan
mode: part of
the Probe Info
Depth Ruler
Focus
Indicator
Reference Bar
Orientation Logo
Smoothing/
Persistence/Map
values; part of the
Probe Info
Probe Type
Patient
Information
Focal Point
Frame Indicator
Image Display Properties
The Zoom thumbnail only displays with the image is zoomed. The Frame Rate (in Hz)
displays at the bottom right of the Terason window.
Frame Rate (Hz value)
See Chapter 5, Working With Scan Modes, on page 89 for details about the information
provided by each of these image guides.
Changing the Text Size
The Terason software lets you choose the font size for the text displayed in the Image
Display window. If you choose a large text size, the text may overlap the image. If you
choose a small text size, the text may be difficult to read.
To choose a text size, select
View > Text Size, and then the specific size you want to set.
Terason t3000 / Echo Ultrasound System User Guide 78

Chapter 4 - Acquiring Images Using Split Screen Mode
Changing the Text Size
Using Split Screen Mode
The Terason software lets you split the Image Display screen into two sections to view two
current scans for a patient. For example, you can acquire a scan for the patient, select Split
Screen, and then acquire another scan from a different angle or location. Split Screen
mode works with the 2D scanning modes (2D, Color Doppler, Directional Power Doppler,
or Power Doppler).
You can use any of the following methods to enter split screen mode:
• Click
• Select
•Type S when not in Text mode
When you enter Split Screen mode, the Terason software copies the current settings for the
Image Control window to the new screen. You can then apply any Image Control setting
independently to either screen. You can go live or freeze either screen (only one screen can
be live at a time), and you can use any of the tools and menus with either screen. In
addition, you can scan in different modes in each screen. For example, you can acquire a
2D scan, enter split screen mode, then acquire a Color Doppler scan in the second screen.
The following figure shows an example of a split screen.
View > Split Screen
Terason t3000 / Echo Ultrasound System User Guide 79

Chapter 4 - Acquiring Images Using Split Screen Mode
Split Screen
The cyan bars at the bottom and top of a screen indicate the active screen.
To switch between the two screens, perform any of these actions:
• Click
• Click in the screen
• Select
View > Toggle Split Screen
•Type G when not in Text mode
You can exit split screen mode using any of these methods:
• Click
• Select a different exam
• Select M-Mode, PWD, or Triplex scan modes
• Select
View > Split Screen
•Type S when not in Text mode
When saving.ult images in Split Screen mode, only the active window is saved. If you
wish to save an image with both windows visible, save the image in a format other
than.ult. See Working With Image Files on page 131 for information on saving images and
loops.
When you exit Split Screen mode, the Terason software keeps the acquired data for the
active screen (the one with the cyan lines at the top and bottom) and discards the acquired
data for the other screen.
Note: If you create a custom exam in Split Screen mode, make sure the active window
contains the Image Control settings you want to save before you proceed. When
finished saving your custom exam, the Terason software displays a single screen in
the Image Display window. See Working With Exams on page 212 for information
on saving custom exams.
Terason t3000 / Echo Ultrasound System User Guide 80

Chapter 4 - Acquiring Images Working with Annotations
Working with Annotations
This section explains the following topics:
• Working with Text on page 81
• Using Body Markers on page 86
Working with Text
To place text on an image, you must first view the image in the Image Display window. If
the image has been saved, retrieve it from the Terason Explorer window. See Finding
Stored Images and Loops on page 136 for instructions.
You can only add text to the 2D Image Display window. You cannot add text to the Time
Series window.
To work with text annotation, you should understand:
• Adding Text to an Image on page 81
• Setting the Text Home Position on page 83
• Placing Arrows on the Image on page 83
• Moving Text on page 84
• Typing Text on an Image on page 84
• Editing Text on page 85
• Deleting Text from an Image on page 85
Adding Text to an Image
Use one of these methods to enter Text mode:
• Click
• Select
•Type T when not in Text mode
The Terason software opens the Text tab in the Annotation Window listing patient
positions, scan orientations, and anatomy specific to the current exam.
Annotation > Text
Terason t3000 / Echo Ultrasound System User Guide 81

Chapter 4 - Acquiring Images Working with Annotations
Annotation Window (Abdominal Exam)
If you added custom text using the Option dialog box (see Adding Custom Text to the
Annotation Window on page 251, that text shows in the anatomy list.
In this window:
•The New button starts a new line of text beneath the last line
•The Arrow button places an arrow next to the text (see Placing Arrows on the Image on
page 83)
•The Clear Text button deletes all text (including manually typed text) from the image
You can also choose to use all caps (ALL CAPS) by clicking in the check box before you
select the text. This check box has no affect on text already added to the image.
Click any text to add it to the image.
To add the Patient Position, select the appropriate position from the pull-down menu.
Patient Position Choices (Abdominal Exam)
Terason t3000 / Echo Ultrasound System User Guide 82

Chapter 4 - Acquiring Images Working with Annotations
When you click a position, the Terason software adds that text at the home position. When
you add a Patient Position, you can then click the blue arrow to add the shown patient
position to the image (usually used for subsequent scans during an exam).
Setting the Text Home Position
You can choose a default location in the Image Display tab as the text home position. The
Terason software uses the specified position as the starting location whenever you enter
Text mode.
To set a text home position, complete these steps:
1. Select
Annotation > Set Text Home Position. The Windows pointer changes to an arrow
with the Text symbol.
Setting the Text Home Position
2. Click the location on the Image Display tab where you want to set the home position.
The Terason software uses this location when adding text from the Annotation Window,
and as the text cursor location when typing text. You can always move text after placing it.
Placing Arrows on the Image
You can draw an arrow from text to the scanned anatomy. You can also add an arrow
without adding text.
To place an arrow on an image, complete these steps:
1. Add the text you need.
2. Click the Arrow button in the Annotation window. The Terason software draws a
short arrow from the text toward the scan area.
Terason t3000 / Echo Ultrasound System User Guide 83

Chapter 4 - Acquiring Images Working with Annotations
Adding an Arrow to Text
3. Click the arrowhead and drag it to the proper location on the scanned image, and
release the button.
In this example, one arrow is tied to the text, and two arrows were added without
accompanying text and positioned as shown.
When working with arrows, you can:
• Add text before or after adding the arrow
• Move the arrow and text later if needed
• Add an arrow to existing text by right-clicking on the text and selecting
Show Arrow
from the pop-up menu
• Remove an arrow by deleting the text, or right-clicking on the text and selecting
to toggle the check mark off
Arrow
Show
Moving Text
After placing text on an image, you can easily move it to any location within the Image
Display tab. Just click the text, move it to a new location, and click where you want to
place it.
Typing Text on an Image
In addition to choosing from the provided text phrases, you can type any text you want
onto an image. You can only add text to the 2D Image Display window. You cannot add
text to the Time Series window.
Terason t3000 / Echo Ultrasound System User Guide 84

Chapter 4 - Acquiring Images Working with Annotations
To add text to an image, complete these steps:
1. Use one of these methods to select the text tool:
• Click
• Right-click the image and select
Text
• Select Annotation > Text from the menu bar
• Ty pe T when not in Text mode
The Terason software displays a text cursor at the text home position.
2. Begin typing. The text displays in blue while you type.
3. To start a new line, hold the Shift key down and press the Enter key.
4. When finished, press the Enter key or click to exit Text mode. The Terason
software shows the text in white.
Editing Text
The Terason software lets you edit text added to the image using the Annotation window,
or that you manually typed onto the image.
1. Double-click the text you want to edit. The Terason software places the text cursor at
the end of the text and opens the Annotation window showing the Text tab.
2. Use the backspace key to delete text, or the arrow keys to move the text cursor to
where you want to delete or insert text.
3. Right-click the text and select
New Text to add a new line.
4. Double-click any text phrases in the Text tab that you want to include on the image.
5. Use the keyboard to add or delete text.
6. Press the Enter key when finished.
Deleting Text from an Image
You can only delete text that you added to an image. You cannot delete any text that is part
of an image display property, such as the probe image control values. You can hide that
text (see Adding Guides to the Image Display on page 77), but you cannot delete it.
To delete text, perform one of these actions:
• Click the text to highlight it and press the Del key on your keyboard
• Right-click top of the text and select
Delete Text
To remove all text from the 2D window, perform one of these actions:
• Double-click the text and click the Clear All button in the Text tab of the Annotation
Window
• Select
Edit > Clear All
• Select Annotation > Clear Text Annotation
• Right-click in the 2D window and select Clear Text Annotation
Terason t3000 / Echo Ultrasound System User Guide 85
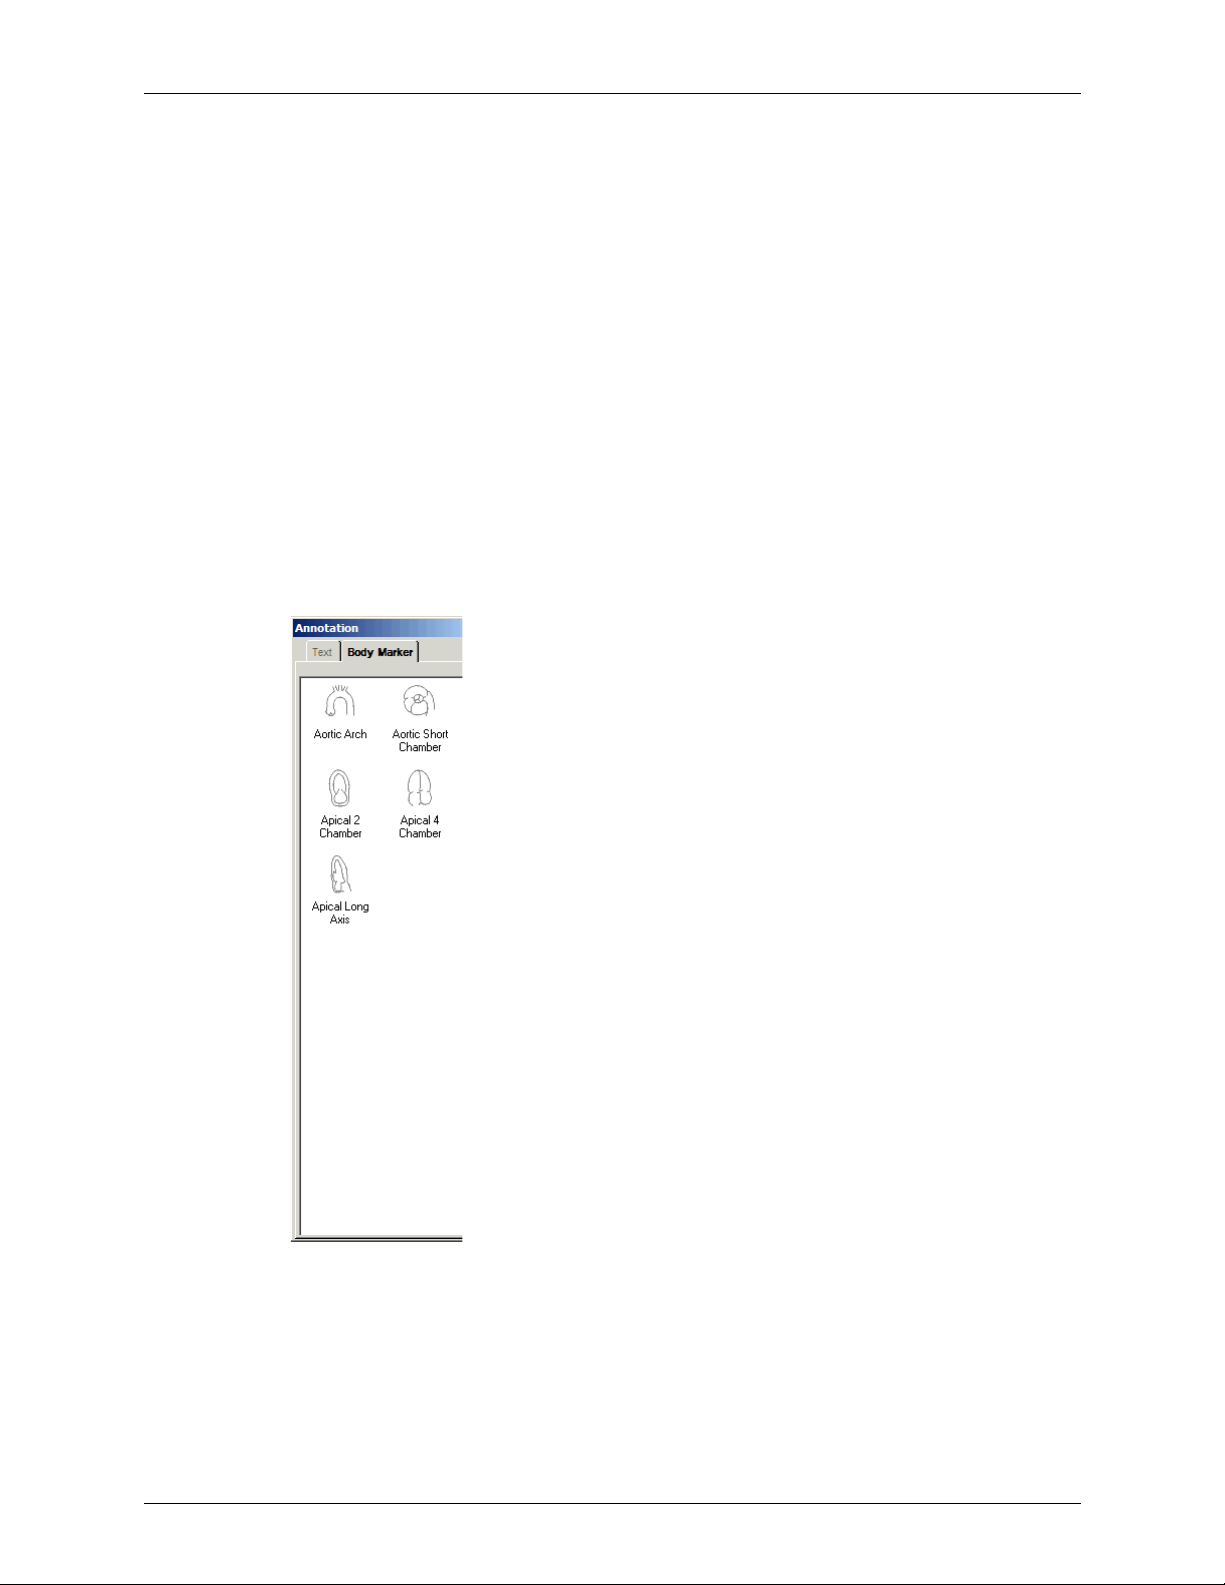
Chapter 4 - Acquiring Images Working with Annotations
Using Body Markers
You can add an icon to the 2D image that identifies the anatomy of the scan. Body Marker
in the Annotation menu opens a window containing several anatomical views based on
the current exam.
To work with body markers, you must understand:
• Adding a Body Marker on page 86
• Changing the Icon in the Body Marker on page 87
• Moving the Indicator on page 87
• Changing the Indicator’s Direction on page 87
• Rotating the Indicator on page 88
• Removing the Body Marker on page 88
Adding a Body Marker
To add a body marker to an image, complete these steps:
1. Select
Annotation > Body Marker. The Terason software opens the Annotation window.
Adding a Body Marker to a Scan
2. Click the view for the body marker you want. The Terason software adds the icon to
the scan and closes the Annotation window. The pink rectangle within the marker icon
indicates the precise location.
Terason t3000 / Echo Ultrasound System User Guide 86

Chapter 4 - Acquiring Images Working with Annotations
Scan with an Abdomen Supine Body Marker
Changing the Icon in the Body Marker
To change the icon shown in the body marker, complete these steps:
1. Right-click the body marker and select
Body Marker. The Terason software opens the
Annotation window showing the Body Marker tab.
2. Click the an icon in the Body Marker pane. The Terason software updates the icon
shown in the body marker and closes the Annotation window.
Moving the Indicator
You can move the pink marker to anywhere on the icon to more precisely indicate the
scanned anatomy. To move the pink marker, complete these steps:
1. Move the Windows pointer over the rectangular end of the pink indicator. When the
pointer changes to a circle with four arrows, click the left mouse or console button.
2. Move the pointer to the desired location on the body marker.
3. Click to lock the indicator in position.
Changing the Indicator’s Direction
You can use
Body Marker Indicator on the Annotation menu if you must adjust the
orientation of the pink rectangle.
Changing the Orientation of the Body Marker Indicator
Click the direction (horizontal or vertical) that you want.
Terason t3000 / Echo Ultrasound System User Guide 87

Chapter 4 - Acquiring Images Working with Annotations
Rotating the Indicator
You can rotate the pink rectangle to more positions by completing these steps:
1. Move the Windows pointer over the round end of the pink rectangle.
The pointer changes to a circular arrow.
Rotating the Body Marker
2. Click and move the pointer until the pink rectangle is in the desired orientation.
3. Click to lock the rectangle in position.
Removing the Body Marker
To remove the Body Marker from the image, right-click the body marker and select
Remove Body Marker.
Terason t3000 / Echo Ultrasound System User Guide 88

5 Working With Scan Modes
Scan Modes Overview
When you select a scan mode, the Image Control bar shows as many as four tabs. The 2D
and I.Q. tabs associated with 2D imaging are always displayed. All other modes available
in the Terason Ultrasound System software include the 2D functions, and also include an
additional tab or tabs with image controls for the selected scan mode.
In general, follow these guidelines to choose which scan mode to use for an exam:
• Select 2D Mode to view a two-dimensional display of the anatomy. 2D controls adjust
the size, depth, focus, overall image gain, brightness, and exam type. See Using 2D and
I.Q. Controls on page 90.
• Select M-Mode (Motion Mode) to evaluate motion over time, such as viewing motion
patterns of the heart. See Using M-Mode Image Controls on page 105.
• Select Pulsed-Wave Doppler (PWD) mode when you want obtain frequency or velocity
information from a specific point along a ultrasound cursor. See Using Spectral Doppler
Image Controls on page 109.
• Select Continuous-Wave Doppler (CWD) mode when aliasing is a problem, and when
depth-specific information is not important. See Using Spectral Doppler Image Controls
on page 109.
• Select Color Doppler (CD) when you must view the mean velocity within an assigned
region of interest. See Using Color and Power Doppler Image Controls on page 118.
• Select Power Doppler (Pwr) to view the density of blood, but not the velocity. Power
Doppler is more sensitive to low flow than either color Doppler or Directional Power
Doppler, and is often used to evaluate perfusion and vessel patency See Using Color
and Power Doppler Image Controls on page 118.
• Select Directional Power Doppler (DPD) to combine the density information provided
by Power Doppler with the directional information of Color Doppler. See Using Color
and Power Doppler Image Controls on page 118.
•Use Triplex to combine Pulsed-Wave Doppler or Continuous Wave Doppler scanning
with Color Doppler, with Power Doppler, or with Directional Power Doppler scanning.
See Scanning in Triplex Mode on page 126.
You can adjust image controls for these tabs, depending on the selected scanning mode:
•2D tab
•IQ tab
• M-Mode tab
•PWD tab
•CWD tab
• CD, DirPwr, or Pwr tabs
Terason t3000 / Echo Ultrasound System User Guide 89

Chapter 5 - Working With Scan Modes Scan Modes Overview
Using 2D and I.Q. Controls
Controls on the 2D Image Control window begin on this page. For discussion of IQ image
controls, see Controls on the I.Q. Image Control Window on page 100.
Controls on the 2D Image Control Window
The figure 2-D Tab in the Image Control Window on page 91 shows the available 2D
image controls. You can only adjust these image controls during live scanning. When you
freeze a scan, the Terason software replaces the 2D tab with a 2D Measure tab, for making
measurements on the scan image. (See Chapter 7 - Working With Measurements.)
You can adjust the following 2D image controls during live scanning:
• Exam
• Patient size
• Frequency
• Depth
• Focus depth
• Gain
• Time Gain Compensation (TGC)
• Lateral Gain Compensation (LGC)
• Line Density or Image Format
• Tissue Harmonic Imaging (THI)
• Omni Beam
When you freeze a scan, the Terason software replaces the 2D tab with a 2D Measure tab.
Terason t3000 / Echo Ultrasound System User Guide 90

Chapter 5 - Working With Scan Modes Scan Modes Overview
2-D Tab in the Image Control Window
Choosing an Exam
Terason provides customized exams for scanning different types of anatomy. When you
choose an exam, the Terason software loads image controls settings on the 2D and I.Q.
tabs that are customized for that anatomy and the connected transducer.
To select an exam, choose it from the Exam menu at the top of the 2D Image Control
window. You can highlight the exam type box in blue and then either press the first letter
of the exam type name or use the right and left arrow keys to cycle through the exam
types. For example, if you are using a 12L5 probe and want the Carotid exam, click the
exam control and type C.
Choosing an Exam
The software displays only those exams supported by the connected transducer. You can
also select an exam from the Exam menu.
Terason t3000 / Echo Ultrasound System User Guide 91
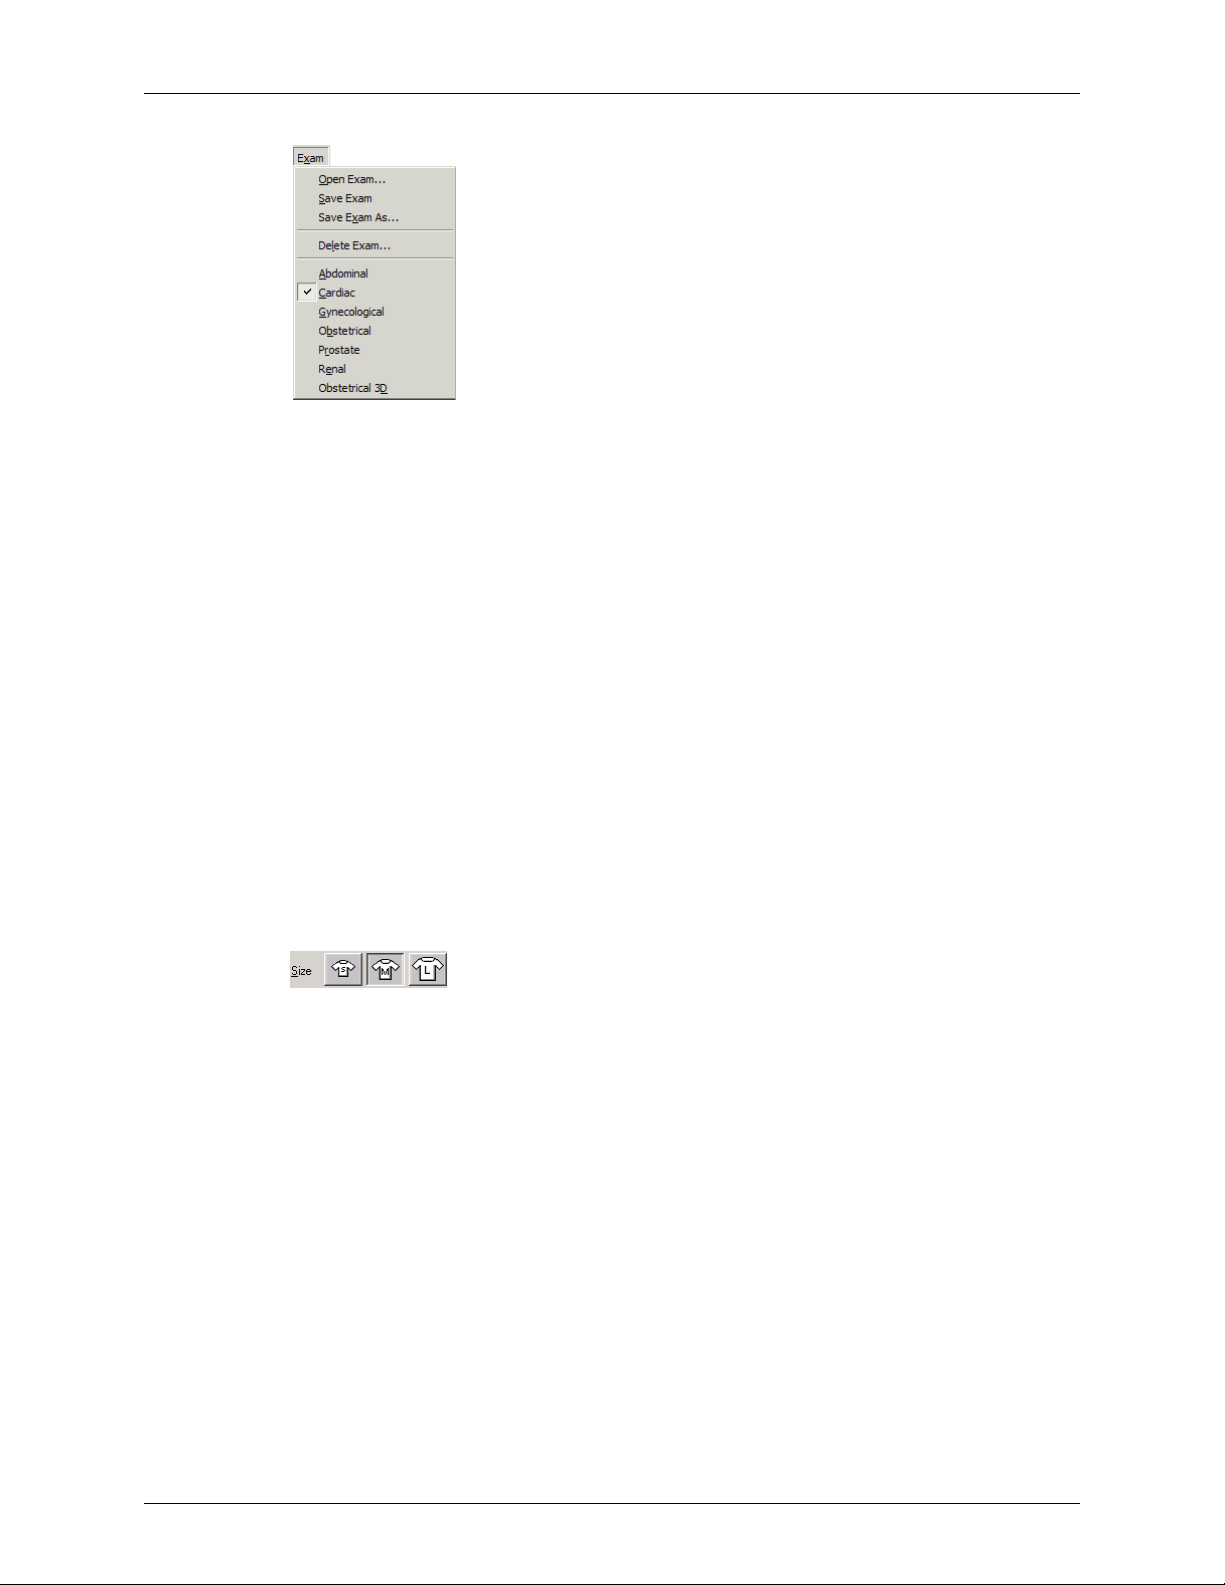
Chapter 5 - Working With Scan Modes Scan Modes Overview
Selecting an Exam from the Menu Bar
The top group of menu items are used to work with custom exam types. The next group of
menu items load the presets for the indicated exam type. If you created any custom exams,
they show at the bottom of the Exam menu. See Chapter 8 - Working With Exams for
more details about exam types and defining custom exams.
Adjusting the Size
The “T-shirt” Size buttons on the 2D Image Control window load preset values that
optimize the scan for the size of the patient or for the structured anatomy. Click the size
button that matches the patient size for small, medium, or large (or for superficial,
moderately deep, and deep areas of interest).
The Size setting applies a preset 2D transmit frequency. In general, Choosing the small
size sets the highest transmit frequency, to yield the best 2D resolution, while the medium
size sets a mid-range frequency, and the large size sets a lower frequency for the best
penetration.
Choosing a Size setting also sets other 2D and Doppler settings. When you choose a size,
you also load baseline settings for the other controls.
To set a patient size, click the appropriate T-shirt symbol.
Patient Size Controls
You can also click Size on the Image menu and choose a size from the menu.
Terason t3000 / Echo Ultrasound System User Guide 92

Chapter 5 - Working With Scan Modes Scan Modes Overview
Using the Image Menu to Set the Patient Size
Note: After selecting the size that suits the clinical situation, you can modify any
available controls to further optimize the image.
Adjusting the Frequency
When you select an exam, the Terason software sets an appropriate frequency for that
exam and patient size (see Adjusting the Size on page 92). You can select an alternate
frequency to better suit specific circumstances.
Frequency Control
In the Frequency list:
•
L = Low
•
M = Medium
H = High
•
VH = Very High (available only with the 12L5 transducer)
•
The exact frequencies vary, depending on the connected transducer.
Adjusting the Depth
Depth adjusts the field of view. You can increase the depth to see larger or deeper
structures. You can decrease the depth to enlarge the display of structures near the skin
line, or to not display unnecessary areas at the bottom of the window.
When you select an exam type, the Terason software enters a preset depth value for the
specific exam type, transducer, and patient size.
Select a depth (in cm) from the menu.
Terason t3000 / Echo Ultrasound System User Guide 93

Chapter 5 - Working With Scan Modes Scan Modes Overview
Focus depth
Choosing the Depth (Values in cm)
The values displayed in the menu depend on the transducer.
After adjusting depth, you may want to adjust the gain, time gain compensation (TGC)
curve, and focus control settings.
You can view a depth ruler on the image by selecting
Depth Ruler. The figure below shows the depth ruler along the right side of the image.
Example Depth Ruler
View > Image Display Properties >
The pink triangle on the depth ruler indicates the focus depth.
You can also use the Image menu to set the depth. To do so, complete these steps:
1. Select
Set Depth Dialog Box
Image > Depth. The Set Depth dialog box opens.
2. Select a depth value from the menu.
3. Click
Terason t3000 / Echo Ultrasound System User Guide 94
OK.

Chapter 5 - Working With Scan Modes Scan Modes Overview
Adjusting the Focus
Focus optimizes the image by increasing the resolution for a specific area. The depth ruler
uses a pink triangle to indicate the focus depth. This indicator is only visible if you show
the depth ruler.
When you select an exam type, the software updates the focus value to a preset value for
the specific exam type, transducer, and patient size.
In 2D, you can set up to four focus depths. In all the other modes, you can set only one
focus depth. When you use more than one focus depth, you can choose the distribution of
the focus depths.
To set the focus depth for any mode other than 2D, or for a single focus point in 2D, select
a value (in cm) from the @ pull-down menu.
Setting the Focus (Non-2D)
You can also use the left and right arrow buttons to increase or decrease the focus depth.
To set multiple focus depths in 2D, complete these steps:
1. From the @ menu, select the primary focus depth. You can also use the left and right
arrow to increase or decrease the depth.
2. From the # menu, select the number of focus points.
3. From the focus distribution menu, select a distribution method.
Focus Distribution List
In the focus distribution menu:
• spaces the focus depths densely, centered on the primary focus depth
• spaces all but the deepest focus depth densely
• spaces the focus depths widely, centered on the primary focus depth
The actual spacing of the focus depths depends on the number of points selected and
on the depth
Note: Increasing the number of focal zones decreases the frame rate.
Adjusting the Gain
2D gain allows you to increase or decrease amplification of the returning echoes, which
increases or decreases the amount of echo information displayed in an image.
Terason t3000 / Echo Ultrasound System User Guide 95
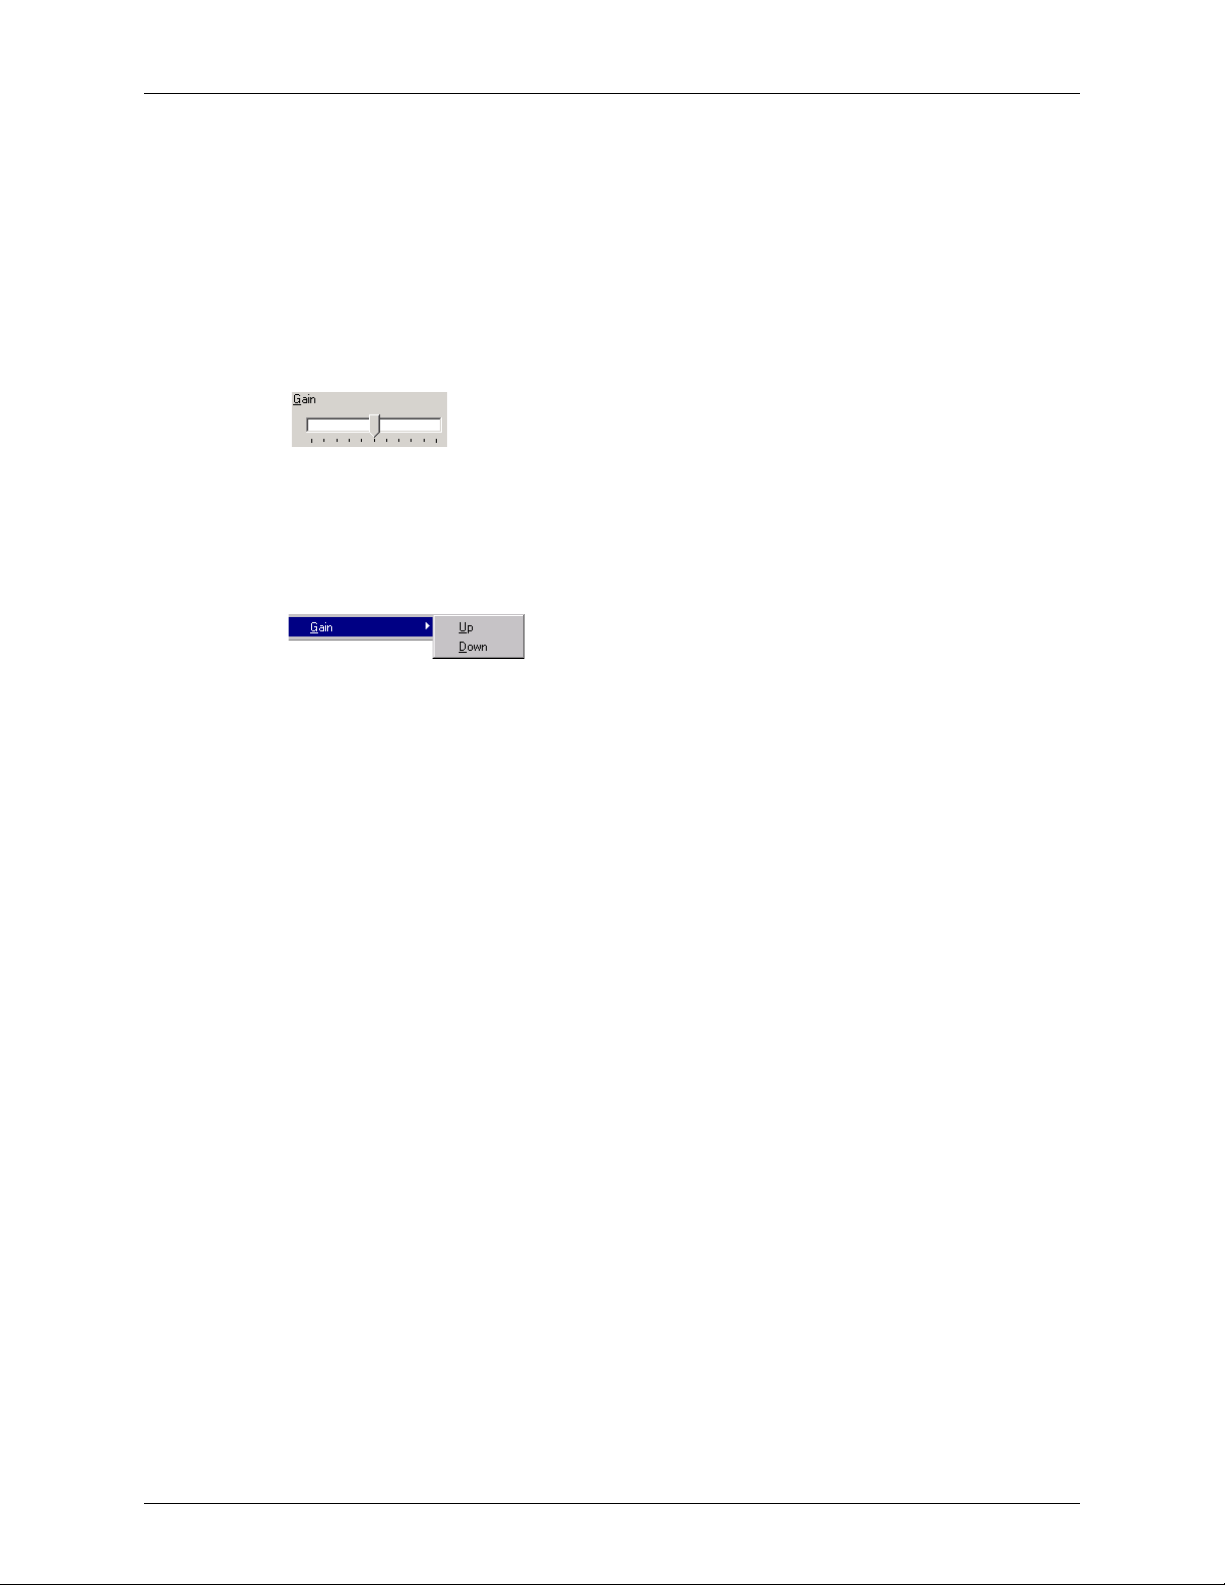
Chapter 5 - Working With Scan Modes Scan Modes Overview
Adjusting gain may brighten or darken the image if sufficient echo information is
generated. When you adjust the gain, the Terason software increases or decreases the
overall gain while maintaining the shape of the TGC curve. See Adjusting Time Gain
Compensation on page 96 for more information on TGC settings.
When you select an exam type, the Terason software sets the gain to a preset value for the
specific exam type, transducer, and patient size.
To decrease the gain, click the slider and drag it to the left. To increase the gain, click the
slider and drag it to the right.
Changing the Gain
You can also adjust the gain by clicking in the 2D window and pressing the left (to
decrease gain) and right (to increase gain) arrow keys. Or you can use the Image menu to
move the gain one setting higher (
).
Down
Image > Gain > Up) or one setting lower (Image > Gain >
Changing the Gain from the Image Menu
When you adjust the gain setting, the Terason software automatically adjusts the Time
Gain Compensation curve to support the new gain setting.
Adjusting Time Gain Compensation
Scanning tissues at increasing depths causes attenuation of the returned signal. The TGC
sliders adjust amplification of returning signals to correct for the attenuation. TGC
balances the image to equalize the brightness of echoes from near field to far field.
The Terason software rescales the TGC settings when you do any of the following:
• Change the depth
• Load a new exam type
• Select a different patient size
• Adjust the gain setting
The TGC slider bar spacing is proportional to the depth. The TGC curve on the image
display represents the TGC settings.
Terason t3000 / Echo Ultrasound System User Guide 96

Chapter 5 - Working With Scan Modes Scan Modes Overview
Example TGC Curve on an Image
Each slider controls one dot on the curve. You can adjust the TGC sliders individually as
needed. Drag a slider to the left to decrease the gain, or drag it to the right to increase the
gain. You can also use the keyboard arrow keys; after clicking the 2D tab to select the
Gain control, press the down arrow key to select a TGC slider, then use the left and right
arrow keys to adjust it.
To show or hide the TGC curve, select
TGC Curve Display Options
View > Image Display Properties > TGC Display.
Select On to show the curve, or select Off to hide the curve. If you select Time Out (the
default setting), the curve displays briefly when you start the application, adjust the gain,
or adjust an individual TGC slider.
The optional console houses physical sliders that control TGC. See Console Controls on
page 35.
Adjusting Lateral Gain Compensation (LGC)
A set of LGC sliders increase or decrease the gain of segments of the returned signal,
when using some transducers. (Linear transducers do not support LGC.) These segments
are arcs one eighth of the full width of the scan. Adjusting LGC can enhance imaging of
the cardiac wall with some scanning orientations.
Terason t3000 / Echo Ultrasound System User Guide 97

Chapter 5 - Working With Scan Modes Scan Modes Overview
To use the LGC controls:
1. On the Tools menu, select
Opening the LGC Controls
LGC Control....
The LGC Control window opens.
LGC Control Window
2. To increase the gain on a sector, slide the control for that sector up.
Note: When the Cardiac exam is selected, lower-numbered sliders (at the left side of the
LGC Control window) control segments at the left side of the display. When any
other exam is selected, the left-right relationship between the LCG window
controls and the scan is reversed (lower-numbered controls affect the right side of
the display.)
3. To close the LGC Control window, click the close box .
Adjusting the Image Format
The Image Format control lets you choose an image format of linear or trapezoid.
Image Format Choices
To select the shape or size of the sectors, click the associated button.
See Changing the Display Mode Defaults on page 247 for information on choosing
defaults associated with sector width and image format.
Tissue Harmonic Imaging (THI)
The transmitted ultrasound signal generates harmonics (signals at frequencies that are
multiples of the transmitted signal frequency) in tissue. Tissue harmonic imaging
processes a returned harmonic signal to enhance the displayed image. The harmonic used
for THI is twice the frequency of the transmitted signal.
Terason t3000 / Echo Ultrasound System User Guide 98

Chapter 5 - Working With Scan Modes Scan Modes Overview
THI is only available when a 4V2 or 5C2A transducer is connected. When a different type
of transducer is connected, the THI button does not display, and the THI menu item is
grayed out on the Modes menu.
THI is most effective at mid-range depths. Shallow and deep scans do not benefit from
THI.
To turn THI on or off, use one of the following methods:
• Click the THI button at the bottom of the 2D Image Control window.
THI Button
• Select THI in the Modes menu.
THI in Modes Menu
Omni Beam
Omni permits electronic steering of the ultrasound beam to acquire scans of an ROI from
several directions. Omni works with linear and curved-linear array transducers, but not
with phased-array and endocavity transducers. It is not available in Stress Echo exams.
Transducers Supporting Omni Beam Transducers Not Supporting Omni Beam
12L5 4V2A
5C2A 4V2S
7L3V 8EC4A
8BP4
8MC3
12HL7
12L5V
PDOF
When Omni is on, the word Omni shows in the scan information display, and the focus
markers on the depth ruler change to this:
To turn Omni on or off, click the Omni button on the 2D Image Control window.
Omni Button
Terason t3000 / Echo Ultrasound System User Guide 99
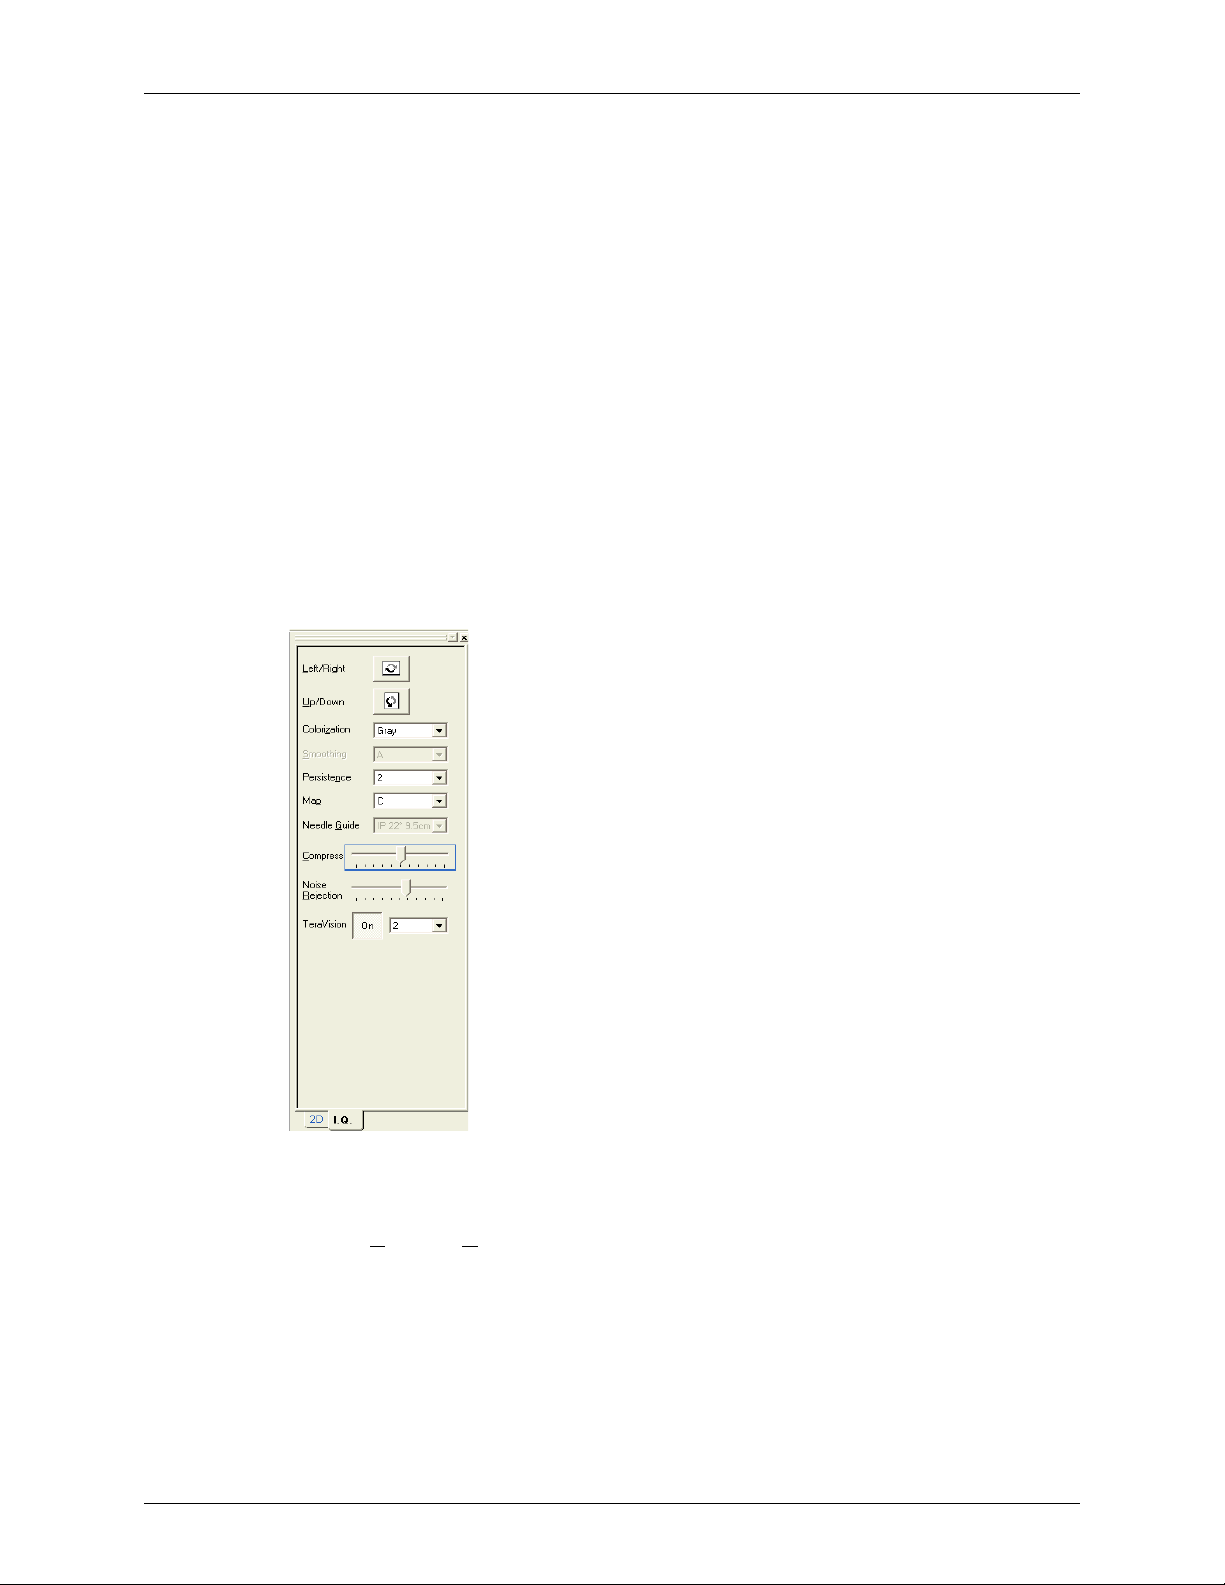
Chapter 5 - Working With Scan Modes Scan Modes Overview
Controls on the I.Q. Image Control Window
The preset values that load when you choose an exam are optimized for that exam using
the selected ultrasound mode and transducer. You can use these optimized presets, or you
can make individual adjustments as necessary for the current exam.
You can use these optimized presets, or you can make individual adjustments to these
image controls as necessary for the current exam:
• Left/Right and Up/Down invert
• Color palette
• Image smoothing
• Persistence
•Image map
• Needle guide
• Compression
• Noise Rejection
• TeraVision
The following figure shows the I.Q. controls.
I.Q. Controls
Inverting Images
The Left/R
ight and Up/Down buttons control the orientation of the scanned image.
The following figure shows the effect of using the invert buttons.
Terason t3000 / Echo Ultrasound System User Guide 100
 Loading...