

Page 1
6
For more information, please visit: self-balancing.terasic.com
C
Quick Start Guide
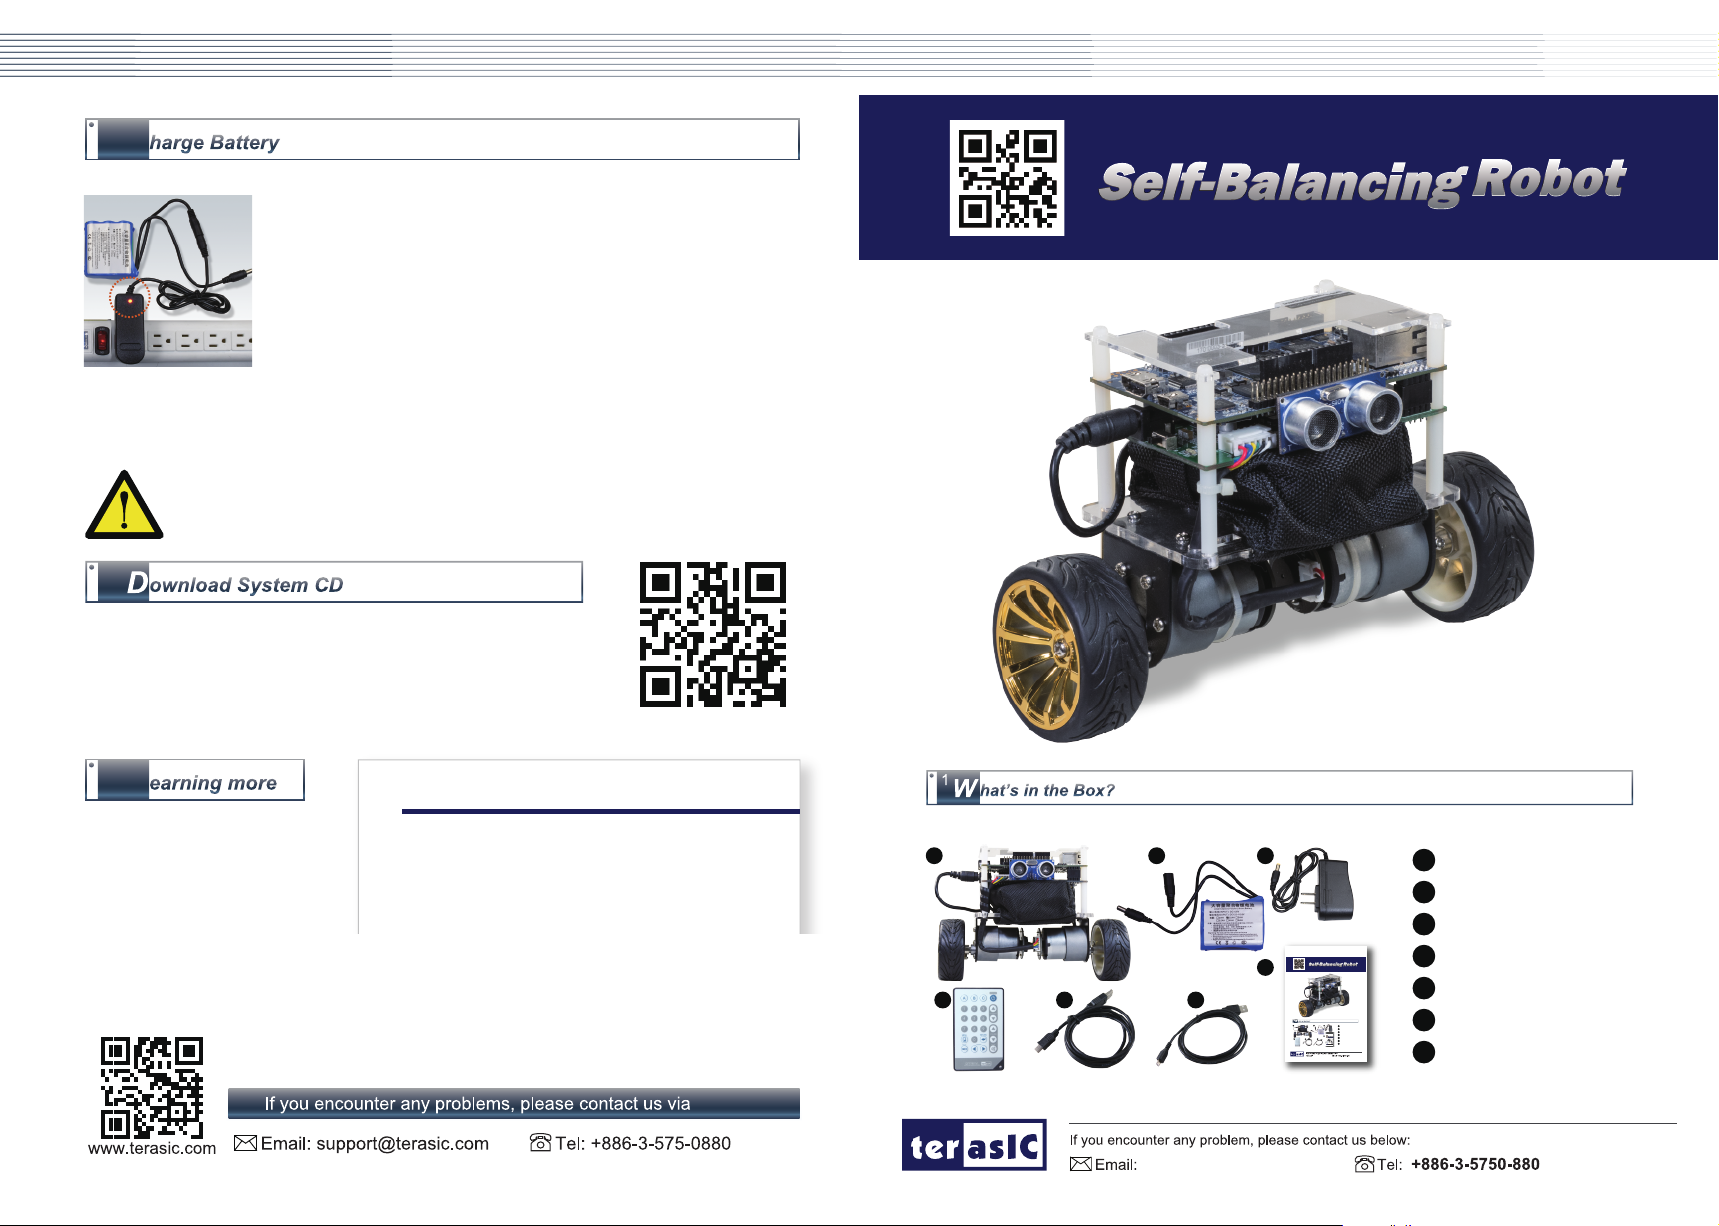
The Self-Balancing Robot is powered by three lithium
batteries, when the power is less than 10V, the LED4 on
the DE10-Nano board will light up, that indicates the
batteries need to be recharged.
Please use the lithium battery charger (that is shipped with
the robot) to charge the battery. During the charging, the
LED on the lithium battery charger will light red; once it is
fully be charged, the LED will light green. If lithium battery
starts charging when it is completely unable to supply the robot, it is expected to
take up to 2 hours to fully be charged.
Attention!! Please DON’T use a non-lithium battery charger to
charge the battery.
7
Users can download the latest system CD from:
http://bal.terasic.com/cd
8
L
For more detailed
information about making
the Self-Balancing Robot
Self-Balancing Robot_Getting_Started_Guide 2
Chapter 1 Introduction 2
Chapter 2 Package Contents 2
Chapter 3 Components and Functions 3
Chapter 4 Switches and LEDs Status Elements 6
Chapter 5 Basic Operations 10
Chapter 6 Advanced features demonstration 12
Chapter 7 Charge the battery 22
Chapter 8 Debug 24
Contents
working, please refer to
Self-Balancing Robot_Getting_Started_Guide.pdf.
For more information, please visit: http://bal.terasic.com
1 3
4 5 6
2
1
A Self-Balancing Robot
2
Lithium Battery
3
Lithium Battery Charger
Quick Start Guide
For more information, please visit: self-balancing-robot.terasic.com
7
1 3
2
1
A Self-Balancing Robot
2
Lithium Battery
3
Lithium Battery Charger
4
IR Remote Control
Quick Start Guide
7
5
Mini USB Cable
4 5 6
6
Micro USB Cable
Quick Start Guide
7
support@terasic.com.cn
www.terasic.com
4
IR Remote Control
5
Mini USB Cable
6
Micro USB Cable
Quick Start Guide
7
support@terasic.com.cn
CPT-3335-00
www.terasic.com
Page 2
4
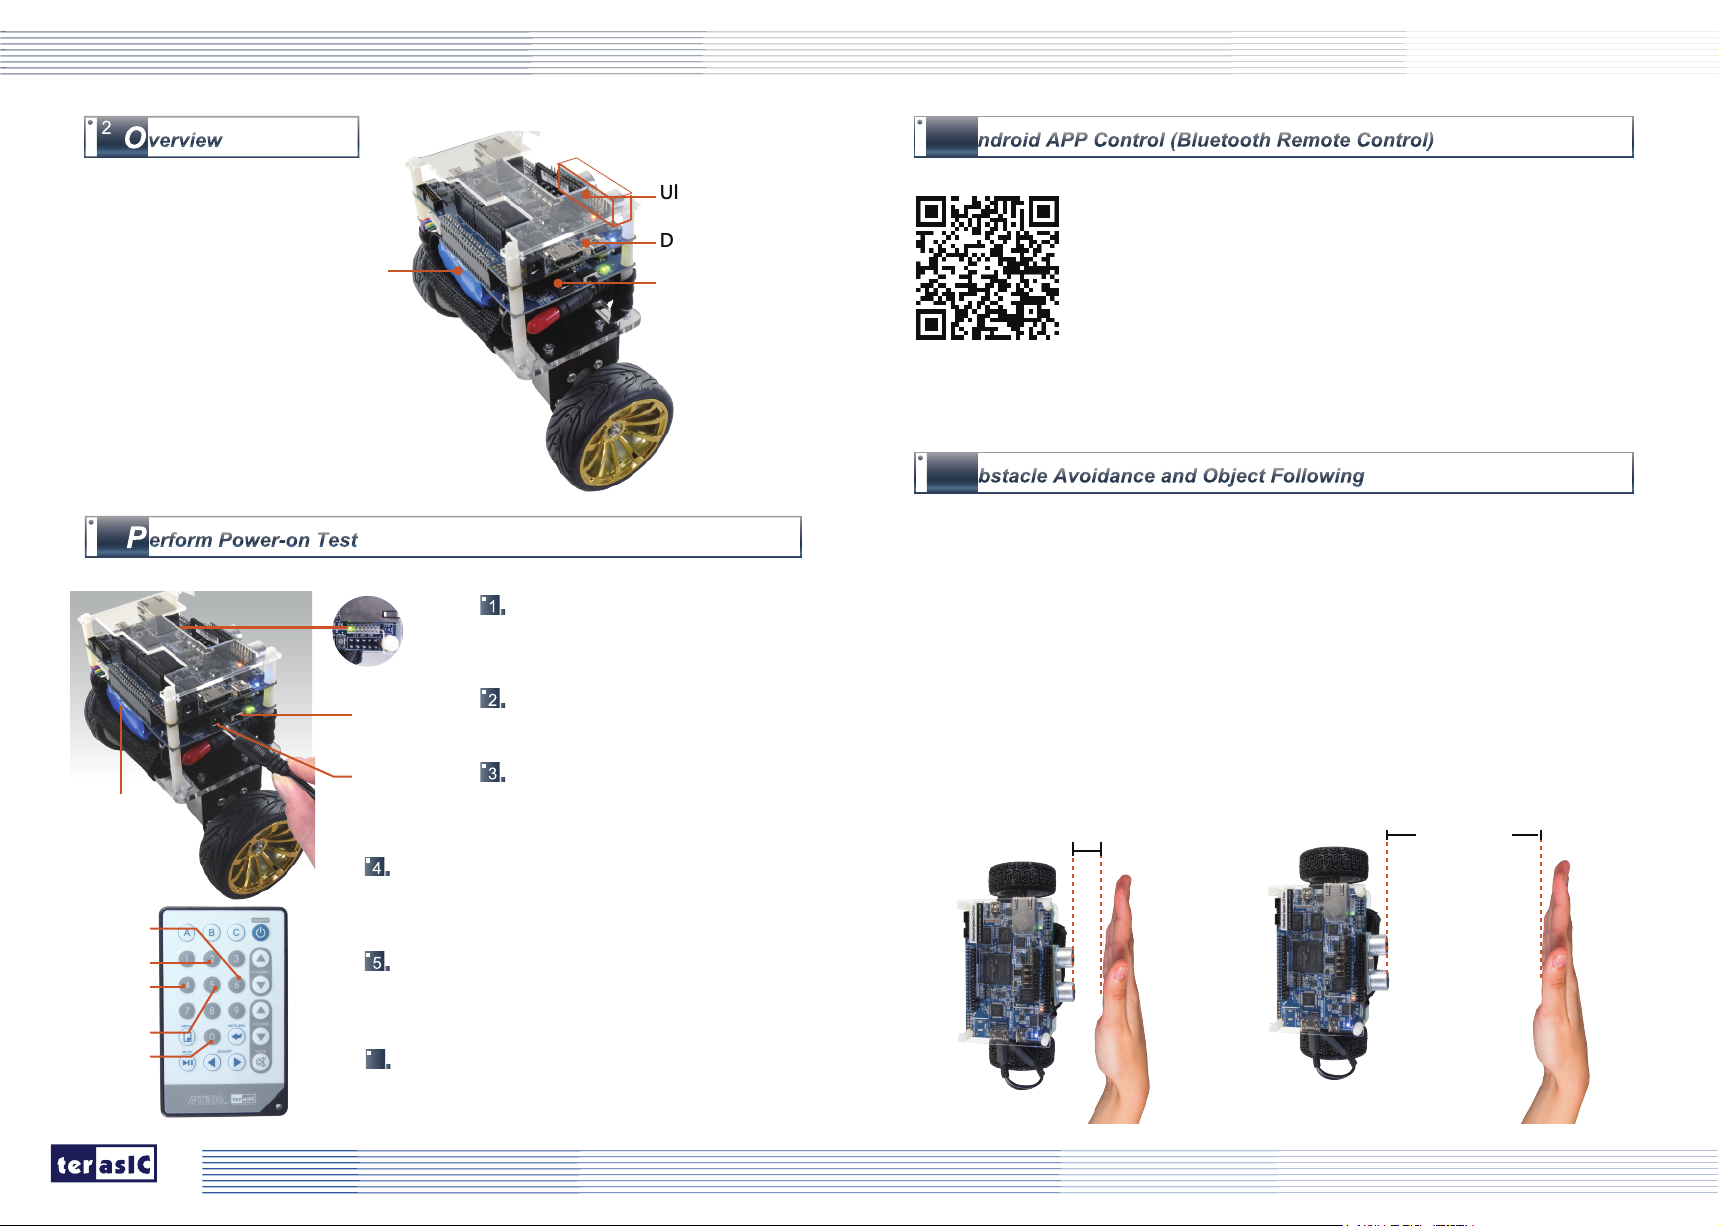
<10CM
A
The Terasic’s Self-Balancing
Robot is a DE10-Nano
based platform, it
integrates BAL board
Battery
(motor driver board),
ultrasonic module,
and it is designed and
manufactured independently by
Terasic. The Self-Balancing Robot comes
with multiple advanced features such as object
following, obstacle avoidance, and it can also be
controlled by Android APP and IR remote control.
3
LED7
Power
switch (SW1)
Power input
Baterry
Jack (J5)
Ultrasonic Module
DE10-Nano Kit
Moter Driver Board
(BAL Board)
Set the power switch (SW1) of
the motor driver board to OFF
position.
Install the Lithium batteries into
the battery package.
Insert the output plug of battery
power into the J5 interface of
the motor driver board.
The Self-Balancing Robot system CD also includes a Bluetooth remote control demo code.
Users can remote control the Self-Balancing Robot by any
Android mobile via Bluetooth.
Users can download and install the Android application by
scanning the QR code with any Android mobile, then can remote control the
robot via the Bluetooth device.
5
O
When set the SW0 to Down position and set the SW1 to Up position, if the
ultrasonic sensor detects the obstacle is in front of the robot and the distance is
within 10cm, the robot will stop automatically.
When set the SW0 to UP position and set the SW1 to Down position, if the
ultrasonic sensor detects the obstacle is in front of the robot and the distance is
within 10cm, the robot will automatically move backward to avoiding the
obstacle; when an object is in front of the ultrasonic module and move slowly and
the distance is in 10cm~20cm, the robot will follow the object to move forward.
Obstacle Avoidance
Object Following
10CM~20CM
Turn right
Forward
Turn left
Stop
Backward
www.terasic.com
Place the Self-Balancing Robot on the plane,
keep the robot on a horizontal state, then set
the power switch (SW1) to ON position.
When the LED7 on the DE10-Nano board
lights up, release the e Self-Balancing Robot,
the robot will keep balance automatically.
6
Use the IR remote control to control the
Self-Balancing Robot.
 Loading...