

Tenvis Mini316W User Manual
User's Manual
V1.3
Product name: Mini series network camera

CONTENT
PRODUCT INSTRUCTION .................................................................................................................3
NOTICE..................................................................................................................................................3
P ACKAGE CONTENTS.......................................................................................................................4
INSTALLATION....................................................................................................................................5
CONNECTING THE CAMERA ...................................................................................................................5
CAMERA SETUP INSTALLATION & USAGE..............................................................................................5
ACCESSING THE NETWORK CAMERA........................................................................................7
INSTALLING THE ACTIVEX....................................................................................................................7
CHECKING THE NETWORK SETTINGS ...................................................................................................14
WITH A PASSWORD TO PREVENT UNAUTHORIZED ACCESS....................................................................14
MAIN PAGE.........................................................................................................................................14
SYSTEM SETUP..................................................................................................................................17
2.1 NETWORK .....................................................................................................................................19
2.1.1 TCP/IP ............................................................................................................ 19
2.1.2 Wireless Network............................................................................................ 21
2.1.3 UPNP.............................................................................................................. 22
2.1.4 PPOE Account Configure................................................................................ 22
2.1.5 DDNS.............................................................................................................. 23
2.2 VIDEO STREAM SETTING. ..............................................................................................................24
2.2.1 Click ‘Stream’ enter Video setting....................................................................24
2.2.2 Night Vision Setting......................................................................................... 26
2
.2.
3 OSD Setting............................................................................................... 26
2.3 ALARM SETTING............................................................................................................................27
2.3.1 Motion Detection.............................................................................................27
2.3.2 Periodic Detection........................................................................................... 28
2.3.3 Alarm Configuration ........................................................................................28
2.3.5 Periodic sending ............................................................................................. 30
2.3.6 I/O alarm......................................................................................................... 31
2.4 RECORDER SETTING.......................................................................................................................31
2.4.1 Device storage................................................................................................31
2.4.2 Storage documents......................................................................................... 32
2.5 SYSTEM MANAGEMENT ................................................................................................................32
2.5.1 User Management .......................................................................................... 32
2.5.2 Firmware Update ............................................................................................ 34
2.5.3 Factory Defaults.............................................................................................. 34
2.5.4 Device Status.................................................................................................. 35
2.5.5 Reboot ............................................................................................................ 35

Product instruction
The use of surveillance devices may be prohibited by law in your country. It is the user’s
responsibility to ensure that the operation of such devices is legal before installing this unit
for its intended use
It is important to first verify that all contents received are complete according to the
Package contents listed below. Take notice of the section Quick Installation Guide before
the Network Camera is installed; then carefully read and follow the instructions in the
Installation chapter to avoid damages due to faulty assembly and installation
The Network Camera is a network device and its use should be straightforward for those
who have basic network knowledge. It is designed for various applications, such as
security surveillance etc.
Notice
1. TF Card
The TF card format should be FAT32, if not, please format it .
2. Power turn on, Power off
The interval time of power on/off must be more than 10seconds, otherwise, it will cause
flash or CPU with serious damaged.
3. If Shaking the Mini cameras, the click voice from camera is normal. Please don’t shake
the Mini camera deliberately to avoid damaging component.
4. When the Mini series Ip camera are in strong light, the slight color cast of image is
normal.
5. As the MINI series with COMS sensor, so the colors are more relatively bright in default
setting. You can adjust it according to the condition.
6. Please check the adaptor, we provide the standard adaptor; please do not change
other adaptors to use.
7. When you update cameras, please note:
Please connect the camera with computer via network cable directly
Please close the other program and windows in the computer;
Please keeps the good power connecting when you update the firmware.

Package contents
1、 Mini Series 2、Power adaptor
3.Camera stand 4、Software CD-ROM

Installation
Connecting the camera
Please verify the all contents received are complete according to the package contents
listed .First of all, making sure that the integrity of package in order to determine whether
the product had been shocked violently or impacted during transport, then we can check
the cause of hardware failure accordingly and find suitable solutions. Using a standard
Ethernet network cable, connect the camera to your network (depending on your own
setup, this may be to your router or switch). The length of the cable should below
100meters.
onnecting the adaptor with power , camera device will detect automatically, the “power”
tatus LED will blinks alternately in green and orange, then infrared light will be fully bright
st, infrared light will extinguish automatically, and the “power”
rnately in green and red. Then, Network camera will be ready to
C
s
by self-test. After self-te
status LED will blinks alte
start.
Camera Setup Installation & Usage
Insert the Installation CD into your CD-ROM drive and the installation screen should
appear automatically (See image below). If it does not, click “Start” then “Run”. In the text
field enter “D:\autorun.exe” (if “D:” is the letter of your CD-ROM Drive)
Click on “Tools” and the following screen will be displayed.
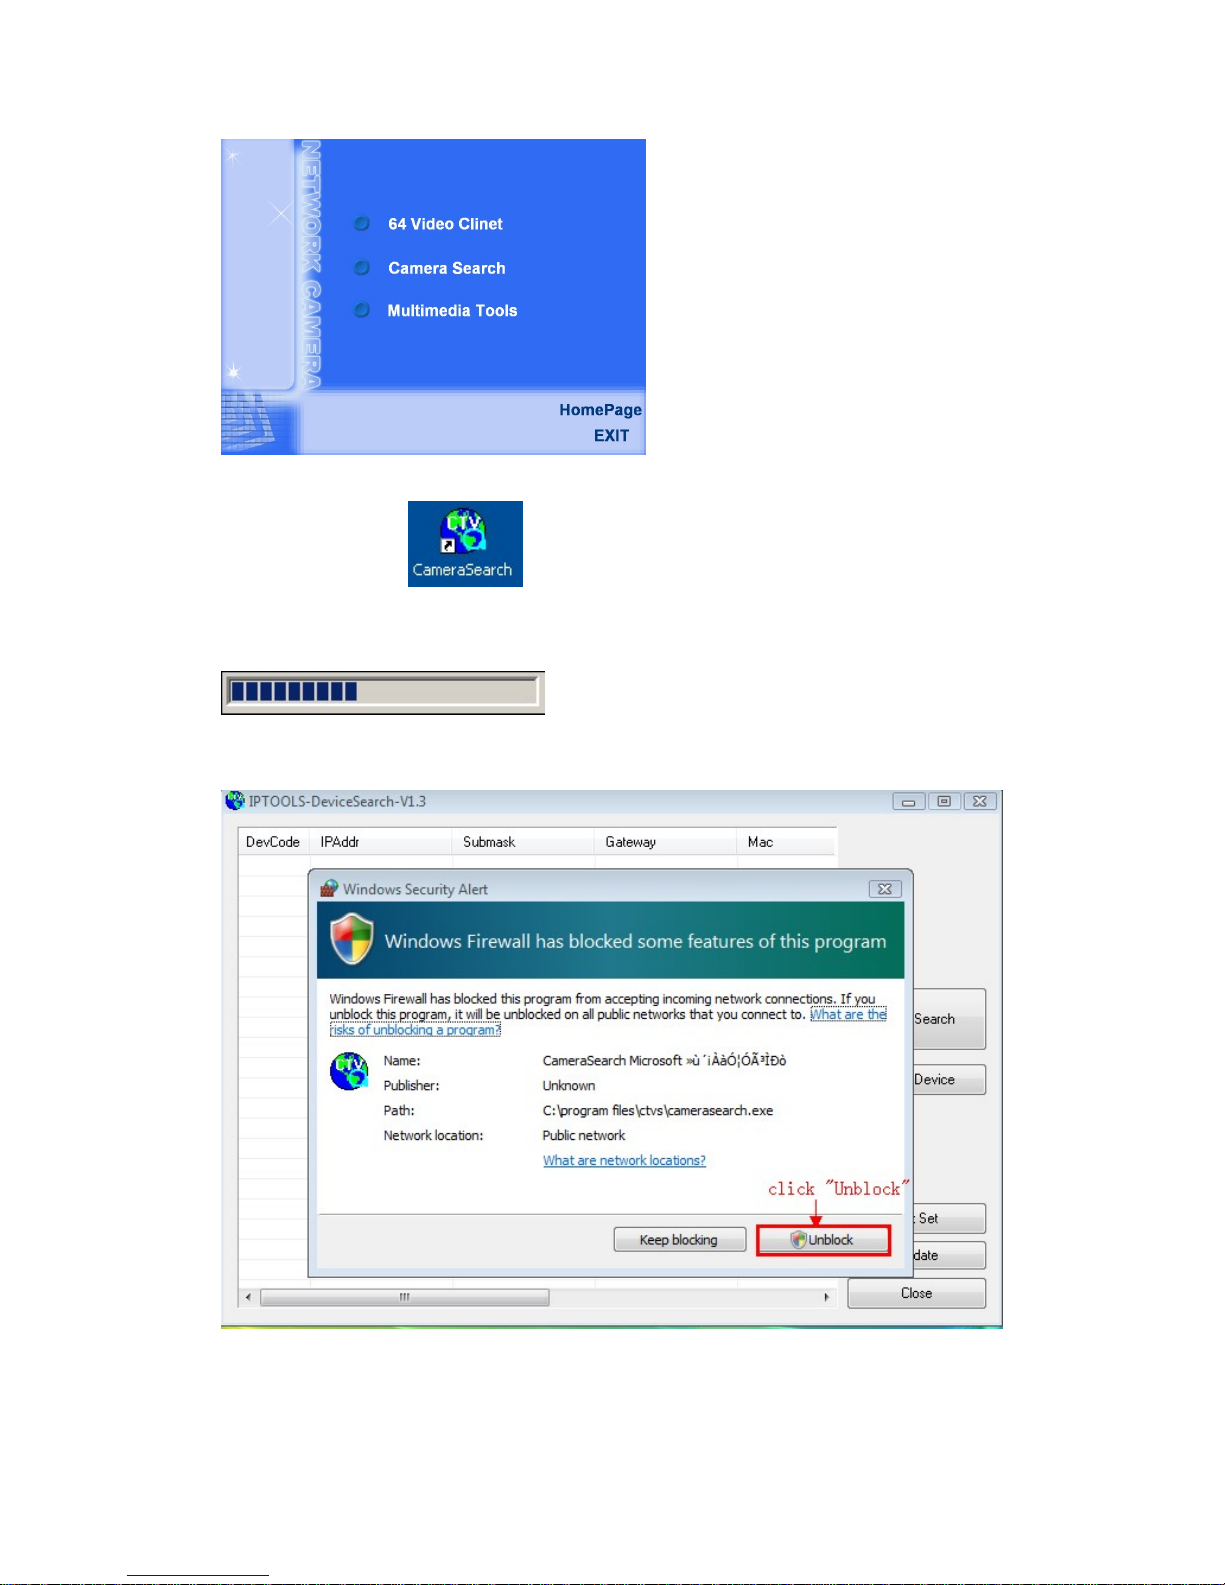
Click on “Camera Search”, Click Finish to end the installation. You should now find an
icon on the desktop.
Double-click the “Camera Search” icon on the Desktop to launch the program. The
Camera Setup utility should automatically find your camera if is correctly connected
The Search Tool will be blocked by fire wall of some Operate Systems. (See image
below).
When Windows Security Alert come out, please click “Unblock” to be sure Search Tool
working well.
All cameras information will be showing when you finish searching.
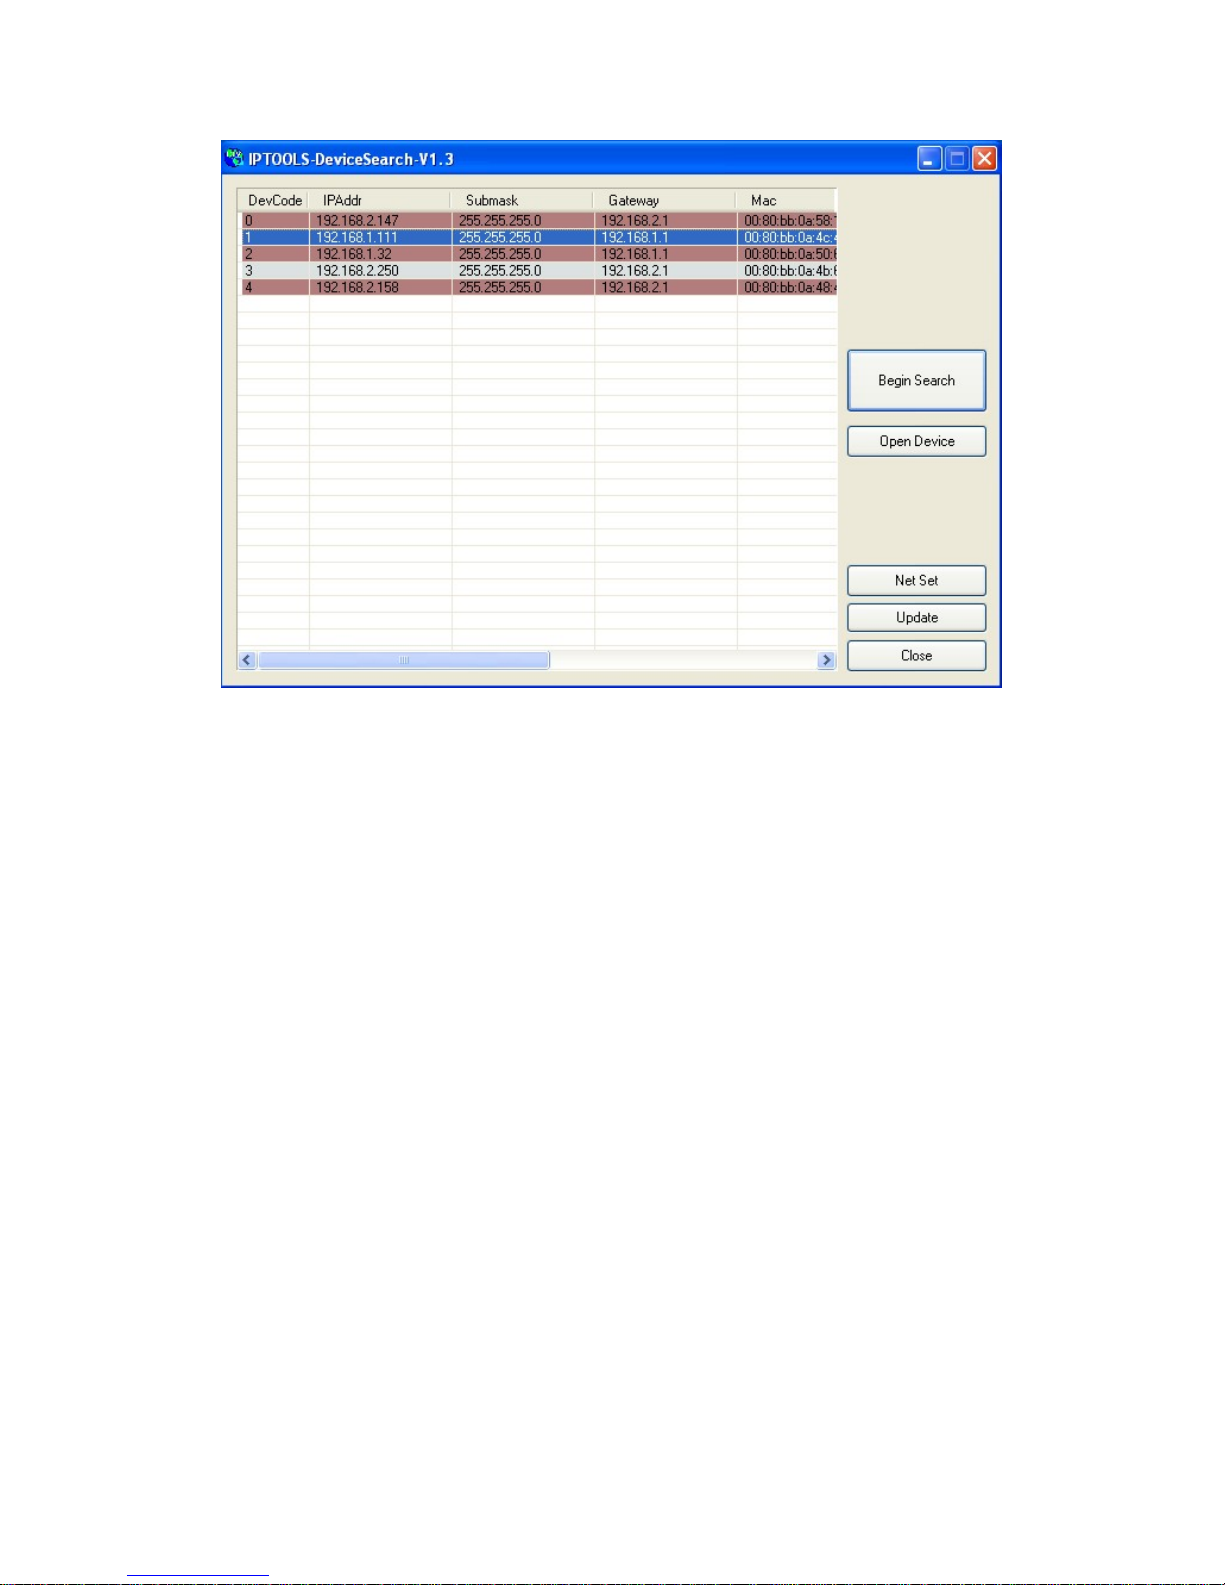
When you finish the “camera to connecting” the administrator should run the “Camera
Search” program to locate the newly installed network cameras. All of the network
cameras installed will be searched by the “camera search” program. When there are
DHCP server in the LAN, MINI Series Network Camera will obtain IP address
automatically from the DHCP server and display in the device list with the LAN ip
address. If there is not the DHCP server, Network Cameras display the factory default
IP address in the search software, factory default IP address: 192.168.1.111.
When the search software have not searched the IP address in the list, please re-click
“begin Search" button, re-searching for network cameras.
User select one of the IP from the device list (the selected one show with blue), click
on the "open device" button, the camera will be opened in the Web browser. When the
network camera is opened with the factory default IP address (192.168.1.111), make
sure that the IP address of the computer with the same network gateway as the
camera. (E.g. the IP address of the camera is 192.168.1.111, the PC should be with
192.168.1.X, the x≠111).
Accessing the network camera
Installing the ActiveX
Input the assigned IP address (or URL) of the camera on the Web Browser, the below
ialog will appear. Input the correct username (the default is admin, in lowercase) and
d
password (the default is admin, in lowercase).
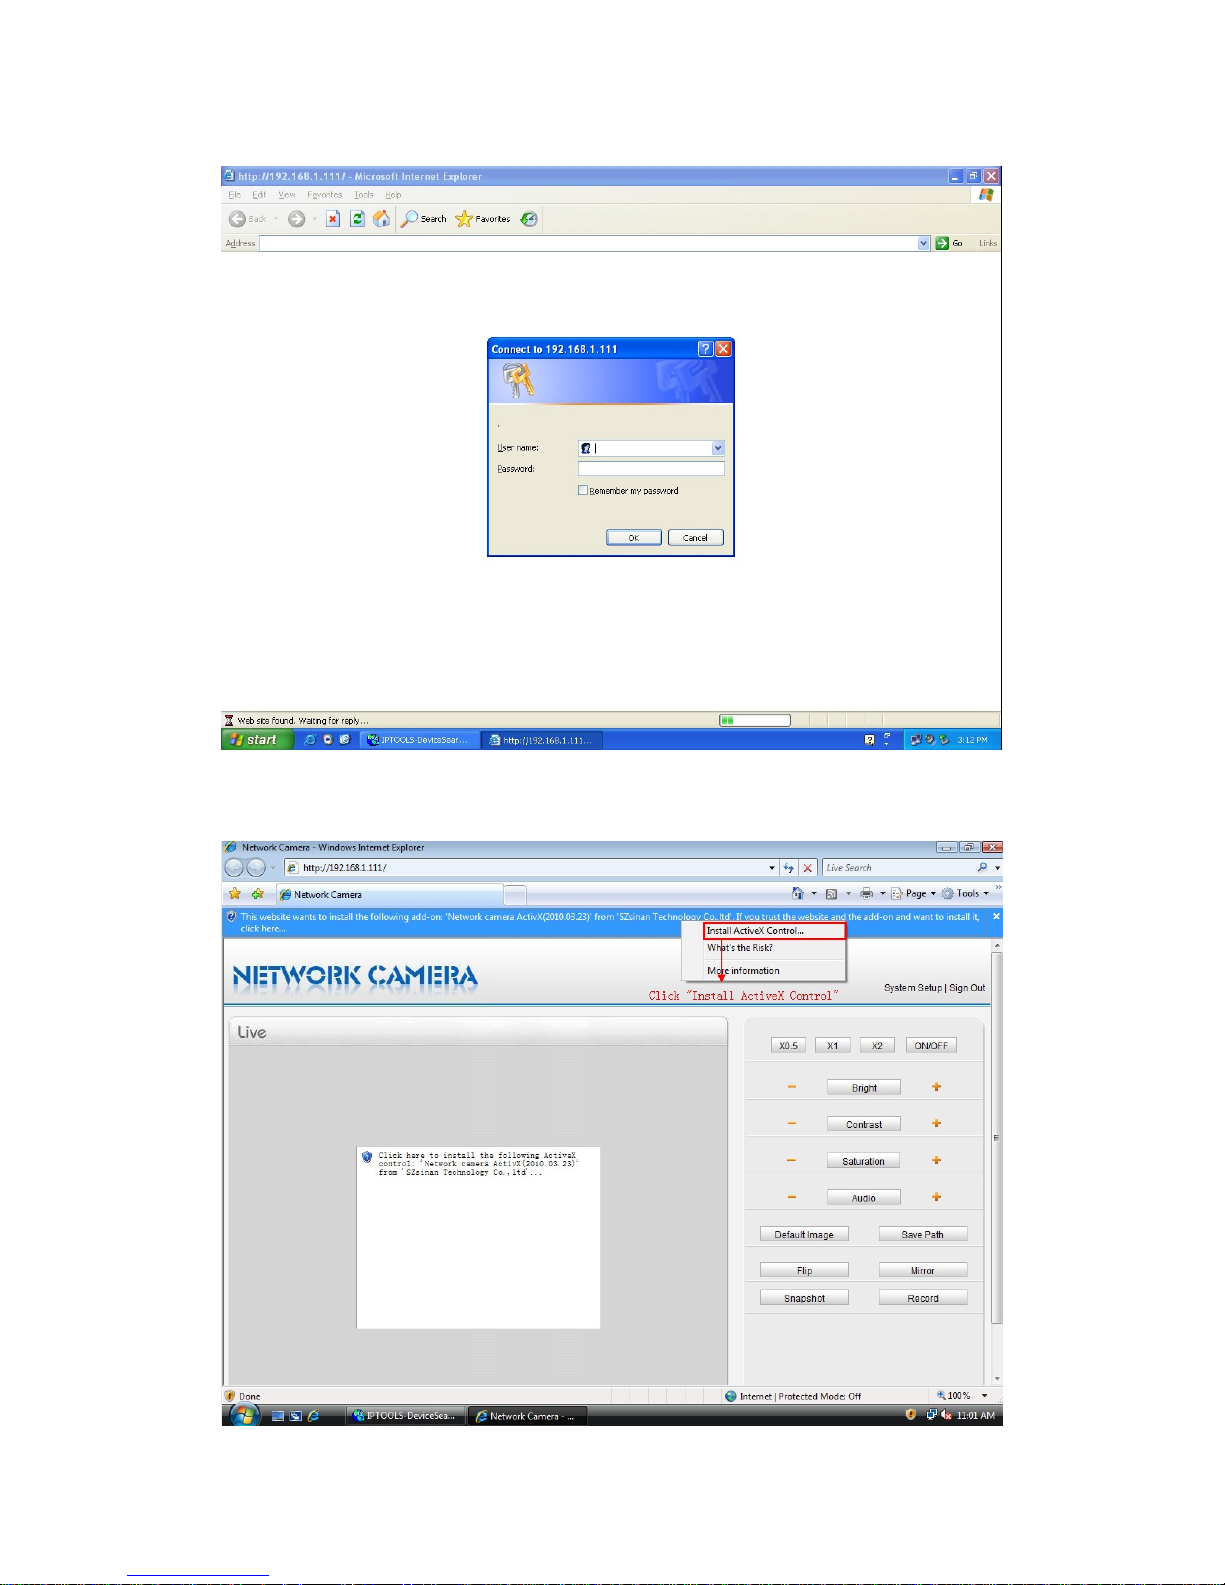
it is the first time to access the windows of the network camera, IE will be prompted to
install the ActiveX control. Users can install it with the following steps:
If
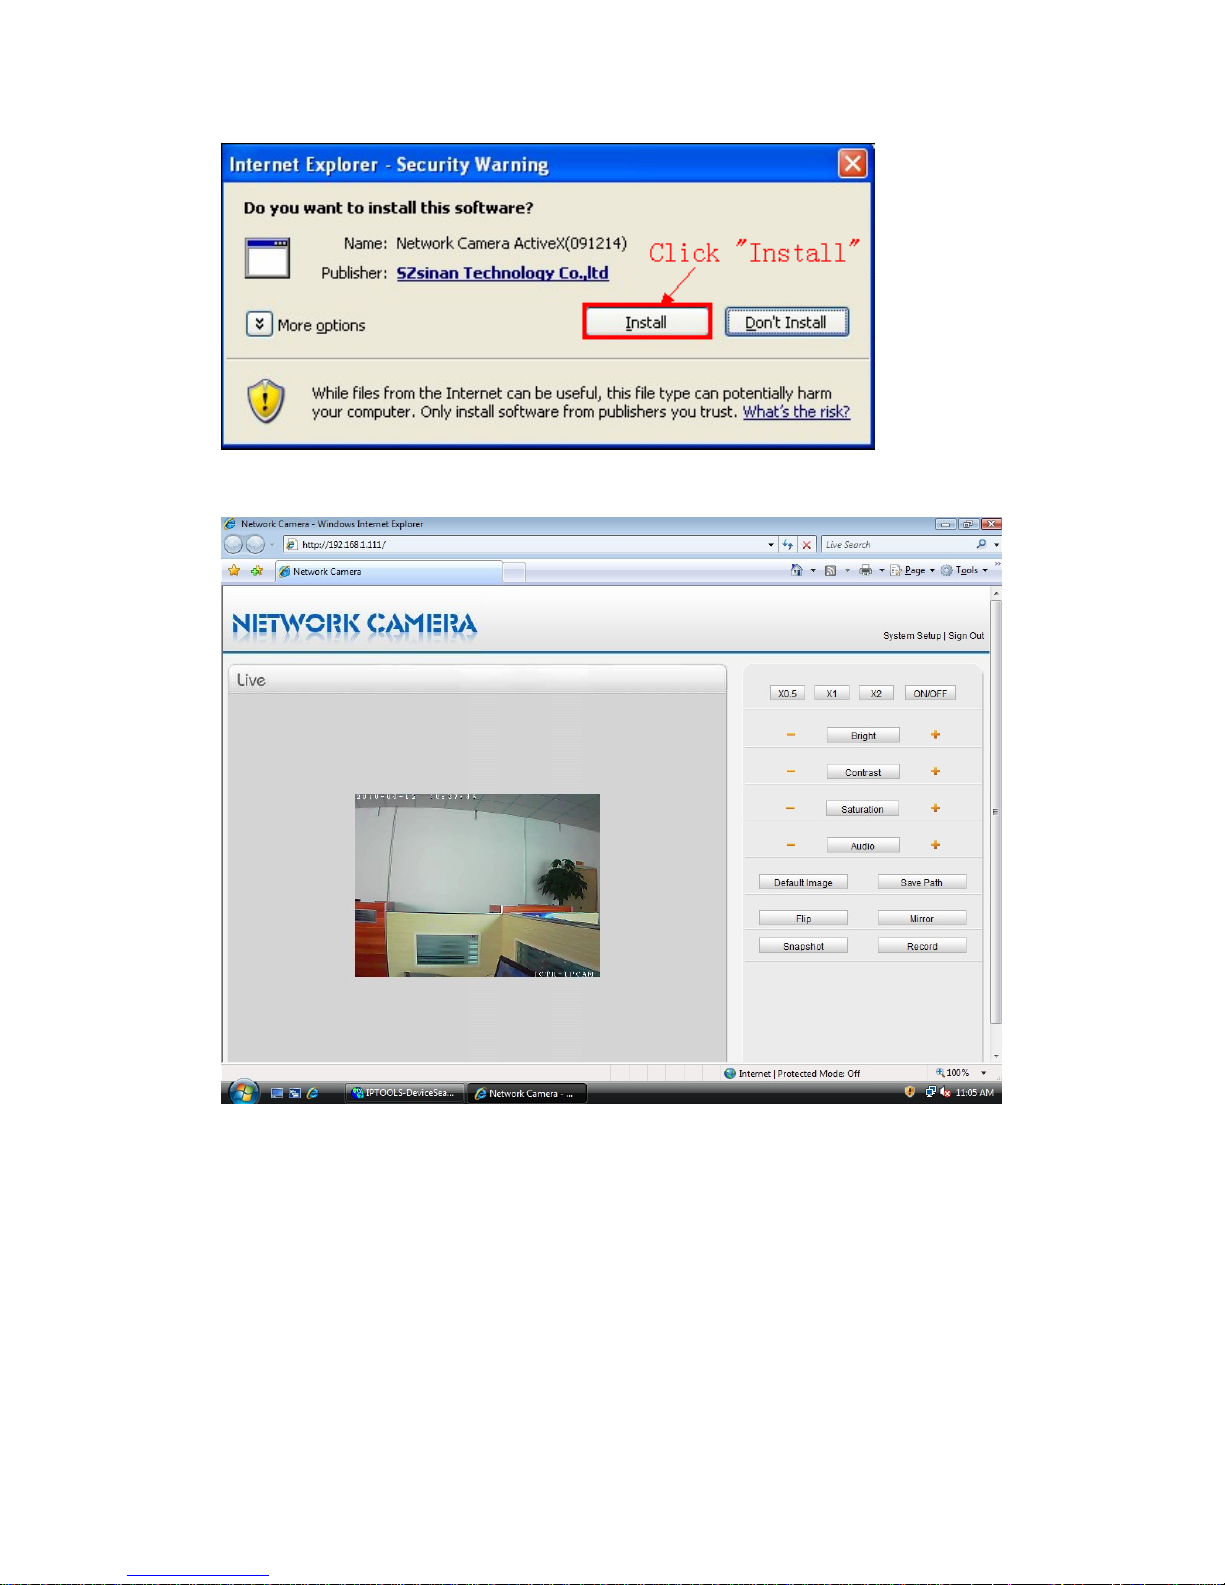
When you finish the installation of the ActiveX control, the live video will be displayed in
your web browser.
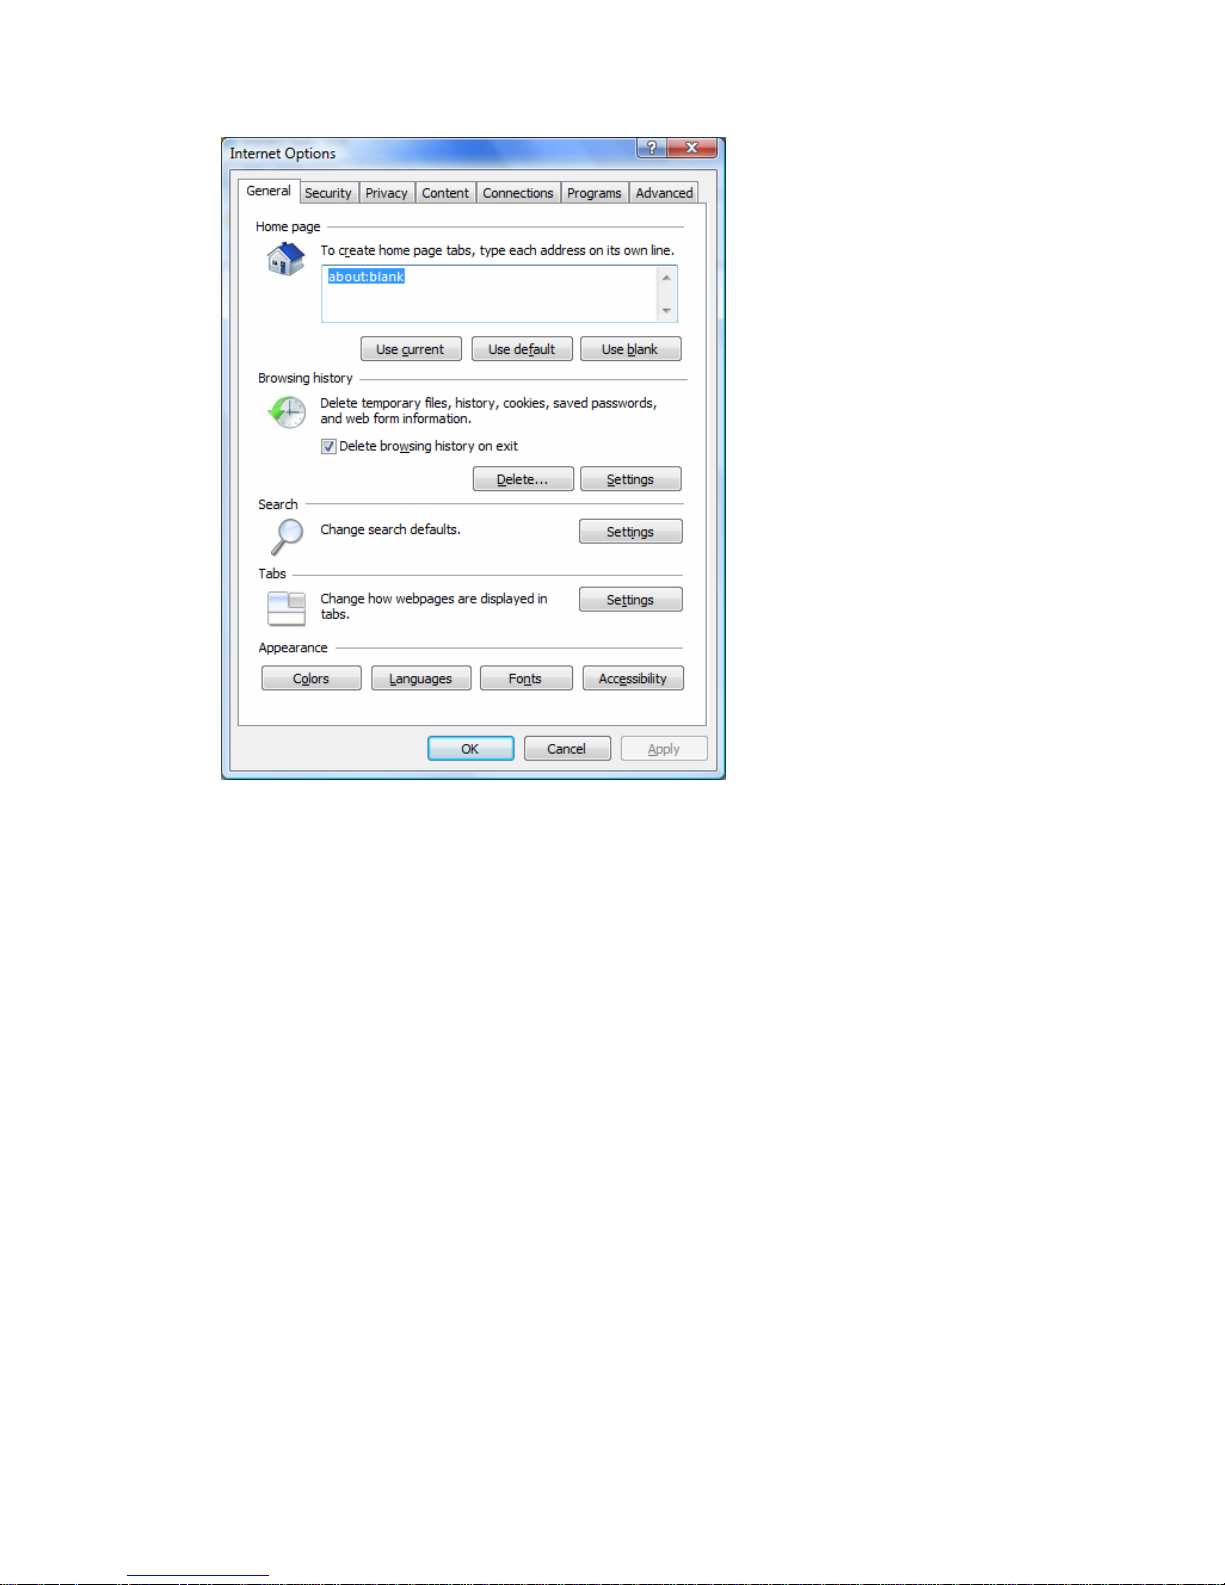
If you see a dialog box indicating that your security settings prohibit running Active
controls, please enable your ActiveX control for your browser.

The steps as following:
1. Open internet explorer
2. Click Tools and Select Internet Options
4. Click on the Security tab in Internet Option snap-in menu.
 Loading...