

Tenvis IPROBOT3 H.264 Quick Start Manual

H.264 Quick Start Guide
Version 1.0
the worl d in my eyes
R
Contents
Hardware Connection
2
iOS View
2
Android View
5
PC View 8
Last, but not least
11
1
NOTE:
Certain functions, appearance or structure mentioned in
this manual may vary according to camera's model. There
will be no prior notice should there be minor changes to
TENVIS product design.

Hardware Connection
1. Screw the antenna into the back of the unit. Tilt it up to an up
right position.
2
2. Connect the power cable and wait for the camera to initialize.
Link the camera to the router using the supplied network cable.
iOS View
1. Download TENVIS P2P from the App Store.
2. Tap on the icon.Add Camera
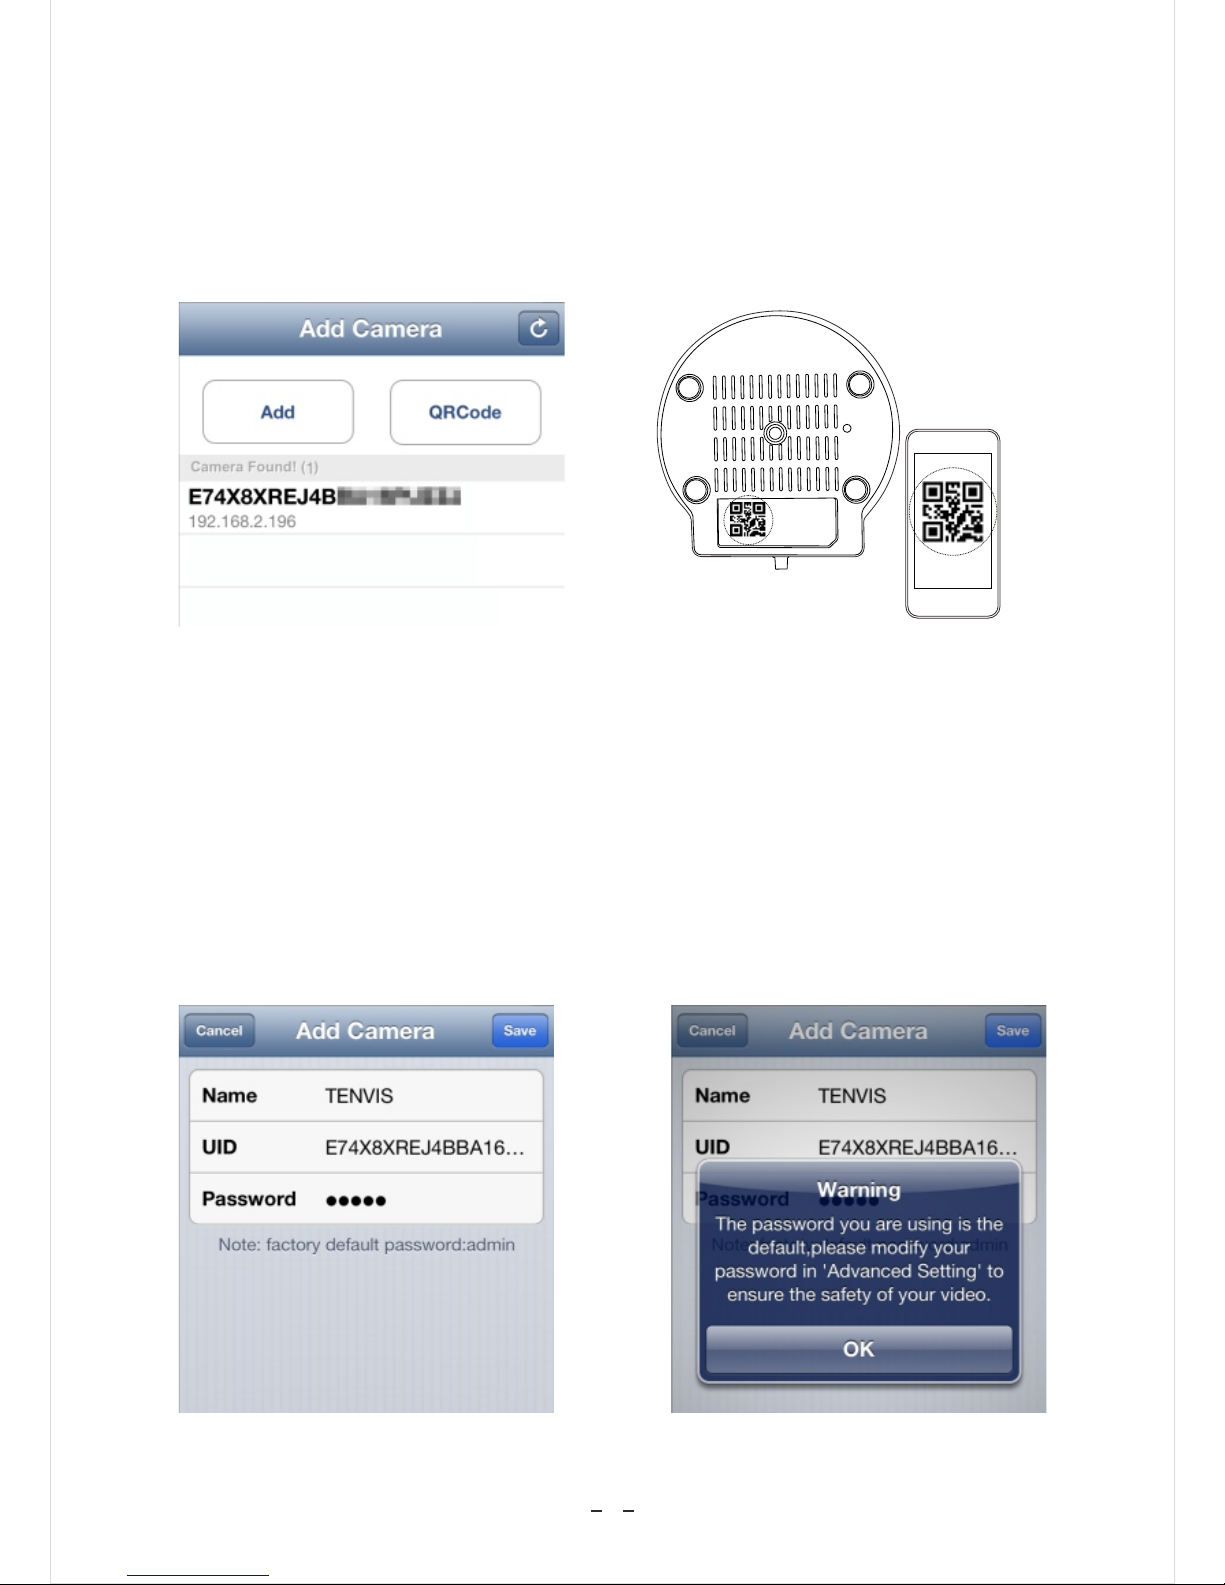
3. Select the camera found in the Local Area Network (LAN) or
press QR Code button to scan the QR code located on the
bottom of the camera. This should give you the UID (User ID).
3
4. Type the camera's name and password. The default password
is .admin
5. For security reasons, please update the default password
of your IP camera so your safety and security is not
compromised.
 Loading...