

Tentipi Nordic Tipi Mounting Instruction
The canopy’s fastening is connected to the
Nordic tipi’s porch sleeve. The eyelet and
cord are used when the canopy is put up
as a freestanding shelter, see the pictures
on the opposite page.
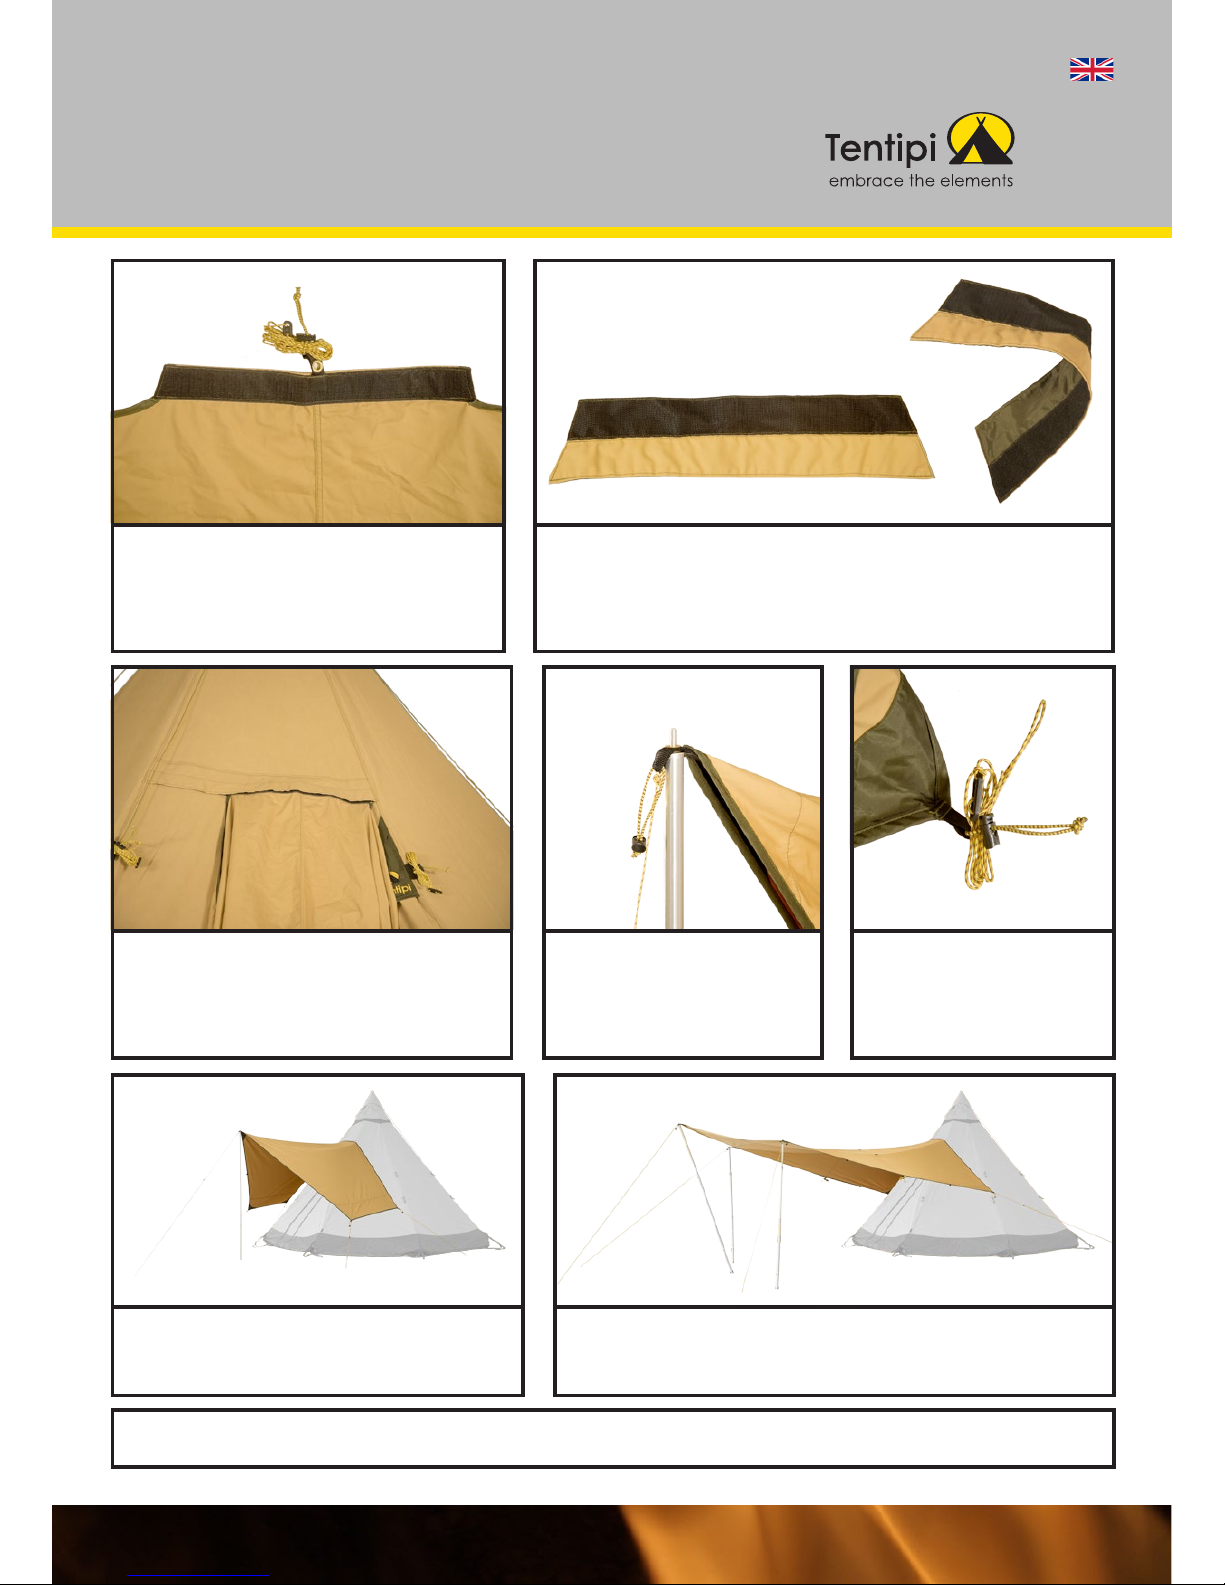
The canopy’s Velcro fastening is designed to fit tent size 7.
A canopy adapter for mounting the canopy to a size 5 tent is
available as an extra accessory, see the picture above. For
size 9, the canopy is mounted furthest to the right on the
porch sleeve.
Canopy 5/7 is mounted using a telescope
pole and a cord and is tightened using
another four cords.
Canopy 7/9 is mounted using three telescope poles plus cords
and is tightened using two or four more cords.
1. Attach the canopy to the porch sleeve. The
Nordic tipi in the picture is size 9. In this example,
the canopy is mounted on the right so that rain
water is led away from the tent opening.
2. The eyelet at the front end
of the canopy is pulled over the
end of a telescope pole and the
cord is pegged to the ground.
Canopy 7/9 has three poles .
3. The other cords are
pegged to the ground too.
Adjust and tighten so that
the canopy is positioned
against the tent.
Mounting the canopy
onto the Nordic tipi
Before using the product, please read “Care instructions, hints and advice” which is found on the memory stick that was included when you purchased your tent.
The canopy is not intended to resist strong winds and snow. The exceptional storm resistance of a Tentipi® Adventure Nordic
tipi is maintained by the canopy being designed so that it can easily be removed in bad weather.
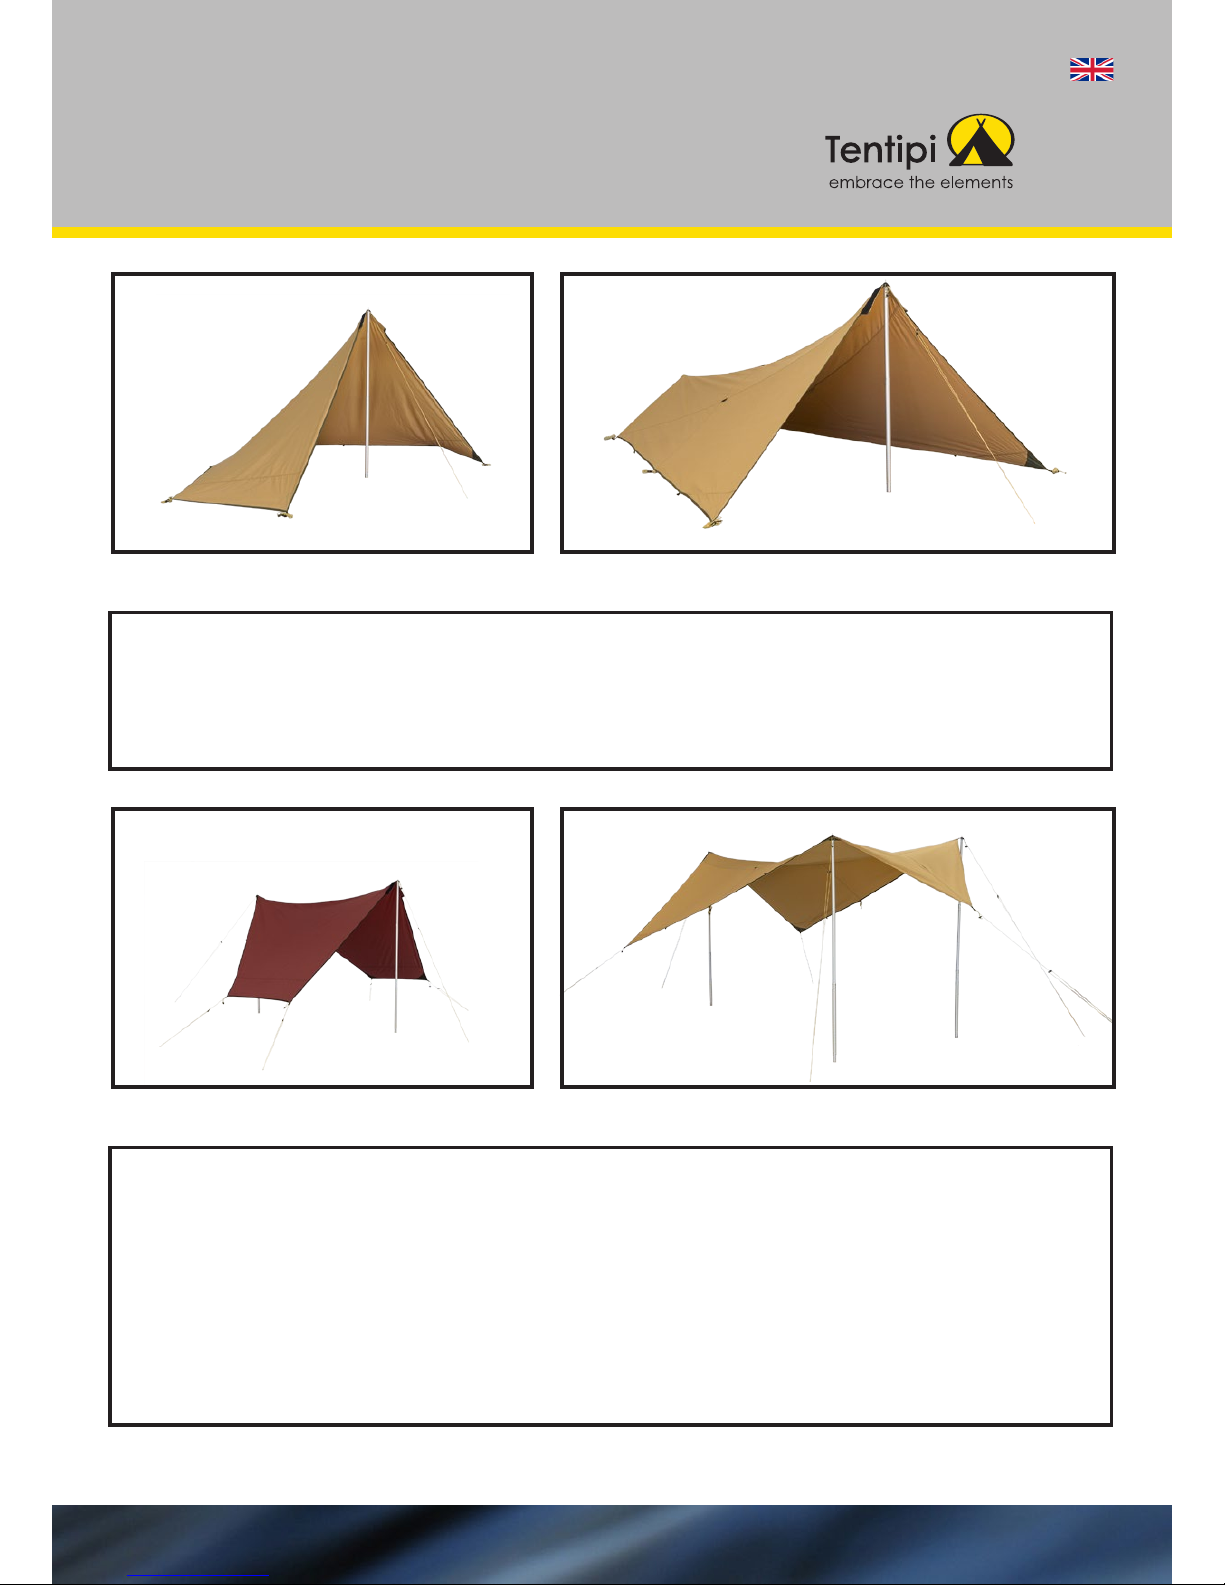
Freestanding canopy
Putting up the canopy as a wind-break or freestanding shelter
Wind-break
First of all, put a tent peg in the band loop on the side opposite the side with the Velcro fastening. Push the end of
a telescope pole through the eyelet by the Velcro fastening and adjust it to a suitable height. Peg the cord down and
tighten it. Place tent pegs along the long sides. Canopy 5/7 has band loops for two tent pegs on each side while
Canopy 7/9 has band loops for three tent pegs on each side.
Freestanding shelter
It is easier to be two people when putting up the canopy like this. One person pushes the end of a telescope pole
through the eyelet by the Velcro fastening and pegs the cord to the ground. While the same person holds the
telescope pole upright, the other person attaches a telescope pole plus cord on the opposite side. For size 7/9,
two poles are needed on this side and it is also possible to put a third telescope pole here, in the same way as
when the canopy is mounted onto the Nordic tipi. The cords on the long sides are pegged down and all cords are
then adjusted using their tensioners. Canopy 5/7 is xed in place using two cords on each long side while for
Canopy 7/9, it may be enough with one cord on each side, thanks to the extra telescope pole.
There are two cords on each long side of Canopy 7/9 as well which can be used if more stability is required.
Canopy 5/7, lightweight model, put up as a freestanding shelter Canopy 7/9 put up as a freestanding shelter
Canopy 5/7 put up as a wind-break Canopy 7/9 put up as a wind-break
Before using the product, please read “Care instructions, hints and advice” which is found on the memory stick that was included when you purchased your tent.
 Loading...