

Page 1
Distributed by:
Period PainReliever
TensCare Ltd, PainAway House,
9 Blenheim Road, Longmead Business Park,
Epsom, Surrey KT19 9BE, UK
Tel: +44(0) 1372 723434
www.tenscare.co.uk info@tenscare.co.uk
Pub Ref.: I-OVAP-UK Rev 3.0 01/17
INSTRUCTIONS FOR USE
READ CAREFULLY BEFORE STARTING USE
Page 2
CONTENTS
Introduction
Intended Use
Period Pain
Advantages of “Ova+”
How itWorks
Contraindications, Cautions &Warnings
Pain Relief programmes
Battery
Controls and Display
Contents of Pack
SettingUp and Using the “Ova+”
Placement ofPads
Application ofPads
Cleaning
Accessories
Disposal
EMCPrecautions
TechnicalSpecifications
Troubleshooting
Warranty
3
4
5
7
8
9
14
17
19
21
22
24
27
30
31
31
32
33
34
37
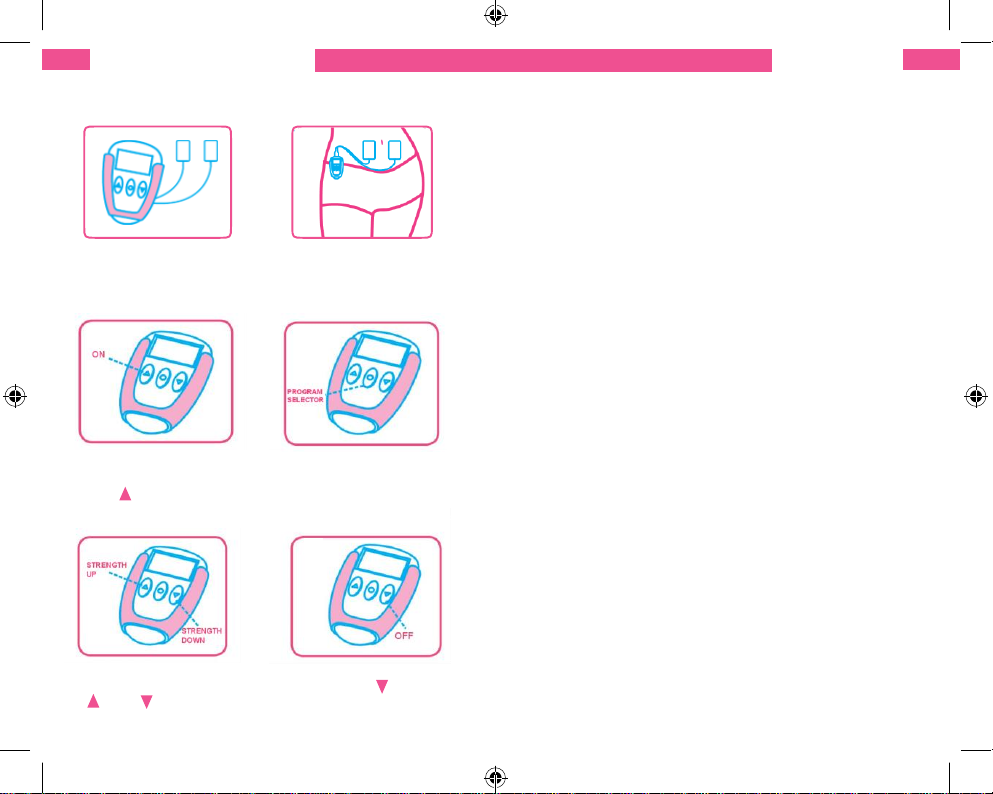
QUICK STARTGUIDE
Connect the main unit
with electrodes using
the Y-cable
Place two electrodes on each
side of your lower tummy,
distance between the
electrodes should be over 3cm
Turn on the device by
pressing and holding
the “ “ button for 3
seconds
Select the programme
which works best for you
by pressing and holding
the “programmeME
SELECTOR” button
Regulate the output
intensity by pressing the
“ ”, or “ ” buttons
Keep pressing and
holding the “ ” button
for 3 seconds to turn
off the device
1.
2.
3.
4.
5.
6.
7.
8.
9.
10.
11.
12.
13.
14.
15.
16.
17.
18.
19.
20.
Page 3

2. INTENDED USE
This device has been designed to be
used in the home healthcare
environment to treat symptoms of
primary menstrual pain
(dysmenorrhoea).
The “Ova+" may also help to relieve the
pain of secondary menstrual pain due to
conditions such as endometriosis, fibroids
or pelvic inflammatory disease.
Do not use the device for any purpose
other than this intendeduse.
1. INTRODUCTION
3 4
Period Pain (Dysmenorrhoea) is a
widespread problem which affects 4090% of women. Period pain can have a
real impact on quality of life, leading to
absences from work and school.
The “Ova +” Period Pain Reliever offers
drug-free relief from period pain. If you
are unsure of the cause of the pain then
you should seek medical advice to
establish the cause and identify the
correct treatment.
The “Ova+” is a non-invasive small and
convenient unit that can be worn all day
under clothing to provide safe,
continuous, drug-free period pain relief
whilst maintaining a normal, active
lifestyle.
Page 4

Painful periods are common in teenagers
and young adults.
Most women have some pain during
periods. The pain is often mild but, in about
5 in 10 women, the pain is severe enough to
affect day-to-day activities. The pain can be
so severe that they are unable to go to
school or work.
Period pain generally falls into two
categories: primary dysmenorrhea and
secondary dysmenorrhea.
Primary dysmenorrhoea has no specific
cause yet is the most common type of
painful periods affecting 9 out of 10 women.
It occurs where there is no underlying
problem of the womb (uterus) or pelvis. The
main symptom is a cramping type of pain in
the lower tummy (abdomen); it may in some
cases spread to the lower back, or to the top
of the legs. Pains are generally worst in the
first few years after starting your period, with
symptoms tending to improve with age or
after childbirth.
Secondary dysmenorrhoea is less common,
and is more likely to occur in women in their
30s and 40s. It is caused by a specific
underlying condition such as endometriosis
(when cells that normally line the uterus are
found at other sites in the body – usually the
ovaries and fallopian tubes). Again, the main
symptom is cramping pain in the lower tummy
during your periods. In some women with
secondary dysmenorrhoea the pain starts
several days before the period begins, and
lasts all the way through the period. (This is
uncommon with primary dysmenorrhoea). With
secondary dysmenorrhoea it is likely to have
other symptoms - forexample:
• Irregular periods.
• Bleeding between periods.
• Pains between periods.
• The bleeding becomes heavier than
previously.
• Vaginal discharge.
• Pain during sex.
• Pain in your backpassage(rectum).
Secondary dysmenorrhoea may occur as a
result of:
• Endometriosis/adenomyosis.
• Pelvic inflammatory disease.
3. PERIOD PAIN
5
6
Page 5

5. HOW IT WORKS
The “Ova+” can be an option for women
who prefer not to usemedication.
The “Ova+” causes muscles in the uterine
area to relax with a calming analgesic
effect.
By reducing menstrual pain, the “Ova+” can
help improve sense of wellbeing and allows
everyday activity to resumewhile it is worn.
The “Ova+” is non-invasive and drug-free,
therefore the risk of side effects is
considered to be low, and can be worn
comfortably while engaging in everyday
activities.
The “Ova+” is easy to useand very discreet.
Its small size makesit convenientto wear all
.
4. ADVANTAGES OF “OVA+”
7
8
day and this allows you to get on with your
everyday life, without period pain.
The “Ova+” uses T.E.N.S. to relieve pain.
T.E.N.S. stands for Transcutaneous
Electrical Nerve Stimulation. The “Ova+”
machine delivers small electrical pulses to
the body via electrode patches placed on
the lower abdomen. It works in three ways:
- It blocks pain signals from reaching the
brain through a mechanism called the
‘Pain Gate’.
- It stimulates the natural production of
endorphins which raise the thresholdfor
painperception.
- Finally, it helps to relax the contracted
muscles.
It is important to allow the “Ova+” time to
work. Each time a new programme or
position for the pads is selected allow the
“Ova+” to run for thirty minutes. If after that
time the relief is not sufficient, then try
another programme or pad position. Evenif
you obtain excellent relief it is still useful to
try othersettings.
• Fibroids when it is often associated
with heavy menstrual bleeding.
• Adhesions.
• Developmental abnormalities.
Consult your healthcare professional if you
are experiencing any of the above
symptoms.
Page 6
6. CONTRAINDICATIONS, CAUTIONS & WARNINGS
Do NOT use if you are or may be pregnant;
or in the first 6-8 weeks after childbirth. It is
not known whether TENS may affect
foetal development.
WARNINGS:
Do NOT use when driving, operating
machinery, or similar actions needing
muscular control. Loose pads, damaged
leads, or sudden changes in contact may
cause brief involuntary muscle
movements.
Do NOT use to mask or relieve
undiagnosed pain. This may delay
diagnosis of a progressivecondition.
Do NOT use if you have poor sensation in
the pelvic region. You may not be able to
control the intensity of stimulation safely.
Do NOT use if you have, in the area
being treated: active or suspected cancer;
or have undiagnosed pain with a history of
cancer. Stimulation directly through a
confirmed or suspected malignancy
should be avoided as it may stimulate
growth and promote spread of cancer
cells.
9
10
In this manual:
A Warning is used when failure to follow
the instructions may result in serious injury
or death.
A Caution is used when failure to follow the
instructions may result in a minor or
moderate injury, or damage to the device or
other property.
CONTRAINDICATIONS:
Do NOT use if you have a pacemaker (or
you have a heart rhythm problem) or with
any electronic medical devices. Using this
unit with electronic medical devices may
cause erroneous operation of the device.
Stimulation in the direct vicinity of an
implanted device may affect some models.
Stimulation on the front of the neck can
affect your heart rate. Very strong
stimulation across the chest may cause an
extra heartbeat.
Page 7

CAUTIONS:
Caution should be used if you have
suspected or diagnosed epilepsy as
electrical stimulation may affect seizure
threshold.
Caution should be observed when using
the “Ova+” at the same time as being
connected to monitoring equipment with
body worn electrode pads. It may interfere
with the signals being monitored.
Caution should be used following recent
surgical procedures. Stimulation may
disrupt the healing process.
Caution. Simultaneous connection to high
frequency surgical equipment may result in
burns and damage to the stimulator.
Caution. Strong electromagnetic fields
(electro-surgery/ microwave cookers/
mobile phones) may affect the correct
operation of this unit. If it appears to
behave unusually, move it away from
these devices.
Caution. Do not permit use by children
unable to understand the instructions or
persons with cognitive disabilities, i.e.;
Alzheimer’s disease or dementia.
DO NOT PLACE ELECTRODE PADS:
• On skin which does not have normal
sensation. If the skin is numb too great a
strength may be used, which could result in
skin inflammation.
• On broken skin. The pads could
encourage infection.
• On the front of the neck. This could
cause the airway to close, giving
breathing problems. May cause sudden
drop in blood pressure (vasovagal
response).
• Over the eyes. May affect eyesight or
cause headaches.
• Across the front of the head. Effect on
patients who have had strokes or seizures
is not known. May affect your sense
of balance. The effects of stimulation of
the brain are unknown.
11
12
Page 8

• Do NOT ignore any allergic reaction to
the electrode pads: If a skin irritation
develops, stop using TENS, as this type of
electrodes may not be suitable for you. You
may need to contact your healthcare
professional to discuss other suitable
options.
TO KEEP YOUR DEVICE IN GOOD WORKING
ORDER, OBSERVE THE FOLLOWING
ADDITIONAL CAUTIONS:
Caution. Do not immerse your device in
water or place it close to excessive heat
such as a fireplace or radiant heater or
sources of high humidity such as a nebulizer
or kettle as this may cause it to cease to
operate correctly.
Caution. Do not attempt to open up or
modify the TENS unit. This may affect the
safe operation of the unit and will invalidate
the warranty.
Caution. Do not use this device with
electrodes other than those recommended
by the manufacturer. Performance may vary
from specification.
13
14
The "Ova+“ offers four preset clinically tested
programmes which are displayed on the
screen as 1, 2, 3, 4. Each programme
relieves pain in a different way. It is
important to try all four programmes to find
which suits you the best. It is also sensible
to change from one programme to another
regularly in order to prevent your body
unduly accommodating to one particular
programme.
programme 1 has a constant output that
produces a tingling sensation, activating the
Pain Gate. It is the programme that is likely
to result in the greatest pain relief.
programme 2 also has a constant output but,
due to a different pulse width, it will feel less
strong than programme A.
programme 3 contains a burst signal thus the
feeling will be one of pulsing. This
programme can have the advantage of
achieving, for a time, ongoing residual pain
relief after the “Ova+” has been switched off.
programme 4 is a fast tapping/vibrating
sensation. This setting uses the Endorphin
Release mechanism, and has been shown to
soothe over-excited nerves.
7. PAIN RELIEF programmes
Page 9
15
16
GENERAL POINTS
i) A microprocessor inside the device offers
user-friendly controls and gentle outputs.
ii) Most users feel a warm, relaxing sensation
and pain relief across the lower tummy
during treatments. These results are the
favourable effects produced by the electrical
output from the device which copies natural
nerve impulses.
iii) A large LCD screen clearly shows the
operation of the unit.
iv) A small clip on the back of the plastic
holder of the main unit helps to attach the
device to your underwear, skirt, trousers or
pockets.
v) 4 programmes cover typical types of
individual nervedifferences.
vi) Output current automatically returns to
zero when switching programmes.
vii) The unit has a built-in Li-ion rechargeable
battery & a micro USB port. To charge the
device, use a phone or tablet charger, or the
USB port of a computer.
viii) When the device is switched ON, it will
resume in the mode previously used.
ix) When the battery is low, the battery
symbol on the LCD screenwill flash.
x) Use the highest intensity setting that is still
comfortable.
xi) You will find that you grow accustomed to
the stimulation (this is known as
accommodation), and need to increase the
intensity to keep feelinga strong sensation.
xii) TENS can be used as long as it gives
relief. If the effect wears off, turn off the unit
for an hour to allow your nerves to re-set.
xiii) Do not use while sleeping.
Warning. Turn off the device before
disconnecting leads or removing the
electrodes from the skin.
Page 10

17
18
1. A fully charged battery should run for at
least 5 hours.
2. When the battery symbol on the LCD
screen flashes, it is time to charge the
battery.
3. Connect the USB cable to a mobile
phone or tablet charger, or to a PC USB
port.
4. The battery indicator bar cycles from zero
to the max when charging is in progress.
5. Charging should take about 40 minutes.
8. BATTERY
6. When the battery charging has
completed, the bar stops cycling and
remains at maximum to indicate full
capacity.
7. Remove the charging cable and
adaptor from the device when charging
is completed.
WARNING:
This product is equipped with a Lithium-ion
battery. Failure to follow these instructions
could cause the lithium-ion battery to leak
acid, become hot, explode or ignite and
cause injury and /or damage:
Do NOT expose to temperatures over
60°C (140F)
Do NOT put, store or leave it
near sources of heat, in direct strong
sunlight, in a high temperature
location, in a pressurized container or
in a microwave oven.
NB A charging adaptor is available as an
optional accessory. Please contact
TensCare helpline on +44 (0) 1372 723 434.
Caution: If battery leakage occurs and comes in
contact with the skin or eyes, wash thoroughly with
lots of water and seek medical advice.
Page 11

9. CONTROLS AND DISPLAY
LCD
USB
Off/Down
On/Up
Programme
selector
Left button ( ):
Press and hold this key for 2 seconds to turn
ON the device. When the device is ON,
repeatedly press it to increase the strength
of the electrical signal. Turn the strength up
slowly, wait after eachpress to feel the effect.
Central button ( ):
Every time the unit is switched ON, the
programme used in the last session is
automatically loaded. To change it, press
and hold the button for 2 seconds. This
allows the selection one of the 4 preset
programmes. When a different programme is
selected, the stimulation strength is
automatically reset to 0.
Right button ( ):
Repeatedly press this key to decrease the
strength. To switch OFF the device, press
and hold it for 2 seconds.
The micro USB port provides a connection to
the electrodes, or to charge the battery
inside.
The LCD display shows the selected
programme (through a number from 1 to 4)
and the level and status of stimulation output
(through a 20 segment bar graph).
When the battery is low, a blinking symbol is
displayed to warn it should be recharged.
19 20
Page 12

10. CONTENTS OFPACK
21
22
The Ova+ packaging should include the
following parts:
– “Ova+” unit
– Pack of 2 self adhesive electrodes, 50x90
mm with 2.1 mm “pigtail” connection
– USB chargingcable
– Lead wire (Y- cable)
– Belt clipsupport tobe attached to clothing
– User guide
– Storage pouch
11. SETTINGUP
11.1 PREPARING THE “OVA+” UNIT
1. To test that the battery is charged (see
section 8) and that the unit is working press
and hold the “ ” button for at least three
seconds.
The display should appear and an audible
“Beep” will be heard.
Press and hold the “ ” button to turn off the
unit.
2. Connect the Y-cable to the unit.
3. Connect the electrode pad “pigtail”
connections to the Y-cable.
Y-cable
Page 13

23
24
4. After the wires are securely connected,
separate the electrodes from the backing
and apply as described in sections 12 &
13.
11.2 USIGN THE “OVA+”
1. Once the electrode pads are in place,
press and hold the “ ” button on the control
unit for at least 3 seconds to switch the
control unit on.
2. When switched on for the first time, the
“Ova+” will automatically select the ‘1’
programme. After that it will automatically
select the programme you were using the last
time it was switched off.
3. You can select from the four preset
programmes. Details in section 7 will help
you identify the best programme to suityou.
4. With the required programme selected,
you can adjust the intensity of the stimulation
until you reach a comfortable level.
Note: If the sensation becomes uncomfortable,
reduce the intensity.
12. PLACEMENT OF PADS
In order to obtain the best relief, the pads
need to be placed over the dermatomes T10,
T11 and T12, which are the nerve roots that
supply the sensory fibres to the uterus. These
dermatomes wrap around the body, but do
not quite meet up at the front. They run from
around waist height at the back down to the
groin area at the front.
As each person’s body is different, the
“Ova+” is supplied with pads which are large
enough to be effective even if not located
exactly over all three dermatomes. When the
pads are placed correctly the “Ova+” will
work very well. Therefore if after thirty
minutes considerable relief has not been
achieved, either move the pads slightly or try
one of the other pad positioning areas.
There are THREE positions where the pads
can be placed for maximum benefit. It is
recommended that the positions are tried in
the following order until maximum relief is
obtained:
Caution: Ensure the device is OFF before
connecting/disconnecting the leads or
applying/removing the electrodes from the skin.
Page 14

25 26
On the front, in a vertical format:
In the vicinity of your groin, place the pads
vertically, about 10cms (4 inches) apart. The
“pigtails” should be uppermost.
• On the lower back
• On the front, in a vertical format
• On the front, in a diagonal format
Please refer to the diagrams below:
On the lower back:
Place the pads vertically either side of the
spine, approximately 10cms (4 inches)
apart, with the bottom of the electrodes no
higher than the top of your buttocks. The
“pigtails” should hang down from thepads.
On the front, in a diagonal format:
In the vicinity of your groin, place the pads in
a V-shape, narrowing to about 10cms (4
inches) apart at the lower end of the pads.
The “pigtails” should be uppermost.
.
Caution: The self-adhesive pads supplied are
intended for multi-use by one person only. Do
not lend used pads to others, nor use someone
else’s used pads yourself.
Page 15

27 28
To apply the pads simply peel off the clear
film liner and the pads will adhere to the skin
automatically.
Return the plastic film liner into the bag, as
the pads will need to be replaced onto the
film after use.
Points to note when applying the pads:
• Make sure the “Ova+” is switched off before
applying or removing the pads.
• Ensure that the skin is clean and thoroughly
dry before attaching the pads, as they will
not adhere well if the skin is wet or greasy.
• Do not worry if a small part of each pad
covers the pubic hair. After use the pads
can be removed gently without pulling out
the hair.
• If a large part of the pad area is covered
with hair the stimulation may be less
effective. If hair needs to be removed, wait
48 hours after shaving, waxing or using
depilatory cream before applying the pads,
to avoid irritating the skin.
• Remove the pads from the skin or from the
liner by peeling them back from the edge of
the pad. Do not remove by pulling on the
pad’s “pigtail” wire.
• If you find that a small part of the pad
overlaps the top of your thigh, and that this
is uncomfortable, then it is possible to cut
off this part using scissors. Before cutting
make sure that you are cutting from the
opposite end to the lead wire and that you
are not cutting through any of the wires
which run through the pad. Do not cut off
more than a small triangular piece, with
sides no more than 20mm long and an
area no greater than 200 sq.mm.
Ensure that the leadwire is slack at all times
when the “Ova+” is in use. Excessive force
applied to the leadwire could cause a “pigtail”
to separatefrom its pad.
Seediagram.
13. APPLICATION OF PADS
Care of Electrode Pads
Page 16

The electrode pads supplied with your “Ova+”
unit are self-adhesive and can be used
several times. Skin must be allowed to
breathe, so the pads should be removed
periodically.
When not in use, the pads should be placed
onto the plastic film liner and sealed in the
bag.
• Storage life of an unopened pack of
electrodes is 2 years. This may be
affected by very high temperatures or
very low humidity.
29 30
Clean the case and lead wires at least once a
week either with an alcohol-free antibacterial
wipe or by wiping with a damp lint-free cloth
and a solution of mild soap and water. Wipe
dry.
• Do not immerse your TENS machine in
water.
• Do not use anyothercleaningsolution.
Expected Service life
• The machine will often last for more than
5 years, but is guaranteed for 2 years.
Damage to the leads or electrode pads is
not covered by the warranty.
• Lead life depends greatly on use. Always
handle the lead with care.
• Pads should last 12-20 applications,
depending on skin condition and humidity.
• Fully charged battery should last about 5
hours continuous use.
• Battery should last approximately 400
charge cycles.
• The pads provided are latex-free.
14. CLEANING
• When the pads initially lose
their adhesive quality, it is
possible to reactivate their
adhesiveness by applying
a fine mist of water.
• Replace pads when they
lose their stickiness.
Note: Poor connectionmay cause discomfort and
skin irritation.
Page 17

31 32
15. ACCESSORIES
Part number:
E-CM5090-2
L-OVA+
X-OVA-USB
- pack of 2electrodes
- Y electrodecable
- USBcable
Telephone: +44 (0) 1372 723 434
Web: www.tenscare.co.uk
17. EMC PRECAUTIONS
Wireless communications equipment such
as wireless home network devices, mobile
phones, cordless telephones and their base
stations, walkie-talkies can affect this
equipment and should be kept at least a
distance d = 3,3 m away from the
equipment.
NB: As indicated in Table 6 of IEC 60601-12:2007 for ME EQUIPMENT, a typical cell
phone with a maximum output power of 2 W
yields d = 3,3 m at an IMMUNITY LEVEL of
3 V/m
16. DISPOSAL
One of the provisions of the European
Directive 2002/96/CE is that anything
electrical or electronic should not be treated
as domestic waste and simply thrown away.
To remind you of this Directive all affected
products are now being marked with a
crossed-out wheelie bin symbol, as depicted
below.
To comply with the Directive you can return
your old electrotherapy unit to us for disposal.
Simply print a postage-paid PACKETPOST
RETURNS
Note: For use in hospitals, full EMC tables are
available on request.
Further information on purchasing accessories
can be obtained from TensCare Ltd:
label from our website www.tenscare.co.uk,
attach this to an envelope or padded bag
with the unit enclosed, and post it back to
us. Upon receipt we will send your old
device for components recovery and
recycling to help to conserve the world’s
resources and minimise any adverse effects
on the environment.
Page 18

18. TECHNICAL SPECIFICATIONS
19. TROUBLESHOOTING
Problem Possible
causes
Solution
No display Flat batteries Charge battery
Low
battery
display
Low batteries Charge battery
No
sensation
Incorrect
connection
Have you
applied both
electrode pads
to the Y-cable
to ensure a
complete
circuit?
Not strong
enough
Increase
strength. Most
users will feel
something at a
setting below
5.
Lead
faulty/damaged
Replace lead
33 34
Prog Description Rate Hz
Pulse duration
μs
1 Constant Output 110 100
2 Constant Output 110 50
3 Burst Output 2Hz 100 150
4 Constant Output 10 200
Output
Output current
Wave shape
Display
Battery
Power supply
Dimensions
Type BF
Equipment
Water resistance
Contact Duration
Environmental Specifications
Operating:
Storage:
Single channel
Max. 52 mA across 500 Ohm
Symmetrical Bi-Polar rectangular
14 mm x 24 mm LCD
Rechargeable Li-ion 3.7V
5V DC 1A
38x65.3x9.6 mm
Degree of protection against electrical
shock
IP22. No special moisture protection
At least 10 minutes
Temperature range: 5 to 40 C
Humidity: 15 to 93%RH non
condensing
Temperature range: -25 to +70 C
Humidity: 93%RH non condensing
NB The electrical specifications are nominal and subject to
variation from the listed values due to normal production
tolerances.
Page 19
35
36
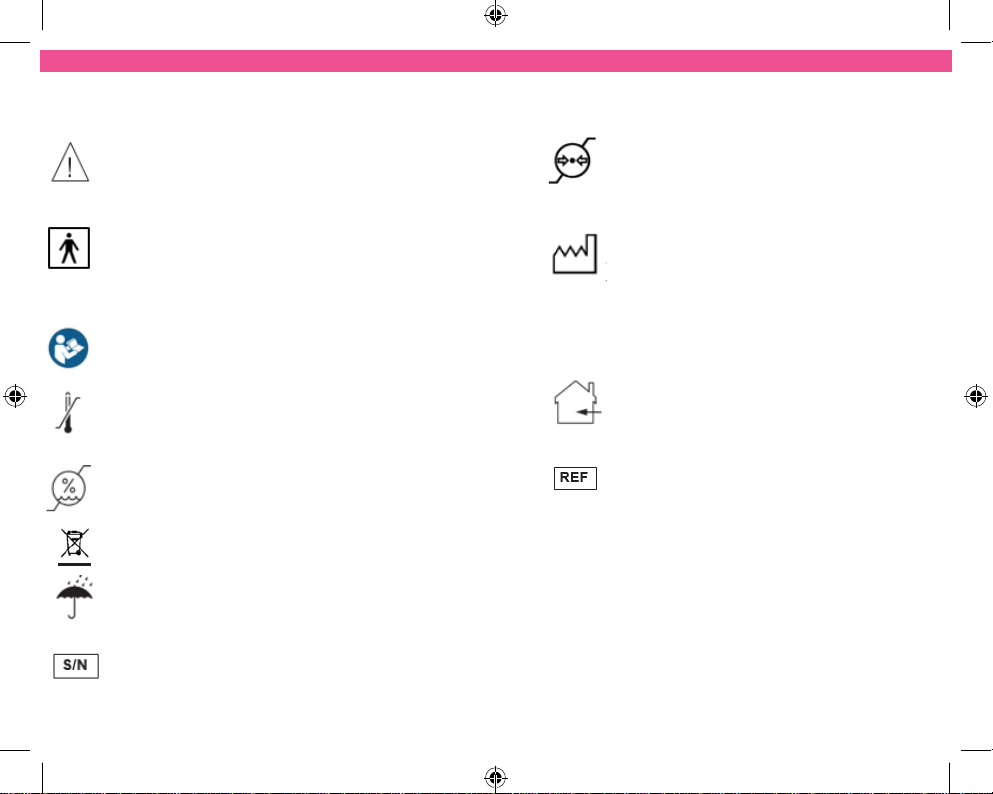
SYMBOLS USED
Attention! Please follow the instruction in
the Instruction Manual.
TYPE BF EQUIPMENT: Equipment
providing a degree of protection against
electric shock, with isolated applied part.
Indicates that this device has conductive
contact with the end user.
This symbol on the unit means “Refer to
Instruction Manual”
Temperature Limitation: Indicates the
temperature limits to which the medical
device can be safely exposed.
Humidity Limitation: indicates the
humidity limits to which the medical
device can be safely exposed.
Do not dispose in householdwaste.
This medical device is not water resistant
and should be protected from liquids.
Serial Number: indicates the
manufacturer’s serial number so that a
specific medical device can be
identified.
Atmospheric Pressure: indicates the
atmospheric limits to which the
medical device can be safely exposed.
Date of Manufacture: indicates the
date which the medical device was
manufactured. This is included within
the serial number found on the device
(usually in the battery compartment),
“E/Month/Year/Number”
(MM/YY/123456).
This medical device is indicated for
home use.
Catalogue Number: indicates the
manufacturer’s catalogue number so
that the device can be identified.
Page 20

37 38
The benefits conferred by this warranty are in
addition to all other rights and remedies in
respect of the product, which the consumer
has under the Consumer ProtectionAct 1987.
Our goods come with guarantees that cannot
be excluded under the UK consumer Law.
You are entitled to have the goods repaired or
replaced if the goods fail to be of acceptable
quality and the failure does not amount to a
major failure.
Before you send your unit for service
Before sending in your unit for service, please
take a few minutes to do the following:
Read your manual and make sure you follow
all the instructions.
Contact TensCare customer service on +44
(0) 1372 723 434. Our staff are trained to
assist you with most issues you may have
experienced, without the need to send your
product in for service.
20. WARRANTY
This warranty refers to the unit only. It does
not cover electrode pads, battery or the lead
wire.
PRODUCT WARRANTY INFORMATION
This product is warranted to be free from
manufacturing defects for 2 years from date
of purchase.
This warranty is void if the product is
modified or altered, is subject to misuse or
abuse; damaged in transit; lack of
responsible care; is dropped; if incorrect
battery has been fitted; if the unit has been
immersed in water; if damage occurs by
reason of failure to follow the written
instruction booklet enclosed; or if product
repairs are carried out without authority from
TensCare Ltd.
We will repair, or at our option replace free of
charge, any parts necessary to correct
material or workmanship, or replace the
entire unit and return to you during the
period of the warranty. Otherwise, we will
quote for any repair which will be carried out
on acceptance of our quotation.
Page 21

PLEASE RETAIN THIS WARRANTY CARD.
RETURN THIS PORTION ONLY WHEN YOU
RETURN YOUR PRODUCT FOR REPAIR UNDER
WARRANTY.
NAME:
ADDRESS:
POSTCODE:
DAYTIME TELEPHONE:
E-MAIL:
MODEL:
DATE OF PURCHASE:
ATTACH PROOF OF PURCHASE
RETAILERS NAME:
RETAILERS ADDRESS:
RETAILERS POSTCODE:
BRIEF DESCRIPTION OF PROBLEM YOU ARE
EXPERIENCING:
WARRANTY IS VOID UNLESS THE ABOVE INFORMATION
IS COMPLETED AND CORRECT.
Returning your unit for service
Should repair be needed within the warranty
period, enclose the tear off section of this
warranty card and your proof of purchase
receipt. Please ensure all relevant details are
completed and before sending your unit in for
service. Please ensure your contact details
are still current and include a brief description
of the problem you are experiencing together
with your purchase receipt.
Please return the unit and warranty card at
your cost to:
39
40
TensCare Ltd
PainAway House,
9 Blenheim Road,
Longmead Business Park,
Epsom, Surrey
KT19 9BE, UK
Should you require any further information
please do not hesitate to contact us by calling
our number: +44 (0) 1372 723434
Page 22
NOTES:
FEEDBACK
TensCare aim to give you the best possible
product and service. We listen to your
suggestions and are constantly trying to
improve our products. We also want to learn
about the way our products are used, and
the benefits they give. If you have anything
you would like to share with us, please
contact:
41
www.tenscare.co.uk
Tenscare Ltd
TensCare Ltd (@TensCareLtd)
Tenscare Ltd –
http://uk.pinterest.com/TensCareLtd/
TensCare Ltd –
http://tenscareltd.wordpress.com/
Tenscare Ltd –
https://www.youtube.com/user/TenscareLtd
 Loading...