

Page 1
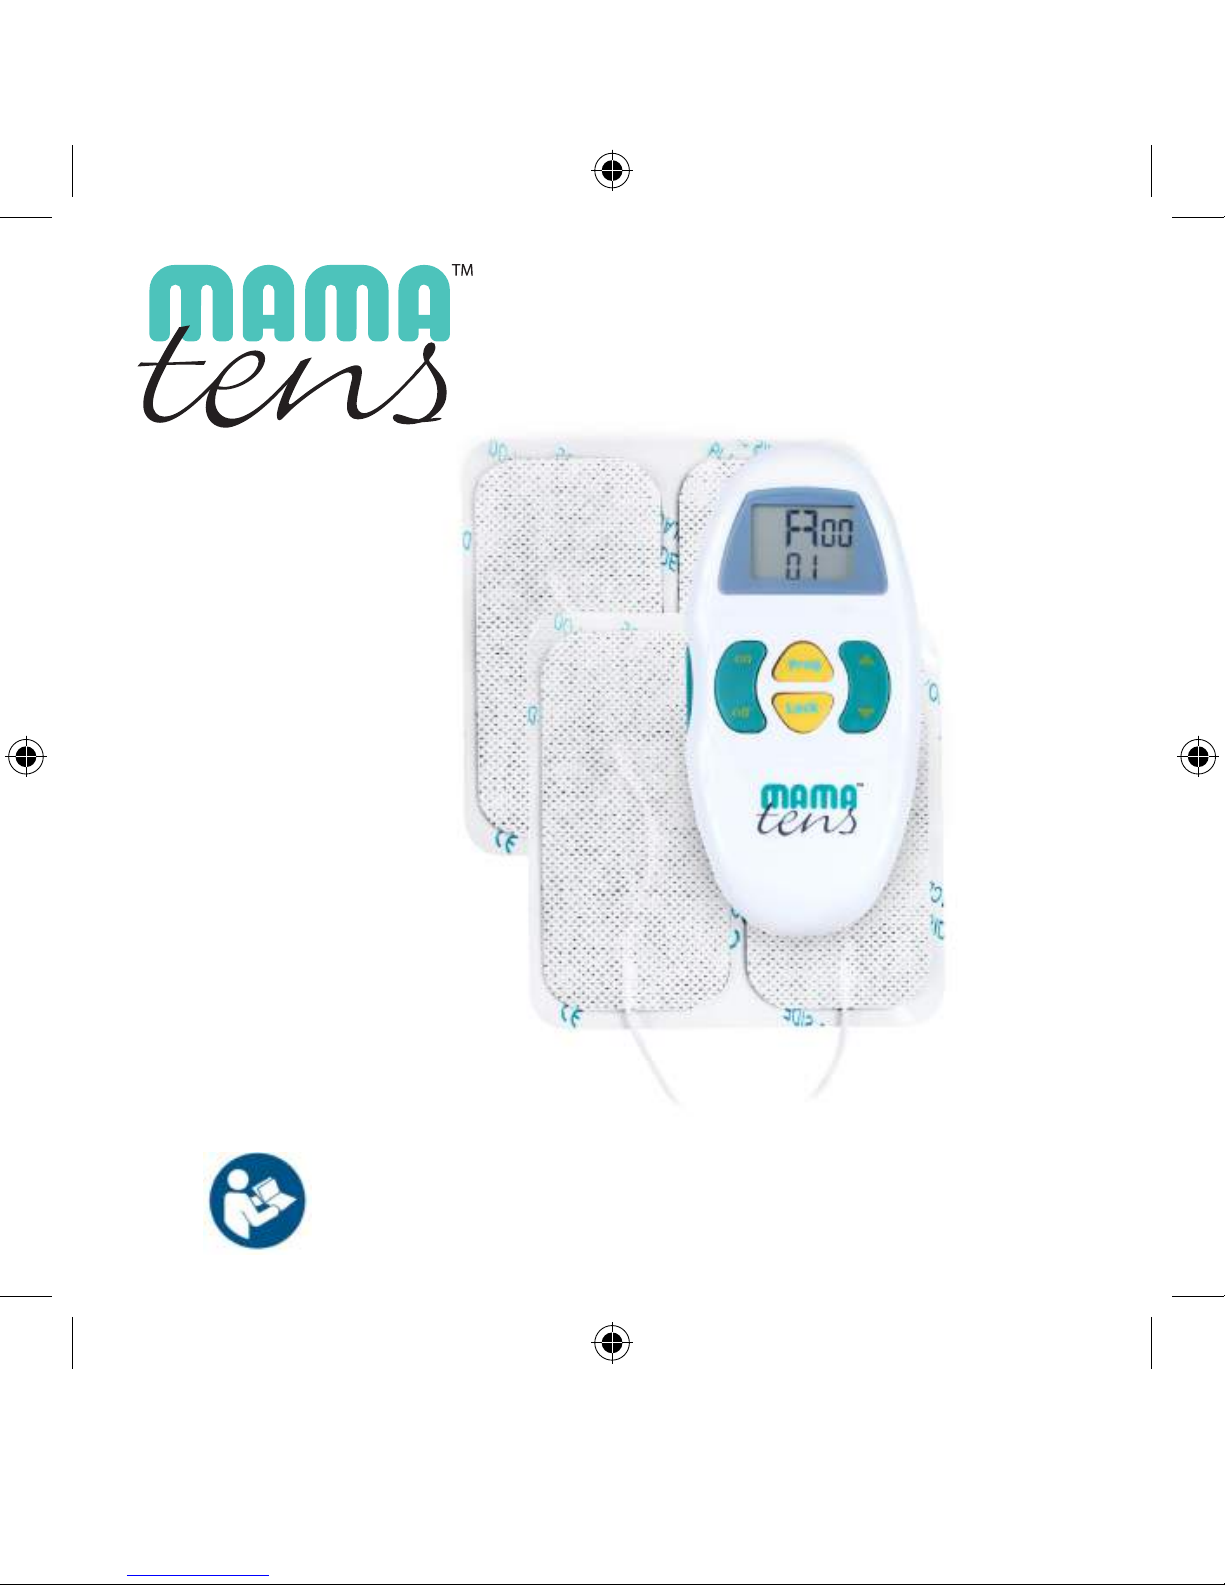
INSTRUCTIONS FOR USE
READ CAREFULLY BEFORE USE
Page 2
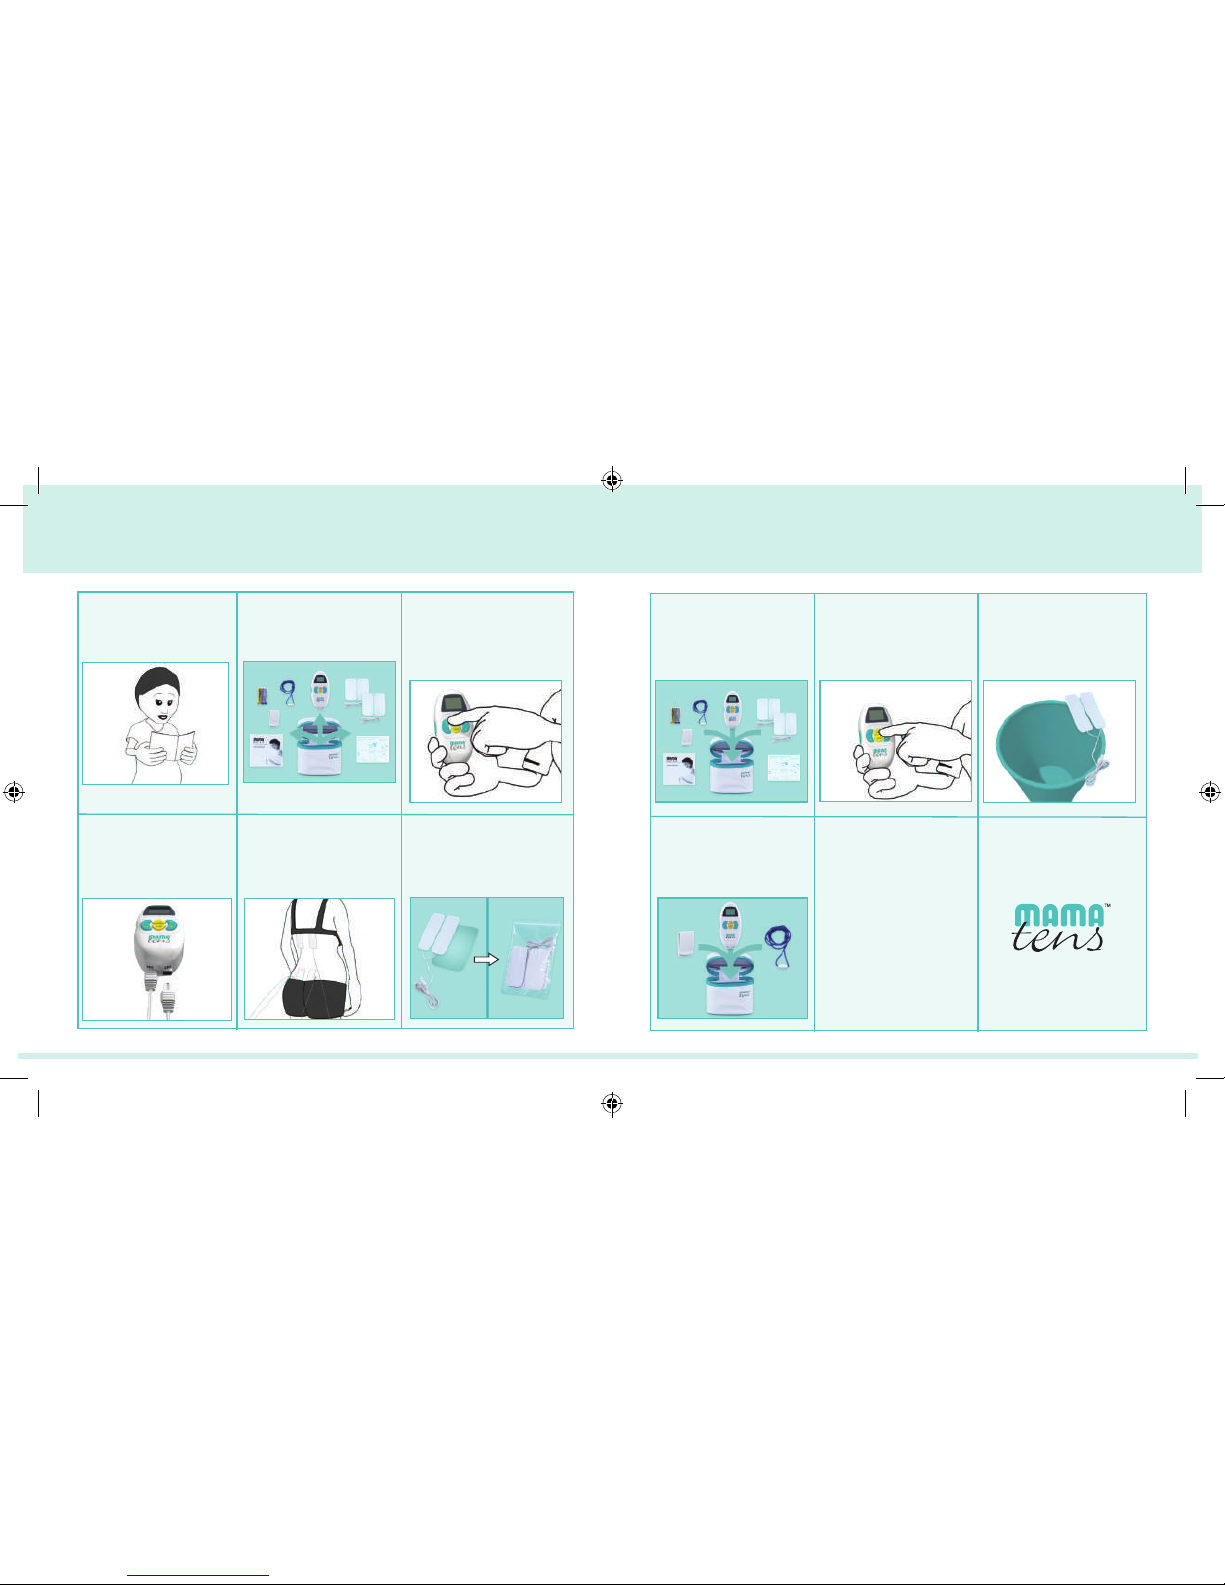
mamaTENS QUICKSTART GUIDE
1. Read instruction
book carefully
2. Check contents
3.
Press ON/OFF button to
check that the unit is
working (LCD will be
activated) then switch OFF
4. Attach leads to
the unit
5. Attach the electrodes
to your back and try
out the unit to see how
it feels
6.
Replace electrodes
onto their liners and
seal them in the
re-sealable bag
7. Put everything back
into the pouch until
labour begins
8. As soon as labour
begins, set up, attach,
and use the unit as per
instructions
9. After the birth, dispose
of electrodes and leads
10. Place unit, belt clip,
and neck cord back
into the pouch
mamaTENS Helpline
Helpline
01372 723434
mama tens instructions artwork.indd 3
Page 3

Contents Page
1 Introduction 1
2 What is TENS and how does it work? 1
3 What’s in the box?
3.1 Contents 3
3.2 Trial Run 3
4 Setting up and using your mamaTENS
4
4.1 Assembly 5
4.2 When to start using 6
4.3 Programme A 6
4.4 Programme B 7
4.5 Programme C 8
5 After use 9
6 Cleaning 10
7 Cautions & Warnings 10
8 Controls 13
9 Positioning of pads 16
10 Batteries
10.1 Low battery display 16
10.2 Changing the batteries 17
11 Returning your rental unit 18
12
Guarantee 18
13 Troubleshooting 19
14 Consumables and Servicing 20
15
Disposal of Waste Electrical and Electronic products (WEEE)
21
16 Technical information 22
17 EMC Precautions 23
mama tens instructions artwork.indd 4-5
Page 4
1. INTRODUCTION
The mamaTENS is a TENS machine specially designed to help
counter Labour Pain.
The pain during birth might start with the rst contraction or when the
cervix starts to dilate. The pain then increases progressively until the
cervix is completely dilated. During this period you will experience pain
of different types and intensities but due to the innovative technology
which has been incorporated into your mamaTENS, you will be able
to help counter this. The mamaTENS achieves this by delivering a
variety of signals dependent upon the stage of your labour.
Please note that whilst some expectant mothers will achieve
sufcient pain relief using just the mamaTENS, others may require
additional pain relief. MamaTENS can be used with other pain relief
options such as gas and air but as you might expect should be
removed if having a water birth.
2. WHAT IS TENS AND HOW DOES IT WORK?
Midwives recommend maternity TENS machines for their benets,
particularly in early labour, as they enable mums to remain mobile
and upright. This aids descent and dilatation and provides a
completely drug free and natural form of pain relief which is safe for
both you and your baby. Maternity TENS machines can be used in
conjunction with other forms of pain relief.
1
However, as you might expect, it can’t
be used in a birthing pool.
TENS stands for Transcutaneous
Electrical Nerve Stimulation.
Transcutaneous simply means
‘across the skin’.
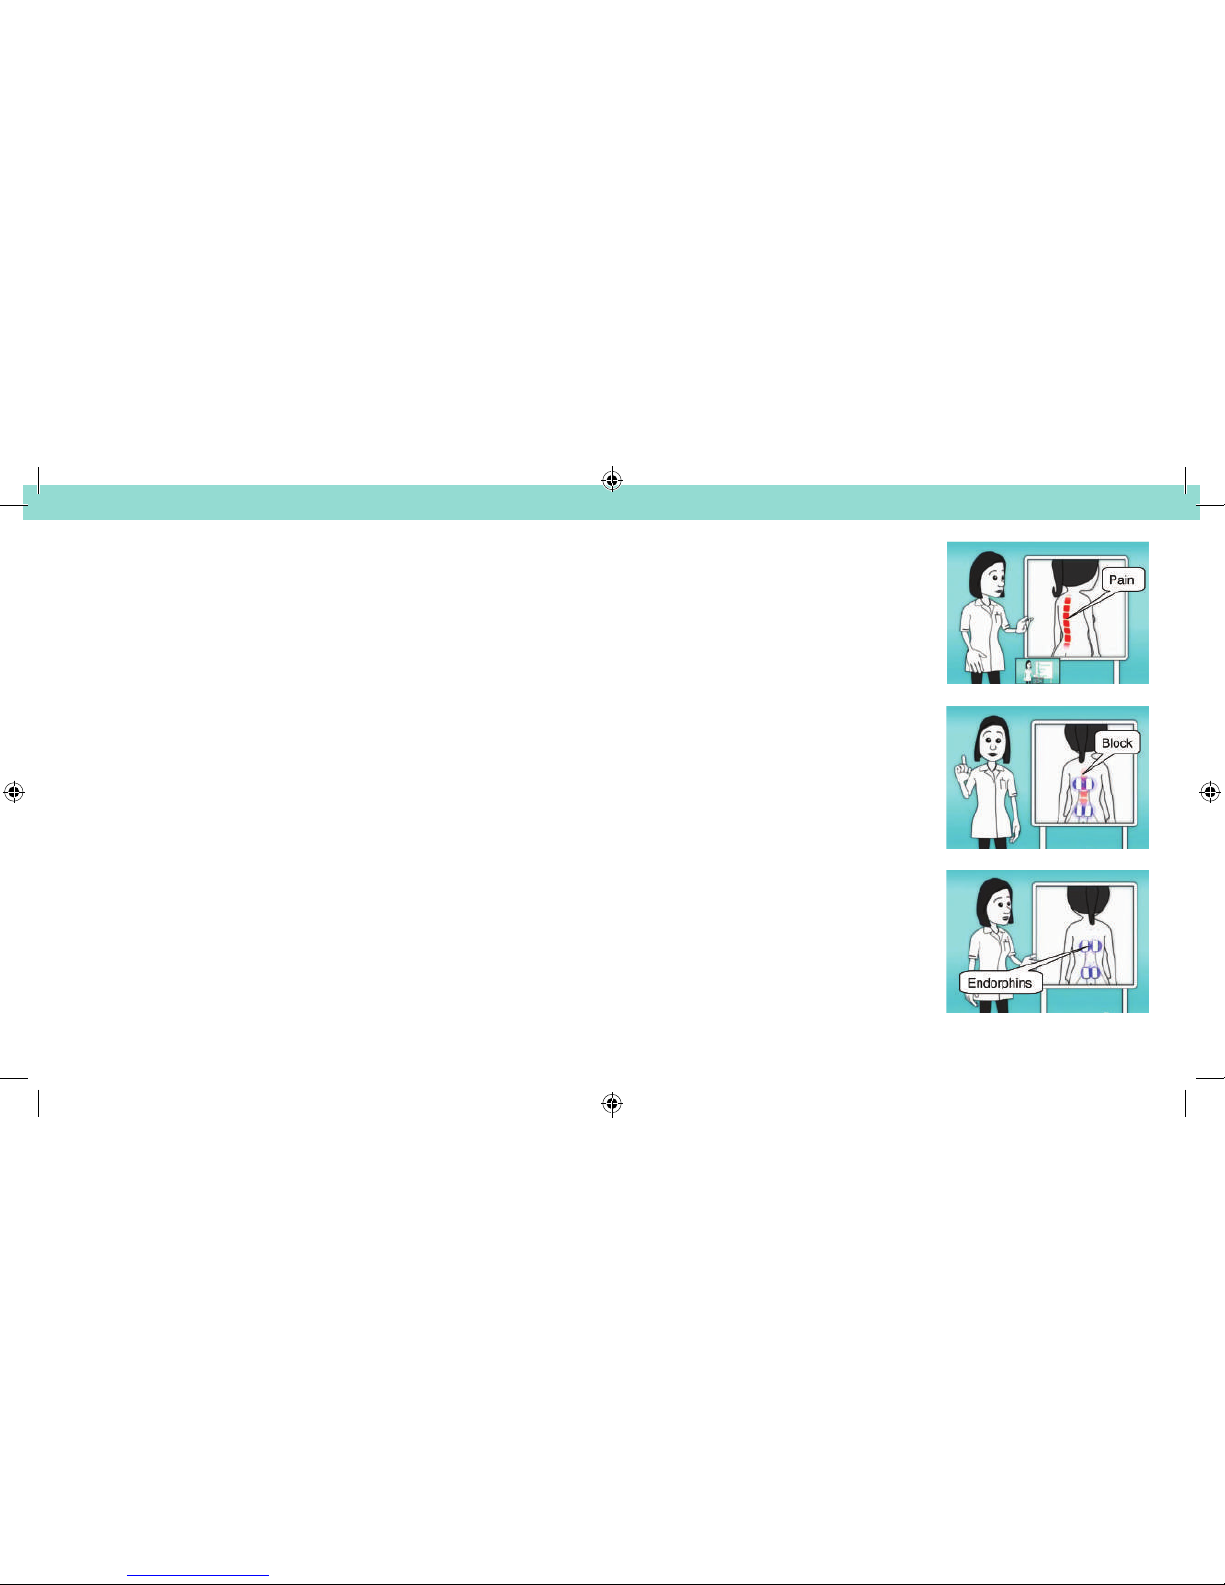
We feel pain when signals reach the
brain from the affected area.
TENS works by stimulating the nerve
endings to reduce the pain message.
It also stimulates your body into
generating endorphins, the body’s
own natural pain relievers.
This is why pain relief can continue
even when the machine is switched off.
Your TensCare maternity TENS
machine allows you complete control
over the strength of the pain relief
it provides so that you can manage
your pain as labour progresses.
2
mama tens instructions artwork.indd 6-7
Page 5
3 4
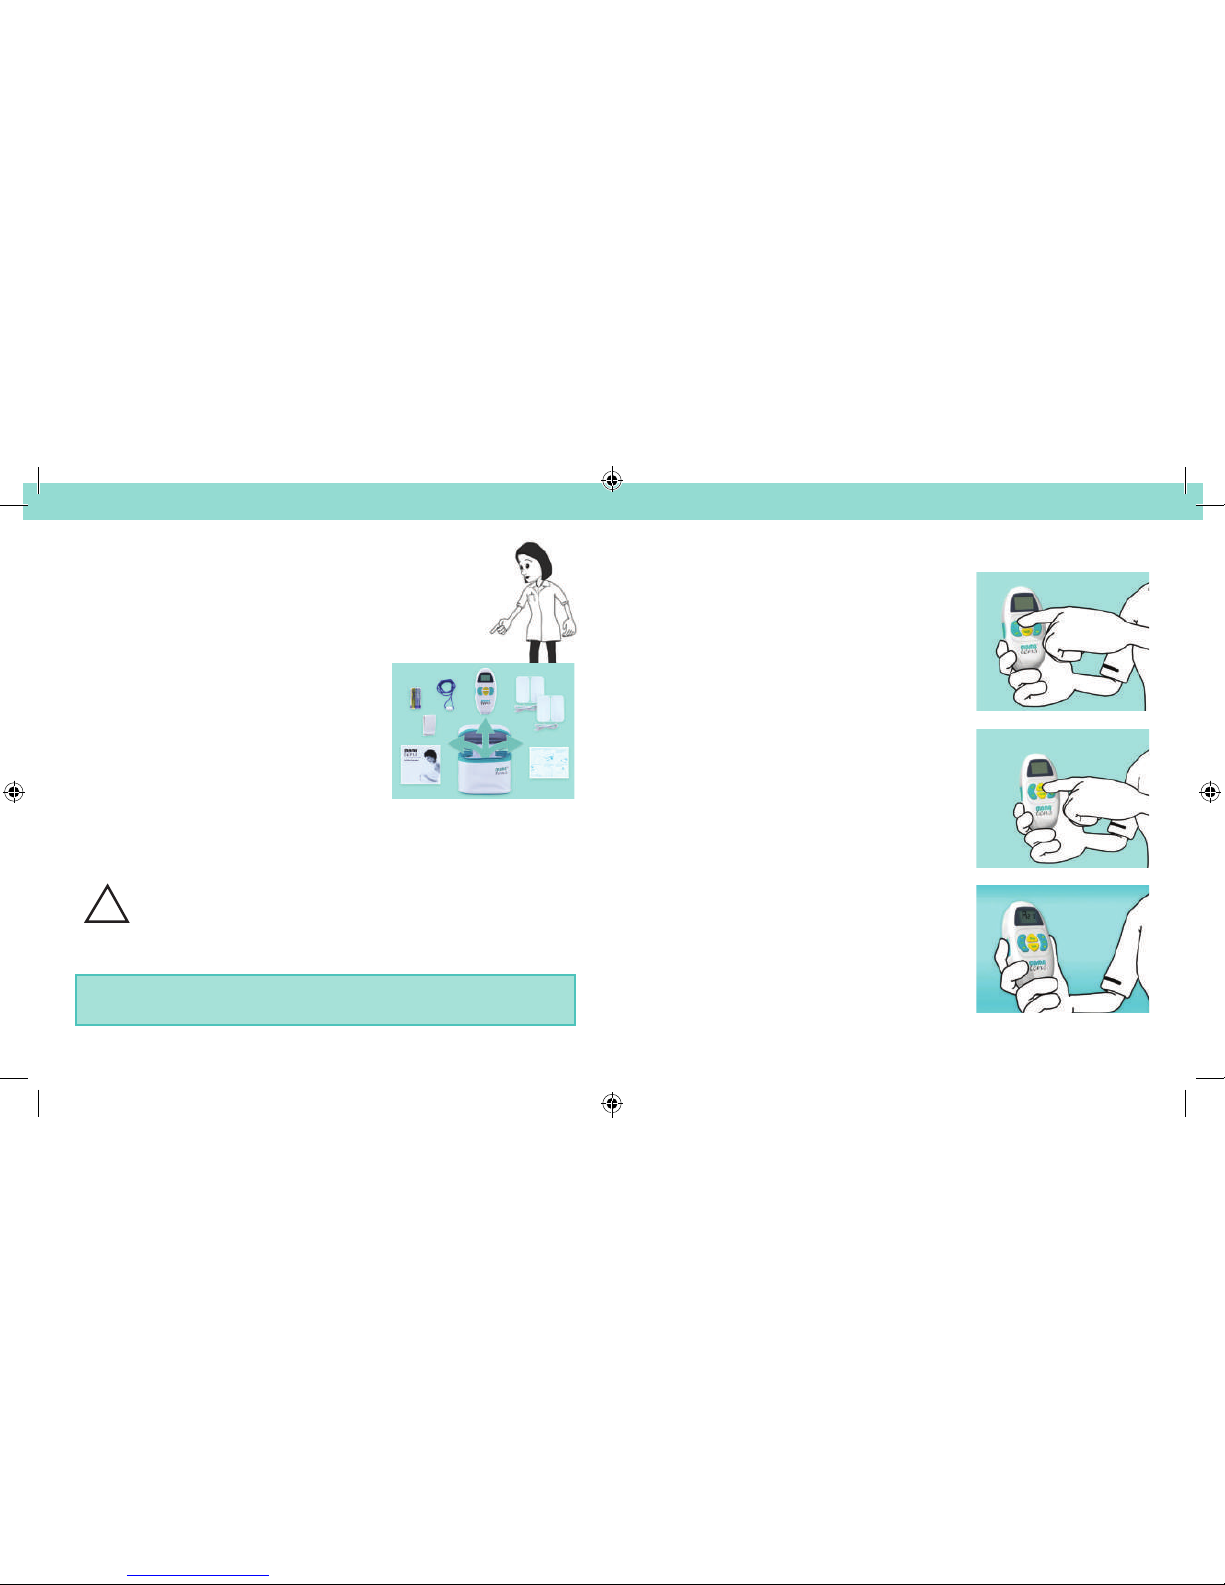
3. WHAT’S IN THE BOX?
When you open the box your mamaTENS and its
accessories are contained within a white leatherette
pouch, ideal for putting into your hospital bag.
3.1 CONTENTS
Inside the pouch you will nd:
• Your mamaTENS unit
• Two sets of batteries (Rental units
will have one set already inserted)
• Neck cord
• Handy belt clip
• Electrode pads designed specically for use with your
mamaTENS
• This instruction manual
Before using your mamaTENS, please read this manual
thoroughly, especially the safety notes and precautions.
3.2 TRIAL RUN
4. SETTING UP AND USING YOUR mamaTENS
The curved green button to the left of the
machine is clearly marked ‘on’ and ‘off’ whilst
the curved green button to the right of the
machine is marked with arrows to increase
or decrease the intensity as desired.
Intensity cannot be adjusted unless the
electrode pads are properly attached.
In the centre of the panel are two
yellow buttons.
The top button says ‘Prog’ and is used to
select from three preset programmes, one
for each stage of labour.
The bottom button says ‘Lock’. Holding
this button down for three seconds when
intensity is more than zero locks the
controls: this avoids any accidental changes
of intensity.
On the side of the unit is the green ‘Boost’
button. Its action depends upon the
programme selected.
We recommend that all mums-to-be familiarise themselves with
the unit prior to the due date for added peace of mind.
!
WARNING
mama tens instructions artwork.indd 8-9
Page 6

5 6
4.1 ASSEMBLY
Before use, you will rst need to assemble your mamaTENS.
Insert the lead wire for the pads to be used under the
bra line into channel one at the base of the machine.
The lead wire for the pads which will be used on your
lower back should then be inserted into channel two.
Once you have done this you will need to ask your birthing partner to
place the electrode pads into the correct position on your back.
To ensure adhesion of pads, the area of skin they are going to be
applied to needs to be clean, dry and free from grease or powder.
Peel off the clear plastic covers and attach the pads to your back
as shown in section 9. Please keep the bag and clear lm liners for
preserving the pads after use.
Place the pads which are wired to
channel one under the bra line
and the pads wired to channel two
just below the knicker line.
With the pads in place you can choose to use the belt clip or the neck
cord, whichever you are most comfortable with, so you are able to
remain as mobile as possible.
This neck cord is specially designed to pull apart if you snag it or the
machine. Do not use other things like string that might not break.
!
WARNING
CH1
CH2
4.2 WHEN TO START USING YOUR mamaTENS
You can start using mamaTENS as soon your contractions start to
become regular.
4.3 PROGRAMME A
When you switch the machine on it
automatically selects Labour Programme A.
The LCD screen will display ‘A01’.
This programme is designed to provide a pulsing sensation that triggers
the release of endorphins, relaxing you and relieving you from pain.
There are two modes, A1 and A2.
Mode A1 is for use between contractions and mode A2 is for use
during contractions. You can switch between the two modes at any
time by pressing the ‘Boost’ button.
The mamaTENS will start at zero intensity. Increase the intensity until
you feel a pulsing on-off-on-off sensation. mamaTENS has 50 small
steps of intensity, so you have ne control of the strength of stimulation.
When the next contraction starts press the ‘Boost’ button once and
the mode will change to mode A2, at the same intensity level as it
was when in mode A1. Mode A2 feels like a constant strong tingling.
At the end of the contraction, press the ‘Boost’ button to return to
mode A1. Repeat this each time a contraction starts.
As the contractions become stronger simply increase the intensity.
If a lead wire becomes detached from its socket the unit
will automatically reset intensity to zero.
A01
!
mama tens instructions artwork.indd 10-11
Page 7

7
8
4.4 PROGRAMME B
You should stay in programme A as long as
possible, but when your contractions intensify
and become more frequent you can progress to
programme B.
Do this by pressing the ‘Prog’ button. The LCD
screen will display ‘B01’.
To avoid discomfort with the change in programme, the set intensity will
drop by half. Press and release the INTENSITY ▲ BUTTON until you
reach a comfortable intensity setting.
Again there are two modes.
The second mode is triggered by pressing the ‘Boost’ button when you
experience a strong contraction. This mode provides a constant tingling
sensation. When the contraction passes press the ‘Boost’ button once
more and your mamaTENS unit will change back to mode B1.
Programme B provides you with a stimulation pattern which is set to
block the heightened pain which you may suffer.
You will feel that the stimulation in the higher set of pads (which have
been placed just below your bra line) is stronger than the lower set
of pads (at the bottom of your back): this is intentional and part of the
therapy. As the contractions become more intense and closer together,
increase the intensity.
If the lower electrodes feel stronger than the upper ones
then the leads have probably been incorrectly inserted into
the mamaTENS. To correct this, change over the leads, and
reset the intensity.
NB
NOTE
4.5 PROGRAMME C
If you nd programmes A and B do not meet your needs for pain relief there is
a third programme C, which provides a higher level of pain relief.
Press the ‘Prog’ button again and this will take you to programme C
which will be displayed on the screen as ‘C01’.
To avoid discomfort with the change in programme, the set intensity will
drop by half. Press and release the INTENSITY ▲ BUTTON until you
reach a comfortable intensity setting.
Again there are two modes.
However this time mode C1 is continuous. Mode C2 ramps the power or
level of intensity during the nal contractions.
In between contractions use the INTENSITY ▲ & ▼ BUTTONS until
you reach a comfortable level.
When you experience a contraction just press the ‘Boost’ button down
and HOLD IT.
The intensity will increase until you release the ‘Boost’ button because the
intensity became too much to bear, at which point the intensity will drop
rapidly and return to the background setting you pre-selected. As it falls,
you can press and hold the ‘Boost’ button again to keep the intensity at a
xed level to the end of your contraction.
In MODE C2 RAMP the intensity goes up to 60.
This is a very natural way for you to control your pain as you rapidly increase
and decrease the intensity to match the strength of your contractions.
HOLD
RELEASE
STRENGTH
mama tens instructions artwork.indd 12-13
Page 8

9 10
When instructed to start “pushing” you can use the ‘Prog’ button to
switch the TENS unit back to programme A.
And that’s all there is to it. It’s quite simple really.
Just remember the three programmes (A, B and C) which you can
choose at any time as your labour progresses, and when you need a
boost, just press the ‘Boost’ button.
5. AFTER USE
Always ensure that the mamaTENS is switched OFF before removing
the electrodes.
After use, return the electrodes onto the clear
plastic covers and store in the resealable bag(s).
The electrodes are water-based, and will dry out
if left out in the open.
After the birth, you can use your mamaTENS
to help with post-episiotomy pain.
• If you are re-using the unit, be sure to replace pads when they lose their
stickiness. Poor connection may cause discomfort and skin irritation.
If you purchased, rather than rented, and plan to
put your mamaTENS into storage for your next
baby then do the following:
•
Clean as instructed
• Remove batteries
• Throw away the electrode pads and leads
(You will need to buy a new set for the next use)
• Storage life of an unopened pack of electrodes is 2 years. This may
be affected by very high temperatures or very low humidity.
6. CLEANING
Clean the case and lead wires after each use by wiping with a damp cloth
and a solution of mild soap and water. Wipe dry.
Do not immerse your TENS machine in water.
Do not use any other cleaning solution than soap and water.
7. CAUTIONS & WARNINGS
Do not use TENS :
•
If you have a heart pacemaker or have a heart rhythm problem.
TENS in the direct vicinity of a pacemaker may affect some models.
If TENS is applied on the front of the neck this can affect your
heart rate. Very strong TENS across the chest may cause an
extra heartbeat.
•
If you have epilepsy.
TENS may affect seizure threshold. You should consult your doctor
prior to using the mamaTENS unit.
•
During the rst three months of pregnancy.
It is not known whether TENS may affect foetal development
•
On the abdomen in the later stages of pregnancy.
Stop use immediately if you experience unexpected contractions.
•
When driving, operating machinery, or similar actions needing ne control.
Loose pads, damaged leads, or sudden changes in contact may
cause brief involuntary muscle movements
• To mask or relieve undiagnosed pain.
TENS may delay diagnosis of progressive condition.
mama tens instructions artwork.indd 14-15
Page 9

11 12
Caution:
•
Observe caution when using the mamaTENS at the same time as being
connected to monitoring equipment with body worn electrode pads;
it may interfere with the signals being monitored.
• Strong electromagnetic elds (electrosurgery/microwave cookers/
mobile phones) may affect the correct operation of this unit - See
section 17. If it appears to behave unusually, move it away from
these devices.
• Use caution following recent surgical procedures.
Stimulation may disrupt the healing process.
Do not place electrode pads:
•
On broken skin.
The pads could encourage infection.
• On skin which does not have normal sensation.
If the skin is numb, too great a strength may be used, which could
result in skin inammation.
• On the front of the neck.
Could cause the airway to close, giving breathing problems. May
cause sudden drop in blood pressure (vasovagal response).
• Over the eyes.
May affect eyesight or cause headaches
•
Across the front of the head.
Effect on patients who have had strokes or seizures is not known.
May affect sense of balance. The effects of stimulation of the brain
are unknown.
• Near malignant tumours.
In vitro experiments have shown that electricity can promote cell growth.
Do not:
•
Ignore any allergic reaction to the electrode pads.
If a skin irritation develops stop using TENS, and try a different type
of electrode.
Alternative pads specially made for sensitive skin are available, see
section 16.
Also do not :
•
Immerse your TENS unit in water or place it close to excessive heat.
It may cease to operate correctly.
•
Attempt to open up the TENS unit.
This will invalidate the guarantee.
•
Mix old, new or different types of batteries.
•
Use this device with leads, electrodes, and accessories other than
those recommended by the manufacturer.
Performance may vary from specication.
IF IN DOUBT CONSULT YOUR MEDICAL PRACTITIONER, MIDWIFE
OR OBSTETRIC PHYSIOTHERAPIST
mama tens instructions artwork.indd 16-17
Page 10

BOOST
13 14
8. CONTROLS
The mamaTENS has four coloured buttons on the front and one on
the side.
The left curved GREEN BUTTON marked “ON/OFF” is
the ON and OFF Switch.
Press ON and hold for 2 seconds to turn ON. (This
delay avoids turning ON accidentally). The LCD display
will appear as “A01 00” indicating that the unit has
automatically set itself into Labour Programme A and mode
1 at zero intensity (00). Press OFF to turn the unit off.
The right curved GREEN BUTTON marked ▼ & ▲ is the
intensity control.
Each time the ▲ is pressed and then released, the
mamaTENS will increase in intensity by one level. The
mamaTENS has 50 levels of intensity in Programmes A
and B and 60 in Programme C.
Each time the ▼ is pressed, the intensity will decrease by
one level. Hold down the ▼ or ▲ button to scroll intensity.
As you increase the intensity you will experience a gentle
tingling feeling. You may feel little or no sensation from
the mamaTENS at its lower levels, but keep pressing and
releasing the green button until the sensation is strong
but comfortable. To maintain the effect as your body
becomes accustomed to the signal you will probably need
to steadily increase the stimulation by raising the intensity
one level at a time: this is perfectly normal.
SAFETY FEATURE - If the pads or leads become disconnected,
the intensity will automatically reset to zero. If the mamaTENS
is accidentally switched on it will switch off automatically if the
intensity is not pressed within 5 minutes.
NB
NOTE
mama tens instructions artwork.indd 18-19
Page 11

9. POSITIONING OF PADS
The pads need to be placed over the junctions of the nerves joining the
womb and birth canal to the spinal cord. Correct positioning of the pads
will give maximum pain relief so please study the diagram and then
follow these instructions:
1. Carefully peel the pads off their plastic
covers. Do not pull on the lead wire.
2. Place the top pair of pads (connected
to CH1) either side of the spinal column
2 inches (50mm) apart from each other
and about 3 inches (75mm) below the
bottom of the shoulder blades (close to
vertebrae T10, T11, T12 and L1). This
is just below the bra line.
3. The lower pair of pads (connected to CH2)
are placed either side of the spine about 4 inches (100mm) apart and
about 1 inch (25mm) above the dimples at the base of the spine, just
above the buttocks (close to vertebrae S2, S3 and S4).
10. BATTERIES
10.1 LOW BATTERY DISPLAY
If the batteries begin to lose their power a battery symbol will appear
on the LCD. Change both batteries at this stage using spare batteries
supplied. See instructions below as to how to change the batteries.
Upper
Pads
(Uterus)
Lower
Pads
(Perineum
& Birth
Canal)
15 16
The UPWARD POINTING TRIANGULAR YELLOW
BUTTON marked ‘Prog’ is used to select from three
programmes, one for each phase of labour.
Each time the ‘Prog’ button is pressed the programme
changes and intensity is reduced by 50%.
The programme selected is displayed on the LCD screen.
Programme A, for Phase 1 is shown as A 01
Programme B, for Phase 2 is shown as B 01
Programme C, for Phase 3 is shown as C 01
The programmes are explained in detail in section 4
“Setting up and Using Your mamaTENS”.
The DOWNWARD POINTING TRIANGULAR BUTTON
marked ‘Lock’ is the lock switch.
Holding this button down for 3 seconds locks the
controls. A key symbol appears in the LCD and none of
the controls will operate. This function avoids accidental
changes in programme and intensity.
Hold down the ‘Lock’ button for 3 seconds to remove
the lock.
On the SIDE of the unit is a BOOST button. Its
action depends upon the programme selected and is
detailed within the section “Setting up and Using Your
mamaTENS”.
mama tens instructions artwork.indd 20-21
Page 12

a b e f
17 18
10.2 CHANGING THE BATTERIES
a. Unlock the battery holder by sliding the knob downwards.
b. Pull out the battery holder.
c. Remove the existing batteries.
d. Using the diagram on the battery holder as
a guide, insert the new AA (LR6) batteries.
e. With the batteries uppermost, slide the battery holder back into place.
f. Lock the battery holder by sliding the knob upwards.
To check that the batteries have been correctly tted, press and hold the ON
for 2 seconds and the LCD screen will display ‘A 01’.
Warnings
• The mamaTENS will not function if the batteries are inserted incorrectly
and damage to the unit could occur.
•
If the battery holder cannot be fully inserted it is upside down. Do not
force the battery holder into place.
• Replace only with the AA(LR6) battery type indicated.
• Replace both batteries at the same time.
• Do not dispose of the batteries in a re.
• Keep batteries out of the reach of children.
11. RETURNING YOUR RENTAL UNIT
If you rented your mamaTENS your machine should have been sent to
you three weeks before your due date.
The rental period is for ve weeks, but if you need more time just call us
before the end of the rental period and we’ll arrange an additional two
weeks absolutely free of charge.
Sending your maternity TENS machine back at the end of the rental
period is very easy.
• You’ll have received a pre-paid envelope with your machine so simply put the
unit back in the box - no need to include the lead wires and pads - pop the box
into the envelope and drop it in at the post ofce.
• You’ll need to ask for a proof of posting certicate at the post ofce but it’s
all free of charge and very straightforward.
• If you rented by purchasing a voucher or DVD, do NOT return the unit to the shop
where you made the purchase. It should only be returned in the envelope provided.
• If you collected your unit at a Tesco Pharmacy, please return it to the
same place.
12. GUARANTEE
(Refers only to mamaTENS units that have been purchased).
Your unit is guaranteed for two years from the date of purchase.
If a fault develops, return the unit to mamaTENS at the address on the back
cover, together with a copy of your invoice and details of the problem.The
guarantee does not cover the batteries, electrode pads or mono leadwire.
Please note that the guarantee is invalidated if:
i) incorrect batteries have been tted.
ii) the unit has been immersed in water, maltreated or tampered with.
iii) the unit has not been used with genuine mamaTENS or TensCare electrode pads.
mama tens instructions artwork.indd 22-23
Page 13

19 20
13. TROUBLESHOOTING
If your TENS machine is not working properly please check the following:
If the above review has failed to resolve your problem, call TensCare or
your local dealer (address on back cover) for advice.
Or if you have any questions or need more information you can contact
TensCare at anytime via our website, www.tenscare.co.uk or by phoning
01372 723 434.
Problem Possible causes Solution
No display Flat batteries Replace batteries
Batteries inserted Check
incorrectly
Damaged battery Contact supplier
contacts
Low battery Low batteries Replace batteries
display
No Incorrect Have you applied both electrode pads (per
sensation connection lead wire) to ensure a complete circuit?
Not strong enough Increase strength.
Most users will feel something at a
setting below 10
Intensity Open circuit cutout Ensure machine is attached to your
will not go body correctly.
above zero
Lead faulty/damaged Purchase replacement if necessary.
14. CONSUMABLES AND SERVICING
(Refers only to mamaTENS that have been purchased)
To ensure reliability and hygiene, use only genuine rectangular
electrodes with integral leads:
For units after 1330000, we are using
part number E-CM50100-MTNEW
For units before 1330000, we are using
part number E-CM50100-MT
Please note: these are the part numbers according to the TensCare website.
These are available from either your supplier or by ringing
01372 723434 or by going to www.tenscare.co.uk. Please ensure that
you order the correct pads.
Batteries can also be purchased in the same way or on the high street.
They are AA 1.5v alkaline batteries.
For servicing please return the unit to: TensCare Ltd, 9 Blenheim Road,
Longmead Business Park, Epsom, Surrey KT19 9BE. Please ensure
that you enclose your name, address and contact telephone number
so that you can be contacted and informed about any problem and any
costs involved.
Expected Service Life
• The machine will often last for more than 5 years, but is guaranteed for 2 years.
Accessories (leads, pads, and batteries) are not covered by the guarantee.
• Lead life depends greatly on use. Always handle the leads with care.
• Pads should last 12-20 applications, depending on skin condition and humidity.
• AA alkaline batteries should last about 48 hours continuous use.
mama tens instructions artwork.indd 24-25
Page 14

21
22
15. DISPOSAL OF WASTE ELECTRICAL AND
ELECTRONIC PRODUCTS (WEEE)
(Refers only to mamaTENS that have been purchased)
One of the provisions of the European Directive 2002/96/CE is that
anything electrical or electronic should not be treated as domestic waste
and simply thrown away. To remind you of this Directive all affected
products are now being marked with a crossed-out wheelie bin symbol,
as depicted below. To comply with the Directive you can return your old
electro-therapy unit to us for disposal.
Simply print a postage-paid PACKETPOST RETURNS label from our
website www.tenscare.co.uk, attach this to an envelope or padded
bag with the unit enclosed, and post it back to us. Upon receipt we will
send your old device for components recovery and recycling to help to
conserve the world’s resources and minimise any adverse effects on
the environment.
16. TECHNICAL INFORMATION
Waveform Symmetrical Bi-Phasic Rectangular
Amplitude 75 mA zero to peak
(over 500 Ohm) 50 steps in
A&B, 60 steps in C
Channels Dual channel
W
eight
96 gms
Dimensions 120x52x22mm
Batteries 2 x 1.5V
AA Alkaline LR6
Environmental: T
emperature range: 5 to 40C
Specications Humidity: 15 to 93% RH non-condensing
Operating T
emperature range: -25-+70C RH 93% non condensing
Storage
Contact Duration: at least 10 minutes
Safety classication Internal power source.
Designed for continuous use.
TYPE BF Equipment providing a degree of protection against
EQUIPMENT electric shock, with isolated applied part.
This symbol on the unit means “Refer to
Instructions for Use”
The unit is not water resistant, and should be protected
from liquids.
NB The electrical specications are nominal and subject to variation from the listed values due to
normal production tolerances.
mama tens instructions artwork.indd 26-27
Page 15

23 24
Programme Settings
Display
Mode Frequency/Pulse Width
A1
Burst 80Hz 150us
A1 Boost
Continuous 80Hz 150us
B2
Burst 150Hz 150us
B2 Boost
Continuous 150Hz 150us
C3
Ramp 80Hz 250us
17. EMC PRECAUTIONS
Use special precautions regarding EMC according to the information
provided below.
Guidance and manufacturer’s declaration - electromagnetic emissions
The mamaTENS is intended for use in the electromagnetic environment specified below.
The customer or the user of the mamaTENS should assure that it is used in such an environment.
Emissions test Compliance Electromagnatic environment - guidance
RF emissions Group 1 The mamaTENS uses RF energy only for its internal function. Therefore,
CISPR 11
its RF emissions ar
e very low and are not likely to cause any interference
in nearby electr
onic equipment
RF emissions
Class B
CISPR 11
Harmonic emissions Not applicable
IEC61000-3-2
V
oltage fluctuations/ flicker
Not applicable
emissions IEC 61000-3-3
The mamaTENS is suitable for use in domestic establishment and in
establishment directly connected to a low voltage power supply
network which supplies buildings used for domestic purposes.
The mamaTENS is intended for use in the electromagnetic environment specied below. The
customer or the user of the mamaTENS should assure that it is used in such an environment.
Immunity test IEC 60601 test level Compliance Electromagnetic
level environment guidance
Electrostatic discharge (ESD) ±6 kV contact ±6 kV contact Floors should be wood,
IEC 61000-4-2
±8 kV air ±8 kV air concr
ete or ceramic tile
If floors are covered with synthetic material, the relative humidity should be at least 30%.
Electrical fast transient/burst
±2 kV for power supply lines Not applicable Not applicable
IEC 61000-4-4
±1 kV for Input/output lines
Surge ±1 kV dif
ferential mode
Not applicable Not applicable
IEC 61000-4-5
±2 kV common mode
V
oltage dips, short interruptions
<5 % U
T
(>95 % dip in UT) for 0,5 cycle
Not applicable Not applicable
and voltage variations on 40 % UT (60 % dip in UT ) for 5 cycles
power supply input lines
70 % U
T
(30 % dip in UT ) for 25 cycles
IEC 61000-4-11
<5 % U
T
(>95 % dip in UT ) For 5s
Power frequency (50/60 Hz) 3 A/m Not applicable Not applicable
magnetic field
IEC 61000-4-8
NOTE U
T
is the a.c. mains voltage prior to application of the test level.
Other portable and mobile RF communications equipment can affect
performance. Do not use when adjacent to or stacked with other
electrical equipment. Use of leads or pads other than those listed in
section 18 may affect EMC performance.
mama tens instructions artwork.indd 28-29
Page 16

25 26
The mamaTENS is intended for use in the electromagnetic environment specified
below. The customer or the user of the mamaTENS should assure that it is used in
such an environment.
Immunity test IEC 60601 test level Compliance level Electromagnetic environment - guidance
Portable and mobile RF communications equipment should
be used no closer to any part of the mamaTENS, including
cables, than the recommended separation distance
calculated from the equation applicable to the frequency
of the transmitter
Recommended separation distance 3V
d = 1.2
√
P 80M Hz to 800MHz
Conducted RF
3 Vrms 3 Vrms d = 2.3√ P 800MHz to 2.5GHz
IEC 61000-4-6
150 kHz to 80 MHz where P is the maximum output power rating of the
transmitter in watts (W) according to the transmitter
manufacturer and d is the recommended separation
distance in meters (m).
Radiated RF
3 V/m 3 V/m Field strengths from fixed RF transmitters, as determined
61000-4-3
80 MHz to 2,5 GHz by an electromagnetic site survey, should be less than
the compliance level in each frequency range.
Interference may occur in the vicinity of equipment
marked with the symbol on the left of this box
NOTE 1 At 80 MHz and 800 MHz, the higher frequency range applies. NOTE 2 These guidelines may not apply in all
situations. Electromagnetic propagation is affected by absorption and reflection from structures, objects and people.
a. Field strengths from fixed transmitters, such as base stations for radio (cellular/cordless) telephones and land mobile
radios, amateur radio, AM and FM radio broadcast and TV broadcast cannot be predicted theoretically with accuracy. To
assess the electromagnetic environment due to fixed RF transmitters, an electromagnetic site survey should be considered.
If the measured field strength in the location in which the
mamaTENS
is used exceeds the applicable RF compliance level
above, the
mamaTENS
should be observed to verify normal operation. If abnormal performance is observed, additional
measures may be necessary, such as re-orienting or relocating the
mamaTENS
.
b.Over the frequency range 150 kHz to 80 MHz, field strengths should be less than 3 V/m.
Recommended separation distances between portable and mobile RF
communications equipment and the mamaTENS.
The mamaTENS is intended for use in an electromagnetic environment in which radiated RF
disturbances are controlled. The customer or the user of the mamaTENS can help prevent
electromagnetic interference by maintaining a minimum distance between portable and mobile RF
communications equipment (transmitters) and the mamaTENS as recommended below, according to
the maximum output power of the communications equipment.
Rated maximum
Separation distance according to frequency of transmitter M
output power of
150kHz to 80MHz 80 MHz to 800 MHz 800MHz to 2.5GHz
transmitter W
d=1.2
√ P d=1.2√ P d=2.3√ P
0.01 0.12 0.12 0.23
0.1 0.38 0.38 0.73
1 1.2 1.2 2.3
10 3.8 3.8 7.3
100
12 12 23
For transmitters rated at a maximum output power not listed above, the recommended separation distance d in
meters (m) can be estimated using the equation applicable to the frequency of the transmitter, where P is the
maximum output power rating of the transmitter in watts (W) according to the transmitter manufacturer.
NOTE 1 At 80 MHz and 800 MHz, the separation distance for the higher frequency range applies.
NOTE 2 These guidelines may not apply in all situations. Electromagnetic propagation is affected by absorption and
reflection from structures, objects and people.
EC Declaration of Conformity
TensCare Ltd hereby declare that an examination of the production quality
assurance system has been carried out following the requirements of the
UK national legislation according to Annex V of the Directive 93/42/EEC
on medical devices. We certify that the production quality system conforms
with the relevant provisions of the aforementioned legislation, and the
result entitles the organization to use the CE 0088 marking on this product.
mama tens instructions artwork.indd 30-31
Page 17

TensCare Ltd, 9 Blenheim Road,
Epsom, Surrey KT19 9BE, UK
Tel: +44(0) 1372 723434
www.tenscare.co.uk
Distributed by:
Pub Ref.: I-MT-UK Rev 1.4 3/17
Manufactured by:
 Loading...