

Tenn-Tex Plastics QuikTRAY Rollout System Installation Instructions Manual
HOOK DOWEL
FRONT PILASTER
Installation Instructions
for faceframe cabinets
Instrucciones de Instalación
Pilaster
Qty: 4
Drawer Slide
Qty: 2L/2R
Hook
Hook
Dowel
Dowel
Screw
Drawer
connector
Qty: 4
Drawer
box
Qty: 2
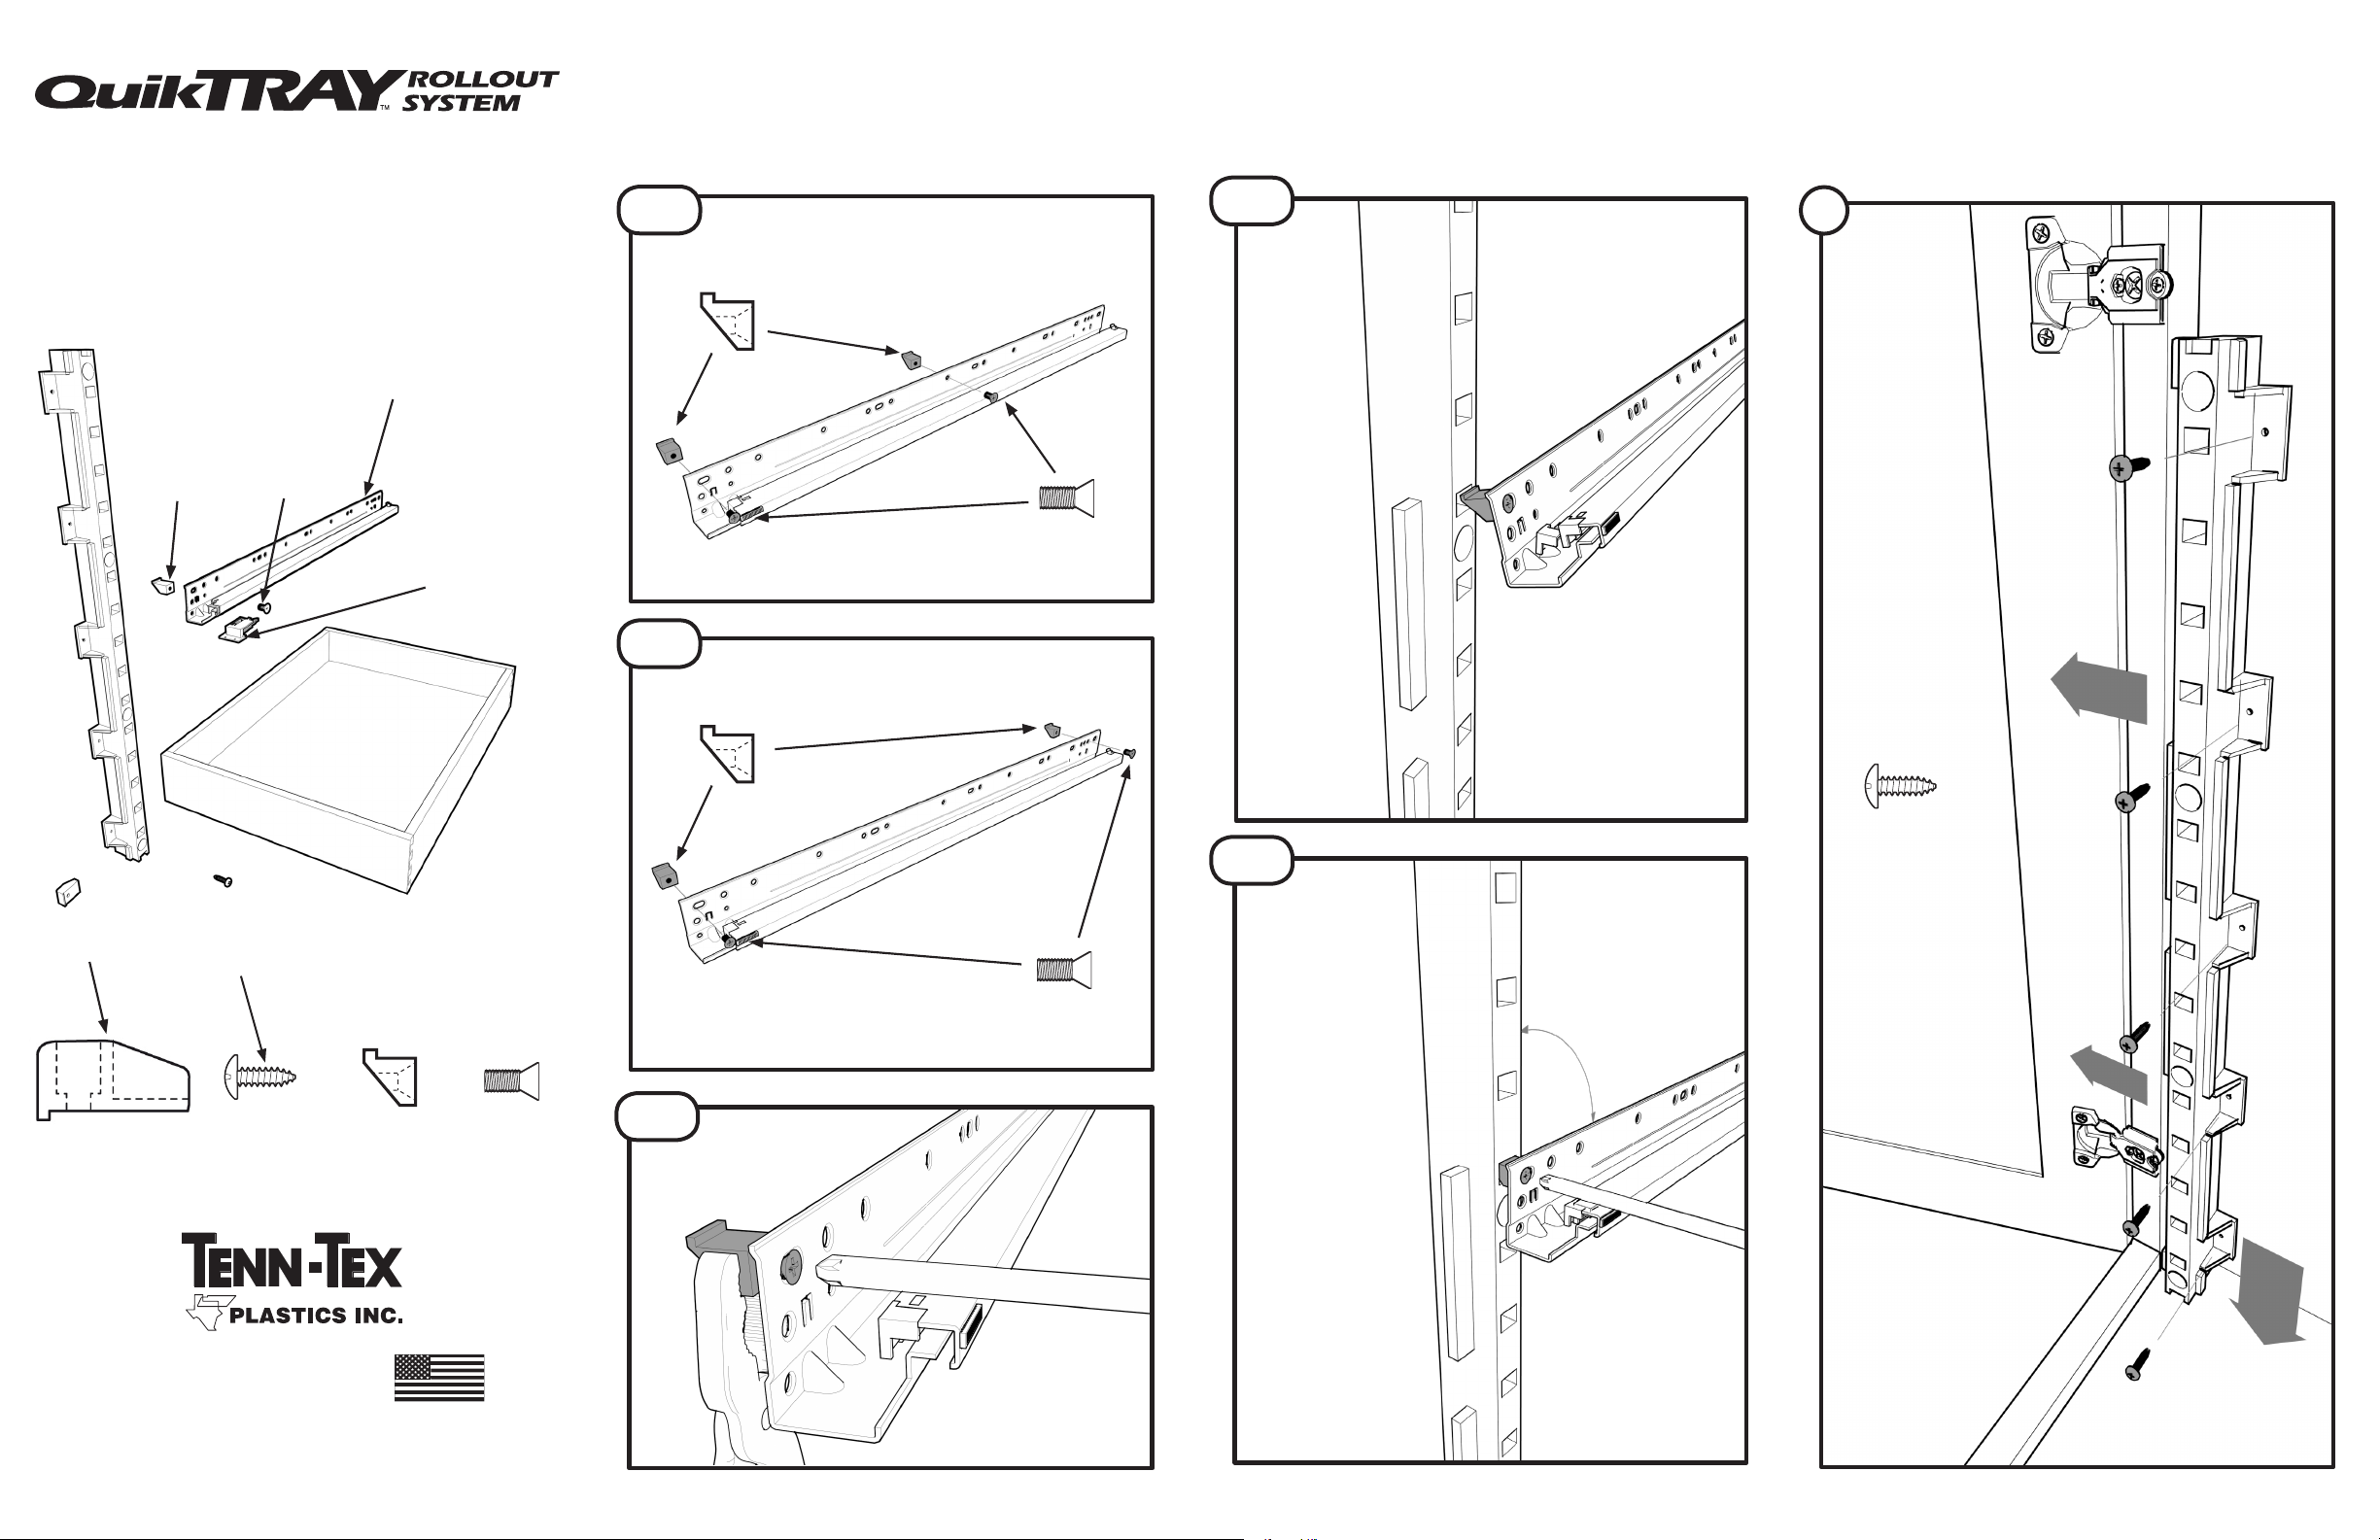
ASSEMBLY
1a
Hook
Dowel
1b
Hook
Dowel
With Half Shelf
Without Half Shelf
Hook
Dowel
Screw
1d
INSTALLATION
2
Angle the slide to
get the lip into the
hole in the pilaster.
Bumper
Qty: 2
Additional tools needed:
Screwdriver, pliers
www.quiktray.com
www.tenntex.com
For additional installation questions, call 1-800-TENNTEX
#6x1/2”
Screw
Qty: 40
between the hours of 9am and 4pm EST
Hook
Dowel
Qty: 8
Made in USA
Hook
Dowel
Screw
Qty: 8
1c
Hook
Dowel
Screw
Mount the hook
dowels so the
lip points up
1e
Use the pilaster
to hold the hook
dowel at 90°
when tightening.
#6x1/2”
Screw
Qty: 5 per
pilaster
90°
Place QuikTRAY™ pilaster
behind face-frame.
Rest pilaster against
cabinet bottom.
Fasten with 5 screws.
INS-QT01
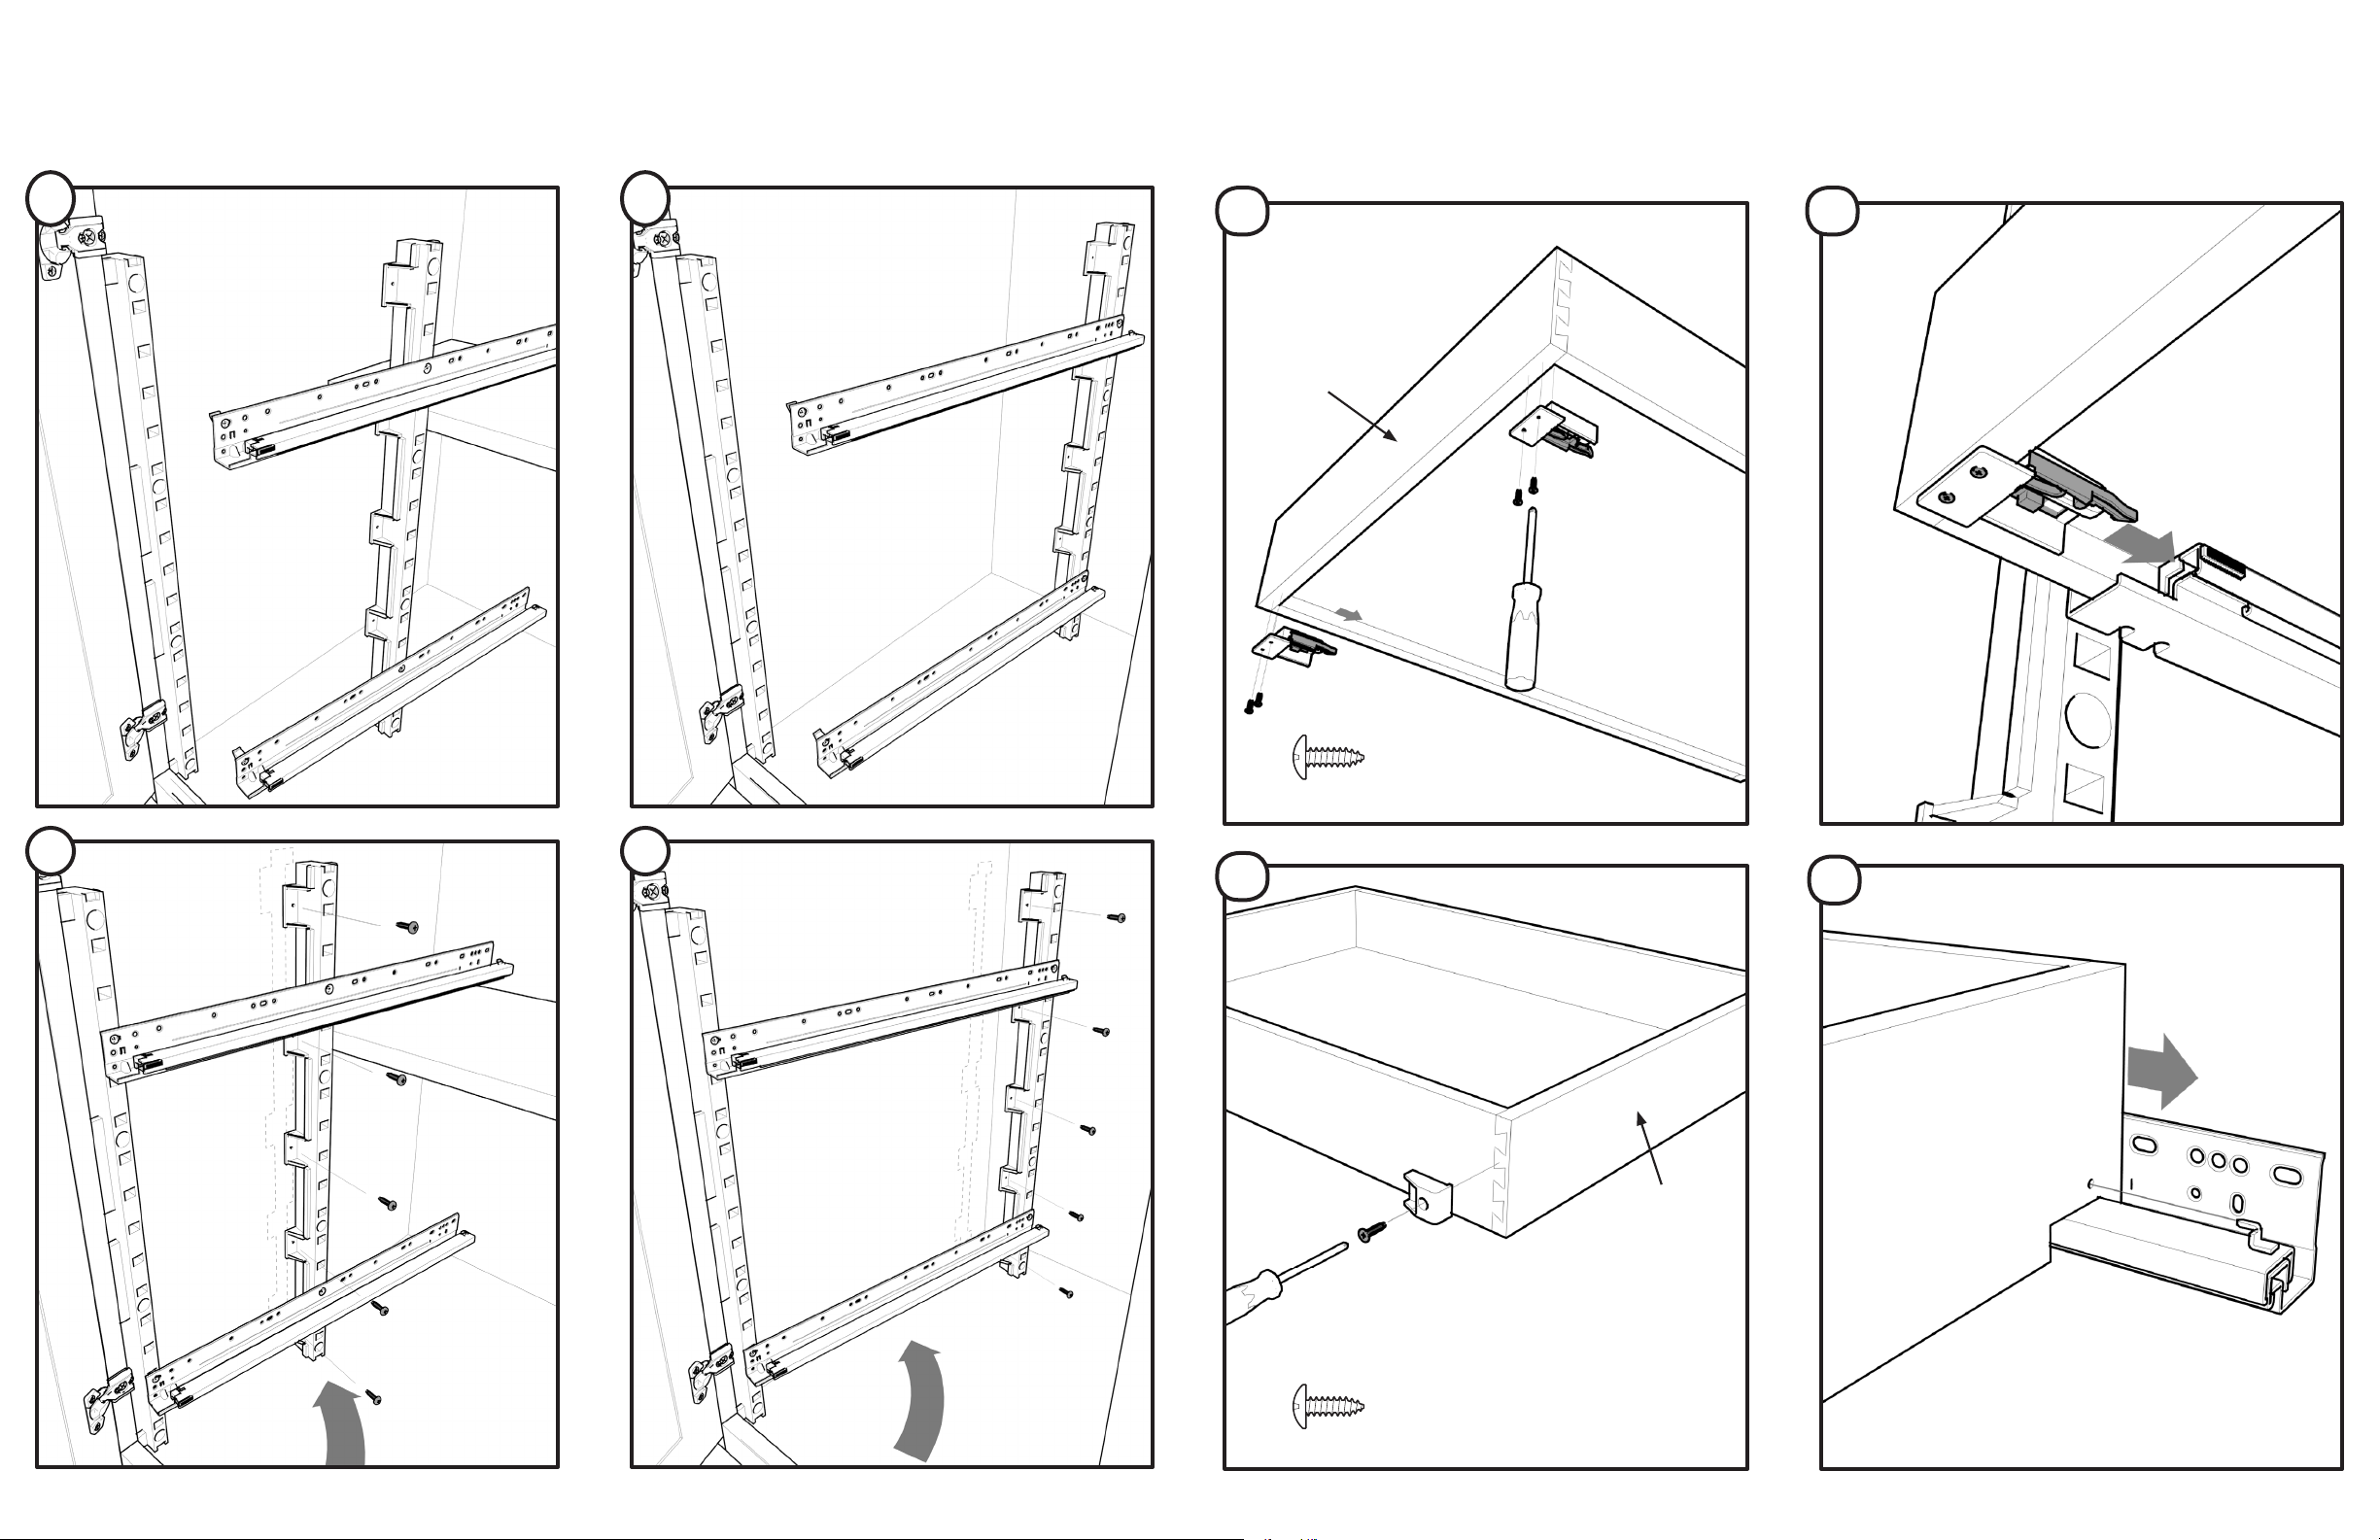
BACK PILASTER INSTALLATION
DRAWER BOX
ATTACH
With Half-Shelf Without Half-Shelf
3 3
Insert two drawer slides
to top and bottom of
unattached rear pilaster.
Insert two drawer slides
to top and bottom of
unattached rear pilaster.
ASSEMBLY
5
The front of the
drawer is plain, the
back has cutouts
and hols for the
slides to hook into.
Front
DRAWER SLIDE
7
Set the drawer
box on the slides
and push back
to engage the
connectors.
4 4
Insert front
hook dowels
into front
pilaster.
Float rear
pilaster into
position and
fasten with
screws.
Insert front hook
dowels into
front pilaster.
Float rear
pilaster into
position and
fasten with
screws.
6
#6x1/2” Screw
Qty: 2 per
connector
Install on the
hinge side on
the front.
#6x1/2” Screw
Qty: 1 per
bumper
8
Front
The hook on the back of the
slide fits into the hole on the
back of the drawer box.
 Loading...