

Tennsco LSS-361872 User Manual
ASSEMBLY INSTRUCTIONS & PARTS MANUAL #1540703
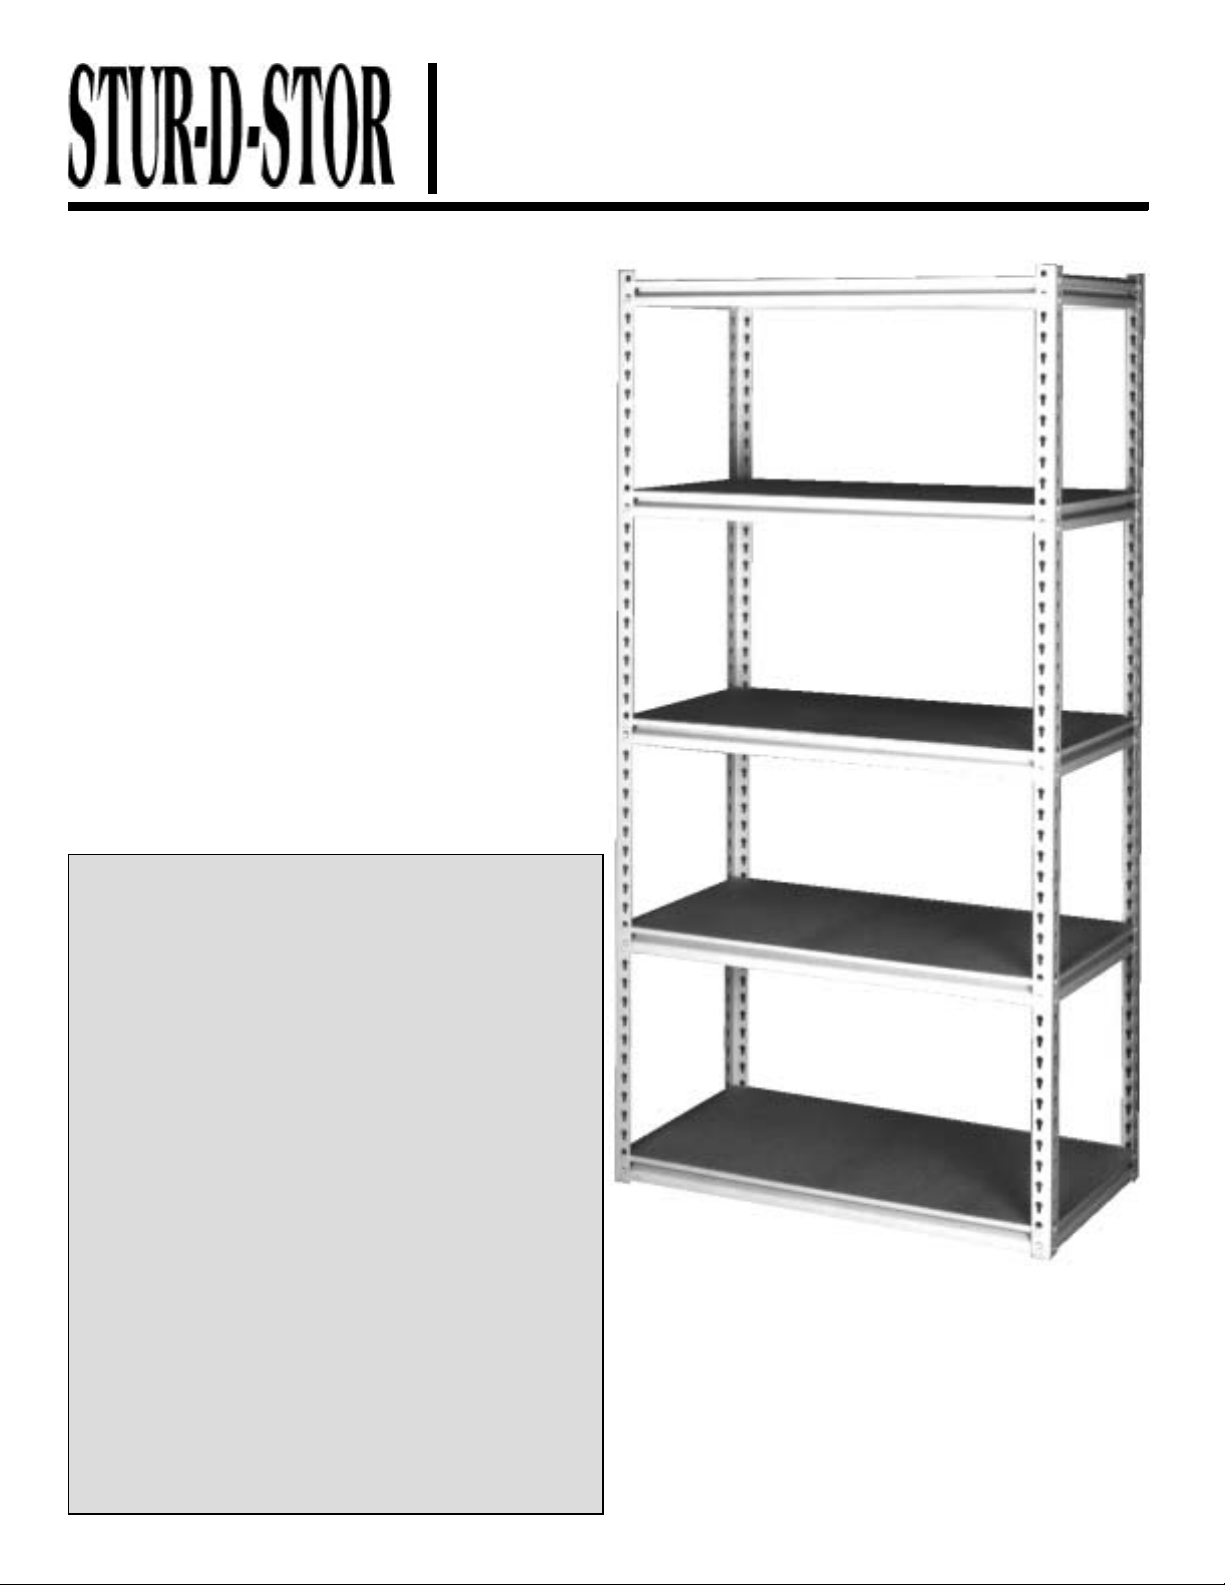
HOME SHELVING SYSTEM,
Model No. LSS-361872
STUR-D-STOR, Dickson, TN 37056-1888 * (615) 446-8000
Be Sure To Save This Instruction Sheet For Future Reference!
CONGRATULATIONS on your
selection of Tennsco’s STUR -D-STOR
home shelving s ystem . T he
STUR-D-STOR system is designed for
use in the home, the of f ic e, and t he
industrial work place. STUR-D -S T OR
shelving systems provide sturdy
shelving whic h m ay be us ed as eit her a
single upright unit or s plit in half to
provide shelving with a handy work
surface. Our unique shelf support
design provide s support for loads of up
to 1,000 pounds per s helf!
LIMITED WARRANTY
Tennsco warrants goods purchased hereunder to be free of defects
in materials and workmanship for a period of one (1) year from the
date of shipment, hereunder. This warranty shall not apply in the
event goods are damaged as a result of misuse, abuse, neglect,
accident, improper application, modification or repair by persons not
authorized by Seller, where goods are damaged during shipment, or
where the date stamps on the goods have been defaced, modified or
removed. UNLESS CONSIDERED UNENFORCEABLE OR
UNLAWFUL UNDER APPLICABLE LAW:
a. ALL IMPLIED WARRANTIES, I NCLUDING BUT NOT LIMITED TO
WARRANTIES OR MERCHANT ABILITY AND FITNESS FOR A
PARTICULAR PURPOSE ARE HEREBY EXCLUDED.
b. BUYERS REMEDY, IF ANY, FOR ANY DEFECTIVE GOODS
SHALL BE LIMITED TO A REFUND BY SELLER OR
REPLACEMENT OF THE G OODS AT SELLER’S OP TION, AND
SHALL IN NO EVENT INCLUDE DAMAGES OF ANY KIND,
WHETHER INCIDENTAL, CONSEQUENTI A L OR OTHE RWISE.
NO GOODS ACCEPTED FOR RETURN WITHOUT PRIOR
APPROVAL. Seller shall have the right to inspect any goods claimed
to be defective at Buyers pl ac e of busin es s or r e qu ir e Bu yer to ret urn
the goods to Seller for inspection on Seller’s premises. Transportation
charges covering returned goods will be borne by Seller only if such
goods are proven to be defective, are covered by this warranty and are
returne d wit h in the wa r ran ty period stat ed above.
GENERAL SAFETY INFORMATION
Some parts may have sharp edges. CARE must be taken when
handling various pieces to avoid injury. For safety, wear a pair of
work gloves when assembling or performing any maintenance on
shelving uni t. Shel ving uni t is des igned to be pl aced upr ight on a flat
surface. Distribute the weight of it em s st or ed on the shelves ev enly
across the sh elves. Do not place h eavier items on the u pper shelves.
If the shelvin g unit is to be located i n an uneven ma nner or positioned
on an unlevel surface, the unit should be secured to a wall or floor
with appropriat e fa st ener s. D o not use as a lad der !
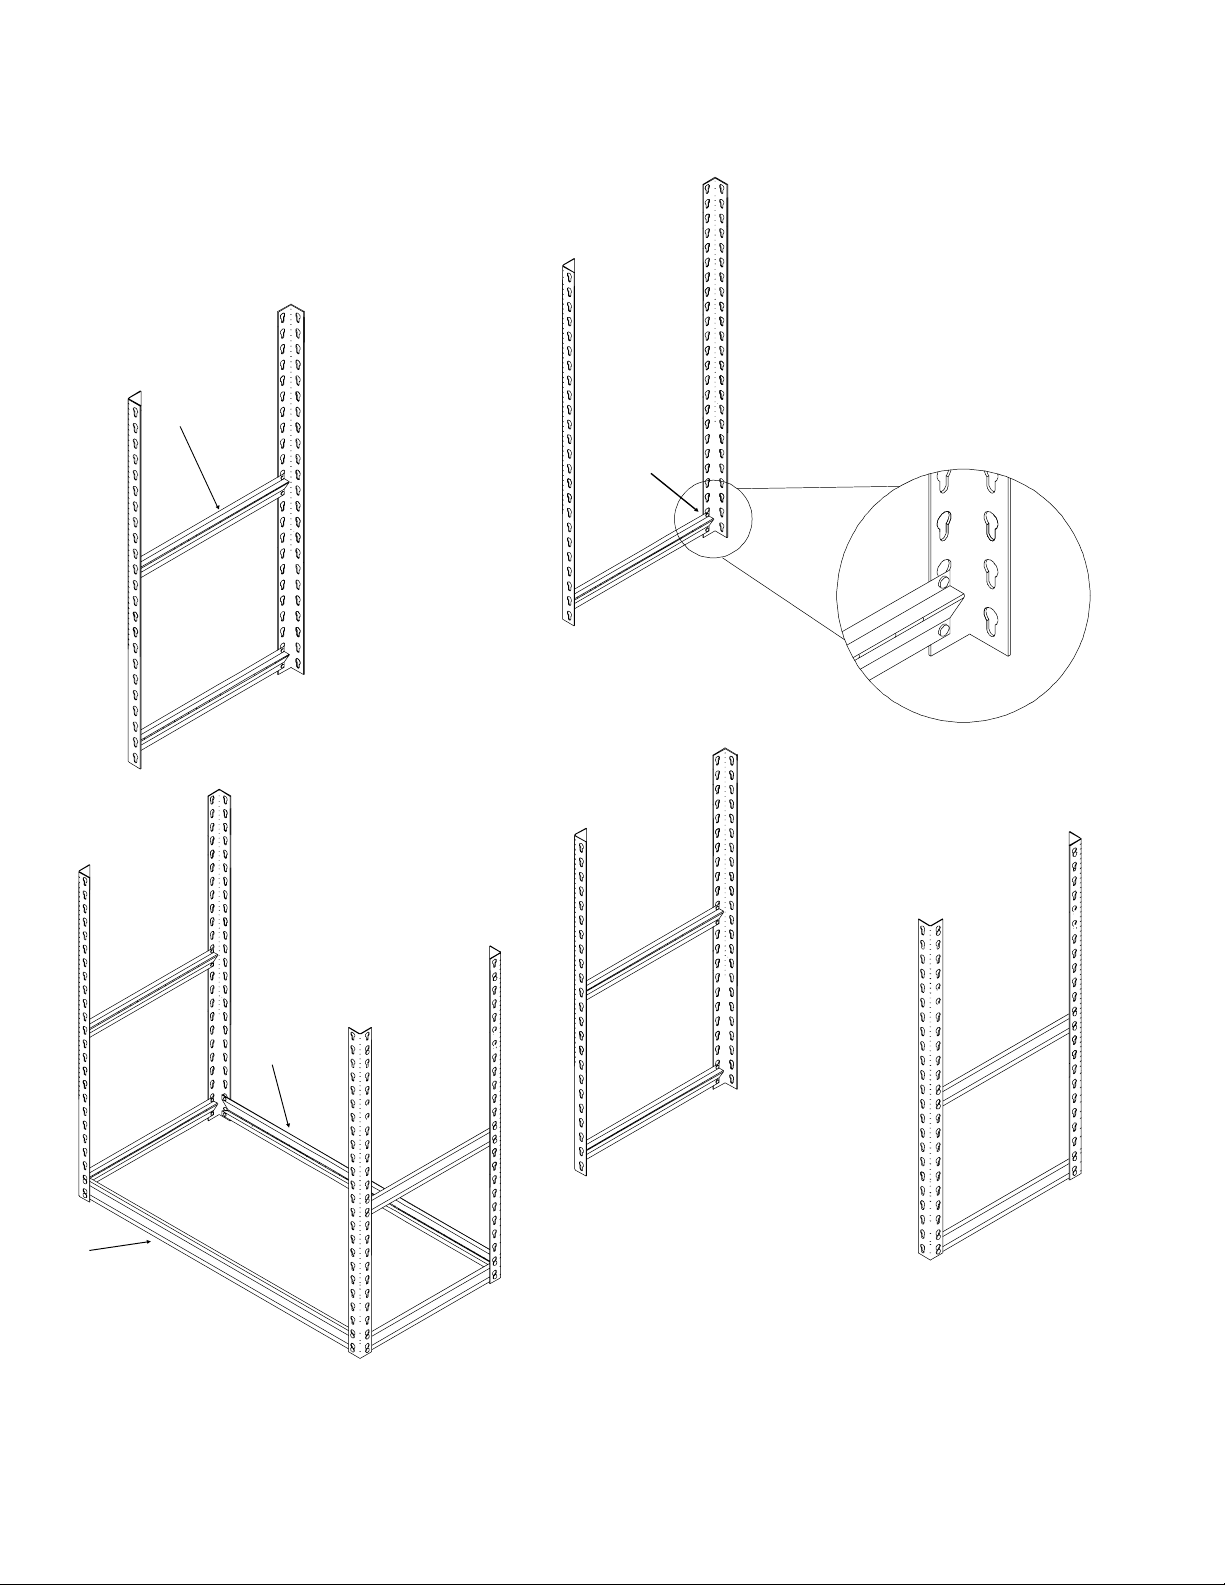
Step By Step Installation Instructions
1. Remove all parts from carton and
check against the parts list on back
cover for any missing parts.
3. Place a second
18" wide upright
halfway up the
upright assembly
as shown.
Tool required: Rubber Mallet or Hammer
2. Connect two upright posts (Ref. A) with a
A
A
18" wide shelf support (Ref. B) by
inserting shelf support rivets into the
bottom two keyhole slots of each upright.
Use a rubber mallet to seat the upright
securely in the keyhole slots.
NOTE: Make sure that the narrow
end of the keyhole slots are pointing
downward, and that the fla t e dge of
the shelf support is facing up, as
shown in exploded view below.
B
C
C
5. Place the two end
assemblies about 36"
apart, with the angled corners
facing outward. Connect two 36"
shelf supports (Ref. C) between the
two assemblies, one on each side,
as shown. Be sure to use the two
keyhole slots nearest the floor, as
before.
4. Repeat steps 2 and 3 to
prepare a second set of
uprights, as shown. You should
now have two upright end
assemblies.
NOTE: As in step two, make sure the flat edge of the
shelf su pports are facing upward. I f y ou have done this
correctly, there should now be a flat surface around all
four edges on which to lay the bottom particleboard
shelf. If any edge has an upward-facing angled edge, the
upright has been inserted upside-down.
 Loading...