

Tennsco B-8400 Assembly Instructions Manual
ASSEMBLY INSTRUCTIONS & PARTS MANUAL #1550499
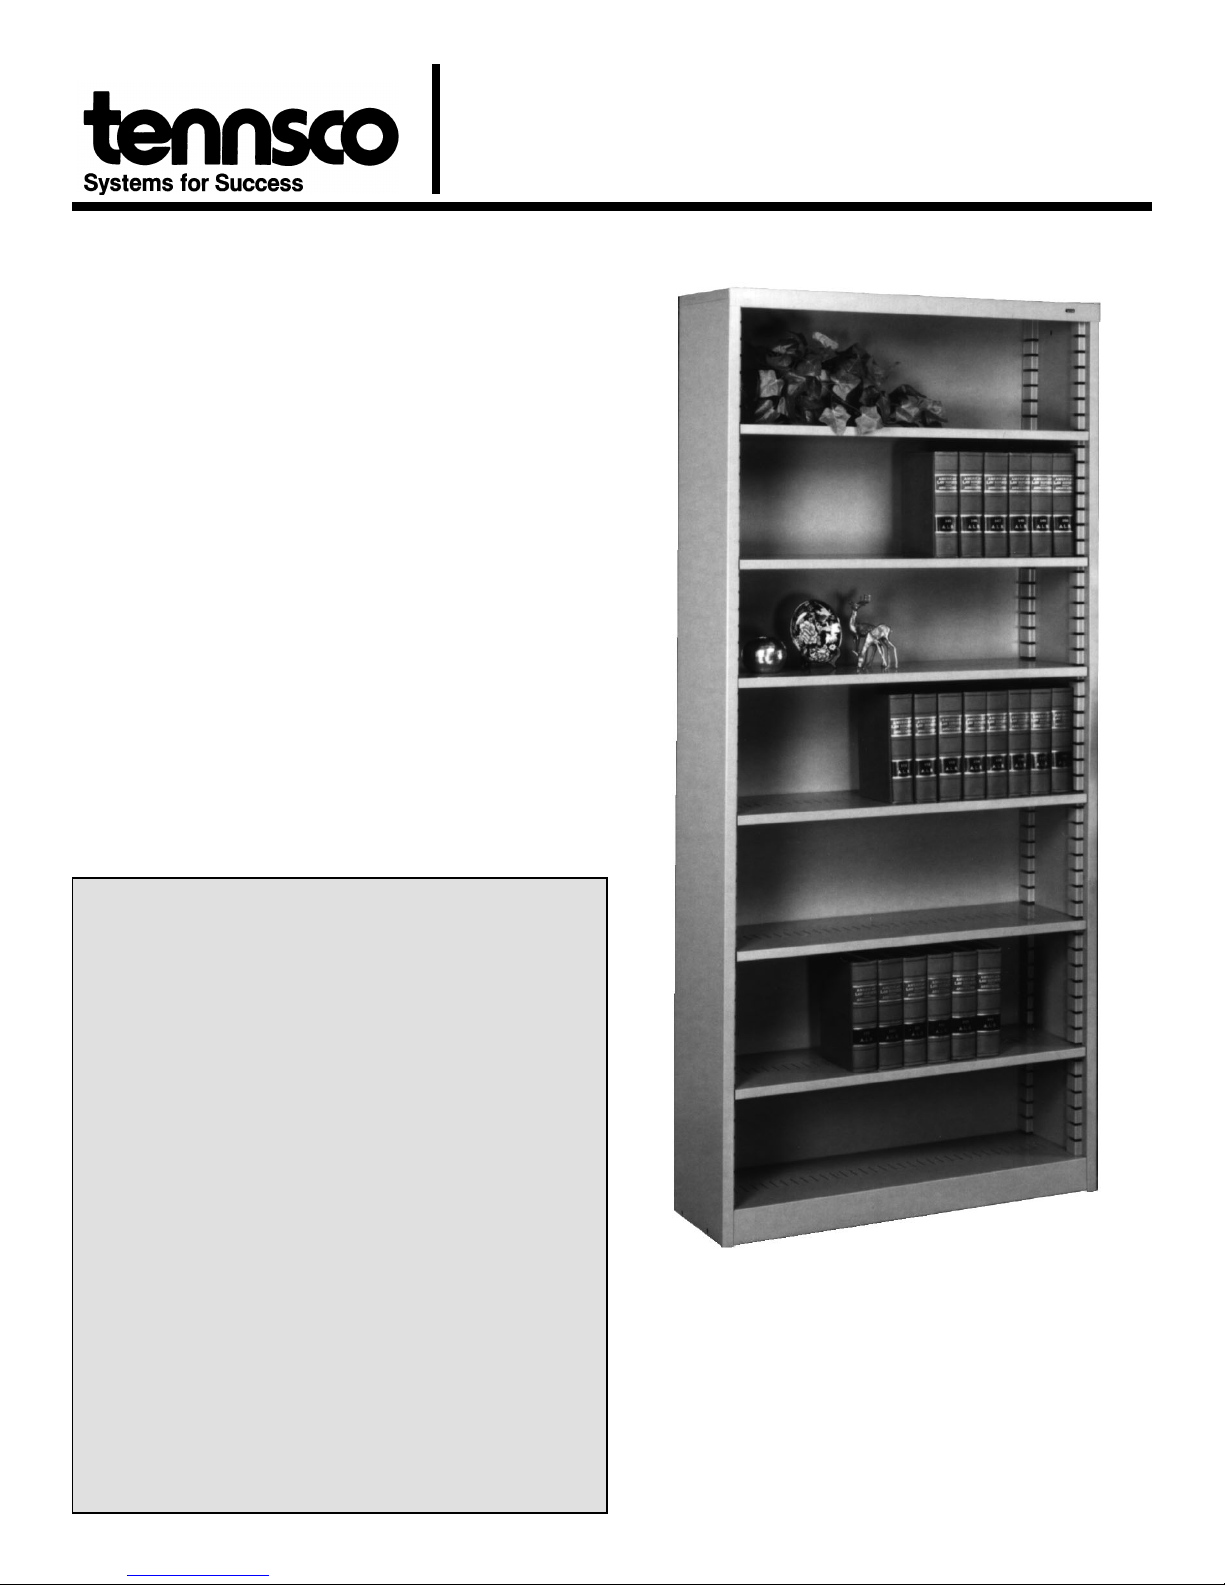
KD BOOKCASE
Models B-8400
Tennsco Corp., Dickson, TN 37056-1888 * (615) 446-8000
Be Sure To Save This Instruction Sheet For Future Reference!
CONGRATULATIONS on your selection of a
TENNSCO B-8400 bookcase! Tennsco
bookcases combine the strength you need
with the versatility of easily adjustable
shelves. Features include seven heavy-duty
reinforced shelves to handle loads of up to
200 pounds per shelf, a raised base to keep
materials safe from mops and damaging
cleaners; double wall construction to keep
materials from slip ping behi nd upri ghts; an d
slotted shelves to allow for shelf dividers. Top
it off with our tough baked-on enamel finish,
and you have a shelving unit which will
remain attractive through years service.
LIMITED WARRANTY
Tennsco warrants goods purchased hereunder to be free of defects
in materials and workmanship for a period of one (1) year from the
date of shipment, hereunder. This warranty shall not apply in t he
event goods are damaged as a result of misuse, abuse, neglect,
accident, improper application, modification or repair by persons not
authorized by Seller, where goods are damaged during shipment, or
where the date stamps on the goods have been defaced, modified or
removed. UNLESS CONSIDERED UNENFORCEABLE OR
UNLAWFUL UNDER APPLICABLE LAW:
a. ALL IMPLIED WARRANTIES, INCLUDING BUT NOT LIMITED TO
WARRANTIES OR MERCHANTABILITY AND FITNESS FOR A
PARTICULAR PURPOSE ARE HEREBY EXCLUDED.
b. BUYERS REMEDY, IF ANY, FOR ANY DEFECTIVE GOODS
SHALL BE LIMITED TO A REFUND BY SELLER OR
REPLACEMENT OF THE GOODS AT SELLER’S OPTION, AND
SHALL IN NO EVENT INCLUDE DAMAGES OF ANY KIND,
WHETHER INCIDENTAL, CONSEQUENTIAL OR OTHERWISE.
NO GOODS ACCEPTED FOR RETURN WITHOUT PRIOR
APPROVAL. Seller shall have the right to inspect any goods claimed
to be defective at Buyers place of business or require Buyer to return
the goods to Seller for inspection on Seller’s premises. Transportation
charges covering returned goods will be borne by Seller only if such
goods are proven to be defective, are covered by this warranty and are
returned within the warranty period stated above.
Unit Dimensions: 38"w x 12"d x 84"h
GENERAL SAFETY INFORMATION
Some parts may have sharp edges. CARE must be taken
when handling various pieces to avoid injury. For safety, wear
a pair of work gloves when assembling or performing any
maintenance on shelving unit. Shelving unit is designed to be
placed upright on a flat surface. Distribute the weight of items
stored on the shelves evenly across the shelves. Do not place
heavier items on the upper shelves. If the shelving unit is to
be located in an uneven manner or positioned on an unlevel
surface, the unit should be secured to a wall or floor with
appropriate fasteners. Do not use as a ladder!
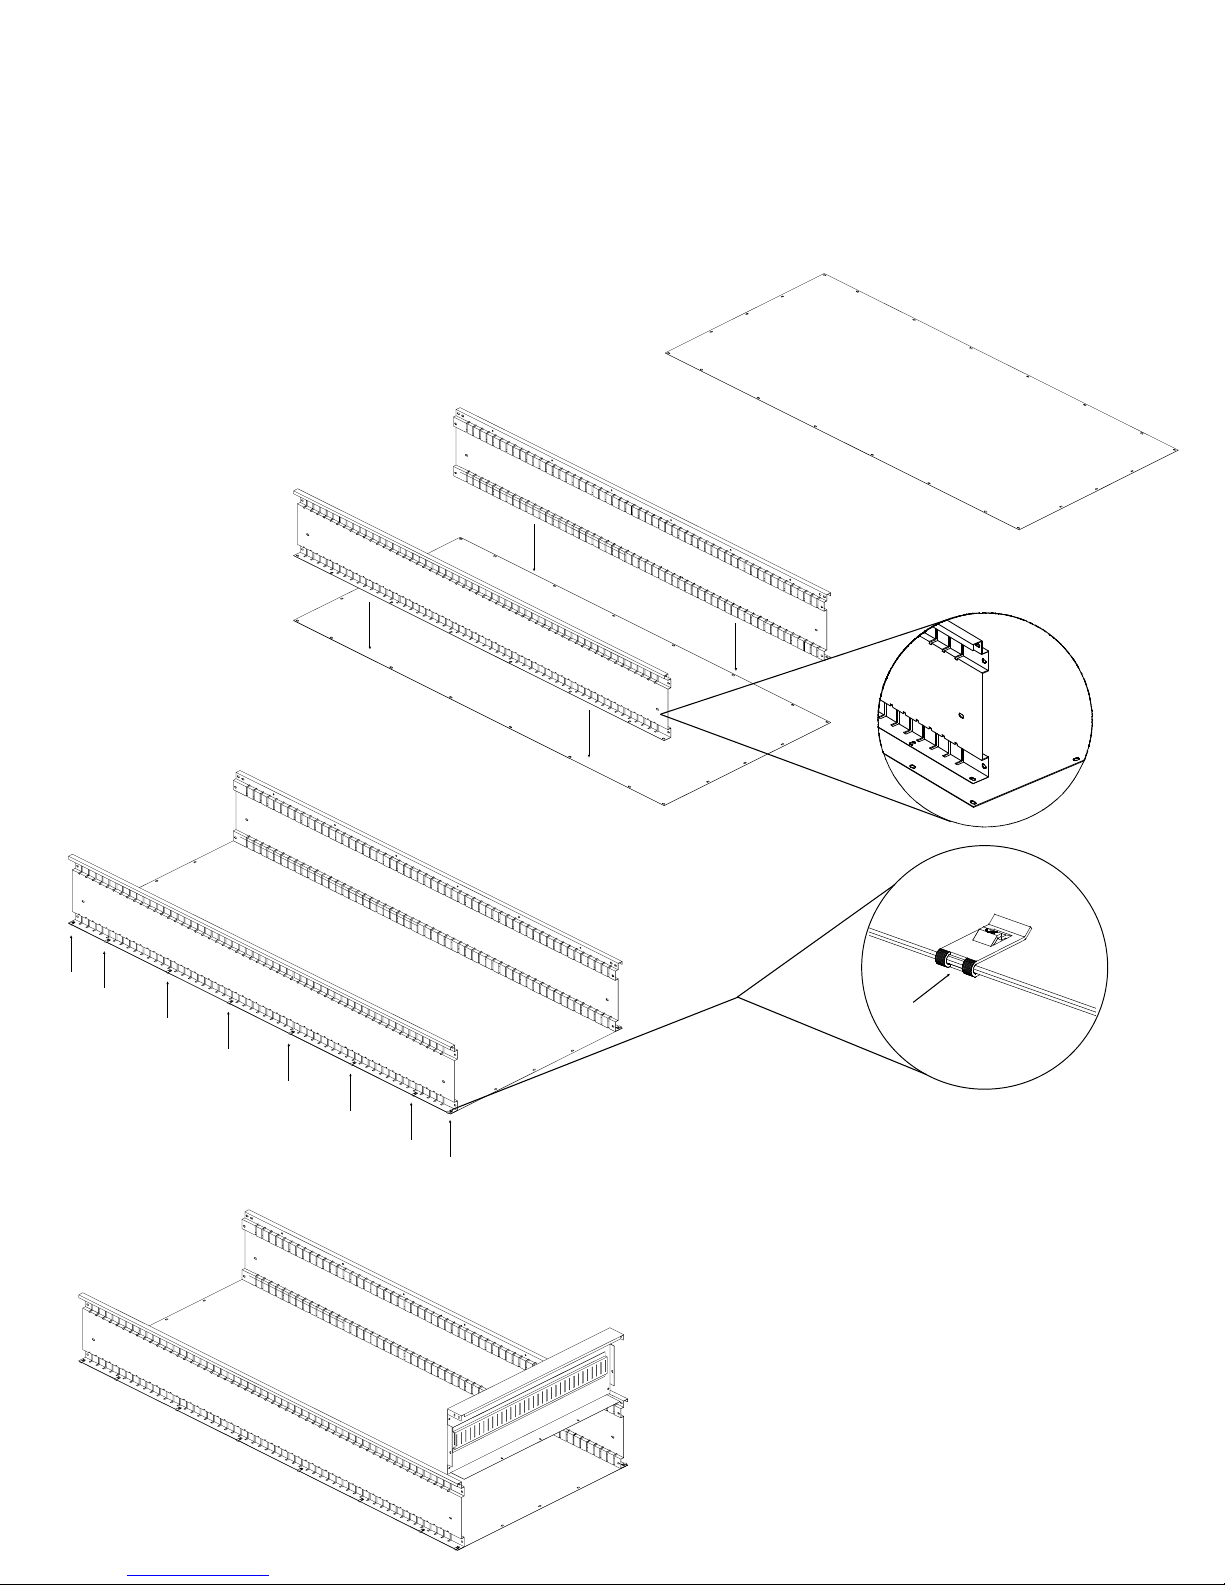
Step By Step Installation Instructions
Tools required: One phillips screwdriver and a 3/8" wrench or nutdriver.
Unit should be assembled on any convenient, non-marring flat surface.
1. Remove all parts from carton and
check against the parts list on back
cover for any missing parts.
2. Place back (Ref. No. 1)
on a flat surface.
3. Place uprights (Ref. No. 2)
on either side of the back.
Be sure that the flat edge of
the upright is facing outward
as shown in exploded
view at right.
NOTE:
"right" or "left" upright;
both uprights are the
same. There is a small
unslotted area at the
end of each upright; when
properly installed, these will
not be directly across from
each other, but on opposite
ends of the unit.
There is no
1
2
2
7
PK-1550499
4. Fasten each upright to
the back using tinnerman
clips (Ref. No. 7). Place one tinnerman
clip over each of the slotted holes
(see exploded view at right for example).
NOTE:
tinnerman clips yet. The back will be
screwed into place in step 8.
5. Place bottom shelf (Ref. No. 4) into position by slipping into slots on
uprights. It may be necessary to pry uprights apart slightly to
move bottom shelf into position.
NOTE:
unslotted area at one end which will be at the top of
the unit on one side and at the bottom of the unit on
4
the other side. This means that the bottom shelf will
be inserted in the second slot from the bottom on the
upright with slots all the way to the bottom, but in the
first slot from the bottom on the opposite upright (the
one with the slotless area at the bottom).
Do not place the screws into the
As mentioned in Step 2, the uprights have an
 Loading...