

Tennsco 1842, 2442 Assembly Instructions Manual
ASSEMBLY INSTRUCTIONS & PARTS MANUAL #2570110
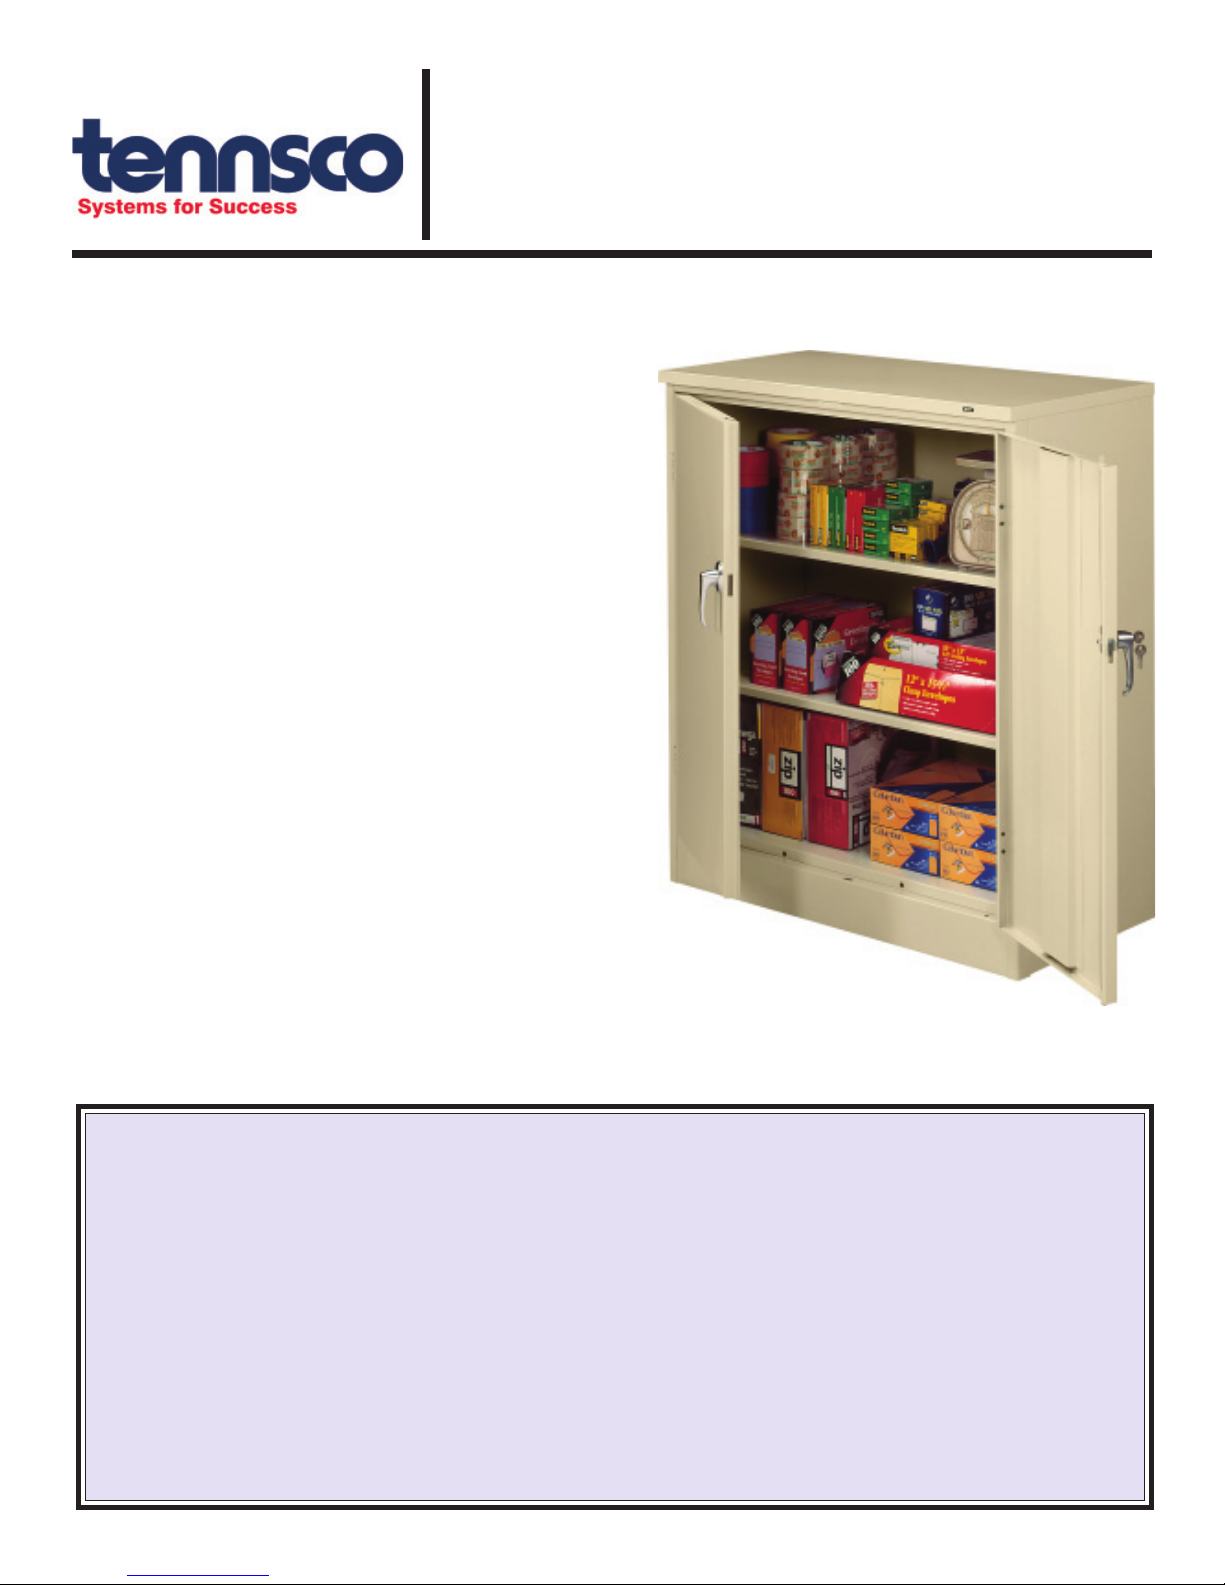
STORAGE CABINET, 42" High
Models 1842 & 2442 Counter-Height
Tennsco Corp., Dickson, TN 37056-1888 • (615) 446-8000
RETAIN INSTRUCTIONS FOR FUTURE REFERENCE!
Congratulations on your purchase of a
Counter High Storage Cabinet from
Tennsco! Our cabinets provide abundant
storage space; the Model 1842
18"d
x 42" tall, while the Model 2442 is
is 36"w x
36"w x 24"d x 42" tall. Our cabinets are
rigidly constructed to give you
dependable and
efficient service. Nylon
years of
lock-bar guides ensure smooth,quiet
operation. A locking handle with two keys
provides a three-point locking system for
added security. Sturdy adjustable shelves
provide exceptional strength — up to
150 lbs. per shelf (evenly distributed) on the
18" deep cabinet and up to 200 lbs. per
shelf (evenly distributed) on the 24" deep
cabinet. And our baked-on powder finish adds
even more durability.
GENERAL SAFETY INFORMATION: Some parts may have sharp edges. CARE must be taken when handling various pieces
to avoid injury. For safety, wear a pair of work gloves when assembling or performing any maintenance on your cabinet.
Tennsco warrants goods purchased hereunder to be free of defects in materials and workmanship for a period of one (1) year from the date of shipment,
hereunder. This warranty shall not apply in the event goods are damaged as a result of misuse, abuse, neglect, accident, improper application, modification
or repair by persons not authorized by Seller, where goods are damaged during shipment, or where the date stamps on the goods have been defaced, modified
or removed. UNLESS CONSIDERED UNENFORCEABLE OR UNLAWFUL UNDER APPLICABLE LAW:
a. ALL IMPLIED WARRANTIES, INCLUDING BUT NOT LIMITED TO WARRANTIES OR MERCHANTABILITY AND FITNESS FOR A PARTICULAR
PURPOSE ARE HEREBY EXCLUDED:
b. BUYERS REMEDY, IF ANY, FOR ANY DEFECTIVE GOODS SHALL BE LIMITED TO A REFUND BY SELLER OR REPLACEMENT OF THE GOODS
AT SELLER’S OPTION, AND SHALL IN NO EVENT INCLUDE DAMAGES OF ANY KIND, WHETHER INCIDENTAL, CONSEQUENTIAL OR OTHERWISE.
NO GOODS ACCEPTED FOR RETURN WITHOUT PRIOR APPROVAL. Seller shall have the right to inspect any goods claimed to be defective at Buyers
place of business or require Buyer to return the goods to Seller for inspection on Seller’s premises. Transportation charges covering returned goods will
be borne by Seller only if such goods are proven to be defective, are covered by this warranty and are returned within the warranty period stated above.
Mailing Address: TENNSCO CORP. Shipping Address: TENNSCO CORP.
P.O. Box 1888 201 Tennsco Drive
Dickson, TN 37056-1888 Dickson, TN 37055
(615) 446-8000 (800) 251-8184 (615) 446-8000 (800) 251-8184
LIMITED WARRANTY
PK-2570110
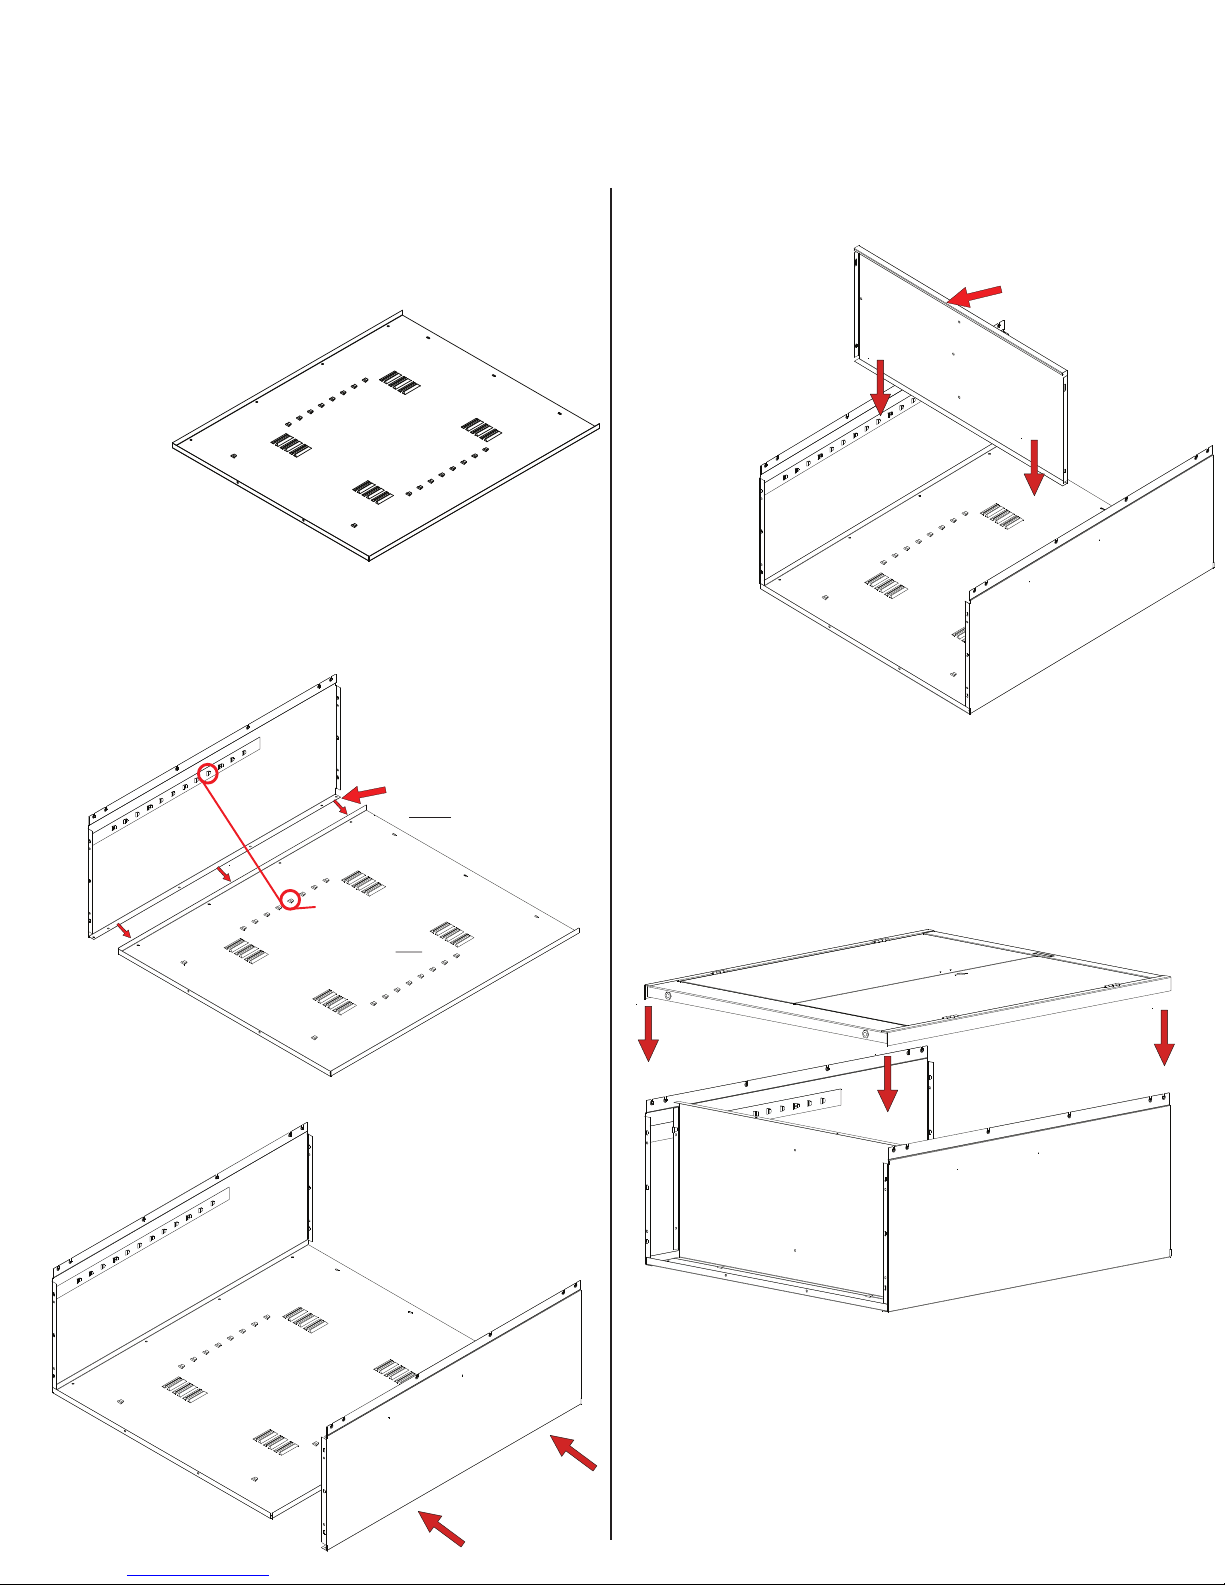
INSTALLATION OF 42"H STORAGE CABINET
Tools needed: An 11/32" nut driver (provided free with unit); a hammer; and a flathead screwdriver.
Two people recommended for installation. Approximate assembly time: 15 to 25 minutes.
1. The reference numbers used throughout this
sheet refer to the illustration on the back cover.
This is to help you to identify the various parts as
they are mentioned.
2.
Place the back (Ref.
1) on a
No.
padded
surface
with
the flanges
facing upward.
3. Attach the left side (Ref. No. 2) to the back by
placing flange (A) around the back and bolting the
back and side together with four bolts and nuts
(Ref. Nos. 16 & 17). Be sure that the lances
on all shelf adjustment
strips (B) point in the
same direction.
Flange goes
A
under back
5. Place the shelf (Ref. No. 5) into the shelf adjusting
strips somewhere near the center of the cabinet, to
hold the sides in an
upright position
while installing the
door frame assembly and top. Be
sure the channeled
edge of the
shelf is to
the front.
(Don't be
too concerned
about the
position of
the shelf at this
point. You may
move the shelf up or
down as desired later.) Make
sure that the rear and sides of the shelf aref well
seated into all four lances.
NOTE: You may use a flathead screwdriver to
slighty pry the lances outward if they are too tight
to insert the shelf edges into.
Channeled edge of shelf
is toward front of unit.
All lances
B
point UP on
the back
on both sides.
and
4. Attach the right side (Ref. No. 3) to the back in
the same manner as you did in step 3, again
making sure that the
lances on the shelf adjustment strips are pointed in
the same direction as
those on the back
and left
side.
6. Attach the door frame assembly (Ref. No. 6) to the
cabinet body by placing it over the sides. Align the
weld studs with the slots in the left and right sides,
and attach using four nuts on each side.
 Loading...