

Page 1

Static Field Meter
TM-291
User’s Manual
HB2TM2910001
Page 2

Page 3

Contents
1 Introduction.......................................................1
2 Accessories.......................................................1
3 Safety Precaution..............................................1
4 Instrument Description ......................................2
5 Operation..........................................................3
5-1 Disable Auto Power Off Mode....................4
5-2 Zeroing......................................................4
5-3 Manual record mode .................................4
5-4 Display logs mode.....................................5
5-5 Backlight Mode..........................................5
5-6 Setting mode.............................................5
6 Specifications....................................................7
7 Maintenance or Repair......................................8
8 Battery Replacement.........................................8
9 Product Disposal...............................................8
Page 4
1 Introduction
1
Carrying case
and its components.
This contactless precise electrostatic field meter can
immediately sensor the static voltage on a charged body
without contact. The measuring range is 0.010kV ~
20.000kV with the sensing distance 1 inch (2.54cm).
The meter provides alarm function for prompt.
2 Accessories
1
Meter
1
User’s Manual
1
9V alkaline battery
3 Safety Precaution
Caution! Please refer to this manual.
Improper use may damage the meter
Complies with European Directive.
Do not operate in environments with flammable gas or
humid environments.
Operating altitude: up to 2000M.
Operating environment: Indoor use; Pollution degree 2.
Clean with soft cloth when dirty, such as glasses cloth.
Do not clean with chemicals and other solvents.
EMC: EN61326-1:CISPR 11:Group 1, Class B
Class B – Equipment for use in all establishments other
than
domestic.
Group 1 – RF energy generated is needed for internal
functioning.
1
Page 5
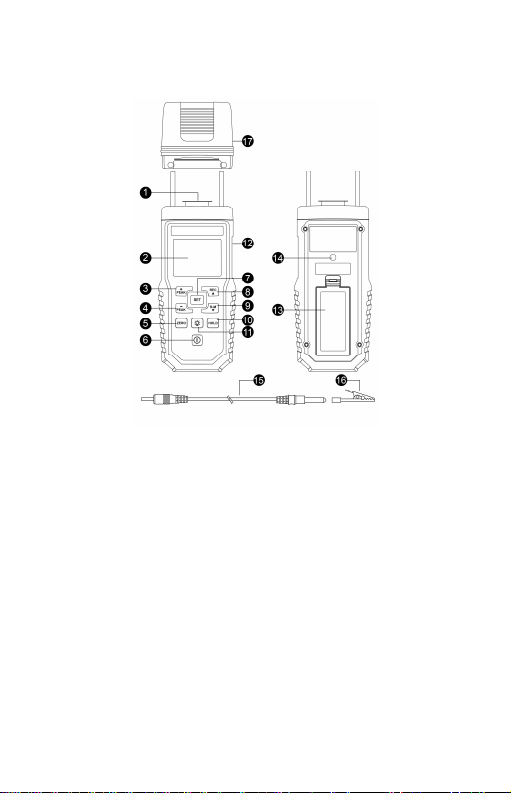
4 Instrument Description
button
1. Sensor
2. LCD display
3. +peak value (max.
value)
4. -peak value (min.
value)
5. Zero setting button
6. Power button
7. Function Setting button
8. Record readings / up
button
9. Display logs / down
10.Data hold
11.Backlight button
12.Grounding socket
13.Tripod nut
14.battery cover
15.Grounding wire
16.Crocodile clip
17.Protection cap
2
Page 6

5 Operation
Warning
The meter must be securely
grounded during measuring, and the
ing position not close to the
so to avoid the risk of electric
shock
.
hold
sensor
Before use, the meter must be grounded. Please
choose one of the following two methods to ground the
meter:
1. The first method is connecting the meter's ground
socket with one end of the grounding wire of
accessory and connecting to the earth end of the
building with another end of the grounding wire, or
connecting to the electrical socket for earthing, or
clamping the earth end with a crocodile clip.
2. The second method is the operator wears the
anti-static wrist strap and connecting to the earth
end of the building with another end of the anti-static
wrist strap. Note that the anti-static wrist strap is not
an accessory and shall beprepared by yourself.
During the measuring for static voltage, please
fasten ceramic spacers on the fix-threads besides the
sensor. Keep the sensor from the area under test for 1
inch (2.54 cm).
Clickthe Power button.
Make sure the meter is grounded before operating.
Aim the sensor point to the area under test, keeping
your fingers away from the area under test as possible.
Readthe value (static voltage value) on the LCD.
As completing a measurement, click the
button to lock the reading permanently to hold the
3
Page 7
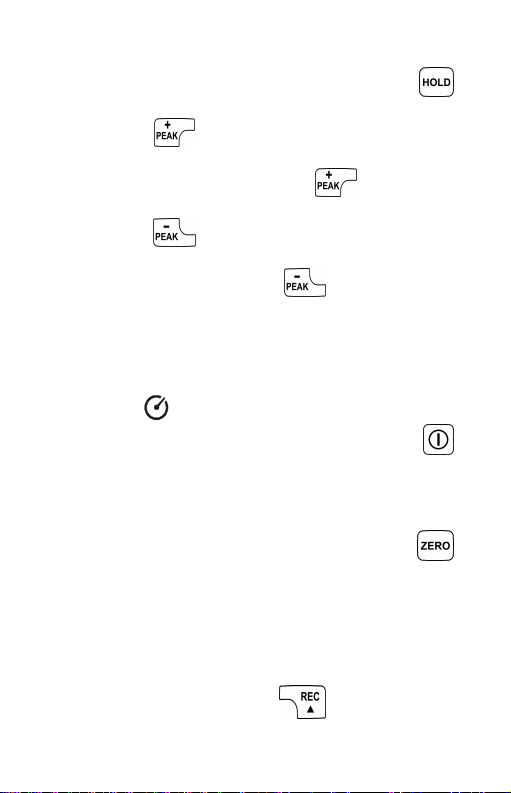
reading on the LCD for a long time; click the
button again to unlock to unlock the reading.
Click the button to continuously update the
maximum measuring value on the LCD to keep the
+peak value (max. value), click the button again
to cancel.
Click the button to continuously update the
minimum measuring value on the LCD to keep the -peak
value (min. value), click the button again to
cancel.
5-1 Disable Auto Power Off Mode
The meter will automatically power off after
powering on for about 15 minutes. The LCD
displays symbol at the mode. If to
disable the function, press and hold the
button for more than 2 seconds.
5-2 Zeroing
Prior to measuring the static voltage, click the
button for more than 2 seconds to clear the reading if an
old reading survived on the LCD. (Note: Set the static
voltage of the surrounding environment to be 0, if not,
the measuring may be biased.)
5-3 Manual record mode
At measuring mode, click button to record
4
Page 8
the present reading, the records can be logged up to 99.
5-4 Display logs mode
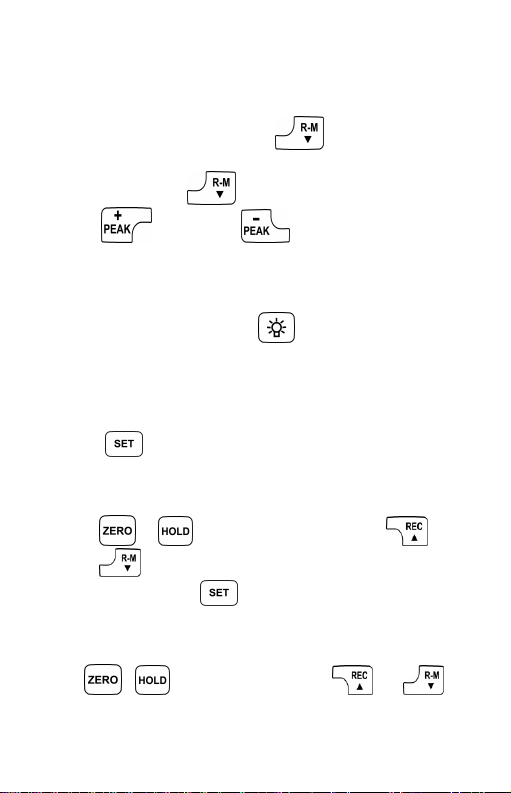
At measuring mode, click button to display
the readings of logged data while MEM symbol appears
on the LCD. Click button again to quit the mode.
Click button or button to select the
number of logs.
5-5 Backlight Mode
During measuring, click button to turn on the
backlight of LCD for 15 seconds and then turn off
automatically.
5-6 Setting mode
Press button repeatedly and enter the settings of
Step 1 to 4 sequentially.
Step 1. Set (HI) + alarm
1. While the LCD displays SET1 HI symbol, Press
or to move digits, press or
button to change the settings.
2. Quickly press button again and enter Step 2.
Step 2. Set (LO)- alarm
1. While the LCD displays SET2 LO symbol, Press
or to move digits, press or
button to change the settings.
5
Page 9
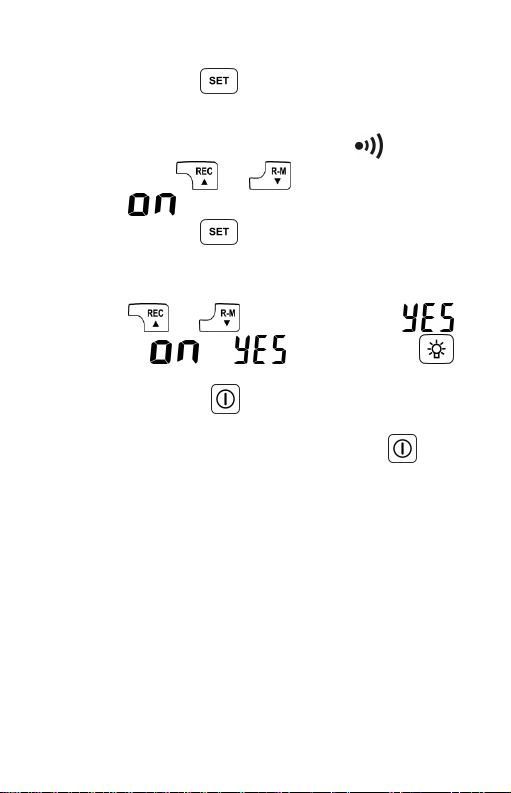
2. Quickly press button again and enter Step 3.
Step 3. Set the alarm on or off
1. While the LCD displays SET3 and symbols,
press or button to change as
or OFF.
2. Quickly press button again and enter Step 4.
Step 4. Clear memory
1. While the LCD displays SET4 dELsymbol, press
or button to change as
or . As is chosen, press
button to get memory cleared.
2. Quickly press button to quit the settings
status.
PS: If to quit the settings status, press
button in any step.
6
Page 10

6 Specifications
Display for readings: Liquid crystal display (LCD) of
4 1/2 digits with the displaying value up to 19999.
Resolution: 0.001KV.
Measuring range:-19.999KV~+19.999KV
Accuracy: ±(5%+10dgt).
Overloading indication: OL.
Sampling period: 2 times per second.
Battery: 9V NEDA 1604、IEC 6F22 or JIS 006P.
Battery life: Approximately 100 hours.
Operation temperature and humidity: 5 to 40oC (41
to 104oF); < 80%RH.
Storage temperature and humidity: -10ºC to 60ºC
(14 to 140oF), < 70%RH.
Weight: Approximately 210g.
Dimension: 148(L)x65(W)x37.5(H)mm.
Professional and precise static voltmeter with
resolution of 0.001kV.
Function including Data lock (HOLD), Max. value
(+PEAK) lock, Min. value (-PEAK) lock, Record
(REC) the displayed value, Display the logged data
(R-M), Zeroing (ZERO)
High voltage alarm:+/- 18.000KV。
Alarm setting:0.001KV~18.000KV
Auto power off (for about 15 minutes).
Battery low display .
Overload display OL.
7
Page 11

7 Maintenance or Repair
1. When the When symbol is displayed on the
LCD, it means that there is insufficient power;
please change the battery immediately in order to
ensure its accuracy.
2. Do not place the meter in locations that have high
temperature, humidity or that are exposed to direct
sunlight.
3. Remember to turn off the power after usage; remove
the battery if not used for a long period of time in
order to prevent battery leakage and causing
damages to internal components.
4. When the instrument failure, only by the authorized
service provider or return the original repair.
8 Battery Replacement
1. Turn off the power.
2. Open the battery cover at the back of the meter,
remove the batteries.
3. Please insert six new 9V batteries according to the
polarities.
4. Put the battery cover back in place.
9 Product Disposal
Note: This symbol indicates that the meter
and its accessories must be separated and
processed properly.
8
Page 12

TENMARS ELECTRONICS CO., LTD.
6F, NO.586 Ruiguang Rd, Neihu Dist.
Taipei City,Taiwan
E-mail: [email protected]
http://www.tenmars.com
 Loading...