

Page 1
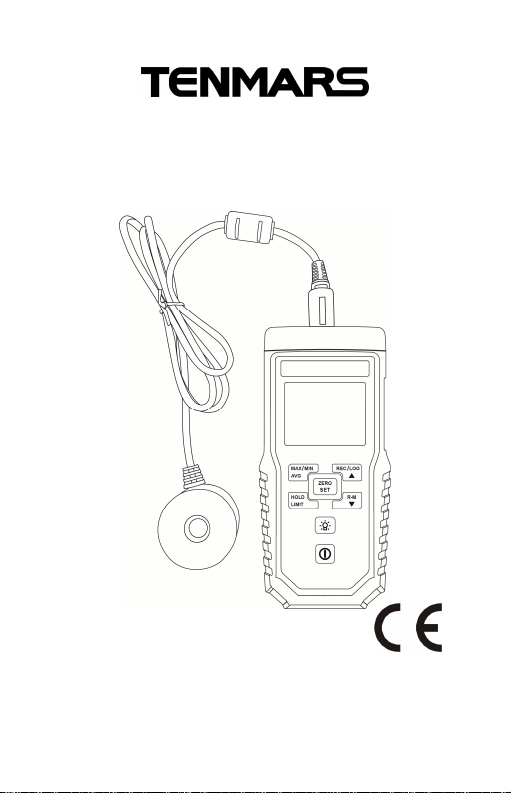
UVC Light Meter
TM-218
User’s Manual
HB2TM2180001
Page 2
Contents:
1.Application..............................................................1
2.Accessories ............................................................1
3.Safety Precaution ...................................................1
4.Instrument Description...........................................2
4.1 Feature and function ........................................2
4.2 Indication on the LCD display..........................3
5.Operation ................................................................4
5.1 ZERO.........................................................4
5.2 Data Hold:............................................4
5.3 The Max./Min. Values Hold: ..................5
5.4 Manual Record for One Log:............5
5.5 Auto Record........................................5
5.6 Read the record data ............................6
5.7 Backlight:................................................6
5.8 Disable or Enable Auto Power-off .........6
5.9 Reset to factory settings.....................6
5.10 Settings: SET1~SET9...........................6
6.General Specifications .........................................14
7.Electrical Specifications.......................................15
8.Relative Spectral (Sensitivity)..............................15
9.Maintenance or Repair .........................................16
10. PRECAUTIONS ..................................................16
11. Battery Replacement.........................................17
12. Product Disposal...............................................17
Page 3
TM-218/TM-228
1. Application
Quickly determine the UV intensity of the factory’s UV
products
UVC germicidal lamp intensity and aging measurement.
2. Accessories
1 Meter
1 UV sensor
1 User’s Manua
1 9V alkaline
battery
1 Carrying case
3. Safety Precaution
Caution! Please refer to this manual.
Improper use may damage the meter
and its components.
Complies with European Directive.
Do not operate in environments with flammable gas or humid
environments.
Operating altitude: up to 2000M.
Operating environment: Indoor use; Pollution degree 2.
Clean with soft cloth when dirty,such as glasses cloth. Do not
clean with chemicals and other solvents.
EMC: EN61326-1:CISPR 11:Group 1, Class B
Class B –Equipment for use in allestablishments other than
Group 1 – RF energy generated is needed for internal
domestic.
functioning.
1
Page 4
4. Instrument Description
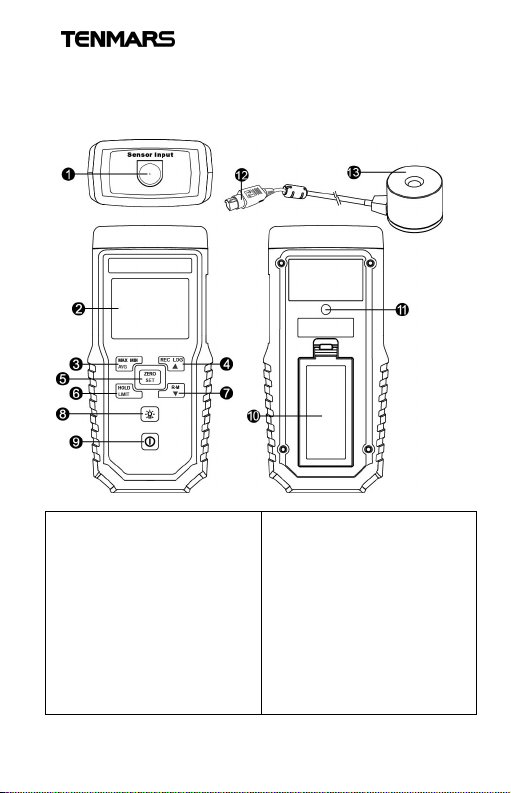
1.
6.
4.1 Feature and function
TM-218/TM-228
Sensor connecting jack
2.LCD display
3.Button for Maximum
value /Minimum value /
Average value
4.Button for Manual record
data / Long-time record
data /Up
5.Button for Reset / Setting
Button for Readings lock
/Comparison
7.Button for Viewing record
/ Down
8. Backlight button
9. Power switch button
10.battery cover
11.Tripod nut
12.Sensor connecting plug
13.Sensing probe
2
Page 5
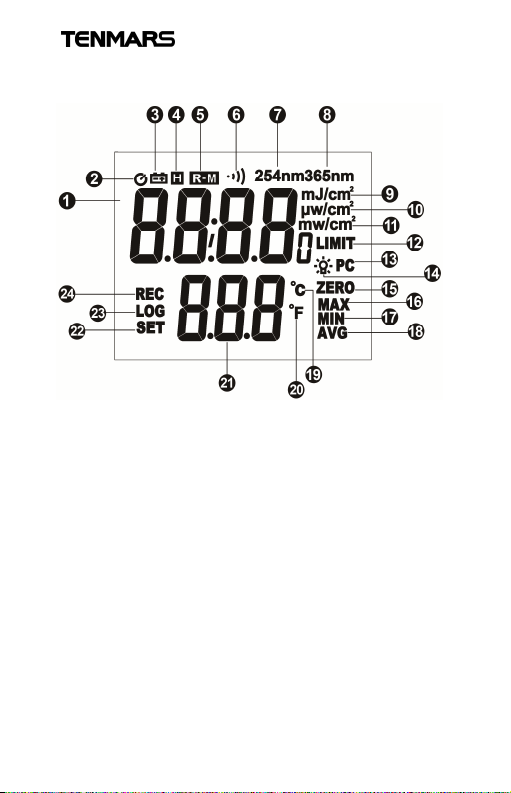
4.2 Indication on the LCD display
TM-218/TM-228
1. Primary display
2. Auto power-off
3. Battery low
4. Readings lock
5. Query memory data
6. Buzzer
7.8. Calibration wavelength
9.10.11. Unit
12. Alarm
13. Connection to
computer via USB
14. Backlight function
15. Zeroing
16. Maximum value locking
17. Minimum value locking
18. Average value
19.20. Temperature unit
21. Secondary display
22. Setting
23. Auto logging
24. Manual recording
3
Page 6
TM-218/TM-228
5. Operation
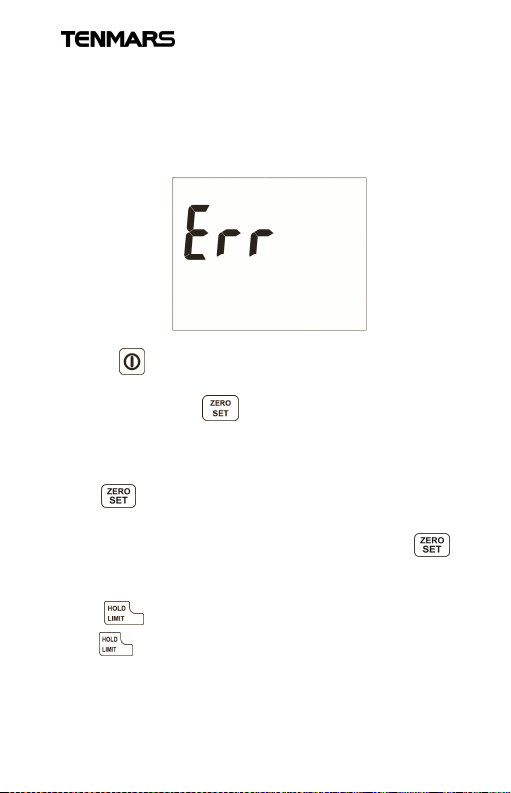
1.Firstly, insert the sensor connecting plug into the sensor
connecting jack with the direction indicated on the meter’s
body (if not connected properly, the LCD will display Err
when power-on, as shown in the figure below).
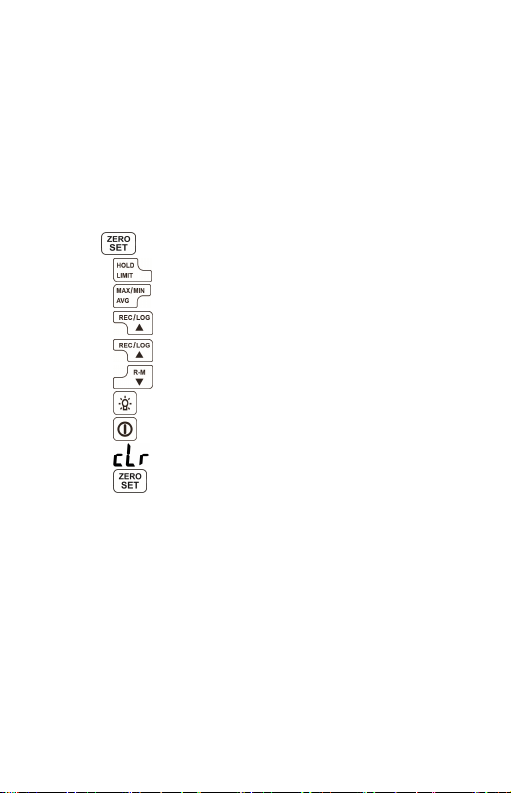
2.Press to turn the power-on or off
3.When close to the front of the UV source and the readings
not zeroed, press to zero.
4.Align the sensor to the UV source to be tested, and read
the measured value on the LCD.
5.1 ZERO
Before the light receiver close to the UV measurement and
the previous readings displayed on the LCD, click to
clear off.
5.2 Data Hold:
Click to enable or disable the readings lock.
4
Page 7
TM-218/TM-228
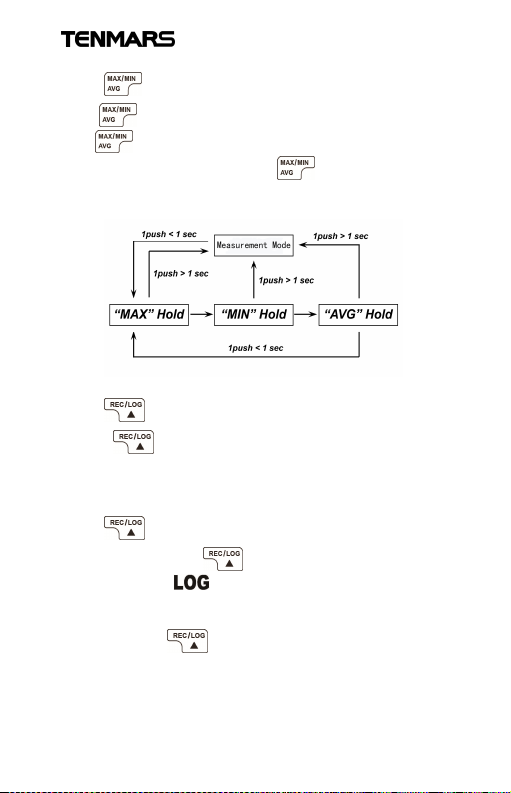
5.3 The Max./Min. Values Hold:
Click to activate the Min./Max./Avg. function, and then
click repeatedly, the max.,min. and avg. value will
appear in turn; press and hold to quit.
The max., min. and ave. values of all previous
measurements can be locked and updated.
5.4 Manual Record for One Log:
Click to store one log., the LCD will display "REC"
symbol and the number of recorded logs simultaneously;
for example: 10 logs will increase by 1 per click and up to
200 logs, and “FuLL” symbol appears if exceeding.
5.5 Auto Record
Pressed and held for more than 2 seconds, the
LCD displays and auto-record starts. The record
can be set according to the storage interval, up to 200
logs.
Again, press to quit the auto recording.
5
Page 8
TM-218/TM-228
5.6 Read the record data
Click to enter the reading mode for recorded value,
symbol appears on the LCD simultaneously. Press
or to read the logs. Press and hold for
more than 2 seconds to quit.
5.7 Backlight:
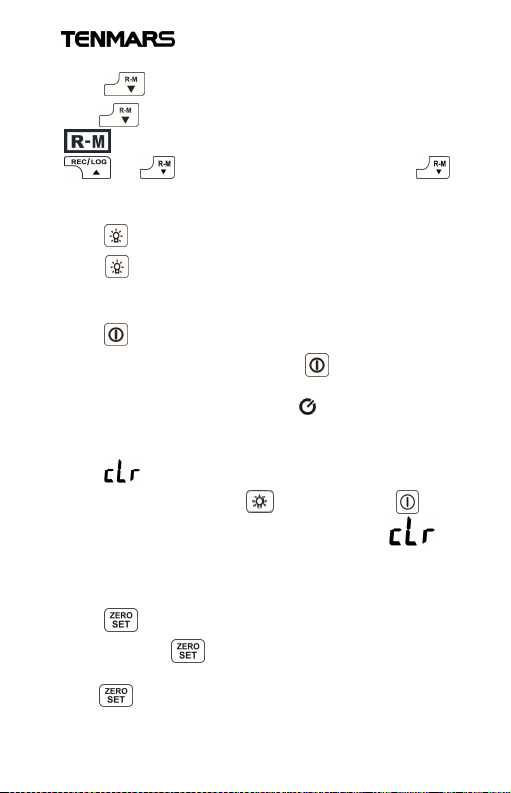
Press to turn the backlight on or off.
The backlight mode turns off automatically after 15 seconds.
5.8 Disable or Enable Auto Power-off
When power-on, press and hold for more than 2
seconds to disable or enable auto power-off, followed by
the automatic power-off symbol disappears or displays
accordingly.
5.9 Reset to factory settings
At power-off status, press and then press , the
LCD displays the boot screen and followed by for 1
second, the factory settings restored and the memory
cleared.
5.10 Settings: SET1~SET9
Press and hold for more than 2 seconds to enter
"SET", while "SET" flashes
Click repeatedly to enter SET1~SET9 sequentially
6
Page 9
TM-218/TM-228
※PS: Each setting will be stored instantly. If the setting
period exceeds 15 seconds, it will be back to the
measurement mode.
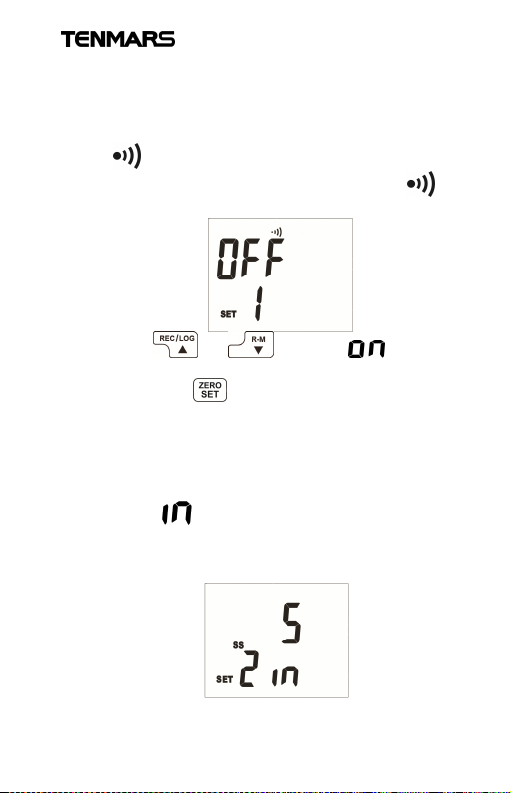
SET.1. Set the buzzer to turn on or off the beep.
1. At the moment, LCD displays "SET1" and . As
shown in the figure below:
2. Press or to select (ON) or
OFF.
3. Again, click to enter "SET2".
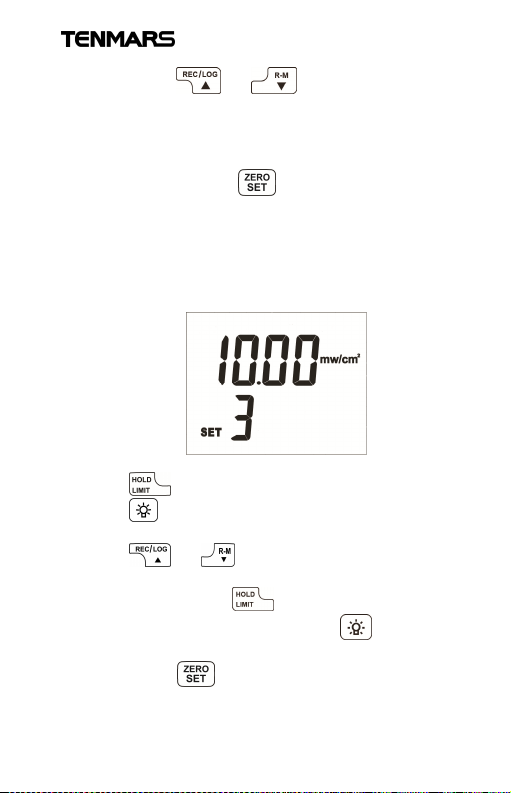
SET.2. Auto Storage Interval Setting
1. Followed by "SET1", the LCD displays " SET2"
and sequentially, as shown in the figure
below:
7
Page 10
TM-218/TM-228
2. Press or to set the storage
interval by 5 sec, 10 sec, 20 sec, 30 sec,
60 sec, 5 min, 10 min, 20 min, 30 min,
and 60 min.
3. Again, click to enter "SET3".
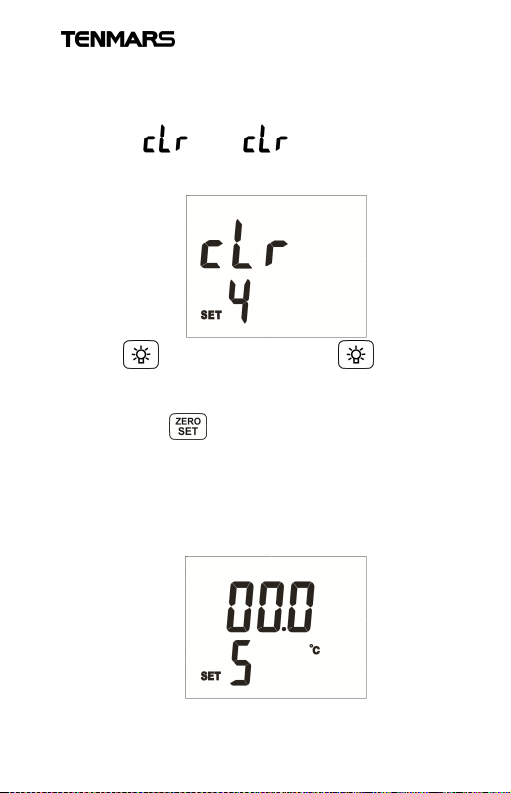
SET.3. Alarm setting (LIMIT)
1. Followed by "SET2", the LCD displays "SET3" LIMIT, as
shown in the figure below:
2. Press to select mW/cm
2
or μW/cm
2
.
3. Press tomove the digit and select while the digit to
be selected will flash.
4. Press or to modify the settings. The default
value of mW/cm2is 10.00mW/cm
is 70μW/cm
2
. Press to switch between
2
and that of μW/cm
2
10.00mw/cm2and 70uw/cm2, press toselect the
digit to be selected.
5. Again, click to enter “SET4".
8
Page 11
TM-218/TM-228
SET.4. Memory Clear
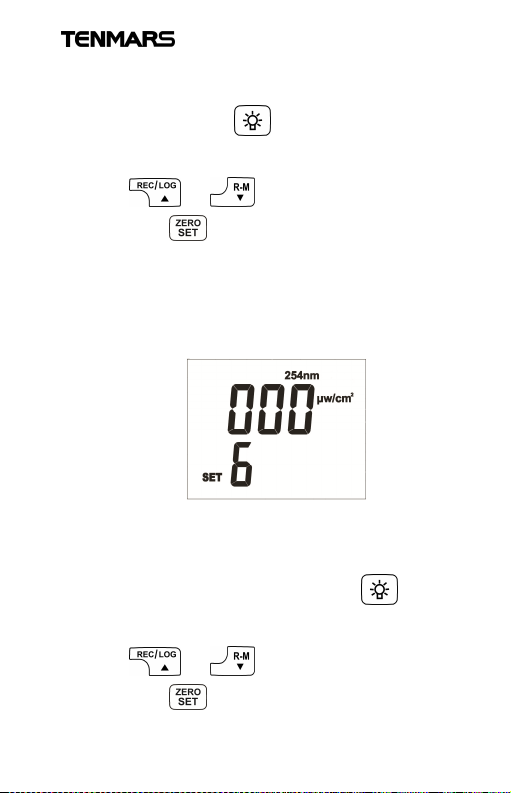
1. Followed by "SET3", the LCD displays "SET4" and the
symbol , when flashes. As shown in the
figure below:
2. Click , while dFL flashes, click again, dEL
flashes for 4 times, and the memory is cleared.
3. Again, click to enter SET5.
SET.5. Temperature Calibration
1. Followed by "SET4", the LCD displays "SET5" and the
symbol °C or °F. As shown in the figure below:
9
Page 12
TM-218/TM-228
2. If to increase or decrease the displayed temperature
value directly, press to move the digit, while the
digit to be selected flashes.
3. Press or to modify the value.
4. Again, click to enter SET6.
SET.6. UV Light 254nm Calibration
1. Followed by "SET5" , the LCD displays "SET6" and the
symbol 254nm. As shown in the figure below:
2. If to increase or decrease the value displayed at the
254nm calibration point directly, press to move
the digit, while the digit to be selected flashes.
3. Press or to modify the value.
4. Again, click to enter " SET7"
10
Page 13
TM-218/TM-228
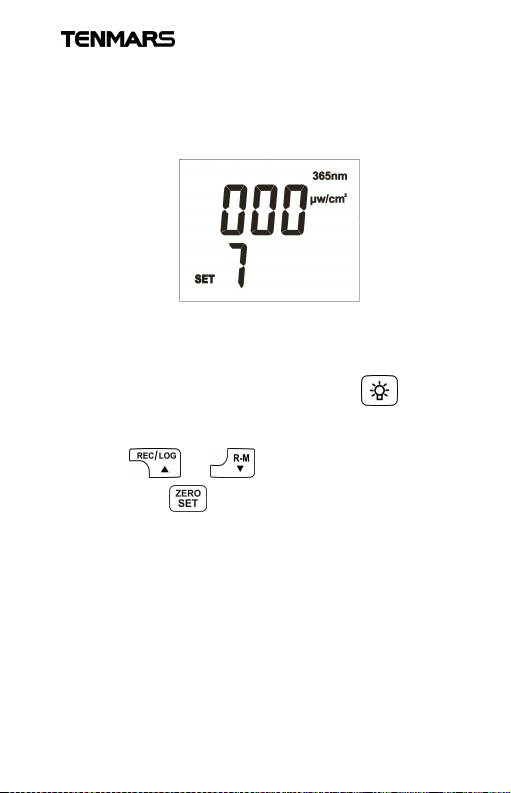
SET.7. UV Light 365nm Calibration(TM-228)
1. Followed by "SET6" , the LCD displays "SET7" and the
symbol 365nm. As shown in the figure below:
1. If to increase or decrease the value displayed at the
365nm calibration point directly, press to move
the digit, while the digit to be selected flashes.
2. Press or to modify the value.
3. Again, click to enter "SET8".
11
Page 14
TM-218/TM-228
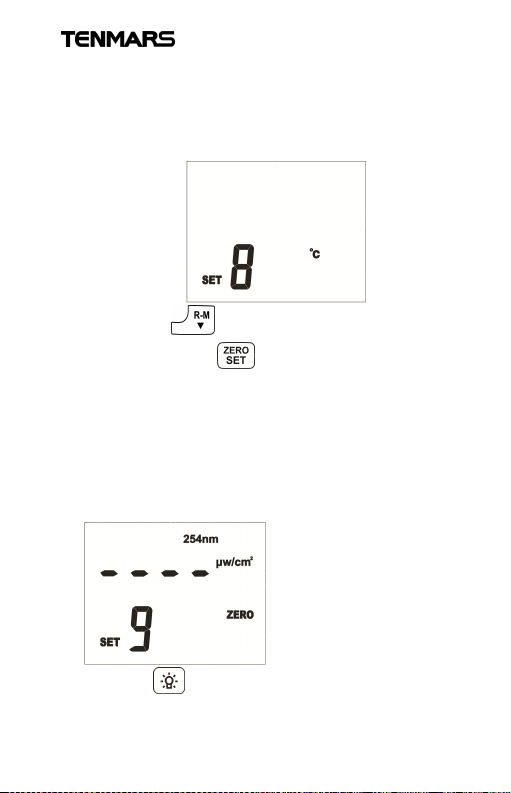
SET.8. Switching °C°F
Followed by "SET7", the LCD displays "SET8" and the
symbol °C or °F (the default is °C). As shown in the figure
below:
1.Click to switch between °C and °F,
2.Again, click to enter "SET9".
SET.9. Replace the sensor setting with a new one
1. Followed by "SET8", the LCD displays "SET9" , the
symbols 254nm, ---- , and ZERO, as shown in the
figure below:
2. Press , the LCD displays AUTO.
12
Page 15
TM-218/TM-228
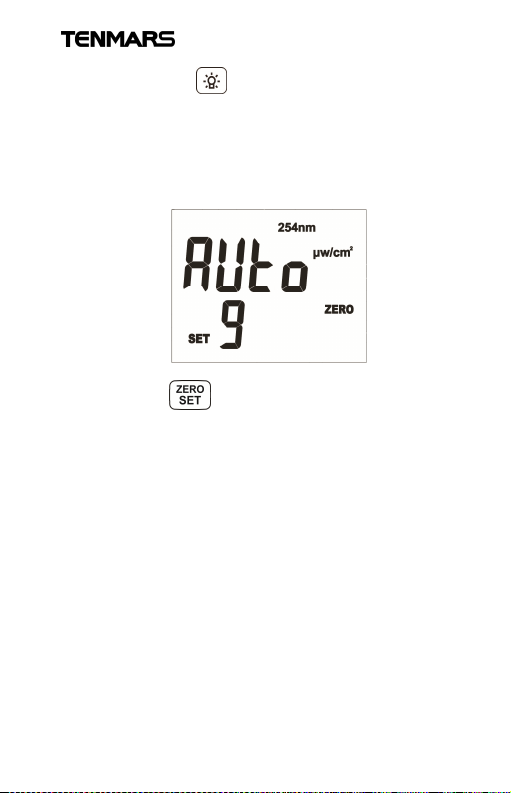
3. Again, press button again, the LCD , the LCD
displays the word AUTO with flashing for 4 times, the
sensor is calibrated automatically. (Require to execute
one time only when replacing the sensor)
※As shown in the figure below:
4. Again, click to quit the settings status.
13
Page 16
TM-218/TM-228
6. General Specifications
4-digit LCD display, the max. value is up to 9999.
UV intensity: 0~9999uw/cm2, 10.00~40.00mw/cm2.
Locking for Max./Min./Ave. value
Auto-switch band and locking data
Display the UV intensity and temperature simultaneously
Enable and disable auto-power-off
Alarm setting LIMIT: The beep of auxiliary judgment for
pass/fail from factory QC
200 logs for stored data with auto logging/manual record
Sampling time: per 2 seconds.
Battery low indicator
Weight: 320g (battery included)
Power: 9V(NEDA 1604 IEC 6F22 JIS 006P)x 1
Battery life: up to 100 hours (without alarm)
Operation temperature and humidity: 0°C to
+50°C,<80%RH (No condensation)
Storage temperature and humidity: 0°C to
+60°C,<70%RH (No condensation)
Dimensions:
Meter 143(L) x 65(W) x 37.5(H) mm
Sensor
The line length of the light receiver: approximate 100 cm.
39.5ψ x 30.5(H) mm
14
Page 17
TM-218/TM-228
7. Electrical Specifications
Accuracy is indicated as [ % reading + digital] Environmental
conditions at 23°C ± 5°C with RH < 80%.
UV Irradiance Measurement Range
Model TM-218(UVC)
Spectrum Range
Calibration Point 254nm
Range
Accuracy ±4%+1digit
Resolution 1μW/cm², 0.01 m W/cm²
Temprature:
Range
Accuracy ±1.0°C(±2.0°F)
Resolution 0.1°C/0.1°F
220nm~280nm
1μW/cm²~40.00m W/cm²
0.0°C~70.0°C(32.0°F~158.0°F)
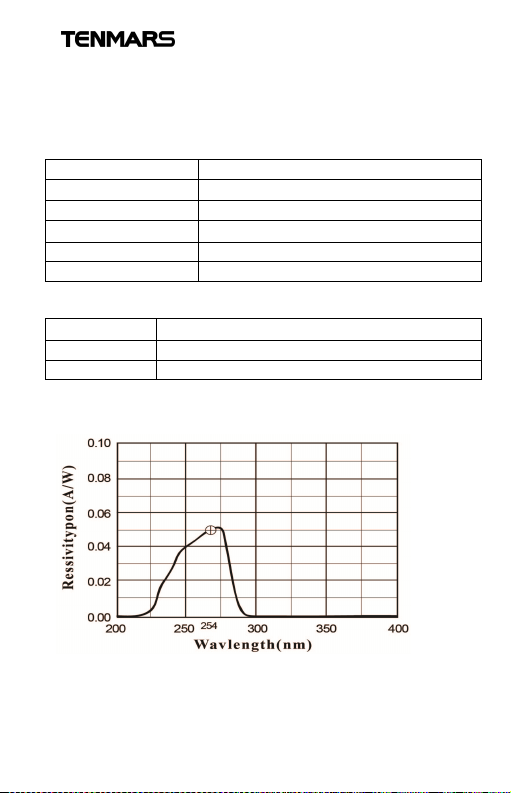
8. Relative Spectral (Sensitivity)
15
Page 18
TM-218/TM-228
9. Maintenance or Repair
1. appearing on the LCD display indicates the battery
low. Please replace the battery immediately to ensure the
accuracy.
2.Please use a soft cloth, such as glasses cloth, to wipe the
meter for the dirt and not use chemical solvents.
3.If not using for a long time, please remove the battery to
prevent the leakage of batteryfluid which may corrode the
internal components.
4.In case of malfunction, the meter can only be sent to the
authorized service suppliers or back to the original factory
for maintenance.
10. PRECAUTIONS
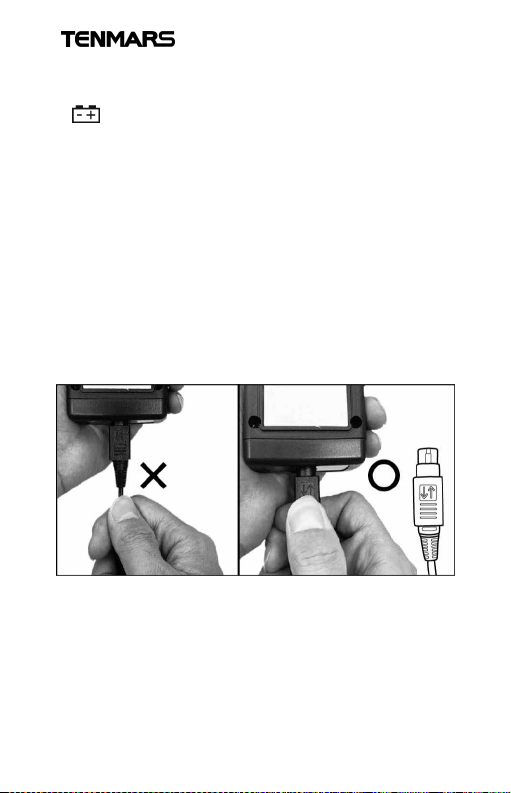
Removing Probe (With LOCK) :
16
Page 19
TM-218/TM-228
Warning
11. Battery Replacement
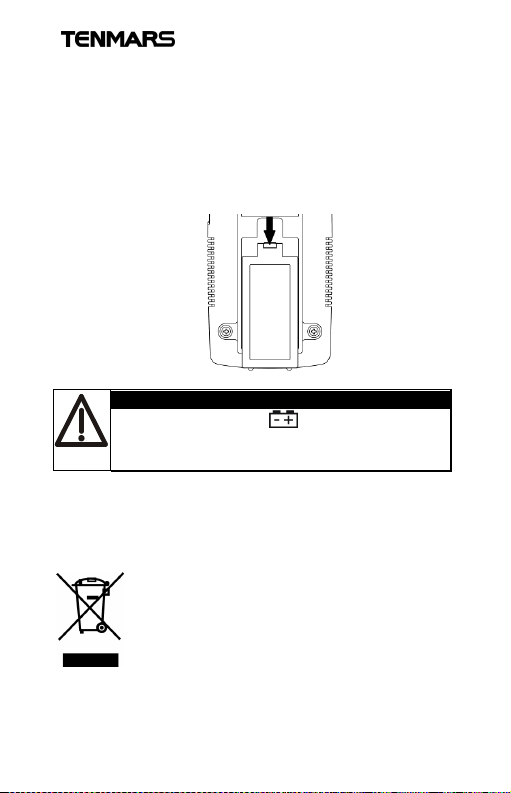
1.Turn off the power.
2.Open the battery cover at the back of the meter, remove
the batteries.
3.Please insert new 9V batteries according to the polarities.
4.Put the battery cover back in place.
As battery low icon appears on the
LCD display, please replace the battery
immediately by the correct steps.
12. Product Disposal
Note: This symbol indicates that the
meter and its accessories must be
separated and processed properly.
17
Page 20
Professional Electrical and Environment
TENMARS ELECTRONICS CO., LTD.
Test & Measurement Instruments:
LED light meter, Temperature & Humidity
meter,Infrared Thermometer, Sound level meter,
Light meter, EMF meter, UV Light meter, RF
meter, Hot wire Anemometer, Co
meter,Anemometer, Lan cable tester, Co2 meter,
Solar power meter, Radiation meter,
Clamp meter, Multimeter, Phase Rotation test,
Digital Insulation tester
Our products of high quality are selling well
all over the world
6F, NO.586 Ruiguang Rd, Neihu Dist.
Taipei City, Taiwan
E-mail: [email protected]
http://www.tenmars.com
 Loading...