

Page 1
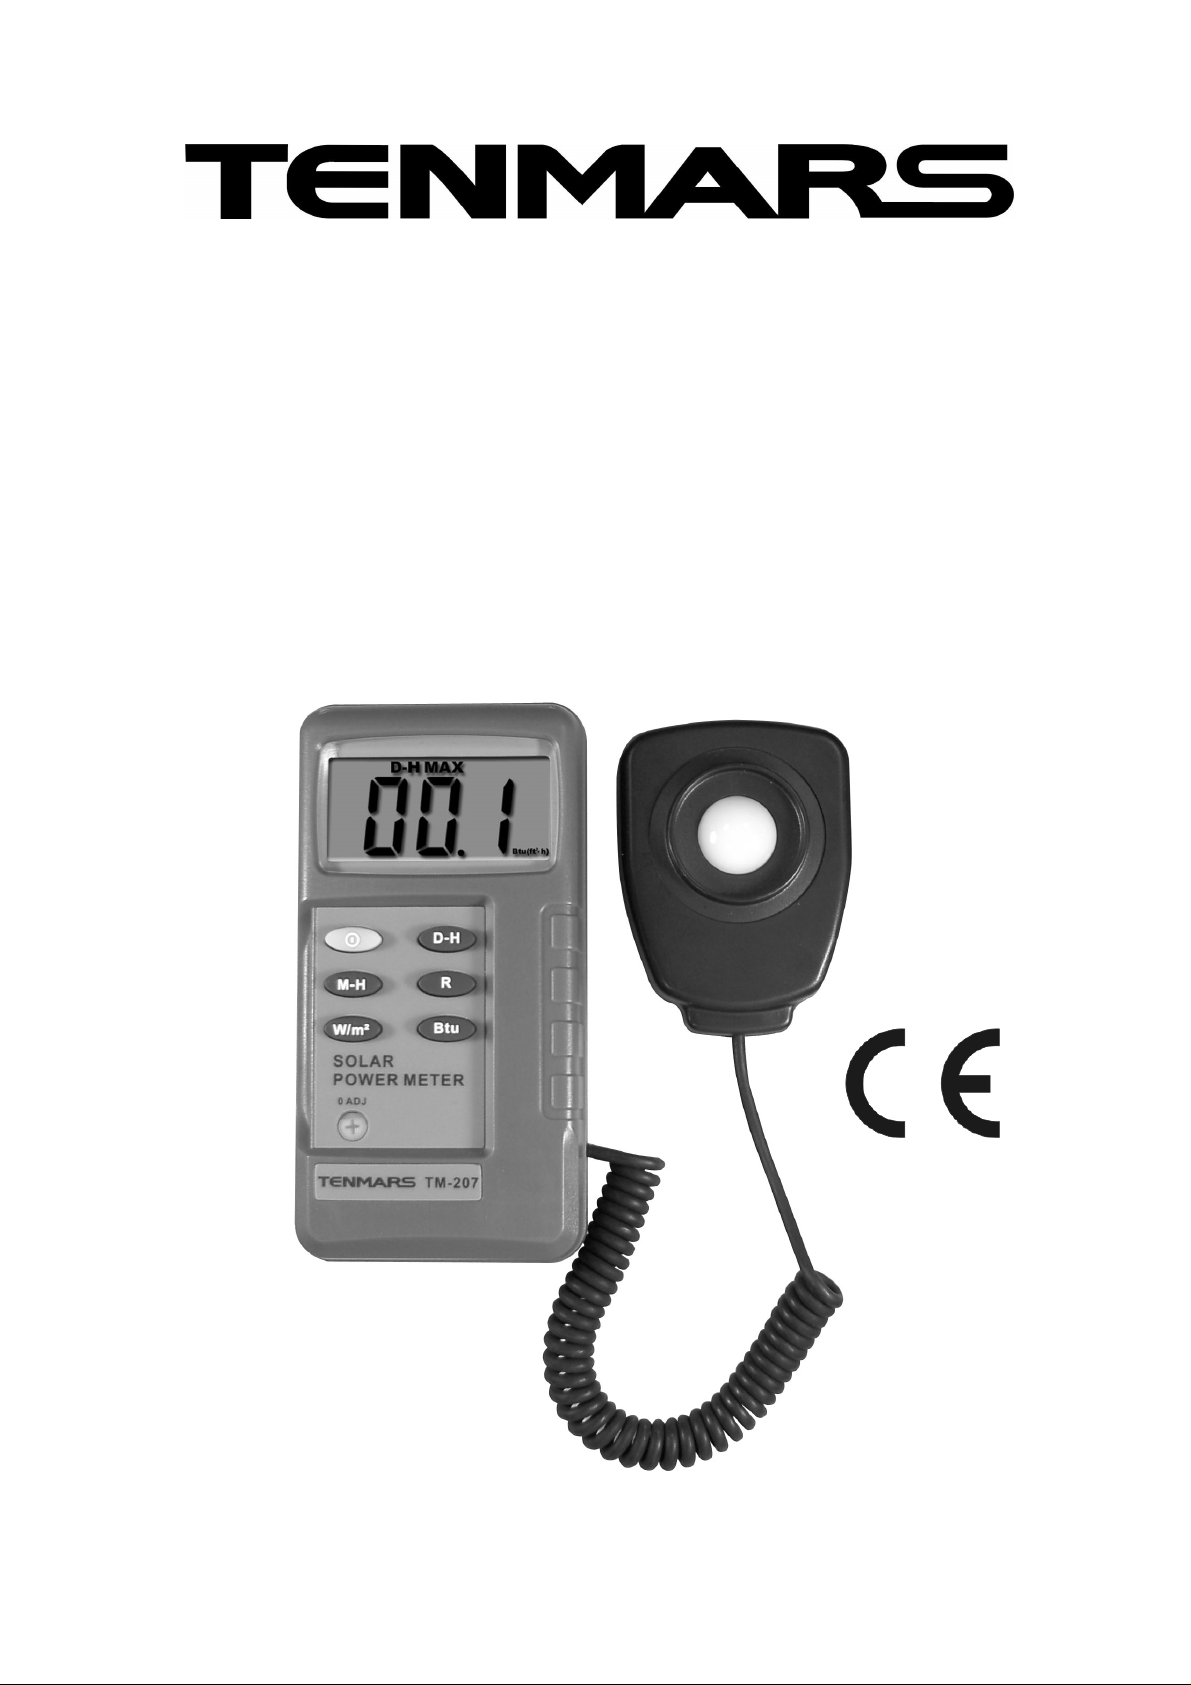
SOLAR POWER METER
TM
-
20
7
User’s Manual
HB2TM2070001
TENMARS ELECTRONICS CO., LTD
Page 2

Page 3

CONTENTS
1. FOREWORD...................................................................... 2
2. SAFETY PRECAUTIONS AND PROCEDURES..... 2
3. THE FOLLOWING SYMBOLS ARE USED:.............. 3
4. APPLICATIONS ................................................................ 4
5. FEATURES......................................................................... 4
6. NAMEAND FUNCTION OF EACH PART................. 5
7. ELECTRIC SPECIFICATION....................................... 11
8. Safety and maintenance standards........................... 12
9. Battery Replacement ..................................................... 13
10.SERVICE.......................................................................... 13
11.END OF LIFE.................................................................. 16
Page 4
TM-207
EN
-
2
For your own safety an
d to avoid damaging
described in this instruction manual and read
carefully all notes preceded by this symbol
1. FOREWORD
Solar meter: a device used to measure solar power.
From the moment you buy such a product, your future
is not uncertain any more. When the sun shines
recklessly, just take the TM-207 and aim its opening at
the sun, and you will see how powerful the sun is. If
you want your skin white, you surely cannot do without
it!
Measurement: Expressed by W/m2or BTU (ft2*h).
2. SAFETY PRECAUTIONS AND
PROCEDURES
This instrument conforms with safety Standard EN
61010-1 related to electronic measuring instruments.
For your own safety and to avoid damaging the
instrument follow the procedures described in this
instruction manual and read carefully all notes
preceded by this symbol.
CATION
the instrument follow the procedures
Page 5
TM-207
EN
-
3
When taking measurements:
Be particularly careful when measuring voltages
exceeding 20V to avoid risks of electrical shocks.
Avoid doing that in humid or wet places.
Avoid doing that in rooms where explosive gas,
combustible gas, steam or excessive dust is present.
Keep you insulated from the object under test.
Do not touch exposed metal parts such as test lead
ends, sockets, fixing objects, circuits etc.
Avoid doing that if you notice anomalous conditions
such as breakages, deformations, fractures,
leakages of battery liquid, blind display etc.
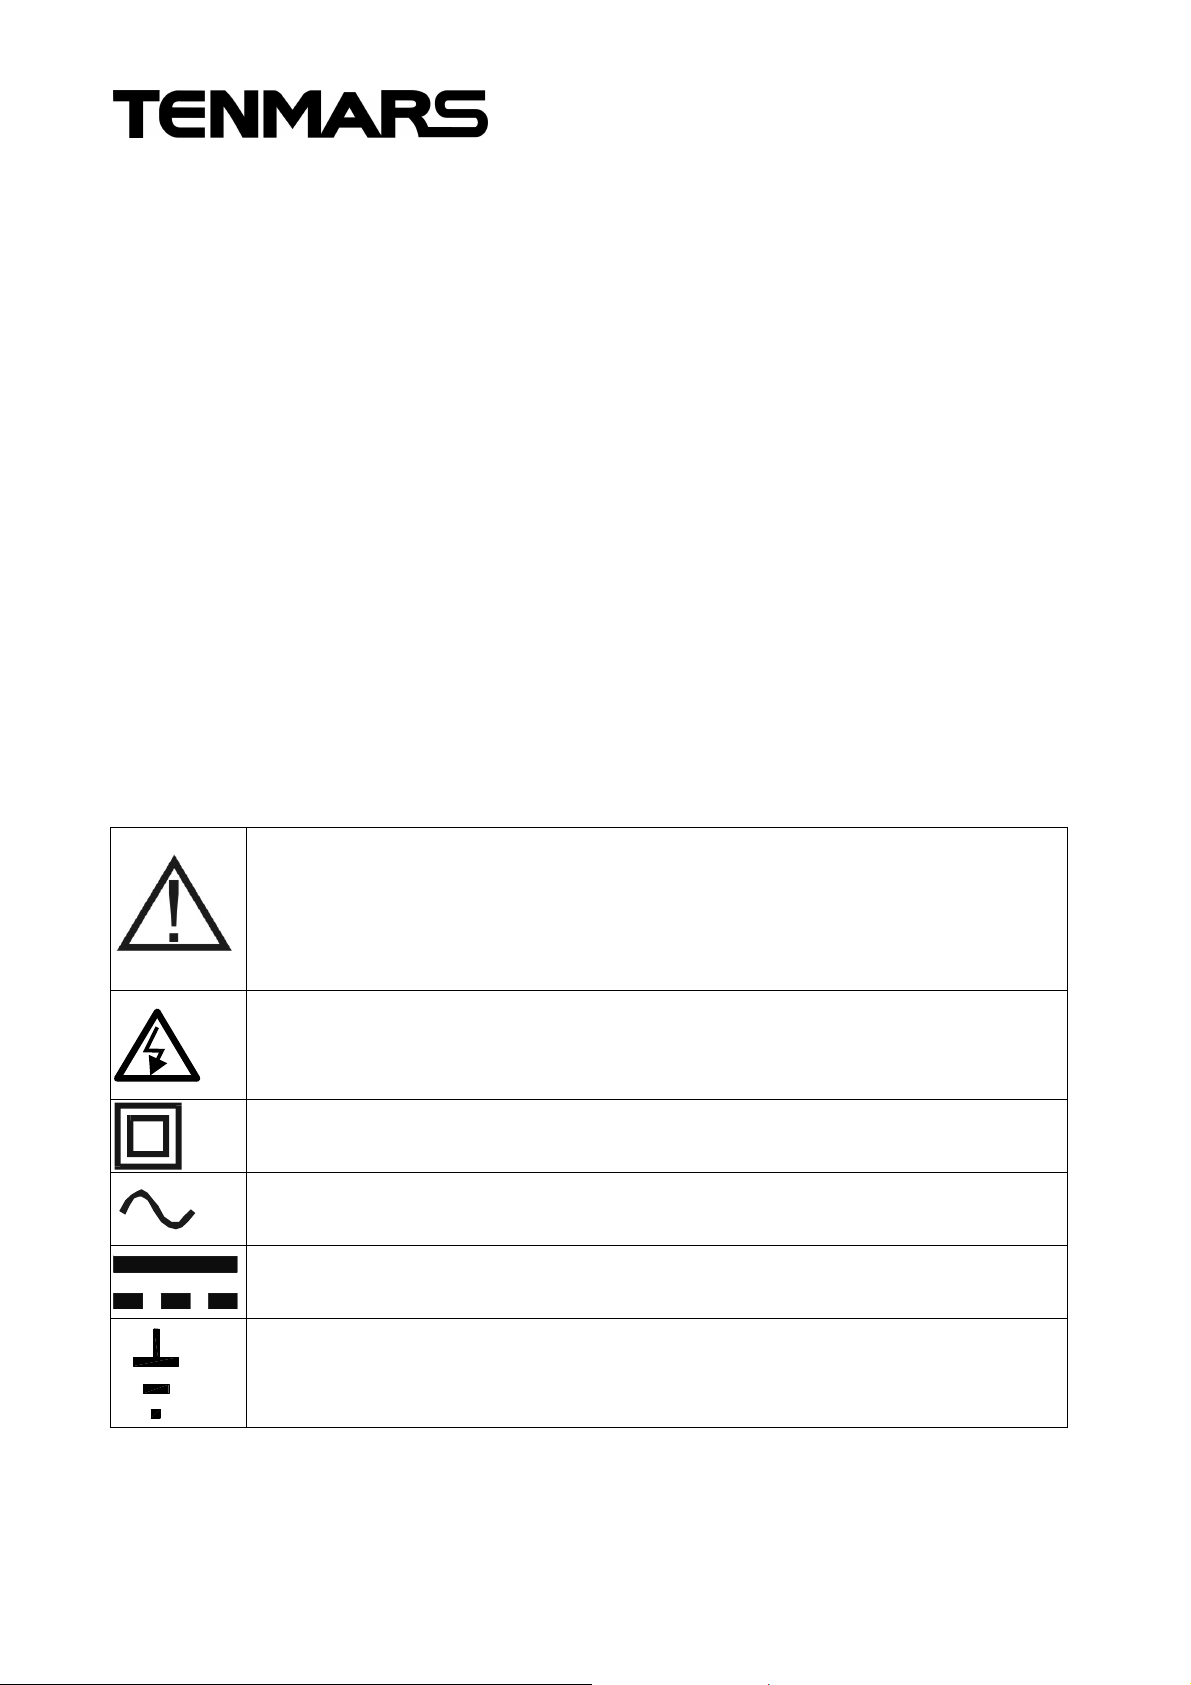
3. THE FOLLOWING SYMBOLS ARE USED:
CAUTION - refer to the instruction manual an improper use may damage the instrument
or its components
Danger high voltage: risk of electric shock
Double insulated meter
AC voltage or current
DC voltage or current
Earth
Page 6

TM-207
EN
-
4
4. APPLICATIONS
Transmission measurement is most suitable for
measuring the effectiveness of the solar film.
Solar radiation measurement.
Car windows light intensity measurement.
Optimal incident angle for the solar panel.
Measurement of the sun’s transmission
through transparent and film glass
Convenient, no need to adjust, data displayed
clearly.
5. FEATURES
Super low price, high precision.
Measurable light sources, including all visible
light.
Overload display OL.
Select either W/m2or BTU / (ft2*h) units1
Stable for long use.
Page 7
TM-207
EN
-
5
indicator
1.
Power button
.
6. NAME AND FUNCTION OF EACH PART
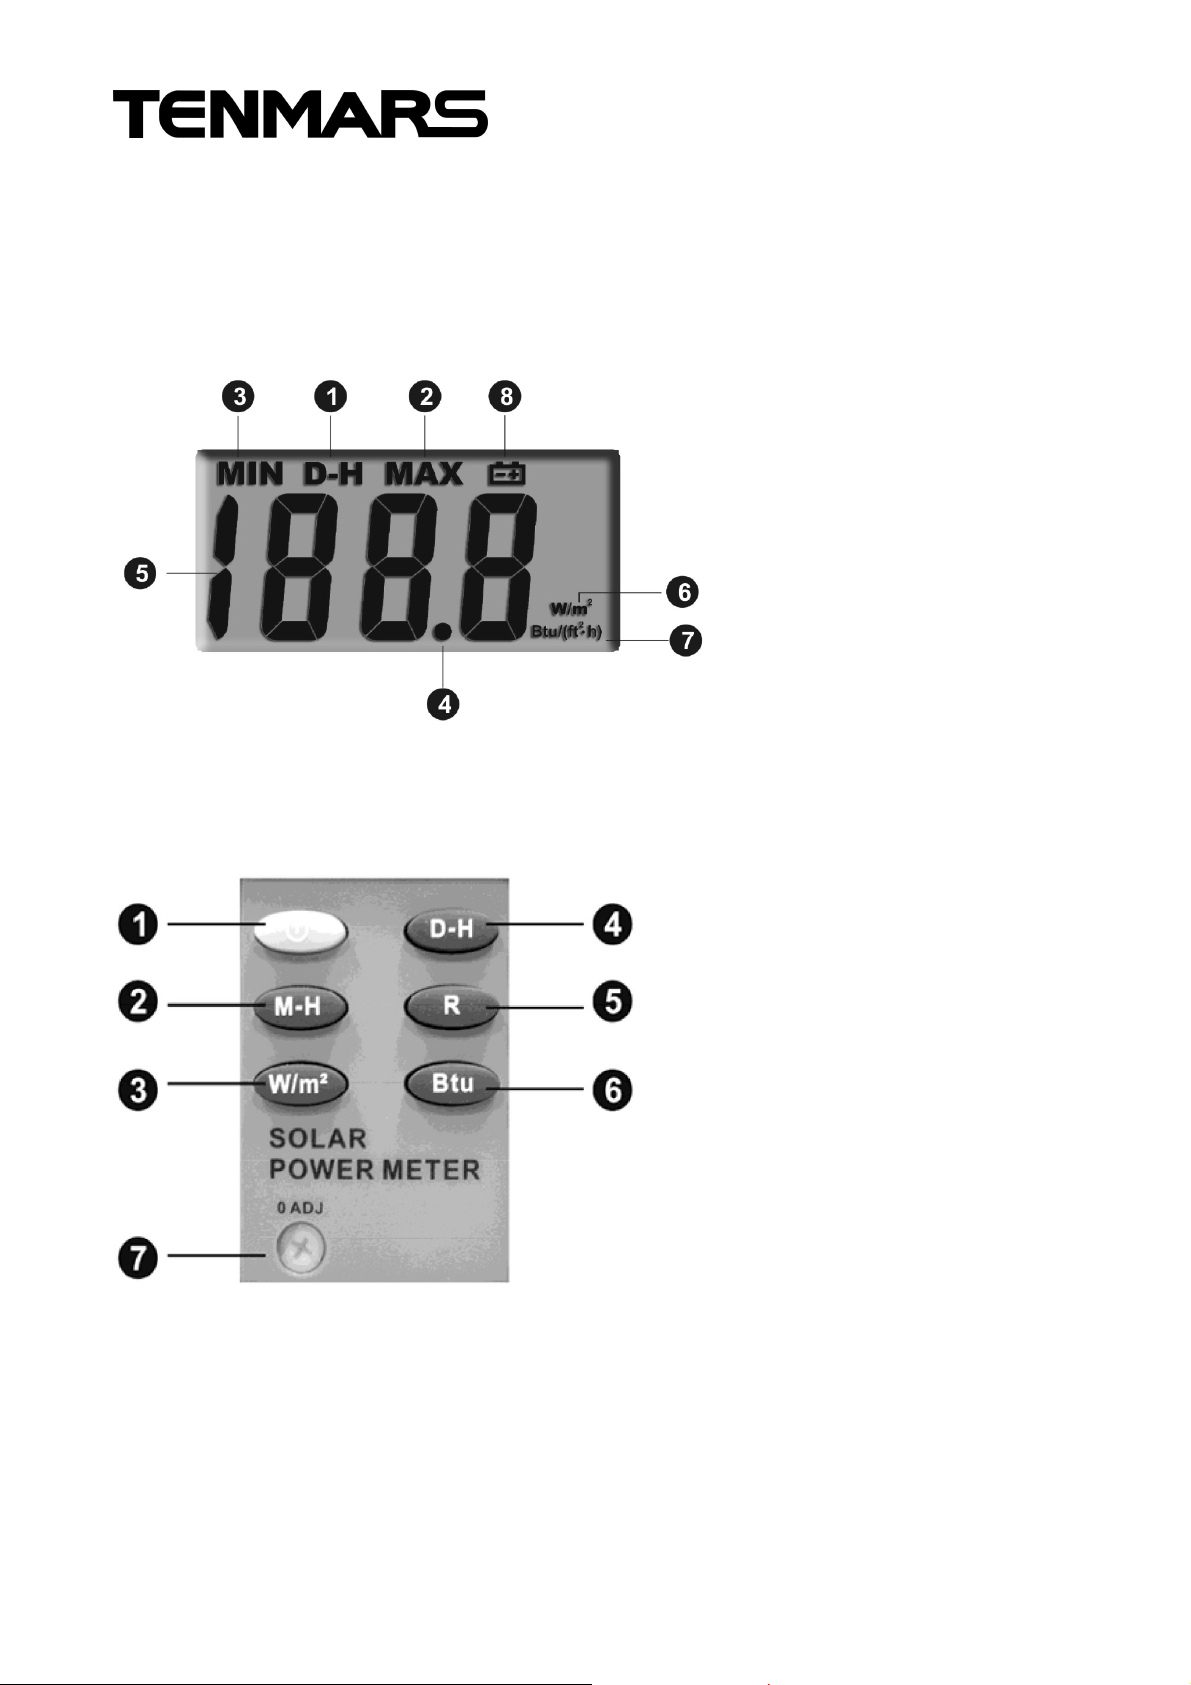
6.1. THE LCD DISPLAY SHOWS:
1. Data hold .
2. Max. value.
3. Min. value.
4. Decimal point.
5. numeral screen.
6. W/m
7. BTU (ft2*h)
8. Low battery
2
6.2. BUTTONS:
2. Lock up Max. and
Min button.
3. W/m2switch button.
4. Data Hold button.
5. Auto Range.
6. BTU (ft2*h) switch
button.
7. ZERO adjustment.
Page 8
TM-207
EN
-
6
6.2.1.Power button :
Press the “ ” button to turn ON the power.
The display comes alive.
Press the “ ” button once again to turn OFF
the power and put the device go into sleep mode.
The display changes from light to dark.
6.2.2.Lock up Max. and Min button:
When you test in W/m2or BTU (ft2*h) press the
“ ” button to display the max. or min. reading.
Press and hold the “ ” button for 1 second to
allow the device to read the max. value. Press the
button one more time to read the min. value.
Press and hold the “ ” button for more than 1
second, and the max. and min. come off.
When the “ ” button is functional, the
“ ” button is disabled.
Page 9
TM-207
EN
-
7
6.2.3. BTU (ft2*h) :
Press the “ ” button to go into Btu (ft2*h) mode,
The screen displays Btu (ft2*h). if screen displays
W/m2, To select a different unit, Press the “ ”
button to switch from W/m2to Btu (ft2*h) .
6.2.4. W/m2button :
Press the “ ” button to go into W/m2mode. if
screen displays Btu (ft2*h) , To select a different unit.
Press the “ ” button to switch from Btu (ft2*h)
to W/m2.
6.2.5. Data hold button:
Press the “ ” button to go into hold mode,
and “ D-H” appears on the screen to allow you to
read the data. Press this button once again to
deactivate it.
Page 10

TM-207
EN
-
8
6.2.6.Auto Range button Large integrated circuit
design :
Press the “ ” power button to turn ON the
power and put the device to operating mode. If
“199.9” comes up on the screen, it suggests
the device will become overloaded or has become
overloaded “OL”. In this case, press the “ ”
button, and “1999” or your acquired value then
comes up.
6.3. TEST PROCEDURE
Press the ZERO adjustment. for the zero
adjustment if any digits is appear
If performing the zero adjustment after powering on,
several digits may not disappear. In this case,
perform the zero adjustment again.
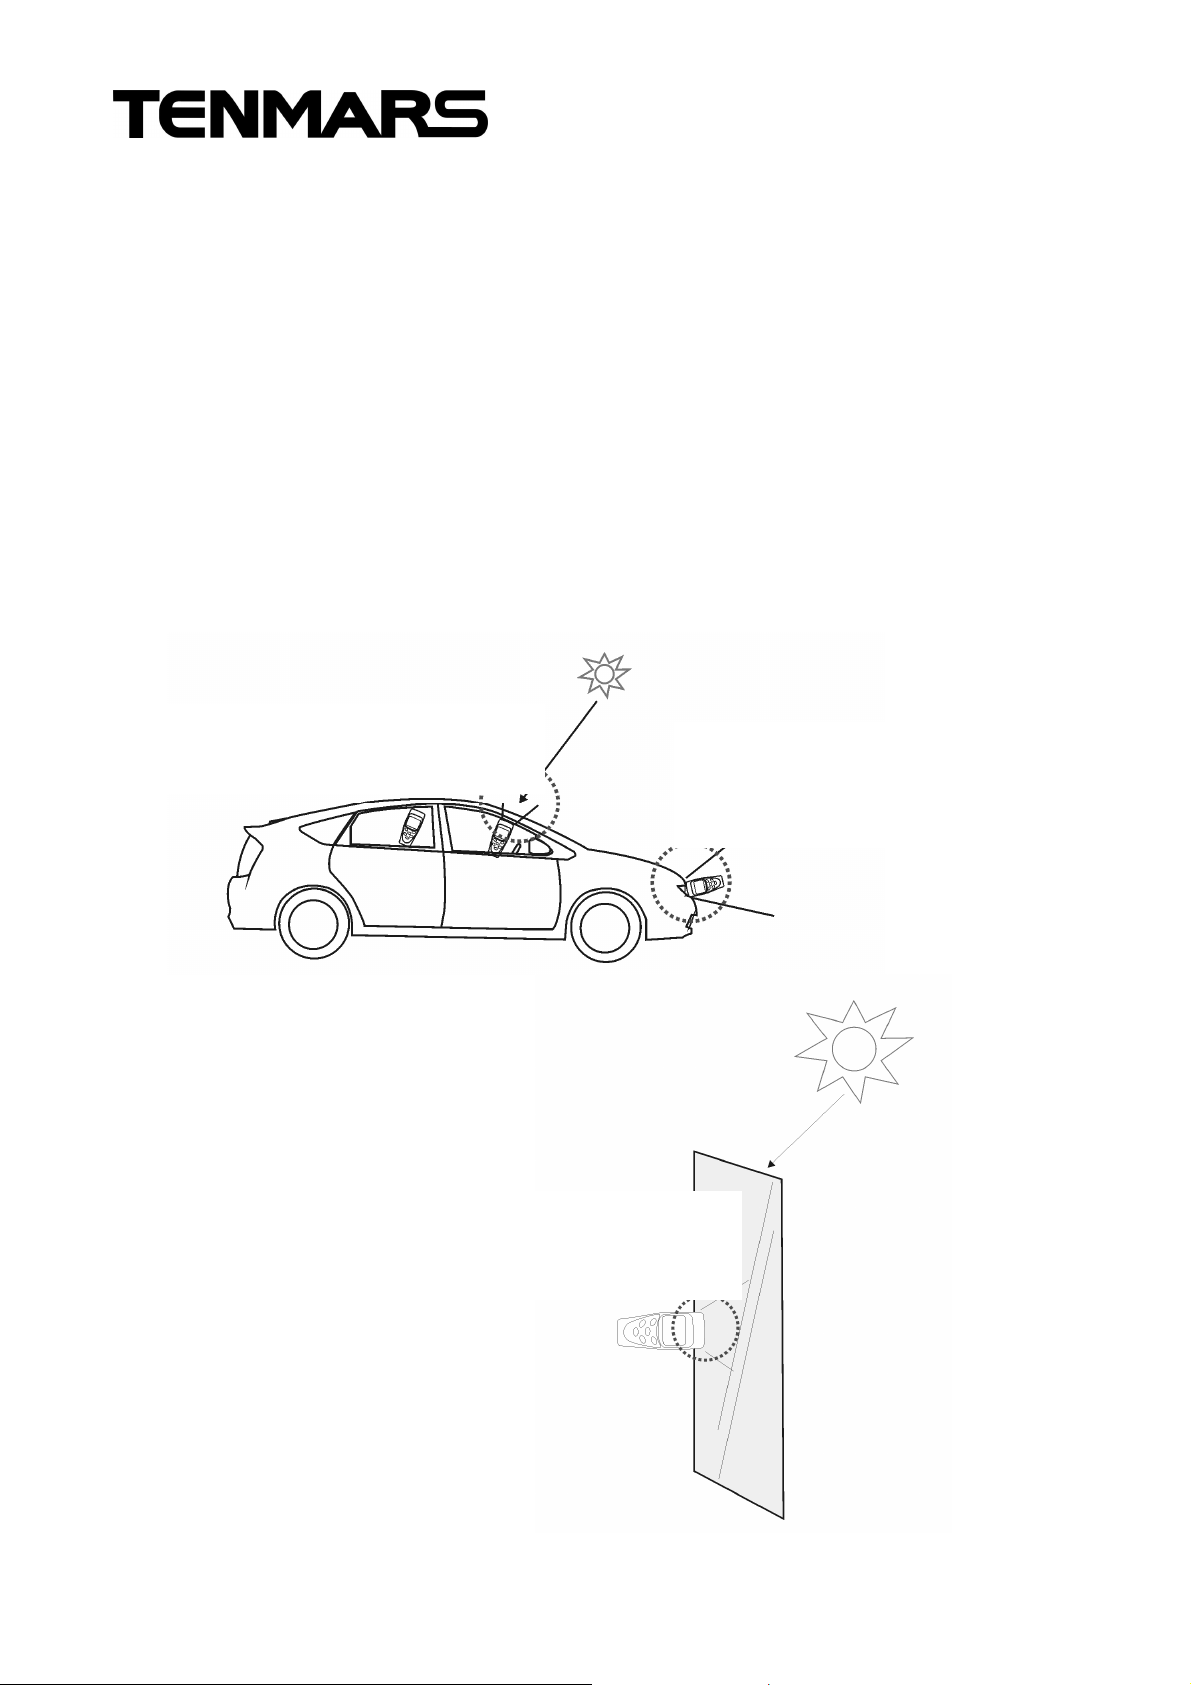
Measure your car’s headlights:
Turn ON your car’s headlights. Then turn ON the
TM-207 solar meter, and “00.0” appears on the
screen. Put the device down close to the headlights.
Page 11

TM-207
EN
-
9
Switch between high beam and low beam, and light
intensity values appear on the screen. Both the
right and left headlights must be tested. Note the
values and put them in your car for reference.
(Picture 2)
Measure the effect of solar insulation of your
vehicle’s windows:
Press the “ ” button to turn ON the TM-207
solar meter, “00.0” appears on the screen. Aim the
device at the sun and close to a window, and the
intensity appears on the screen. Open the window
and aim the device at the sun. Compare the value
against that acquired when the window is closed to
understand the efficiency of the window’s solar film.
Test your new car and preserve the measurements
in it. After that, test it at least once every year.
(Picture 2)
Page 12
TM-207
EN
-
10
window
NOTE:When the light sensor cover is not attached
“CAP” is indicated. Make sure that it is attached. If
performing the zero adjustment after powering on,
several digits may not disappear. In this case,
perform the zero adjustment again.
Picture 2:
To test the sun’s intensity, put the
device up close to the window
Picture 3
To test the sun’s intensity,
put the device close to the
Turn ON the headlights and put the
device down close to them to test
their intensity
Page 13

TM-207
EN
-
11
Measure the solar insulation effect of your house’s
windows:
Close the window. Press the “ ” button on
your TM-207 solar meter, and “00.0” comes up on
the screen. Put the device close to the window and
aim it at the sun. Compare the value against that
acquired when the window is closed and the device
is placed at the same position,
In order to understand the window’s heat efficiency.
(Picture 3)
7. ELECTRIC SPECIFICATION
Battery life: approx. 100 hr.
Accuracy:typically within ± 10W/m2[ ±3 BTU / (ft
*h) ] or ±5% , whichever is greater in sunlight;
Additional temperature induced error ±0.38W/m2/
°C [ ±0.12 BTU / (ft2*h)/ °C] from 25°C
Operating temp. & RH: 5oC~40oC, below 80%RH.
Storage temp. & RH: -10oC ~60oC, below 70%RH.
DISPLAY:3-1/2 digits LCD with maximum reading
1999.
Sampling Time:Approx. 0.25 second
2
Resolution:1W/m2、1 BTU /(ft2*h).
Accuracy: < ±3/year
Over-input:Display shows" OL".
Range:1999W/m2、634 BTU /(ft2* h).
Page 14

TM-207
EN
-
12
Dimensions & weight: 143(L) x74(W) x 34 (H)mm,
approx. 250g.
EMC: this instrument is EMC-compliant and has
undergone compatibility tests according to
EN61326 (1997) + A1 (1998) + A2 (2001).
ACCESSORIES
User manual.
9V battery(NEDA 1604 IEC 6F 22 JIS 006P)*1
carrying case.
8. SAFETY AND MAINTENANCE STANDARDS
Operating altitude: below 2,000m.
Operating environment: for indoor use, expose to
pollution level II.
This is a precision device. During use or storage,
do not go beyond its spec. to prevent any possible
damage or danger.
Do not put this device in direct sunlight or where it
is hot and/or damp.
Remember to turn OFF the power after use. For
long storage, remove the battery to prevent the
battery from leaking to cause damage to the parts
inside.
Clean the device with a dry soft cloth. Wet cloths,
liquid and water are prohibited.
Page 15
TM-207
EN
-
13
CAUTION
Before replacing batteries disconnect
circuit
s to avoid electrical shocks.
9. BATTERY REPLACEMENT
When the symbol " " is displayed, batteries need
replacement.
the test leads from any energized
Turn OFF the meter and disconnect the test leads
from the input terminals.
Unscrew the battery cover and remove the battery.
Insert a new battery of the same type (9V
NEDA1604, JIS006P, IEC6F22) observing the
proper polarity, re-screw the battery cover and
reposition the protective holster.
10. SERVICE
Warranty Conditions
This instrument is guaranteed for one year against
material or production defects, in accordance with our
general sales conditions. During the warranty period
the manufacturer reserves the right to decide either to
repair or replace the product.
Should you need for any reason to return back the
instrument for repair or replacement take prior
agreements with the local distributor from whom you
bought it. Do not forget to enclose a report describing
the reasons for returning (detected fault). Use only
original packaging. Any damage occurred in transit
Page 16

TM-207
EN
-
14
due to non original packaging will be charged anyhow
to the customer.
The warranty doesn’t apply to:
Accessories and batteries (not covered by
arrantly).
Repairs made necessary by improper use
(including adaptation to particular applications not
foreseen in the instructions manual) or improper
combination with incompatible accessories or
equipment.
Repairs made necessary by improper shipping
material causing damages in transit.
Repairs made necessary by previous attempts for
repair carried out by non skilled or unauthorized
personnel.
Instruments for whatever reason modified by the
customer himself without explicit authorization of
our Technical Dept.
The contents of this manual may not be reproduced in
any form whatsoever without the manufacturer’s
authorization.
Our products are patented and our logotypes
registered. We reserve the right to modify
specifications and prices in view of technological
improvements or developments which might be
necessary.
Page 17

TM-207
EN
-
15
Service
Shouldn’t the instrument work properly, before
contacting your distributor make sure that batteries are
correctly installed and working, check the test leads
and replace them if necessary.
Should you need for any reason to return back the
instrument for repair or replacement take prior
agreements with the local distributor from whom you
bought it. Do not forget to enclose a report describing
the reasons for returning (detected fault). Use only
original packaging. Any damage occurred in transit
due to non original packaging will be charged anyhow
to the customer.
The manufacturer will not be responsible for any
damage to persons or things.
Page 18

EN
-
16
11. END OF LIFE
Caution: this symbol indicates that
equipment and its accessories shall be
subject to a separate collection and
correct disposal
TM-207
Page 19

Page 20

Professional Electrical and Environment
Test & Measurement Instruments:
LED light meter, Temperature &Humidity meter
Infrared Thermometer, Sound level meter
Light meter, EMF meter, UV Light meter, RF meter
Hot wire Anemometer, Co meter
Anemometer, Lan cable tester, Co2 meter
Solar power meter, Radiation meter,
Clamp meter, Multimeter
Phase Rotation tester, Digital Insulation tester
Our products of high quality are selling well
all over the world
TENMARS ELECTRONICS CO., LTD
6F, 586, RUI GUANG ROAD, NEIHU,
TAIPEI 114, TAIWAN.
E-mail: [email protected]
http://www.tenmars.com
 Loading...