

Page 1
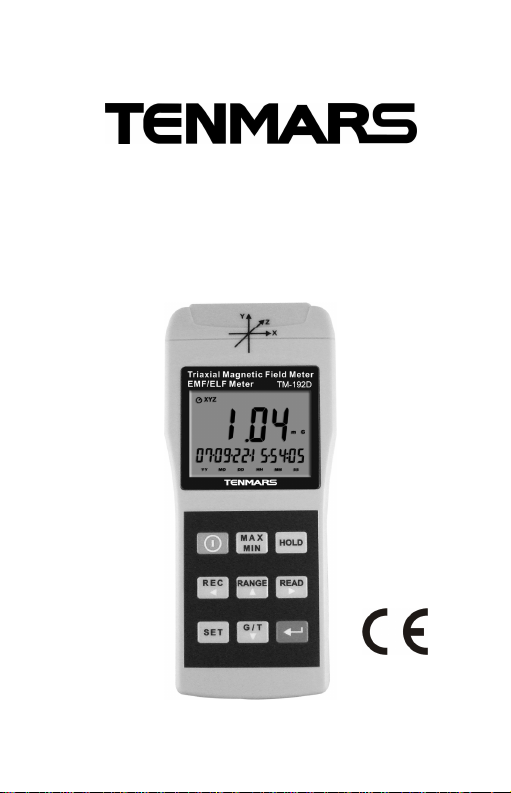
TRIAXIAL ELF Magnetic
Field Meter
TM-192 / TM-192D
HB2TM1920005
Page 2

Table of Contents
1. Introduction.......................................................1
2. Application ........................................................2
3. Features............................................................3
4. Identifying Parts ................................................4
5. Measurement Procedures.................................5
6. Clock setup.......................................................7
7. Auto power off setup.........................................8
8. Continuity data logging setup............................9
9. ClearALL data logger memory........................ 11
10. Single data memory record.............................12
11. Viewing logged reading controlkey.................12
12. Specifications..................................................13
13. Battery replacement........................................14
14. External DCPower..........................................14
15. Safety Precaution............................................15
16. Software installation(192D) ............................16
17. End of Life Disposal........................................17
Page 3

TM-192/TM-192D
1. Introduction
Safety precautions should be taken against electric
appliances in places including medical institutions,
schools and residential districts, where people
usually stay for a long time, to prevent patients,
babies and senior citizens from exposure to high
electromagnetic waves.
An electromagnetic wave simply means the wave
motion of the electromagnetic field (EMF).
The change in electric fields produces magnetic
fields, and the change in magnetic fields can also
generate electric fields. The fluctuation of
correlation between each other is known as
“electromagnetic waves", which is a form of energy
similar to light and heat that can be transmitted
either by radiation in the air or by an electric
conductor.
It is suggested that rearrangements should be
made in homes and work locations where the
strongest electromagnetic fields are detected in
order to avoid prolonged exposure to excessive
electromagnetic fields.
1
Page 4

TM-192/TM-192D
2. Application
This meter is applied to measuring magneticfields
of extremely low frequency (ELF) of 30 to
2000Hz.
It is capable of measuring the magnetic field
radiation intensity that is produced from electric
transmission equipment, power lines, microwave
ovens, air conditioners, refrigerators, computer
monitors, video/audio devices and so forth.
The magnetic field unit is Tesla (T), Gauss (G),
milli-Gauss (mG) or micro-Tesla (μT).
1 T=10,000 G 1 G=1,000 mG
1μT=10 mG
2
Page 5

TM-192/TM-192D
3. Features
Uses three internal orthogonal sensors to test a
wide range of ELF magnetic fields, independent
of measurement angle.
The tester is designed to provide a quick, reliable
and easy wayto measure magnetic field radiation
levels around power lines, home appliances and
industrial devices.
The tester is a cost-effective hand-held
instrument that was designed and calibrated to
measure magnetic field radiation at different
bandwidths from 30Hz to 2000Hz.
Display microTesla(uT) or milliGauss(mG) units.
Data hold (HOLD), maximum Hold (MAX), and
minimum Hold(MIN) function.
Auto range or manual range select mode.
Datalogging capacity with Memory Size:500 data
sets (Model 192) or 9999 data sets(Model 192D).
USB PC interface (192D).
Time and calendar function.
Low battery indication “ ”.
Over load display “OL”.
Auto power OFF function .
3
Page 6
TM-192/TM-192D
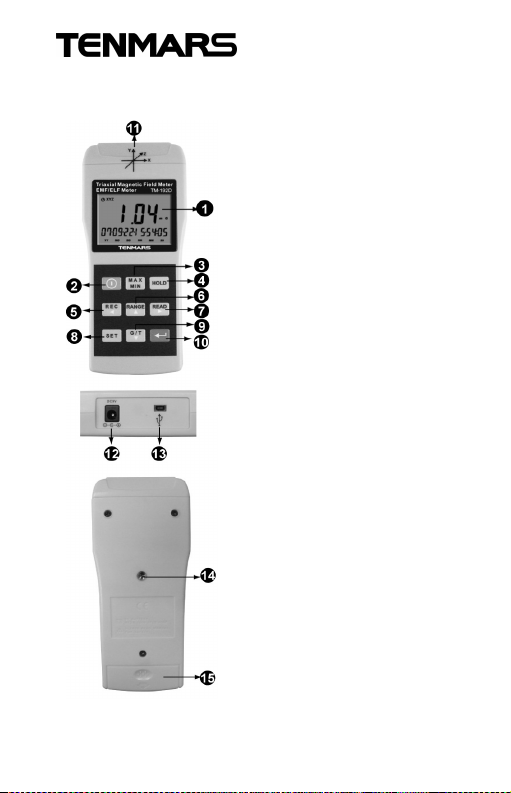
4. Identifying Parts
1. LCD display.
2. Power key.
3. maximum Hold and
minimum Holdkey.
4. Data Hold key.
5. Record data and
Setup functionleft
key.
6. Range and Setup
function up key.
7. Reading and Setup
function right key.
8. Setup function key.
9. Units and Setup
function down key.
10.Enter key.
11.Calibration pointfor
Triple axis.
12.External power DC
9V.
13.USB interface
(TM-192D).
14.Tripod mounting
screw.
15.Battery cover.
4
Page 7
TM-192/TM-192D
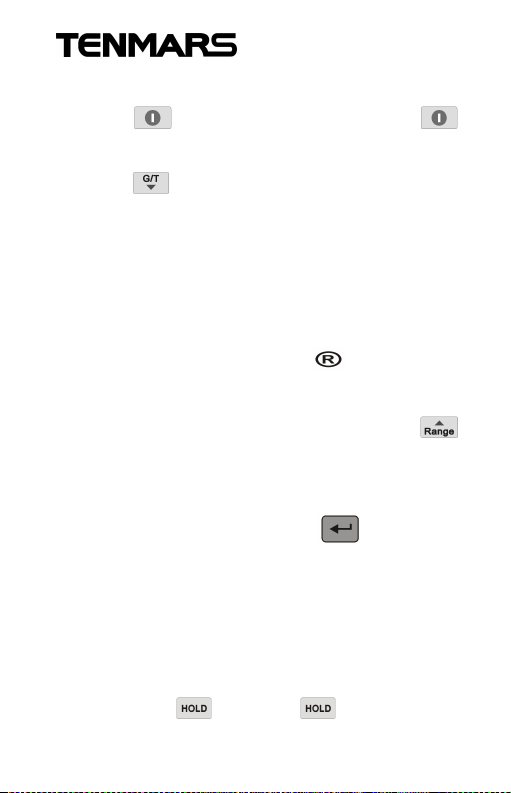
5. Measurement Procedures
Press “ ” key turn on the meter, press “ ”
key again to turn OFF the meter.
Press “ ” key to select milli-gauss (mG) or
micro-tesla (µT) unit.
Position the front of the meter to measure the
magnetic waves.
Read the measured value. When manual range
mode is
selected, LCD will shown the mark, The
display of “OL” on the highest position indicates
there is an overload on the reading. Press “ ”
to select a higher range for measurement again.
The default value displayis triaxialtotal
magnetic field reading. Press “ ” key to
toggle between independent three single-axis
magnetic field readings and triaxial total magnetic
field reading.
To lock and keep the reading displayed on the
LCD, press “ ” or press “ ” again to
5
Page 8

TM-192/TM-192D
unlock.
To retain the maximum and minimum value,
press “ ” key and the reading value displayed
on the LCD will keep
updating to the maximum value. Press again to
select minimum value, press and hold down
“ ” key 2 seconds to exit the maximumand
minimum mode.
Due to the magnetic interference of the
environment field factors, this magnetic field
meter could display a reading value that is
greater than 0.5 mG prior to measuring. This is
not a malfunction of the tester.
With the tester in hand, move slowly towards to
the object under measurement until it is
physically touched.
Notice how the field intensity increases as you
move closer to the object.
If the power of object was turned off during the
measurement, the reading of tester should return
to zero, unless an electromagnetic field from
6
Page 9
TM-192/TM-192D
other sources is detected.
6. Clock setup
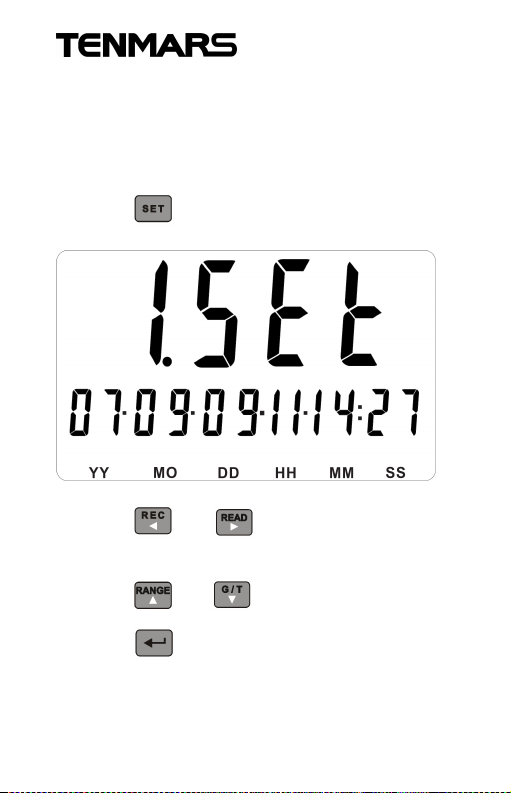
This meter clock uses 24 hour time.
Press “ ” key to enter clock setting mode
(1.SET).
Press “ ” or “ ” key to select option to
adjust.
Press “ ” or “ ” key to change the digit.
Press “ ” key to store the setup, exit the
mode.
7
Page 10
TM-192/TM-192D
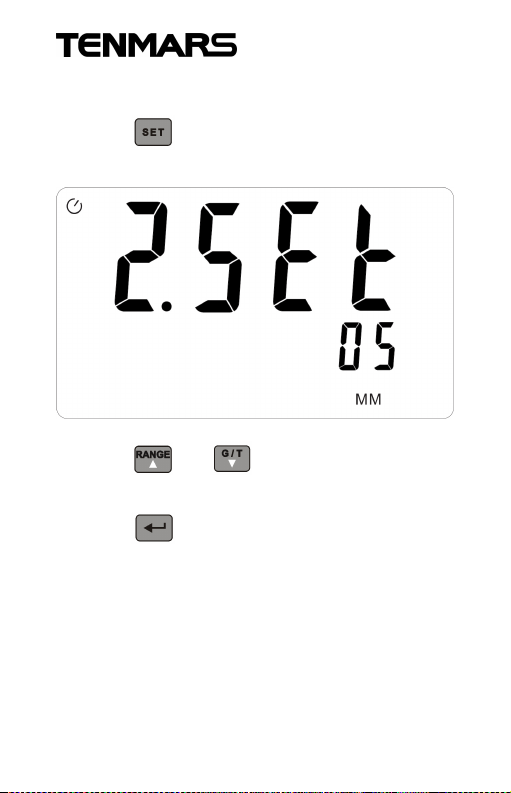
7. Auto power off setup
Press “ ” key again to auto power off time
setting mode (2.SET).
Press “ ” or “ ” key to change the auto
power off time.
Press “ ” key to store the setup, exit the
mode.
The autopower off time default value is 5
minutes. Range is 0 to 99 minutes. To cancel
auto power off, please set time to 0 minutes.
8
Page 11
TM-192/TM-192D
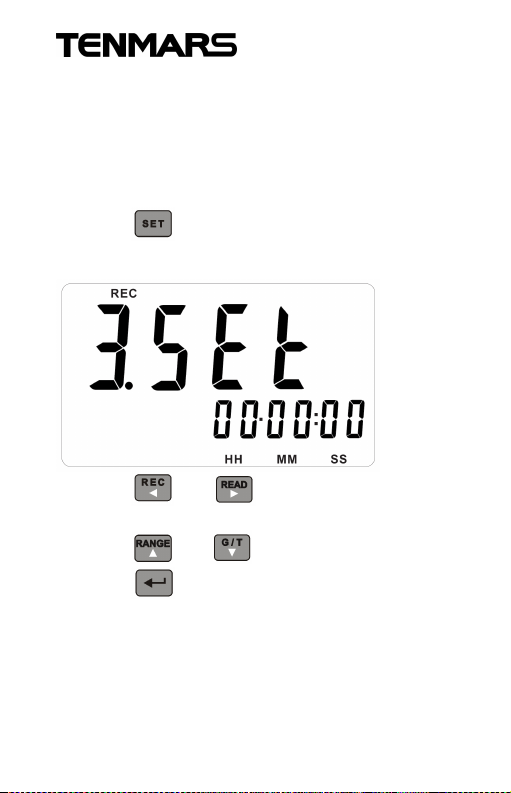
8. Continuity data logging setup
The data logging interval is the time between data
records. To begin data logging, set the logging
interval as per instructions below. To exit data
logging, set logging interval back to 0.
Press “ ” key again to enter continuous data
logging interval setting mode (3.SET).
Press “ ” or “ ” key to select option to
adjust.
Press “ ” or “ ” key to change the value.
Press “ ” key to store the setup, exit the
mode.
Interval time range can be set by user, from 2
seconds to 24 hours, 59 minutes and 59 seconds.
9
Page 12
TM-192/TM-192D
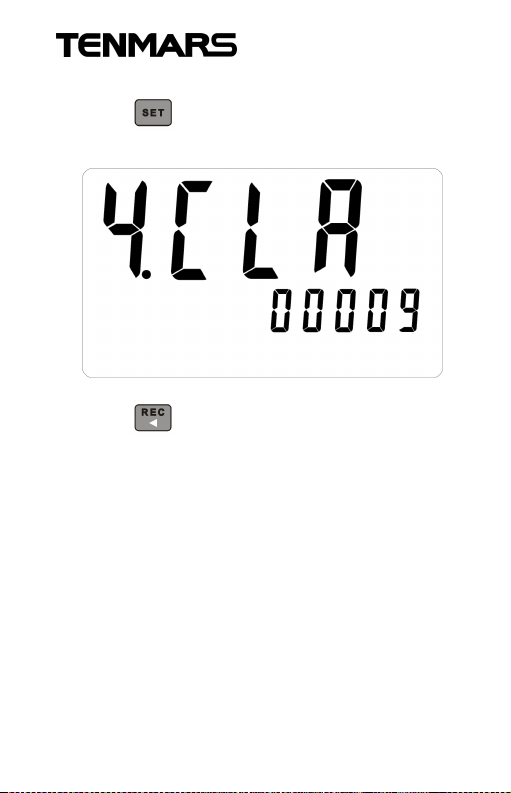
Clear data logger memory (last data entry)
Press “ ” key again to clear data logger
memory for last record setting mode (4.CLA)
Press “ ” key to clear data logger memory for
last record and exit the mode.
10
Page 13
TM-192/TM-192D
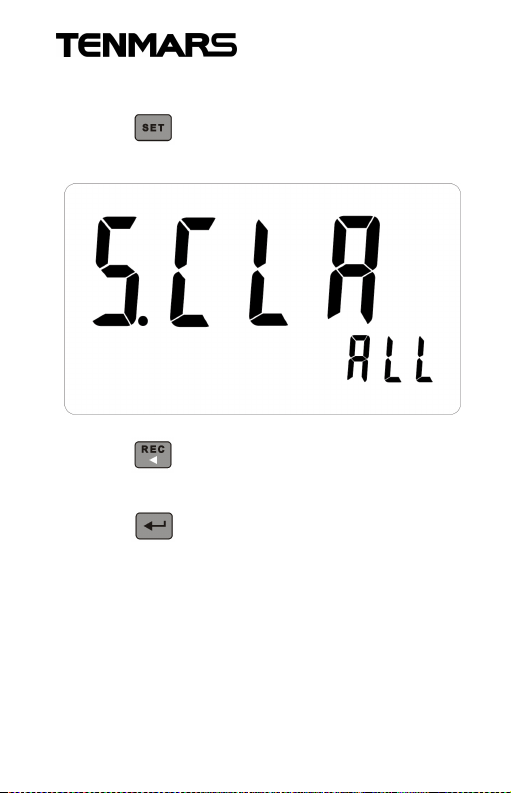
9. Clear ALL data logger memory
Press “ ” key again to clear data logger
memory for all record setting mode. (5.CLA)
Press “ ” key to clear data logger memory for
all record.
Press “ ” key to store the setup, exit the
mode.
11
Page 14
TM-192/TM-192D
10. Single data memory record
Press “ ” key each time to store the display
reading and time stamp in memory.
11. Viewing logged reading control
key
Press “ ” key to view logged readings.
Press or key to scroll through the
readings, Press “ ” key to exit this mode.
12
Page 15

TM-192/TM-192D
12. Specifications
Display : 4 digits Triple LCD display.
Range : 20/200/2000 mG, 2/20/200µT.
Resolution : 0.01/0.1/1 mG or 0.001/0.01/0.1 µT.
Frequency response : 30Hz to 2000Hz.
Sensor : Triple Axis (X, Y, Z).
Accuracy : 20mG/2µT ±(3.0%+30dgt) at
50Hz/60Hz. 200mG/20µT and 2000mG/200µT
±(2.5%+5dgt) at 50Hz/60Hz. or ±(5%+5dgt) at
(30Hz~2000Hz)
Over load : LCD display “OL”.
Sample rate : 2.5 times per second.
Battery : 9V NEDA 1604, IEC 6F22 or JIS 006P.
Battery life : Approximate 100hours.
Operating temperature & humidity :
5℃to 40℃, below 80% RH.
Storage temperature & humidity :
-10℃ to 60℃, below 70%.
Weight : About 230g.
Dimensions : 173(L) X80(W) X32(H) mm.
Accessories : User’s manual, 9V battery,
Carrying case.(MINI USB 4P(MALE) to USB A
Type cable).
13
Page 16
WARNING
TM-192/TM-192D
13. Battery replacement
If the symbol “ ” appears on the
LCD, please replace the battery
immediately
Turn off the instrument.
Open the battery cover and remove the battery.
Replace with four-9V NEDA 1604, IEC 6F22 or
JIS 006P size battery.
Install the battery cover.
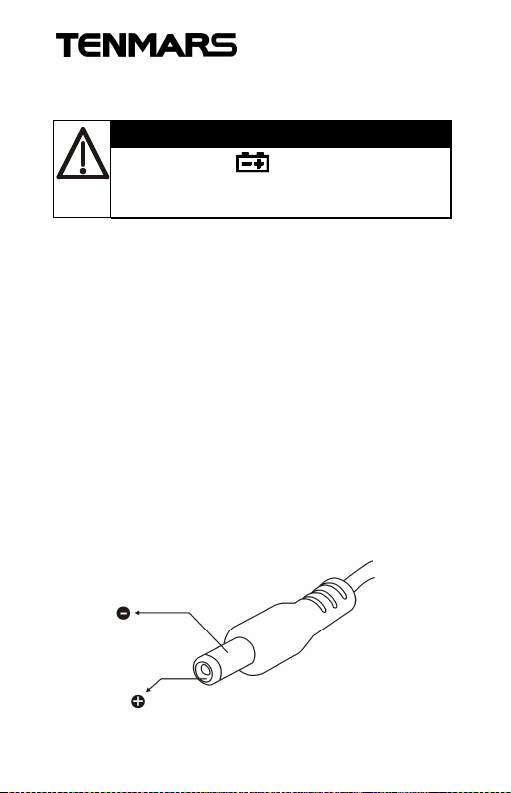
14. External DC Power
External AC to DC adapter :
Voltage 9VDC (8~14VDCMax).
Supply current:>300Madc.
Socket:pin Positive, Ground Casing External.
Diameter 6.3mm ; internal Diameter 2.0 mm.
14
Page 17

TM-192/TM-192D
15. Safety Precaution
For cleaning the instrument use a soft dry cloth.
Never use a wet cloth, solvents or water, etc.
Operation Altitude : Up to 2000M.
Operating Environment : Indoors use.
This instrument has been designed for being
used in an environment of pollution degree 2.
15
Page 18
TM-192/TM-192D
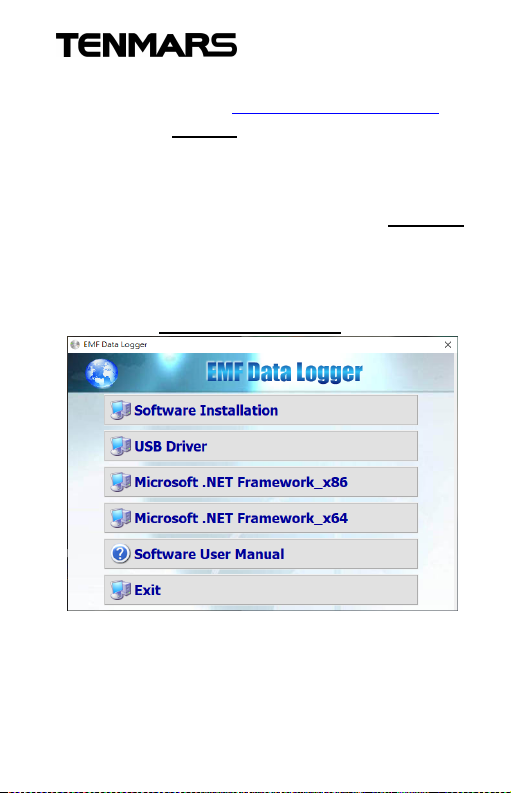
16. Software Installation (192D)
1. Link website https://www.tenmars.com/
2. Click English in the upper right corner of
the web page.
3. Search TM-192D.
4. Click on the TM-192D photo.
5. Click File Download, then select Software
Download.
6. Download and unzip the software.
7. For the latest software information and
installation procedures, Please download
the software instructions.
16
Page 19

Caution
and its accessories shall be subject to a
TM-192/TM-192D
17. End of Life Disposal
This symbol indicates that equipment
separate collection and correct
disposal
17
Page 20

TENMARS ELECTRONICS CO., LTD
6F, 586, RUI GUANG ROAD, NEIHU,
TAIPEI 114, TAIWAN.
E-mail : service@ tenmars.com
http: //www.tenmars.com
 Loading...