

Page 1
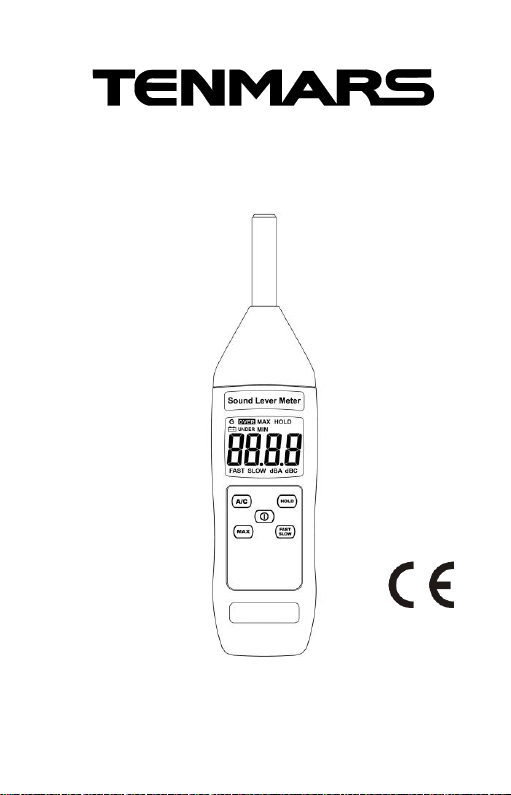
TM-104
Sound Level Meter
User’s Manual
HB2TM1040000
Page 2

Contents:
1 Introduction ....................................................... 1
2 Accessories ....................................................... 1
3 Safety ................................................................ 1
4 Meter description ............................................... 2
5 Operation .......................................................... 3
5.1 Disable auto power off ................................ 4
5.2 Maximum and Minimum hold ...................... 4
5.3 Data hold .................................................... 4
5.4 94dB Calibration ......................................... 5
6 General Specifications ...................................... 6
7 Electrical Specifications: .................................... 7
8 Maintenance ..................................................... 8
9 Battery Replacement ......................................... 8
10 Disposal ............................................................ 9
Page 3
- 1 -
1
1 Introduction
This sound level meter is a digital noise meter
auto-shifting function that can be applied to the
measurements for both environmental noise and
mechanical noise.
2 Accessories
1
Meter
1
User’s Manual
1
9V battery
1
Carrying case
1
Windscreen
3 Safety
Caution! Please refer to this manual.
Improper use may damage the meter
and its components.
Compliance with European Directive
Do not operate in environments with flammable gas or
humid environments.
Do not place the meter in locations with high temperature,
humid, or exposed to direct sunlight.
Operating altitude: 2000 meters below sea level.
Operation environment: Indoor use; contamination level
class 2.
EMC: EN61326-1:CISPR 11:Group 1, Class B
Class B – Equipment is suitable for use in domestic
establishments and outside facilities.
Group 1 – RF energy generated is needed for internal
functioning.
Page 4
- 2 -
2
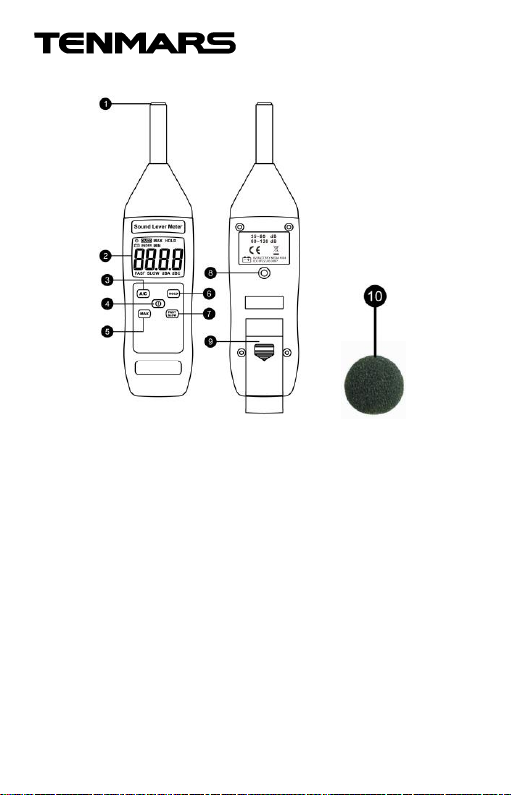
4 Meter description
1.Microphone.
2.LCD display
3.A /C weighting select button.
4.Power button
5.Maximum and Minimum hold button
6.Data hold button.
7.Time weighting select button.
8.Tripod nut.
9.Battery cover.
10.Windscreen.
Page 5
- 3 -
3
5 Operation
Press to turn on or turn off.
Please select dBA for the measurement of
acoustic noise, dBC for the measurement and
analysis of mechanical noise, wherein click
to switch the modes.
Select “FAST” to read the instantaneous noise
level, “SLOW” to read the average noise level,
wherein click to switch the modes.
Press to capture the maximum or minimum
noise level and lock the readings.
When measuring noise with the sound level meter
by hand, keep the distance between the
microphone and the sound source by about 1~1.5
meters.
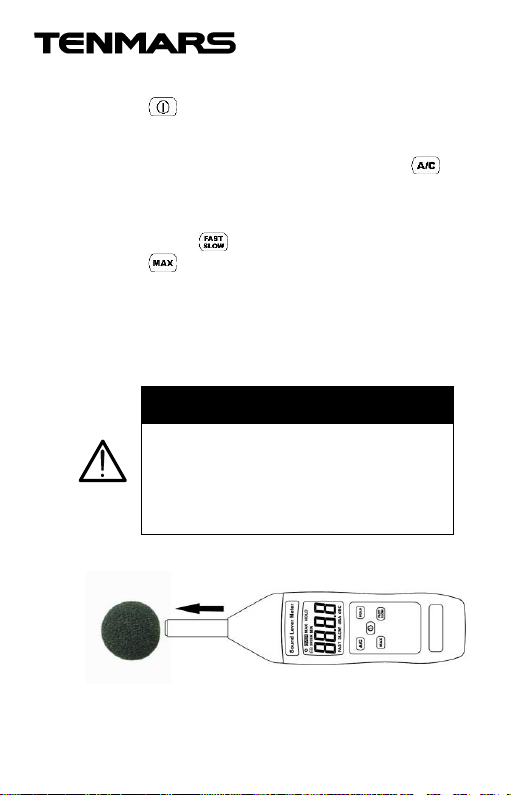
Warning
Wind blowing across the microphone
would bring additional extraneous noise.
Once using the instrument in the
presence of wind with speed higher than
10m/s, it must mount the windscreen to
prevent the undesirable signals.
Page 6
- 4 -
4
5.1 Disable auto power off
The meter is preset to shutdown automatically after
15-minute inactivity.
When powering on, press for 2 seconds to
disable the auto shutdown function which can be set
to disable or enable as needed.
5.2 Maximum and Minimum hold
Click for less than 1 second to view the
maximum and minimum values cyclically, while
pressing and for switching frequency
weighting and time weighting. Press and hold
for more than 1 second to quit the function.
5.3 Data hold
Click to enable or disable the data hold
function.
When "HOLD" is activated, all buttons will be
disabled, except for .
Page 7
- 5 -
5
5.4 94dB Calibration
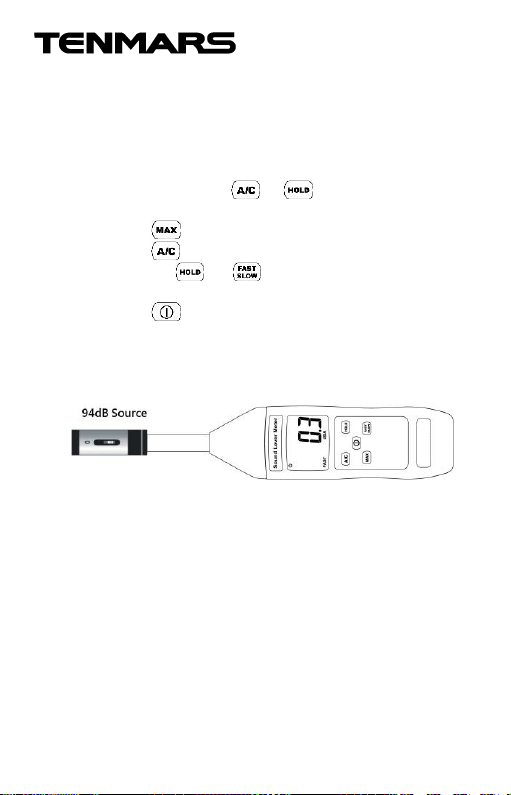
Carefully plug the microphone head into the 1/2
inch hole of the standard audio source (94dB,
@1KHz sine wave).
Turn on the power of the standard audio source
(94dB, @1KHz sine wave).
Press and hold + for more than 1
second and enter the 94dB correction function.
Press for auto calibration.
Press to select frequency weighting.
Use the / to manually adjust the
deviation value (±3.5dB).
Press to quit the 94dB correction function.
* Auto correction range is 90.5~97.5dB.
* The meter has been calibrated as ex-factory. The
calibration period is recommended as 1 year.
Page 8

- 6 -
6
6 General Specifications
4 digital LCD.
Frequency weighting: dBA, dBC
Time weighting: FAST, SLOW
Data hold.
Autoranging.
Auto power off(default 15 min)and disable auto
power off.
Maximum and Minimum hold
Overloading “OVER” or “UNDER”.
Low battery indication
Battery: 9V (NEDA 1604、IEC 6F22 or JIS 006P)
Battery life: About 50 hrs (alkaline Battery)
Standby power consumption: 9uW
Operating power consumption: 90mW
Operation temperature and humidity:
5 to 40oC(41 to 104oF); < 80%RH
Storage temperature and humidity:
-10ºC to 60ºC(14 to 140℉),< 70%RH
Weight: about 200g(including battery)
Dimension: 235(L) x 56(W) x 40(H)mm
Page 9
- 7 -
7
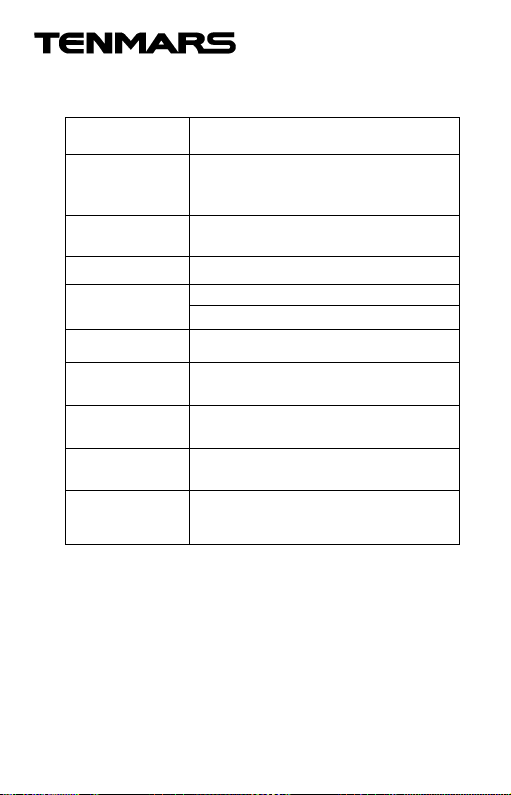
7 Electrical Specifications:
Environmental conditions at 23°C ± 5°C
Sample rate
1 second
Standard applied
IEC 61672-1 class 2
IEC651 Type2
ANSI1.4 Type2
Microphone
1/2 inch Electret condenser
microphone.
Dynamic Range
50 dB
Measuring range
35 ~ 130 dBA
40 ~ 130 dBC
Frequency
response
31.5 Hz ~ 8 KHz
Resolution
0.1 dB
Time weighting
FAST 125 ms ; SLOW 1s
Frequency
weighting
A / C
Accuracy
±1.8 dB (reference SPL 94 dB
@1KHZ)
Page 10
- 8 -
8
8 Maintenance
1. When the When symbol is displayed on
the LCD, it means that there is insufficient power;
please change the battery immediately in order to
ensure its accuracy.
2. Do not place the meter in locations that have high
temperature, humidity or that are exposed to
direct sunlight.
3. Remember to turn off the power after usage;
remove the battery if not used for a long period of
time in order to prevent battery leakage and
causing damages to internal components.
4. When the instrument failure, only by the
authorized service provider or return the original
repair.
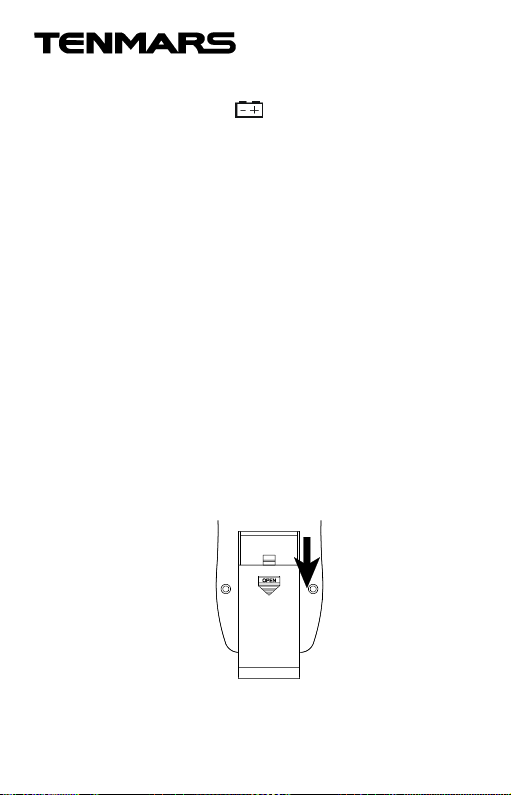
9 Battery Replacement
1. Turn off the power.
2. Open the battery cover at the back of the meter,
remove the batteries.
3. Please insert six new 9V batteries according to
the polarities.
4. Put the battery cover back in place.
Page 11

- 9 -
9
10 Disposal
Note: This symbol indicates that the
meter and its accessories must be
separated and processed properly.
Page 12

TENMARS ELECTRONICS CO., LTD.
6F, NO.586 Ruiguang Rd, Neihu
Dist. Taipei City, Taiwan
E-mail: [email protected]
http://www.tenmars.com
 Loading...