

Page 1
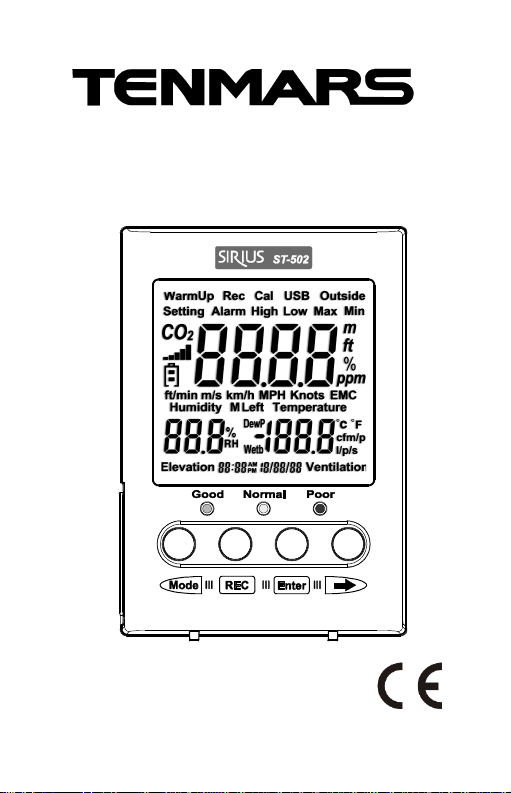
ST-502
Desktop Indoor Air Quality (IAQ)
Monitor User’s Manual
HB2ST5020001
Page 2

Page 3

CONTENTS
1 Introduction..............................................................1
2 Accessories..............................................................1
3 Safety Precaution....................................................1
4 Meter Description....................................................2
5 Operation..................................................................3
5.1 Applications......................................................3
5.2 CO2Concentration and Guidelines...............3
5.3 Checking Measurement Modes.....................4
5.4 Record Function ..............................................4
5.5 Reset Settings..................................................4
5.6 Function Setting...............................................5
5.7 Ventilation Formula .......................................10
6 Software Installation..............................................11
7 General Specifications..........................................13
8 Electrical Specifications........................................14
9 Maintenance..........................................................15
10 Cleaning.................................................................15
11 End of Life Disposal..............................................15
Page 4
1
1 Introduction
ammeter and its components.
ST-502 is a desktop indoor air quality monitor that
can measure carbon dioxide, relative humidity, air
temperature, and ventilation rate.
2 Accessories
1 ST-502 Ammeter
1 User’s Manual
1 AC100~240V
12V/1A (5.5*2.1*1.0mm) switching
transformer
1 5-pin USB cable
3 Safety Precaution
Note! Please refer to this manual.
Improper usage may damage the
Complies with European Directive
Do not operate in environments with flammable
gas or humid environments.
Operating altitude: 2000 meters below sea level.
Operating environment: Indoor use; contamination
level class 2.
Cleans wide with soft cloth when dirty, such as
glasses cloth. Do not clean with chemical and
other solvents.
EMC: EN61326-1:CISPR 11:Group 1, Class A
Class A –Equipment for use in all establishments
other than domestic
Group 1 –RF energy generated is needed for
internal functioning
Page 5
2
4 Meter Description
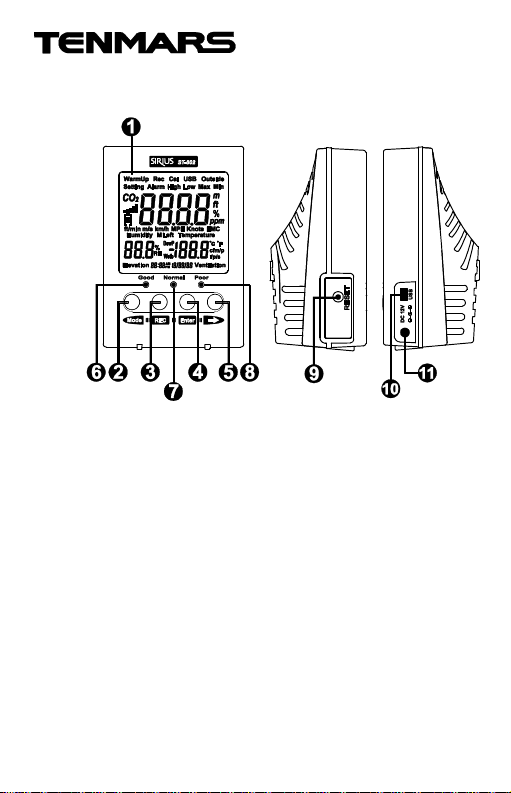
1. LCD Monitor
2. Mode/Left button
3. Datalogger button
4. Enter button
5. Right button
6. CO2concentration indicator; good
7. CO2concentration indicator; normal
8. CO2concentration indicator; poor
9. Setting reset button
10. USB jack
11. External power input jack
Page 6

3
5 Operation
5.1 Applications
Building air conditioning system (HVAC)
monitoring.
Indoorair quality monitoring.
5.2 CO2Concentration and Guidelines
Asindicated according to ASHRAE standard
62.1-2013 Appendix B Summery of Selected
Air Quality Guidelines, carbon dioxide may
cause risks to body health when the under very
high concentrations (for example greater than
5,000PPM).
NIOSH recommendations:
250-350ppm – Concentration of normal outdoor
environment
600ppm – Minimum requirement for good air
quality.
600-1000ppm – CO2 concentration slightly high
1000ppm – Insufficient ventilation
These standards are guideline references only; if
the CO2 content exceeds 1,000ppm, it does not
necessarily mean that the building is dangerous and
needs to be evacuated. This standard is used as a
guideline to help increase the level of comfort to a
maximum.
Page 7
4
5.3 Checking Measurement Modes
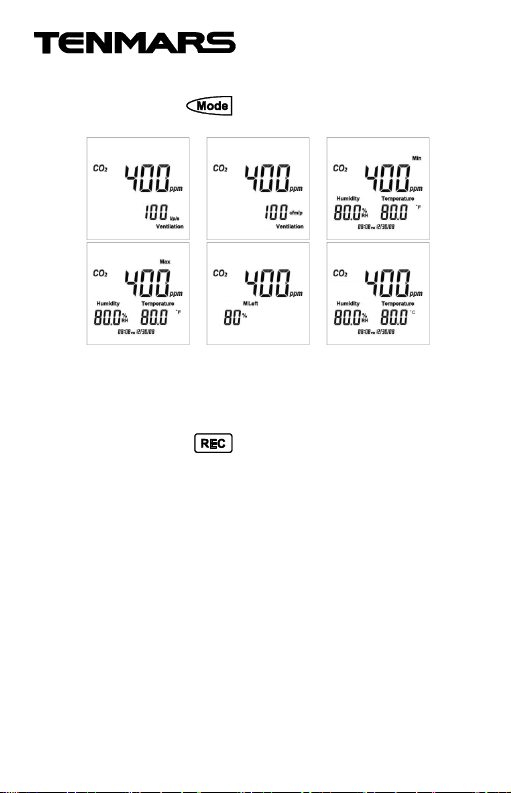
Pressthe button to view the following
screens in this order:
L/P/S ventilationCFM/P ventilation
minimum valuemaximum valuesave
effective percentage℃.
5.4 Record Function
Pressthe button until “REC” appears on
the LCD (2 seconds) to enter the automatic
recording function. The currently measured
value, setting function and USB connection can
be displayed during the recording process.
Press the “REC” button again until “REC” on
the LCD disappears (2 seconds) to exit the
automatic recording function.
5.5 Reset Settings
Before powering on, press and hold the
“RESET” button and then turn on the power to
restore all settings to the factory default values.
Page 8
5
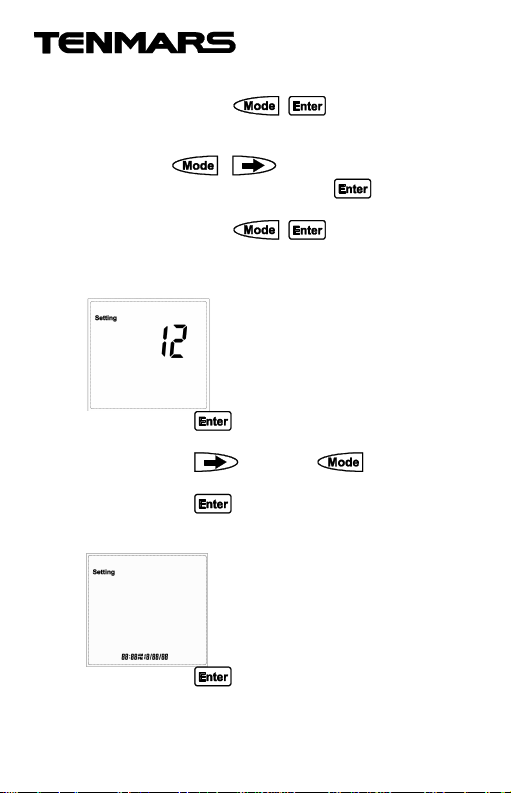
5.6 Function Setting
Press and hold + buttons
simultaneously for 2 seconds to enter the
function setting mode;
use the or buttons to select the
content to set and then press to enter
and set that item.
Press and hold + buttons
simultaneously for 2 seconds to exit the
function setting mode.
Step 1. 12/24 hour mode
Pressthe buttonto enter this item
setting operation.
Pressthe button or button to
select between 12/24.
Pressthe buttonto exit this item setting
operation.
Step 2. Clock setting
Pressthe buttonto enter this item
setting operation.
Page 9
6
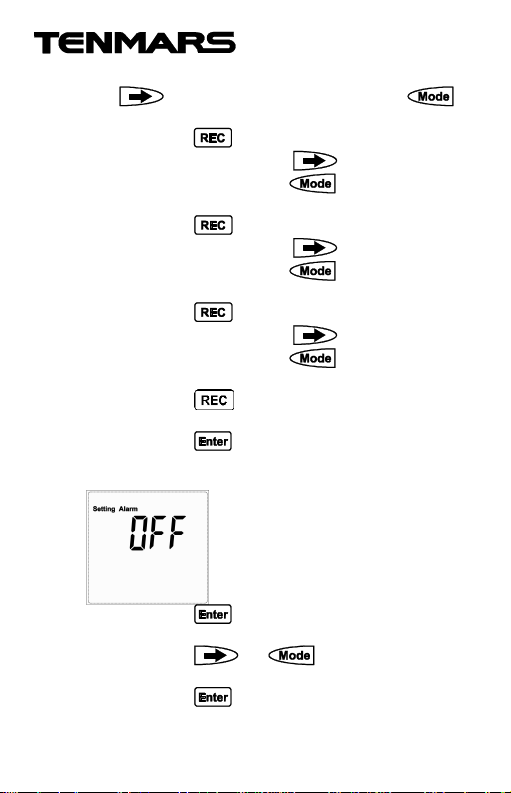
Thehour digit will start flashing; press the
button to increase and press the
button to decrease.
Pressthe button and the minute digit will
start flashing; press the button to
increase and press the button to
decrease.
Pressthe button and the month digit will
start flashing; press the button to
increase and press the button to
decrease.
Pressthe button and the year digit will
start flashing; press the button to
increase and press the button to
decrease.
Pressthe button again to start setting
from the first digit again.
Pressthe buttonto exit this item setting
operation.
Step 3.Alarm switch
Pressthe buttonto enter this item
setting operation.
Pressthe or button to select
on/off.
Pressthe buttonto exit this item setting
operation.
Page 10
7
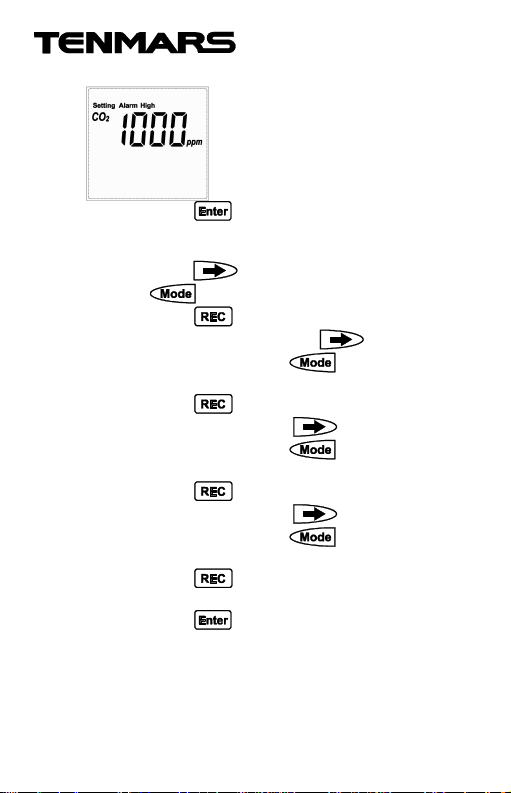
Step 4.CO2 alarm maximum value
Pressthe buttonto enter this setting
item operation.
Thefirst digit will start flashing at this time;
press the button to increase and press
the buttonto decrease.
Pressthe button and the second digit
will start flashing; press the button to
increase and press the button to
decrease.
Pressthe button and the third digit will
start flashing; press the button to
increase and press the button to
decrease.
Pressthe button and the fourth digit will
start flashing; press the button to
increase and press the button to
decrease.
Pressthe button again to start setting
from the first digit again.
Pressthe buttonto exit this item setting
operation.
Page 11
8
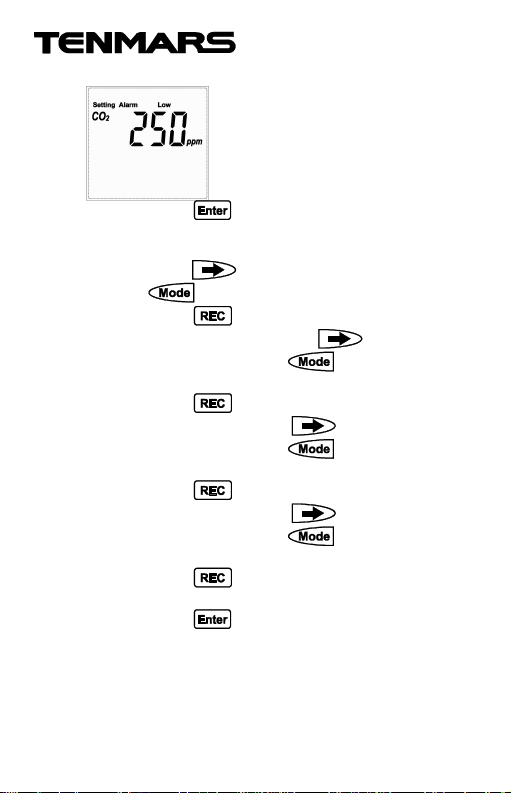
Step 5. CO2 alarm minimum value
Press the button to enter this setting
item operation.
The first digit will start flashing at this time;
press the button to increase and press
the buttonto decrease.
Press the button and the second digit
will start flashing; press the button to
increase and press the button to
decrease.
Press the button and the third digit will
start flashing; press the button to
increase and press the button to
decrease.
Press the button and the fourth digit will
start flashing; press the button to
increase and press the button to
decrease.
Press the button again to start setting
from the first digit again.
Press the button to exit this item setting
operation.
Page 12
9
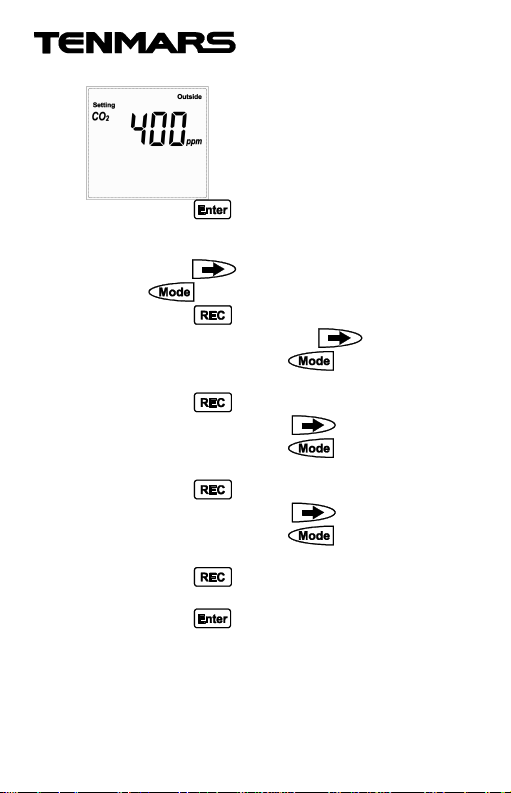
Step 6. Outdoor CO2
Press the button to enter this setting
item operation.
The first digit will start flashing at this time;
press the button to increase and press
the buttonto decrease.
Press the button and the second digit
will start flashing; press the button to
increase and press the button to
decrease.
Press the button and the third digit will
start flashing; press the button to
increase and press the button to
decrease.
Press the button and the fourth digit will
start flashing; press the button to
increase and press the button to
decrease.
Press the button again to start setting
from the first digit again.
Press the button to exit this item setting
operation.
Page 13
10
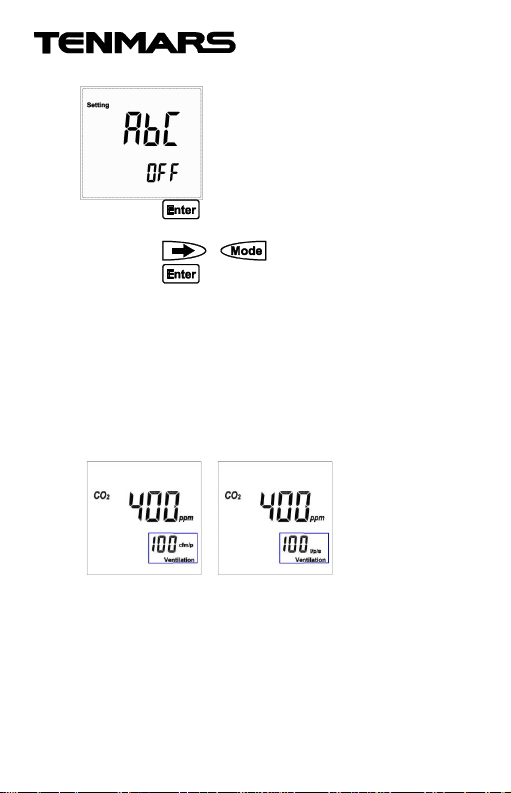
Step 7.ABC Auto-correct function
Press the button to enter this item setting
operation.
Press the or button to select on/off.
Press the button to exit this item setting
operation.
Once the ABC function is turned on, it uses
400ppm as the standard and will have
adjusted approximately 30ppm over an
accumulated time of 180 hours; therefore it is
recommended to place it at a well-ventilated
place once the function is enabled.
5.7 Ventilation Formula
CFM/P(inch/minute/person)
CFM/P= 10600/(Cs-Co)
Cs = CO2read value, Co = CO2outdoor read
value.
L/P/S(liter/second/person)
L/P/S=(CFM/P)*28.32/60
Page 14
11
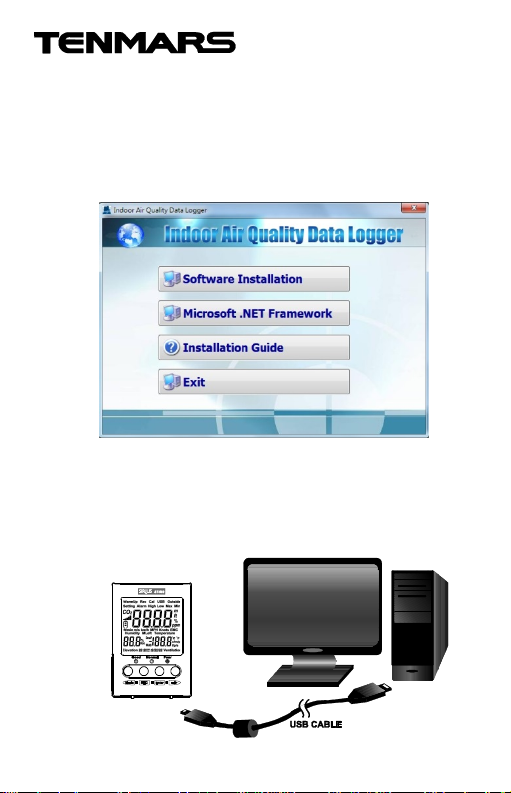
6 Software Installation
Supported operating systems:
XP/Windosw7/Windows 8.1/Windows10
First place the CD included with this meter into the
CD/DVD ROM of the PC to install the desktop
program:
Once the desktop program installation is complete,
remove the CD from the CD/DVD ROM drive.
Connect this meter to the PC using the USB cable
included, as shown in the figure below:
Page 15
12
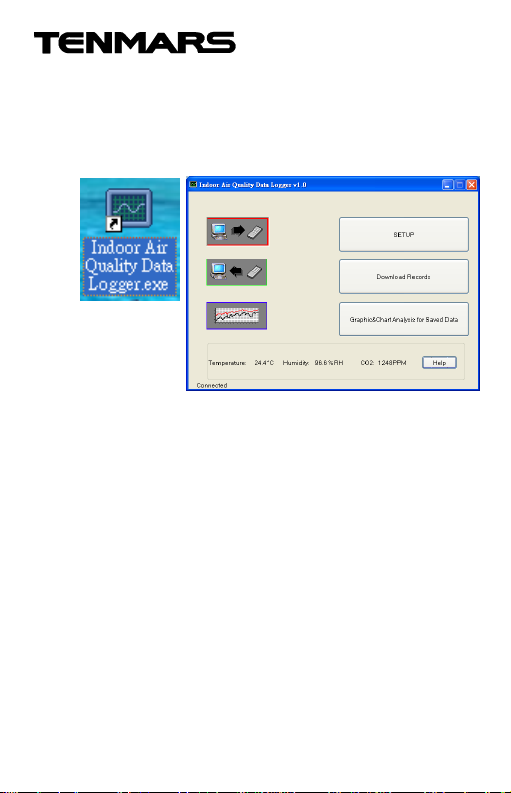
Execute the PC desktop software program:
double-click the left mouse button on the desktop
program (Indoor Air Quality Data Logger.exe) to
execute the desktop program.
Page 16

13
7 General Specifications
Read value display: Triple-display LCD
monitor
Display unit: ℃/℉, PPM, %RH
Maximum value/Minimum value
Alarm function
Memory can store a maximum of 17,000 data
entries.
Record time interval:
5 seconds/10 seconds/1 minute/5 minutes
/10 minutes/30 minutes/1 hour/2 hours
Operating power consumption: 2.4W
Operating temperature and humidity: 0℃ to
50°C (32-122°F), relative humidity 5-95% RH
(non-condensing)
Storage temperature and humidity: -10℃ to
60℃(14-140℉) , relative humidity under 70%
Weight: Approximately 190 grams
Dimensions: 89 x 62 x 128 mm (L x W x H)
Page 17
14
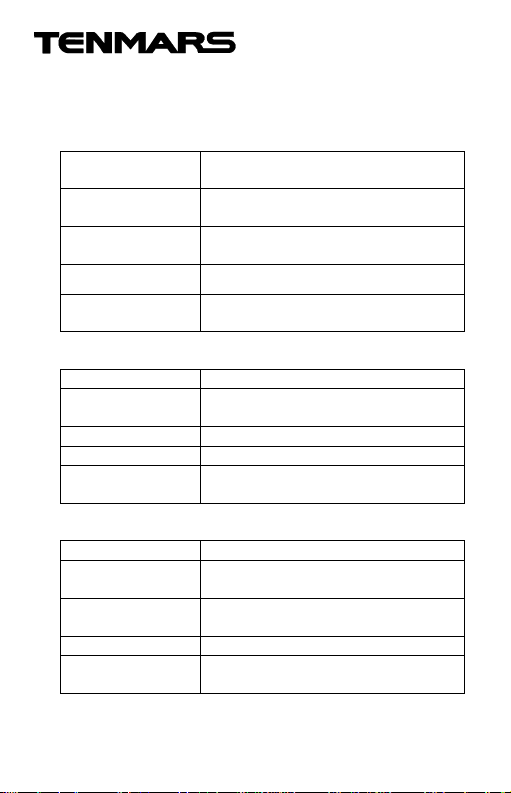
8 Electrical Specifications
(NDIR)
Range
±75ppm.(0
-
2000ppm)
Time
2 minutes
Sensor Type
Thermistor
Range
Accuracy
±1.0°C/±1.8°F
Resolution
0.1°C/0.1°F
Time
Sensor Type
Capacitive
Range
±5.0%RH(<20%,>80%)
at 25
°C
Resolution
0.1%
Time
Accurate ambient temperature range: 18℃ (64℉) ~ 28℃
(82℉)
Carbon dioxide
Sensor Type Non-Dispersive InfraRed
Measurement
Accuracy ±5% read value or
Resolution ±1ppm
Response
Temperature
Measurement
Response
Relative Humidity
Measurement
Accuracy ±3.0%RH(20~80%); at 25°C
Response
0 to 9999ppm
Reaches 90% in approximately
0°C~50°C / 32°F~122°F
Approximately 1 second
5-95%
Approximately 4 seconds
Page 18

15
9 Maintenance
1. Pleaseread the user’s manual carefully to
check whether there are any operating errors.
2. Donot place the ammeter in locations that has
high temperature, humidity or that are exposed
to direct sunlight.
10 Cleaning
Please turn off the power first before cleaning; use a
soft and dry cloth to wipe it clean. Do not wipe it with
wet cloth, liquids or water etc.
11 End of Life Disposal
Note: This symbol indicates that the
ammeter and accessories must be
separated and processed properly.
Page 19

Page 20

TENMARS ELECTRONICS CO., LTD.
6F, NO.586 Ruiguang Rd, Neihu Dist.
Taipei City, Taiwan
E-mail: [email protected]
http://www.tenmars.com
 Loading...