

Ten-Haaft D5000, CARO Digital MA Operating Instructions Manual
04/2010 language: englisch
Innovative Mobile Technology
Operating instructions
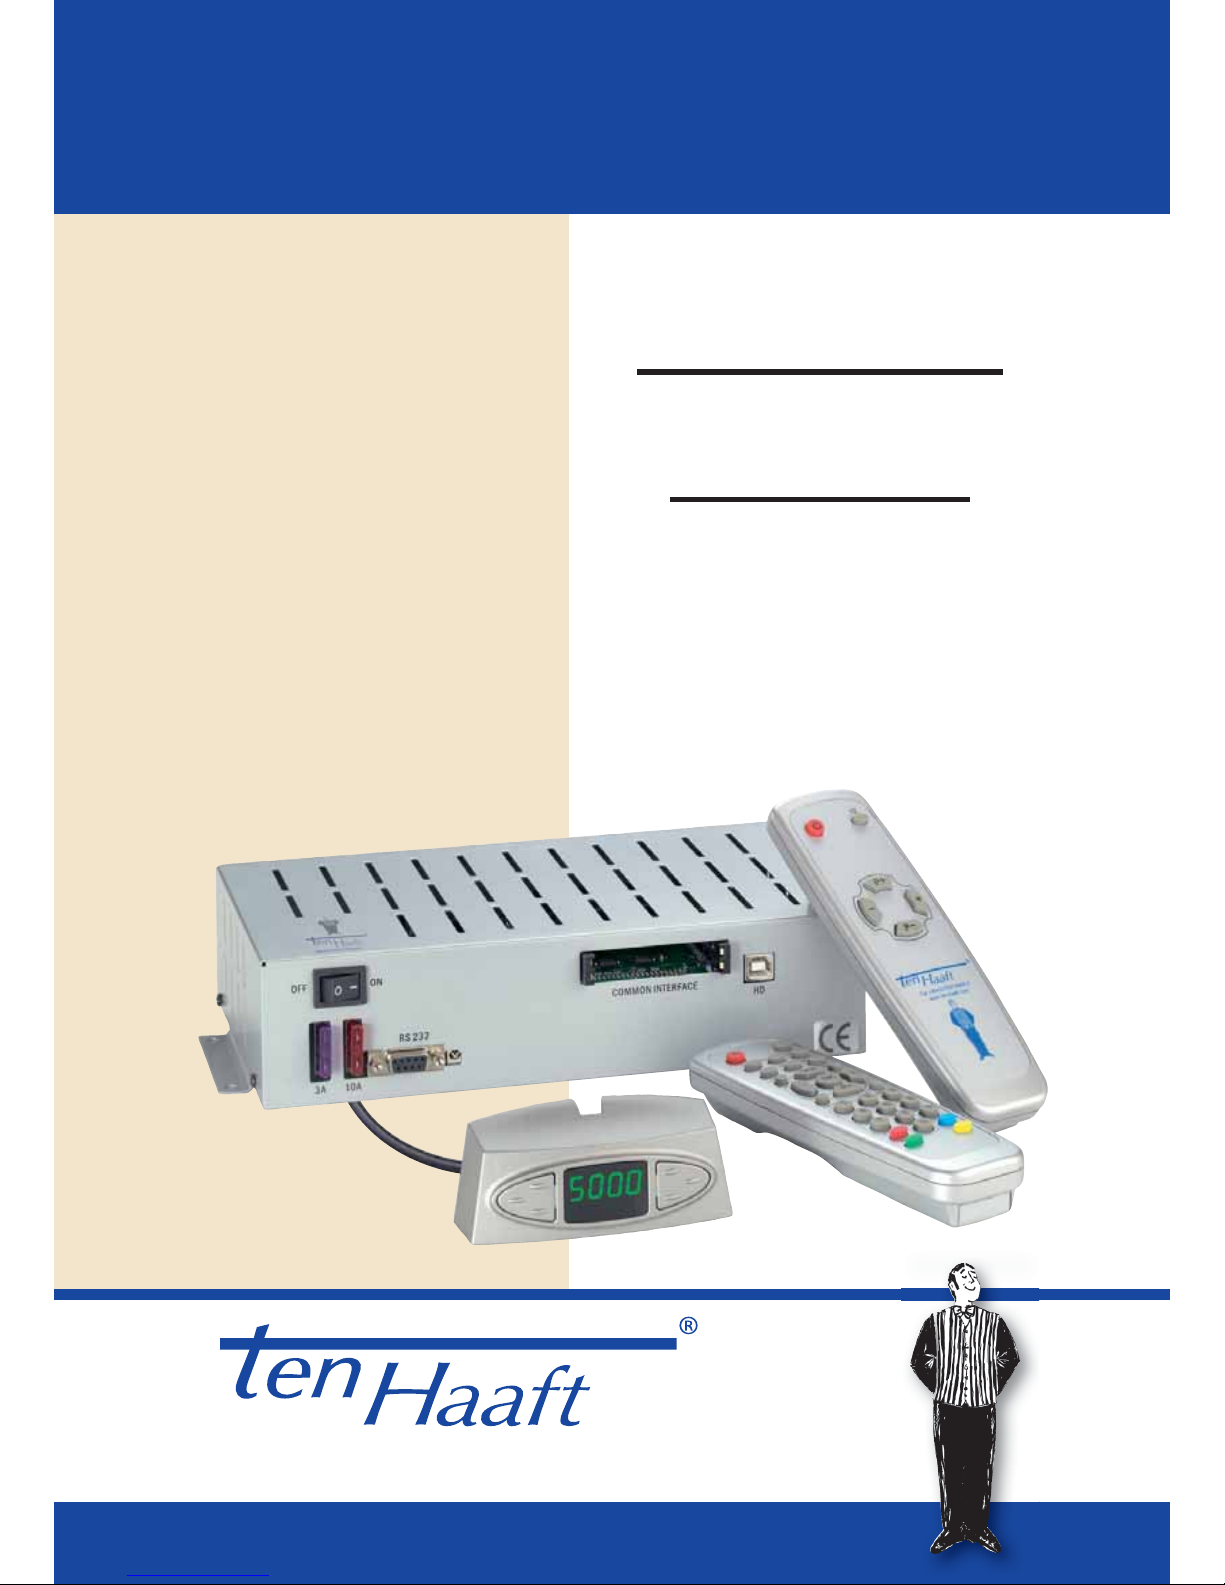
Receiver
D5000

Table of content
1
Generals
Safety information 2
Control Instruments Receiver
Remote control 3
SAT-Mouse – control without remote control 4
Fault code recognition 5
Operation instructions receiver
Receiver menu tree 7
Favorite Channel list 11
Editing channel list 12
Channel search 14
Extras 16
Video Hard Disk (HD) Recording -optional 18
Timer 21
Editing Transponder / Channels 23
Piece of equipment description
Connections 24
CI Common Interface Module 25
DVB- T (terrestrial TV) - optional 26
Software update 27
Receiver DATA 30
Declaration of CE Conformity 31
Appendix
Channel lists 32
Search satellites 35
Protection of the environment 37
Safety information
Place the receiver in a place with suffi cient air circulation and away from
any heat sources. This will prevent heat accumulation inside the receiver
and ensures a longer lifecycle.
Do not place any items on the receiver – malfunctions, damage and even
self-ignition may occur if the ventilation openings are blocked.
To avoid the risk of fi re or damage to the device the receiver must never be exposed
to moisture or rain.
Should an item or liquid get into the housing, immediately disconnect the device from the power supply and have it checked by a qualifi ed professional before
further usage.
Should you ever notice an unusual smell or smoke, immediately disconnect the
device from the power supply and have it checked by a qualifi ed professional.
Switch off the receiver before connecting other devices.
The power supply line to the receiver must have a cross-section of 0,75
to 1,5 mm² and must be connected directly to the vehicle battery. Ensure
that the device is not connected to an electronic charge controller.
Keep a suffi cient distance to potential sources of interference such as mobile phones, electronic heater controllers, ignited components or radio devices when routing
the lines and positioning the components.
It is recommended that you ground your television set in the vehicle to
avoid interference on your television set or satellite receiver. Only connect
the freely accessible ground of your television set to the vehicle chassis.
Only use the wiring harnesses supplied or the extension wiring harnesses available
as accessories to connect the antenna unit.
Take care that there is no obstacle e. g. tree or traffi c sign, which might
disturb erecting the antenna.
2
TV
AV
LIST
-
+
OK
INFO
RADIO
SWAP
EXIT
MENU
P+
P-
0-9
PVR
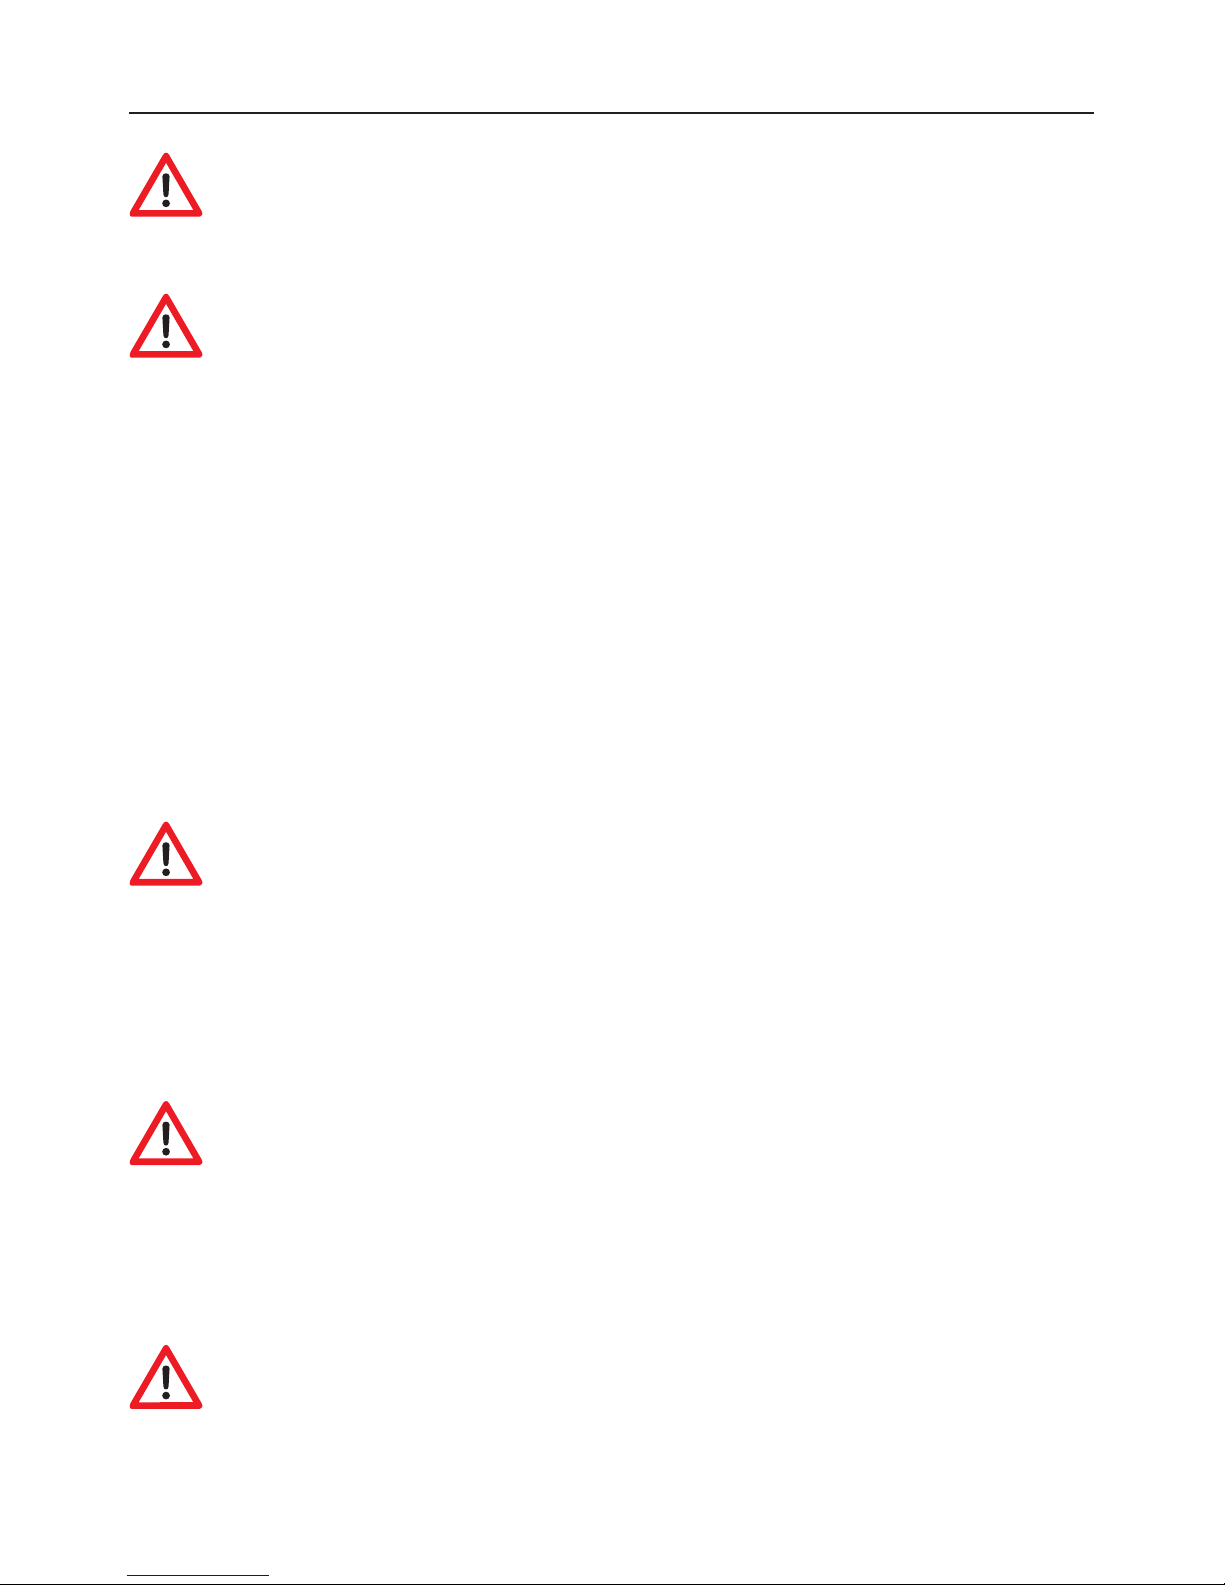
Remote control
PVR
PQRS TUV WXYZ
GHI JKL MNO
ABC DEF
MENU
EXITLIST
TEXT
P+
OK
P-
-+
SWAPAV
PAU SE RA DI OTV
INFO
231
4
7809
56
P+
OK
P-
-
+
TEL: +49(0)7237/4855-0
www.ten-haaft.com
Switches the system on or off. (Power)
Mute function of speakers.
SLEEP function - press 3 sec to activate
Activation of TV mode
Activates the loop-trough of the satellite and video signal
Display of program list
Volume down. Changing of values in menus
Volume up. Changing of values in menus
Select or confi rms functions
Display of current program information (EPG)
Activation of radio mode
Return to previously selected channel
Closes on-screen menus
Display of on-screen menus
Program up. upward in menus
Program down. downward in menus
Number keys for direct channel selection
Direct selection, video/audio settings
Opens the control menu of the personal Video Recorder (optional)
Starting DVB-T program search (optional)
Caro Digital MA: Starting Menu Intelligent satellite recognition system.
OYSTER Internet: Starting satellite search
3
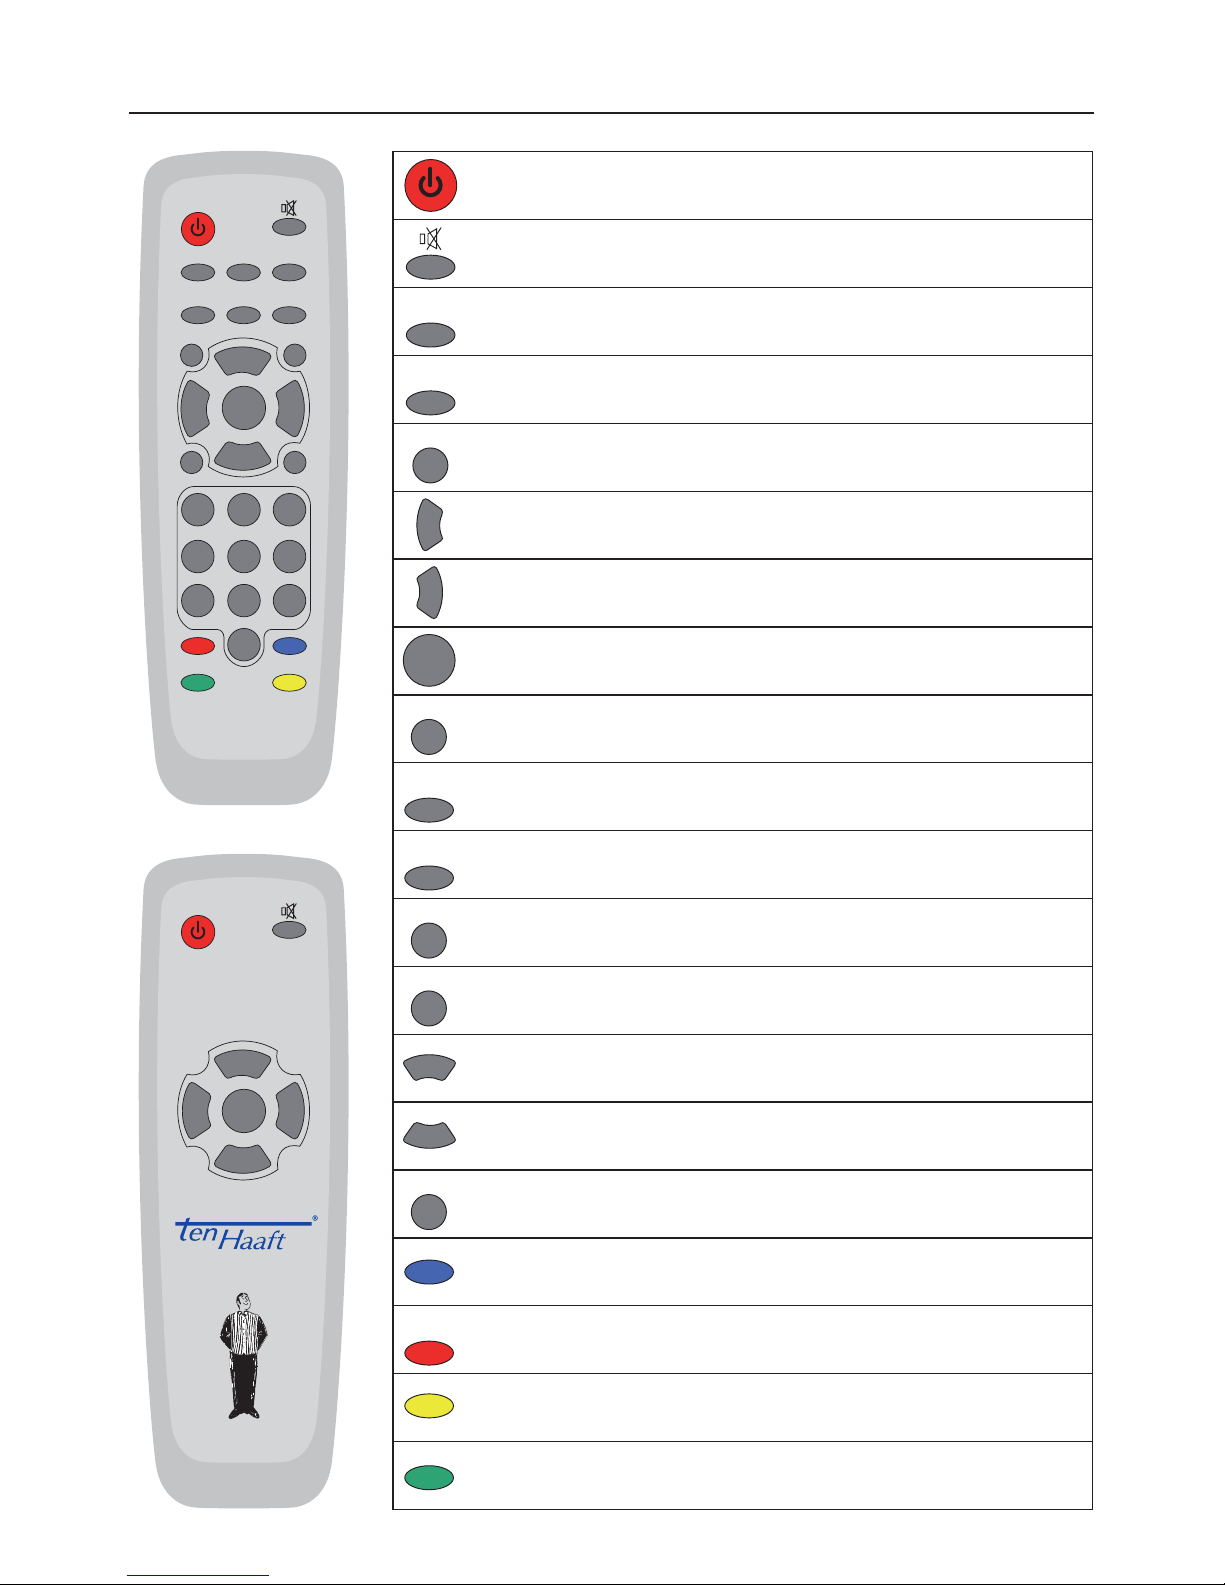
Sat Mouse - Control without remote control
4
The two keys on the satellite mouse (see graphic on this page below) allow the
following basic functions of the receiver to be controlled without the remote
control:
When in stand-by mode, a brief press on both keys switches the system back on.
If the receiver is in the Stand-by mode “energy saving”, it can only be restarted
by these keys both keys.
Another control element is the master switch on the front of the receiver. In position „0“ or „OFF“ the complete system is disconnected from the vehicle‘s power
supply. The switch must be in position „I“ or „ON“ for the system to operate.
Should the system no longer respond to commands, set the master switch to „0“
for approx. 10 seconds and then back to „I“ to reboot the operating software of the
receiver.
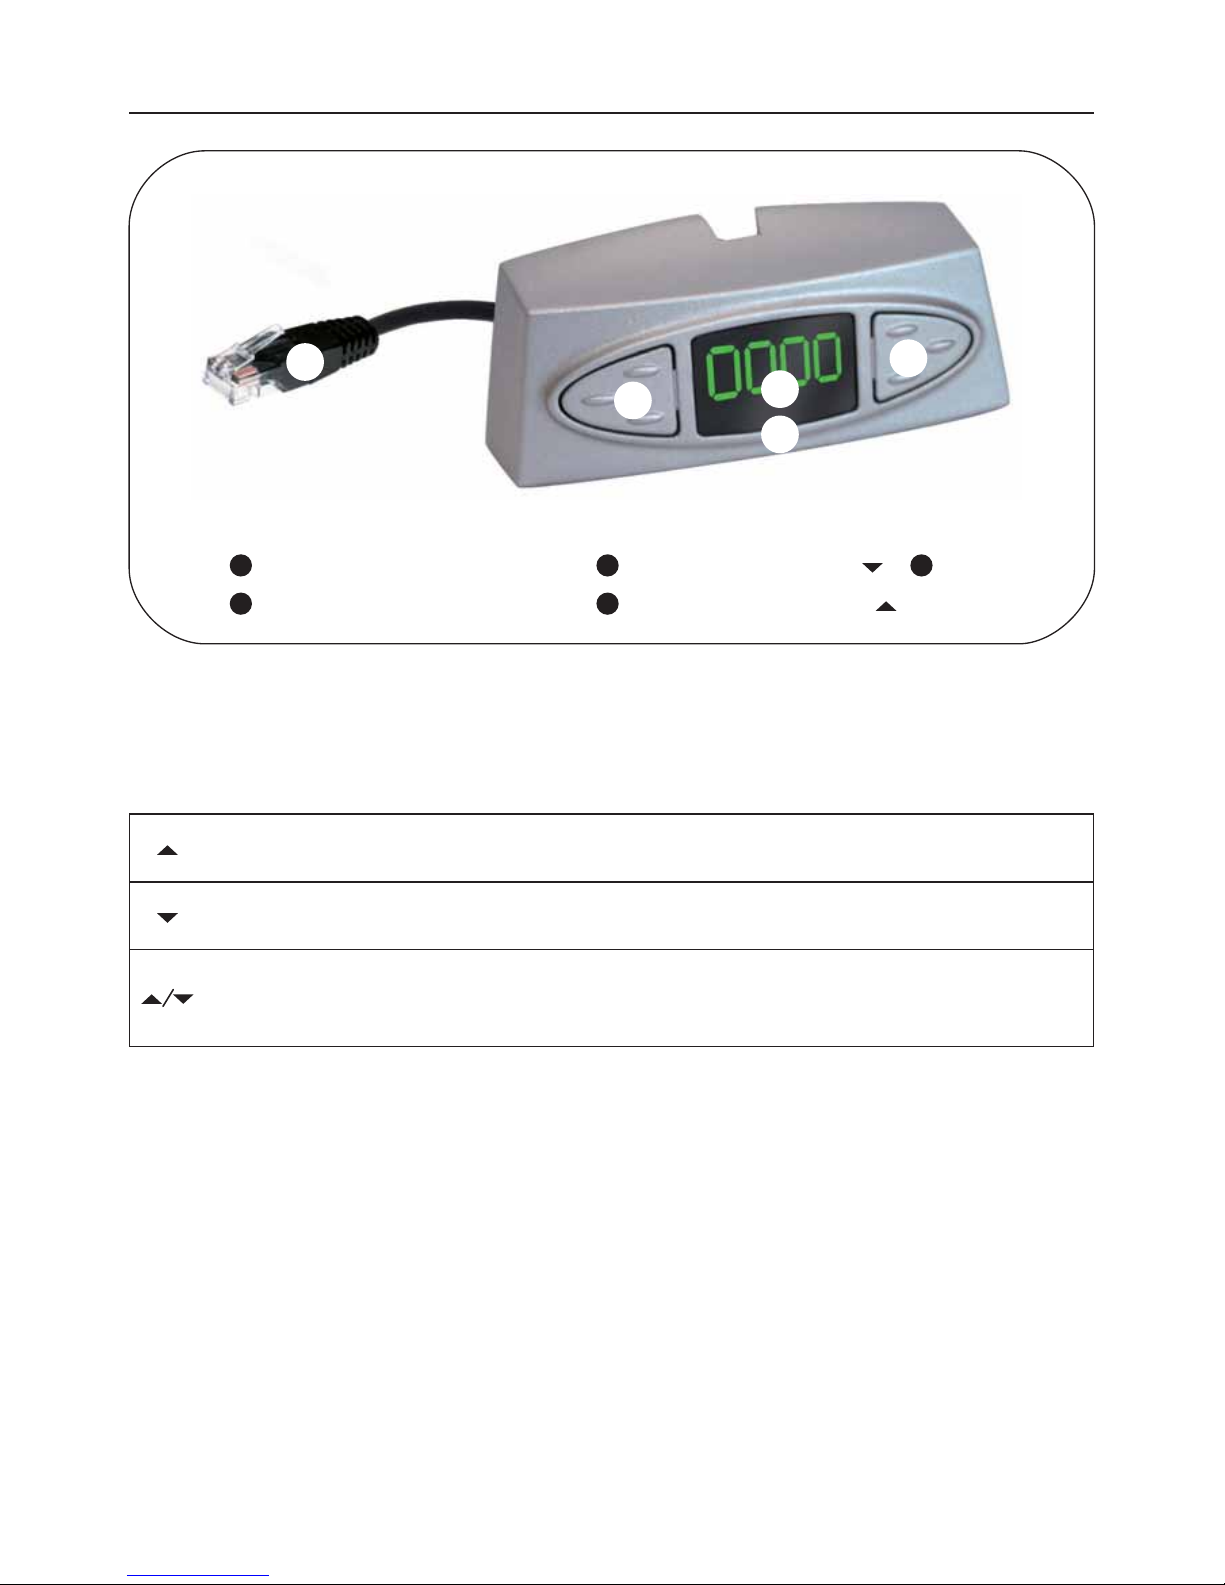
Change to the next channel in the channel list
Change to the previous channel in the channel list
Pressing both keys briefl y at the same time toggles between RADIO and TV mode.
Pressing both keys longer will cause the antenna to retract und the system to switch off.
This corresponds to pressing the red stand-by key (ON/OFF) on the remote control.
Satellite-mouse connector (RJ-45)
Remote-control receiver
Left satellite-mouse key
Right satellite-mouse key
Display
1
4
2
5
3
1
2
3
4
5

5
Fault code recognition
Malfunctions of the automatic antenna unit may occur e. g. when the antenna‘s
motion is obstructed by branches or snow. Such malfunctions are automatically
detected and will be displayed by the satellite mouse as fault codes.
E 07/ Short-circuit/open circuit in antenna cable or at antenna
:
E 09 Check the white antenna cable and the connectors at the receiver and
at the LNB.
E 10 The supply voltage drops considerably
:
Recharge the battery as soon as possible. Check the wiring and the
connection of the system to the voltage supply. .
E 16 Incorrect model confi guration. / Error occurred during model
confi guration
:
An update may have been performed incorrectly. The system must be
serviced by the manufacturer.
E 17 Re-Init activated.
:
Undefi ned memory content detected. The faults were corrected.
Switch the system off and back on. You may have to change some
settings (e. g. search satellite).
No No power supply:
Display Maybe the violet fuse at the receiver has a fault. Replace it by a new 3A
fuse. If the system is a 24V one, you may also use a 2A fuse.
Invert poles - power supply:
Please check the correct positioning of the electric + and - connections
and voltage. If this is left for too long, the receiver may be damaged. !!
External Sat Mouse Display not plugged:
Check if the RJ plugged in or snapped.

6
Stand-by Mode “low current”:
This is no error. Please restart the system by pressing both buttons of
the SAT Mouse.
The receiver is in failure mode:
Switch the receiver off by the main circuit breaker. Restart after 10
seconds. (Hardware reset).
Other power supply problems:
The voltage breaks down or malfunctions from the power supply.
(Perhaps charge controller or others.) Always connect the system
directly to the battery, never via charge controller or charge device).
A software update couldn’t be performed without faults:
Repeat the software update. Ask customer service for correct data.
Check the wiring.
A Hardware fault occurred:
The receiver indicated a hardware fault or hardware confi guration and
has to be inspected by customer service.

7
MENU
Receiver Menu Tree
access with button “MENU” on remote controll
Audio channel
Teletext
EPG
Favourite lists
Edit Channel
Edit Transponder
Main Menu
D5000 / Standby Mode / LED Display upside
Channel List
Edit settings
Extras
Timer
Encryption
Satellite update
Help
Edit Entries
Favorite lists
General options
System info
Reception
Factory defaults
Erase harddisk
Game
Search channels
Sort channels
OSD/EPG
Signal strengtht
Signal output
Stream info
Satellite sytems
Sleep timer
Saving settings
Calendar
Game Snake
Professional scan
Satellites
Transponder
Channels
8
Function Menu Level To confi gure/ to see
Audio channel 1. Menu Level Choice of Audio- and Video channels, if provided
by the channels: language, stereo
calender Main Menu / extra date
channels Main Menu/ channellist/
edit entries
Confi gurations, needed for reception of the single
channels, watch and modify
D 5000MA 1. Menu Level turning SAT Mouse Display / LED Display display
confi gure Stand-by Mode
Encryption Main Menu display State CI Module, confi guration Smart-
card
EPG 1. Menu Level show Programm info
Erase harddisk Main Menu / extra Optional, if receiver with hard disk
Factory defaults Main Menu / edit settings Back to Factory defaults
favourite lists Main Menu / channel list a favourite list is a choice of channels out of the
whole provided channel list.
Generals Main Menu / confi guration Time zone, summer time, language, search
encrypted channels
OSD/EPG Main Menu / edit settings Onscreen display – brightness, duration fl ash
professional scan Main Menu / channel list Only a certain transponder is scanned
reception Main Menu / confi guration 5V Antenna power supply, DVB-T (optional)
Satellite systems Main Menu / edit settings Use only with competence: limination of the
active channel list
Satellite update Main Menu Software update via satellite
Satellites Main Menu / channel list/
edit entries
Use only with competence: Orbital position of
satellite can be modifi ed
search channels Main Menu / channel list Channel search of selected satellites
Signal output Main Menu / edit settings Confi guration signal output
Signal strength Main Menu / extra See Signal strength
Sleeptimer Main Menu / extra Automatic switch off after x minutes
Sort channels Main Menu / channel list Choosing channels by O.K. change order
Use with remote control:
P+
P-
+
-
OK
MENU EXIT

9
Function Menu Level To confi gure/ to see
Stream Info Main Menu / extra display state of signalprocessing
System info Main Menu / extra display state of Software + System
Teletext 1. Menu Level display Teletext
Timer Main Menu Start of auto recording (optional HD)
Transponder Main Menu / channel list/
edit entries
Confi gurations, needed for reception of the
single transponder, watch and modify
Receiver lists
Satellite list (All noted satellites)
Pre-programmed – software updateable
z 001 Astra 19,2 °O
z 002 Hotbird 13 ° O
z 005 Sirius 5 ° O
z „ etc.“
Channel list (All receivable channels )
Channel number --> program, satellite, transponder
Pre-programmed – software updateable
z 0011 NDR
z 0012 RTL
z 0013 BBC
z „ etc.“
Favourite lists (Personnel choice of programs out of channel list)
Remote control position ‚ Channel number, programm, Partly pre-programmed –
individually confi gurable
z Remote control position 1
z Remote control position 2
z „ etc.“

10
Not visible in the receiver menu tree menu items
Confi guration only with competence
Service Menu:
Choose the menu item D5000‚ confi guration and press in the menu item LED Display turning the die MENU-button of the remote control to enter the service menu.
Sat - Maus Display:
The standard confi guration of the SAT – Mouse display is 4 digits
.
UHF Channel (TV OUT):
This item enables you to adapt the picture carrier frequency to your television set.
The range starts from C 21 (471.25 MHz) to C 69 (855.25 MHz). The standard confi guration is C 32 (559.25 MHz).
This confi guration does only matter if you use a „simple“ antenna cable.
Audio IF mode (TV OUT):
This item enables you to adapt the sound carrier frequency to your television set.
The possible confi gurations are B/G (5.5 MHz), I (6.0 MHz) or D/K (6.5 MHz). The
common confi guration is B/G (5.5 MHz).
This confi guration does only matter if you use a „simple“ antenna cable.

11
Favourite channels list
Your digital CI receiver provides 9 freely programmable favourite channels lists. A
favourite channels list is a selection of channels from the list of all channels.
When a favourite channels list is activated, only the channels maintained in this list
are available, all other channels will be suppressed.
The possibility of creating up to 9 different favourite channels lists allows different
system users to create personal lists without having to change the complete list of
channels.
Creating favourite channels lists:
The favourite channels lists are maintained under MENU , Main menu , Channel list
, Favourite lists. In this submenu, any channel from the complete channel list can be
allocated to any of the 9 favourite channels list. For operation, observe the help text
displayed at the bottom of the screen.
To exit the editing dialog of the favourite channels list, press EXIT two times. Chan-
ges must be confi rmed with OK.
Using favourite channels lists:
Start the selection menu of the favourite channels list by pressing the „0“ key. Use
P+/P- to select a list and confi rm your selection with OK. Now, the channel list only
provides the channels maintained in the selected favourite channels list. To regain
access to the full range of channels, press „0“ again and select <none>. As a shortcut, you may press „0“ „0“ on the remote to deactivate any active favourite list and
gain access to all channels in the list. Please note that you can directly select any
channel even if a favourite channels list is active.
The following Favorite lists are pre programmed:
z 1-5 free choice
z 6 Scandinavians Programs
z 7 English Programs
z 8 French Programs
z 9 Greek Programs
 Loading...