

Page 1

Page 2

i
Copyright Statement
How to access the Internet quickly using the Router?
Go
How to change your WiFi name and password?
Go
How to change your login password?
Go
How to enable/disable your WiFi according to schedule?
Go
How to extend your wireless range?
Go
How to control your Internet speed?
Go
How to prevent unknown device from connecting to your network?
Go
Copyright Statement
© 2015 Shenzhen Tenda Technology Co., Ltd. All rights reserved.
Tenda is a registered trademark legally held by Shenzhen Tenda Technology Co., Ltd. Other brand
and product names mentioned herein are trademarks or registered trademarks of their respective
holders. Copyright of the whole product as integration, including its accessories and software, belongs
to Shenzhen Tenda Technology Co., Ltd. No part of this publication can be reproduced, transmitted,
transcribed, stored in a retrieval system, or translated into any language in any form or by any means
without the prior written permission of Shenzhen Tenda Technology Co., Ltd.
Disclaimer
Pictures, images and product specifications herein are for references only. To improve internal design,
operational function, and/or reliability, Tenda reserves the right to make changes to the products
without obligation to notify any person or organization of such revisions or changes. Tenda does not
assume any liability that may occur due to the use or application of the product described herein.
Every effort has been made in the preparation of this document to ensure accuracy of the contents,
but all statements, information and recommendations in this document do not constitute the warranty
of any kind, express or implied.
Shortcut of Common Functions
Page 3

ii
Contents
Contents
I Get to Know Your Router ............................................................................................................... 1
1 Package Contents ........................................................................................................................... 1
2 LED Indicators .............................................................................................................................. 2
3 Buttons & Interfaces ...................................................................................................................... 3
4 Product Label ................................................................................................................................. 4
II Specify Your Internet Settings ...................................................................................................... 6
1 Prepare Your Router ...................................................................................................................... 6
2 Position Your Router ..................................................................................................................... 7
3 Connect Your Router ..................................................................................................................... 9
Connect your Router to the Internet .............................................................................................. 9
Connect a computer to the Router............................................................................................... 11
4 Access to the Router .................................................................................................................... 13
5 Specify the Internet Settings ........................................................................................................ 13
DHCP (Dynamic IP) ................................................................................................................... 14
PPPoE ......................................................................................................................................... 17
Static IP ....................................................................................................................................... 19
6 Join Your WiFi ............................................................................................................................. 23
Windows 8 .................................................................................................................................. 23
Windows 7 .................................................................................................................................. 24
iPad/iPhone ................................................................................................................................. 25
Android ....................................................................................................................................... 26
III Specify Advanced Settings ......................................................................................................... 29
1 Internet Status .............................................................................................................................. 29
Change the Internet Type ............................................................................................................ 29
Customize your WiFi name and password .................................................................................. 37
Manage the attached device ........................................................................................................ 38
2 Internet Settings ........................................................................................................................... 41
Select your connection type ........................................................................................................ 41
3 Wireless Settings ......................................................................................................................... 42
WiFi Name & Password .............................................................................................................. 42
WiFi Schedule ............................................................................................................................. 43
Wireless Repeating ...................................................................................................................... 44
Channel & Bandwidth ................................................................................................................. 53
Signal Conditioning .................................................................................................................... 54
WPS ............................................................................................................................................ 55
4 Guest Network ............................................................................................................................. 58
To create a guest network: .......................................................................................................... 58
5 Smart Power ................................................................................................................................ 59
To schedule the Router’s working time: ..................................................................................... 59
6 USB Application .......................................................................................................................... 61
File Share .................................................................................................................................... 61
Page 4

iii
Contents
DLNA.......................................................................................................................................... 67
Printer Service ............................................................................................................................. 78
7 VPN ............................................................................................................................................. 85
PPTP Server ................................................................................................................................ 85
PPTP/L2TP Client ....................................................................................................................... 92
8 Advanced Settings ....................................................................................................................... 95
Parental Controls ......................................................................................................................... 95
Bandwidth Control ...................................................................................................................... 98
Smart LED .................................................................................................................................. 99
Tenda Cloud .............................................................................................................................. 100
Remote WEB ............................................................................................................................ 102
DDNS ........................................................................................................................................ 104
Virtual Server ............................................................................................................................ 105
DMZ .......................................................................................................................................... 107
UPnP ......................................................................................................................................... 108
IPTV .......................................................................................................................................... 108
9 System Settings ......................................................................................................................... 111
System Status ............................................................................................................................ 111
Login Password ......................................................................................................................... 112
LAN IP Settings ........................................................................................................................ 113
WAN Settings ............................................................................................................................ 115
Reboot ....................................................................................................................................... 117
Firmware Upgrade .................................................................................................................... 117
Backup/Restore ......................................................................................................................... 118
Reset .......................................................................................................................................... 119
System Log ............................................................................................................................... 120
Auto Maintenance ..................................................................................................................... 121
Time Setup ................................................................................................................................ 121
IV Appendix .................................................................................................................................... 123
1 Channel ...................................................................................................................................... 123
2 Configure Your Computer ......................................................................................................... 124
Windows 8 ................................................................................................................................ 124
Windows 7 ................................................................................................................................ 126
Windows XP ............................................................................................................................. 127
3 FAQs .......................................................................................................................................... 129
4 Technical Support ...................................................................................................................... 130
5 Safety and Emission Statement ................................................................................................. 131
CE Mark Warning ..................................................................................................................... 131
FCC Statement .......................................................................................................................... 131
NOM ......................................................................................................................................... 132
Page 5

1
Get to Know Your Router
I Get to Know Your Router
Before you connect to your Router, take a moment to become familiar with the package contents,
product label, and the front and back panels. Pay particular attention to the LEDs on the front panel.
This section contains the following:
Package Contents
LED Indicators
Buttons & Interfaces
Product Label
1 Package Contents
Unpack the package. Your box should contain the following items:
AC1900 Smart Dual-Band Gigabit WiFi Router * 1
Power Adapter * 1
Removable Stand * 1
Ethernet Cable * 1
Install Guide * 1
* If any item is incorrect, missing or damaged, please keep the original package and contact the
vendor for replacement immediately.
Page 6

2
Get to Know Your Router
LED Indicator
Status
Description
Power
Solid
The power is ON.
Off
The power interface is not well-connected, or the Router malfunctions.
LAN 1/2/3
Solid
The LAN port is well connected.
Blinking
Data is being transmitted via interface.
Off
No connection is detected on the LAN port.
Internet
Solid
The Internet port is well-connected.
Blinking
Data is being transmitted via interface.
Off
No Ethernet cable is detected.
2.4GHz
Solid
2.4GHz WiFi is enabled.
Blinking
The Router is sending or receiving 2.4GHz WiFi data.
Off
2.4GHz WiFi is disabled.
2 LED Indicators
LED indicator description are shown as below after the device is powered on.
Page 7

3
Get to Know Your Router
5GHz
Solid
5GHz WiFi is enabled.
Blinking
The Router is sending or receiving 5GHz WiFi data.
Off
5GHz WiFi is disabled.
WPS
Solid
WPS is enabled.
Blinking
The Router is performing WPS negotiation to a client device, or transmitting
data.
Off
WPS is disabled.
USB
Solid
A USB device is well-connected, and ready.
Blinking
A USB device is plugged in, and is transmitting data.
Off
No USB device is detected, or USB device is ejected safely.
SYS
Blinking
The system is working fine.
Off
The system is malfunctioning.
3 Buttons & Interfaces
WPS: Press and hold it for about half a second and then release it to enable the WPS feature.
Within 2 minutes, enable the wireless device’s WPS feature to establish WPS connection.
WiFi: Press and then release it to enable/disable WiFi feature.
Page 8

4
Get to Know Your Router
1
3
2
RST: Press and hold it with some needle-like things for about 8 seconds until all the LEDs light
up once and then release it to reset the Router to factory default settings.
Power on/off: Push it to turn on/off the power supply.
Power: Power Connector. Insert the included power adapter into this connector.
USB3.0: USB3.0 port. USB3.0 can be used to connect to a USB storage drive, USB printer, and
etc.
Internet: WAN port. Connect an Ethernet cable from the Internet side to this port for Internet
access.
1/2: LAN port. Connect a network device (computer, XBOX, etc.) to this port.
3: Port 3 is used for IPTV only when IPTV feature is enabled; otherwise, it serves as a LAN port.
4 Product Label
*This label can be found on the rear panel of the Router.
1. Default Access: http://tendawifi.com
The default login domain name of the Router. Type the domain name in the address bar of a web
browser to log in to the Router’s Quick Setup Wizard or User Interface (Only when you access the
Router at the first time, or restore the Router to factory default, can the Router log in to the Router’s
Quick Setup Wizard).
The default login IP address is 192.168.0.1, you can also type 192.168.0.1 in the address bar of a
Page 9

5
Get to Know Your Router
web browser to log in to the Router’s Quick Setup Wizard or User Interface.
2. SSID/ Wireless Password: The default 2.4GHz wireless network name (WiFi Name) and the WiFi
password (security key). Your Router is preset with a unique WiFi Name and WiFi password.
3. Pin NO.: The required number when you establish a WPS connection.
Page 10

6
Specify Your Internet Settings
II Specify Your Internet Settings
This Chapter will instruct you to position, connect and configure your Router.
This section contains the following:
Prepare Your Router
Position Your Router
Connect Your Router
Access to the Router
Specify the Internet Settings
Join Your WiFi
1 Prepare Your Router
Mount the removable stand on the router.
For best wireless signal, orient the three antennas as shown in the figure below:
Page 11
7
Specify Your Internet Settings
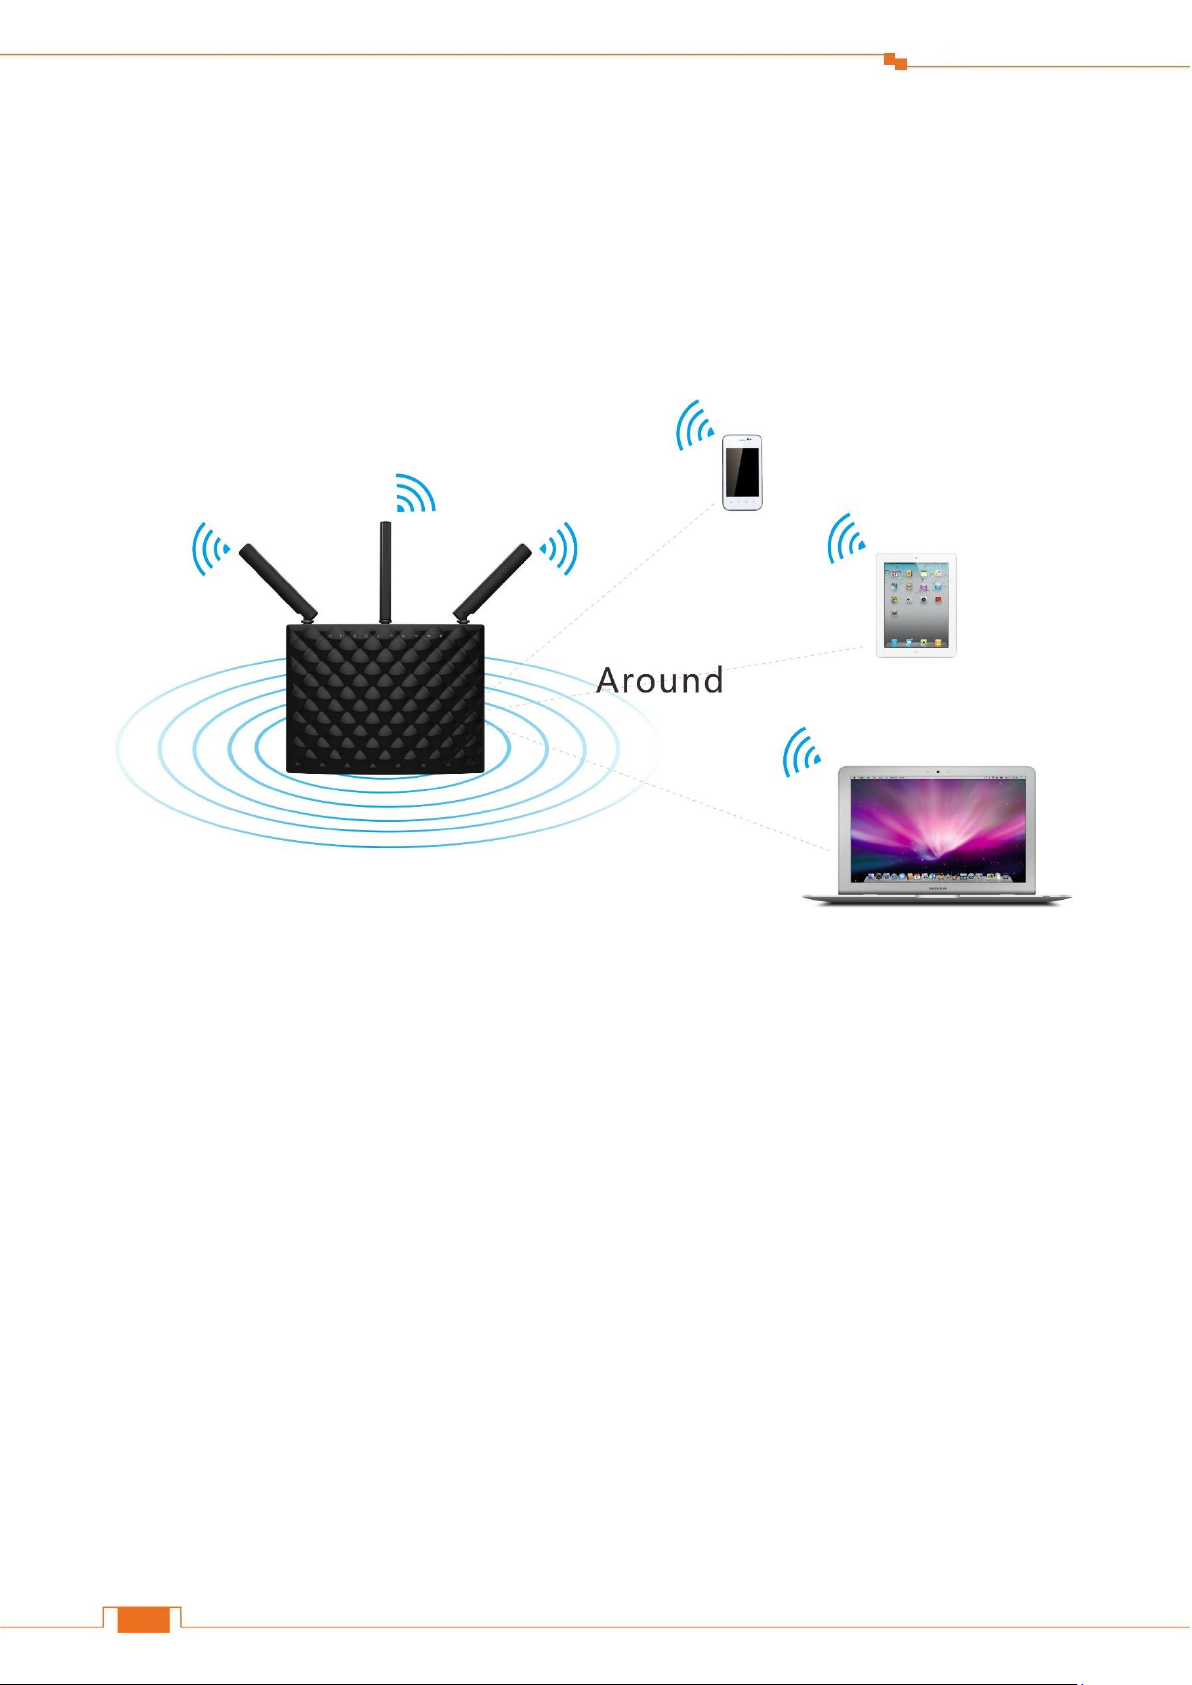
2 Position Your Router
The Router lets you access the Internet anywhere within the operating range of your wireless network.
However, the operating range of your wireless connection can vary significantly depending on the
physical placement of your Router.
And pay attention to the followings:
Place it around the central area which your laptops, smart phones and other devices usually
surround, and preferably within line of sight to your wireless devices.
Page 12
8
Specify Your Internet Settings
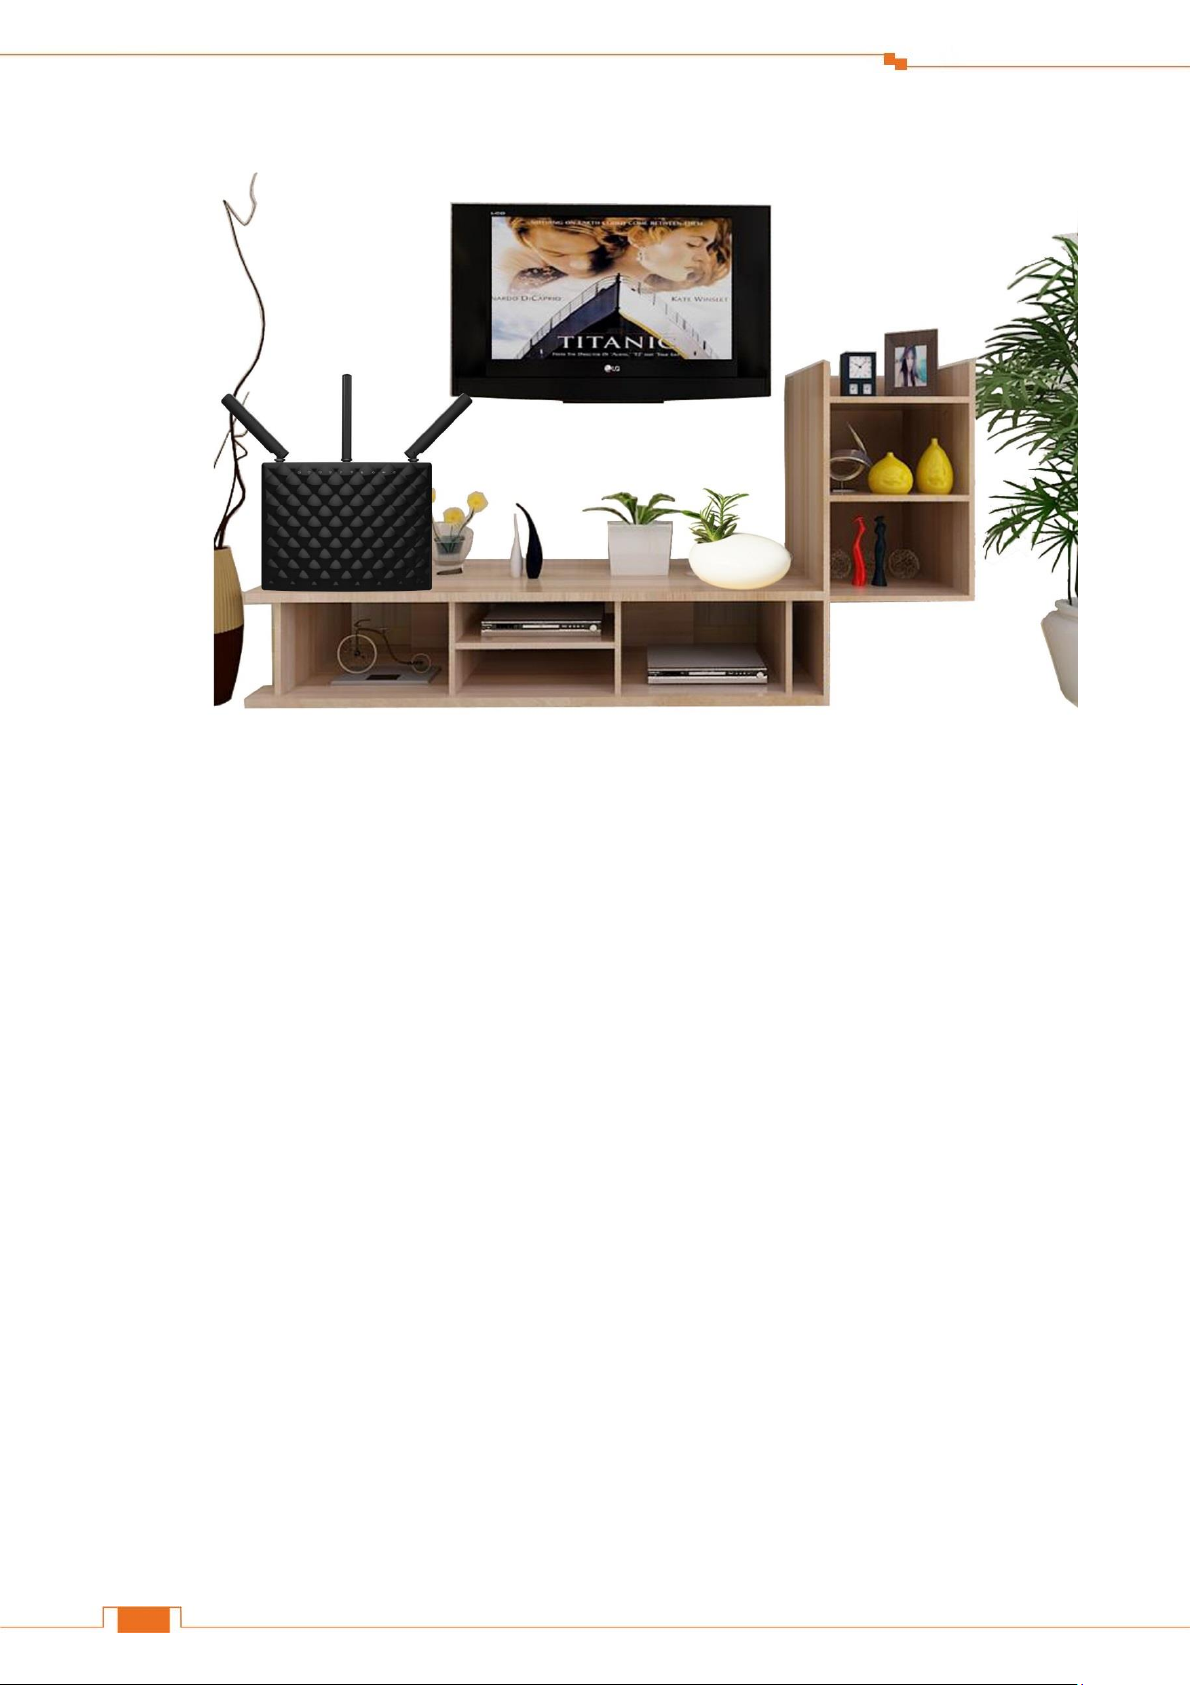
Put it on an elevated spot such as a high shelf, keeping the number of walls and ceilings to a
minimum between the Router and other clients such as computers and smart phones.
Page 13

9
Specify Your Internet Settings
Keep it away from electrical devices that are potential sources of interference, such as ceiling fans,
home security systems or microwaves.
Keep it away from any large metal surfaces, such as a solid metal door or aluminum studs.
Keep it away from other materials such as glass, insulated walls, fish tanks, mirrors, brick, and
concrete that may also affect your wireless signal.
3 Connect Your Router
Connect your Router to the Internet
Select type 1 if a modem is required for your Internet access, and select type 2 if you access the
Internet without a modem.
Type 1: Telephone Line/FTTH (Fiber To The Home)/Cable Access
Page 14

10
Specify Your Internet Settings
1
2 3 4
Connect the cable (prepared by yourself) from the Internet side to your modem.
Connect the modem to the Internet port of the Router.
Insert the power adapter to your Router’s Power port, and plug the other end to a power outlet.
Insert your modem’s power adapter to the power interface, and plug the other end to a power
outlet.
Type 2: Ethernet Cable Access
Page 15

11
Specify Your Internet Settings
1
2
Insert the Ethernet cable from the Internet side into the Internet port of the Router.
Insert the power adapter to your Router’s Power port, and plug the other end to a power outlet.
Connect a computer to the Router
Select wired or wireless connection as you like to connect your computer to the Router.
Wired Connection
Page 16

12
Specify Your Internet Settings
Connect an Ethernet cable (included in the packet) to the Ethernet port of your computer, and insert
the other end of the Ethernet cable into 1/2/3 port of the Router.
Wireless Connection
Procedure: On your computer with wireless adapter or other wireless devices, find and select the
Router’s WiFi name, enter the wireless password, and then join it.
Page 17

13
Specify Your Internet Settings
Tips
1. If you don’t know how to join your WiFi, please refer to 6 Join Your WiFi.
2. Either WiFi (SSID) or WiFi password is changed, devices are required to reconnect with WiFi
manually once again.
3. The devices can only access the Internet after you finish Internet configuration.
4 Access to the Router
Launch a web browser on your connected computer, type http://tendawifi.com or 192.168.0.1 in the
address bar, and tap Enter on the keyboard.
Tips
If the Router’s Quick Setup Wizard page doesn’t appear after the operation above when you access
the Router at the first time, please refer to the solutions in FAQ > Q1.
5 Specify the Internet Settings
After the steps above, you will log in to the Router’s Quick Setup Wizard if you access the Router at
Page 18

14
Specify Your Internet Settings
the first time or restore your Router to factory default. Click Start. The Router will detect your
connection type automatically.
Follow the corresponding steps to complete the Internet settings according to your Router’s
detection result.
DHCP (Dynamic IP) PPPoE Static IP
DHCP (Dynamic IP)
If the following page appears, it indicates that your connection type is dynamic IP (DHCP). No
parameter is required, just click Next to continue.
Page 19

15
Specify Your Internet Settings
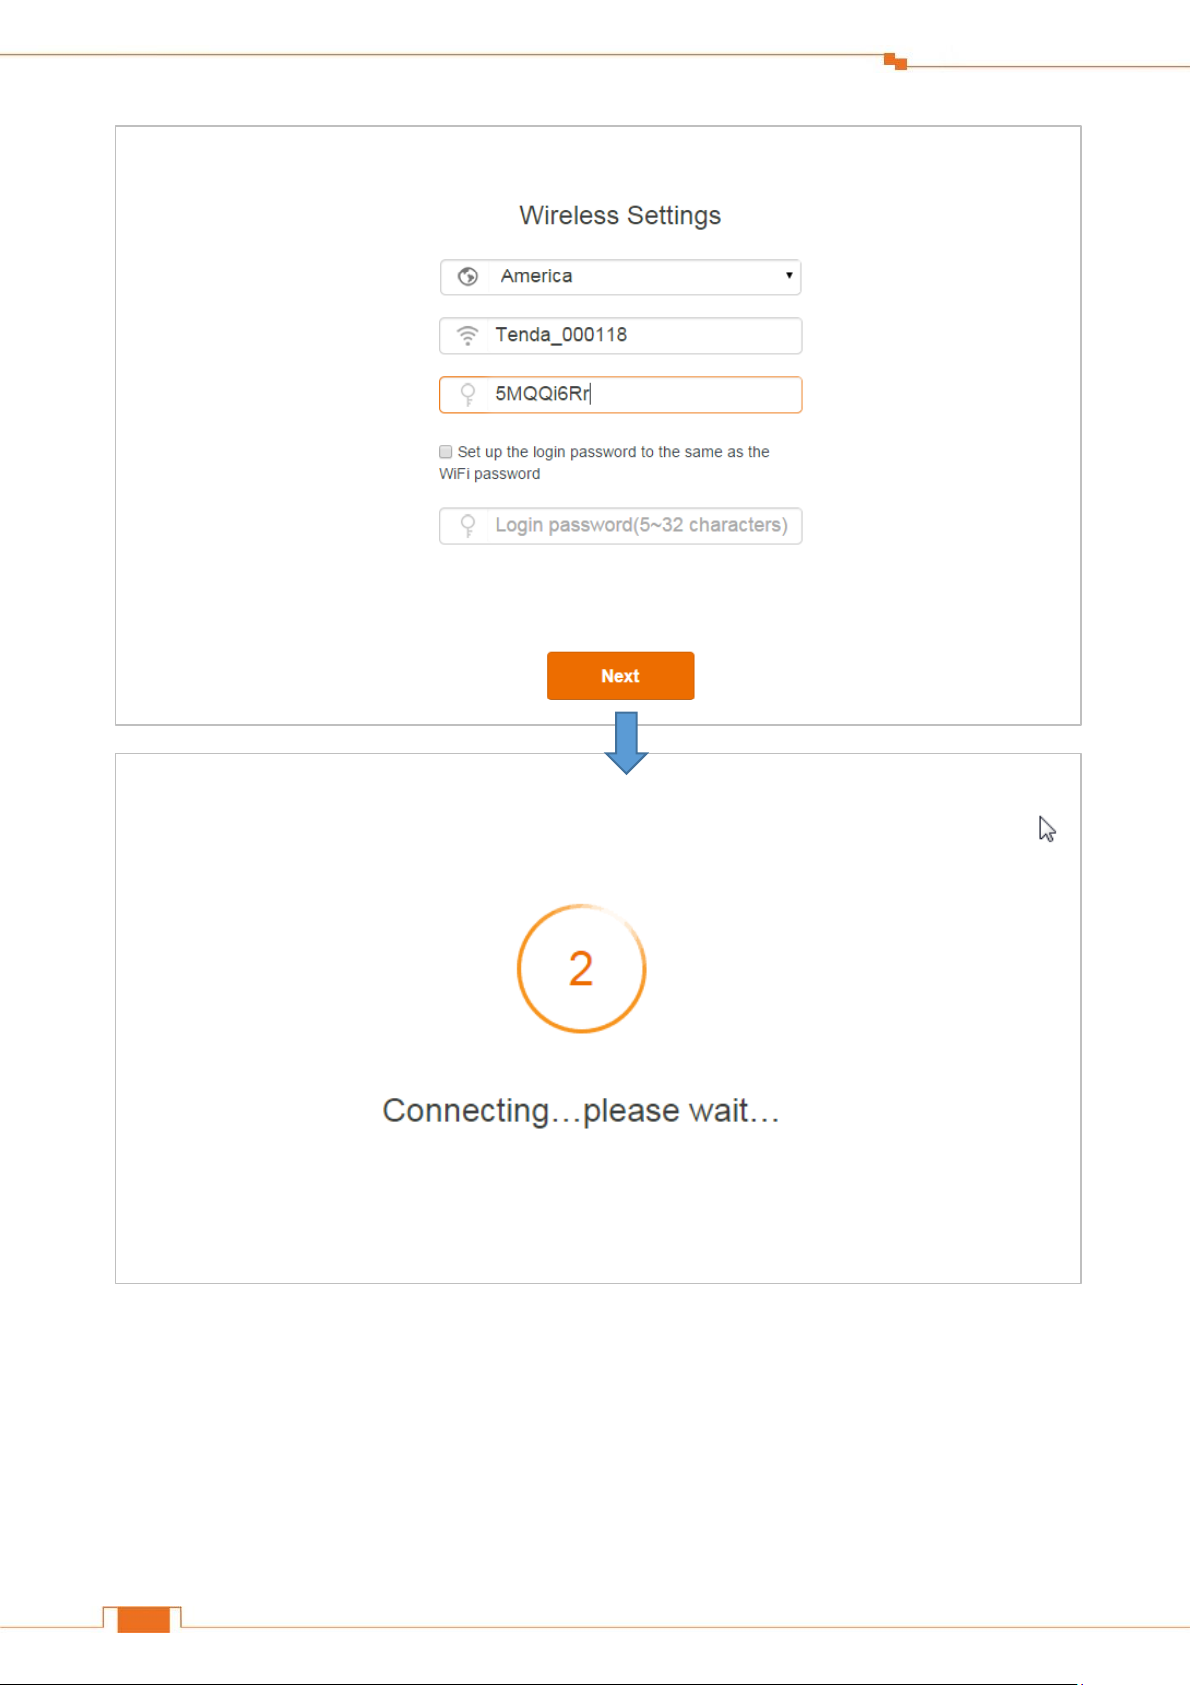
This page allows you to customize your WiFi name, WiFi password, and login password.
Customize your WiFi name, password, and login password, then click Next to continue.
Tips
1. Note that the WiFi password is used to connect to your wireless network (WiFi) while the login
password is for logging in to the Router’s User Interface. You can check the option in front of Set
up the login password to the same as the WiFi password to set them to the same. Or uncheck it
to set them to different ones respectively.
2. The Router provides two types of frequency bands: 2.4GHz and 5GHz. 5GHz WiFi name can
only be searched by 5GHz available wireless devices.
When you click the Next button in the page below, the 5GHz WiFi name will be changed into the
same one as that of 2.4GHz WiFi name except the suffix “_5G”, for example, the 2.4GHz WiFi
name is Tenda_000118, the 5GHz WiFi name will be Tenda_000118_5G.
Page 20

16
Specify Your Internet Settings
When the following page appears, it indicates that you can access the Internet now. If you want
to experience more features, click Advanced, type login password you set up just now, and click
Login to log in to the Router’s user Interface.
Page 21

17
Specify Your Internet Settings
PPPoE
Type the user name and password your Internet Service Provider provided, and click Next.
Customize your WiFi name, password, and login password, then click Next to continue.
Page 22

18
Specify Your Internet Settings
Tips
1. Note that the WiFi password is used to connect to your wireless network (WiFi) while the login
password is for logging in to the Router’s User Interface. You can check the option in front of Set
up the login password to the same as the WiFi password to set them to the same. Or uncheck it
to set them to different ones respectively.
2. The Router provides two types of frequency bands: 2.4GHz and 5GHz. 5GHz WiFi name can
only be searched by 5GHz available wireless devices.
When you click the Next button in the page below, the 5GHz WiFi name will be changed into the
same one as that of 2.4GHz WiFi name except the suffix “_5G”, for example, the 2.4GHz WiFi
name is Tenda_000118, the 5GHz WiFi name will be Tenda_000118_5G.
When the following page appears, it indicates that you can access the Internet now. If you want
to experience more features, click Advanced, type login password you set up just now, and
click Login to log in to the Router’s user Interface.
Page 23

19
Specify Your Internet Settings
Static IP
If the following page appears, it indicates that your connection type is Static IP. Click Next to
continue.
Page 24

20
Specify Your Internet Settings
Customize your WiFi name, password, and login password, then click Next to continue.
Tips
1. Note that the WiFi password is used to connect to your wireless network (WiFi) while the login
password is for logging in to the Router’s User Interface. You can check the option in front of Set
up the login password to the same as the WiFi password to set them to the same. Or uncheck it
to set them to different ones respectively.
2. The Router provides two types of frequency bands: 2.4GHz and 5GHz. 5GHz WiFi name can
only be searched by 5GHz available wireless devices.
When you click the Next button in the page below, the 5GHz WiFi name will be changed into the
same one as that of 2.4GHz WiFi name except the suffix “_5G”, for example, the 2.4GHz WiFi
name is Tenda_000118, the 5GHz WiFi name will be Tenda_000118_5G.
Page 25
21
Specify Your Internet Settings
Type the login password you set just now, and click Login.
Page 26

22
Specify Your Internet Settings
Click Internet Settings.
Page 27

23
Specify Your Internet Settings
1
2
1. Type the static IP, subnet mask, default gateway, and preferred DNS server provided by your
Internet Service Provider.
2. Click Connect.
Then you can enjoy your wired or wireless network, or go forward to customize more settings.
6 Join Your WiFi
This part instructs you how to connect to your wireless network via your notebook or other wireless
devices. We take Windows 8, Windows 7, iPad/iPhone, and Android as examples here. Choose the
corresponding configuration steps according to your needs.
Windows 8
Click the icon on the bottom right corner of your desktop.
Page 28

24
Specify Your Internet Settings
Tips
1. If you cannot find the icon , please move your cursor to the top right corner of your desktop,
select Settings > Control Panel > Network and Internet > Network and Sharing Center >
Change adapter settings, right click Wi-Fi and select Connect/Disconnect.
2. If you cannot find your WiFi from the list, ensure the Airplane Mode is not enabled on your
computer.
Select your WiFi name from the list, click Connect and then follow onscreen instructions.
Connected successfully.
Windows 7
Click the icon on the bottom right corner of your desktop. Select your WiFi name from the
list, click Connect and then follow onscreen instructions.
Page 29

25
Specify Your Internet Settings
Tips
If you cannot find the icon , please move your mouse to the bottom left corner of your desktop,
select Start > Control Panel > Network and Internet > Network and Sharing Center > Change
adapter settings, right click Wireless Network Connection and select Connect/Disconnect.
Connected successfully.
iPad/iPhone
Click on Settings. Click Wi-Fi, and choose your SSID.
Page 30

26
Specify Your Internet Settings
Enter your Wireless password, and click Join.
Android
Click on Settings. Click WLAN to enter your WLAN settings.
Page 31

27
Specify Your Internet Settings
Enable your WLAN, and select your SSID. Enter your wireless password, and click Connect.
When your WiFi is connected successfully, it will display Connected.
Page 32

28
Specify Your Internet Settings
Page 33

29
Specify Advanced Settings
III Specify Advanced Settings
This Chapter describes the advanced features of your Router, such as Guest Network, Smart Power,
USB Application, and etc.
Click the following icons (shortcut) to go to the corresponding features.
Internet Status Guest Network VPN
Internet Settings Smart Power Advanced Settings
Wireless Settings USB Application System Settings
1 Internet Status
In Internet Status page, you can check the Internet connection status, WiFi Info, and the connected
devices’ info. Meanwhile, this part offers three shortcuts for you to change the Internet type and
wireless settings, and allows you to manage the connected devices.
Change the Internet Type
If you don’t set up your Internet connection by following Quick Setup Wizard, or want to change
Page 34

30
Specify Advanced Settings
your Internet settings, you can refer to the following instructions.
Click the Internet Settings’ gray roundness in the page, and then the Internet Settings page will pop
up.
Tenda recommends: This field shows the Internet type the Router detected.
Select a connection type: There are three types of Internet connection on the Internet Settings page:
Page 35

31
Specify Advanced Settings
Connection Type
The parameters your Internet Service Provider provided for Internet access
PPPoE
User name and password.
DHCP (Dynamic IP)
Nothing.
Static IP
Static IP address, subnet mask, gateway, DNS server.
DHCP, Static IP, and PPPoE.
Refer to the instructions in the form below to select your Internet connection type.
Connection Status: It displays the current connection status.
DHCP
Select DHCP and click Connect.
Check the Connection Status. If it displays Connected! You can surf the Internet, it indicates you
can access the Internet now.
Page 36

32
Specify Advanced Settings
And the Internet Settings’ gray roundness will turn green.
Page 37

33
Specify Advanced Settings
PPPoE
1. Select PPPoE.
2. Enter the user name and password provided by your ISP in the ISP Username and ISP Password
field.
3. Click Connect.
Check the Connection Status. If it displays Connected! You can surf the Internet, it indicates you
can access the Internet now.
Page 38

34
Specify Advanced Settings
And the Internet Settings’ gray roundness will turn green.
Page 39

35
Specify Advanced Settings
Static IP
1. Select Static IP.
2. Enter the Static IP and other parameters provided by your ISP in the corresponding field.
3. Click Connect.
Check the Connection Status. If it displays Connected! You can surf the Internet, it indicates you
can access the Internet now.
Page 40

36
Specify Advanced Settings
And the Internet Settings’ gray roundness will turn green.
Page 41

37
Specify Advanced Settings
Customize your WiFi name and password
Click the Wireless Settings’ green roundness on the upper right, and then the Wireless Settings page
will pop up.
WiFi Name & WiFi Password
The Router provides two types of frequency bands: 2.4GHz and 5GHz. You can assign a unique name
containing up to 32 characters for WiFi name, and customize a password containing up to 63
Page 42

38
Specify Advanced Settings
characters for WiFi password. Note them down if you change the default one to avoid forgetting it.
Hide
If the Hide option is checked, the wireless clients cannot search the WiFi name of the Router. You
need know the WiFi name in advance and enter the WiFi name on each wireless client manually.
No Password
If the No Password option is checked, there is no password for your WiFi. The wireless client can
join in your wireless network by selecting your WiFi name without entering any password. It poses
safe risk to your network. So DO NOT check this option if unnecessary. But in some case, for example,
the Router is used in a small café shop, and you want to share the wireless network with your
customers without requiring a WiFi password. Then you can check the No password option.
Manage the attached device
Click Attached Devices, the attached devices’ info will pop up.
Page 43

39
Specify Advanced Settings
In this page, you can see the connected devices’ name, IP address, MAC address, and access type. It
allows you to edit the devices’ name, and add the unknown devices to blacklist.
Edit the devices’ name
Click the icon , input your custom name in the box, and click Save.
Add to the blacklist
If you find unknown devices in your network from the Attached Devices list, you can add it to
blacklist.
Click the corresponding Add button on the right, and it will be moved to blacklist.
Blacklist
The devices in blacklist cannot access the Internet via the Router.
Page 44

40
Specify Advanced Settings
Click Remove button to remove the corresponding device back to Attached Devices list.
Page 45

41
Specify Advanced Settings
2 Internet Settings
If you don’t set up your Internet connection by following Quick Setup Wizard, or want to change
your Internet settings, you can refer to this page.
Select your connection type
There are three types of Internet connection on the Internet Settings page: DHCP, PPPoE and Static
IP. Usually the Quick Setup Wizard will help you to finish Internet settings, and you can also
configure them by yourself.
Please refer to Change the Internet Type for details.
Page 46

42
Specify Advanced Settings
3 Wireless Settings
This section offers some features such as: WiFi Schedule, Wireless Repeating, and Signal
Conditioning, which helps you enjoy your WiFi.
Click the following icons (shortcut) to go to the corresponding features.
WiFi Name& Password WiFi Schedule Wireless Repeating Channel & Bandwidth
Signal Conditioning WPS
WiFi Name & Password
If you don’t customize your WiFi name and password in Internet Status page, you can set it up in
this part.
Click Wireless Settings > WiFi Name & Password.
Page 47

43
Specify Advanced Settings
WiFi Name & WiFi Password
The Router provides two types of frequency bands: 2.4GHz and 5GHz. You can assign a unique name
containing up to 32 characters for WiFi name, and customize a password containing up to 63
characters for WiFi password. Note them down if you change the default one avoid forgetting it.
Hide
If the Hide option is checked, the wireless clients cannot search the WiFi name of the Router. You
need know the WiFi name in advance and enter the WiFi name on each wireless client manually.
No Password
If the No Password option is checked, there is no password for your WiFi. The wireless device can
join in your wireless network by selecting your WiFi name without entering any password. It poses
safe risk to your network. So DO NOT check this option if unnecessary. But in some case, for example,
the Router is used in a small café shop, and you want to share the wireless network with your
customers without requiring a WiFi password. Then you can check the No password option.
WiFi Schedule
This feature allows you to specify WiFi ON/OFF time. For example, assume that you want to turn off
your WiFi during 23:00~06:00, from Monday to Friday, you can configure it as follows:
Click WiFi ON/OFF button to enable the feature.
Select 23:00 and 06:00 in the OFF Time field.
Page 48

44
Specify Advanced Settings
Wireless Router
Wireless Router in Bridge Mode
Select Specified Day, and check the options of the corresponding days, Mon. to Fri.
Click Save.
Wireless Repeating
The Router can act as a wireless repeater to extend wireless signal. The wireless repeater can have
wired and wireless clients, and access the Internet when it connects to the wireless base station. There
are two types of Wireless Repeating: WISP and Universal repeater. When the Router works under
WISP mode, it assigns IP addresses to its clients by itself. And the clients obtain IP addresses from
the base station the Router bridges when the Router works under Universal repeater mode. You can
select WISP OR Universal repeater to extend your wireless network.
You need two routers: one set up as a Router which acts as a base station, and the other set up as a
bridge.
Example
You can install the first Router (Router A) in a room that located on the first floor which has your
Internet connection, then set up the second Router (Router B) in bridge modes. And place the Router
B in a different room that has your home entertainment center which located on the second floor.
Connect the second Router (Router B) to your computer, game console, and etc.
Page 49

45
Specify Advanced Settings
WiFi Name (SSID)
WiFi Password
1
To set up a WISP bridge
Configure Router B:
Generally, you don’t need configure the Router A.
Make a note of the WiFi name and password of the Router A to which this Router (Router B) will
connected.
❷ Log in to the Router’s User Interface, and click Wireless Settings > Wireless Repeating. Click
the Wireless Repeating button to enable the feature.
Page 50

46
Specify Advanced Settings
2
3
4
Click Please select.
Find and click the WiFi name (wireless network name) of the base station (Router A).
Tips
Router B MUST contain the Router A’s channel, or the Router A’s WiFi name (wireless network
name) won’t be displayed in the Base Station WiFi Name list. For example, if the Router A’s channel
is 13, but Router B’s channel range is 1~11, you won’t find the Router A’s WiFi name in the Base
Station WiFi Name list. So you’d better select the correct country (the country where you use the
router), because the Channel range varies in different countries. Or you can set the Router A’s channel
to the one within Router B’s channel range.
Page 51

47
Specify Advanced Settings
5
6
7
Type the security key (WiFi password) of the base station (Router A).
Click Save.
Click OK on the prompt window.
Check whether the bridge is successful
After this Router (Router B) auto-reboots, log in to this Router’s (Router B’s) User Interface, and
click Internet Status. Check the connection status. If it displays Connected! You can surf the
Internet, it indicates that the bridge is successful.
Page 52

48
Specify Advanced Settings
If the bridge failed, try solving the problem as follows:
Verify that the Router A’s DHCP server is enabled. If not,
Enable the Router A’s DHCP sever.
Log in to Router B’s User Interface, click Internet Settings, select Static IP, type the required
info in the corresponding field, and click OK.
Note
1. The WiFi Schedule, WPS, Guest Network, Smart Power-save, and IPTV feature are not available
when the Router B is in WISP mode.
2. The configuration of the Router b’s wireless channel won’t take effect after bridge.
3. If Router B’s LAN IP address is the same as that of Router A, it will be changed into another one
automatically which is not in the same network segment as that of Router A after bridge. For example,
if the Router A and Router B’s LAN IP address are all 192.168.0.1, the Router B’s LAN IP address
will be changed into 192.168.1.1 after bridge. You can use 192.168.1.1 or the domain name
tendawifi.com to log in to the Router B’s User Interface.
Page 53

49
Specify Advanced Settings
WiFi Name (SSID)
WiFi Password
1
To set up a Universal Repeater bridge
Configure Router B:
Generally, you don’t need configure the Router A.
Note
The DHCP of Router A MUST be enabled.
❶ Make a note of the WiFi name and password of the Router A to which this Router (Router B) will
connected.
❷ Log in to the Router’s User Interface, and click Wireless Settings > Wireless Repeating. Click
the Wireless Repeating button to enable the feature.
Page 54

50
Specify Advanced Settings
2
345
Select Universal Repeater.
Click Please select.
Find and click the WiFi name (wireless network name) of the base station (Router A).
Page 55

51
Specify Advanced Settings
6
7
8
Tips
Router B MUST contain the Router A’s channel, or the Router A’s WiFi name (wireless network
name) won’t be displayed in the Base Station WiFi Name list. For example, if the Router A’s channel
is 13, but Router B’s channel range is 1~11, you won’t find the Router A’s WiFi name in the Base
Station WiFi Name list. So you’d better select the correct country (the country where you use the
router), because the Channel range varies in different countries. Or you can set the Router A’s channel
to the one within Router B’s channel range.
Type the security key (WiFi password) of the base station.
Click Save.
Click OK on the prompt windows.
Check whether the bridge is successful
After this Router (Router B) auto-reboots, log in to this Router’s (Router B’s) User Interface, and
Page 56

52
Specify Advanced Settings
click Internet Status. Check the connection status. If it displays Bridged successfully in Universal
Repeater mode, it indicates that the bridge is successful.
Note
1. You can only use the Router B’s domain name tendawifi.com to log in to the Router B’s User
Interface after bridge.
2. The Internet Setting, LAN IP Settings, WAN IP Settings, Parental Control, Bandwidth Control,
Remote WEB, DDNS, Virtual Server, UPnP, IPTV, Smart Power-save, Guest Network, WPS, and
WiFi Schedule feature are not available when the Router B is in Universal Repeater mode.
3. The configuration of Router B’s channel won’t take effect after bridge.
4. You cannot manage the attached device when the Router is in Universal Repeater mode.
Page 57

53
Specify Advanced Settings
Mode
Compatibility
Wireless Speed
11bgn mixed
Allows 802.11b, 802.11g, and 802.11n devices to join the network.
Up to 600Mbps
11bg mixed
Allows 802.11b and 802.11g devices to join the network.
Up to 54Mbps
11n only
Allows 802.11n devices to join the network.
Up to 54Mbps
Channel & Bandwidth
In this part, you can change the basic settings of your wireless network. There are two different
frequency bands: 2.4GHz and 5GHz.
1. In the Country | Region list, select your region.
2. This Router supports 3 network modes for 2.4GHz frequency band, and 2 modes for 5GHz
frequency band. To change the mode, select it from the Network Mode list. The default one is
optimum.
For 2.4GHz
Page 58

54
Specify Advanced Settings
Mode
Compatibility
Wireless Speed
11a/n/ac mixed
Allows 802.11a, 802.11n, and 802.11ac devices to join the network.
Up to 1300Mbps
11ac only
Allows 802.11a and 802.11c devices to join the network.
Up to 1300Mbps
For 5GHz
3. In different regions, the Channel range varies (Please refer to Appendix 1 for details). To change
the wireless channel, select a number from the Channel list. Do not change the channel unless you
experience interference (shown by lost wireless connection or slow data transfers). If this happens,
experiment with different channels to see which the best is. The recommended channel spacing
between adjacent access points is four channels (for example, use channel 1 and 5, or 6 and 10).
4. Select any of these channel bandwidths to accommodate higher transmission speeds:
40 (default): Select this bandwidth to maximize the wireless throughput. Keep the default unless
you encounter some issues with your wireless connection.
20: Select this bandwidth if you encounter some issues with your wireless connection.
When the 2.4GHz network mode is set to 11bg mixed, the 2.4GHz bandwidth can only be 20.
For 2.4GHz
20/40: Select this bandwidth to switch among 20 and 40 according to the situation of the current
wireless network.
For 5GHz
80 (default): Select this bandwidth to maximize the wireless throughput. Keep the default unless
you encounter some issues with your wireless connection.
20/40/80: Select this bandwidth to switch among 20, 40 and 80 according to the situation of the
current wireless network.
Signal Conditioning
There are three levels of signal strength for 2.4GHz and 5GHz frequency bands: low, medium, and
high (default). Select Low if it can satisfy you. Standard offers the widest coverage range while
High has strong capability of penetrating wall. Select one from them according to your needs.
Page 59

55
Specify Advanced Settings
WPS
WPS (Wi-Fi Protected Setup) allows you to join the WiFi network without typing the WiFi password.
You can establish a WPS connection to your wireless Router via WPS button, or PIN code.
To establish a WPS connection:
Log in to the Router’s User Interface, and click Wireless Settings > WPS, and click to enable the
WPS feature.
Use a WPS button
If your wireless client has a WPS push button, you can use it to connect to the Router.
❶ Press and hold the WPS button for about half a second on the Router and then release it, or click
the WPS button on the Webpage.
Page 60

56
Specify Advanced Settings
❷ Within 2 minutes, enable WPS feature on your wireless clients.
Take SAMSUNG cellphone as an example:
Enter the WLAN setting page, and tap the icon on the bottom left corner on the cellphone.
Then select WPS push button on the pop-up subpage. The cellphone’s WPS feature is enabled.
Page 61

57
Specify Advanced Settings
Then the Router will negotiate with the cellphone, and establish WPS connection.
Use a PIN code
If your wireless client requires a PIN code, enter the PIN code on the page into the required box.
Tips
The WiFi password will be changed into a random password with 63 characters if you use the PIN
code to establish a WPS connection.
Page 62

58
Specify Advanced Settings
4 Guest Network
A guest network allows visitors at your home to use a separate SSIDs or networks without providing
access to your private network. You can create a guest network for each wireless network: 2.4GHz
and 5GHz.
To create a guest network:
Log in to the Router’s User Interface, and click Guest Network.
1. Click Guest Network button to enable the feature.
2. Customize a WiFi Name for 2.4GHz network and 5GHz network respectively and a password for
both of them.
3. Click Save.
Page 63

59
Specify Advanced Settings
5 Smart Power
Smart power-save allows you to schedule your Router’s working time.
To schedule the Router’s working time:
Log in to the Router’s User Interface, and click Smart Power.
Page 64

60
Specify Advanced Settings
1. Click Smart Power-save button to enable the feature.
2. Select the Power-save time during which the Router will be in power-save mode.
3. Check or uncheck the option according to your needs. When the option is checked, the Router
will keep working unless the NAT data transmitting speed is less than 3KB/s for 30 minutes.
4. Click Save.
Tips
When the Router is in power-save mode, the Router’s LED indicators are off except Power LED
indicator. And the wireless feature and the USB feature are not available.
Page 65

61
Specify Advanced Settings
FTP Server:
6 USB Application
The USB application provides File Share, DLAN, and Printer Service submenus. Click the
following icons to skip to the corresponding features.
File Share DLNA Printer Service
File Share
The Router allows you to share files on a connected USB device from the local clients, or devices
from the Internet.
ftp://LAN IP address:port number
Or ftp://tendawifi.com
Samba Server:
\\LAN IP address
Or \\tendawifi.com 访问 Samba
To connect a USB drive
Page 66

62
Specify Advanced Settings
sda
When a USB storage drive is attached, the Router will detect it automatically
and this place will display the free space of it. Click Safely Eject button on the
right after use.
Guest Account &
Password
The File Share includes FTP server and Samba Server. Both of the servers use the
same account and password. The default account is admin which isn’t editable.
But you can specify a password to access the servers.
LAN devices visit
The addresses displayed here will be changed with the LAN address.
On LAN computer, visit the FTP server using ftp://xxx.xxx.xxx.xxx:xx; visit the
Samba server using \\xxx.xxx.xxx.xxx.
WAN devices visit
The address displayed here will be changed with the WAN address.
Insert your USB storage drive into the USB3.0 port on the back panel of the Router.
Note
1. DO NOT remove the USB drive when it is working to avoid data loss or other damages.
2. DO NOT concurrently connect two or more external hard drives to the router’s USB3.0 port with
the help of a USB hub to avoid possible damages to the router.
To access the USB drive
Log in to the Router’s User Interface, and click USB Application > File Share.
Page Info
Page 67

63
Specify Advanced Settings
On WAN computer, visit the FTP server using the address displayed here.
Allow visit from the
Internet
If you want to allow the devices from the Internet to visit your USB storage
drive, you need enable this button.
To access the USB storage drive (FTP server) from your LAN computer:
1. Type the address ftp://xxx.xxx.xxx.xxx:xx (ftp://192.168.0.1:21 here) in the address bar of a web
browser. Tap Enter on the keyboard.
2. Type the default User name (Guest account) and the Password you just specified and click Log
In.
Then you can share the files on the USB storage drive.
Page 68

64
Specify Advanced Settings
To access the USB storage drive (FTP server) from WAN computer:
Configure your Router:
To allow the devices from the Internet to visit your USB storage drive, you need verify that the
Allow visit from the Internet button is enabled.
1. Log in to the Router’s User Interface, and click USB Application > File Share.
2. Click Allow visit from the Internet button.
3. Click Save.
Page 69

65
Specify Advanced Settings
Visit the USB storage drive (FTP server) from the Internet:
1. Type the address ftp://xxx.xxx.xxx.xxx:xx (xxx.xxx.xxx.xxx MUST be public IP address,
ftp://14.153.220.141:21 here) in the address bar of a web browser on a computer from the Internet.
Tap Enter on the keyboard.
2. Type the default User name (Guest account) and the Password you just specified and click Log
In.
Then you can share the files on the USB storage drive.
Page 70

66
Specify Advanced Settings
To access the USB storage drive (Samba server) from your LAN computer:
1. Open a folder, type \\xxx.xxx.xxx.xxx in the address bar (\\192.168.0.1 here), and click .
2. Type the default User name (Guest account) and the Password you just specified and click OK.
Page 71

67
Specify Advanced Settings
Then you can share the files on the USB storage drive.
DLNA
When DLNA feature is enabled, the Router acts as a DLNA server which allows devices (such as
USB storage drive, smart devices, and etc. without DLNA server) to share the media files from each
other.
Page 72

68
Specify Advanced Settings
With DLNA enabled
Devices support DLNA feature
Share pictures, video, and audio
Example
You want to play the videos (in the USB storage drive) on your computer (Windows 8), you can do
as follows:
Insert your USB storage drive into the USB port of the Router.
To enable DLNA server of your computer:
Right-click icon on the bottom right corner of the desktop on your computer, and click
Open Network and Sharing Center.
❷ Click Change advanced sharing settings on the left side.
Page 73

69
Specify Advanced Settings
Click All Networks, find and click Choose media options…under Media streaming.
Click Turn on media streaming button.
Page 74

70
Specify Advanced Settings
If the following page appears, click Windows services administrative tool. If not, skip to step
.
Page 75

71
Specify Advanced Settings
Find and double-click Windows Media Player Network Sharing Service.
Change the Startup type to Automatic, amd click OK.
Page 76

72
Specify Advanced Settings
As the steps above, find and change the Startup type of UPnP Device Host and SSDP
Disovery to Automatic respectively.
Page 77

73
Specify Advanced Settings
11
Then go back to Media streaming options page, and click Turn on media streaming.
The following page will appear. Customize a name in Name your media library, and click
Next.
Choose files and devices you want to share, and set Permissions level to Shared.
Page 78

74
Specify Advanced Settings
12
For security purpose, a password will be created. Use this password to add other computers to
your homegroup. Then you can share files between these computers. Click Finish.
Page 79

75
Specify Advanced Settings
To enable DLNA feature of the Router:
Log in to the Router’s User Interface, and click USB Application > DLNA.
1. Click DLNA Service Button to enable the feature.
2. Customize a device name (default: TendaDLNA).
3. Click Save.
Tips
Page 80

76
Specify Advanced Settings
1. After the DLNA enabled, you also need enable DLNA feature in other devices to establish
connection. For details, please refer to the user guide of those devices.
2. If the newly-added resources don’t update automatically when the DLNA server is running, try to
re-enable the DLNA feature.
To play videos:
There are two methods for you to play the videos. Take windows 8 OS as an example.
Method 1:
❶ Double-click the Computer icon on your desktop, you’ll see the TendaDLNA icon under
Network Location.
❷ Double-click the icon, you can see the resources in the USB storage drive. Then you can select
the items you want to play.
Page 81

77
Specify Advanced Settings
Method 2:
❶ Search Windows Media Player on your computer, and click to enter it.
❷ You’ll see the TendaDLNA under Other Libraries. Then you can select the items you want to
play.
Page 82

78
Specify Advanced Settings
Tips
If the TendaDLNA doesn’t appear, please try re-enabling DLNA feature, and refresh the Other
Libraries.
Printer Service
Printer Service allows you to connect a USB printer to the Router’s USB port, and the attached
computers installed with USB printer driver software can use the printer to print and scan files.
Page 83

79
Specify Advanced Settings
USB Printer
Attached devices installed with USB
printer driver software can use the
USB printer.
Before you use a USB printer, you need download a USB Printer Controller for USB printer from
http://down.tendacn.com/uploadfile/2015/AC15/AC15_Print_Control_Software.rar
Note
1. Verify that the printer is working normally when it is connected to your computer. If not, please
refer to the User Guide of the printer.
2. Note that most printers need to install driver software.
To install the USB Printer Controller:
❶ Double-click the setup icon if you download and unzip the USB Printer Controller
successfully.
❷ Select English and click OK.
Page 84

80
Specify Advanced Settings
Then the USB Printer Controller will start installing.
Keep click next until the following page appears, then click Install.
Click Finish when the following page appears.
Page 85

81
Specify Advanced Settings
The shortcut icon of the USB Printer Controller will appear on your desktop.
To enable Printer Service feature:
Log in to the Router’s User Interface, and click USB Application > Printer Service.
❶ Click Printer Service button.
❷ Click Save.
To print files:
Page 86

82
Specify Advanced Settings
❶ Connect the USB printer to the Router’s USB port.
❷ Double-click the shortcut icon of the USB Printer Controller.
The USB Printer Controller will detect the printer automatically if the Printer Service feature is
enabled.
Click the Printer, and then Auto-Connect Printer > Set Auto-Connect Printer.
Select your printer and click Apply.
Page 87

83
Specify Advanced Settings
When the page below appear, it indicates that the USB printer is connected to the Router
successfully.
Then you can print the files!
Page 88

84
Specify Advanced Settings
Tips
1. The USB Printer Controller is compatible with most printers on the market, but if your printer
cannot be detected by the USB Printer Controller, you can contact our technical support for help.
2. When you select Auto-Connect Printer, the USB printer can be used by several computers
simultaneously; but when Connect is selected, the USB printer can only be used by a computer at
one time.
Page 89

85
Specify Advanced Settings
7 VPN
Virtual private network (VPN) provides a secure communication to a remote computer or remote
network using a public network such as the Internet. This Router can perform as a PPTP Server or
PPTP/L2TP Client here.
Click the following icons to go to the corresponding features.
PPTP Server PPTP/L2TP Client
PPTP Server
When the Router acts as a PPTP Server, it provides a secure virtual tunnel between your home
network and a remote computer.
Example
You have a FTP server (LAN IP: 192.168.0.154) in your home network. If you want to visit the
resources on the FTP server from the company’s computer, you can refer to the following procedures.
Configuration
To set up a PPTP Server:
Log in to the Router’s User Interface, and click VPN > PPTP Server.
Page 90

86
Specify Advanced Settings
1
2 3 4
5
❶ Click PPTP Server button to enable the feature.
❷ Type an IP range for PPTP clients which should not overlap with the IP address of the PPTP
server.
❸ Enable MPPE Encryption, and select an encryption bits, 40 or 128 according to your needs.
❹ Specify a username and password for your PPTP server, and click Add.
Click Save.
To establish a VPN connection:
To access the PPTP server, you need establish a VPN connection on your computer in the company.
Verify that your computer is connected to the Internet successfully.
❶ Click the icon on the bottom right corner of your desktop. Click Open Network and
Sharing Center.
Page 91

87
Specify Advanced Settings
❷ Click Set up a new connection or network > Connect to a workplace > Use my Internet
connection (VPN).
Page 92

88
Specify Advanced Settings
❸ Type the public WAN IP of the PPTP server (such as: 183.37.211.8 here) in the Internet
address field, and click Next.
❹ Type the user name and password of the PPTP server, click Create, and then click Close.
Page 93

89
Specify Advanced Settings
If you fail to establish a VPN connection, try following steps to solve the issue:
❶ Click the icon on the bottom right corner of your desktop, and then right-click VPN
Connection.
Page 94

90
Specify Advanced Settings
❷ Click Properties > Security, set the Type of VPN to Point to Point Tunneling Protocol
(PPTP), set Data encryption to Optional encryption (connect even if no encryption), and click
OK.
❸ Go bake to VPN connection page, click Connect, type the user name and password of the PPTP
Page 95

91
Specify Advanced Settings
server in the pop-up window again, and click Connect.
When the VPN Connection displays Connected, it indicates that you access the PPTP server
successfully.
To access the FTP server:
Launch a web browser, type the address of the FTP server (ftp://FTP server IP address: port
Page 96

92
Specify Advanced Settings
PPTP/L2TP Server
PPTP/L2TP Client enabled
number, such as ftp://192.168.0.154:21) in the address bar, and tap Enter on the keyboard.
Then you can visit the resources on the FTP server.
PPTP/L2TP Client
When acts as a PPTP/L2TP client, the Router helps you to establish a secure communication between
the attached devices and the PPTP/L2TP server provided by individual or Internet Service Provider.
Then all the devices connected to the router can access the exclusive resources network via the
PPTP/L2TP server.
Page 97

93
Specify Advanced Settings
1 2 3
4
5
To set up PPTP Client:
Log in to the Router’s User Interface, and click VPN > PPTP/L2TP Client.
❶ Click PPTP/L2TP Client button to enable the feature.
❷ Select PPTP.
❸ Click to enable MPPE Encryption, and select an encryption bits, 40 or 128 according to your
needs.
❹ Type the server IP/DNS, username, and password of the PPTP server.
Click Save.
To set up L2TP Client:
Log in to the Router’s User Interface, and click VPN > PPTP/L2TP Client.
Page 98

94
Specify Advanced Settings
1
2 3 4
❶ Click PPTP/L2TP Client button to enable the feature.
❷ Select L2TP.
❸ Type the Server IP/DNS, username, and password of the L2TP server.
❹ Click Save.
Page 99

95
Specify Advanced Settings
8 Advanced Settings
This section will explain more features such as: Parental Control, Bandwidth Control, Smart LED,
and etc.
Click the following icons (shortcut) to go to the corresponding features.
Parental Control Bandwidth Control Smart LED Tenda Cloud
Remote WEB DDNS Virtual Server DMZ
UPnP IPTV
Parental Controls
With Parental Controls, you can only allow your teenager to visit some specified sites and restrict
access by time.
To control access to the Internet:
Log in to the Router’s User Interface, and click Advanced Settings > Parental Controls.
❶ Click the selected device’s Action button on the right.
Page 100

96
Specify Advanced Settings
1
2
3
❷ You can customize a device name for easy recognition, and click Complete.
Click Parental Control button to enable the feature.
Select the time you allow your teenager to access the Internet, for example: 07:00pm~10:00pm.
Select Specified Days.
Select the days you apply the rule, for example: Monday to Friday.
Click Save.
 Loading...