

Tempur-Pedic TEMPUR-Choice Supreme, TEMPUR-Choice Luxe User Manual

TEMPUR-Choice
User Guide
™
TEMPUR-Choice™ Supreme
Patents pending
© 2013 Tempur-Pedic Management, LLC. All Rights Reserved.
TEMPUR-Choice™ Luxe
Rev 1 0313

TEMPUR-Choice
™
Contents
DELIVERY AND SETUP PROCEDURE ................................................................................ 3
INSTALLATION OVERVIEW ............................................................................................... 5
INSTALLATION ................................................................................................................. 6
OPERATIONS .................................................................................................................... 9
SAFETY PRECAUTIONS .................................................................................................. 12
COMMONLY ASKED QUESTIONS AND ANSWERS ........................................................... 14
TROUBLESHOOTING ...................................................................................................... 15
Delivery and Setup Procedure
Delivery and Setup Procedure
STEP 1
Remove your existing mattress (if you have not yet
completed this step). Decide where you want to put
the new TEMPUR-Choice™ mattress.
STEP 2
Make sure there is an electrical outlet close to
where the mattress will be located for use with
the Pump Assembly.
STEP 3
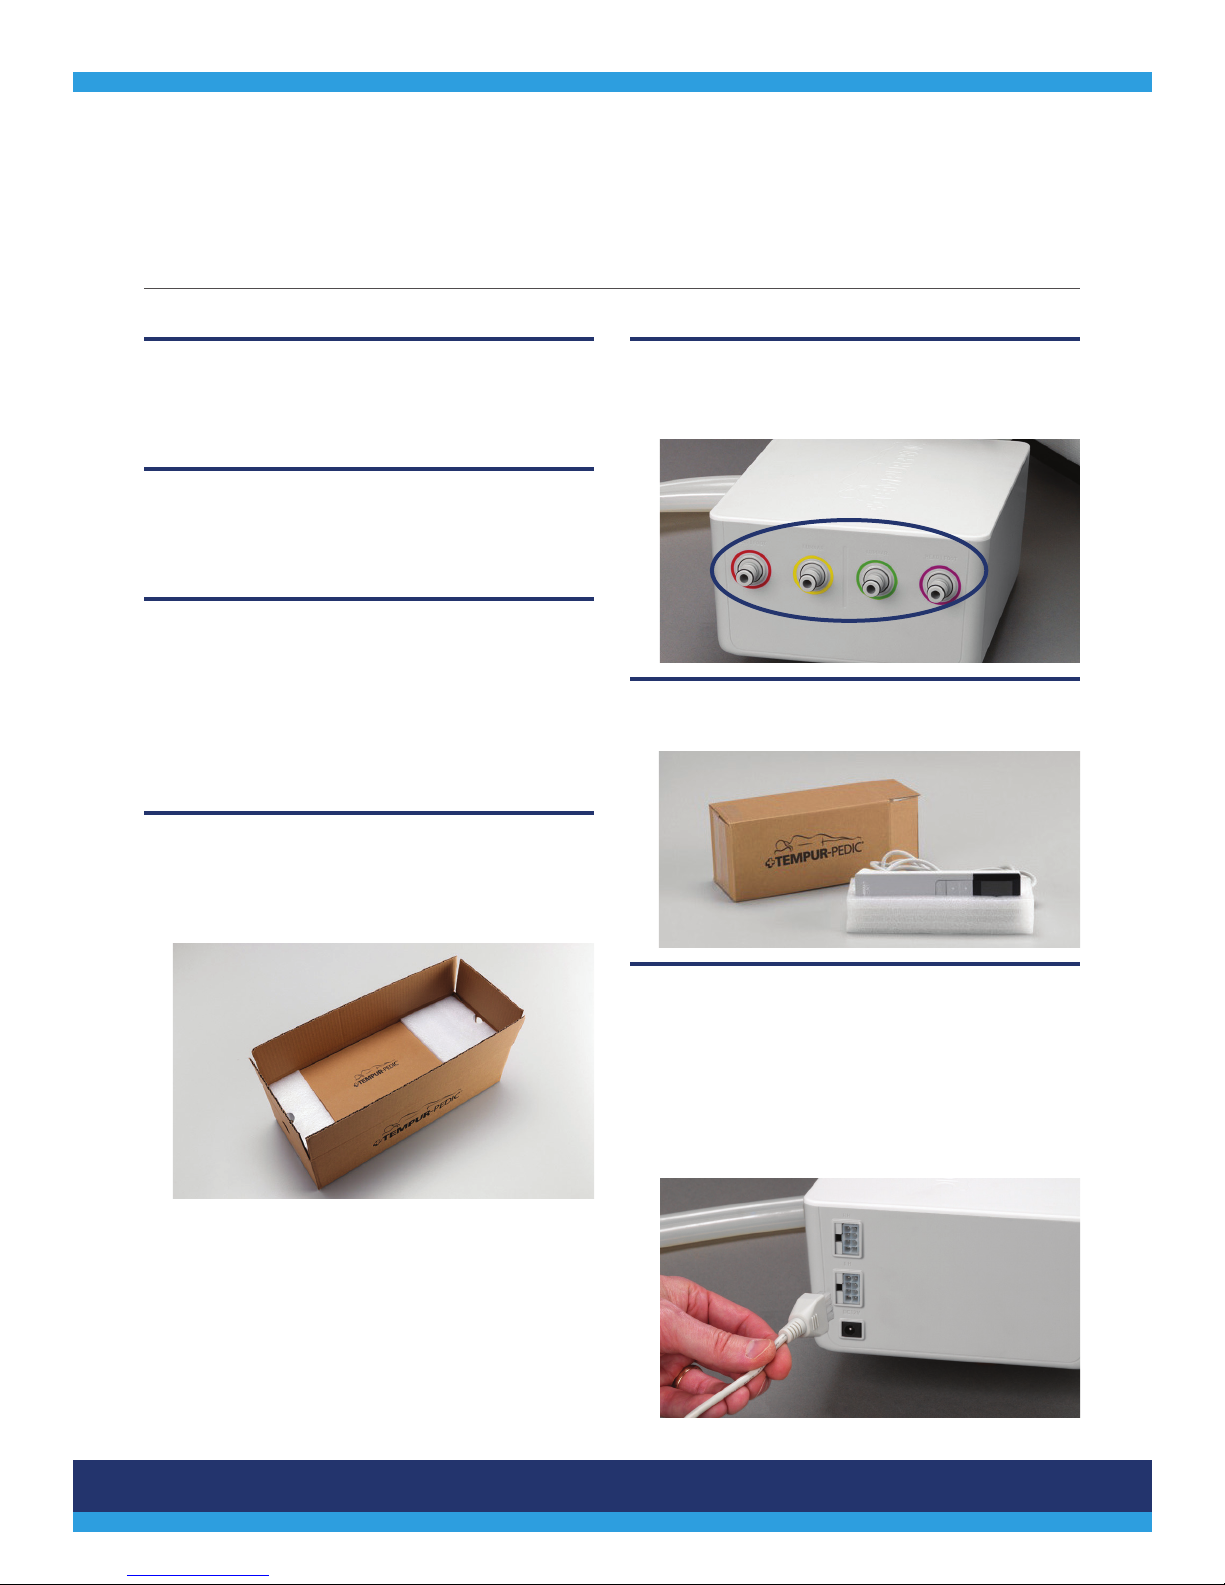
Open the carton to reveal the TEMPUR-Choice™
mattress. Additionally, there are boxed accessories
included in the mattress carton. If you purchased a
Tempur-Pedic foundation or TEMPUR-Ergo™ Premier
adjustable base, the unit is shipped in a
separate carton.
STEP 4
Open and check your TEMPUR-Choice™
accessories carton to verify the following items are
included. Remove these items and set aside.
STEP 5
Locate the Pump Assembly. Remove the caps from
the air nozzles on the front of the Pump Assembly.
STEP 6
Unbox the Remote Controls.
• Pump Assembly
• Two remote controls (only one if you
purchased the TEMPUR-Choice™ Twin Long
mattress)
• Power cord and power supply
CUSTOMER SERVICE: 1–800–821–6621
STEP 7
Connect one Remote Control to the LH (left hand)
input in the rear of the Pump Assembly. This
becomes the remote for the left side of the bed.
Connect the other Remote Control to the RH (right
hand) input in the rear of the Pump Assembly. This
becomes the remote for the right side of the bed.
3
TEMPUR-Choice
™
NOTE: If you have a TEMPUR-Choice™
Twin Long mattress, it has only one remote
control. Connect the remote control to the
LH (left hand) input in the rear of the Pump
Assembly to operate properly with the nozzles.
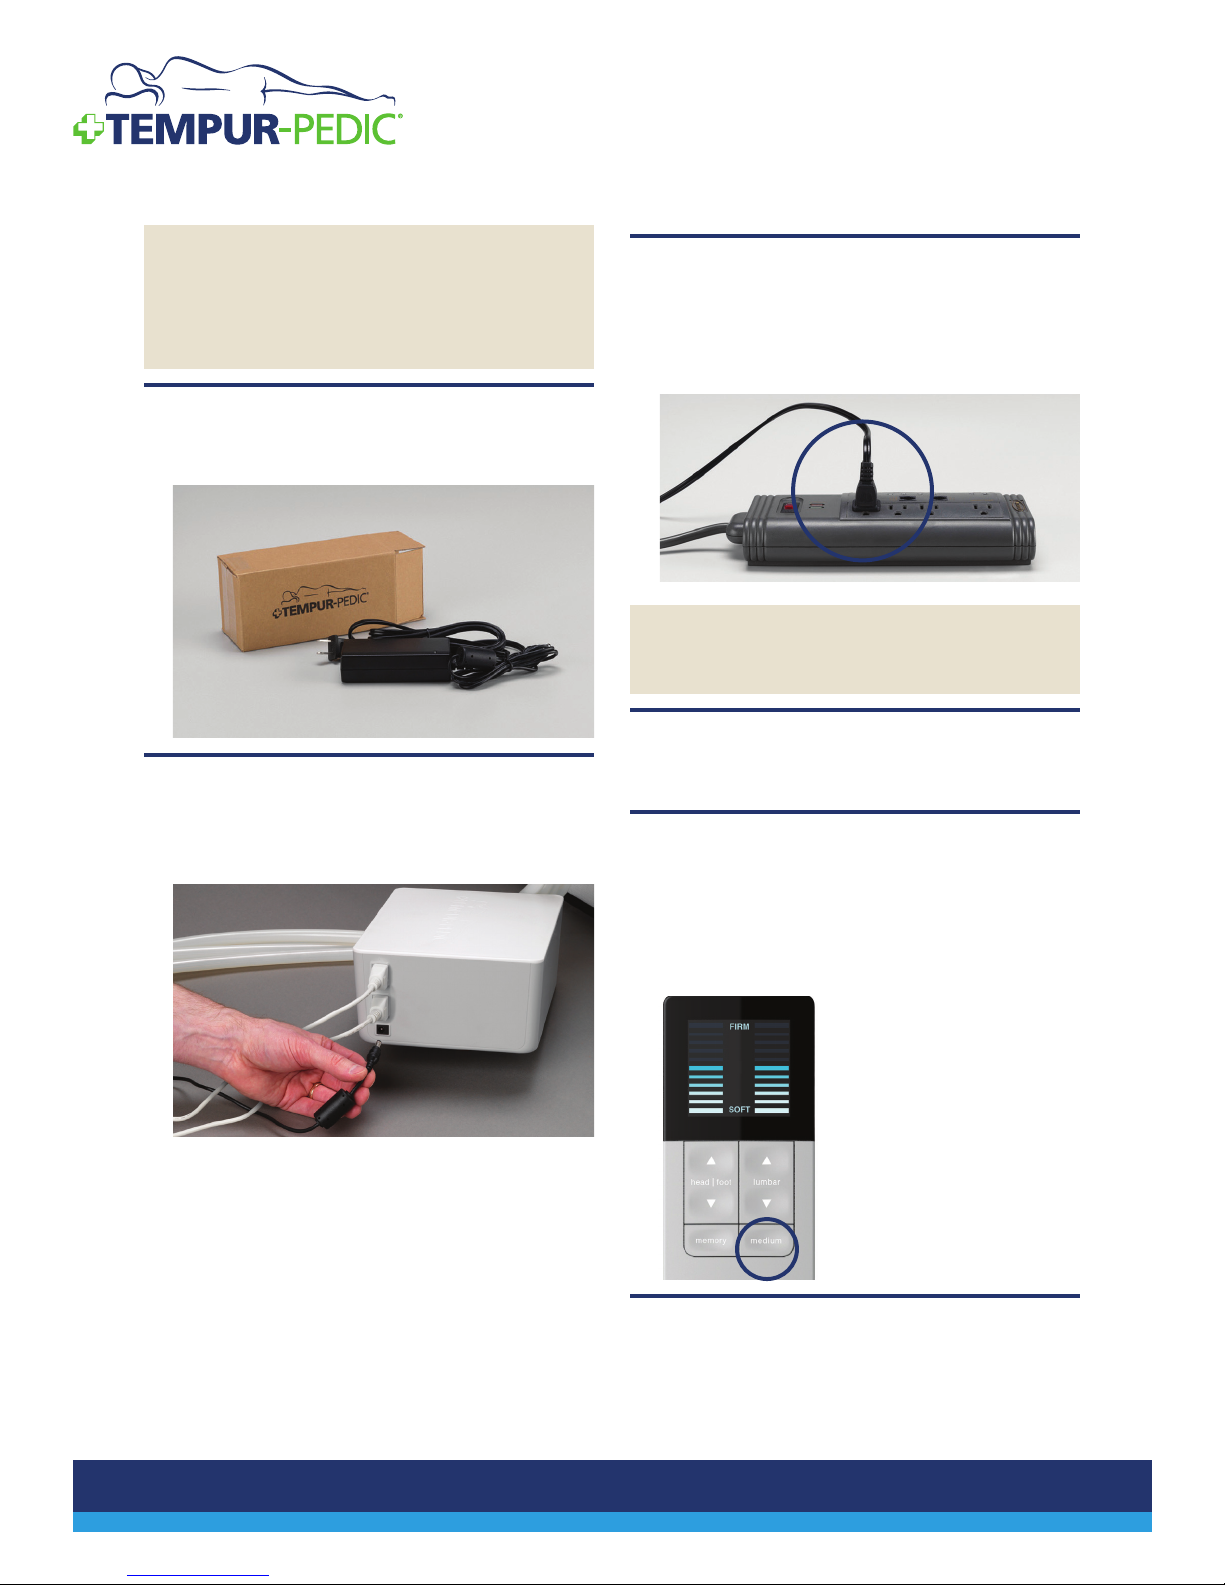
STEP 8
Unbox the power cord and connect it into the power
supply.
STEP 9
Connect the power supply DC output connector to
the DC12V input socket in the rear of the Pump
Assembly.
STEP 10
Connect the power cord plug to a surge protector
and plug the surge protector into a wall outlet.
Ensure the power switch on the surge protector is in
the “on” position.
NOTE: It is recommended that you use a surge
protector to guard against unexpected power
surges.
STEP 11
Test and make sure the remote controls and Pump
Assembly are working properly.
STEP 12
Press the medium button once on the remote
controls. Air will discharge from the nozzles on the
Pump Assembly and the remote controls remain lit.
The MED letters on the screen blink and then the
remote controls turn off.
CUSTOMER SERVICE: 1–800–821–6621
4
STEP 13
Once you conrm the remote controls and
Pump Assembly are working properly, go to the
“Installation” section on page 6 for details on setting
up your TEMPUR-Choice™ mattress.

Installation Overview
Installation Overview
The installation procedure in this guide applies to the following for TEMPUR-Choice™ Supreme and
TEMPUR-Choice™ Luxe mattresses:
• TEMPUR-Choice™ Supreme or Luxe mattress installed on an existing bed frame.
• TEMPUR-Choice™ Supreme or Luxe mattress installed on a matching Tempur-Pedic foundation (high or low
prole).
• TEMPUR-Choice™ Supreme or Luxe mattress installed on a TEMPUR-Ergo™ Premier adjustable base.
Refer to the TEMPUR-Ergo™ Premier Complete Reference Guide for details on adjustable base installation.
The TEMPUR-Choice™ Supreme or Luxe mattresses sizes are listed in the following table:
Mattress Size Components
Twin Long
(one multi-zone Air Chamber Assembly)
Split King
(two individual multi-zone Air Chamber
Assemblies)
Queen, California King, and King
(two multi-zone Air Chamber
Assemblies)
The Installation section on page 6 explains the installation procedures for these mattress sizes on an existing bed
frame, matching Tempur-Pedic foundation, or Tempur-Pedic adjustable base.
Includes one Pump Assembly and one Remote Control.
Two built-in hoses are also included.
Includes two Pump Assemblies and two remote controls. Split
Kings consist of two Twin Long mattresses placed side-by-side.
Complete the assembly of one mattress, assemble the second,
and then place them together on your bed frame. Four built-in
hoses are also included (two hoses in each mattress).
NOTE: Optionally, you can use only one Pump Assembly if
desired.
Includes one Pump Assembly and two Remote Controls. Four
built-in hoses are also included.
CUSTOMER SERVICE: 1–800–821–6621
5
 Loading...