

Page 1
Product Instructions
1
TP150 Thermostat Operation Instructions
1、Overview:
TP150 digital LCD room thermostat is programmable for 4 time periods a day and 7 days a week. It mainly be used in
the control of heating cable, heating film, heater, wall-mounted boiler and water valve on the collector in heating system.
Based on the setting temperature, the testing ambient tempearture as the variable, it can automaticly control the power of
the terminal equipment. Thus to achieve the thermostatic control of temperature and the display interface is shown as
below:
2、Main functions:
1. Manual mode:According to the manual setting
temperature, the controller controls the room
temperature. When the testing temperature is less than or
equal to setting temperature -0.5℃,the equipment starts.
When the testing temperature is equal or greater than
setting temperature +0.5℃, the equipment stops.
2. Auto mode:According to the setting temperature in
different periods, the controller controls the room
temperature, operation process is the same as Manual
mode.
3. Antifreeze function (optional) : When the testing
ambient temperature is less than or equal to 5 ℃, the
controller will automaticly power on and start the
equipment, when reaching 8 ℃, the system will be back to normal operation.
4. Overheating protection function: When then the protecting temperature sensor tests the temperature is more
than 55 ℃, the equipment will stop. When the temperature is less than 50 ℃, the system will recover to normal
operation.
3、Operation setup:
3.1 Operation sequence:
①Switch on the power ②Press the “power” key for 3 seconds to open the thermostat ③Setting the
required ambient temperature (Manual setting temperature and programmable periods temperatures). ④Select
the control mode (Manual/Auto).
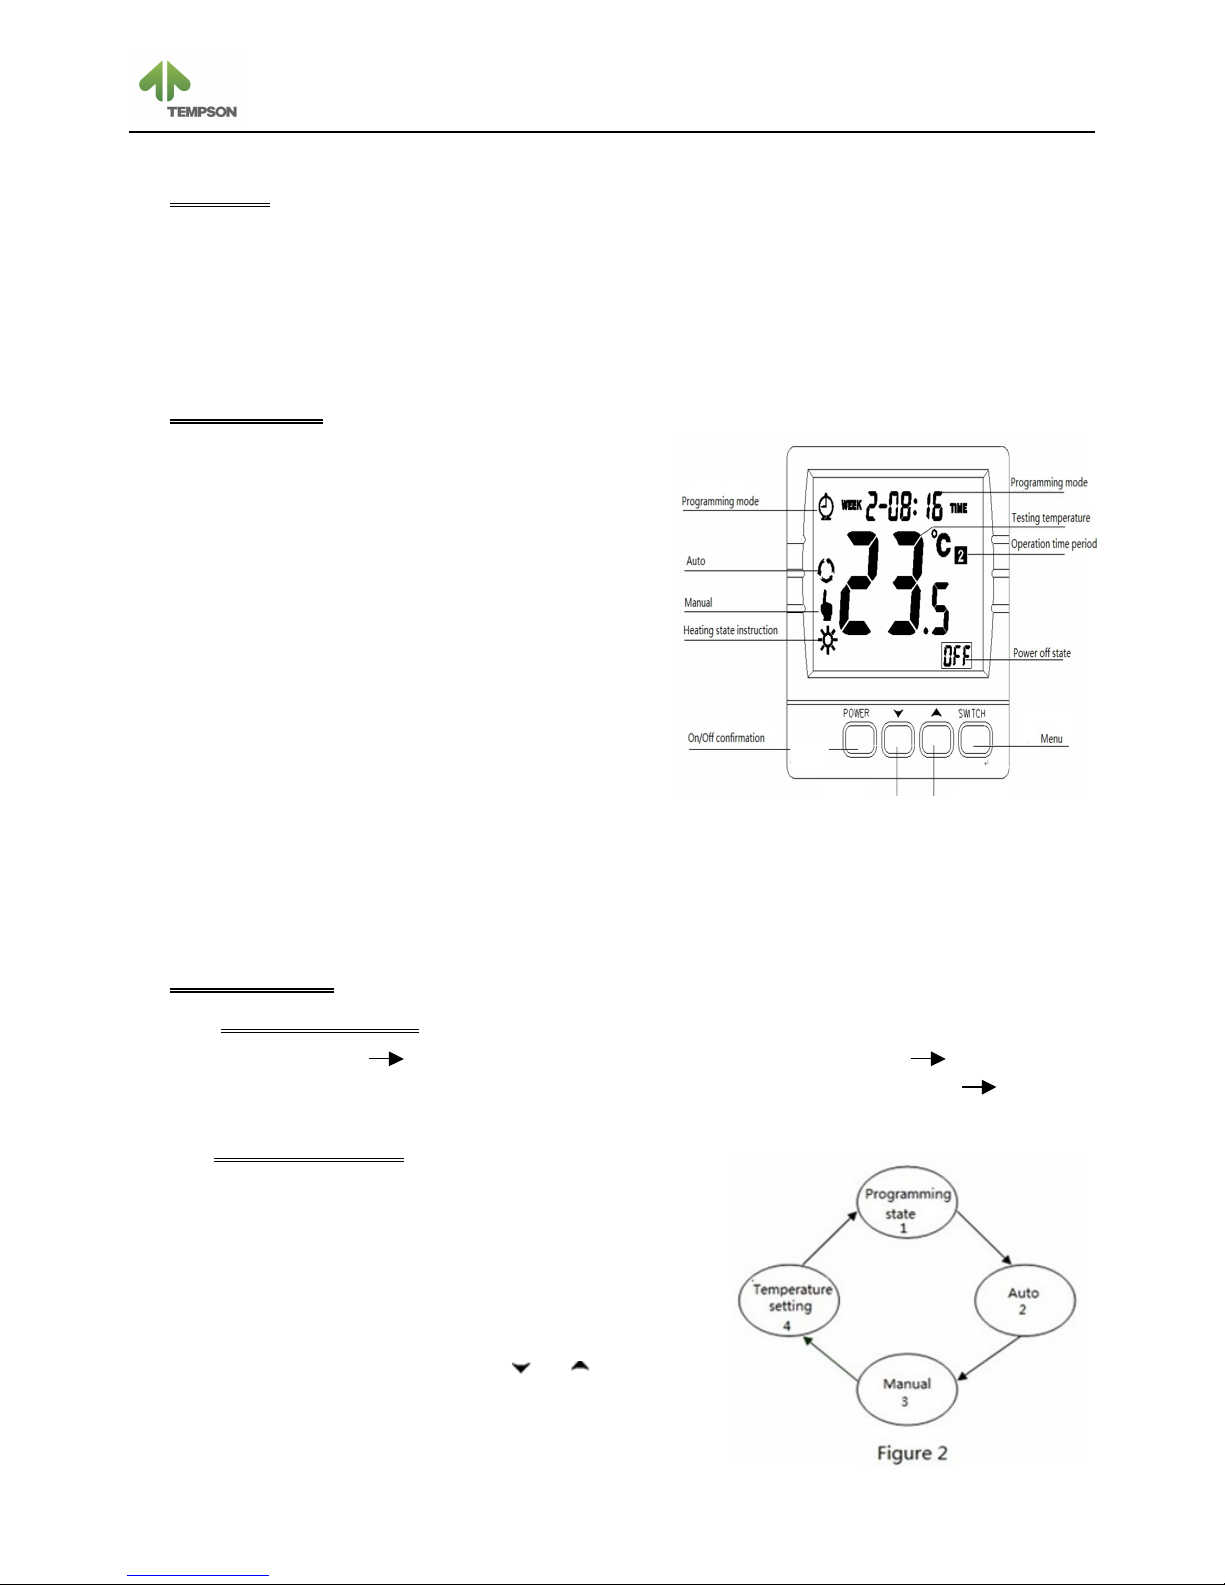
3.2 Setup instruction:
Statement: When any icons on the LCD screen do not flash, it’s
the normal state. If not, you can wait 10 seconds to let the system
automatically default, or lightly press the “power” key circularly
until it shows the normal state:
1. Hold on the “power” key for 3 seconds to turn on/off.
2. Manual setting temperature: After choosing manual mode, in
normal state, you can directly press or to set the
manual temperature, after setting, press “power” key for
your confirmation.
3. Control mode change: In normal state, a menu icon will
flash after every press of the “menu” key, when the flashing icon is the one which the user wants, the user can
Page 2
Product Instructions
2
lightly press the “power” key to confirm, the menu sequence for circulation when press “menu” is shown as
figure 2 :
4. Programming methods: In normal state, press “menu” key, when flashes, press the “power” key
lightly:
a) Firstly, into the local time calibration, the user can press “menu” key to select week-hour-minute, using
or to adjust, pressing “power” key to confirm all the calibration.
b) After the local time calibration, press the “power” key to get into the time periods for programmable
settings of Monday, the right side will show the time periods which suggests the current time period of
the menu. Press the “menu” key to select the starting time of each time periods---setting temperature,
using or to adjust, pressing “power” key to confirm all the settings.
c) After the programming of Monday, pressing “power” key to get into “Tuesday” programming settings,
selecting the starting time of each time periods of Tuesday as method b), pressing “power” key to
confirm all the settings.
d) Repeated methods b) and c) to complete the starting time and setting temperatures of 4 time periods a
day and 7 days a week, wait 10 seconds to let the system automatically confirm to the normal state.
4、Technical data:
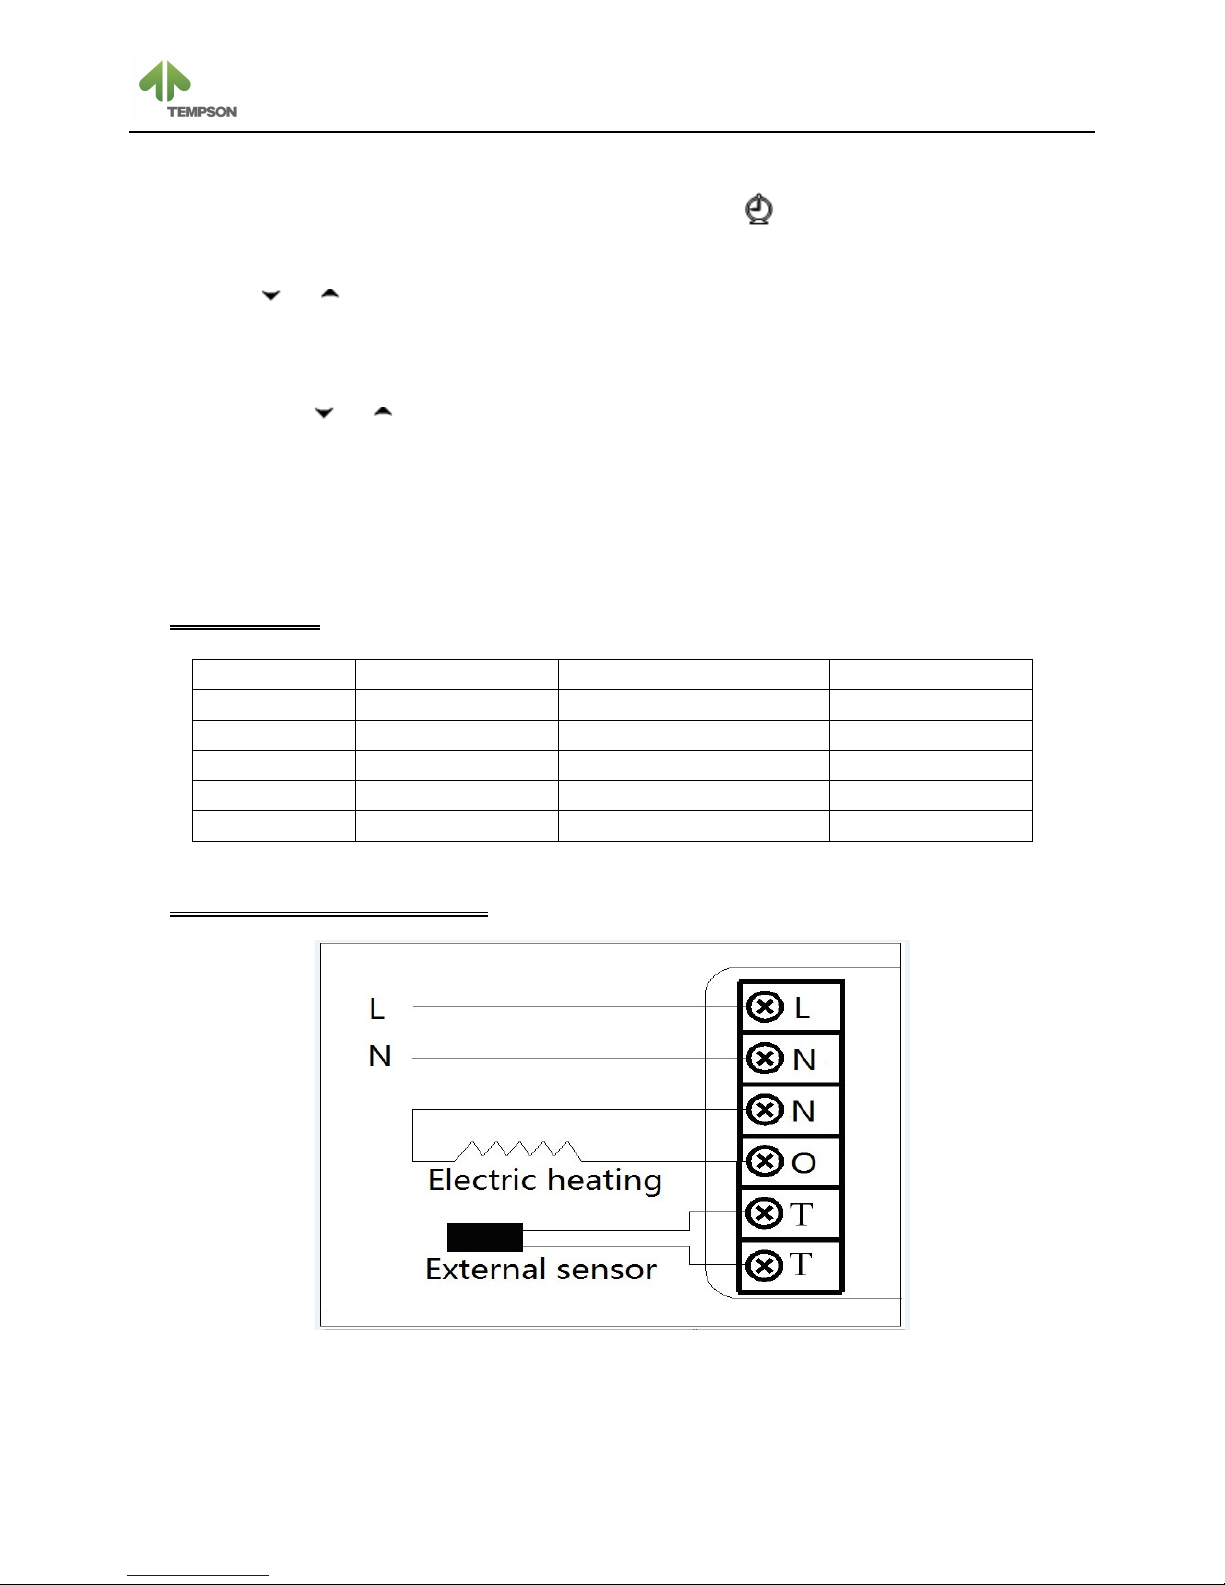
5、Typical product wiring diagram:
Note: "N-O" of the output power relay contact capacity is 16 A, heating after power on, controlled by the protection
temperature.
"T-T" connects 5 K external protection temperature sensors.
Content
Statement
Content
Statement
Power supply
AC220V±10﹪ 50/60HZ
Power consumption
≤1W
Control range
0~99℃
Temperature elements
NTC,5K
Control precision
±1℃
Protection temperature sensor
NTC,5K
Outer shell
PC+ABS Anti-flaming
Dimension
86mm *86mm*13mm
Weight
210g
Wiring connection
terminal
Page 3

Product Instructions
3
6、Installation instructions:
Note:
1. Before doing the wiring installation considerations, disconnect all power to avoid the equipment burning out.
2. Get the outer shell installation and wiring process done through the electric professional.
3. During the usage, the power may jitter instantly and the thermostat may be dead, such as blank screen and disabled
operation. At the moment, the user should separate the panel from the wirings according to installation instructions,
take off the panel, reinstalling after 10 seconds.
 Loading...