

Page 1

User Manual and Installation Guide
Tornado Moving Light Enclosures
In the interest of continuous product improvement, the information in this document is subject to change without
notice. Neither Tempest Lighting, Inc. nor its representatives or agents may be held liable for expense or injury
arising from it.
© Tempest Lighting Inc. All Rights Reserved December, 2012
User Manual
DEC3.x Firmware Upgrade
Firmware Upgrade Instructions for Tempest Lighting Digital Enclosure Controllers
DEC3.2, 3.3 and higher.
Tempest Lighting, Inc.
13110 Saticoy Street, Unit C
N. Hollywood, CA 91605, USA
Tel +1 818 787 8984
Fax +1 818 982 5510
www.tempestlighting.com
1
Page 2
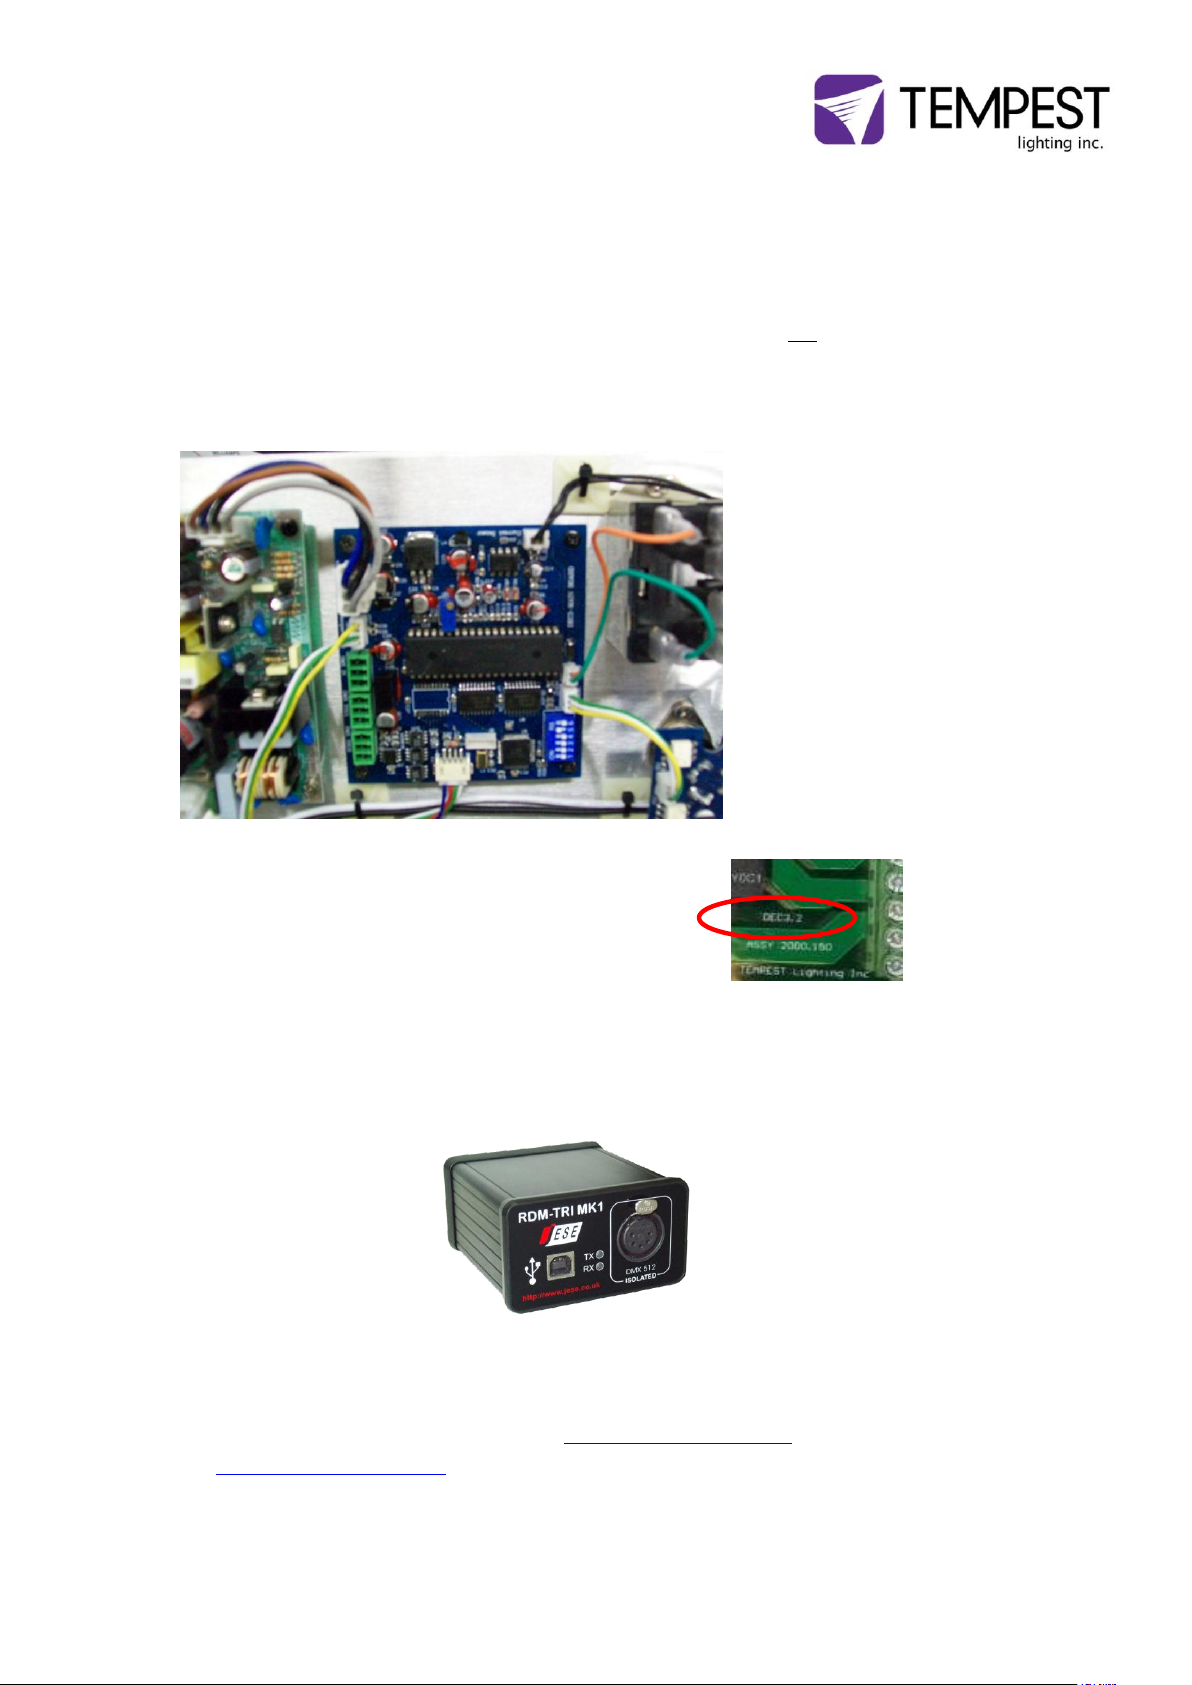
Which DEC?
DEC3.x refers to Digital Enclosure Control 3.2 or higher.
If you have a DEC3 controller, it may NOT be upgraded, but Tempest will upgrade your
hardware at a preferential rate to the current DEC version.
DEC3 looks like this:
Note that DEC3.2 and DEC3.3 have different firmware builds.
Look for the silkscreen text on the circuit board for the
hardware revision level:
You will Need:
1 JESE RDM-TRI Interface, obtainable from Tempest lighting, under item number 2000.190.
2 A Windows XP or 7 PC or laptop running the JESE GetSet utility (included with the RDM-TRI
Interface).
3 Latest DEC firmware, downloaded from www.tempestlighting.com, or by emailing
[email protected]. Be sure to include the DEC3.x hardware version with your
request.
2
Page 3
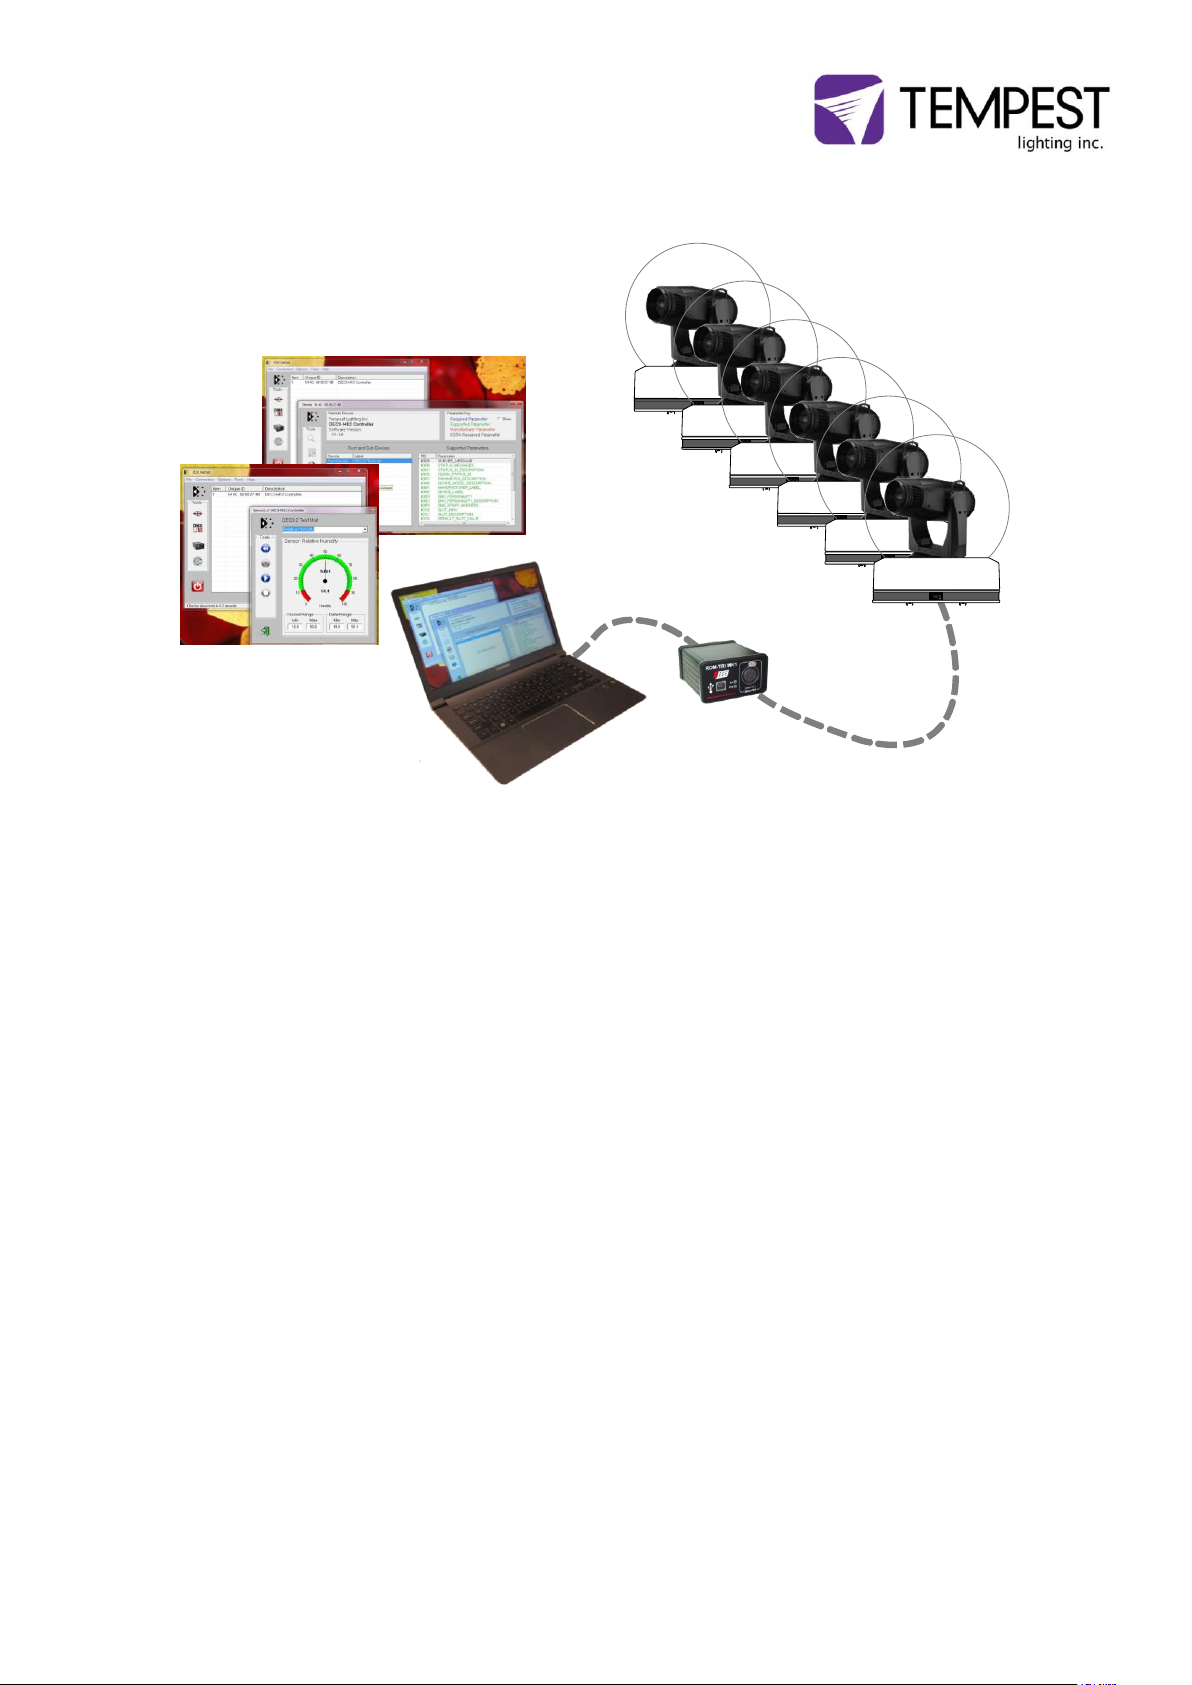
RDM-TRI
Installing the RDM-TRI in your DMX Network
Connect the RDM-TRI to your PC using the USB cable provided, and plug the Male XLR5 DMX
network plug into the front of the RDM-TRI Interface.
For more on DMX and RDM wiring, see your Tempest enclosure manual. Note that the RDM-TRI
will discover all the compliant RDM devices on the network, not only the Tempest enclosures.
3
Page 4
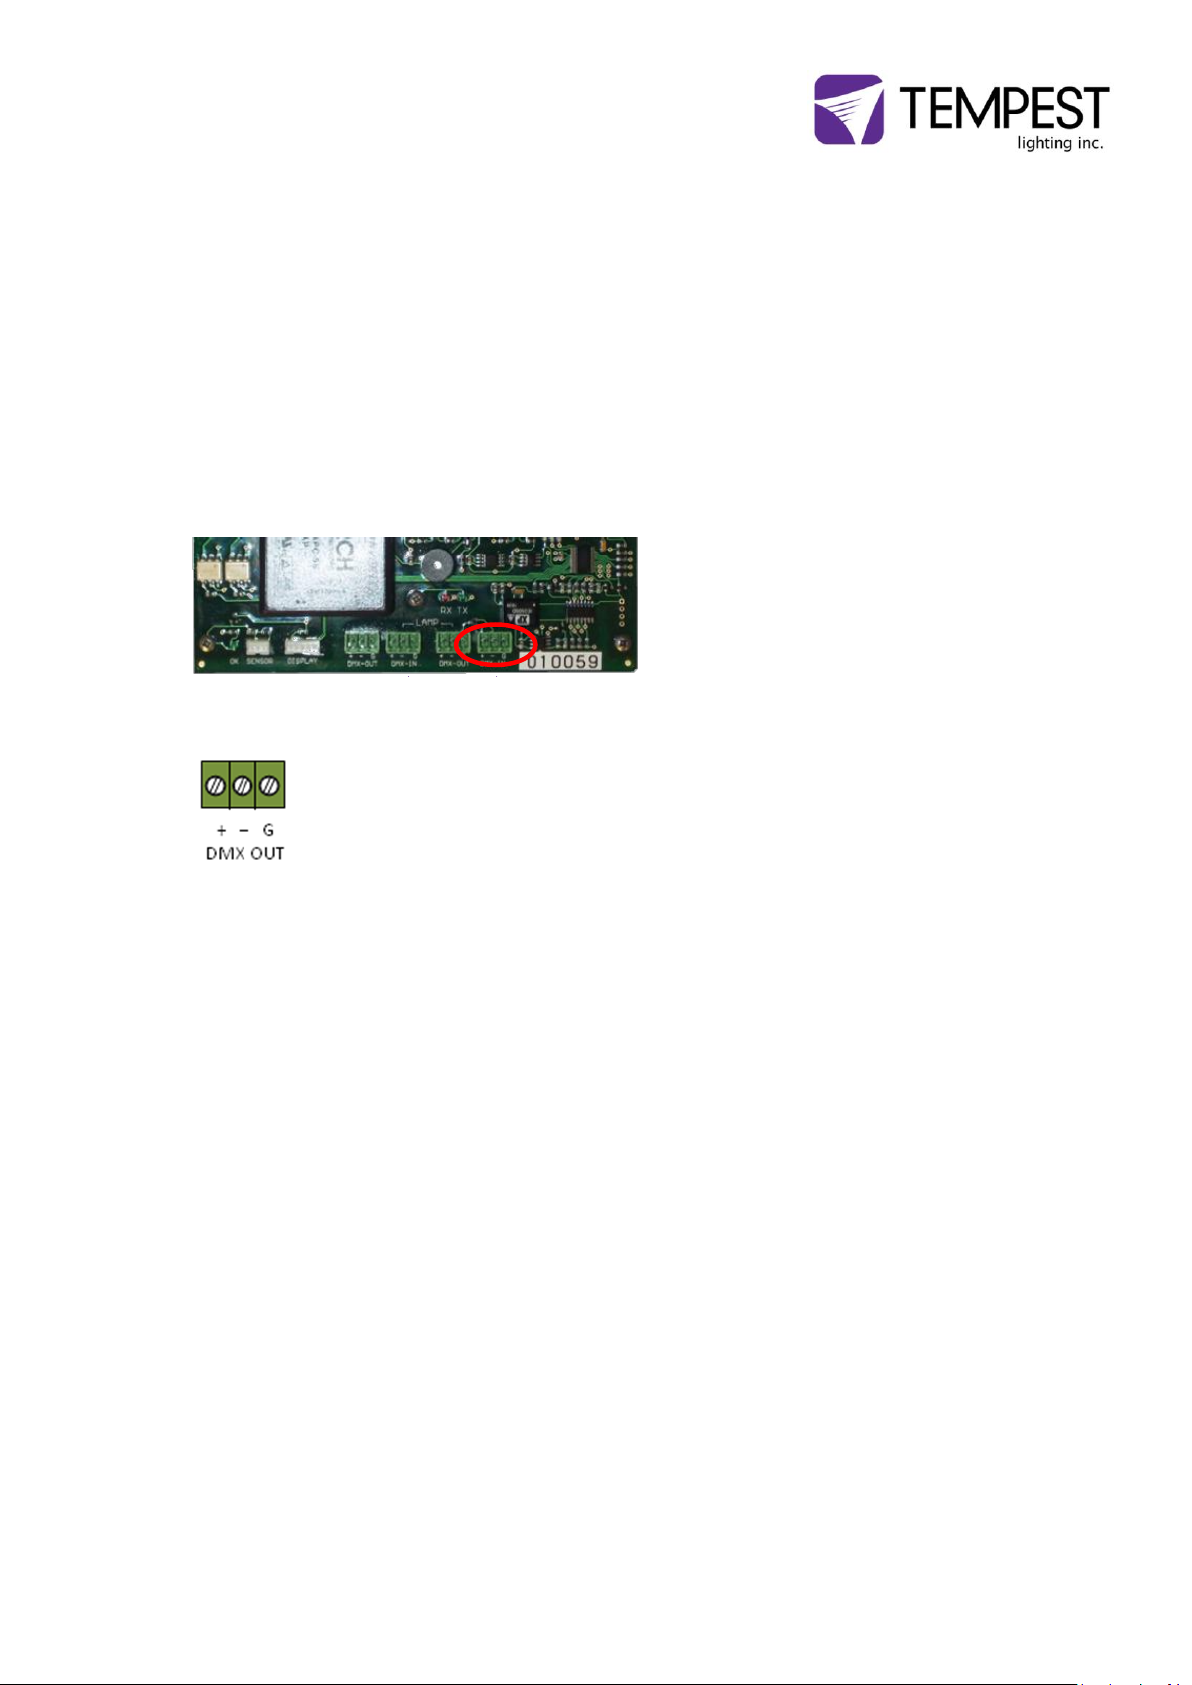
Connecting the RDM-TRI directly to the DEC
In situations where DMX wiring is not present, such as projector installations, you will need to
connect directly from the RDM-TRI to the DEC control circuit board, using the DMX cable
provided.
Connect the 5-pin XLR plug to the connector on the RDM-TRI.
Connect the green 3-pole terminal connector to the DMX IN header on the DEC circuit board.
Note that there are two connectors marked DMX IN – use the one on the right.
Pinout: (1) Ground, (2) Data -, (3) Data +.
4
Page 5
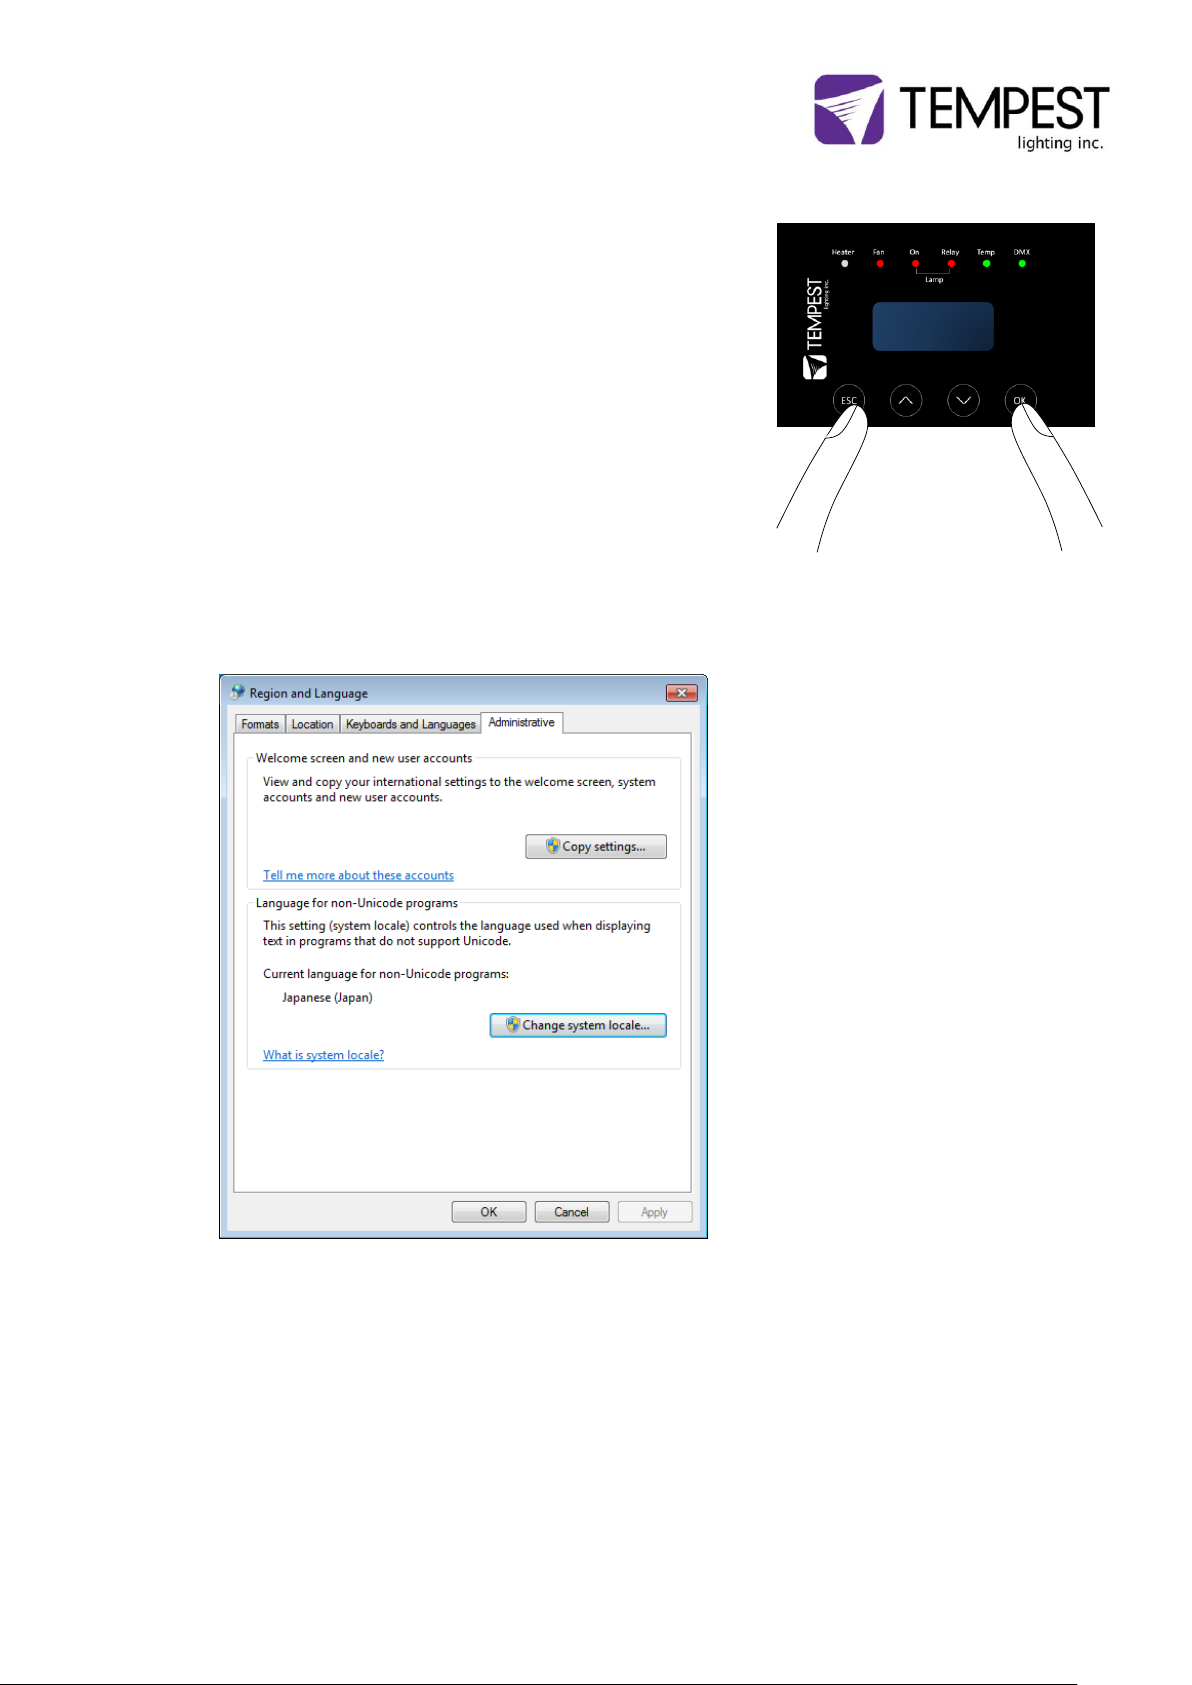
Firmware Upgrade Procedure
1. Configure the DEC3.x DMX option and set to MONITOR
mode, using the user interface panel.
a. Press and hold the ESC and OK keys for 5 seconds to
unlock the DEC display
b. Use to navigate to the SET DMX MODE menu,
and press OK. MAKE A NOTE OF THE CURRENT
OPERATING MODE.
c. Use to find MONITOR mode, and press OK.
2. Install JESE GetSet on Windows 7 PC or laptop.
3. ASIAN USERS: Ensure input locale for non Unicode programs is set to a non Asian language
In Windows 7, go to control
panel and select Region and
Language
4. Plug your RDM-TRI in to your PC, using the USB cable provided.
5
Page 6
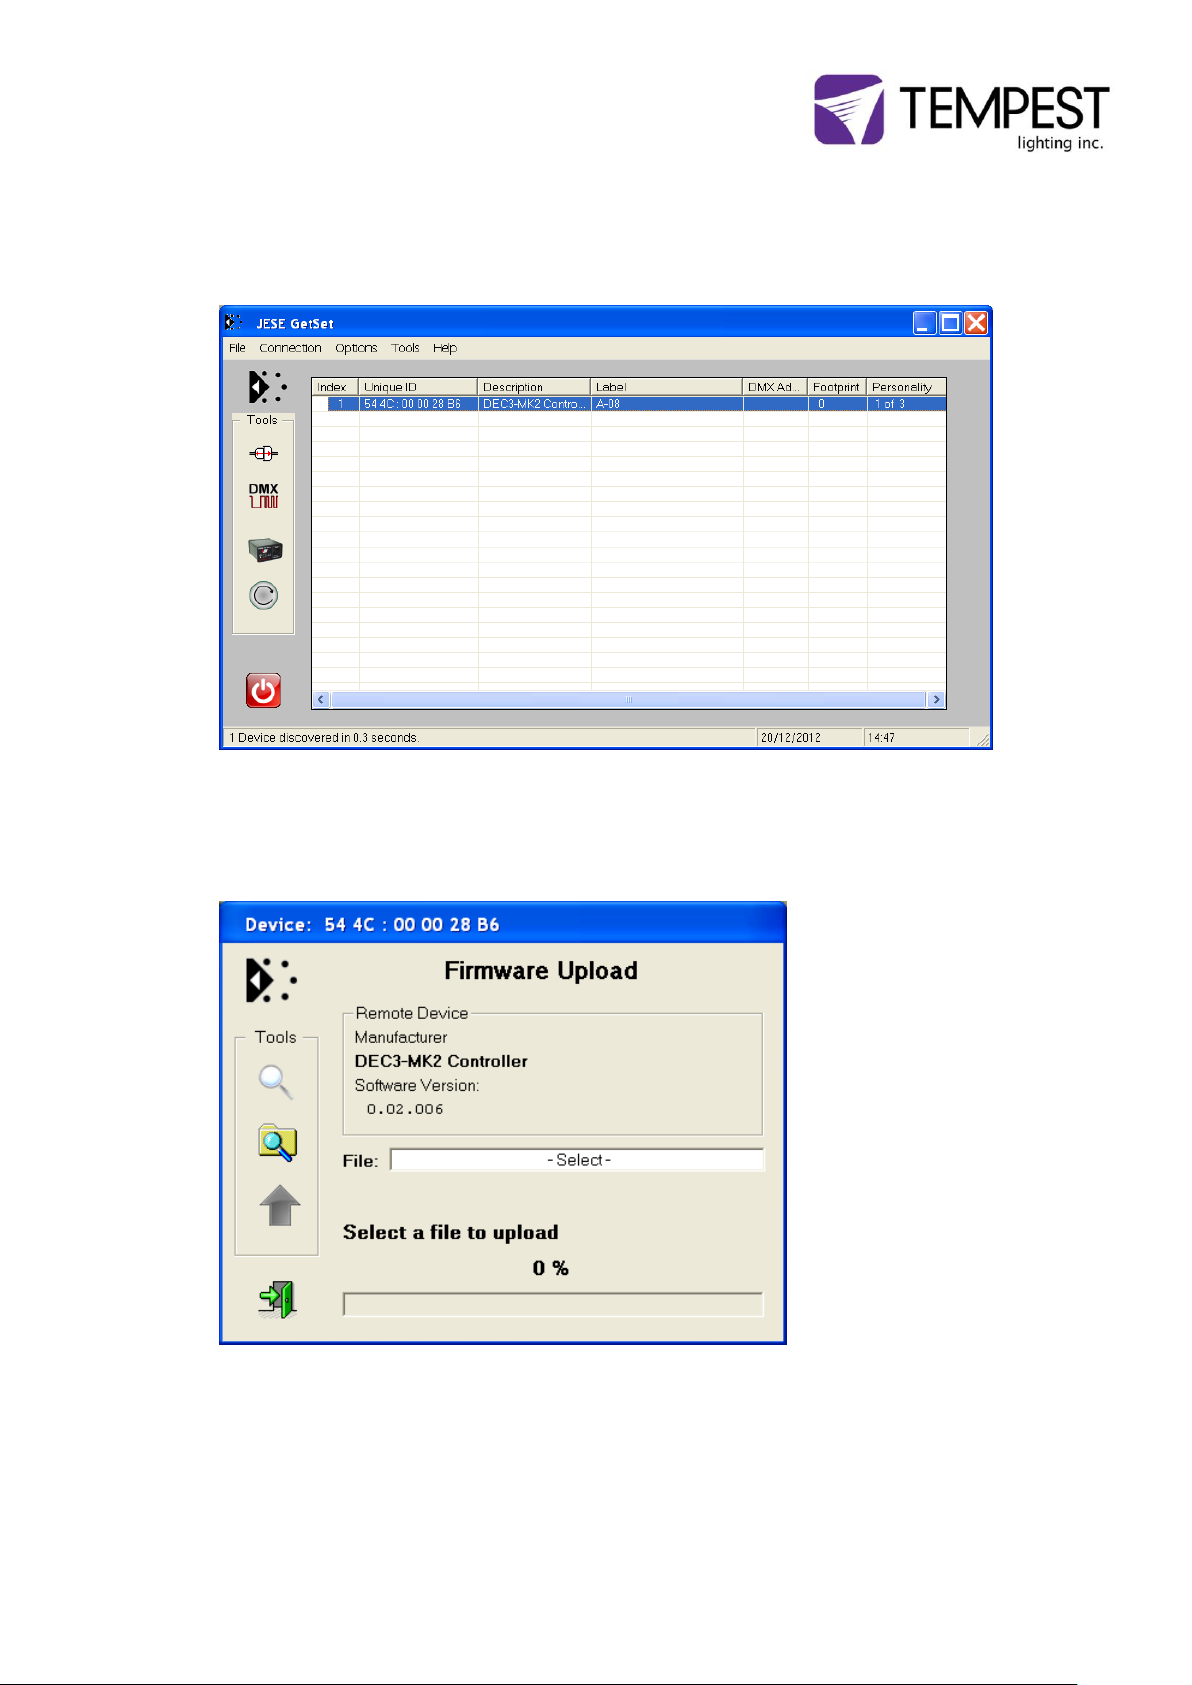
6. Open the GetSet application, connect to the RDM-TRI and discover the DEC3.x. If
you are connected to a network you may see many devices.
7. Right click on the discovered DEC3.x device in the list of discovered devices and
select the ‘reprogram’ option.
6
Page 7
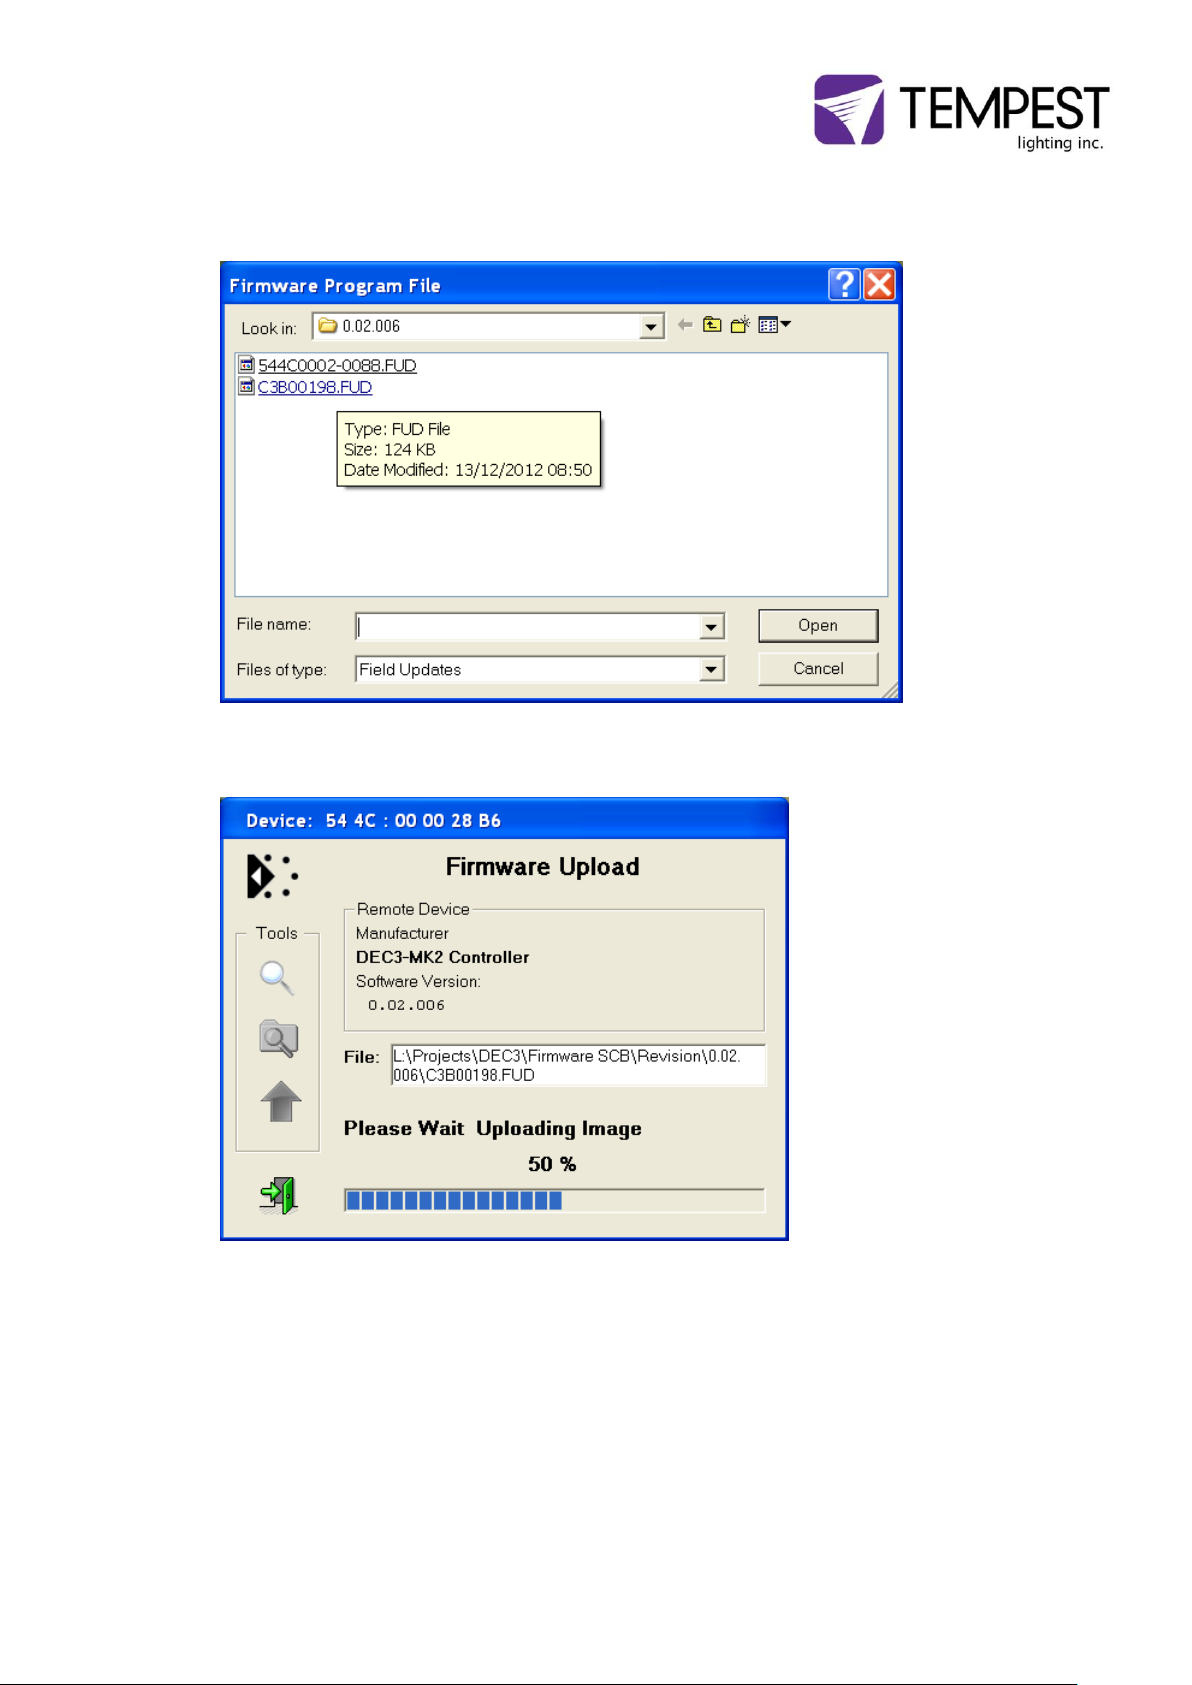
8. Click on the search icon to locate file to upload and select the file to upload.
9. Click on green upload button to start the upload
7
Page 8
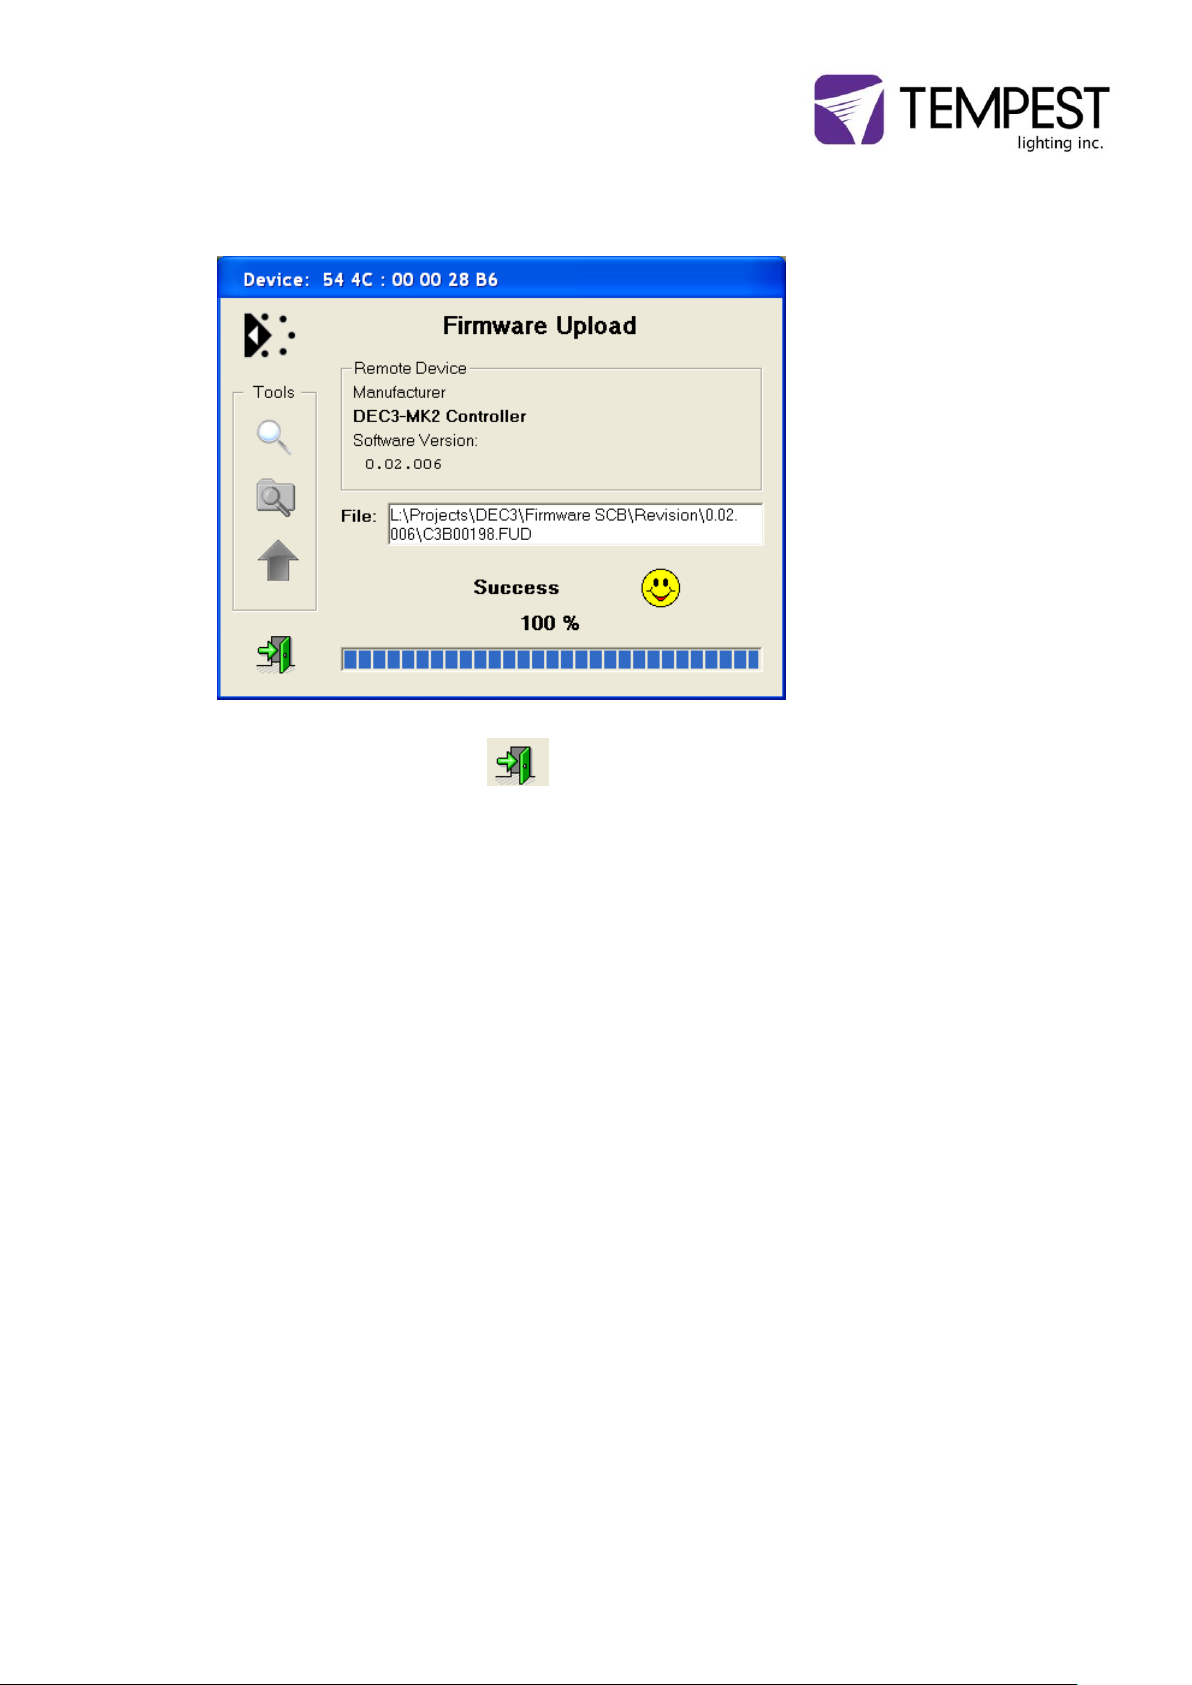
10. When the upload is complete, the new firmware version number will appear in
the information window.
11. Dismiss the upload window and close the application
12. Return the DEC3.x DMX setting to its previous operating mode:
a. Press and hold the ESC and OK keys for 5 seconds to unlock the DEC display
b. Use to navigate to the SET DMX MODE menu, and press OK
c. Use to find the correct mode (usually BASIC), and press OK.
8
 Loading...