

Page 1
Page 2

TABLE OF CONTENTS
PREPERATION FOR OPERATION ................................................................................................... - 1 -
ASSEMBLY WARNINGS ................................................................................................................... - 1 -
DISPLAY AND KEYBOARD .............................................................................................................. - 3 -
FIRST OPERATION ........................................................................................................................... - 4 -
WEIGHING THE PRODUCT .............................................................................................................. - 4 -
COUNTING ........................................................................................................................................ - 4 -
KNOWN UNIT WEIGHT OF PRODUCT AND COUNTING ................................................................ - 4 -
SAMPLING OPERATION .................................................................................................................. - 5 -
IMPORTANT SUBJECTS ABOUT SAMPLING ................................................................................. - 5 -
USAGE OF EXTRA PROGRAMS (PLU) ........................................................................................... - 6 -
WEIGHING WITH TARE .................................................................................................................... - 6 -
TOTAL MEMORY TRANSACTIONS ................................................................................................. - 6 -
DISPLAY BACKLIGHT ...................................................................................................................... - 8 -
RS232 INTERFACE ........................................................................................................................... - 9 -
SETTINGS ......................................................................................................................................... - 9 -
1. T
.................................................................................................................................... - 10 -
ARE
ERO SETTING
2. Z
OTAL MEMORY, UNIT PRICE
3. T
4. L
IMITATION
5. LCD / T
OWER MANAGEMENT SETTINGS
6. P
7. F
ILTERS
8. C
ALIBRATION
ELAY SETTINGS
9. R
NTERFACE SETTINGS
10. I
11. T
ESTING MENU
12. O
THERS
THINGS TO DO BEFORE CALLING THE SERVICE ....................................................................... - 12 -
TECHNICAL SPECIFICATIONS ...................................................................................................... - 13 -
MANUFACTURER INFORMATION ................................................................................................. - 13 -
MKULNSB_EN-Rev.No:06 Rev.Date: 23.01.2013
: ..................................................................................................................... - 10 -
:........................................................................................................................... - 10 -
IME SETTINGS
: ............................................................................................................................... - 11 -
: ....................................................................................................................... - 11 -
: .................................................................................................................. - 11 -
: .................................................................................................................. - 12 -
:............................................................................................................................. - 12 -
: ................................................................................................ - 10 -
: ........................................................................................................... - 11 -
: ........................................................................................... - 11 -
:.......................................................................................................... - 11 -
Page 3
-
PREPERATION FOR OPERATION
-
After removing scale from its package, installation could be accomplished by following instructions given
in “ASSEMBLY WARNINGS” part.
In models using post part, after setting the post to desired angle, screw the connecting screw to stabilize
it.
Place the scale on a horizontal stable base. Avoid disturbing environmental conditions such as shocks,
vibrations and air currents.
For setting the scale parallel to the base just turn the adjustable feet in order to stable the spirit level.
(The bubble of the spirit level must be within the indicating circle)
Attach the adaptor to an electric outlet that has ground (220V), and connect it to adaptor input. There is
an on/off key near the adaptor input. You can operate scale from this key.
NOTE: If scale has a rechargeable battery (sealed lead t
before first operation.
NOTE: There are protecting bands on the back display and post display. Taking out these bands make
clear seeing the display. There may be white or blue band to protect stainless steel part of the scale. It
should be taken off before using the scale.
ype), it should be charged at least 8 hour
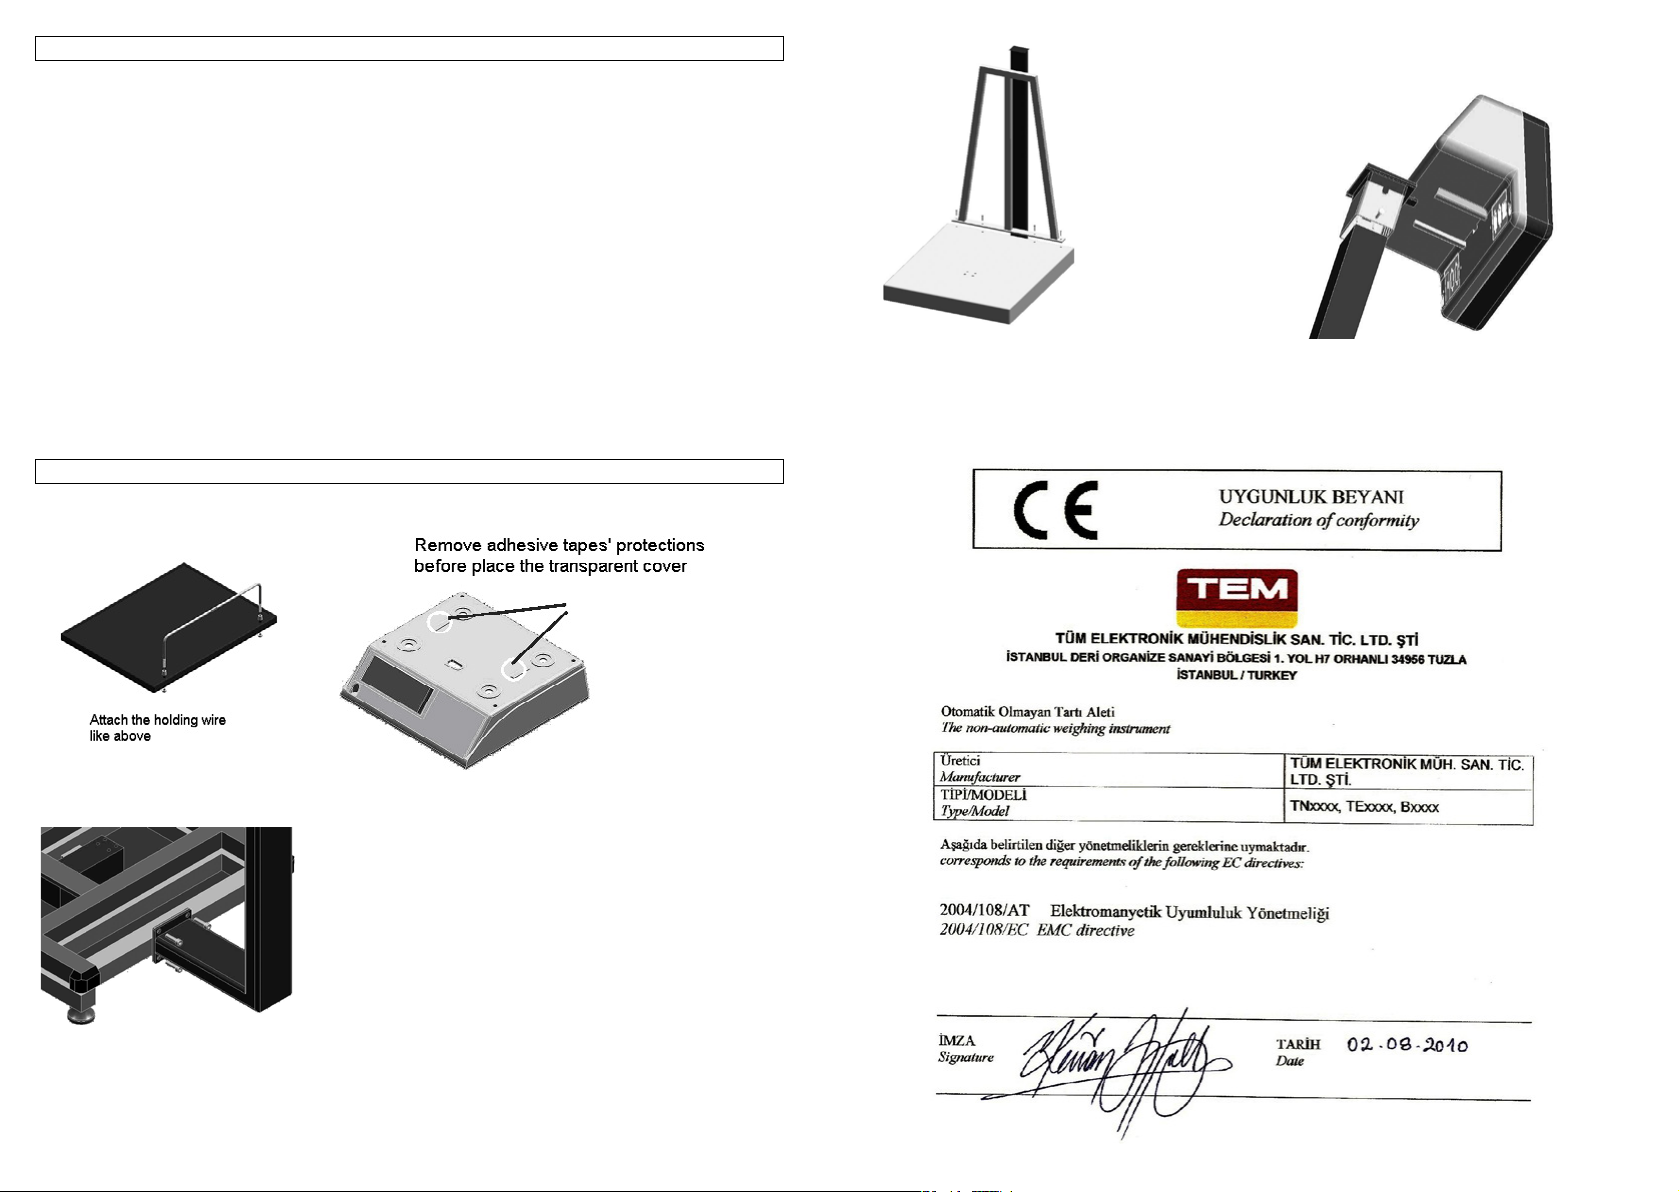
ASSEMBLY WARNINGS
COUNTING SCALE HOLDING WIRE:
Attach the shield with 10x25 hexagon Attach indicator to the post like above. Do not
bolts. remove after looked up. To remove indicator from
post, remove two screws near the post connector.
ASSEMBLY OF COUNTING SCALES:
Connect post to the bottom chassis with metric 10x25 imbus bolts.
- 1
- 2
Page 4
-
EASY OPERATION
-
Scale open using ON/OFF
Value of zero is seen on display. O and D indicators are ON. Nothing should be placed on
weighing plate until it gets ready for weighing operation.
Use sampling operation;
o Weight put on the scale
o Piece value is entered using number keys
o Press “sample” keys and wait
o Weighing is shown on “g/pc” indicator
o When all products is put on scale, total piece value is shown on ”pc” indicator
o “C” key use to cancel
To check number of pieces of known weight of the product
o Weight put on the scale
o Unit weight is entered
o Weighing is shown on “g/pc” indicator
o total piece value is shown on ”pc” indicator
For “PRINT” operation
o Press “PRINT” key.
Zero Led
product, be sure that the weighing plate is empty and press “O” key for zero setting if the O
indicator is off. Otherwise error may occur.
Equilibrium Indicator D : Shows that the load on the weighing plate is well stabled. It
is off while placing or removing the product. If D indicator goes off, the weight shown on the display
may be wrong. Therefore, in order to read the weight, wait until
product on the weighing plate.
Tare Indicator
tare is not fixed. It is continuously on when the tare is fixed. (Only for scales with LCD display.)
Total Memory Indicator M : It flashes when the total memory is containing a value. It
remains continuously on while the content of the total memory is being displayed.
Sample Defective Led : Shows that Sample number is less or Sample number is
insufficient.
Battery Indicator R : Shows that the battery is used. If Battery indicator is ON,
scale is powered by the battery. If it flashes, it is necessary to charge or change the battery in the
shortest time.
Weighting instrument that designed with using LCD type display modules has four additional battery
indicators for indicating the fullness of the battery and also they have a sliding battery charg
animation mode, which is only activated when the adapter connection is established. While the adapter
connection is not established, the battery frame around the battery indicators appears for indicating the
battery is being used. Just before the battery becomes empty, the battery frame flashes.
Number Keys : Used to enter unit price or other variables.
Key :Used for zero setting of unit price or other variables.
C
O
T
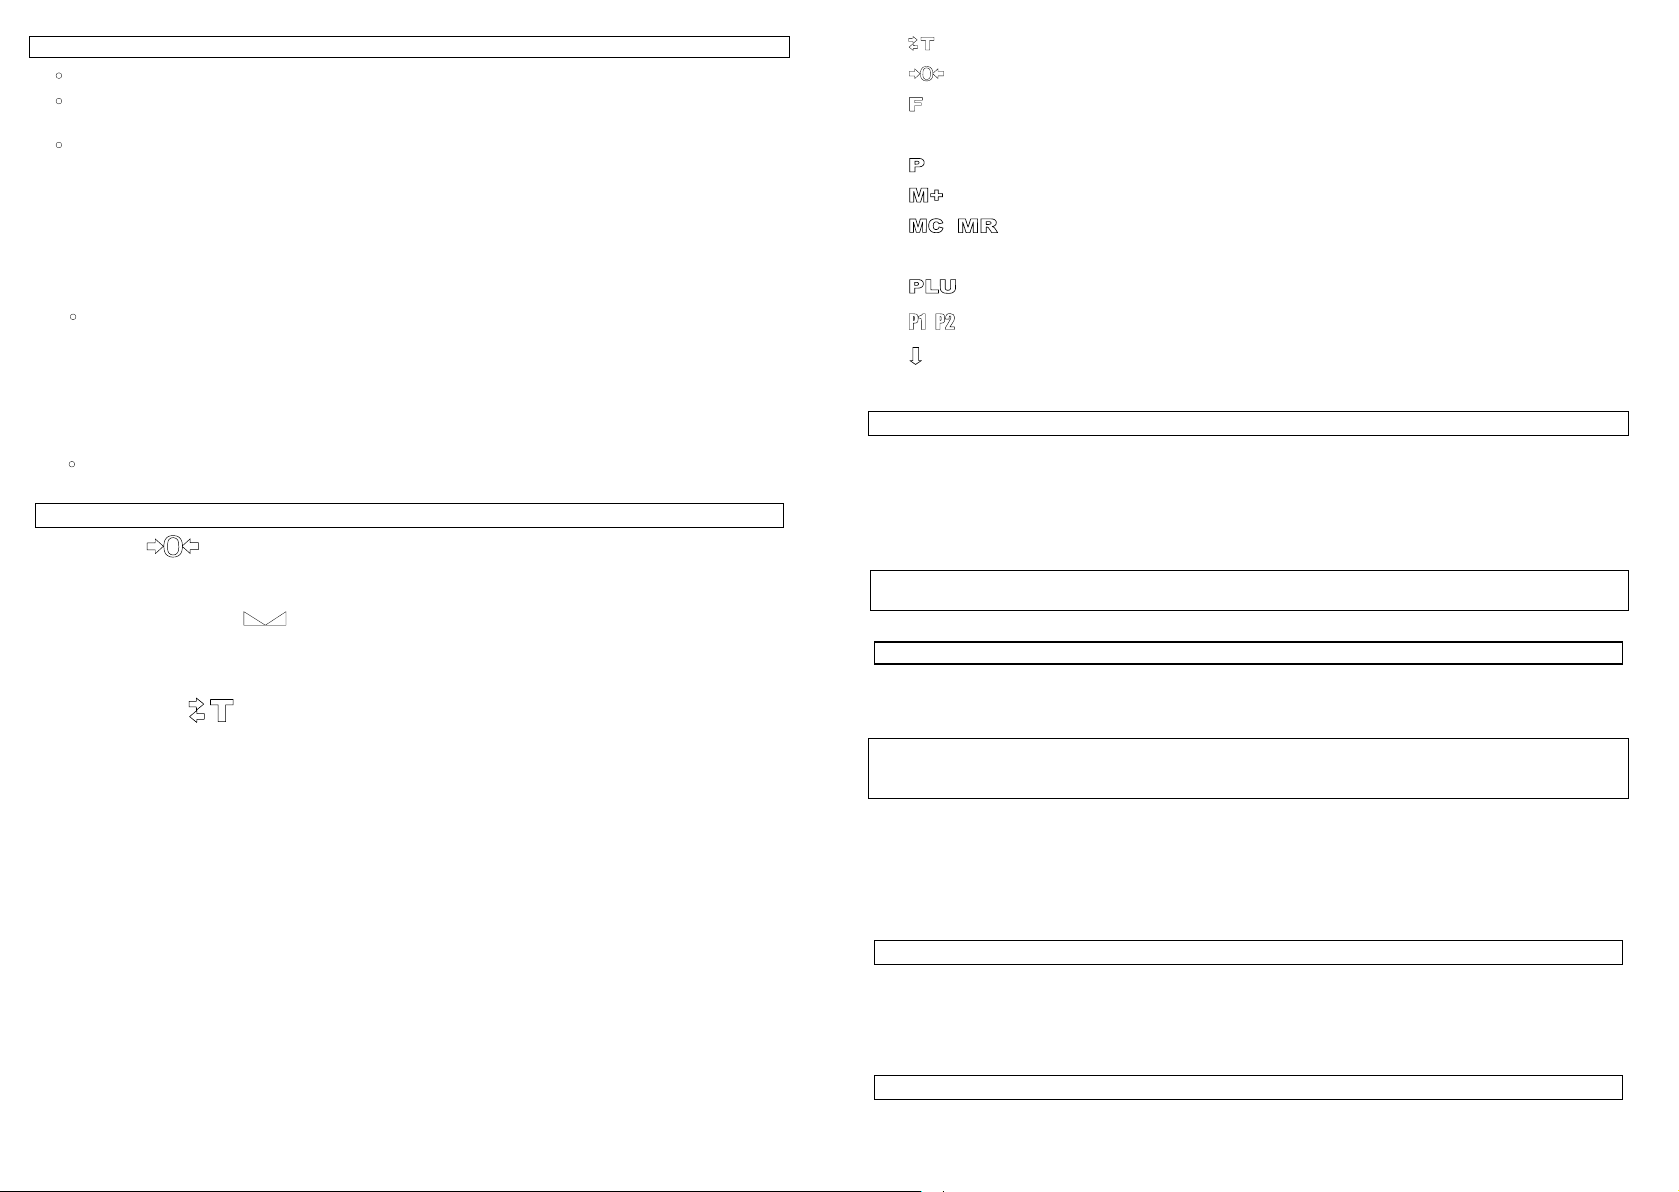
DISPLAY AND KEYBOARD
: Shows that the weighing plate is empty. Before weighing a
: Shows that the tare effects the weighing. It flashes when the
- 3
D
symbol appears after placing the
ing
T Key :Used for accepting the load as tare.
Key : Use for zero setting the scale when the weighing plate is empty.
O
F
Key : Used for reaching setting menu and some functions similar to settings.
Sample Key : Used for entering piece.
Key : Used for taking printout. (Only for PC or printer options)
Q
W
Key : Used for adding total memory.
M / X Key : Used for displaying and deleting total memory.
☼ Key : Toggles backlight between ON, OFF, ON-OFF (only for LCD displays)
Key : Used for reaching to unit weight lookup table by a single key.
P
... Keys : Used for reaching unit weight lookup table by a single key.
P1, P2
Key : Used for reaching to programs that are written bottom of the price lookup keys.
U
FIRST OPERATION
When scale is turn on all segments and symbols are seen. Numbers counting backwards are seen on
display about 10 seconds. After that, maximum capacity and division is seen for a while and scale gets
ready to weigh.
D
Value of zero is seen on display. O and
weighing plate until it gets ready for weighing operation.
If there is any weight on weighing p
might be seen on display. Be sure that there is no weight on the weighing plate before calling service.
Place the product on the weighing plate. Wait until the D indicator is on. Weight of the product is
seen on display.
The value “0.000” should appear on the display and also the
when the weighing plate is empty. If the value on the display is not zero(or
press O for zero setting. After establishing zero and balance, proceed to the weighing process.
WARNING: Absolutely not place any load more than maximum capacity of scale. (“Max” value on data
plate)
Product should be placed on weighing plate by hand. Leaving the product from high or throwing it on to
the weighing plate (even the weight is low) scale may be damaged.
To count the products which will be counted it is needed them to be in the same weight and to make this
count work this weight should be known. The weight of one of these counted products is called “unit
weight”
If it is known the unit weight of the product which will count, it can be found with sampling operation.
Sampling operation was explained in the chapter of sampling detail
KNOWN UNIT WEIGH
o Enter unit weight by using “0”, “1” … “9” keys (number keys).
late or there is no weighing plate on scale, nnnnn error message
WEIGHING THE PRODUCT
indicators are ON. Nothing should be placed on
D
and O indicator should be on
COUNTING
T OF PRODUCT AND COUNTING
- 4
D
indicator is not on),
Page 5
-
Entered unit weight is read from unit weight display
-
Calculating piece value flashes in the number display
o Wait five second after enter unit weight.
Entered unit weight is read from unit weight display
Calculating piece value is read in the number display
SAMPLING OPERATION
Number value of product which is known put on the weighting plate
If sampling operations are done with more product piece, the following count results will be more
correct
Enter number value of product on the plate by using “0”, “1” … “9” keys (number keys)
“sample”
Press
Calculating Unit weight is read from unit weight display.
Calculating piece value is read in the number display
o Unit weight is calculated with sample operations. If sampling operations are done with more
product piece, unit weight will be calculated more correctly.
o Showing the calculating unit weight, digits that have error probability are flashing during the five
seconds to warn user.
Sampling operation should be done with more products, which are possible, to decrease number of
digits can be effe
o There would be insufficient sample error if enough weight is not used in sampling operation. In
that condition, scale does not allow getting sample. During the following 3 seconds it gives sound
warning, during the following 6 seconds sample defective led is on.
o If unit weight is too light, the result of counting is shown by rolling.(When sensitivit
counting, is not enough to show one by one)
o The important subject about the unit weight point position
Example : The default point position for a 600 kg scale is “3” . For unit weights bigger than “999,999”
g, point position should be 2,1 or 0
o The scale can be late while counting the products one by one. Delay can be solved by changing
filter settings. However, results will be different a bit, when the filter settings change. User should find
that which filter will be on or off according to his/her using condition by trying.
User can change filter’s value to median (7.1) or average (7.2) in
o If a filter value is on, the probability of difference decreases,
o If a filter value is off, the probability of difference and it perceive small weight differences rapidly.
Note: When the filter setting is changed, scale must be restarted.
o For sensitive counting operations, scale should be made working at least 15-20 minutes after its
starting.
Press one of P1,…, P8keys that you want to save the unit price, at least 3 seconds.
A long “Beep” signal is heard. Number of program key you entered to save is seen on unit piece display
for a while.
Press U key to reach the programs placed to the bottom (programs between P16-P30).
keys for taking sample operation.
IMPORTANT SUBJECTS ABOUT SAMPLING
cted from error or to leave any of them.
REGISTERING
THE UNIT PRICE TO PROGRAM KEYS
y, during the
the setting menu (7).
USAGE OF EXTRA PROGRAMS (PLU)
There are 250 price lookups. It is possible to reach first 30 programs directly by P1,…,P8 keys. To reach
other price lookup tables:
o Press P key.
” PLU “is seen on price display.
o Enter program number. (For instance; press “7”, “1” keys for registering the program number)
Unit price is saved in program 71 is seen on the unit price display.
First, “PLU 71 ” should be seen then price to pay
Registering the unit price on program keys:
o Enter price by using number keys.
This price is seen on unit price display.
o Press P key at least 3 seconds.
Flashing “PLU” is seen on price to pay display.
o Enter program number (for instance, press “7”, “1” keys one by one for program numbered 71)
After 3 seconds long “Beep” signal is going to be heard. Saved
pay display for a while.
WEIGHING WITH TARE
o Place the tare weight on the weighing plate. Wait until the D indicator is on.
Weight of tare can be read from weight display.
o Press T key. “tare” is seen on display for a second then value of “
display.. NET indicator is ON. T symbol is flashing (only for LCD display). Tare has been weighted.
o Place the product on weighing plate. Wait until
Product’s net w
o Make empty the weighing plate.
Wait until the D indicator is on. NET and T indicators are off. Tare is cancelled automatically.
Preset Tare:
o Tare value can be entered by using numerical keypad.
o Press F
Zero value is seen on Weight display.
o Weight value can be entered by using numerical keys “0”,”1”,…”9”.
If 1 kg Tare value will be set for 150 kg weighing instrument, “
o Press T key to fix the tare value. In this case tare will not be cancelled when weighing plate is
empty.
NOTE: Press T key 2 times for
seen on weight display for a while and tare symbol (only for scale with LCD display) begins to be
continuously ON. To cancel tare, press T key when the weighing plate is empty.
Models with T symbol (for LCD display);
Never ON : There is no tare
FLASHING :When weighing plate is empty, tare will be cancelled automatically.
Always ON :Tare is fixed. Press T key to cancel it when weighing plate is empty.
eight is seen on display screen.
key, then Press T key. “hand” message is seen on weight display.
blocking the cancellation of tare. In this case, word “
TOTAL MEMORY TRANSACTIONS
should be seen on price display.
program’s number is seen on price to
D
indicator is on.
1.000
” must be entered.
0.000
-tare-
”is seen on
” is
- 5
- 6
Page 6
-
ATTENTION: If weighing instrument is EGE-M or EGE-LED and there is no printer, not to
-
be used for Total Memory Transactions.
Total memory is used for adding weight and price of products to previous calculated weight and price.
For this transaction there are two keys W, M X on keyboard.
Adding to Total Memory:
o Place the product; to add to memory, on the weighing plate.
Wait until
o Enter the unit price of product.
o Press W key. Weight and price to pay are added to memory.
Related M indicator f
NOTE: During the zero, negatif and Full weight indications and also when the
adding to total memory will not be operated.
NOTE: After an adding to total memory transaction, new adding transactions will not be allowed until
weighing plate is empty and “0.000” value is seen on weight display or new unit price value is entered.
indicator turns ON.
D
lashes.
indicator is off;
D
ATTENTION: If weighing instrument is EGE-M or EGE-LED and there is no printer, not to
be used for Total Memory Transactions.
NOTE: It is possible to see the total as soon as pressing W key. For this transaction turns off “Adding
without Showing Total” (Set3-1) specification from SETTINGS. In this case, total would be seen until the
product is taken from weighing plate.
NOTE: Turn off “Temporary Unit Price” (Set3-2) specification from SETTINGS part to cancel zero
setting of unit price continuously.
NOTE: Maximum 80 record is allowed for total memory transaction.
Seeing and Erasing Total:
o Press M X key.
Total weight is seen on weight display, price is seen on price to pay display, “TPA” and the number of
products added to memory is seen on unit price display.
o Press M X key to delete the total memory or press
weighing mode.
Total indicator is seen as “
If total indicator is;
off memory is empty.
flashing memory has value.
on memory value is seen.
NOTE: It is possible to see the details of weighted products that are saved to total memory by pressing
W key. Detailed explanation can be found in “Seeing the Memory in Details” part.
M
”.
to return to normal
F
- 7
ATTENTION: If weighing instrument is EGE-M or EGE-LED and there is no printer, not to
be used for Total Memory Transactions.
Seeing the Memory in Details:
o Press M X key.
Total weight is seen on weight display, price is seen on price to pay display, “TPA” and the number of
products added to total memory is seen on unit price display.
o Press W key.
Weight and price that are saved first are seen on weight and price to pay display, “TPA” message is
seen on unit price display.
o When W key is pressed transactions are seen on display, respectively.
o Press M X key.
Total weight is seen on weight display, price is seen on price to pay display, “TPA” and the number of
products added to total memory is seen on unit price display.
o Press M X key to erase memory or press
Press ☼ key to toggle between backlight ON, OFF and ON_OFF modes. To change backlight mode :
o Press ☼ key.
For a second, backlight’s mode is seen on display.
bL On : Backlight ON
Backlight is continuously ON.
bL OFF : Backlight OFF.
Backlight is continuously OFF.
bLOnFF : Backlight ON_OFF .
Backlight is ON while weighing or pressing a key.
Backlight is OFF when there is no weight on the w
When scale is turned on, backlight mode is ON_OFF.
If there will be a flashing point on display instead of weight value, backlight will be turned off
automatically
F
to return without erasing.
DISPLAY BACKLIGHT
eighing plate.
- 8
Page 7
-
RS232 INTERFACE
For 10.1 should be open in setting menu.
Example of receipt like to below;
09.01.13 09:45 FİŞ NO: 000030
AĞIRLIK :2.000
BİRİM AĞ. :20 g
ADET :100
SETTINGS
o Pres F key during 3 seconds to enter settings menu.
“Set” and “Basis Menu Number” is seen on Weight display, and “Sub Menu Number” is seen on Unit
Price display. Value is seen on Price to Pay display.
o Press F key to pass to following menu.
o Press O key to pass to following sub menu.
To change the type of On/Off values:
Press T key.
To change the type of number values:
Number keys should be used to change
Press F key to save the number.
o Press F key for 3 seconds to return normal weighing.
NOTE: After exiting from Setting menu, scale should be turned off and turned on for a reliable weighing.
EXAMPLE: Turn off “Set 2-4” to block Automatic Zero Setting specification continuously. (2:basis menu
number, 4:sub menu number):
Press F key during 3 seconds.
“Set1” is seen on Weight display, 1 (submenu number) is seen on Unit Price display. Value is seen
on Price to Pay display.
Press F key once. Pass to menu 2. (Zero setting)
“Set2” is seen on Weight display, 1 (sub menu number) is seen on Unit Price display. Value is seen
on Price to Pay display.
Press O key 3 times. Pass to sub menu 4. (Automatic Zero setting)
“Set2” is seen on Weight display, “4” (sub menu number) is seen on Unit Price display. Value is
seen on Price to Pay display.
Press T key to make “Off” the value seen on Price to Pay display.
“Set2” is seen on Weight display, “4” (sub menu number) is seen on Unit Price display. “Off” is
seen on Price to Pay display.
Press F key 3 seconds to return normal weighing.
Turn off the scale and turn it on again.
SETTINGS MENU:
(Values in parenthesis are factory settings.)
1. Tare
1.1 Tare depends on stable equilibrium
(On)
(If it is approved, its default value is ON and it
cannot be changed)
1.2 Cancel tare operation in negative net
value (Off)
Smaller tare than valid tare. (In negative net
value)
(If it is approved, its default value is ON and it
cannot be changed)
1.3 Tare from interface
Not in this type.
2. Zero setting:
2.1 Initial zero setting range control ±10%
(Off)
(If it is approved, its default value is ON and it
cannot be changed)
2.2 Zero setting key range control < 2%
(If it is approved, its default value is ON and it
cannot be changed)
2.3 Zero setting depends on stability (On)
(If it is approved, its default value is ON and it
be changed)
cannot
Not in this type.
(Off)
(Off)
2.4 Automatic zero setting (Off)
If the weight indication is negative for more
than 5 seconds when the equilibrium indicator
is on, zero will be set automatically.
2.5 Automatic zero tracking (Off)
If it is ON : Automatic zero tracking is done
when the display is zero and stable.
If it is OFF : Automatic zero tracking will not
be done.
NOTE : If there is tare, aut
tracking program is not going to run.
2.6 Zero from interface (Off)
3. Total Memory, Unit Price:
3.1 Adding without showing total memory
(On)
If it is ON: Total cannot be seen after M+.
Weighing is seen.
If it is OFF: Total can be seen until the weighing
plate is empty, after M+
3.2 Temporary unit price (Off)
Not in this type.
3.3 Addi
(On)
(If it is approved, its default value is ON and it
cannot be changed.)
4. Limitation:
Not in this type.
ng by M+ is depends on stability
omatic zero
- 9
- 10 -
Page 8

5. LCD / Time Settings:
5.1 LCD contrast (7)
Can be adjusted between 1 and 9.
5.2 Backlight brightness (7)
Can be adjusted between 1 and 9
5.3 Date (Optional)
First two digits: day
Middle two digits: month
Last two digits: year
5.4 Time (Optional)
First two digits: hour
Last two digits: minute
6. Power management settings:
6.1 Empty weighing plat
(On)
If it is ON: there will be a flashing point on display
instead of weight value if scale is powered by
battery and empty during 30 seconds. (in a scale
with LCD display “
If it is OFF: does not work.
6.2 Power management (On)
Manages empty weighing plate special display
mode and the other power saving modes.
If it is ON: works for saving power in all mod
If it is OFF: works without any power
management in all modes.
7. Filters:
7.1 Median filter (On)
7.2 Average filter (On)
7.3 Point position
It shows the location of point on the unit weight
display. If the number is “ 0 ” point is at the end of
the right side. If it is “ 5 “ point is at the end of the
left side.
8. Calibration:
8.1 Calibration coefficient
(It can be
8.2 Maximum capacity
(It can be changed, if the calibration key is ON)
8.3 Division (1)
0: 3000
1: 2 x 3000
(division can not be set if it is approved)
3: 6000 / 7500 (division can not be set if it is
approved)
changed, if the calibration key is ON)
------
e special display
” is shown)
es.
4: 12000 / 15000(division can not be
set it is approved)
6: 1500
(It can be changed, if the calibration key is ON.)
8.4 Calibration empty weighing plate internal
count
(It can be changed, if the calibration key is ON.)
8.5 Maximum capacity unit (1)
0: g
1: kg
2: ton
(It can not be changed, if
8.6 Gravity value of place where instruments
was calibrated (9.8022)
(It can be changed, if the calibration key is ON)
8.7 Gravity value of place where instrument
will be used (9.8022)
(It can be changed, if the calibration key is ON)
8.8 Load Cell mV/ V value (2,0)
9. Relay settings:
Not in this type.
10. Interface settings:
(Only for PRINTER/PC type scales.)
10.1 Communication ON/OFF (On)
If it is ON :RS232 communication is active.
If it is OFF : RS232 communication is inactive.
(It must be activated in only for printer/pc type
scales, otherwise
10.2 ID Number ( )
Not in this type.
10.3 Continuous transmitting ( )
Not in this type.
10.4 PC data package selection ( )
Not in this type.
10.5 Baud Rate ( )
It is com
and Scale
0: 9600
1: 19200
2: 38400
3: 57600
4: 115200
munication speed between Computer
it is approved)
ER 8
message will be seen.)
11. Testing Menu:
Not in this type.
12. Others:
12.1 Approved
(Off)
(It can be changed, if the calibration key is ON.)
If it is turned ON, all settings depended on
THINGS TO DO BEFORE CALLING THE SERVICE
FAILURE SIGNALS
ERROR1 : Turn off the scale and then turn on it again. If failure continues, call service.
ERROR2 : Wait for a while. Turn off the scale and then turn on it again. If failure still continues, call
service.
ERROR3 : Wait for a while. Sure weighing plate is empty and press
off the scale and then turn on it again. If failure still continues, call serv
ERROR4 : Turn off the scale and then turn on it again. If failure continues, call service.
ERROR5 : Initial zero setting range control error. Weighing not allowed.
Be sure the weighing plate is empty. (If the weighing plate is not on scale, put it on to the scale)Turn off
the scale and turn it on again, when the weighing plate is empty.
Call the service if this warning is active again, when
ERROR6 : Turn off the scale and turn on it again. If failure continues, call service.
ERROR7 : Turn off the scale and then turn on it again. If failure continues, call service.
ERROR8 : Interface communication error. Turn off the scale and then turn on it again. If scale is not
pc/printer type and error still continues, call the service.
If scale is pc/printer type,
continues call the service.
ERROR9 : Turn off the scale and then turn on it again. If failure continues, call service.
ERROR11 : Turn off the scale and then turn on it again. If failure continues, call service.
ERROR12 : Turn off the scale and then turn on it again. If failure continues, call service.
ERROR13 : For pc/p
There will be no data transmission to the PC/Printer and new transaction will be blocked until alibi
memory erased.
Erase alibi memory, turn off the scale and then turn on it again. For Printer type models see related
documents.
ERROR14 : Loadcell cable detection error. Check loadcell connector and cable. If the
connector i
failure still continues, call service.
ERROR15 : Wait for a while. If failure continues, turn off the scale and then turn on it again. If
failure still continues, call service.
ERROR16 : See “PrinterUserManualAnnex.doc”. If failure continues, call service.
Lo bAtt: The battery is empty. Scale does no
possible.
Full (on weight display): Weight is more than maximum capacity.
Full (Price display): Price to pay is too long to shown on display.
nnnnnn :
instrument may be tried to open up. On the empty platform. (The platform is not installed, replace) If
neces
If load carrier has two platform, you make sure to empty on load carrier.
s unplugged, plug it again. If failure continues, turn off the scale and then turn on it again. If
Platform (load carrier) is not fitted, or when there is weight on the platform weighing
sary, there was no load on the instrument a more open platform.
change SET 10.1 to “On” and turn off the scale and turn on it again. If still
rinter type models, If alibi memory is full, this message will be shown.
condition “APPROVED” returns to factory
settings values.
12.2 Starting delay (10sn)
(On)
(If it is approved, it cannot be changed)
O
key. If failure continues, turn
ice.
the weighing plate is empty.
t work. It should be charged or changed as soon as
- 11 -
- 12 -
Page 9
The platform was empty, If failure still continues, call service.
ACOUSTIC SIGNALS
Short beep : Any key pressed.
Double short beep : Indicates the pressed key has no use for the related function.
Long beep : Same frequency with short beep. Indicates second function of the pressed key was done.
Short beep and long beep different frequency: It indicates desired operation could not be operated. For
example, pressing T key when D indicator is off.
Regular short beep 10 seconds period : When battery is low, scale signals in every ten seconds.
However, battery indicator flashes. It means that the battery is going to be empty and weighing cannot
be done after a while. Adaptor should be connected as soon as possible. If you continue weighing
F
without adaptor it continues signaling. Press
to control if it works or not.
TECHNICAL SPECIFICATIONS
Adapter : 220-240 VAC, 50 Hz input, 7,5 V DC output, 10 W
Weighing Instrument Electrical Specifications : 7.5 V DC, 6 W
Metrological Specifications : Look at data plate on scale.
Operating temperature range : -10 °C ~ +40 °C
MANUFACTURER INFORMATION
FACTORY AND HEADQUARTERS:
key to cancel signaling. Look at the red light on adapter
İstanbul Deri Organize Sanayi Bölgesi 1. Yol H7 Orhanlı 34956 TUZLA/ İSTANBUL
TEL: (216) 394 25 25 FAKS: (216) 394 83 82
www.temterazi.com
Note: For latest information about authorized services, call factory service.
- 13 -
Page 10

OPERATIONS GUIDE
TNS0XXD-O
Page 11
Deutsch
Polski
Česky
Français
Italiano
Español
3
7
11
15
19
23
BEDIENUNGSANLEITUNG
DISPLAY UND TASTATURTASTEN
Null-Anzeige Zeigt an, dass die Waagschale leer
ist. Vergewissern Sie sich vor dem Wiegen, dass die
Waagschale leer ist und drücken Sie die Taste „
die Waage auf Null zurückzusetzen, wenn die Nullanzeige
nicht aktiv ist. Andernfalls kann ein Fehler auftreten.
Gleichgewichtsanzeige
Waagschale stabil ist. Die Anzeige ist inaktiv, wenn die Last
auf die Waagschale gelegt wird oder wenn die Last von der
Waagschale genommen wird. Wenn die Anzeige erlischt,
kann die Anzeige des Skalenwertes falsch sein. Warten
Sie daher, bis nach dem Auegen des Produkts auf die
Waagschale das Symbol
abzulesen.
Tara-Anzeige
beeinusst. Blinkt, wenn Tara nicht xiert ist. Leuchtet
kontinuierlich, wenn die Tara konstant ist. (Nur Waage mit
LCD-Display)
Gesamtspeicheranzeige M: Blinkt, wenn sich Daten im
Speicher benden. Wird aktiviert, wenn der Speicherinhalt
angezeigt wird.
Akku-Anzeige:
Wenn die Anzeige leuchtet, läuft die Waage mit
Batteriestrom. Wenn die Anzeige blinkt, muss die Batterie
so schnell wie möglich aufgeladen oder ausgetauscht
werden.
Die Waagen mit LCD-Display verfügen über vier zusätzliche
Batterieanzeigen, die den Ladezustand der Batterie
anzeigen, sowie über grasche Informationen über die
Batterieladung, die erst nach dem Anschluss des Netzteils
beginnt. Wenn das Netzteil nicht angeschlossen ist,
erscheint ein Rahmen um die Batterieanzeige, der anzeigt,
dass es verwendet wird. Kurz bevor die Batterie leer ist,
blinkt der Rahmen um das Batteriesymbol.
Zierntasten: Zur Eingabe von Einheitspreisen oder
anderen Daten.
C-Taste: Dient zum Zurücksetzen von Einzelpreisen oder
anderen Daten
: Dient zum Einstellen der Last als Tara.
Taste
Taste
Waagschale.
Taste F: Eingang in das Einstellungsmenü und einige der
Funktionen, die den Einstellungen ähnlich sind.
Taste
(nur für PC-Optionen oder Drucker)
Taste
hinzuzufügen.
Taste
Gesamtspeicher anzuzeigen und zu löschen
Taste ☼: Schaltet Hintergrundbeleuchtung zwischen Ein/
Aus, EIN-AUS (nur für LCD-Display) ON, OFF, ON-OFF
Taste
auszuwählen.
: Zum Nullstellen der Waage bei leerer
: Wird zum Erstellen von Ausdrucken verwendet
: Wird verwendet, um Daten zum Gesamtspeicher
: Wird verwendet, um den Stückpreis
Zeigt an, dass die Last auf der
erscheint, um den Lastwert
: Zeigt an, dass Tara die Wägung
:Zeigt an, dass die Batterie funktioniert.
: Wird verwendet, um den
Tasten P1, P2...: Wird verwendet, um einen Stückpreis
schnell auszuwählen.
Taste ↓: (SHIFT) Wird zur Auswahl von P16-P30 Programmen
verwendet.
” um
Alle Symbole und Elemente sind beim Einschalten der Waage
sichtbar. Der Countdown ist für ca. 10 Sekunden sichtbar.
Dann sehen Sie die maximal zulässige Gewichtsbelastung
und die Waage und das Gewicht gehen in den normalen
Betriebsmodus über.
Das Display zeigt Null an. Die Symbole
sind aktiviert. Die Waagschale darf erst belastet werden,
wenn sie wiegebereit ist. Bei vorhandener Belastung der
Waagschale oder wenn keine Waagschale vorhanden ist,
kann ein nnnnnn-Fehler in der Anzeige erscheinen. Stellen
Sie sicher, dass die Waagschale nicht belastet wird, bevor
der Service aufgerufen wird.
Legen Sie die Last auf die Waagschale. Warten Sie, bis die
Anzeige
dem Display angezeigt.
Der Wert „0.000“ sollte auf dem Display erscheinen und
die Anzeigen
Waagschale leer ist. Wenn der Anzeigewert ungleich Null
ist oder die Anzeige
um die Waage zu löschen. Nachdem die Waage nullgestellt
und stabilisiert wurde, kann der Normalbetrieb gestartet
werden.
ACHTUNG: Es ist verboten, Lasten auf die Waage zu legen,
die ihre zulässige Höchstlast überschreiten. (Wert „Max:
auf dem Typenschild“). Die Last wird manuell auf die
Waagschale gelegt. Das Werfen einer Last aus der Höhe
oder das Werfen einer Last auf die Waagschale (auch bei
geringer Last) kann die Waage beschädigen.
Um die Stückzählung derselben Produkte korrekt
durchzuführen, muss das Gewicht eines einzelnen Produkts
bekannt sein. Das Gewicht eines einzelnen Produkts ist ein
„Stückgewicht“.
BEKANNTES STÜCKGEWICHT UND BERECHNUNG
Geben Sie den Wert des Stückgewichts mit den Zierntasten
„0“, „1“ ... „9“ ein.
Das eingegebene Stückgewicht wird in der
Stückgewichtanzeige angezeigt.
Die Anzahl der gezählten Stücke bzw. Menge von Produkten
ist in der Mengenanzeige sichtbar.
Legen Sie eine bekannte Anzahl von Produkten auf die
Waagschale.
Wenn die Probenahme mit mehr als einem Produkt
durchgeführt wird, sind die Ergebnisse der Konvertierung
bzw. Berechnung genauer.
Verwenden Sie die Zierntasten „0“, „1“ ... „9“, um die Anzahl
der Produkte einzugeben, die sich auf der Waagschale
benden.
Drücken Sie die „Sample“ -Taste.
ERSTES EINSCHALTEN
WÄGEN
aueuchtet. Das Gewicht der Last wird auf
und sollten leuchten, wenn die
nicht leuchtet, drücken Sie
ZÄHLFUNKTION
SAMPLING-FUNKTION (PROBENAHME
und
DE
)
2 32
Page 12
Das umgerechnete Stückgewicht wird in der
Stückgewichtanzeige angezeigt.
Die umgerechnete Anzahl von Produkten wird in der
Mengenanzeige angezeigt.
Einige auf dem Display angezeigte Ziern des
umgerechneten Gewichtswertes blinken möglicherweise
(5 Sekunden lang). Dies bedeutet, dass diese Zahlen
möglicherweise falsch konvertiert wurden. Um diese
Art von Fehlern zu minimieren bzw. zu vermeiden, wird
empfohlen, das Zähl- / Probenahmeverfahren mit so vielen
Produkten wie möglich durchzuführen.
REGISTRIEREN DES PREISSUCHSCLÜSSELS TASTEN
Geben Sie den Stückpreiswert über die Zehnertastatur
ein. Drücken und halten Sie für ca. 3 Sekunden eine der
Tasten P1,..., P8, welcher der Einheitspreis zugewiesen wird.
Die Waage akzeptiert die Dateneingabe mit einem langen
Piepton.
VERWENDUNG DER EINHEITSPREIS-TASTEN (PLU
Die Waage kann 250 verschiedene Stückpreise speichern.
Direkter Zugri auf die gespeicherten Einheitspreise
erhalten Sie durch Drücken einer der Tasten P1,... P8.
Zugang zu anderen Stückpreisen erhalten Sie mit der PLU-
Taste:
Drücken Sie die PLU-Taste.
„PLU“ wird auf dem Display angezeigt.
Geben Sie die Programmnummer ein, unter der der
Einheitspreis gespeichert ist (drücken Sie z.B. „7“ und
DE DE
dann „1“ – für das PLU-Programm „71“). Auf dem Display
erscheint „PLU 71“ und der Stückpreis, der in diesem
Programm eingegeben wurde.
Erfassen des Stückpreises mit der PLU-Taste:
Geben Sie den Stückpreis über die Zierntasten ein – er
wird auf dem Display angezeigt. Drücken und halten Sie
PLU für ca. 3 Sekunden. „PLU“ blinkt auf dem Display. Geben
Sie die Programmnummer PLU ein, unter der der Stückpreis
eingegeben wird; dieser wurde früher eingegeben (drücken
Sie z.B. „7“ und dann „1“, um diesen Stückpreis unter PLUProgramm Nr. 71 zu registrieren).
TARA
• Taralast auf die Waagschale legen. Warten Sie, bis die
Anzeige
im Display angezeigt.
• Drücken Sie die Taste
„In der Anzeige erscheint für ca. 1 Sekunde die “
Die NET-Anzeige ist eingeschaltet.
blinkt (nur LCD-Anzeige). Tara wurde gewogen.
• Legen Sie die Last auf die Waagschale. Warten Sie, bis
die Anzeige
wird im Display angezeigt.
• Nehmen Sie die Last von der Waagschale.
Warten Sie, bis die Anzeige
Die NET – und
automatisch gelöscht.
Tara-Programmierung:
Der Tarawert kann über die numerische Tastatur
eingegeben werden.
aueuchtet. Das Gewicht der Tara wird
.
” danach wird der Wert „0.000“ angezeigt.
erscheint. Das Nettolastgewicht
Anzeige erlischt. Tara wird
Symbol
aueuchtet.
Drücken der Taste
Einzelpreisanzeige zeigt
zeigt Null an. Der Ladewert kann mit den Zierntasten „0“,
„1“,... „9“ geändert werden.
Drücken Sie die
In diesem Fall wird die Tara nicht gelöscht, wenn die
Waagschale leer ist.
Drücken Sie zweimal die Taste
der Tara zu sperren. In diesem Fall wird das Wort „sabit“
kurz auf dem Display angezeigt und das Tarasymbol (nur
bei LCD-Anzeigen) ist dauerhaft eingeschaltet. Um die
Tara zu annullieren, drücken Sie die
Waagschale leer ist.
Bei Modellen mit LCD-Anzeige, wenn das Symbol
Niemals einschaltet – > Tara nicht vorhanden
Blinkt – > Wenn die Waagschale leer ist, wird die Tara
automatisch gelöscht.
Immer an ist – > Tara ist gesetzt. Um die Tara zu annullieren,
drücken Sie die Taste T, wenn die Waagschale leer ist.
)
HINWEIS: Wenn es sich bei der Waage um einen EGE-M
– oder EGE-LED-Typ handelt und kein Drucker vorhanden
ist, kann sie nicht für Operationen mit Gesamtspeicher
verwendet werden.
Der Gesamtspeicher wird verwendet, um Gewicht und
Produktpreis zu zuvor gewogenen und preislich bewerteten
Produkten hinzuzufügen. Hierzu dienen die Tasten
und
Hinzufügen zum Gesamtspeicher:
Legen Sie das Produkt auf die Waagschale.
Warten Sie, bis sich die Anzeige
Geben Sie den Stückpreis des Produkts ein.
Drücken der Taste
Preis werden dem Gesamtspeicher hinzugefügt. Die
entsprechende M-Anzeige blinkt auf.
ACHTUNG: Während der Nullstellung oder der negativen
Vollanzeige sowie wenn die Anzeige
ist, wird das Hinzufügen zum Gesamtspeicher nicht
durchgeführt.
ACHTUNG: Nach Hinzufügen der Operation zum
Gesamtspeicher ist die Neuaddition des Wertes in den
Gesamtspeicher nicht möglich, wenn die Waagschale nicht
leer ist. Das Display zeigt nicht den Wert „0.000“ an oder es
wird ein neuer Einheitspreis eingegeben.
HINWEIS: Sie können den Gesamtwert überprüfen, indem
Sie die Taste
“SETTINGS” ist die Funktion „Adding without Showing
Total” (Set 3-1) auszuschalten. In diesem Fall ist der
Gesamtwert sichtbar, bis das Produkt aus der Waagschale
entfernt wird.
HINWEIS: Bis zu 80 Aktionen für das Hinzufügen zum
Gesamtspeicher können gespeichert werden.
Werte des Gesamtspeichers anzeigen und löschen:
Drücken der Taste
dem Display sichtbar, der Preis wird auf dem Display des
zu zahlenden Betrags angezeigt,
Produkte, die dem Speicher hinzugefügt werden, sind auf
der Einzelpreisanzeige sichtbar.
Drücken der Taste
Gesamtspeicher oder drücken Sie F, um zum normalen
Wiegemodus zurückzukehren.
Die Gesamtspeicheranzeige wird als M angezeigt:
Wenn die Anzeige aus ist: Der Speicher ist leer.
F. Drücken der Taste . Die
Taste, um den Tarawert zu speichern.
GESAMTSPEICHER-AKTIONEN
.
drücken. In den Detaileinstellungen
an. Die Ladewertanzeige
um die Annullierung
Taste, wenn die
einschaltet.
Das Gewicht und der zu zahlende
. Das Gesamtgewicht ist auf
und die Anzahl der
Löschen Sie den
:
nicht sichtbar
Wenn die Anzeige blinkt: Die gespeicherten Werte werden
im Speicher gespeichert.
Wenn die Anzeige leuchtet: Der Speicherwert ist sichtbar.
Speicherdaten anzeigen:
Drücken der Taste
dem Display sichtbar, der Preis wird auf dem Display des
zu zahlenden Betrags angezeigt,
Produkte, die dem Speicher hinzugefügt werden, sind auf
der Einzelpreisanzeige sichtbar.
Drücken der Taste
zuerst gespeichert wurden, sind auf den Gewichtsanzeigen
und dem zu zahlenden Betrag sichtbar.
Einzelpreisanzeige sichtbar.
Durch Drücken der Taste
Aktionen angezeigt.
Drücken der Taste
X. Das Gesamtgewicht wird auf dem Display angezeigt,
der Preis wird auf dem Display des zu zahlenden
Betrags angezeigt,
die dem Speicher hinzugefügt werden, sind auf der
Einzelpreisanzeige sichtbar.
Drücken Sie die X-Taste
zu löschen, oder drücken Sie F, um zum Wägen
zurückzukehren, ohne Daten zu löschen.
DISPLAY HINTERLEUCHTEN
Drücken Sie ☼, um zwischen ON, OFF und ON_OFF
Hintergrundbeleuchtung umzuschalten. Um den
Hintergrundbeleuchtungsmodus zu ändern:
Der Hintergrundbeleuchtungsmodus wird auf dem Display
für etwa eine Sekunde angezeigt:
bL Ein: die Hintergrundbeleuchtung ist EIN
Die Hintergrundbeleuchtung ist permanent eingeschaltet.
bL OFF: die Hintergrundbeleuchtung ist AUS.
Die Hintergrundbeleuchtung ist dauerhaft ausgeschaltet.
bLOnFF: die Hintergrundbeleuchtung ist im ON_OFF-
Modus eingeschaltet.
Die Hintergrundbeleuchtung wird beim Wiegen oder
Drücken der Tasten eingeschaltet.
Die Beleuchtung wird ausgeschaltet, wenn die Waagschale
leer ist.
Wenn die Waage eingeschaltet ist, ist die
Hintergrundbeleuchtung ausgeschaltet.
Blinkt die Anzeige anstelle der Last, wird die
Hintergrundbeleuchtung automatisch abgeschaltet.
EINSTELLUNGEN
• Drücken Sie die Taste F für ca. 3 Sekunden, um in
das Einstellmenü zu gelangen. Das Display zeigt für
ca. 2 Sekunden „Set“, „Basis Menu Number“ und
„Submenu number“, danach werden die Werte des
Untermenüs für ca. 2 Sekunden auf dem Display
angezeigt.
• Drücken Sie die Taste F, um das Menü aufzurufen
• Drücken Sie die Taste
zu gelangen.
Um Werte zu ändern On O:
• Drücken Sie die Taste
Um den Typ der numerischen Werte zu ändern:
• Verwenden Sie die Zierntasten, um den Wert zu
ändern
• Drücken Sie F, um die Änderung zu speichern.
• Drücken Sie F für ca. 3 Sekunden, um in den
normalen Wiegemodus zurückzukehren.
. Das Gesamtgewicht ist auf
und die Anzahl der
. Das Gewicht und der Preis, die
ist auf der
werden die entsprechenden
. Drücken Sie die Taste
und die Anzahl der Produkte,
um den Speicher
aum in das Untermenü
.
ACHTUNG: Nach Verlassen des Setup-Menüs schalten Sie
die Waage aus und wieder ein.
VOR DEM SERVICEANRUFEN
SIGNALE DER STÖRUNGEN
ER 1: Schalten Sie die Waage aus und wieder ein. Wenn der
Fehler weiterhin auftritt, melden Sie sich beim Service.
ER2: Warte einen Moment. Schalten Sie die Waage aus und
wieder ein. Wenn der Fehler weiterhin auftritt, melden Sie
sich beim Service.
ER 3: Warten Sie eine Weile. Stellen Sie sicher, dass die
Waagschale leer ist und drücken Sie die Taste O. Wenn der
Fehler weiterhin besteht, schalten Sie die Waage aus und
wieder ein. Wenn der Fehler weiterhin besteht, wenden Sie
sich an den Kundendienst.
ER 4: Schalten Sie die Waage aus und wieder ein. Wenn
der Fehler weiterhin besteht, wenden Sie sich an den
Kundendienst.
ER 5: Eingangsfehler – Zurücksetzen. Wiegen unmöglich.
Stellen Sie sicher, dass die Waagschale leer ist. (Wenn die
Waagschale nicht auf der Waage steht, dort unterbringen).
Schalten Sie die Waage aus und wieder ein. Melden Sie sich
beim Service, wenn die Nachricht bei leerer Schale aktiv ist.
ER 6: Waage aus – und wieder einschalten. Wenn der Fehler
weiterhin besteht, wenden Sie sich an den Kundendienst.
ER 7: Schnittstellen-Kommunikationsfehler Schalten Sie die
Waage aus und wieder ein. Wenn es sich bei der Waage
nicht um ein PC-Modell mit Druckfunktion handelt, wenden
Sie sich an den Kundendienst. Wenn es sich bei der Waage
um ein PC-Modell / Modell mit Druckfunktion handelt,
ändern Sie SET 10.1 auf „On“ und schalten Sie die Waage
aus. Dann schalten Sie diese wieder ein. Wenn das Problem
weiterhin besteht, wenden Sie sich an den Kundendienst.
ER 8: Waage aus – und wieder einschalten. Wenn der Fehler
weiterhin besteht, wenden Sie sich an den Kundendienst.
ER 9: Waage aus – und wieder einschalten. Wenn der Fehler
weiterhin besteht, wenden Sie sich an den Kundendienst.
ER 10: Waage aus – und wieder einschalten. Wenn der Fehler
weiterhin besteht, wenden Sie sich an den Kundendienst.
ER 11: Gilt für PC-Modelle / Modelle mit Druckfunktion –
Diese Meldung erscheint, wenn der ALIBI-Speicher voll ist.
Dies blockiert die Datenübertragung zum PC / Drucker.
Löschen Sie den ALIBI-Speicher. Schalten Sie die Waage aus
und wieder ein.
ER 12: Fehler bei der Erkennung der Verbindungsleitung
an den tensometrischen Sensor. Überprüfen Sie das
Verbindungs – und DMS-Kabel. Verbinden Sie den Stecker,
wenn er nicht angeschlossen ist. Wenn der Fehler auftritt,
schalten Sie die Waage aus und wieder ein. Wenn der Fehler
weiterhin auftritt, melden Sie sich beim Service.
ER 13: Warten Sie einen Moment. Wenn der Fehler weiterhin
besteht, schalten Sie die Waage aus und wieder ein. Wenn
der Fehler weiterhin auftritt, melden Sie sich beim Service.
ER 14: Siehe „PrinterUserManualAnnex.doc“. Wenn der
Fehler weiterhin auftritt, melden Sie sich beim Service.
Lo bAtt: Entladene Batterie. Die Waage funktioniert nicht.
Laden Sie die Batterie auf.
Full (auf dem Display der Waage): Der Belastungswert ist
größer als die maximal zulässige Belastung.
4 5
Page 13
INSTRUKCJA OBSŁUGI
Full (auf dem Display der Waage): Der Zahlungsbetrag ist
zu groß, um auf dem Display angezeigt zu werden.
nnnnnn: Die Plattform (Waagschale) ist nicht xiert, oder
die Waagschale wird beim Betätigen der Waage belastet.
Entfernen Sie die Last von den Plattformen. Wenn
die Plattform nicht xiert ist, muss sie xiert werden.
Gegebenenfalls die Waage bei leerer Plattform (ohne Last)
neu starten. Wenn der Fehler weiterhin besteht, wenden Sie
sich an den Kundendienst.
AKUSTISCHE SIGNALE
Kurzer Piepton: gedrückte, beliebige Taste.
Doppelter Piepton: Zeigt an, dass die gedrückte Taste nicht
auf die entsprechende Funktion zutrit.
Langer Piepton: die gleiche Frequenz wie der kurze Piepton.
Zeigt die zweite Funktion der gedrückten Taste an.
Der kurze Piepton und der lange Piepton haben
unterschiedliche Frequenzen: zeigt an, dass der
gewünschte Vorgang nicht ausgeführt werden kann.
Drücken Sie beispielsweise die Taste T, während die
Anzeige D ausgeschaltet ist.
Regelmäßige kurze Pieptöne in 10 Sekunden: Wenn der
Batteriestand niedrig ist, zeigt die Waage dies alle 10
Sekunden an. Die Batterieanzeige blinkt. Dies bedeutet,
dass die Batterie bald vollständig entladen ist und ein
Wiegen nicht mehr möglich ist. Schließen Sie das Netzteil
an. Ein fortgesetzter Betrieb ohne Anschluss des Netzteils
zeigt weiterhin eine niedrige Batterieladung an. Drücken Sie
die Taste F, um die Signalisierung abzubrechen. Überprüfen
DE
Sie die rote LED am Netzteil auf Funktionstüchtigkeit.
TECHNISCHE DATEN
Netzteil: 220-240 V AC, 50 Hz Eingang, 7,5 V DC Ausgang, 10 W
Elektrische Parameter der Waage: 7.5 V DC, 6 W
Meteorologische Daten: auf dem Typenschild.
Betriebstemperatur: – 10 °C ~ +40 °C
HERSTELLER
TÜM ELEKTRONİK MÜH. SAN. TİC.LTD.ŞTİ
İstanbul Deri Oraganize Sanayi Bölgesi 1. Yol H7 Parsel
Orhanlı 34956 TUZLA/ İSTANBUL
TEL: (216) 394 25 25
FAX: (216) 394 83 82
www.temscale.com
Hinweis: Aktuelle Informationen zum autorisierten Service
erhalten Sie von Ihrem Werkskundendienst.
WYŚWIETLACZ I PRZYCISKI KLAWIATURY
Wskaźnik zero: Pokazuje, że szalka wagi jest pusta.
Przed ważeniem produktu należy upewnić się, że szalka
wagi jest pusta oraz nacisnąć przycisk „
wyzerować wagę, jeśli wskaźnik zera
W przeciwnym razie może wystąpić błąd.
Wskaźnik równowagi:
na szalce wagi jest stabilne. Wskaźnik jest nieaktywny
w momencie umieszczania obciążenia na szalce lub
w momencie zdejmowania obciążenia z szalki wagi. Jeśli
wskaźnik wyłączy się, wskazanie wartości wagi może być
nieprawidłowe. W związku z tym, aby odczytać wartość
obciążenia, należy zaczekać aż pojawi się symbol
umieszczeniu produktu na szalce wagi.
Wskaźnik tary
Miga, gdy tara nie jest ustalona. Świeci ciągle, gdy tara jest
stała. (Tylko dla wagi z wyświetlaczem LCD.)
Wskaźnik pamięci całkowitej M: Miga gdy w pamięci
znajdują się dane. Jest włączony gdy zawartość pamięci jest
wyświetlana.
Wskaźnik baterii:
wskaźnik jest włączony, waga pracuje na zasilaniu z baterii.
Jeśli wskaźnik miga, konieczne jest naładowanie lub
wymiana baterii w możliwie najkrótszym czasie.
Wagi wyposażone w wyświetlacz LCD, mają cztery
dodatkowe wskaźniki baterii wskazujące poziom
naładowania baterii, a także tryb posiadają graczną
informację o ładowaniu baterii, która uruchamia się
dopiero po podłączeniu zasilacza. Jeśli zasilacz nie został
podłączony, pojawi się ramka wokół wskaźników baterii
wskazująca, że jest ona używana. Tuż przed wyczerpaniem
baterii, ramka wokół symbolu baterii miga.
Klawisze numeryczne: Używane do wprowadzania cen
jednostkowych lub innych danych.
Przycisk C: używany do zerowania cen jednostkowych lub
innych danych.
Przycisk
Przycisk
gdy szalka wagi jest pusta.
Przycisk F: Służy do przechodzenia do menu ustawień
i niektórych funkcji zbliżonych do ustawień.
Przycisk
opcji komputerów PC lub drukarki).
Przycisk
całkowitej.
Przycisk
i kasowania pamięci całkowitej.
Przycisk ☼: Przełącza podświetlenie pomiędzy włączone,
wyłączone, włączone-wyłączone (tylko dla wyświetlacze
LCD) ON, OFF, ON-OFF
: Pokazuje, że tara wpływa na ważenie.
: Używany do ustawienia obciążenia jako tara.
: Używany do zerowania wagi w momencie
: Używany do wykonywania wydruków (tylko dla
: Używany do dodawania do pamięci
Pokazuje, że obciążenie
: Wskazuje na pracę baterii. Jeśli
: używane do wyświetlania
” aby
nie jest aktywny.
po
Przycisk
Przyciski P1, P2: Używane do szybkiego wybierania ceny
jednostkowej.
Przycisk ↓: (SHIFT) Używany do wybierania programów
P16-P30.
W momencie włączenia wagi, wszystkie symbole i elementy
są widoczne. Przez około 10 sekund widać odliczanie.
Następnie widać maksymalne dopuszczalne obciążenie
wagi oraz podziałkę i waga przechodzi do trybu normalnej
pracy.
Na wyświetlaczu widać cyfrę zero. Symbole
są włączone. Nie należy umieszczać żadnego obciążenia na
szalce wagi, dopóki nie jest ona gotowa do ważenia. Jeśli na
szalce będzie obciążenie, lub jeśli na wadze nie ma szalki, na
wyświetlaczu może pojawić się błąd ER 5. Należy upewnić
się, że na szalce nie ma obciążenia, zanim zostanie wezwany
serwis.
Umieścić obciążenie na szalce wagi. Poczekać aż wskaźnik
się włączy. Waga obciążenia jest widoczna na
wyświetlaczu.
Wartość “0.000” powinna pojawić się na wyświetlaczu oraz
wskaźniki
jest pusta. Jeśli wartość na wyświetlaczu nie jest zerem lub
wskaźnik
wyzerowania wagi. Po wyzerowaniu i ustabilizowaniu się
wagi można rozpocząć normalną pracę.
UWAGA: Zabrania się umieszczania na wadze obciążeń
przekraczających jej dopuszczalne maksymalne obciążenie.
(Wartość „Max: na tabliczce znamionowej).
Obciążenie powinno być położone na szalce wagi ręcznie.
Rzucanie obciążenia z wysokości lub rzucanie obciążeniem
na szalkę (nawet jeśli obciążenie jest niewielkie) może
doprowadzić do uszkodzenia wagi.
Aby poprawnie przeprowadzić liczenie sztuk takich samych
produktów należy znać wagę pojedynczego produktu.
Waga pojedynczego produktu jest „wagą jednostkową”
(„unit weight”).
ZNANA WAGA JEDNOSTKOWA I ZLICZANIE
Wprowadzić wartość wagi jednostkowej przy pomocy
klawiatury numerycznej “0”, “1” … “9”.
Wprowadzona waga jednostkowa jest widoczna na
wyświetlaczu wagi jednostkowej.
Liczba policzonych sztuk jest widoczna na wyświetlaczu
ilości.
Na szalce wagi położyć znaną ilość produktów.
Jeśli próbkowanie przeprowadza się z więcej niż jednym
produktem, wyniki przeliczenia są bardziej dokładne.
Przy pomocy klawiatury numerycznej “0”, “1” … “9”
wprowadzić ilość produktów które są na szalce.
Nacisnąć przycisk „Sample”.
: Używany do wybierania ceny jednostkowej.
PIERWSZE WŁĄCZENIE
WAŻENIE
i powinny się włączyć kiedy szalka wagi
się nie włączył, należy wcisnąć w celu
ZLICZANIE
FUNKCJA PRÓBKOWANIA (SAMPLING
oraz
)
PL
6 7
Page 14
Przeliczona waga jednostkowa pokaże się na wyświetlaczu
wagi jednostkowej.
Przeliczona ilość produktów pokaże się na wyświetlaczu
ilości.
Niektóre cyfry przeliczonej wartości wagi jednostkowej
wyświetlające się na wyświetlaczu mogą migać (przez
5 sekund) – oznacza to, że cyfry te mogły być błędnie
przeliczone. Aby zminimalizować tego typu błędy zaleca się
aby procedura zliczania / sampling była przeprowadzana
z jak największą liczbą produktów.
REJESTROWANIE PRZYCISKÓW
WYSZUKIWANIA CEN
Wprowadzić wartość ceny jednostkowej przy pomocy
klawiatury numerycznej. Nacisnąć i przytrzymać przez
około 3 sekundy jeden z przycisków P1,…, P8., do których
będzie przypisana cena jednostkowa. Waga zatwierdzi
wprowadzenie danych poprzez długi sygnał dźwiękowy
UŻYWANIE PRZYCISKÓW WYBIERANIA
CENY JEDNOSTKOWEJ (PLU
Waga może zapamiętać 250 różnych cen jednostkowych.
Bezpośredni dostęp do zapisanych cen jednostkowych
można uzyskać poprzez przyciśnięcie jednego z przycisków
P1,… P8. Dostęp do pozostałych cen jednostkowych można
uzyskać za pomocą przycisku PLU:
Nacisnąć przycisk PLU.
„PLU’ będzie widoczne na wyświetlaczu.
Wprowadzić numer programu, pod którym jest zapisana
PL
cena jednostkowa (np. nacisnąć „7” a następnie „1” – dla
programu PLU nr „71”). Na wyświetlaczu pokaże się „PLU
71” i cena jednostkowa, która została wprowadzona do
tego programu.
Rejestrowanie ceny jednostkowej przy użyciu przycisku
PLU:
Wprowadzić cenę jednostkową przy użyciu klawiatury
numerycznej – będzie ona widoczna na wyświetlaczu.
Nacisnąć i przytrzymać przez około 3 sekundy przycisk
PLU. „PLU” będzie migało na wyświetlaczu. Wprowadzić
numer programu PLU, pod którym będzie zapisana cena
jednostkowa, która została wprowadzona wcześniej (np.
wcisnąć „7” a następnie „1” aby zarejestrować tę cenę
jednostkową pod programem PLU nr 71).
TARA
• Umieścić obciążenie tary na szalce wagi. Poczekać
aż wskaźnik
widoczna na wyświetlaczu.
• Nacisnąć przycisk
• Umieścić obciążenie na szalce wagi. Poczekać aż
• Zdjąć obciążenie z szalki wagi.
” jest widoczna na wyświetlaczu przez około
“
1 sekundę, następnie wyświetla się wartość “0.000”.
Wskaźnik NET zostaje włączony. Symbol
(tylko dla wyświetlaczy LCD). Tara została zważona.
pokaże się wskaźnik
jest widoczna na wyświetlaczu.
Poczekać aż wskaźnik
NET oraz
automatycznie.
włączy się. Waga tary będzie
.
. Waga obciążenia netto
wyłączą się. Tara jest anulowana
włączy się. Wskaźniki
Programowanie tary:
Wartość tary może być wprowadzona przy pomocy
klawiatur numerycznej.
Nacisnąć przycisk
wyświetlaczu ceny jednostkowej pojawi się
Wyświetlacz wartości obciążenia pokaże zero. Wartość
obciążenia może być zmieniona klawiatura numeryczną
“0”,”1”,…”9”.
Nacisnąć przycisk
przypadku tara nie będzie anulowana w momencie gdy
szalka wagi będzie pusta.
Nacisnąć przycisk
anulowanie tary. W tym przypadku przez chwilę słowo
„sabit” jest widoczne na wyświetlaczu, a symbol tary (tylko
dla wyświetlaczy LCD) jest włączony na stałe. Aby anulować
tarę należy wcisnąć przycisk
wagi jest pusta.
Dla modeli z wyświetlaczem LCD – jeśli symbol
Nie włącza się nigdy – > brak tary
Miga – > w momencie gdy szalka wagi jest pusta, tara
)
będzie anulowana automatycznie
Zawsze włączony – > Tara jest ustalona. Aby anulować tarę
należy nacisnąć przycisk T w momencie gdy szalka wagi jest
pusta.
DZIAŁANIA Z UŻYCIEM PAMIĘCI CAŁKOWITEJ
UWAGA: jeśli waga jest typu EGE-M lub EGE-LED i nie
ma drukarki, nie może być używana do działań z użyciem
pamięci całkowitej.
Pamięć całkowita jest stosowana do dodawania wagi
i ceny produktu do poprzednio zważonych i wycenionych
produktów. Do tego typu działań służą dwa przyciski
oraz
Dodawanie do pamięci całkowitej:
Umieścić produkt na szalce wagi. Poczekać aż włączy się
wskaźnik
produktu. Nacisnąć przycisk
zostaną dodane do pamięci całkowitej. Miga odpowiedni
wskaźnik M.
UWAGA: W trakcie zerowania lub ujemnego pełnego
wskazania wagi, jak również w momencie gdy wskaźnik
nie jest widoczny, dodawanie do pamięci całkowitej
nie będzie wykonywane.
UWAGA: Po wykonaniu działania dodania do pamięci
całkowitej, nowe dodanie wartości do pamięci całkowitej
nie będzie możliwe jeśli szalka wagi nie będzie pusta, na
wyświetlaczu nie pojawi się wartość „0.000” lub zostanie
wprowadzona nowa cena jednostkowa.
UWAGA: Można sprawdzić wartość całkowitą przyciskając
przycisk
należy wyłączyć funkcję „Adding without Showing Total”
(Set3-1). W takim przypadku wartość całkowita będzie
widoczna dopóki produkt nie zostanie zdjęty z szalki wagi.
miga
UWAGA: Maksymalnie można zapamiętać 80 działań
dodawania pamięci całkowitej.
Wyświetlanie i kasowanie wartości pamięci całkowitej:
Nacisnąć przycisk
widoczna na wyświetlaczu, cena jest widoczna na
wyświetlaczu kwoty do zapłaty,
do pamięci produktów są widoczne na wyświetlaczu
ceny jednostkowej. Nacisnąć przycisk
skasować pamięć całkowitą lub nacisnąć F aby powrócić do
normalnego trybu ważenia.
F. Nacisnąć przycisk . Na
aby zapamiętać wartość tary. W tym
dwukrotnie aby zablokować
w momencie gdy szalka
:
.
. Wprowadzić wartość ceny jednostkowej
. W ustawieniach szczegółowych “SETTINGS”
waga i cena do zapłaty
. Waga całkowita jest
oraz liczba dodanych
aby
.
Wskaźnik pamięci całkowitej jest wyświetlany jako M:
Jeśli wskaźnik jest wyłączony – pamięć jest pusta.
Jeśli wskaźnik miga – w pamięci znajdują się zapisane
wartości.
Jeśli wskaźnik jest włączony – wartość pamięci jest
widoczna.
Wyświetlanie danych pamięci:
Nacisnąć przycisk
widoczna na wyświetlaczu, cena jest widoczna na
wyświetlaczu kwoty do zapłaty,
do pamięci produktów są widoczne na wyświetlaczu ceny
jednostkowej. Nacisnąć przycisk
które zostały zapamiętane jako pierwsze, są widoczne na
wyświetlaczach wagi i kwoty do zapłaty.
na wyświetlaczu ceny jednostkowej. Naciskając przycisk
będą widoczne odpowiednie działania. Nacisnąć
przycisk
wyświetlaczu, cena jest widoczna na wyświetlaczu kwoty do
zapłaty,
są widoczne na wyświetlaczu ceny jednostkowej.
Nacisnąć przycisk
nacisnąć F aby wrócić do ważenia bez kasowania danych.
PODŚWIETLENIE WYŚWIETLACZA
Nacisnąć przycisk ☼ aby przełączać między włączeniem
podświetlenia ON, wyłączeniem OFF oraz trybem ON_OFF.
Aby zmienić tryb podświetlenia:
Tryb podświetlenia jest widoczny na wyświetlaczu przez
około sekundę:
bL On: podświetlenie jest włączone ON
Podświetlenie jest włączone na stałe.
bL OFF: podświetlenie jest wyłączone OFF.
Podświetlenie jest wyłączone na stałe.
bLOnFF: podświetlenie jest włączone w trybie ON_OFF.
Podświetlenie jest włączone w trakcie ważenia lub
wciskania przycisków. Podświetlenie jest wyłączone gdy
szalka wagi jest pusta. Gdy waga jest włączona, tryb
podświetlenia jest wyłączony. Jeśli na wyświetlaczu będzie
migał punkt zamiast wartości obciążenia, podświetlenie
będzie automatycznie wyłączone.
• Nacisnąć przycisk F przez około 3 sekundy aby wejść
w menu ustawień.
Przez około 2 sekundy widać na wyświetlaczu “Set”,
„Basis Menu Number” oraz „Submenu number”,
następnie wartości pod-menu są widoczne na
wyświetlaczu przez około 2 sekundy
• Nacisnąć przycisk F aby wejść do menu.
• Nacisnąć przycisk
Aby zmienić rodzaj wartości On O:
• Nacisnąć przycisk
Aby zmienić rodzaj wartości liczbowych:
• Do zmiany wartości należy użyć klawiatury
numerycznej
• Nacisnąć F aby zachować zmianę
• Nacisnąć F przez około 3 sekundy aby powrócić do
trybu normalnego ważenia.
UWAGA: Po wyjściu z menu ustawień należy wyłączyć wagę
i włączyć ją ponownie.
. Waga całkowita jest widoczna na
oraz liczba dodanych do pamięci produktów
USTAWIENIA
. Waga całkowita jest
oraz liczba dodanych
. Waga i cena,
jest widoczne
aby skasować pamięć lub
aby wejść do pod-menu.
.
PRZED WEZWANIEM SERWISU
SYGNAŁY AWARII
ER 1: Wyłączyć i włączyć wagę ponownie. Jeśli awaria
w dalszym ciągu ma miejsce, zgłosić się do serwisu.
ER2: Odczekać chwilę. Wyłączyć i włączyć wagę ponownie.
Jeśli awaria w dalszym ciągu ma miejsce, zgłosić się do
serwisu.
ER 3: Odczekać chwilę. Upewnić się, że szalka wagi jest
pusta i nacisnąć przycisk O. Jeśli awaria nie ustąpi, wyłączyć
i włączyć wagę ponownie. Jeśli awaria w dalszym ciągu ma
miejsce, zgłosić się do serwisu.
ER 4: Wyłączyć i włączyć wagę ponownie. Jeśli awaria
w dalszym ciągu ma miejsce, zgłosić się do serwisu.
ER 5:Błąd wstępnego zakresu zerowania. Ważenie
niemożliwe. Upewnić się że szalka wagi jest pusta. (Jeśli
szalka wagi nie jest na wadze, należy ją tam umieścić).
Wyłączyć i włączyć wagę ponownie w momencie gdy szalka
wagi jest pusta. Zgłosić się do serwisu jeśli komunikat jest
aktywny przy pustej szalce.
ER 6: Wyłączyć i włączyć wagę ponownie. Jeśli awaria
w dalszym ciągu ma miejsce, zgłosić się do serwisu.
ER 7: Wyłączyć i włączyć wagę ponownie. Jeśli awaria
w dalszym ciągu ma miejsce, zgłosić się do serwisu.
ER 8: Błąd komunikacji interfejsu. Wyłączyć i włączyć
wagę ponownie. Jeśli waga nie jest modelem PC/z funkcją
drukowania, wezwać serwis. Jeśli waga jest modelem PC /
z funkcją drukowania, zmienić SET 10.1 na „On” i wyłączyć
wagę. Następnie włączyć ją ponownie. Jeśli problem
pojawia się dalej, wezwać serwis.
ER 9: Wyłączyć i włączyć wagę ponownie. Jeśli awaria
w dalszym ciągu ma miejsce, zgłosić się do serwisu.
ER 11: Wyłączyć i włączyć wagę ponownie. Jeśli awaria
w dalszym ciągu ma miejsce, zgłosić się do serwisu.
ER 12: Wyłączyć i włączyć wagę ponownie. Jeśli awaria
w dalszym ciągu ma miejsce, zgłosić się do serwisu.
ER 13:Dotyczy modeli PC /z funkcją drukowania – ten
komunikat pojawia się jeśli pamięć ALIBI jest pełna.
Powoduje to zablokowanie przesyłu danych do PC /
drukarki. Należy skasować pamięć ALIBI. Wyłączyć wagę
i włączyć ponownie.
ER 14: Błąd wykrycia przewodu podłączenia czujnika
tensometrycznego. Sprawdzić połączenie oraz przewód
czujnika tensometrycznego. Podłączyć złącze, jeśli jest
odłączone. Jeśli błąd pojawia się w dalszym ciągu wyłączyć
i włączyć wagę ponownie. Jeśli awaria w dalszym ciągu ma
miejsce, zgłosić się do serwisu.
ER 15: Odczekać chwilę. Jeśli błąd nie ustępuje, wyłączyć
i włączyć wagę ponownie. Jeśli awaria w dalszym ciągu ma
miejsce, zgłosić się do serwisu.
ER 16: Zapoznać się z „PrinterUserManualAnnex.doc”. Jeśli
awaria w dalszym ciągu ma miejsce, zgłosić się do serwisu.
Lo bAtt: Rozładowana bateria. Waga nie działa. Naładować
baterię.
Full (na wyświetlaczu wagi): Wartość obciążenia jest większa
niż maksymalne dopuszczalne obciążenie.
Full (na wyświetlaczu ceny): Kwota do zapłaty jest zbyt duża
aby mogła być wyświetlona na wyświetlaczu.
PL
8 9
Page 15
NÁVOD K OBSLUZE
nnnnnn: Platforma (szalka) nie jest zamocowana, lub
w momencie uruchamiania się wagi na szalce znajduje się
obciążenie. Usunąć obciążenie za platformy. Jeśli platforma
nie jest zamocowana to należy ją zamocować. Jeśli
konieczne, zrestartować wagę w momencie gdy platforma
jest pusta (bez obciążenia). Jeśli awaria w dalszym ciągu ma
miejsce, zgłosić się do serwisu.
SYGNAŁY AKUSTYCZNE
Krótki sygnał dźwiękowy : wciśnięty dowolny przycisk.
Podwójny krótki sygnał dźwiękowy : wskazuje na to, że
przycisk, który został wciśnięty nie ma zastosowania do
powiązanej funkcji.
Długi sygnał dźwiękowy: taka sam częstotliwość jak krótki
sygnał. Wskazuje na drugą funkcję wciśniętego przycisku.
Krótki sygnał dźwiękowy i długi sygnał dźwiękowy mają
różne częstotliwości: wskazuje na to, że żądana operacja
nie może być przeprowadzona. Np. Naciśnięcie przycisku T
w momencie gdy wskaźnik D jest wyłączony.
Regularne krótkie sygnały dźwiękowe w okresie 10
sekundowym: gdy poziom naładowania baterii jest niski,
waga sygnalizuje ten fakt co 10 sekund. Wskaźnik baterii
miga. Oznacza to, że bateria wkrótce ulegnie całkowitemu
rozładowaniu i ważenie nie będzie możliwe. Należy
podłączyć zasilacz. Kontynuowanie pracy bez podłączenia
zasilacza kontynuuje sygnalizowanie niskiego poziomu
naładowania baterii. Nacisnąć przycisk F aby przerwać
sygnalizowanie. Sprawdzić czerwoną diodę zasilacza w celu
sprawdzenia poprawnego działania
PL
DANE TECHNICZNE
Zasilacz: 220-240V AC, 50Hz wejście, 7,5V DC wyjście, 10W
Specykacja elektryczna wagi: 7.5V DC, 6W
Dane metrologiczne: Podane na tabliczce znamionowej.
Zakres temperatury pracy: – 10 °C ~ +40 °C
PRODUCENT
Istanbul Deri Organize Sanayi Bolgesi Kazlicesme cad.
No:48 Orhanli 34956 TUZLA/ ISTANBUL
TEL: (216) 394 25 25 FAX: (216) 394 83 82
TEL: (216) 394 25 25 FAX: (216) 394 83 82
www.temscale.com
Uwaga: Aby uzyskać najnowsze informacje na temat
autoryzowanych serwisów, należy skontaktować się
serwisem fabrycznym.
DISPLEJ A TLAČÍTKA KLÁVESNICE
Ukazatel nula: Indikuje, že vážní miska je prázdná.
Před vážením produktu se ujistěte, že vážní miska je
prázdná a stiskněte tlačítko „
pokud ukazatel nula
vyskytnout chyba.
Ukazatel rovnováhy:
misce je stabilní. Ukazatel není aktivní v okamžiku umístění
zatížení na misce nebo v okamžiku sejmutí zatížení z vážní
misky. Pokud se ukazatel vypne, nemusí být indikace
hodnoty hmotnosti správná. V této souvislosti, abyste
přečetli hodnotu zatížení, počkejte, až se zobrazí symbol
po umístění produktu na vážní misku.
Ukazatel táry
Bliká, když tára není stanovena. Svítí trvale, když je tára
konstantní. (Pouze pro váhy s LCD displejem.)
Ukazatel celkové paměti M: Bliká, když se v paměti
nacházejí údaje. Je zapnutý, když hodnota je znázorňována.
Ukazatel baterie
ukazatel zapnutý, váha pracuje s bateriovým napájením.
Pokud ukazatel bliká, je nutné nabití nebo výměna baterie
v nejkratší možné době.
Váhy vybavené LCD displejem mají čtyři další ukazatele
baterie indikující úroveň nabití baterie a také režim s
grackou informací o nabíjení baterie, která se aktivuje
teprve po připojení síťového adaptéru. Pokud síťový
adaptér nebyl připojen, zobrazí se rámeček kolem ukazatelů
baterie, který indikuje, že se baterie používá. Těsně před
vybitím baterie rámeček kolem symbolu baterie bliká
Číselné klávesy: Jsou používány k zavádění jednotkových
cen nebo jiných údajů.
Tlačítko C: používáné k nulování jednotkových cen nebo
jiných údajů.
Tlačítko
Tlačítko
je vážní miska prázdná.
Tlačítko F: Slouží pro přecházení do menu nastavení
a některých funkcí přibližných nastavení.
Tlačítko
pro PC počítače nebo tiskárny)
Tlačítko
Tlačítko
a odstraňovaní úplné pamětě.
Tlačítko ☼: Přepíná podsvícení mezi zapnuto, vypnuto,
zapnuto-vypnuto (pouze pro LCD displeje) ON, OFF, ONOFF
Tlačítko
Tlačítka P1, P2...: Používány k rychlé volbě jednotkové ceny.
Tlačítko ↓: (SHIFT) Používané k volbě programů P16-P30.
: Indikuje, že tára má vliv na vážení.
: Indikuje provoz baterie. Pokud je
: Používá se pro nastavení zatížení jako tára.
: Používá se k nulování váhy v okamžiku, když
: používané k provádění výtisků (jenom volitelně
: Používané k přidávání úplné paměti.
: Používané k volbě jednotkové ceny.
” abyste vynulovali váhu,
není aktivní. Jinak se může
Indikuje, že zatížení na vážní
: Používané k znázorňování
PRVNÍ ZAPNUTÍ
V okamžiku zapnutí váhy jsou všechny symboly a prvky
viditelné. Asi na 10 sekund se zobrazuje odpočítávání. Pak
se zobrazuje maximální přípustné zatížení váhy a stupnice
a váha se přepne do normálního provozního režimu.
Na displeji se zobrazuje číslice nula. Symboly
jsou zapnuty. Na vážní misku nepokládejte žádné zatížení,
dokud není připravena k vážení. Pokud na misce bude
zatížení nebo pokud miska nebude na váze, může se na
displeji zobrazit chyba nnnnnn. Dříve než zavoláte servis,
ujistěte se, že na misce není zatížení.
VÁŽENÍ
Na vážní misku položte zatížení. Počkejte na zapnutí
ukazatele
Pokud je vážní miska prázdná, na displeji by se měla
zobrazit hodnota “0.000” a měly by se zapnout ukazatele
vynulování a stabilizaci váhy můžete začít normální práci.
UPOZORNĚNÍ: Na váhu neumísťuje zatížení překračující její
přípustné maximální zatížení. (Hodnota „Max: na typovém
štítku)
Zatížení musí být položeno na vážní misku ručně. Házení
zatížení z výšky nebo házení zatížení na misku (dokonce,
i když zatížení je malé) může poškodit váhu.
Pro správné sečtení kusů stejných výrobků je třeba znát
hmotnost jednotlivého výrobku. Hmotnost jednotlivých
výrobků je „jednotkovou hmotností“ („unit weight“).
Zadejte hodnotu jednotkové hmotnosti pomocí numerické
klávesnice „0“, „1“ … „9“.
Zadaná jednotková hmotnost je zobrazen na displeji
jednotkové hmotnosti.
Počet sečtených kusů je zobrazen na displeji počtu.
Položte na vážicí ploše určený počet výrobků.
Pokud vzorkování provádíte s více než jedním výrobkem,
výsledky přepočtu budou přesnější.
Pomocí numerické klávesnice „0“, „1“ … „9“ zadejte počet
výrobků, které jsou na vážicí ploše.
Stiskněte tlačítko „Sample“.
Přepočtená jednotková hmotnost se zobrazí na displeji
jednotkové váhy.
Přepočtený počet výrobků se zobrazí na displeji množství.
Některá čísla přepočtené jednotkové hmotnosti, která
se zobrazují na displeji, mohou blikat (cca 5 sekund)
– to znamená, že tyto číselné údaje mohly být chybně
přepočteny. K minimalizaci výskytu takových chyb se
doporučuje, aby proces sčítání /sampling byl prováděn s co
největším počtem výrobků.
Zaveďte hodnotu jednotkové ceny prostřednictvím číselné
klávesnice. Stiskněte a po dobu asi 3 vteřin podržte jedno
z tlačítek P1,…, P8., ke kterým bude přiřazena jednotková
Hmotnost zatížení se zobrazuje na displeji.
a Pokud hodnota na displeji není nula, ukazatel
se nezapnul, stiskněte abyste vynulovali váhu. Po
SČÍTÁNÍ
JEDNOTKOVÁ HMOTNOST A SČÍTÁNÍ
FUNKCE VZORKOVÁNÍ (SAMPLING
REGISTRACE TLAČÍTEK VYHLEDÁVÁNÍ CEN
a
)
CZ
10 11
Page 16
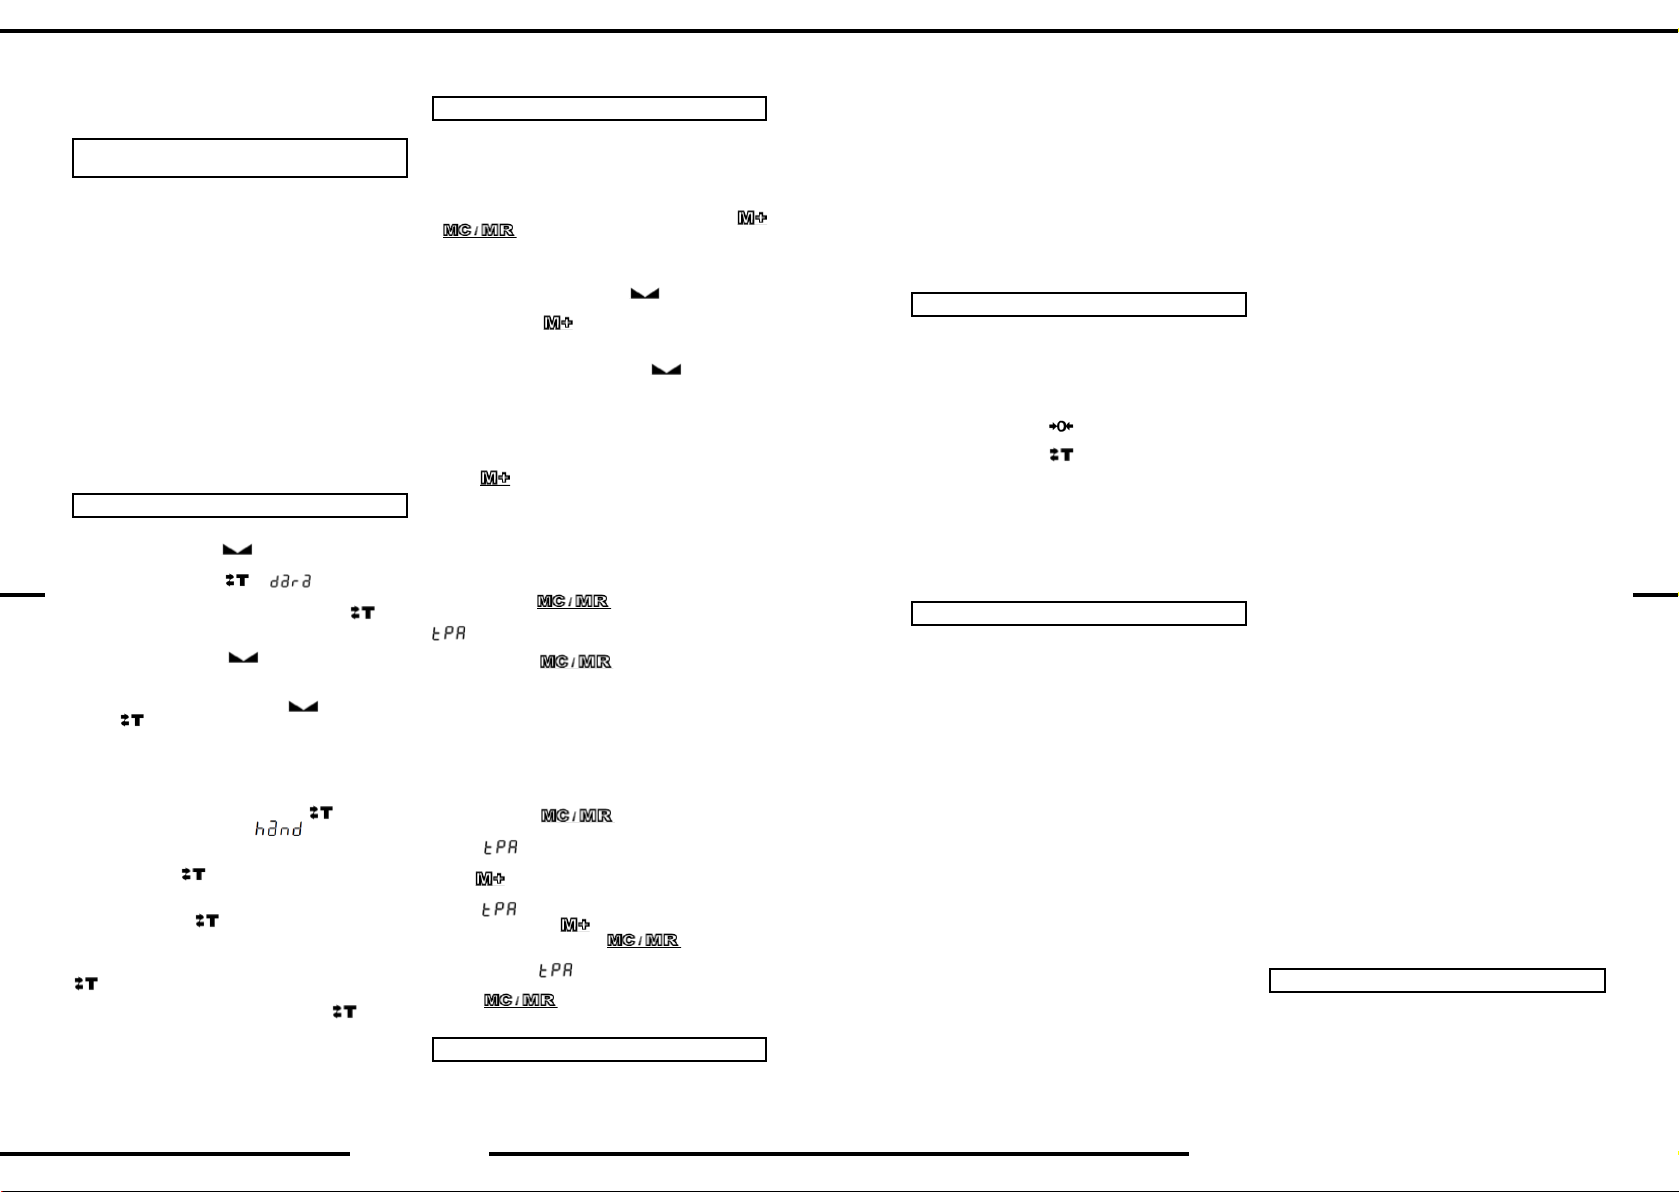
cena. Váha schválí zavedení údajů prostřednictvím
dlouhého zvukového signálu.
POUŽÍVÁNÍ TLAČÍTEK VOLBY
JEDNOTKOVÉ CENY (PLU
Váha si může zapamatovat 250 různých jednotkových cen.
Přímý přístup k uloženým jednotkovým cenám lze získat
stisknutím jednoho z tlačítek P1,… P8. Přístup ke zbývajícím
jednotkovým cenám lze získat prostřednictvím tlačítka PLU:
Stiskněte tlačítko PLU.
„PLU’ bude viditelné na dipsleji.
Zaveďte číslo programu, pod kterým je uložena jednotková
cena (např. stiskněte „7” a následně „1” – pro programu PLU
č. „71”). Na displeji se znázorní „PLU 71” a jednotková cena,
která byla zavedena do tohoto programu.
Registrace jednotkové ceny s použitím tlačítka PLU:
Zaveďte jednotkovou cenu s použitím číselné klávesnice –
bude viditelná na displeji. Stiskněte a po dobu asi 3 vteřin
podržte tlačítko PLU. „PLU” bude blikat na displeji. Zaveďte
číslo programu PLU, pod kterým bude uložena jednotková
cena, která byla zavedena dříve (např. stiskněte „7”
a následně „1” za účelem registraci této jednotkové ceny
pod programem PLU č. 71).
TÁRA
• Položte zatížení táry na vážní misku. Počkejte na
zapnutí ukazatele
CZ
zobrazovat na displeji.
• Stiskněte tlačítko
na displeji asi 1 sekundu, pak se zobrazí hodnota
“0.000”. Zapne se ukazatel NET. Symbol
(pouze pro LCD displeje). Tára byla zvážena.
• Položte zatížení na vážní misku. Počkejte na
zobrazení ukazatele
se zobrazuje na displeji.
• Sejměte zatížení z vážní misky.
Počkejte na zapnutí ukazatele
se vypnou. Tára se automaticky stornuje.
a
Programování táry:
Hodnota táry může být zaváděna s použitím číselné
klávesnice.
Stiskněte tlačítko
jednotkové ceny se znázorní
zatížení ukáže nulu. Hodnota zařázení může být změněna
číselnou klávesnicí “0”,”1”,…”9”.
Stiskněte tlačítko
tomto případě tára nebude zrušena v okamžiku, když bude
miska váhy prázdná
Stiskněte tlačítko
stornování táry. V tomto případě se na displeji zobrazí na
okamžik slovo „sabit“ a symbol táry (pouze pro LCD displeje)
je trvale zapnutý. Chcete-li stornovat táru, stiskněte tlačítko
v okamžiku, když je vážní miska prázdná.
Pro modely s LCD displejem – pokud symbol
Se nikdy nezapne – > chybí tára
Bliká – > v okamžiku, když je vážní miska prázdná, tára se
automaticky stornuje
Vždy zapnutý – > Tára je stanovena. Chcete-li stornovat
táru, stiskněte tlačítko T v okamžiku, když je vážní miska
prázdná.
F. Stiskněte tlačítko . Na displeji
Hmotnost táry se bude
. “ ” se zobrazuje
. Hmotnost zatížení netto
za účelem zapamatování táry. V
dvakrát, abyste zablokovali
)
bliká
Ukazatele NET
. Displej hodnoty
:
ČINNOSTI S POUŽITÍM ÚPLNÉ PAMĚTI
POZOR: pokud je váha typu EGE-M nebo EGE-LEDa není
tiskárna, nemůže být používána k činnostem s použitím
úplné paměti.
Úplná paměť je přizpůsobena k přidávání váhy a ceny
výrobku ke dříve zváženým a výrobkům se stanovenou
cenou. Pro činnosti tohoto druhu slouží dva tlačítka
a
Přidávání do úplné paměti:
Umístěte výrobek v misce váhy.
Počkejte dokud se ukazatel zapne
jednotkové ceny výrobku.
Stiskněte tlačítko
přidané k úplné paměti. Bliká příslušný ukazatel M.
POZOR: Během nulování nebo záporného zobrazení váhy,
jak rovněž v okamžiku když ukazatel
přidávání k úplné paměti nebude prováděno.
POZOR: Po provedení činnosti přidání k úplné paměti, nové
přidání hodnoty k úplné paměti nelze provést, pokud miska
váhy nebude prázdná, na displeji se neznázorní hodnota
„0.000” nebo bude zavedena nová jednotková cena.
POZOR: Lze zkontrolovat úplnou hodnotu stisknutím
tlačítka
třeba vypnout funkci „Adding without Showing Total”
(Set3-1). V takovém případě úplná hodnota bude viditelná
dokud výrobek nebude sundán z misky váhy.
POZOR: Maximálně lze zapamatovat 80 činností přidávání
úplné paměti.
Znázorňování a rušení úplné paměti:
Stiskněte tlačítko
na displeji, cena je viditelná na displeji částky k úhradě,
displeji jednotkové ceny.
Stiskněte tlačítko
paměti nebo stiskněte F za účelem návratu k normálnímu
režimu vážení.
Ukazatel úplně paměti je znázorňován jako M:
Pokud je ukazatel vypnutý – paměť je prázdná.
Pokud ukazatel bliká – v paměti se nacházejí uložené
hodnoty.
Pokud je ukazatel zapnutý – hodnota paměti je viditelná.
Znázorňování údajů pamětě:
Stiskněte tlačítko
na displeji, cena je viditelná na displeji částky k
úhradě,
je viditelný na displeji jednotkové ceny. Stiskněte
tlačítko
jako první jsou viditelné na displejích váhy a částky k
úhradě.
Stisknutím tlačítka
činnosti. Stiskněte tlačítko
je viditelná na displeji, cena je viditelná na displeji
částky k úhradě,
paměti je viditelný na displeji jednotkové ceny. Stiskněte
tlačítko
stiskněte F za účelem návratu k vážení bez zrušení údajů.
Stiskněte tlačítko ☼ abyste mohli přepínat mezi zapnutím
podsvícení ON, vypnutím OFF a režimem ON_OFF. Chceteli změnit režim podsvícení:
.
. Zaveďte hodnotu
váha a cena k úhradě budou
není viditelný,
. V podrobných nastaveních “SETTINGS” je
. Celková váha je viditelná
a počet přidaných k paměti výrobků jsou viditelné na
za účelem zrušení úplné
. Úplná váha je viditelná
a počet přidaných výrobků do paměti
. Váha a cena, které byly zapamatována
je viditelné na displeji jednotkové ceny.
PODSVÍCENÍ DISPLEJE
budou viditelné příslušné
a počet přidaných výrobků do
za účelem zrušení paměti nebo
. Úplná váha
Režim podsvícení se zobrazuje na displeji asi jednu
sekundu:
bL On: podsvícení je zapnuto ON
Podsvícení je trvale zapnuto.
bL OFF: podsvícení je vypnuto OFF.
Podsvícení je trvale vypnuto.
bLOnFF: podsvícení je zapnuto v režimu ON_OFF.
Podsvícení je zapnuto při vážení nebo stlačování tlačítek.
Podsvícení je vypnuto, když je vážní miska prázdná.
Když je váha zapnutá, režim podsvícení je vypnutý.
Pokud bude na displeji blikat bod místo hodnoty zatížení,
podsvícení se automaticky vypne.
NASTAVENÍ
• Stiskněte tlačítko F asi na 3 sekundy, abyste vstoupili
do menu nastavení.
• Asi na 2 sekundy se zobrazí na displeji “Set”, „Basis
Menu Number“ a „Submenu číslo“, pak se hodnoty
podmenu zobrazí na displeji asi na 2 sekundy
• Stiskněte tlačítko F, abyste vstoupili do menu.
• Stiskněte tlačítko
Chcete-li změnit druh hodnoty On O:
• Stiskněte tlačítko
AChcete-li změnit druh číselných hodnot:
• Pro změnu hodnoty je třeba použít číselnou
klávesnici
• Stiskněte F, abyste zachovali změnu
• Stiskněte F asi na 3 sekundy, abyste se vrátili do
režimu normálního vážení.
UPOZORNĚNÍ: Po výstupu z menu nastavení vypněte váhu
a opět ji zapněte.
DŘÍVE NEŽ ZAVOLÁTE SERVIS
CHYBOVÉ ZPRÁVY
ER 1: Opětovně vypněte a zapněte váhu. Pokud porucha
stále trvá, navštivte servis.
ER2: Chviličku počkejte. Opětovně vypněte a zapněte váhu.
Pokud porucha stále trvá, navštivte servis.
ER 3: Počkejte chvíli. Ujistěte se, že vážní miska
je prázdná a stiskněte tlačítko O. Pokud chyba
nezmizí, vypněte váhu a opět ji zapněte. Pokud
chyba nadále trvá, nahlaste to do servisu.
ER 4: Vypněte váhu a opět ji zapněte. Pokud chyba nadále
trvá, nahlaste to do servisu.
ER 5: Chyba vstupního rozsahu nulování. Vážení nelze
provést. Ujistěte se, zda je miska váhy prázdná. (Pokud
miska váhy se nenachází na váze, je třeba ji tam umístit).
Opětovně vypněte a zapněte váhu v okamžiku, když je
miska váha prázdná. Navštivte servis pokud je sdělení
aktivní s prázdnou miskou.
ER 6: Vypněte váhu a opět ji zapněte. Pokud chyba nadále
trvá, nahlaste to do servisu.
ER 7: Vypněte váhu a opět ji zapněte. Pokud chyba nadále
trvá, nahlaste to do servisu.
ER 8: Chyba komunikace interface. Opětovně vypněte
a zapněte váhu. Pokud váha není modelem PC/s funkcí
tisku, zavolejte servis. Pokud je váha modelem PC / s funkcí
tisku, změňte SET 10.1 na „On” a vypněte váhu. Následně
ji zapněte opětovně. Pokud problém stále trvá, navštivte
servis.
abyste vstoupili do podmenu.
.
ER 9: Vypněte váhu a opět ji zapněte. Pokud chyba nadále
trvá, nahlaste to do servisu.
ER 11: Vypněte váhu a opět ji zapněte. Pokud chyba nadále
trvá, nahlaste to do servisu.
ER 12: Vypněte váhu a opět ji zapněte. Pokud chyba nadále
trvá, nahlaste to do servisu.
ER 13:Týče se modelů PC / s funkcí tisku– toto sdělení
se znázorňuje pokud je paměť ALIBI plná. Způsobuje to
zablokování přenosu dat do PC / tiskárny. Je třeba anulovat
paměť ALIBI. Opětovně vypněte a zapněte váhu.
ER 14: Chyba zjištění kabelu zapojení tenzometrického
čidla. Zkontrolujte spoj a kabel tenzometrického čidla.
Zapojte spoje, pokud jsou vypojeny. Pokud se chyba stále
objevuje, opětovně vypněte a zapněte váhu. Pokud porucha
stále trvá, navštivte servis.
ER 15: Chviličku počkejte. Pokud chyba nezmizla, opětovně
vypněte a zapněte váhu. Pokud porucha stále trvá, navštivte
servis.
ER 16: Seznamte se s „PrinterUserManualAnnex.doc”. Pokud
porucha stále trvá, navštivte servis.
Lo bAtt: Vybitá baterie. Váha nefunguje. Nabijte baterii.
Full (na displeji váhy): Hodnota zatížení je větší než
maximální povolené zatížení.
Full (na displeji ceny): Částka k úhradě je příliš velká, aby
mohla být znázorněna na displeji.
nnnnnn: Deska (miska) není připevněná nebo v okamžiku
spuštění váhy je na misce položeno zatížení. Sejměte
zatížení z plošiny. Pokud plošina není připevněna, pak ji
připevněte. Je-li to nutné, restartujte váhu v okamžiku, když
je plošina prázdná (bez zatížení). Pokud porucha nadále
trvá, nahlaste to do servisu.
ZVUKOVÉ SIGNÁLY
Krátký zvukový signál: stisknuté libovolné tlačítko.
Dvojitý krátký zvukový signál: indikuje, že tlačítko, které jste
stiskli, nemá použití k přiřazené funkci.
Dlouhý zvukový signál: stejná frekvence jako u krátkého
signálu. Indikuje druhou funkci stisknutého tlačítka.
Krátký zvukový signál a dlouhý zvukový signál mají různé
frekvence: indikuje to, že požadovanou operaci nelze
provést. Např. Stisknutí tlačítka T v okamžiku, když je
ukazatel D vypnutý.
Pravidelné krátké zvukové signály v 10sekundovém
intervalu: pokud je úroveň nabití baterie nízká, váha
to indikuje každých 10 sekund. Ukazatel baterie bliká.
Znamená to, že baterie se brzy zcela vybije a vážení nebude
možné. Připojte síťový adaptér. Pokračování v práci bez
připojeného adaptéru indikuje trvale nízkou úroveň nabití
baterie. Stiskněte tlačítko F, abyste přerušili indikaci.
Zkontrolujte červenou diodu adaptéru, abyste zkontrolovali
správné fungování.
TECHNICKÉ ÚDAJE
Síťový adaptér: 220–240 V AC, 50 Hz vstup, 7,5 V DC výstup,
10 W
Elektrická specikace váhy: 7.5 V DC, 6 W
Metrologické údaje: uvedeny na výkonovém štítku.
Rozsah pracovní teploty: −10 °C ~ +40 °C
CZ
12 13
Page 17
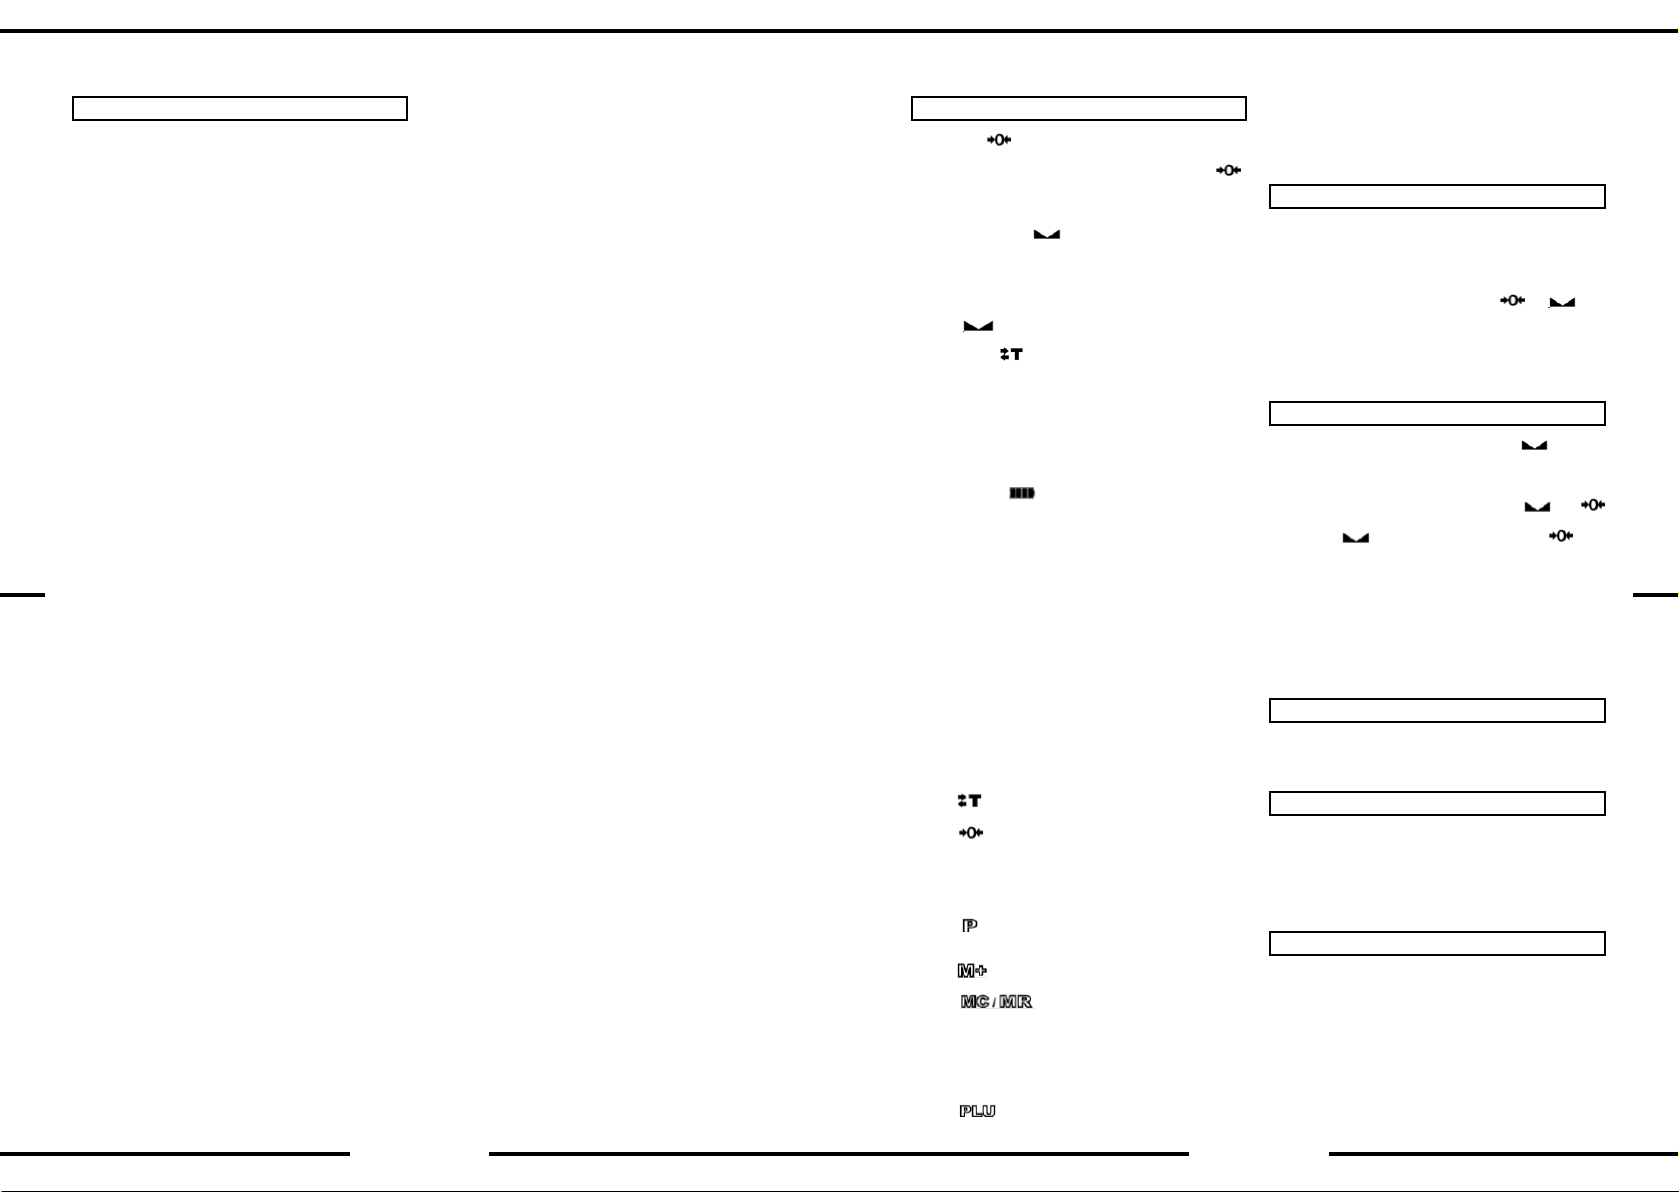
MANUEL D‘UTILISATION
VÝROBCE
TÜM ELEKTRONİK MÜH. SAN. TİC.LTD.ŞTİ
İstanbul Deri Oraganize Sanayi Bölgesi 1. Yol H7 Parsel
Orhanlı 34956 TUZLA/ İSTANBUL
TEL.: (216) 394 25 25
FAX: (216) 394 83 82
www.temscale.com
Poznámka: Chcete-li získat nejnovější informace
o autorizovaných servisech, kontaktujte tovární servis.
CZ
AFFICHEUR ET TOUCHES DU CLAVIER
Témoin zéro : Indique que le plateau est vide. Lorsque
le témoin zéro n’est pas activé avant la pesée, assurez-vous
que le plateau est vide et appuyez sur la touche „
pour remettre la balance à zéro. Sinon, une erreur peut se
produire.
Témoin de stabilité
plateau de pesée est stable. Le témoin n’est actif ni au
moment où la charge est posée sur le plateau, ni à celui
où elle en est retirée. Lorsque ce témoin ne s’éteint, il est
possible que le poids aché soit erroné. Quand vous posez
un produit sur la balance, attendez par conséquent que le
symbole
Témoin de tare
Il clignote quand la tare n’est pas xée. Il s’illumine en
continu quand la tare est constante. (Uniquement sur les
balances à acheur LCD).
Témoin de mémoire M: Clignote quand des données sont
en mémoire. Ce témoin est activé quand le contenu de la
mémoire est aché.
Témoin de pile
ce témoin est allumé, la balance est alimentée par pile.
Lorsque le témoin clignote, la pile doit être rechargée ou
remplacée aussi rapidement que possible.
Les balances à écran LCD disposent de quatre témoins de
pile supplémentaires, qui montrent la charge de la pile ainsi
que des informations visuelles sur son chargement, lequel
débute une fois le bloc d’alimentation branché. Lorsque
le bloc d’alimentation n’est pas branché, une bordure
apparaît autour du témoin de pile pour indiquer que c’est
cette dernière qui alimente la balance. Peu de temps avant
que la pile soit vide, la bordure entourant le symbole se
met à clignoter.
Touches numériques: Permettent la saisie de prix unitaires
ou d’autres données.
Touche C: Sert à réinitialiser les prix unitaires ou d’autres
données
Touche
Touche
plateau est vide.
Touche F: Permet d’accéder au menu des réglages et à
certaines fonctions similaires aux réglages.
Touche
options PC ou imprimantes).
Touche
Touche
mémoire.
Touche ☼: Permet d’activer et de désactiver le
rétroéclairage: EIN-AUS (allumé/éteint) (uniquement pour
l’acheur LCD), ON, OFF, ON-OFF.
Touche
apparaisse avant de lire le poids.
: Sert à régler le poids de la tare.
: Sert à remettre la balance à zéro lorsque le
: Permet d’imprimer (uniquement pour les
: Sert à ajouter des données à la mémoire.
: Permet de sélectionner le prix unitaire.
: Indique que la charge sur le
: Indique qu’une tare inuence la pesée.
: Indique que la pile fonctionne. Si
: Sert à acher et à supprimer la
Touches P1, P2...: Servent à sélectionner rapidement un prix
unitaire.
Touche ↓: (MAJ) Sert à sélectionner les programmes
P16-P30.
”
PREMIÈRE MISE SOUS TENSION
Lorsque la balance est mise sous tension, tous les symboles
et éléments sont visibles. Le compte à rebours est visible
pendant environ 10 secondes. Ensuite, vous voyez la charge
maximale admissible, puis la balance et le poids passent en
mode de fonctionnement normal.
L’acheur indique zéro. Les symboles
actifs. Le plateau ne doit être chargé que lorsque la balance
est prête pour la pesée. Si le plateau est déjà chargé ou
qu’aucun plateau n’est installé, l’erreur « nnnnnn » peut
apparaître sur l’acheur. Assurez-vous que le plateau n’est
pas chargé avant d’appeler le service d’assistance.
PESÉE
Posez la charge sur le plateau de la balance . Attendez
que le témoin D s’allume. Le poids de la charge apparait
sur l’acheur.
Lorsque le plateau est vide, la valeur « 0,000 » devrait
apparaître sur l’acheur et les témoins
devraient s’allumer. Si la valeur achée n’est pas nulle ou
si le témoin
eacer la valeur relevée. Une fois la balance remise à zéro et
stabilisée, le fonctionnement normal peut débuter.
ATTENTION: Il est interdit de poser des objets d’un poids
supérieur à la charge maximale admissible de la balance sur
celle-ci. (Valeur « Max »: voir la plaque signalétique)
Posez la charge à la main sur le plateau. Le fait de lancer une
charge sur le plateau à partir d’un point de même hauteur
ou d’un point plus élevé peut endommager la balance
(même si la charge est légère).
Pour compter correctement plusieurs produits identiques, il
faut connaître le poids d‘un seul produit. Le poids d‘un seul
produit est le « poids unitaire ». (« Unit Weight »).
POIDS UNITAIRE CONNU ET COMPTAGE
Entrez la valeur du poids unitaire à l‘aide du clavier
numérique « 0 », « 1 »... « 9 ».
Le poids unitaire entré est visible sur l‘acheur de poids
unitaire.
Le nombre de pièces comptées est visible sur l‘acheur de
quantité.
Posez une quantité connue de produits sur le plateau de
pesée.
Si l‘échantillonnage est eectué avec plus d‘un produit, les
résultats du calcul seront plus précis.
Entrez la quantité de produits se trouvant sur le plateau à
l‘aide des touches numériques « 0 », « 1 », « 1 »... « 9 ».
Appuyez sur le bouton « Sample ».
Le poids unitaire calculé apparaît sur l‘acheur de poids
unitaire.
La quantité calculée apparaît sur l‘acheur de quantité.
ne s’allume pas, appuyez sur pour
COMPTAGE
FONCTION D‘ÉCHANTILLONNAGE
et sont
et
FR
14 15
Page 18
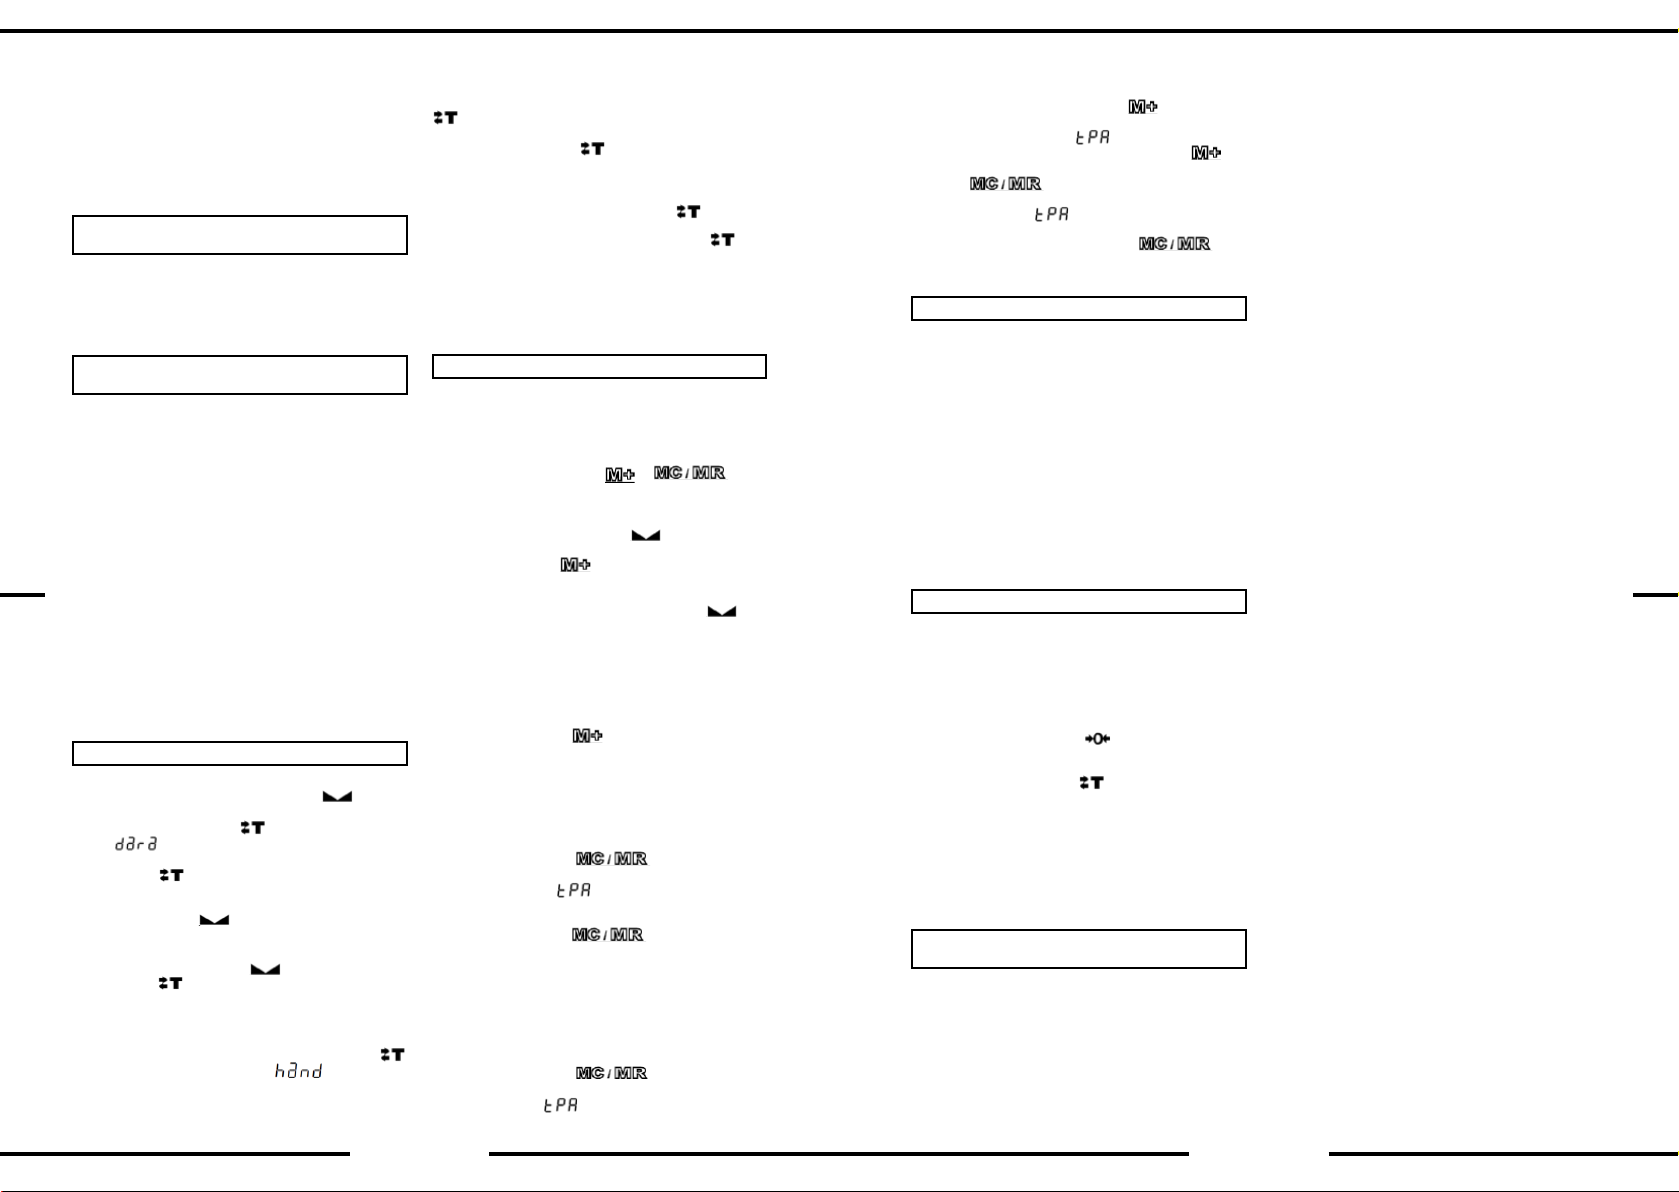
Certains chires du poids unitaire calculé peuvent clignoter
(pendant 5 secondes) sur l’acheur - cela signie que
ces chires ont été HYPERLINK „http://www.synonymo.fr/
synonyme/probablement“possiblement mal calculées. An
de minimiser de telles erreurs, nous vous recommandons
d’eecteur la procédure de comptage/sampling avec le
plus grand nombre possible de produits.
ENREGISTREMENT DES TOUCHES
DE RECHERCHE DE PRIX
Entrez un prix unitaire à l’aide du pavé numérique. Appuyez
sur la touche à laquelle vous souhaitez attribuer un prix
unitaire (P1 à P8) et maintenez-la enfoncée durant environ
3 secondes. Un long « bip » retentit pour signaler que la
saisie est acceptée.
UTILISATION DES TOUCHES DE PRIX
La balance peut stocker jusqu’à 250 prix unitaires
diérents. Vous pouvez accéder directement aux prix
unitaires enregistrés en appuyant sur les touches P1 à P8.
Pour accéder aux autres prix unitaires, vous devez utiliser
la touche PLU:
Appuyez sur la touche PLU.
« PLU » apparaît sur l’acheur.
Saisissez le numéro du programme sous lequel le prix
unitaire est stocké (appuyez sur « 7 », puis sur « 1 » pour
le programme PLU « 71 »). « PLU 71 » et le prix unitaire
associé apparaissent sur l’acheur.
FR
Enregistrement de prix unitaires à l’aide de la touche PLU:
Saisissez le prix unitaire à l’aide du pavé numérique — il
apparaît sur l’acheur. Appuyez sur PLU et maintenez cette
touche enfoncée pendant environ 3 secondes. « PLU »
clignote sur l’acheur. Entrez le numéro du programme
PLU sous lequel vous souhaitez enregistrer le prix unitaire.
Ce prix a été préalablement saisi (appuyez p. ex. sur
« 7 », puis sur « 1 » pour stocker le prix unitaire sous le
programme PLU 71).
• Posez la charge servant de tare sur le plateau de
la balance. Attendez que le témoin
Le poids de la tare apparaît sur l’acheur.
• Appuyez sur la touche
“
la balance ache la valeur « 0,000 ». Le témoin NET
s’allume.
uniquement). La tare été pesée.
• Posez la charge sur le plateau de la balance. Attendez
que le témoin
poids net de la charge apparaît sur l’acheur.
• Retirez la charge du plateau.
Attendez que le témoin
NET et
automatiquement.
Programmation de la tare:
La tare peut être entrée au moyen du pavé numérique.
Appuyez sur la touche
L’acheur de prix unitaire montre
charge montre zéro. Il est possible de modier la valeur
de la charge à l’aide des touches numériques « 0 », « 1 »,...
« 9 ».
UNITAIRE (PLU
TARE
” s’ache pendant environ 1 seconde, puis
Le symbole clignote (acheur LCD
disparaissent. La tare est supprimée
F. Appuyez sur la touche .
)
.
. apparaisse sur l’acheur. Le
s’allume. Les témoins
s’allume.
. L’acheur de
Pour enregistrer la valeur de la tare, appuyez sur la touche
. La tare n’est alors pas supprimée quand le plateau
est vide.
Appuyez sur la touche
l’annulation de la tare. Le mot « sabit » apparaît brièvement
à l’écran et le symbole de la tare (uniquement pour les
acheurs LCD) demeure visible en permanence. Pour
annuler la tare, appuyez sur la touche
plateau est vide.
Pour les modèles avec acheur LCD, le symbole
Ne jamais s’allumer – > aucune tare
Clignoter – > suppression automatique de la tare quand le
plateau est vide.
Demeurer allumé en permanence – > tare dénie. Pour
annuler la tare, appuyez sur la touche T lorsque le plateau
est vide.
ACTIONS LIÉES À LA MÉMOIRE
REMARQUE: Si la balance est de type EGE-M ou EGE-LED
et qu’elle ne possède pas d’imprimante, elle ne permet pas
d’utiliser les opérations avec mémoire.
La mémoire sert à ajouter le poids et le prix de produits au
poids et au prix d’articles précédemment pesés. Pour ce
faire, appuyez sur les touches
Ajout dans la mémoire:
Posez le produit sur le plateau de la balance.
Attendez jusqu’à ce que le témoin
Saisissez le prix unitaire du produit.
Appuyez sur la touche
et le prix à payer. Le témoin M correspondant clignote.
ATTENTION: Pendant la remise à zéro de la balance, quand
une valeur négative s’ache et quand le témoin
pas visible, aucune donnée ne peut être ajoutée dans la
mémoire.
ATTENTION: Après l’ajout d’une opération dans la mémoire,
il n’est pas possible d’ajouter la valeur correspondante dans
la mémoire si le plateau n’est pas vide. L’acheur n’indique
pas la valeur « 0.000 » ou un nouveau prix unitaire est entré.
REMARQUE: Vous pouvez vérier la valeur totale en
appuyant sur la touche
la fonction « Adding without Showing Total » (Set 3-1)
dans les réglages « SETTINGS ». La valeur totale reste alors
visible jusqu’à ce que le produit soit retiré du plateau.
REMARQUE: Il est possible de sauvegarder jusqu’à 80
promotions pour les ajouter à la mémoire.
Achage et suppression des données en mémoire:
Appuyez sur la touche
visible sur l’acheur, le prix est indiqué sur l’acheur
du montant à payer,
seront ajoutés à la mémoire est visible sur l’acheur du
prix unitaire.
Appuyez sur la touche
ou appuyez sur F pour revenir au mode de pesée normal.
Le témoin de mémoire s’ache sous forme de M:
Si le témoin est éteint: la mémoire est vide.
Si le témoin clignote: les données enregistrées sont
stockées dans la mémoire.
Si le témoin est allumé: la valeur de la mémoire est visible.
Achage des données en mémoire:
Appuyez sur la touche
visible sur l’acheur, le prix apparaît sur l’acheur du
montant à payer,
seront ajoutés à la mémoire est visible sur l’acheur du
deux fois pour empêcher
lorsque le
peut:
et .
apparaisse.
La mémoire enregistre le poids
n’est
. Pour cela, il faut désactiver
. Le poids total est
et le nombre de produits qui
Eacez la mémoire,
. Le poids total est
et le nombre de produits qui
prix unitaire. Appuyez sur la touche . Le poids et le
prix précédemment stockés sont visibles sur l’acheur de
poids et de montant à payer.
de prix unitaire. Une pression sur la touche
apparaître les promotions correspondantes. Appuyez sur
la touche
total est visible sur l’acheur, le prix apparaît sur l’acheur
du montant à payer
seront ajoutés à la mémoire est visible sur l’acheur du
prix unitaire. Appuyez sur la touche
eacer la mémoire ou appuyez sur F pour revenir à la pesée
sans supprimer de données.
RÉTROÉCLAIRAGE DE L’AFFICHEUR
Appuyez trois fois sur ☼ pour faire passer le rétroéclairage
de ON, à OFF, puis à ON_OFF. Pour modier le mode de
rétroéclairage, procédez comme suit:
Le mode de rétroéclairage apparaît sur l’acheur pendant
environ une seconde:
bL Ein/On:le rétroéclairage est ALLUMÉ
Le rétroéclairage est activé en continu.
bL OFF: le rétroéclairage est ÉTEINT.
Le rétroéclairage demeure éteint en continu.
bLOnFF: le rétroéclairage est activé en mode ON_OFF.
Le rétroéclairage s’allume lors de la pesée et lorsqu’une
touche est enfoncée.
L’éclairage s’éteint quand le plateau est vide.
Lorsque la balance est allumée, le rétroéclairage est éteint.
Lorsque le témoin clignote au niveau du poids, le
rétroéclairage s’éteint automatiquement.
• Appuyez sur la touche F durant 3 secondes pour
accéder au menu des réglages.
L’acheur montre « Set », « Basis Menu Number »,
puis « Submenu Number » pendant 2 secondes. Les
valeurs du sous-menu apparaissent ensuite pendant
2 secondes sur l’acheur.
• Appuyez sur la touche F pour accéder au menu.
• Appuyez sur la touche
menu.
Pour changer les valeurs On O:
• Appuyez sur la touche
Pour changer le type de valeurs numériques:
• Utilisez les touches numériques pour modier la
valeur.
• Appuyez sur F pour enregistrer les modications.
• Pour revenir au mode de pesée normal, appuyez sur
F pendant environ 3 secondes.
ATTENTION: Après avoir quitté le menu des réglages,
éteignez et rallumez la balance.
AVANT DE FAIRE APPEL AU SERVICE
SIGNAUX D’ERREURS
ER 1: Éteignez la balance et rallumez-la. Si l’erreur persiste,
contactez le service d’assistance.
ER2: Attendez quelques instants. Éteignez la balance
et rallumez-la. Si l’erreur persiste, contactez le service
d’assistance.
ER 3: Attendez un court moment. Assurez-vous que le
plateau est vide et appuyez sur O. Si l’erreur persiste,
. Appuyez sur la touche X. Le poids
RÉGLAGES
D’ASSISTANCE
est visible sur l’acheur
et le nombre de produits qui
pour accéder au sous-
.
fait
pour
16 17
éteignez la balance et rallumez-la. Si l’erreur persiste,
contactez le service client.
ER 4: Éteignez la balance et rallumez-la. Si l’erreur persiste,
contactez le service client.
ER 5: Erreur d’entrée – Réinitialiser. Pesée impossible.
Assurez-vous que le plateau est vide. (Si le plateau n’est pas
sur la balance, posez-le). Éteignez la balance et rallumezla. Contactez le service d’assistance si le message apparaît
alors que le plateau est vide.
ER 6: Éteignez la balance et rallumez-la. Si l’erreur persiste,
contactez le service client.
ER 7: Erreur de communication de l’interface. Éteignez la
balance et rallumez-la. Si la balance n’est pas un modèle
PC avec une fonction d’impression, contactez le service
client. S’il s’agit d’un modèle PC / modèle avec fonction
d’impression, mettez 10.1 mis sur « On » et éteignez la
balance. Rallumez-la ensuite. Si le problème persiste,
contactez le service client.
ER 8: Éteignez la balance et rallumez-la. Si l’erreur persiste,
contactez le service client.
ER 9: Éteignez la balance et rallumez-la. Si l’erreur persiste,
contactez le service client.
ER 10: Éteignez la balance et rallumez-la. Si l’erreur persiste,
contactez le service client.
ER 11: S’applique aux modèles PC / modèles avec fonction
d’impression. Ce message apparaît lorsque la mémoire
ALIBI est pleine. Cela bloque le transfert de données vers
le PC / l’imprimante. Eacez la mémoire ALIBI. Éteignez la
balance et rallumez-la.
ER 12: Erreur lors de la détection du câble de raccordement
au capteur tensométrique. Vériez le câble DMS et de
raccordement. Branchez la che si elle ne l’est pas déjà.
Lorsque l’erreur se produit, éteignez la balance et rallumezla. Si l’erreur persiste, contactez le service d’assistance.
ER 13: Attendez quelques instants. Lorsque l’erreur se
produit, éteignez la balance et rallumez-la. Si l’erreur
persiste, contactez le service d’assistance.
ER 14: Voir « PrinterUserManualAnnex.doc ». Si l’erreur
persiste, contactez le service d’assistance.
Lo bAtt: Pile à plat. La balance ne fonctionne pas. Rechargez
la pile.
Full (sur l’acheur de la balance): Le poids de l’objet
dépasse la charge maximale admissible.
Full (sur l’acheur de la balance): Le montant à payer est
trop élevé pour apparaître sur l’acheur.
nnnnnn: La plate-forme (le plateau de pesée) n’a pas été
xée, ou le plateau de pesée est déjà chargé lors de la mise
sous tension de la balance. Retirez la charge des plates-
formes. Si la plate-forme n’a pas été xée, elle doit l’être.
Si nécessaire, redémarrez la balance après avoir vidé le
plateau (plateau sans charge). Si l’erreur persiste, contactez
le service client.
SIGNAUX SONORES
« Bip » court: L’une des touches est enfoncée.
Double « bip »: Indique que la touche enfoncée n’est pas
valide pour la fonction sélectionnée.
« Bip » long: Même fréquence que le « bip » court. Ache
la deuxième fonction de la touche enfoncée.
Le « bip » long et le « bip » court ont diérentes fréquences:
Indique que le processus souhaité ne peut pas être exécuté.
FR
Page 19
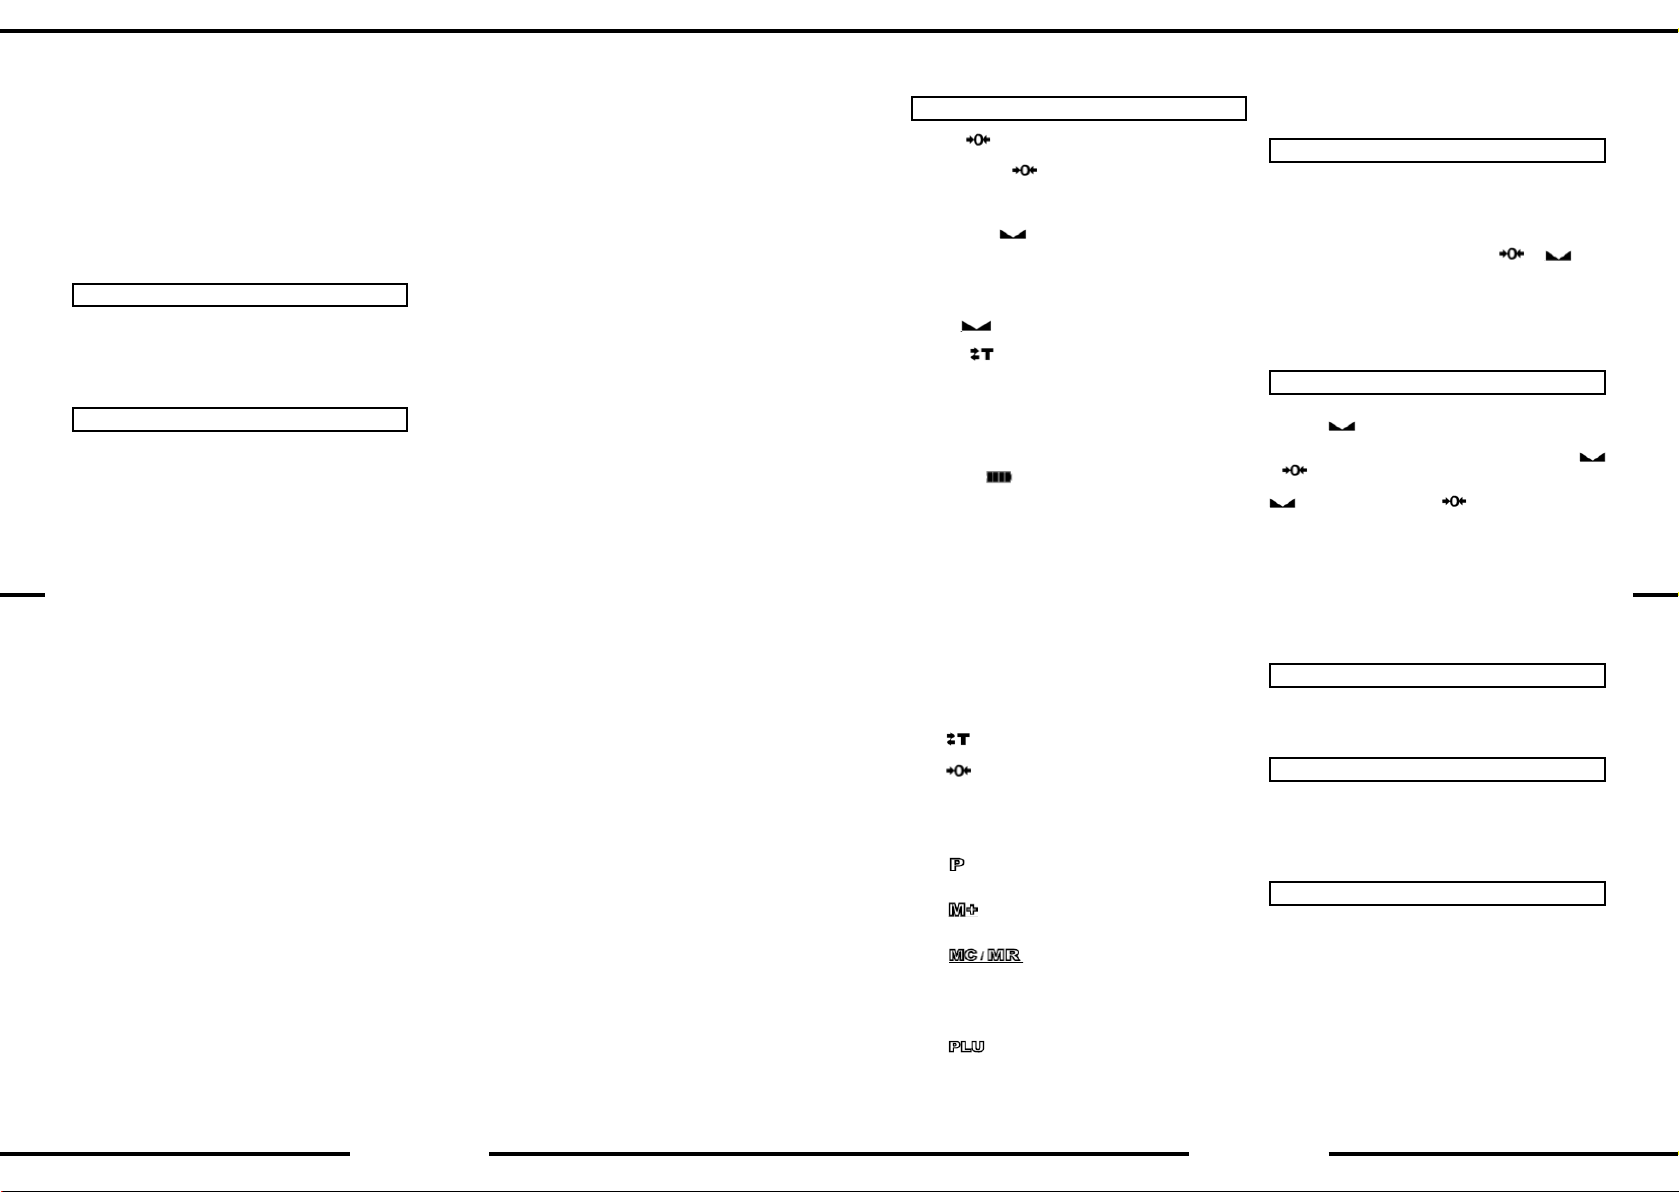
ISTRUZIONI PER L’USO
Appuyez par exemple sur la touche T pendant que le
témoin D est éteint.
« Bips » réguliers toutes les 10 secondes: Lorsque la pile
est faible, la balance l’indique toutes les 10 secondes. Le
témoin de la pile clignote. Cela signie que la pile sera
bientôt complètement à plat et qu’il n’est plus possible
d’eectuer des pesées. Branchez le bloc d’alimentation. Si
la balance continue d’être utilisée sans bloc d’alimentation,
l’avertissement de charge faible persiste. Appuyez sur la
touche F pour interrompre le signal. Vériez que la LED
rouge du bloc d’alimentation fonctionne correctement.
DÉTAILS TECHNIQUES
Bloc d’alimentation: Entrée: 220-240 V CA, 50 Hz
Sortie: 7,5 V CC, 10 W
Paramètres électriques de la balance: 7,5 V CC, 6 W
Données météorologiques: voir la plaque signalétique.
Température de fonctionnement: – 10°C ~ +40°C
FABRICANT
Istanbul Deri Organize Sanayi Bolgesi Kazlicesme cad.
No:48 Orhanli 34956 TUZLA/ ISTANBUL
TEL: (216) 394 25 25 FAX: (216) 394 83 82
TEL: (216) 394 25 25 FAX: (216) 394 83 82
www.temscale.com
Remarque: Pour obtenir des informations à jour sur le
service autorisé, veuillez contacter le service client usine.
FR
TASTI DEL DISPLAY E DELLA TASTIERA
Led zero : Indica che il piatto di pesata è vuoto. Prima
di pesare, vericare che il piatto di pesata sia vuoto e
premere il tasto „
led zero non è attivo. In caso contrario, potrebbe vericarsi
un errore.
Led equilibrio
bilancia è stabile. Il led è inattivo quando il carico viene
posizionato sul piatto o quando il carico viene rimosso dal
piatto. Quando la luce si spegne, l‘indicazione dei valori
può essere errata. Dopo aver appoggiato il prodotto sul
piatto della bilancia, attendere no a che non appare il
simbolo
Led tara
Lampeggia quando la tara non è ssata. Si illumina in
modo continuativo quando la tara è costante. (Solo per la
bilancia con schermo LCD)
Led M della memoria totale: Lampeggia se sono presenti
dei dati nella memoria. Viene attivato quando viene
mostrato il contenuto della memoria.
Led batteria
il led si illumina, la bilancia funziona tramite batteria. Se
lampeggia, la batteria deve essere ricaricata o sostituita il
più velocemente possibile.
Il display LCD ha quattro led per la batteria aggiuntivi che
mostrano lo stato di carica della batteria e informazioni
grache sulla carica della batteria che inizia dopo che
l‘alimentatore è stato collegato. Se l‘alimentatore non è
collegato, la cornice intorno al led della batteria si illumina
e indica che la batteria viene utilizzata. Poco prima che la
batteria sia scarica, la cornice intorno all‘icona della batteria
lampeggia.
Tasti numerici: Per inserire i prezzi unitari o altri dati.
Tasto C: Per reimpostare i singoli prezzi o altri dati.
: Per impostare il carico come tara.
Tasto
Tasto
è vuoto.
Tasto F: Accesso al menu impostazioni e ad alcune funzioni
simili alle impostazioni.
Tasto
opzioni computer o stampante)
Tasto
totale.
Tasto
totale e per cancellarla.
Tasto ☼: Attiva la retroilluminazione on/o, ON-OFF (solo
per display LCD) ON, OFF, ON-OFF.
Tasto
Tasti P1, P2...: Utilizzati per scegliere velocemente il prezzo
unitario.
: Per riportare la bilancia a zero, quando il piatto
: Utilizzato per preparare le stampe (solo per
” per riportare la bilancia a zero, se il
: Indica che il carico sul piatto della
per leggere il valore del carico.
: Indica che la tara inuisce sulla pesata.
: Indica che la batteria funziona. Quando
: Utilizzato per aggiungere dati alla memoria
: Utilizzato per mostrare la memoria
: Utilizzato per selezionare il prezzo unitario.
Tasto ↓: (SHIFT) utilizzato per scegliere i programmi
P16-P30.
PRIMA ACCENSIONE
Tutti gli elementi e i simboli sono visibili al momento
dell‘accensione della bilancia. Il conto alla rovescia è
visibile per circa 10 secondi. Dopodiché è visibile il peso
massimo consentito; la bilancia e il peso vanno in modalità
di funzionamento normale.
Il display indica Null (zero). I simboli
attivati. Il piatto di pesata può essere caricato solo quando
è pronto per la pesatura. In presenza di un carico sul piatto
o quando non è presente il piatto della bilancia, sul display
può comparire un errore (nnnnn). Assicurarsi che il piatto
non venga caricato prima che la bilancia venga messa in
funzione.
PESARE
Mettere il carico sul piatto della bilancia. Attendere nché
il display
mostrato sul display.
Sul display dovrebbe comparire il valore „0.000“ e i led
e
è vuoto. Se il valore indicato è diverso da zero o se il led
Dopo che la bilancia è stata azzerata e stabilizzata, si può
cominciare con il normale funzionamento.
ATTENZIONE: È proibito posizionare sulla bilancia carichi
che superano il peso massimo consentito. (Valore „Max“
sulla targhetta).
Il carico deve essere posizionato manualmente sul piatto
della bilancia. Gettare un carico dall‘alto oppure lanciare un
carico sul paitto della bilancia può danneggiare la bilancia
stessa, anche quando il carico ha un peso limitato.
Per poter contare correttamente gli stessi prodotti, è
necessario conoscere il peso di un singolo prodotto. Il peso
di un singolo prodotto è un „peso unitario“ „(‚unit weight‘).
Inserire il valore del peso unitario con il tasto d‘inserimento
numerico „0“, „1“ .... „9“.
L‘unità di misura inserita è visibile sul display del contapezzi.
Il numero di pezzi conteggiati viene visualizzato sul display
della quantità.
FUNZIONE DI CAMPIONAMENTO (SAMPLING
Posizionare una quantità conosciuta di prodotti su un piatto
di pesata.
Se il campionamento viene eettuato con più di un
prodotto, i risultati del calcolo saranno più precisi.
Utilizzare il tasto numerico „0“, „1“ .... „9“ per inserire la
quantità di prodotti che si trovano sul piatto.
Premere il pulsante „Sample“.
Il peso unitario calcolato viene mostrato sul display del
contapezzi.
La quantità di prodotti calcolata viene mostrata sul display
della quantità.
Può accadere che alcune cifre del valore del contapezzi
visualizzate sul display lampeggino (per 5 secondi).
. non si accende. Il peso del carico verrà
si dovrebbero illuminare, se il piatto della bilancia
non si illumina, premere per cancellare la pesata.
CONTEGGIO
CONTAPEZZI E SISTEMA DI CONTEGGIO
e sono
)
IT
18 19
Page 20
Ciò signica che queste cifre potrebbero essere state
ricalcolate in modo errato. Per ridurre al minimo tali errori,
si raccomanda di eettuare il conteggio/campionamento
con il maggior numero possibile di prodotti.
TASTI DI REGISTRAZIONE DELLA CHIAVE
DI RICERCA DEL PREZZO
Immettere il valore del prezzo unitario sul tastierino
numerico. Premere e tenere premuto per circa 3 secondi
uno dei tasti P1,...., P8, che assegnano il prezzo unitario. La
bilancia accetta l‘inserimento dei dati con un lungo segnale
acustico.
USO DEI TASTI DEL PREZZO UNITARIO (PLU
La bilancia può salvare 250 diversi prezzi unitari. L’accesso
diretto ai prezzi unitari salvati ottenuti è possibile mediante
la pressione di uno dei tasti P1, P8. L‘accesso agli altri prezzi
unitari avviene mediante il tasto PLU:
premere il tasto PLU.
La scritta „PLU“ appare sullo schermo.
Digitare il numero del programma sotto cui è salvato
il prezzo unitario (premere ad es. „7“ e poi „1“ per il
programma PLU „71“). Sul display appare „PLU 71“ e il
prezzo unitario indicato in questo programma.
Registrare il prezzo unitario con il tasto PLU:
Inserire il prezzo unitario mediante i tasti numerici – viene
mostrato sul display. Premere e tenere premuto PLU per
circa 3 secondi. „PLU“ lampeggia sul display. Inserire il
IT
numero del programma PLU sotto cui il prezzo unitario
viene inserito; questo è stato inserito in precedenza
(premere ad es. „7“ e poi „1“ per registrare questo prezzo
unitario sotto il programma PLU nr. 71).
TARA
• Posizionare il carico della tara sul piatto della bilancia.
Attendere nché il display
Il peso della tara è indicato sul display.
• Premere il tasto
Sul display viene mostrato per circa 1 secondo “
”, poi viene indicato il valore „0.000“. Il led
NET è attivo.
schermo LCD). La tara è stata pesata.
• Mettere il carico sul piatto della bilancia. Attendere
no a che il led
carico viene visualizzato sul display.
• Prendere il carico dal piatto della bilancia.Attendere
nché il led
spengono. La tara viene cancellata automaticamente.
Programmazione della tara:
Il valore della tara può essere inserito mediante la tastiera
numerica.
Premere il tasto
unitario indica
zero. Il valore di carico può essere cambiato con i tasti
numerici „0“, „1“, „9“.
Premere il tasto
questo caso la tara non viene cancellata quando il piatto
della bilancia è vuoto.
Premere due volte il tasto
della tara. In questo caso viene brevemente mostrata la
parola „sabit“ sul display e il simbolo della tara (solo su
.
Il simbolo si illumina (solo su
non si accende. I led NET e si
F. Premere il tasto . Il led del prezzo
. Il led del valore di carico indica
per salvare il valore della tara. In
non si accende.
si illumina. Il peso netto del
per bloccare l‘annullamento
display LCD) è attivo in modo continuato. Per annullare la
tara, premere il tasto
è vuoto.
Su modelli con schermo LCD, quando il simbolo
si accende mai – > tara non disponibile
lampeggia – > se il piatto è vuoto, la tara viene eliminata
automaticamente.
sempre acceso – > la tara è impostata. Per annullare la tara,
premere il tasto T quando il piatto della bilancia è vuoto.
MEMORIA TOTALE – AZIONI
AVVERTENZA: Se si tratta di una bilancia di tipo LED EGE-M
o EGE e non è disponibile una stampante, non può essere
utilizzata per operazioni con la memoria totale.
)
La memoria totale viene utilizzata per aggiungere il peso e
il prezzo del prodotto a prodotti precedentemente pesati e
prezzati. Per questo utilizzare i tasti
Per aggiungere alla memoria totale:
Appoggiare il prodotto sul piatto della bilancia.
Attendere no a che il led
Immettere il prezzo unitario del prodotto.
Premere il tasto
vengono aggiunti alla memoria totale. Il corrispondente
led M lampeggia.
ATTENZIONE: Quando i valori vengono impostati su zero,
con valori negativi oppure quando il led
non è possibile aggiungere dati alla memoria totale.
ATTENZIONE: Dopo aver aggiunto l‘operazione alla
memoria totale, non è possibile aggiungere nuovamente
dei valori alla memoria totale, se il piatto della bilancia non
è vuoto. Il display non mostra il valore di „0.000“ oppure
viene immesso un nuovo prezzo unitario.
AVVERTENZA: È possibile controllare il valore totale
premendo i tasti
without Showing Total” (Set 3-1) nelle impostazioni dei
dettagli “SETTINGS”. In questo caso, il valore totale è
visibile no a quando il prodotto non viene rimosso dal
piatto.
AVVERTENZA: Possono essere salvate 80 azioni per
l‘aggiunta alla memoria totale.
Mostrare i valori della memoria totale e cancellarli:
Premere il tasto
display, il prezzo dell‘importo da pagare verrà mostrato sul
display
sono visibili sul display del prezzo unitario.
Premere il tasto
oppure premere F per ritornare alla modalità di pesata
normale.
Il led di memoria totale viene indicato come M:
Se il led è disattivato: La memoria è vuota.
Se il led lampeggia: I valori salvati vengono memorizzati
nella memoria.
Se il led è acceso: Il valore di memoria è visibile.
Mostrare i dati salvati:
Premere il tasto
display, il prezzo dell‘importo da pagare verrà mostrato
sul display,
memoria è visibile sul display del prezzo unitario.
Premere il tasto
precedenza sono visibili sul display del peso e dell‘importo
da pagare.
Premendo il tasto
corrispondenti. Premere il tasto
e il numero di prodotti aggiunti alla memoria
quando il piatto della bilancia
anon si accende.
LIl peso e il prezzo da pagare
. Disattivare la funzione „Adding
. Il peso totale è visibile sul
Cancellare la memoria totale
. Il peso totale è visibile sul
e il numero di prodotti aggiunti alla
. Il peso e il prezzo salvati in
è visibile sul display del prezzo unitario.
vengono indicate le azioni
: non
e .
non è visibile,
. Premere il
tasto X. Il peso totale è visibile sul display, il prezzo verrà
mostrato sul display dell’importo da pagare,
numero dei prodotti aggiunti alla memoria è visibile sul
display del prezzo unitario.
Premere il tasto X
oppure premere il tasto F per reimpostare la pesata senza
cancellare i dati.
RETROILLUMINAZIONE DEL DISPLAY
Premere il tasto ☼ per cambiare la retroilluminazione
tra ON, OFF e ON_OFF. Per cambiare il modo della
retroilluminazione:
La modalità della retroilluminazione viene mostrata sul
display per circa un secondo:
bL Ein: retroilluminazione attiva
La retroilluminazione è sempre attiva.
bL OFF: retroilluminazione disattivata.
L‘illuminazione è sempre spenta.
bLOnFF: la retroilluminazione è attiva in modalità ON_OFF.
La retroilluminazione viene attivata pesando oppure
premendo i tasti.
L‘illuminazione viene disattivata quando il piatto della
bilancia è vuoto.
Quando la bilancia è accesa, la retroilluminazione è spenta.
Se invece il led del carico lampeggia, la retroilluminazione
viene disattivata.
IMPOSTAZIONI
• Premere il tasto F per circa 3 secondi per raggiungere
il menu impostazioni.
Il display mostra per circa 2 secondi „Set“, „Basis
Menu Number“ e „Submenu number“, poi sul display
vengono mostrati per circa 2 secondi i valori del
sottomenu.
• Premere il tasto F per accedere al menu.
• Premere il tasto
Per modicare i valori on o:
• Premere il tasto
Per modiare il tipo di valori numerici:
• Usare i tasti numerici per modicare i valori.
• Premere il tasto F per salvare i cambiamenti.
• Premere il tasto F per circa 3 secondi per ritornare
alla modalità di pesata normale.
ATTENZIONE: Dopo aver lasciato il menu impostazioni,
spegnere la bilancia e poi riaccenderla.
PRIMA DI CONTATTARE L‘ASSISTENZA
SEGNALE DI DISTURBO
ER 1: Spegnere e riaccendere la bilancia. Se l‘errore persiste,
contattare l‘assistenza.
ER2: Attendere un momento. Spegnere e riaccendere la
bilancia. Se l‘errore persiste, contattare l‘assistenza.
ER 3: Attendere qualche istante. Assicurarsi che il piatto
della bilancia sia vuoto e premere il tasto O. Se il problema
continua a presentarsi, riavviare la bilancia. Se l‘errore
persiste, contattare il servizio clienti.
ER 4: Spegnere e riaccendere la bilancia. Se l‘errore persiste,
contattare il servizio clienti.
ER 5: Errore in ingresso – resettare. Impossibile pesare.
Vericare che il piatto di pesata sia vuoto. (Se il piatto della
bilancia non si trova sulla bilancia, metterlo). Spegnere
e riaccendere la bilancia. Contattare l‘assistenza, se il
per cancellare la memoria
per accedere al sottomenu.
.
ee il
messaggio di errore è presente con il piatto vuoto.
ER 6: Riavviare la bilancia. Se l‘errore persiste, contattare il
servizio clienti.
ER 7: Errore di comunicazione con l‘interfaccia: spegnere e
riaccendere la bilancia. Se si tratta di una bilancia modello
non PC / senza la funzione di stampa, rivolgersi al servizio
clienti. Se si tratta di una bilancia modello PC oppure
modello con la funzione di stampa, modicare il SET 10.1
su „on“ e spegnere la bilancia. Poi riaccenderla. Se l‘errore
persiste, contattare il servizio clienti.
ER 8: Riavviare la bilancia. Se l‘errore persiste, contattare il
servizio clienti.
ER 9: Riavviare la bilancia. Se l‘errore persiste, contattare il
servizio clienti.
ER 10: Riavviare la bilancia. Se l‘errore persiste, contattare
il servizio clienti.
ER 11: Vale per i modelli PC e i modelli con funzione di
stampa. Questo errore viene mostrato quando la memoria
ALIBI è piena. Ciò blocca la trasmissione dei dati verso il
PC / la stampante. Cancellare la memoria ALIBI. Spegnere e
riaccendere la bilancia.
ER 12: Errore nel riconoscimento del collegamento sul
sensore tensiometrico. Controllare il cavo di collegamento
e il cavo DMS. Collegare la spina se non è collegata. Se
l‘errore continua a presentarsi, spegnere la bilancia e
riaccenderla. Se l‘errore persiste, contattare l‘assistenza.
ER 13: Attendere un momento. Se l‘errore continua
a presentarsi, spegnere la bilancia e riaccenderla. Se l‘errore
persiste, contattare l‘assistenza.
ER 14: Vedere: „PrinterUserManualAnnex.doc“. Se l‘errore
persiste, contattare l‘assistenza.
Lo bAtt: Batteria scarica. La bilancia non funziona. Caricare
la batteria.
Full (sul display della bilancia): Il valore del carico è più
grande del carico massimo consentito.
Full (sul display della bilancia): L‘importo da pagare è
troppo grande per essere mostrato sul display.
nnnnnn: La piattaforma (piatto della bilancia) non è ssa,
oppure il piatto della bilancia viene caricato mentre la
bilancia viene messa in funzione. Rimuovere il carico dalla
piattaforma. Se la piattaforma non è ssa, deve essere
ssata. Se necessario, riavviare la bilancia con la piattaforma
vuota (senza carico). Se l‘errore persiste, contattare il
servizio clienti.
SEGNALI ACUSTICI
Segnale acustico breve: un tasto a caso è stato premuto.
Segnale acustico doppio: il tasto premuto non corrisponde
alla funzione.
Segnale acustico lungo: la stessa frequenza del segnale
acustico breve. Mostra la seconda funzione del tasto
premuto.
Il segnale acustico breve e il segnale acustico lungo hanno
frequenze diverse: indica che l’azione desiderata non può
essere svolta. Ad esempio, premere il pulsante T mentre il
led D è spento.
Suoni brevi regolari in 10 secondi: Quando il livello della
batteria è basso, la bilancia lo indica ogni 10 secondi. Il led
della batteria lampeggia. Questo signica che la batteria
presto si scaricherà completamente e che non sarà più
possibile pesare. Collegare l‘alimentatore. Se si continua
IT
20 21
Page 21
MANUAL DE INSTRUCCIONES
ad utilizzare la bilancia senza collegare l‘alimentatore,
la bilancia continua ad indicare una carica della batteria
insuciente. Premere il tasto F per interrompere la
segnalazione. Controllare il LED rosso sull‘alimentatore per
il corretto funzionamento.
DATI TECNICI
Alimentatore: 220-240 V CA, 50 Hz in ingresso,
7,5 V CC in uscita, 10 W
Parametri elettrici della bilancia: 7.5 V CC, 6 W
Dati meteologici: sulla targhetta.
Temperatura di funzionamento: – 10 °C ~ +40 °C
PRODUTTORE
Istanbul Deri Organize Sanayi Bolgesi Kazlicesme cad.
No:48 Orhanli 34956 TUZLA/ ISTANBUL
TEL: (216) 394 25 25 FAX: (216) 394 83 82
TEL: (216) 394 25 25 FAX: (216) 394 83 82
www.temscale.com
Avvertenza: Le informazioni aggiornate sui servizi di
assistenza autorizzati sono reperibili presso il nostro
servizio di assistenza tecnica.
IT
PANTALLA Y TECLAS
Indicador de cero : indica que el plato está vacío.
Antes de pesar, asegúrese de que el plato esté vacío y
pulse la tecla „
el indicador de cero no esté activo. De lo contrario, puede
producirse un error.
Indicador de equilibrio
es estable. Este indicador está inactivo cuando se coloca
o retira un objeto en el plato. Si el indicador se apaga, el
valor de la báscula puede ser incorrecto. Espere hasta que
aparezca el símbolo después de colocar el producto en el
plato de pesaje para obtener una lectura correcta.
Indicador de Tara
pesaje. Parpadea cuando Tara no está ja. Se ilumina de
manera continua cuando la tara es constante. (Solo para
básculas con pantalla LCD).
Indicador de memoria total M: Parpadea cuando hay datos
en la memoria. Se activa cuando se muestra el contenido
de la memoria.
Indicador de la batería
funcionando. Cuando el indicador se enciende, la balanza
funciona con batería. Cuando el indicador parpadea, la
batería debe cargarse o cambiarse lo antes posible.
Las básculas con pantalla LCD disponen de cuatro
indicadores de batería adicionales, que muestran el estado
de carga de la batería, así como información gráca sobre
la carga de la batería, que solo comienza después de
conectar la fuente de alimentación. Cuando el adaptador
de CA no está conectado, aparece un marco alrededor del
indicador de batería para indicar que está en uso. Justo
antes de que la batería se agote, el marco alrededor del
símbolo de la batería parpadea.
Teclas numéricas: para introducir precios unitarios u otros
datos.
Tecla C: restablece los precios unitarios u otros datos.
Tecla
Tecla
está vacío.
Tecla F: permite acceder al menú de ajustes y a algunas de
las funciones que son similares a los ajustes.
: se utiliza para imprimir (solo para opciones de
Tecla
PC o impresoras).
Tecla
Tecla
memoria total.
Tecla ☼: enciende o apaga la retroiluminación (solo para
modelos con la pantalla LCD) ON, OFF, ON-OFF.
Tecla
Tecla P1, P2: se utilizan para seleccionar rápidamente un
precio unitario.
” para poner a cero la balanza cuando
: indica que la carga del plato
: indica que se aplica la TARA al
: Indica que la batería está
: establece la carga como tara.
: para poner a cero la balanza cuando el plato
: se utiliza para añadir datos a la memoria total.
: se utiliza para visualizar y borrar la
: USe utiliza para seleccionar el precio unitario.
22 23
Tecla ↓: (SHIFT) Permite seleccionar programas P16-P30.
PRIMERA PUESTA EN MARCHA
Todos los símbolos y elementos son visibles al encender
la balanza. La cuenta atrás es visible durante aprox. 10
segundos. A continuación se muestra el peso máximo
admisible y a continuación la báscula pasa al modo de
funcionamiento normal.
La pantalla muestra cero. Los iconos y se activan. El plato
no debe cargarse hasta que esté listo para el pesaje. Si el
plato está cargado o no hay ningún plato de pesada, puede
aparecer el error nnnnnnnn en la pantalla. Asegúrese de
que el plato de pesada no esté cargado antes de llamar al
servicio técnico.
PESAJE
Coloque la carga en el plato. Espere hasta que se encienda
el indicador
pantalla.
El valor „0.000“ debe aparecer en la pantalla y los
indicadores deben encenderse cuando el plato de pesaje
está vacío. Si el valor de la pantalla no es cero o el indicador
no está encendido, pulse para borrar el valor. Después de la
puesta a cero y estabilización de la balanza se puede iniciar
el funcionamiento normal.
ATENCIÓN: Está prohibido colocar sobre la balanza cargas
que superen la carga máxima admisible. (Valor „Max: en la
placa de características“).
La carga se deposita manualmente en el plato de carga. La
balanza puede resultar dañada si se tira una carga desde
arriba o si se tira una carga sobre el plato (incluso con un
objeto ligero).
Para realizar correctamente el recuento de piezas de
los mismos productos, debe conocer el peso de un solo
producto. El peso de un solo producto es un „peso unitario“
(„unit weight“).
PESO UNITARIO CONOCIDO Y RECUENTO
Ingrese el valor del peso unitario usando el teclado
numérico „0“, „1“ ... „9“.
El peso unitario ingresado aparece en la pantalla de peso
unitario.
El número de piezas contadas aparece en la pantalla de
cantidad.
Coloque un número conocido de productos en el plato de
pesaje.
Si el muestreo se realiza con más de un producto, el
resultado de la conversión es más preciso.
Ingrese el número de productos que están en el plato de
pesaje
usando el teclado numérico „0“, „1“ ... „9“.
Presione el botón „Sample“.
El peso unitario convertido aparecerá en la pantalla de peso
unitario.
El número convertido de productos aparecerá en la pantalla
de cantidad.
Algunos dígitos del valor de peso unitario convertido
que aparecen en la pantalla pueden parpadear (durante
. El peso del objeto se muestra en la
RECUENTO
FUNCION DE MUESTREO (SAMPLING
)
ES
Page 22
5 segundos), lo que signica que estos dígitos pueden
haberse convertido incorrectamente. Para minimizar este
tipo de errores, se recomienda que el procedimiento de
recuento / muestreo se lleve a cabo con el mayor número
de productos posible.
REGISTRO DEL PRECIO UNITARIO
Introduzca el valor del precio unitario con el teclado
numérico. Mantenga pulsada una de las teclas P1,....., P8
durante aprox. 3 segundos. La balanza acepta el registro
de datos con un pitido largo.
UTILIZANDO LOS BOTONES DE
PRECIO UNITARIO (PLU
La balanza puede almacenar 250 precios unitarios
diferentes. Puede acceder directamente a los precios
unitarios almacenados pulsando una de las teclas P1,... P8.
El acceso a otros precios unitarios está disponible con la
tecla PLU:
Pulse el botón PLU.
PLU se muestra en la pantalla.
Introduzca el número de programa con el que se ha
memorizado el precio unitario (por ejemplo, pulse „7“ y
luego „1“ – para el programa PLU „71“). PLU 71“ y el precio
unitario introducido en este programa aparecerá en la
pantalla.
Introduzca el precio unitario con la tecla PLU:
Introduzca el precio unitario con las teclas numéricas – se
ES
muestra en la pantalla. Mantenga pulsado PLU durante
unos 3 segundos. „En el display parpadea „PLU“. Introduzca
el número de programa PLU con el que se quiere introducir
el precio unitario (por ejemplo, pulse „7“ y luego „1“ para
registrar este precio unitario en el programa PLU nº 71).
TARA
• Coloque la carga de tara en el plato de pesaje.
Espere hasta que se ilumine el indicador. El peso de
la tara se muestra en la pantalla.
• Pulse la tecla
„En la pantalla aparece” “
segundo y, a continuación, aparece el valor „0.000“.
La pantalla NET está encendida
en modelos con pantalla LCD). La carga de tara ha
sido correctamente registrada.
• Coloque la carga en el plato de carga y espere hasta
que aparezca la pantalla muestre
de la carga se muestra en la pantalla.
• Retire la carga del plato.
Espere hasta que se ilumine el indicador. NET y la
pantalla se apagan. La tara se borra automáticamente.
Programación de tara:
El valor de tara se puede introducir a través del teclado
numérico.
Pulse la tecla
. La pantalla del valor de carga muestra cero. El
valor de carga se puede cambiar de 0, 1. .. 9.
Pulse la tecla
. En este caso, la tara no se borra cuando el plato de pesaje
está vacío.
Presione dos veces el botón
anulación de la tara. En este caso, la palabra „sabit“ aparece
.
F. La pantalla de precio unitario muestra
. Acepte el valor de tara con la tecla
)
” durante aprox. 1
parpadea (solo
. El peso neto
, para bloquear la
brevemente en la pantalla y el símbolo de tara (solo en
modelos con pantallas LCD) está permanentemente
encendido. Para anular la tara, pulse la tecla
el plato está vacio.
En modelos con pantalla LCD, si el símbolo
No se enciende – > Tara no disponible
Parpadea – > si el plato está vacío, la tara se borra
automáticamente.
Siempre encendido – > Tara está activa. Para anular la tara,
pulse la tecla T cuando el platillo esté vacío.
MEMORIA TOTAL ACCIONES
NOTA: Si la balanza es de tipo EGE-M o EGE-LED y no hay
impresora disponible, no se puede utilizar para operaciones
con memoria total.
La memoria total se utiliza para agregar el precio del peso
a productos previamente pesados. Para ello, utilice las
teclas y.
Añadir a la memoria total:
Coloque el producto en el plato de pesaje. Espere hasta
que se encienda la pantalla. Introduzca el precio unitario
del producto. Pulse la tecla
se añaden a la memoria total. El indicador M parpadea.
ATENCIÓN: durante el reinicio o la visualización negativa
completa y si la lectura no es visible, no se realiza la adición
a la memoria total.
ATENCIÓN: después de añadir la operación a la memoria
total, el valor no se puede añadir a la memoria total si el
plato de pesaje no está vacío. El display no muestra el valor
„0.000“ o se introduce un nuevo precio unitario.
NOTA: se puede comprobar el valor total pulsando la
tecla
desconectar la función „Adding without Showing Total“
(Set 3-1). En este caso, el valor total es visible hasta que el
producto se retira del plato de pesaje.
NOTA: se pueden almacenar hasta 80 acciones para
agregar a la memoria total.
Visualizar y borrar valores de la memoria total:
Presione la tecla
pantalla, el precio es mostrado en la pantalla de la cantidad
a pagar,
memoria es visible en la pantalla de precio unitario.
Pulse la tecla
o pulse F para volver al modo de pesaje normal.
La pantalla de memoria total se muestra como M:
Cuando la pantalla está apagada:
La memoria está vacía.
Si la pantalla parpadea: los valores almacenados se
almacenan en la memoria.
Si el aviso se ilumina permanentemente: el valor de
memoria es visible.
Visualizar datos de memoria:
Presione la tecla
pantalla, el precio se muestra en la pantalla de la cantidad
a pagar,
memoria es visible en la pantalla de precio unitario.
Presione la tecla
primer lugar son visibles en los visores de peso y el importe
a pagar.
Pulsando la tecla
correspondientes. Presione la tecla
tecla X. El peso total es visible en la pantalla, el precio es
mostrado en la pantalla de la cantidad a pagar,
y .
El peso y el precio a pagar
. En los ajustes de detalle „SETTINGS“ se debe
El peso total es visible en la
y la cantidad de productos añadidos a la
para borrar la memoria total
. El peso total es visible en la
y la cantidad de productos añadidos a la
.El peso y precio almacenados en
es visible en el visor de precio unitario.
se muestran las acciones
, cuando
:
. Pulse la
y la
cantidad de productos añadidos a la memoria es visible en
la pantalla de precio unitario.
Pulse el botón X
o pulse F para volver a pesar sin borrar los datos.
ILUMINACIÓN DE LA PANTALLA
Pulse ☼ para cambiar entre ON, OFF y ON_OFF. Para
cambiar el modo de retroiluminación:
El modo de retroiluminación se muestra en la pantalla
durante aproximadamente un segundo:
bL: la luz de fondo está encendida. La luz de fondo está
permanentemente encendida.
bL OFF: la luz de fondo está apagada. La luz de fondo está
permanentemente apagada.
bLOnFF: la luz de fondo se enciende en el modo ON_OFF.
La luz de fondo se enciende cuando se pesa algún objeto
o se pulsan las teclas.
La iluminación se apaga cuando el plato está vacío.
Cuando la balanza está encendida, la luz de fondo está
apagada.
Si la pantalla parpadea en lugar de la carga, la luz de fondo
se apaga automáticamente.
• Pulse el botón F durante unos 3 segundos para entrar
en el menú de conguración. La pantalla muestra
„Set“, „Basic Menu Number“ y „Submenu number“
durante aprox. 2 segundos, luego los valores del
submenú se muestran en la pantalla durante aprox.
2 segundos. Pulse el botón F para entrar en el menú.
• Pulse el botón F para entrar en el menú.
• Pulse el botón
Para cambiar los valores On O:
• Pulse la tecla
Para cambiar el tipo de valores numéricos:
• Utilice el teclado numérico para cambiar el valor
• Presione F, para almacenar el cambio.
• Pulse F durante unos 3 segundos para volver al
modo de pesaje normal.
Atención: después de salir del menú de conguración,
apague y vuelva a encender la balanza.
ANTES DE LLAMAR AL SERVICIO
SEÑALES DE AVERÍA
ER 1: apagar y encender la balanza. Si el error persiste,
póngase en contacto con el servicio técnico.
ER2: espere un momento. Si el error persiste, póngase en
contacto con el servicio técnico.
ER 3: espera un momento. Asegúrese de que el plato está
vacío y pulse el botón O. Si el error persiste, apague y
vuelva a encender la balanza. Si el error persiste, póngase
en contacto con el servicio de atención al cliente.
ER 4: apagar y encender la balanza. Si el error persiste,
póngase en contacto con el servicio técnico.
ER 5: error de entrada – Reset. Pesaje imposible. Asegúrese
de que el plato esté vacío. (Si el plato no está en la báscula,
colóquelo). Apague y vuelva a encender la balanza.
Póngase en contacto con el servicio técnico si el mensaje
está activo cuando el plato está vacío.
ER 6: apagar y encender la balanza. Si el error persiste,
póngase en contacto con el servicio técnico.
para borrar la memoria
AJUSTES
para entrar en el submenú.
.
ER 7: error de comunicación del interfaz. Apague y encienda
la balanza. Si la balanza no es un modelo de PC con función
de impresión, póngase en contacto con el servicio de
atención al cliente. Si la balanza es un modelo de PC /
modelo con función de impresión, cambie SET 10.1 a „On“
y apague la balanza. Enciéndala de nuevo. Si el problema
persiste, comuníquese con el servicio de cliente.
ER 8: apagar y encender la balanza. Si el error persiste,
póngase en contacto con el servicio técnico.
ER 9: apagar y encender la balanza. Si el error persiste,
póngase en contacto con el servicio técnico.
ER 10: apagar y encender la balanza. Si el error persiste,
póngase en contacto con el servicio técnico.
ER 11: se aplica a los modelos para conexión a PC/ impresora
– este mensaje aparece, si la memoria está llena. Esto
bloquea la comunicación de datos al PC/impresora. Borre
la memoria ALIBI. Apague la balanza y vuelva a encenderla.
ER 12: error en la detección de la línea de conexión al
sensor tensométrico. Compruebe la conexión y el cable del
extensómetro. Conecte el enchufe si no está conectado. Si
se produce el error, apague y vuelva a encender la balanza.
Si el error persiste, póngase en contacto con el servicio
técnico.
ER 13: espere un momento. Si el error persiste, apague
y encienda la báscula. Sie el error continua póngase en
contacto con el servicio técnico.
ER 14: véase „PrinterUserManualAnnex.doc“. Si el error
persiste, póngase en contacto con el servicio técnico.
Lo bAtt: batería descargada. La balanza no funciona.
Cargue la batería.
Full (en la pantalla de la balanza): el valor de carga es mayor
que la carga máxima admisible.
Full (en la pantalla de la balanza): el importe a es demasiado
grande para que aparezca en la pantalla.
nnnnnn: El plato no está jo o está cargado cuando se
opera la balanza. Retire la carga. Si el plato no está jo,
debe jarlo. En caso necesario, reinicie la balanza con el
plato vacío (sin carga). Si el error persiste, póngase en
contacto con el servicio de atención al cliente.
SEÑALES ACÚSTICAS
Pitido corto: cualquier tecla pulsada.
Doble pitido: Indica que la tecla pulsada no se aplica a la
función correspondiente.
Pitido largo: la misma frecuencia que el pitido corto. Indica
la segunda función de la tecla pulsada.
El pitido corto y largo tienen frecuencias diferentes: indica
que no se puede realizar la operación deseada. Por ejemplo,
pulse el botón T mientras la pantalla D está apagada.
Pitidos regulares en 10 segundos: Cuando el nivel de la
batería es bajo, la balanza lo indica cada 10 segundos. El
indicador de batería parpadea. Esto signica que la batería
pronto estará completamente descargada y el pesaje
ya no será posible. Conecte la fuente de alimentación.
El funcionamiento continuado sin conectar la fuente
de alimentación seguirá indicando una carga baja de
la batería. Pulse el botón F para cancelar la señalización.
Compruebe el funcionamiento del LED rojo de la fuente de
alimentación.
ES
24 25
Page 23
DATOS TÉCNICOS
Alimentación: 220-240 V AC, 50 Hz de entrada, 7.5 V DC
de salida, 10 W
Parámetros eléctricos de la balanza: 7.5 V DC, 6 W
Datos meteorológicos: en la placa de características.
Temperatura de trabajo: – 10 °C ~ +40 °C
FABRICANTE
Istanbul Deri Organize Sanayi Bolgesi Kazlicesme cad.
No:48 Orhanli 34956 TUZLA/ ISTANBUL
TEL: (216) 394 25 25 FAX: (216) 394 83 82
TEL: (216) 394 25 25 FAX: (216) 394 83 82
www.temscale.com
Note: Para obtener la información sobre el servicio técnico
autorizado, póngase en contacto con el servicio de
atención al cliente.
ES
NOTIZEN/NOTES
26 27
Page 24

28
 Loading...