

Page 1
1
2
Connect Video & Audio Outputs
Connect your video and audio outputs per the connection diagrams on the back
page.
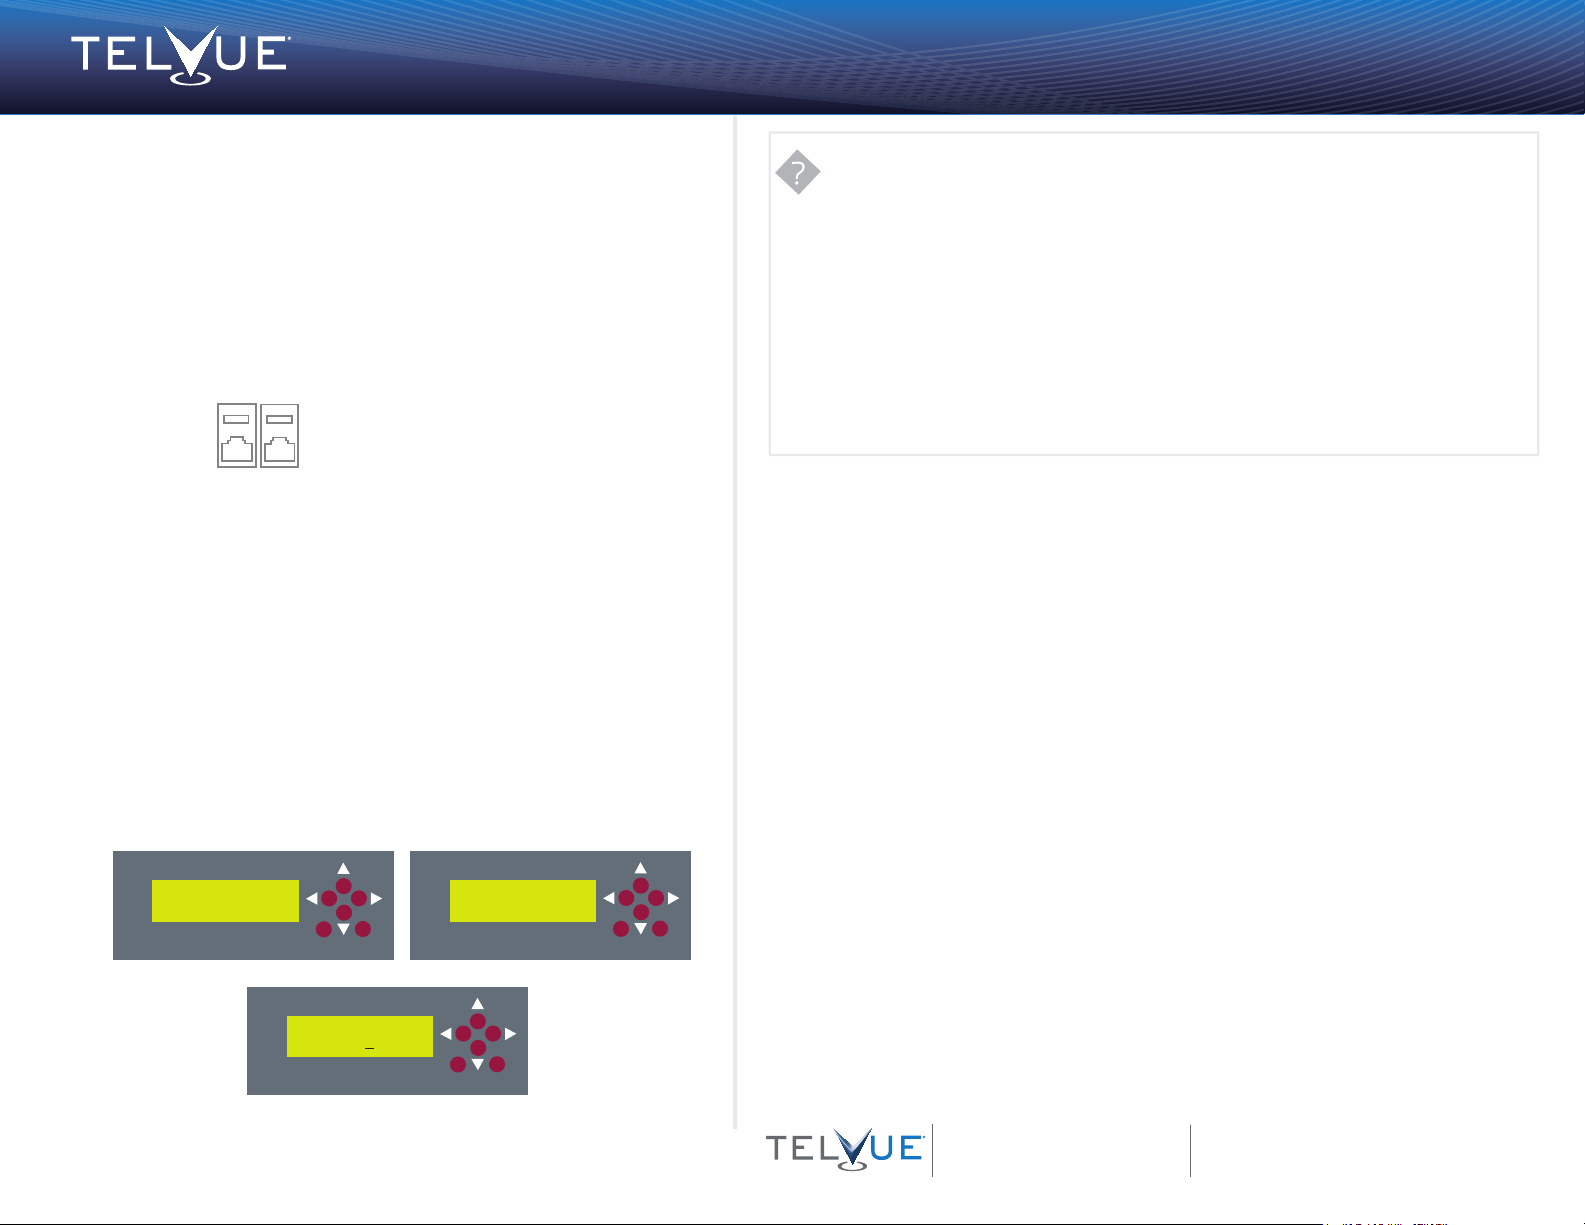
Configure Networking
Press the Down arrow on the server’s LCD display to access the Menu. If there is more
than one network cable attached to the system, then the first menu will ask which device
you want to configure. See diagram for the port numbering.
Ethernet [0] Ethernet [1]
The Up and Down arrows can be used to select which device to configure. Once the
appropriate device has been found, press Enter to continue with the configuration
process.
Select “yes” by using the Up and Down arrows at the DHCP menu to configure the
selected ethernet device automatically.
To specifiy the IP address statically, select “no” at the DHCP menu and press Enter. Then
use the Left and Right arrows to select the part of the IP address to modify. Use the Up
and Down arrows to adjust its value. An underscore will appear below the part of the
IP address that is being modified.
Once a valid IP address has been entered, press Enter to accept.
Configure the subnet mask and default gateway using the above instructions. Press
Enter after each address has been configured. Generally, eth0 should be used for
control, and eth1 for video. Note that out of the box, eth0 is set to DHCP, and eth1 is
set to static IP 1.1.1.1.
3
Getting Started
TelVue® ProVue™ SDI and Analog
IP ADDRESS ASSIGNMENT
DHCP – Dynamic Host Configuration Protocol
Your appliance will acquire an IP address from a DHCP server. This isn’t ideal for an appliance like your TelVue
server because your server may be assigned a new IP address unexpectedly, and it can be hard to determine
what its current IP address is.
Static IP
You set an IP address during configuration and the appliance always uses that IP address. This is the preferred
method because you always know what the IP address is. You will need an available IP address on your network,
outside the DHCP range. Contact your IT department to get one. TelVue
192.168.nnn.nnn, 172.nnn.nnn.nnn., or 10.nnn.nnn.nnn.
DHCP Reservation
The reservation tells your DHCP server to give your appliance the same IP address. This lets you use the simpler
DHCP setup for your appliance, while still letting it use the same IP address. Refer to your DHCP server’s
documentation to set up a reservation.
®
recommends an IP address in the form
®
Configure Incoming Stream
Press the Down arrow to access the menu. Use the Right arrow button to navigate to the “Configure
Input Network Feed” menu, and press Enter.
Use the Up and Down arrow keys to select the source of the input feed (eth0 or eth1).
Select the feed type, then press Enter. The different incoming stream types you can select are: unicast,
multicast, or source-specific multicast (SSM).
If unicast was selected, use the Up and Down arrows to select the UDP port. Press Enter. Then use Up
and Down arrows to select or deselect RTP mode.
If multicast was selected, specify the multicast address using the same procedure you used in Step 2.
Once set, select the port and RTP mode as described under the unicast instructions above.
If SSM was selected, specify the multicast address, then specify the source IP address in the same
manner. Once set, select the port and RTP mode as described above.
TelVue ProVue™ LCD Screen
Network Config
IP, Subnet, GW
CANCEL
Set IP address
192.168.1.127
ENTER
Use DHCP?
yes
CANCEL
ENTER
CANCEL
ENTER
4
Configure Output Format
Press the Down arrow to access the menu.
1a.[ProVue Analog start here.] Use the Right arrow button to navigate to the “Set Output
Configuration” menu, and press Enter. You will be prompted to choose between Composite,
S-Video, Component, or HDMI. Continue to 1b.
1b. [ProVue SDI start here.] Use the Right arrow button to navigate to the “Set Output Format” menu.
2. The next screen will present a list of possible output formats, ranging from SD to HD, and are
available in several different resolutions.
3. Scroll through the list using the Up and Down arrow keys until the desired format is found. Press the
Enter key to complete the process.
16000 Horizon Way, Suite 500
Mount Laurel, NJ 08054
800.885.8886
www.telvue.com/support
Toll Free: 800-885-8886
Email: support@telvue.com
Support Portal: http://www.telvue.com/support
APIs: http://www.telvue.com/api
Training Videos: http://www.telvue.com/training
QSG_TC_7_13_V2
Page 2
Getting Started
TelVue® ProVue™ SDI and Analog
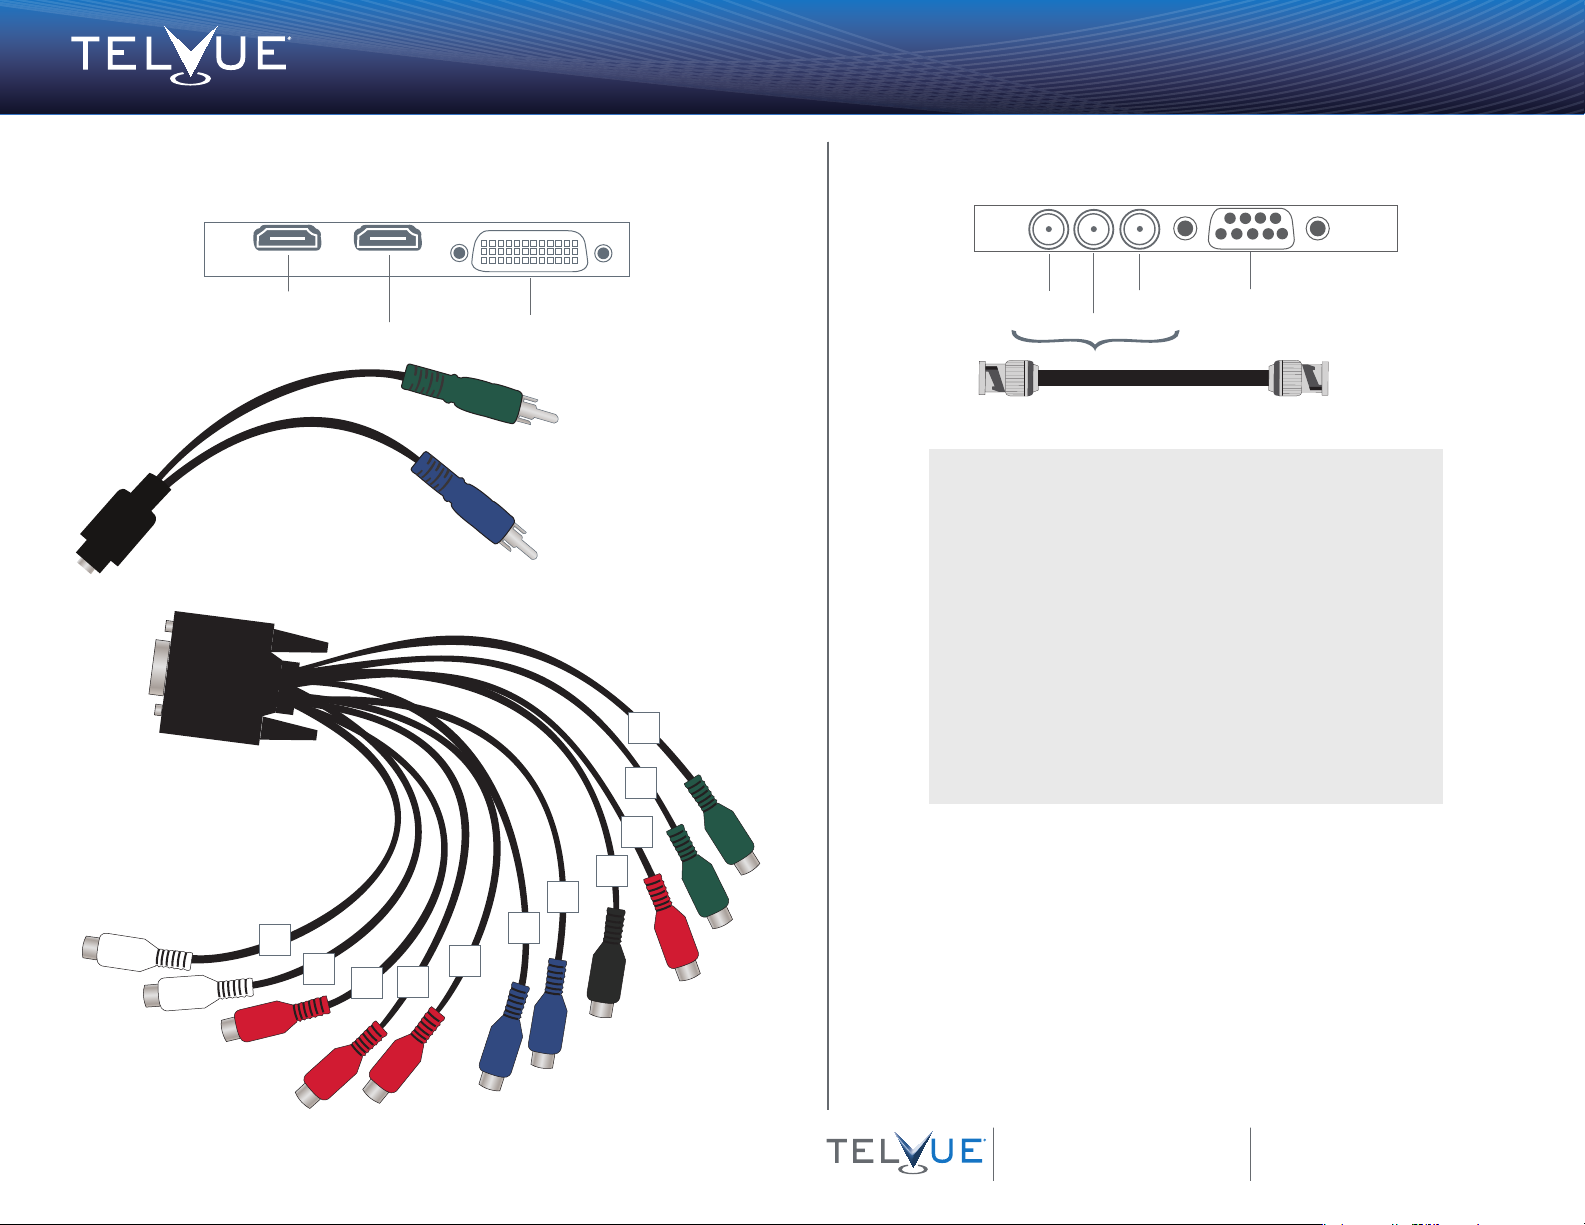
TelVue ProVue™ SDI Video and Audio Output Connectors TelVue ProVue™ Analog Video and Audio Output Connectors
Breakout Cable
Analog Audio Input
Audio In Left
Analog Audio Output
Audio Out Left
Analog Audio Input
Audio In Right
HDMI 4:2:2 Input
14
12
Analog Audio Output
Audio Out Right
HDMI 4:2:2 Output
13
15
Analog Video
Output R-Y Out
Breakout Cable
For S-Video out, connect the:
• S-Video green connector to the
breakout cable #4 Y Out green
connector
• S-Video blue connector to the
breakout cable #5 B-Y Out blue
connector
9
3
Analog Video Input
B-Y In
S-Video Connector
4
8
7
10
5
Digital Audio Output
AES/EBU Out
Analog Video Output
B-Y Out
Output - Y Out
(For Composite)
Analog Video
Analog Video
Input R-Y In
Analog Video
Input Y In
Genlock
HD-SDI Out
HD-SDI In
BNC Connector
Deck Control - Not Used
What’s Next?
We have many resources available to help you further and get you
up and running faster! Solutions, documentation, literature, training
videos and more are all at your fingertips.
Check them out!
http://www.telvue.com/support/
http://www.telvue.com/support/training/
http://www.telvue.com/manual/provue
If you would like to set up an appointment for training please
contact the TelVue
16000 Horizon Way, Suite 500
Mount Laurel, NJ 08054
800.885.8886
www.telvue.com/support
®
Support team at support@telvue.com.
Toll Free: 800-885-8886
Email: support@telvue.com
Support Portal: http://www.telvue.com/support
APIs: http://www.telvue.com/api
Training Videos: http://www.telvue.com/training
QSG_TP_7_13_V2
 Loading...