


LAP100 Netbook
With Integrated 3G Module
User Manual v1.0

Table of Content
CHAPTER 1: GETTING STARTED................................................................................................ 5
1.1 PACKAGE CONTENTS......................................................................................................................................5
1.2 INSERTING AND REMOVING THE BATTERY ................................................................................................. 5
1.3 CONNECTING THE ADAPTER .........................................................................................................................6
1.4 TECHNICAL SPECIFICATION ...........................................................................................................................6
CHAPTER 2: USING YOUR COMPUTER: .................................................................................... 7
2.1 OPEN THE LID .................................................................................................................................................. 7
2.2 RUN YOUR COMPUTER.....................................................................................................................................7
2.3 SHORTCUT KEYS............................................................................................................................................... 8
CHAPTER 3: EXTERNAL FUNCTION ........................................................................................10
CHAPTER 4: GETTING STARTING WITH LINUX UBUNTU.................................................12
4.1 STARTING LINUX UBUNTU OS ....................................................................................................................12
4.2 USING LINUX UBUNTU RECOVERY ............................................................................................................. 12
4.3 3G NETWORK CONFIGURATION IN LINUX UBUNTU ................................................................................ 13
4.4 WIRELESS NETWORK CONFIGURATION IN LINUX UBUNTU .................................................................... 20
4.5 CONNECTING BLUETOOTH DEVICES IN LINUX UBUNTU .......................................................................23
CHAPTER 5: FREQUENTLY ASKED QUESTIONS .................................................................. 24
2
User guide
Dear customer:
Thank you for choosing Teltonika!
Your computer combines powerful information processing and convenient mobility. It
enhances your efficiency whenever you are in the office, on-the-go or at home.
The instructions bellow will help you to know-well your computer.
Legal notice
Copyright © 2009 TELTONIKA Ltd. All rights reserved. Reproduction, transfer,
distribution or storage of part or all of the contents in this document in any form without
the prior written permission of TELTONIKA Ltd is prohibited. The manufacturer
reserves the right to modify the product and manual for the purpose of technical
improvement without prior notice.
Other product and company names mentioned herein may be trademarks or trade names
of their respective owners.
Attention
Before using the device we strongly recommend to read this user
manual carefully.
Do not rip the device. Do not touch the device if the device block
is broken or its connecting wires are without isolation.
All wireless devices for data transferring may be susceptible to
interference, which could affect performance.
The device is not water-resistant. Keep it dry.
The device requires 230V AC voltage. Be careful!
Please use cable and the adapter provided with LAP100 device.
3

Teltonika is not responsible for any harm caused by using wrong
cable or wrong adapter for connection.
Warning! Please use only the battery provided with LAP100
device. Teltonika takes no responsibility for device damage caused
by third party batteries.
Recommended battery lifetime is one year. After that, it is
recommended to change the battery to achieve the indicated
functionality.
Any operation during a lightning storm is under your own risk
and responsibility. It is strongly recommended to turn of the
device during lightning storm.
IMPORTANT NOTES!
It is mandatory to read the notes and manual carefully before starting to use the
device.
Technical support contacts
If you face any problems related to the device, which you are not able to solve by yourself,
you are always welcome to address our technical support department by e-mail
support@teltonika.lt. We will be very glad to assist you.
4

Chapter 1: Getting Started
1.1 Package Contents
• Teltonika Netbook
• Li-ion battery
• Power supply adapter
• Power supply cable
• Quick Start Guide
• A printed card with LAP100 drivers download link.
Note: The manufacturer does not supply the SIM card, which is mandatory for
setting up a connection to the GSM network! The SIM card may be purchased from
your GSM (mobile) service provider!
Note: If any of the components is missing or damaged, please contact the retailer or
reseller from which this product was purchased.
1.2 Inserting and removing the battery
Insert the battery into the Netbook. Note that the battery is not fully charged. The battery
should be left charging for about 12 hours. You are advised to make 3 such cycles fully
discharging and fully charging the battery. This should help increase your battery life.
5
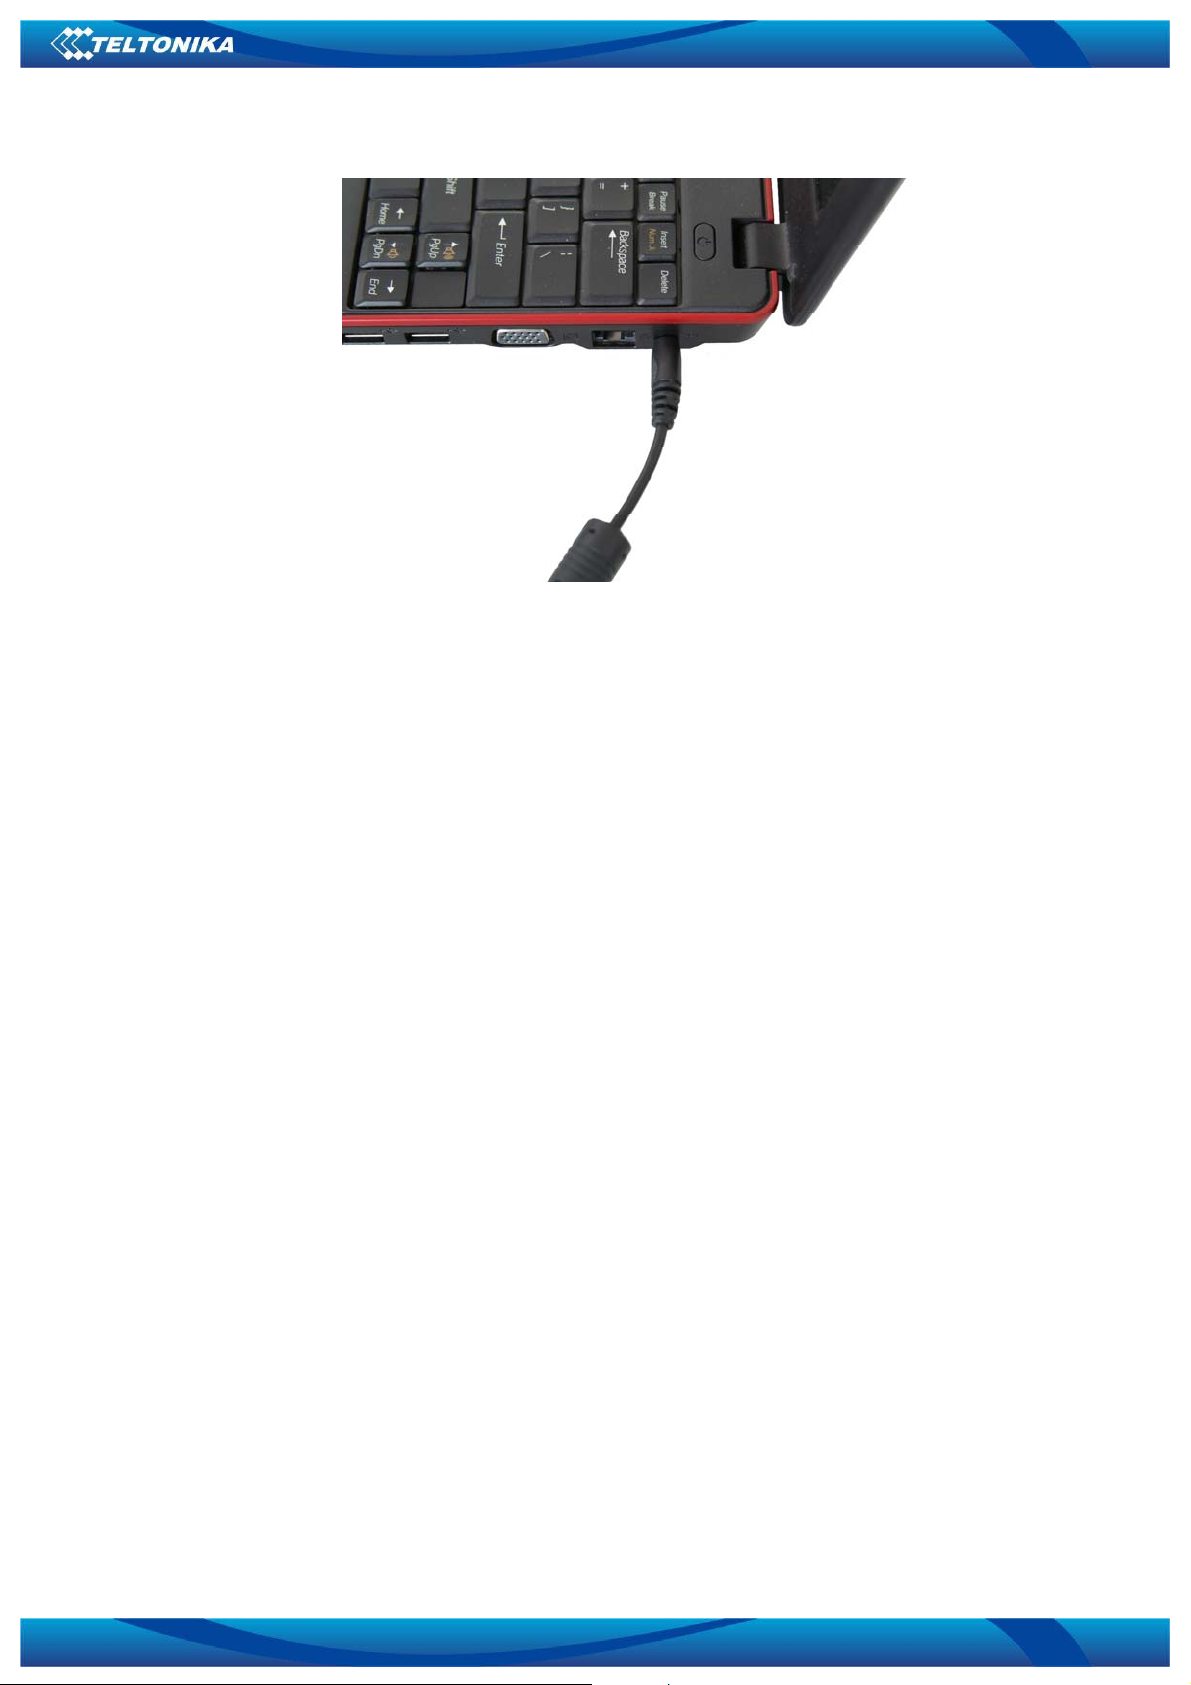
1.3 Connecting the adapter
It is highly recommended to have the battery inserted when connecting your Netbook to
the external power supply.
1.4 Technical specification
9 Chipset: Intel 945GSE+ICH-7
9 CPU: Intel Atom N270, FSB533, 1.6GHz
9 RAM: DDR2 667/533 MHz, 1x1GB (1x2GB max.)
9 Display: 10.1" 16:9 LED backlight, 1024*600
9 Graphic card: Intel GMA 950 (128 MB)
9 Hard Disc Drive: SATA-II HDD 160GB
9 Sound system: HD Audio 2.1 channel output support
9 Card Reader: Supports SD/MMC/MS/MS PRO cards
9 Web camera: 1.3 mega pixels
9 Security: Kensington® Lock
9 Power supply: 4 cell/4400 mAh battery, 36 W power supply adapter
9 NIC: 100 Mbit card
9 HSxPA: GSM/GPRS/EDGE frequencies (850/900/1800/1900 MHz)
UMTS frequency (2100MHz)
HSDPA 7.2 Mbps, HSUPA 5.76 Mbps
9 WiFi: 802.11 b, g
9 BT: built-in
6
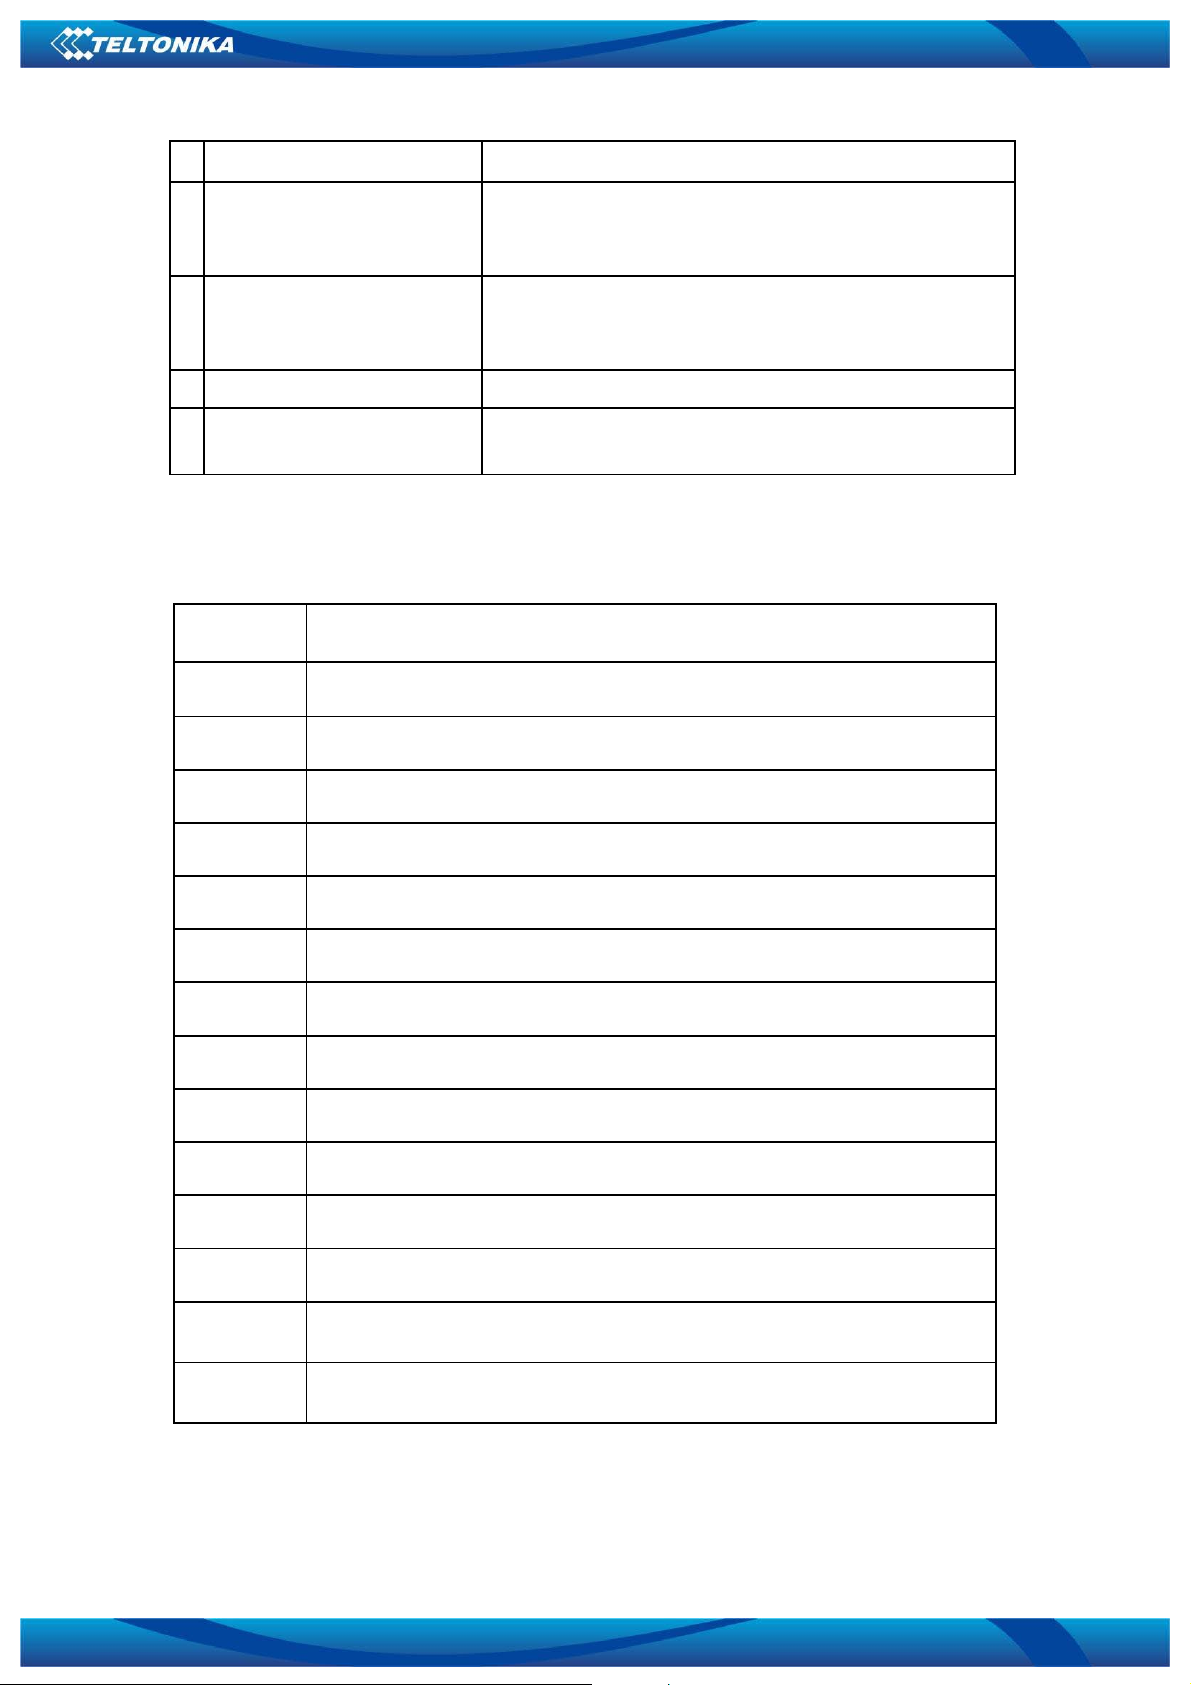
Chapter 2: Using your computer:
For your reference
2.1 Open the lid
Open the lid and adjust the angle of the LCD for comfortable viewing. Please be gentle
when opening or closing the lid. Any rough handling may cause damage to your computer.
2.2 Run your computer
Please insert the battery and connect the adapter, then press the Power button and hold for
more than 1 second to start your computer.
7
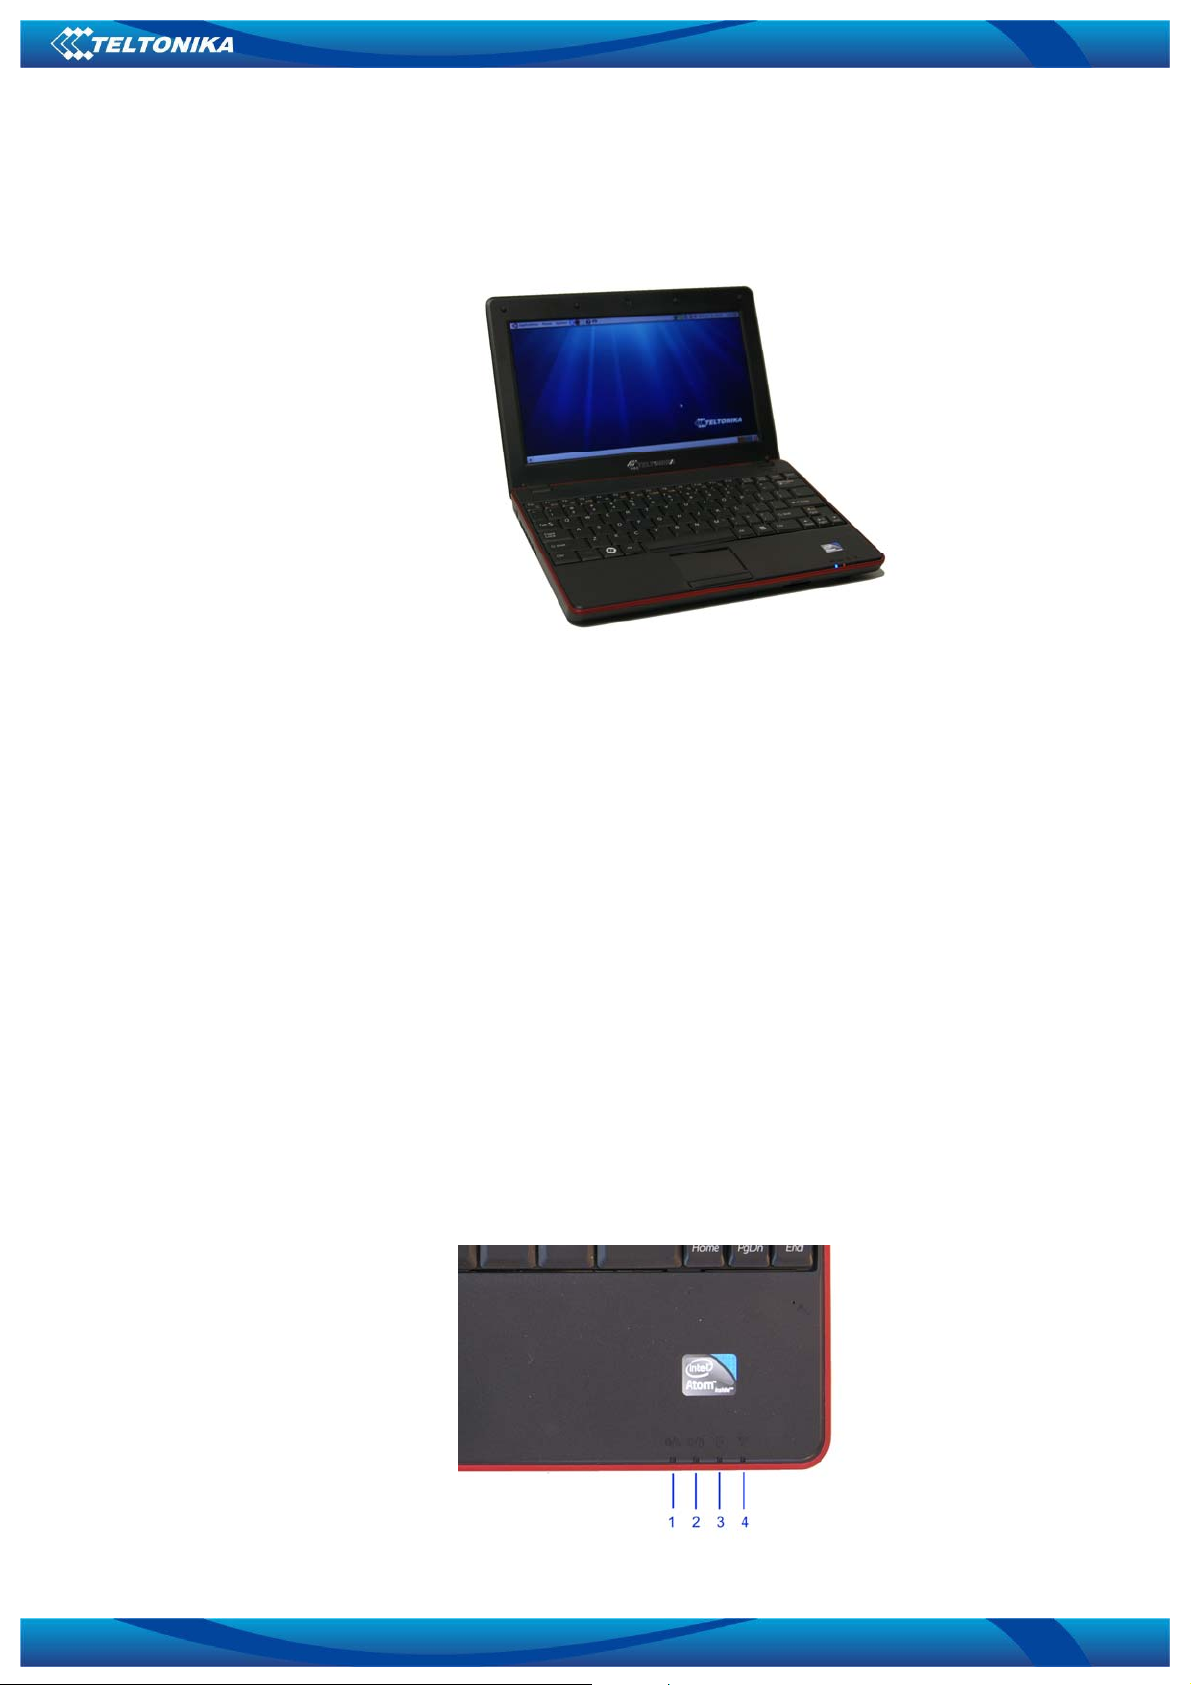
1 Power indicator Blue light indicates the Netbook is on.
2 Charger and battery status
indicator
3 HDD indicator Blue light indicator - HDD is in use.
4 Wireless indicator Blinking blue light indicates WiFi connectivity to the
Item Description
Flashing light indicates the Netbook is in standby
mode.
Blue light indicates the fully charged battery.
Orange indicates the battery is being charged.
Flashing orange indicates the battery in running low.
access point. It is off when WiFi is not active.
2.3 Shortcut keys
Key
Fn+Esc Sleep toggle, customized by the OS power management
Fn+F1 Enable or disable touchpad function
Description
Fn+F2 Enable or disable 3G function (optional)
Fn+F3 Enable or disable WiFi function
Fn+F4 Enable or disable volume
Fn+F5 Decrease Screen brightness
Fn+F6 Increase Screen brightness
Fn+F7 Switch monitors according to the existence of external display
Fn+F8 Toggle the LCD display on and off
Fn+F9 User defined, default: quick launch for internet browser
Fn+F10 User defined, default: quick launch for email application
Fn+F11 User defined, default: quick launch for media player
Fn+Up
Arrow
Fn+Down
Arrow
Increase volume
Decrease volume
8

9

Chapter 3: External function
External ports
10

1 Kensington lock Connector for a Kensington-type lock
2 Card Reader Supports SD/MMC/MS/MS PRO cards
3 Microphone-in Microphone input port
4 Headphone output/Front-out Headphone output or front-side output for 2.1 channel
5 USB port Connect USB devices such as USB mouse, camera
6 VGA port External monitor connector
7 RJ-45 port Ethernet network connector
8 DC jack AC adapter jack
9 SIM card port SIM card for 3G modem
Item Description
audio system
and etc.
11

Chapter 4: Getting starting with Linux Ubuntu
4.1 Starting Linux Ubuntu OS
LAP100 Netbook comes with preinstalled Linux Ubuntu 9.04 OS. This system has all the
required drivers built-in. When starting Linux OS, user name and password are required.
By default, they are:
User: user
Password: user
You can change this password later if desired.
4.2 Using Linux Ubuntu recovery
The preinstalled Linux Ubuntu version in you Netbook has a recovery partition. You are
advised not to format or delete this partition because it contains the recovery image of you
system! It is normal that you can not see this partition in the Linux OS interface. The
recovery partition is required when you need to restore your system to the factory defaults.
System recovery is very simple and takes about 40 minutes.
Start your Netbook, “Teltonika” logo will appear in the screen. When it disappears, press
and hold Esc button until you see Boot System Menu. Choose “ Full system recovery” and
press Enter. This should start your system restore and should take about 40 minutes. When
done, system reboots automatically. You should now be able to operate your Netbook as
usual.
Attention: restoring your system will lead to all personal data loss! Taking care of
your personal files is your own responsibility.
12

4.3 3G network configuration in Linux Ubuntu
1. Right click the network icon on the upper toolbar.
2. In the appeared menu choose „Edit Connections“.
3. New window will open. Choose „Mobile Broadband“ tab and press „Add“
button.
13
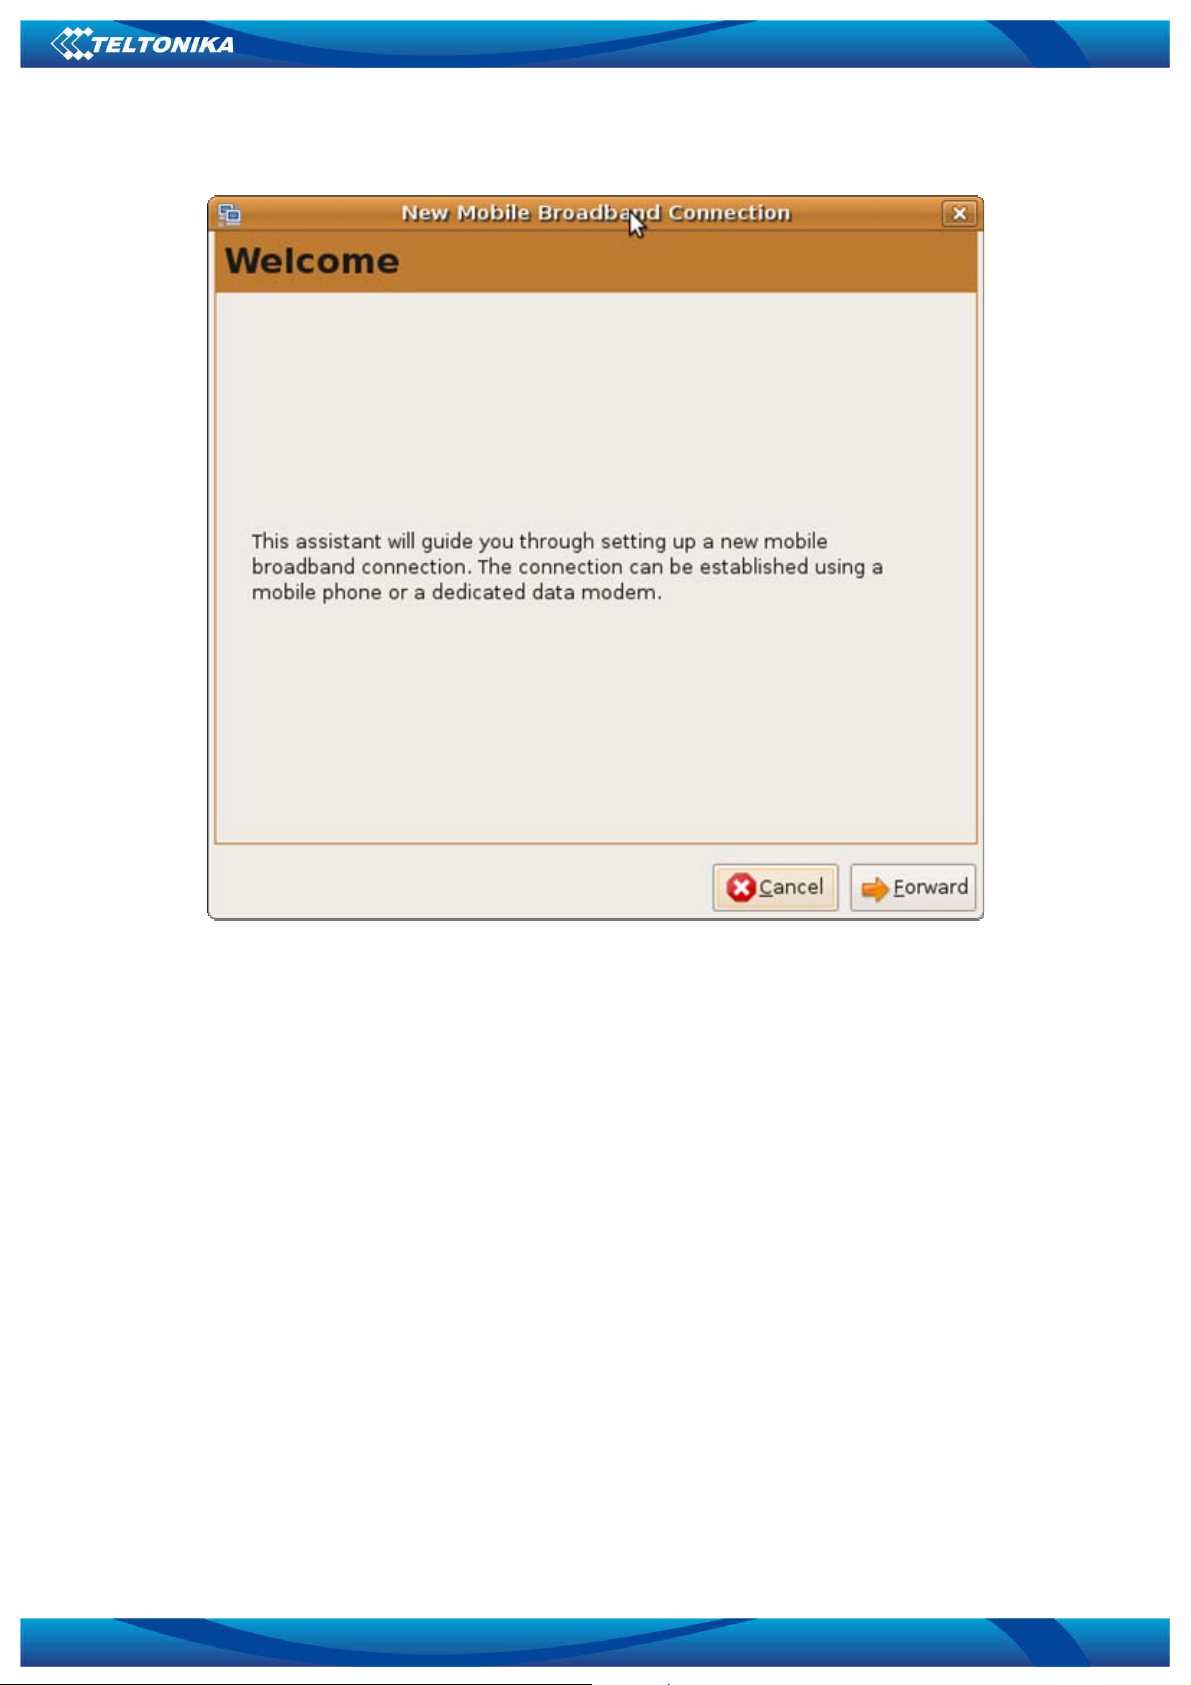
4. In the new window press „Forward“ button.
14
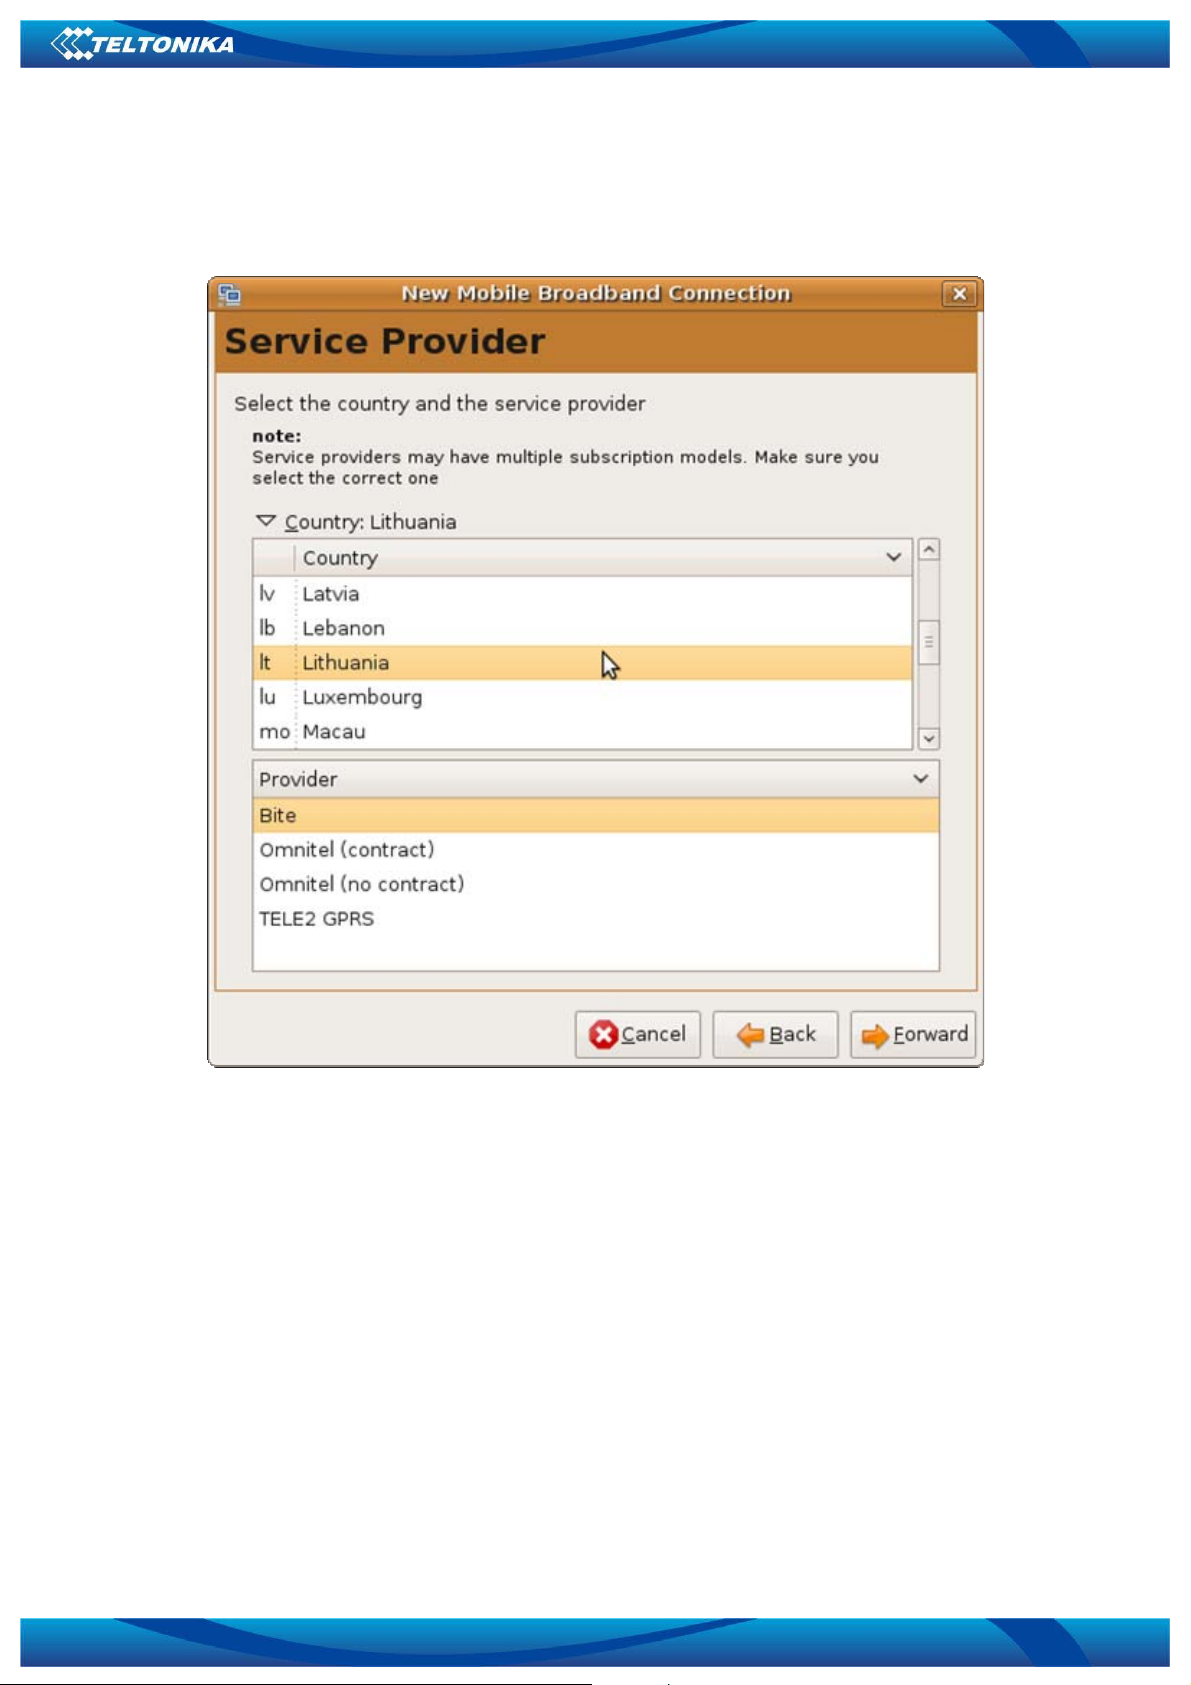
5. In the next window choose your country (Lithuania for example). Left clicking
the „Country“ will expand the list. In the lower list choose your service provider, whose
SIM card you are using to connect to the network (in our case it is „Bite“). Press
„Forward“ button.
15

6. In the next window press „Apply“ button.
16

7. This window will close and you will return to the previous „Network
Connection“ window. Select the newly created profile by left clicking it. Press „Edit“
button.
17

8. In the new window you can adjust connection parameters of the profile. You
have to specify username, password and APN that you get from your service provider.
Press „Apply“ button when finished. The window will close.
18

9. Now you can close the „Network Connection“ window by clicking „Close“
button. GPRS (or 3G) network configured successfully.
10. Now you can connect to the 3G network by left clicking the network icon. The
following menu will appear. You should choose the upper record.
11. If successfully connected, the network icon will change to the following icon:
19

4.4 Wireless network configuration in Linux Ubuntu
1. Start the “3DSP WiFi Radar” application. You can be prompted to enter your
password to perform this task. By default, this password is user.
2. Left click the “3DSP WiFi Radar” icon in the upper toolbar.
20

3. New window will open. Select SSID of the network you are connecting to and
press “Connect” button.
4. New window will open and you will be prompted to create network profile.
Click “Yes” button.
5. Now “WiFi Profile” window will open. Simply press “Save” button. If
connecting to the network requires manual network configuration, please contact your
network administrator.
21

6. “Wireless Network Connecting” window will open. You have to enter network
key here. Contact your network administrator if you do not know it. Press “OK” when
finished.
7. Please wait while your computer connects to the selected network. You may
close the “3DSP WiFi Radar” window when connected.
22

4.5 Connecting Bluetooth devices in Linux Ubuntu
1. You can connect and manage your Bluetooth devices with “Blueman applet”
software that is already installed on your system. To start application simply left
click the Bluetooth icon in the upper toolbar.
2. To start searching for the visible Bluetooth devices simply press “Search” button.
3. You should be able to see all of your Bluetooth devices that are in the working
range (depends on the specification of the devices). Select the device you are trying
to connect to your Netbook. By pressing “Add” button you can add selected device
to known devices list. Press “Bond” button to create bonding with the device.
More details on how to connect your Bluetooth device can be found in the manual
of that device.
23

Chapter 5: Frequently asked questions
Q1. I have just purchased the LAP100 Netbook. When booting up the Linux Ubuntu OS
for the first time, user name and password are required. What are they?
A1. By default, they are:
User: user
Password: user
You can change this password later if desired.
Q2. There are no drivers included with the LAP100 Netbook. Does Teltonika provide any?
A2. LAP100 Netbook documentation and the latest drivers can be found on internet
http://www.teltonika.lt/lap100/.
Q3. What operating systems are supported with LAP100?
A3. Windows 7/XP and Linux OS are supported.
Q4. Does Teltonika provide bigger capacity batteries?
A4. Yes, it is possible to buy 4 or 6 cell batteries.
Q5. How long can LAP100 be used with standard 4 cell battery and how long does it take
to charge it?
A5. LAP100 can be used for 2,5 – 3 hours with the fully charged standard 4 cell battery.
The exact work-time depends on the number of features (for example, number of the
devices connected to the USB port, WiFi, 3G and Bluetooth modules activity) being used.
LAP100 can be charged in ~2,5 hours when idle and ~4 hours when in use.
Q6. What is the warranty period for the LAP100 Netbook?
A6. Warranty period for the LAP100 Netbook is 1 year.
Q7. What is the maximum amount of RAM memory LAP100 can support?
A7. LAP100 can support up to 2GB of RAM memory.
24

Q8. When connecting headphones to the computer, sound keeps coming from the
computer speakers. Turning off the sound in Volume Control disables sound completely
(both: the headphones and the speakers). Is it possible to turn off the computer speakers
without turning off the headphones?
A8. Yes, it is possible to turn off only the computer speakers. You need to make some
adjustments in the Volume Control settings.
Open “Volume Control”, “Playback” tab. You need to adjust Volume settings as depicted
below (if you can not see some of the settings, you can enable them by pressing
Preferences):
Master: adjusts the overall sound level (both: the computer speakers and the headphones).
Front: adjusts sound level for the headphones.
Speaker: adjusts sound level for the computer speakers.
25
 Loading...