

Page 1

GETTING TO
KNOW YOUR
PRE-PAID
TELSTRA
USB 4G
Page 2

LET’S GET THIS SHOW
ON THE ROAD
You must be excited about your brand new Pre-
Paid Telstra USB 4G.
This guide will help you get started as quickly and
as easily as possible. It’ll guide you through
installation and run through all the handy extra
features that are included.
You’ll be up and running in no time so you can
stay connected when you’re on the go.
1
Page 3

WHAT’S
INSIDE
Let’s get started
03
05 Getting connected
09 Using the Connection Manager
12 TelstraOne experience
16 Extra bits you should know
31 Problem solving
2
Page 4

LET’S GET
STARTED
YOUR PACKAGE CONTAINS THE FOLLOWING:
• Pre-Paid Telstra USB 4G
• Telstra Pre-Paid Next G® SIM Card
• USB extension cable
• This Getting Started Guide
• Telstra Pre-Paid Welcome Guide
• Manufacturer’s warranty card
ACCESORIES AVAILABLE FOR PURCHASE:
• MicroSD™ Memory Card to enable the device
to be used as an external storage drive
• External Antenna (connector type TS9) may
improve the modem performance in low
signal strength areas
3
Page 5
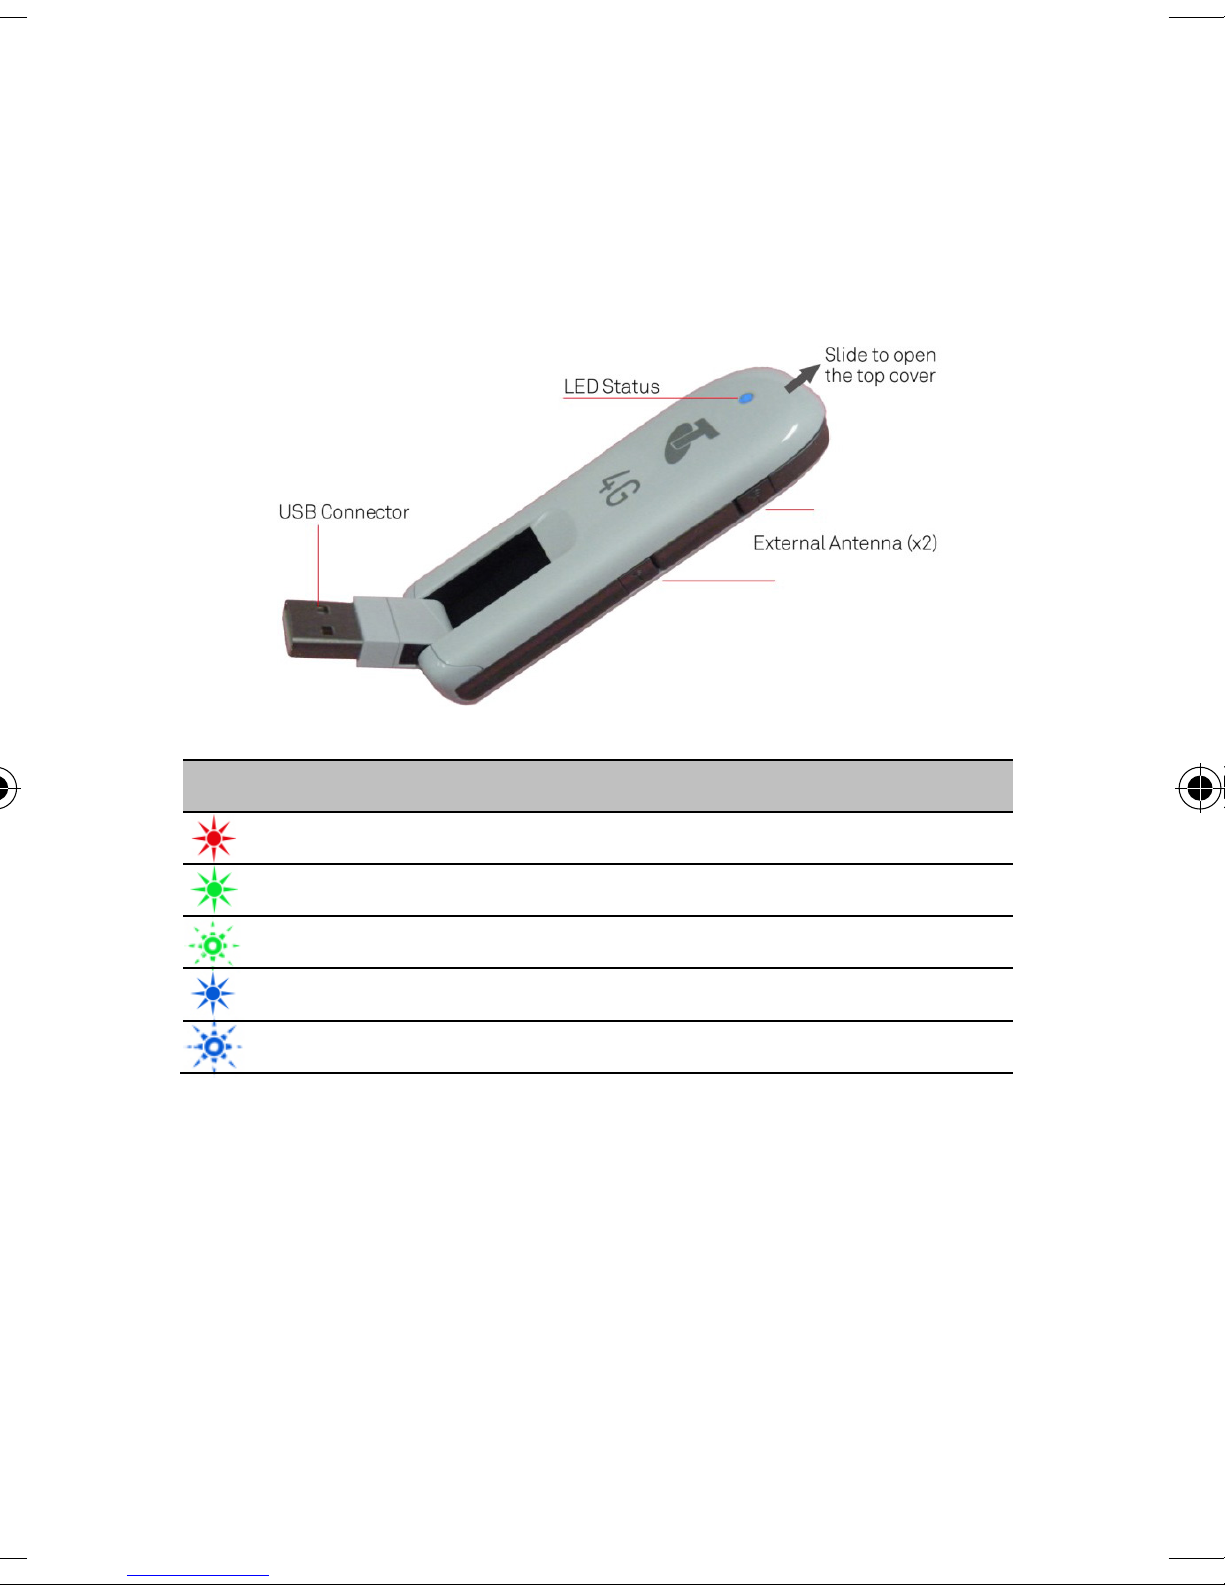
YOUR PRE-PAID TELSTRA
LED indicators
USB Device Status
USB 4G
Red Offline. Not registered on the network
Green solid Registered on the 4G network
Green blinking Active data transfer on the 4G network
Blue solid Registered on the 2G / 3G network
Blue blinking Active data transfer on 2G / 3G network
• The LED indicator shows the status of the
USB device and indicates when your are
sending or receiving data
4
Page 6
GETTING
CONNECTED
INSERT USB DEVICE
• Pull out the USB connector and plug the USB
device into your computer.
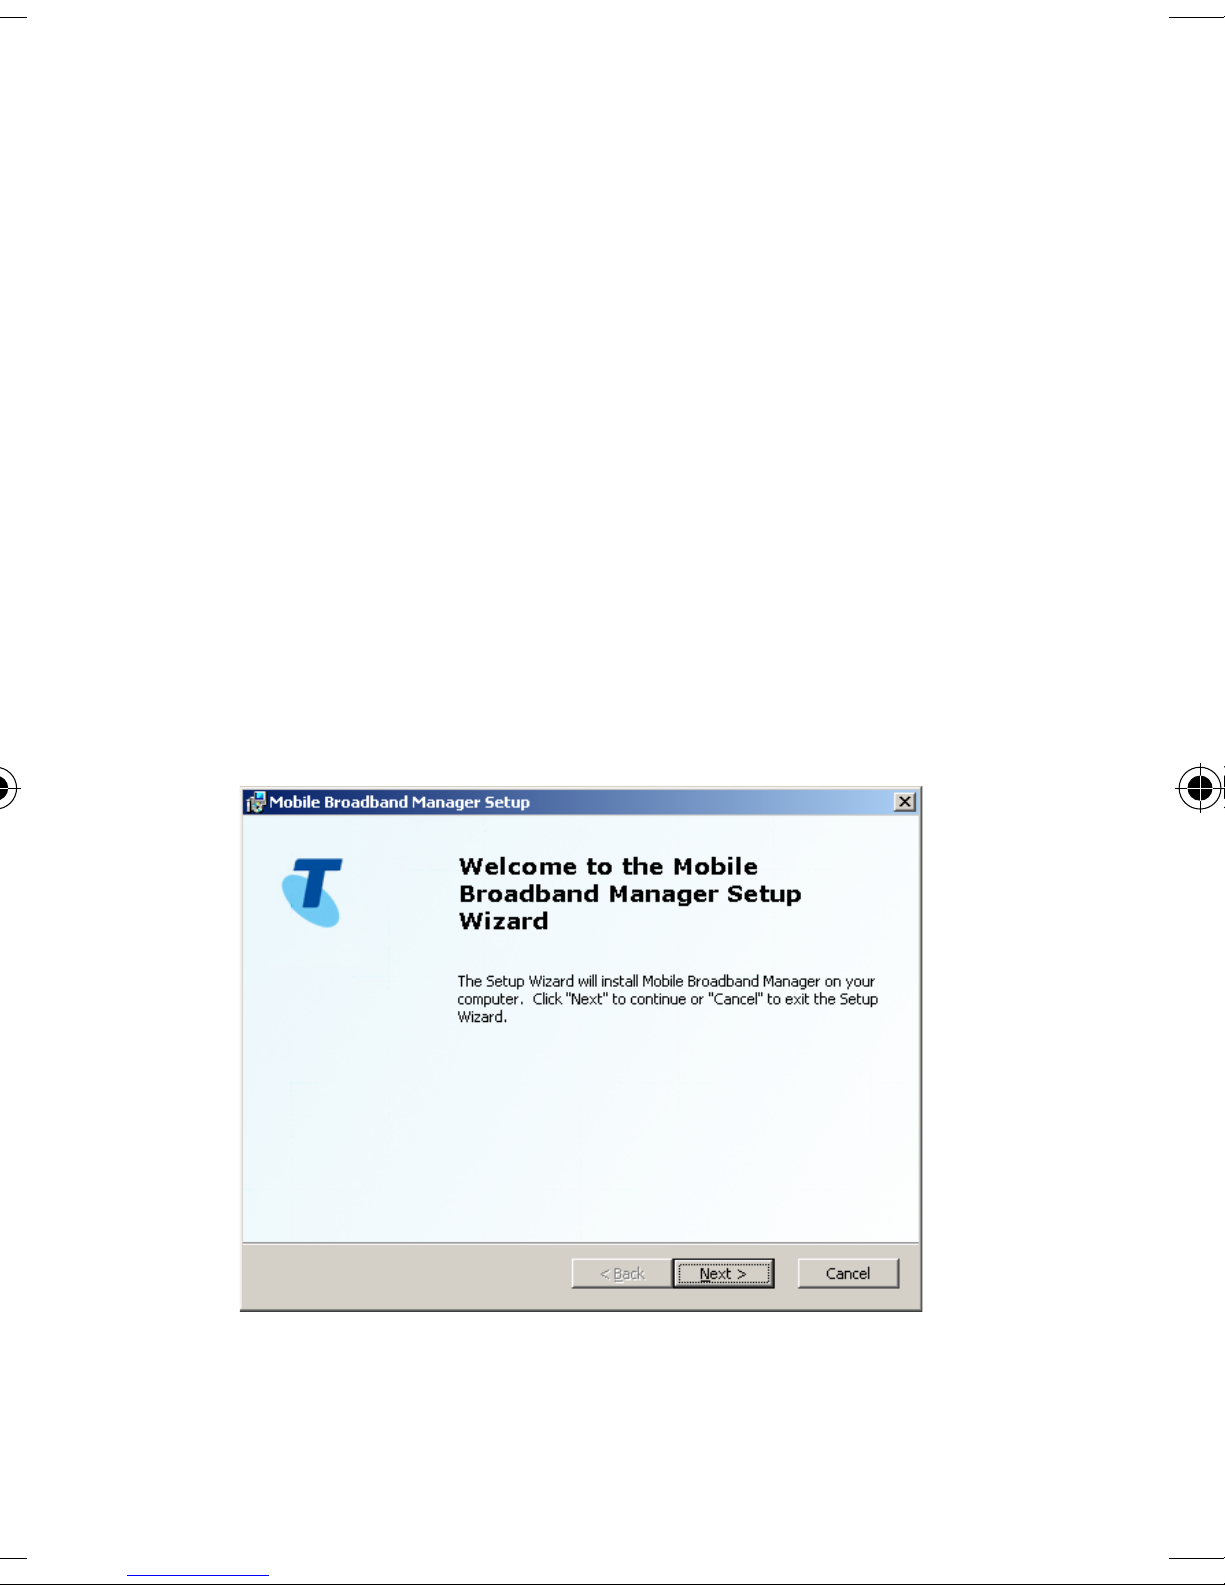
• The computer will detect the new hardware
and start the Mobile Broadband Setup
Wizard.
5
Page 7

Handy Hint:
Windows users:
Mac users:
If nothing happens your system configuration
may be preventing Autorun.
files’, then double click the Telstra icon to
start the software installation.
your desktop.
Select ‘Open folder to view
Double click the Telstra icon from
6
Page 8
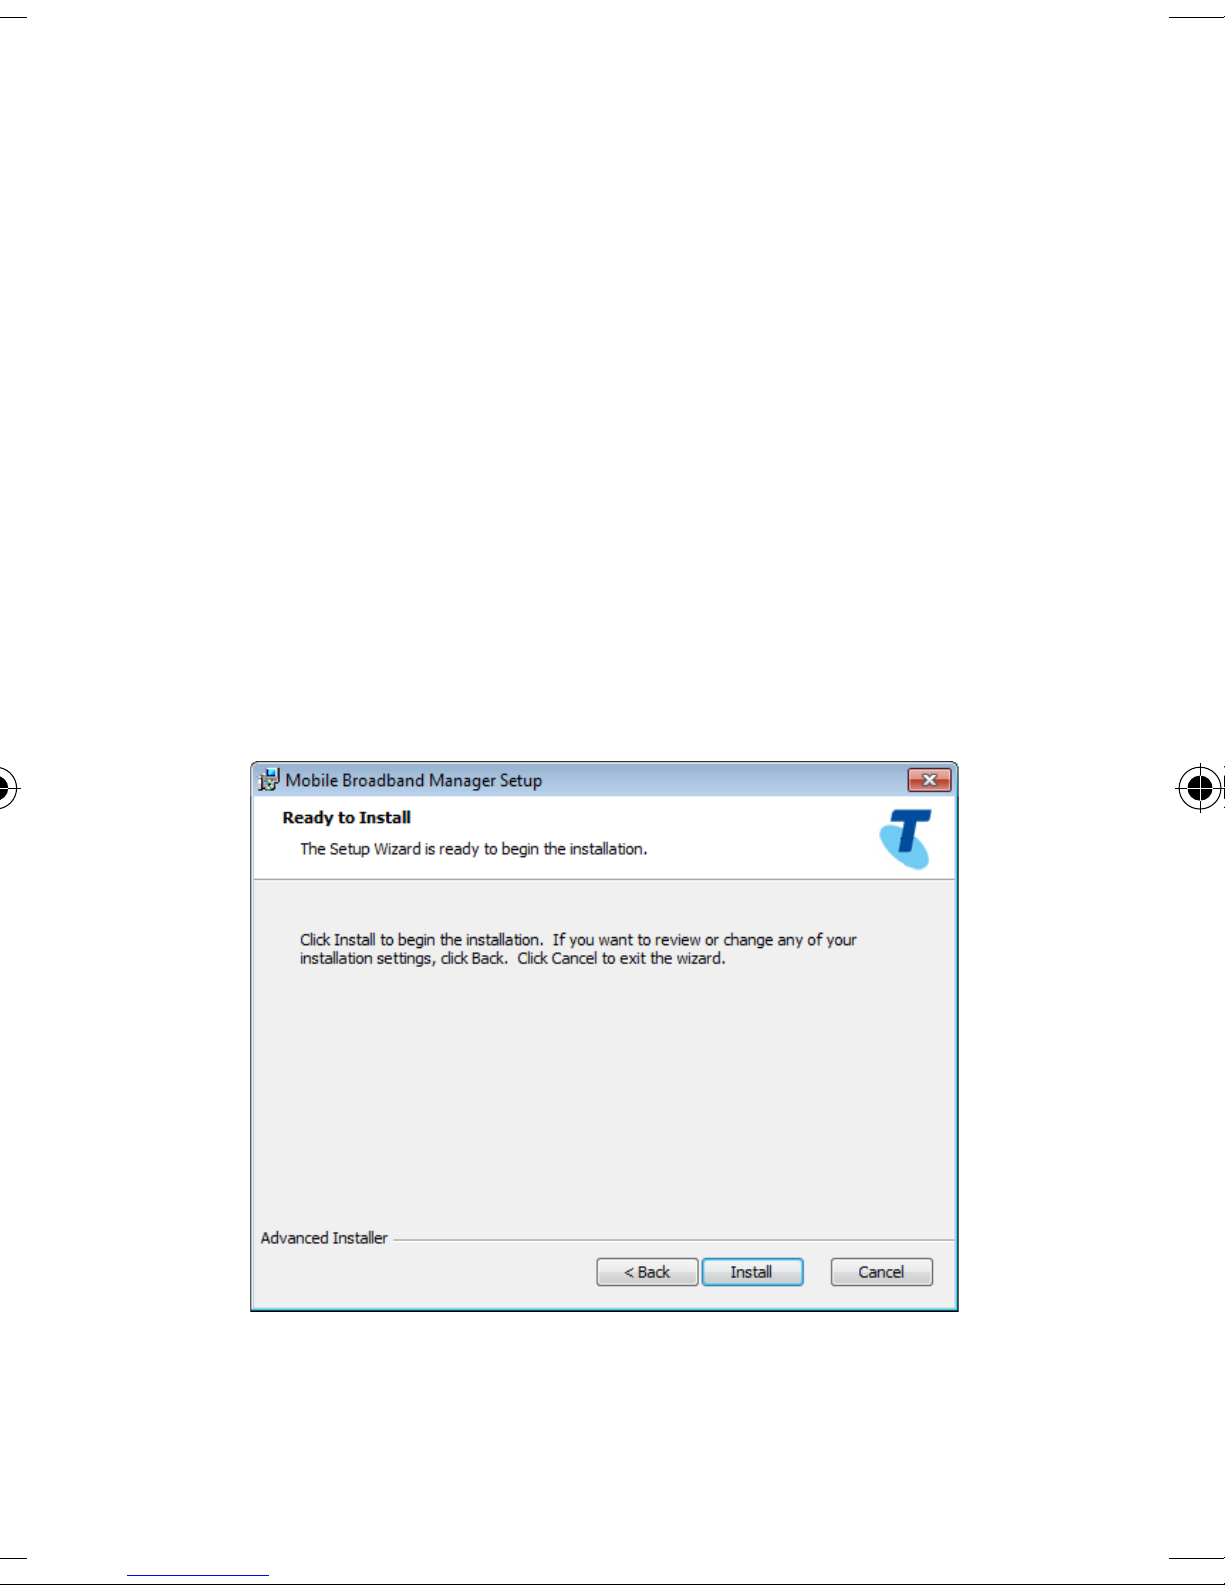
FOLLOW THE PROMPTS TO COMPLETE THE
INSTALLATION
• The Connection Manager software will start
automatically and takes a few minutes to
complete.
• Click next to accept the default location or
click Browse to specify your own path.
• Click Install to start installation.
7
Page 9

LAUNCH CONNECTION MANAGER
12 58880
13 2200
• Your Connection Manager will now launch
and the USB device will continue the
installation process for a few minutes. Once
complete, click Finish to exit Setup.
• Your Connection Manager is now installed
and a shortcut has been created on your
desktop.
ACTIVATE PREPAID SERVICE
• Activate via Connection Manager or
• Call
the Telstra Pre-Paid Welcome Guide for
further details.
• If you are calling from a non-Telstra phone
and cannot connect on this number,
call
Paid’.
and follow prompts. Refer to
and when prompted say ‘Pre-
8
Page 10
USING THE CONNECTION
MANAGER
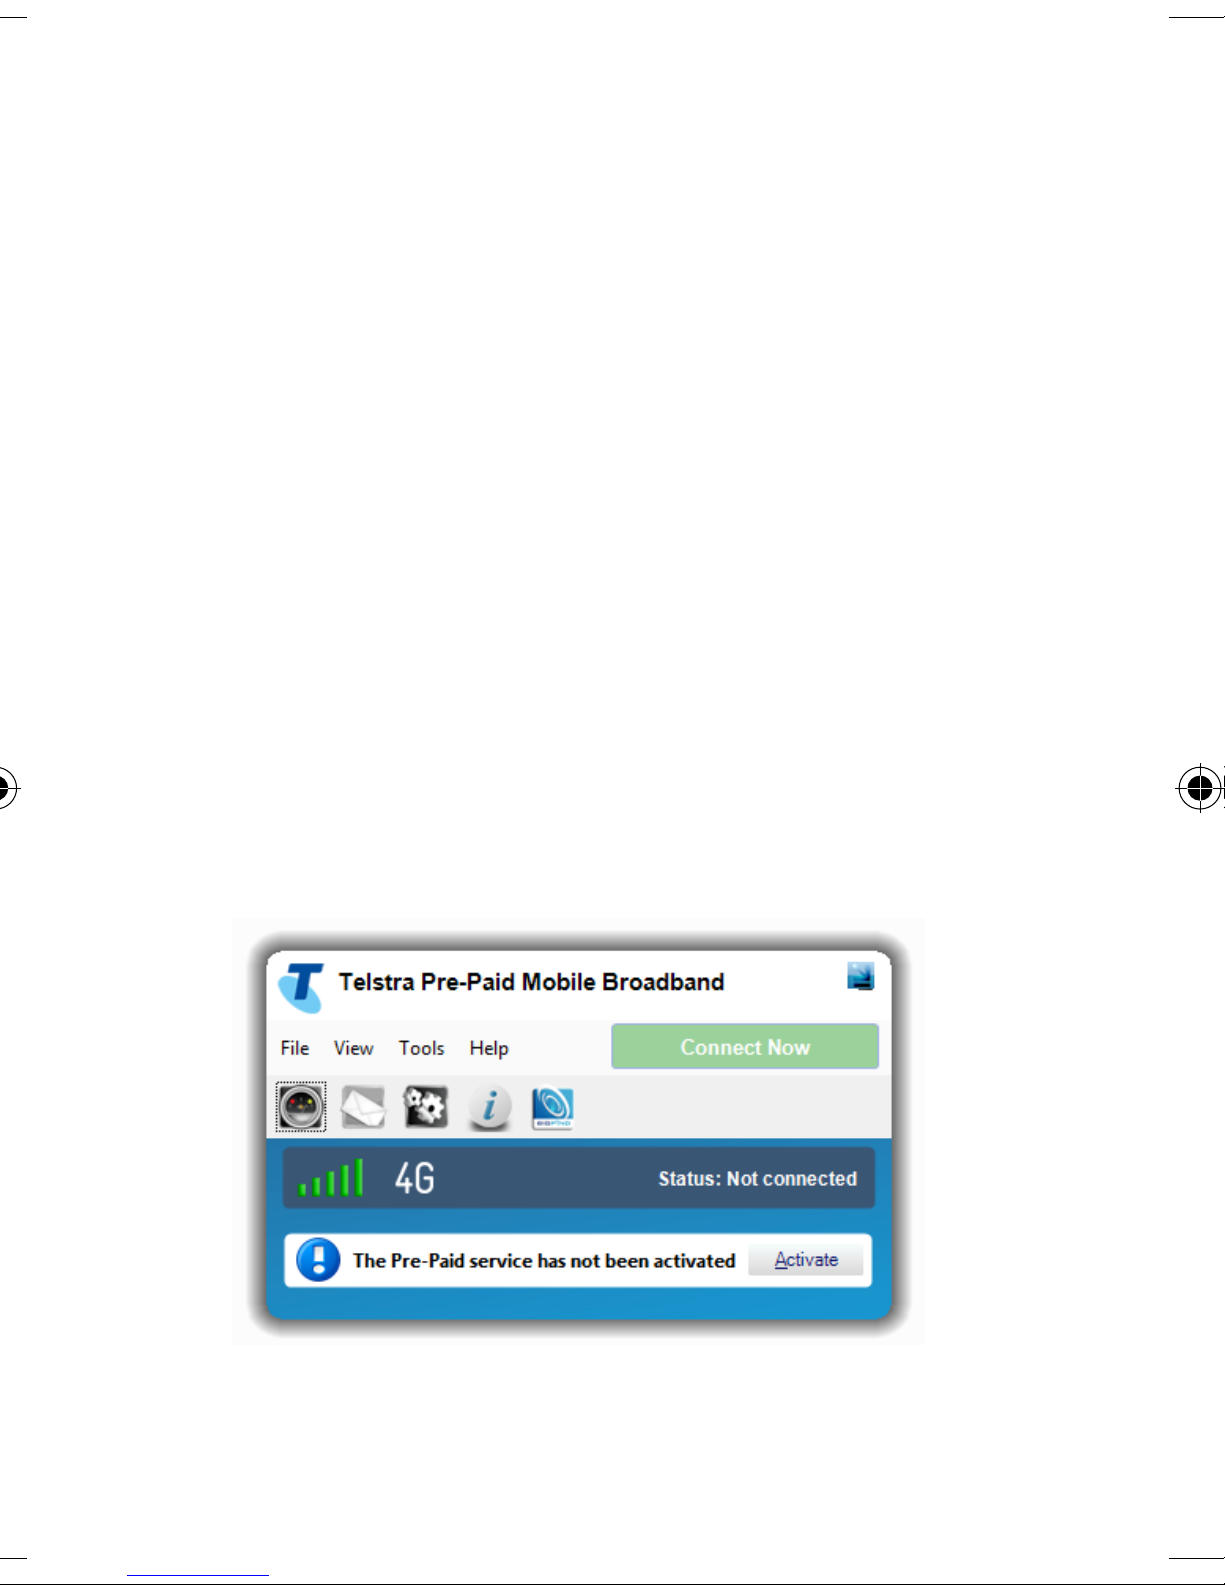
ACTIVATE YOUR SERVICE VIA CONNECTION
MANAGER
• Once your Connection Manager is installed
you can activate your service by clicking the
Activate button in the bottom right hand
corner, fill in your details and follow the
prompts.
9
Page 11

• Once the Connection Manager has loaded up
and your service has been activated you will
be able to click Connect Now.
• Whenever your Pre-Paid Telstra USB 4G is
plugged into your computer the Connection
Manager will automatically launch.
Alternatively double click the shortcut on
your desktop.
10
Page 12
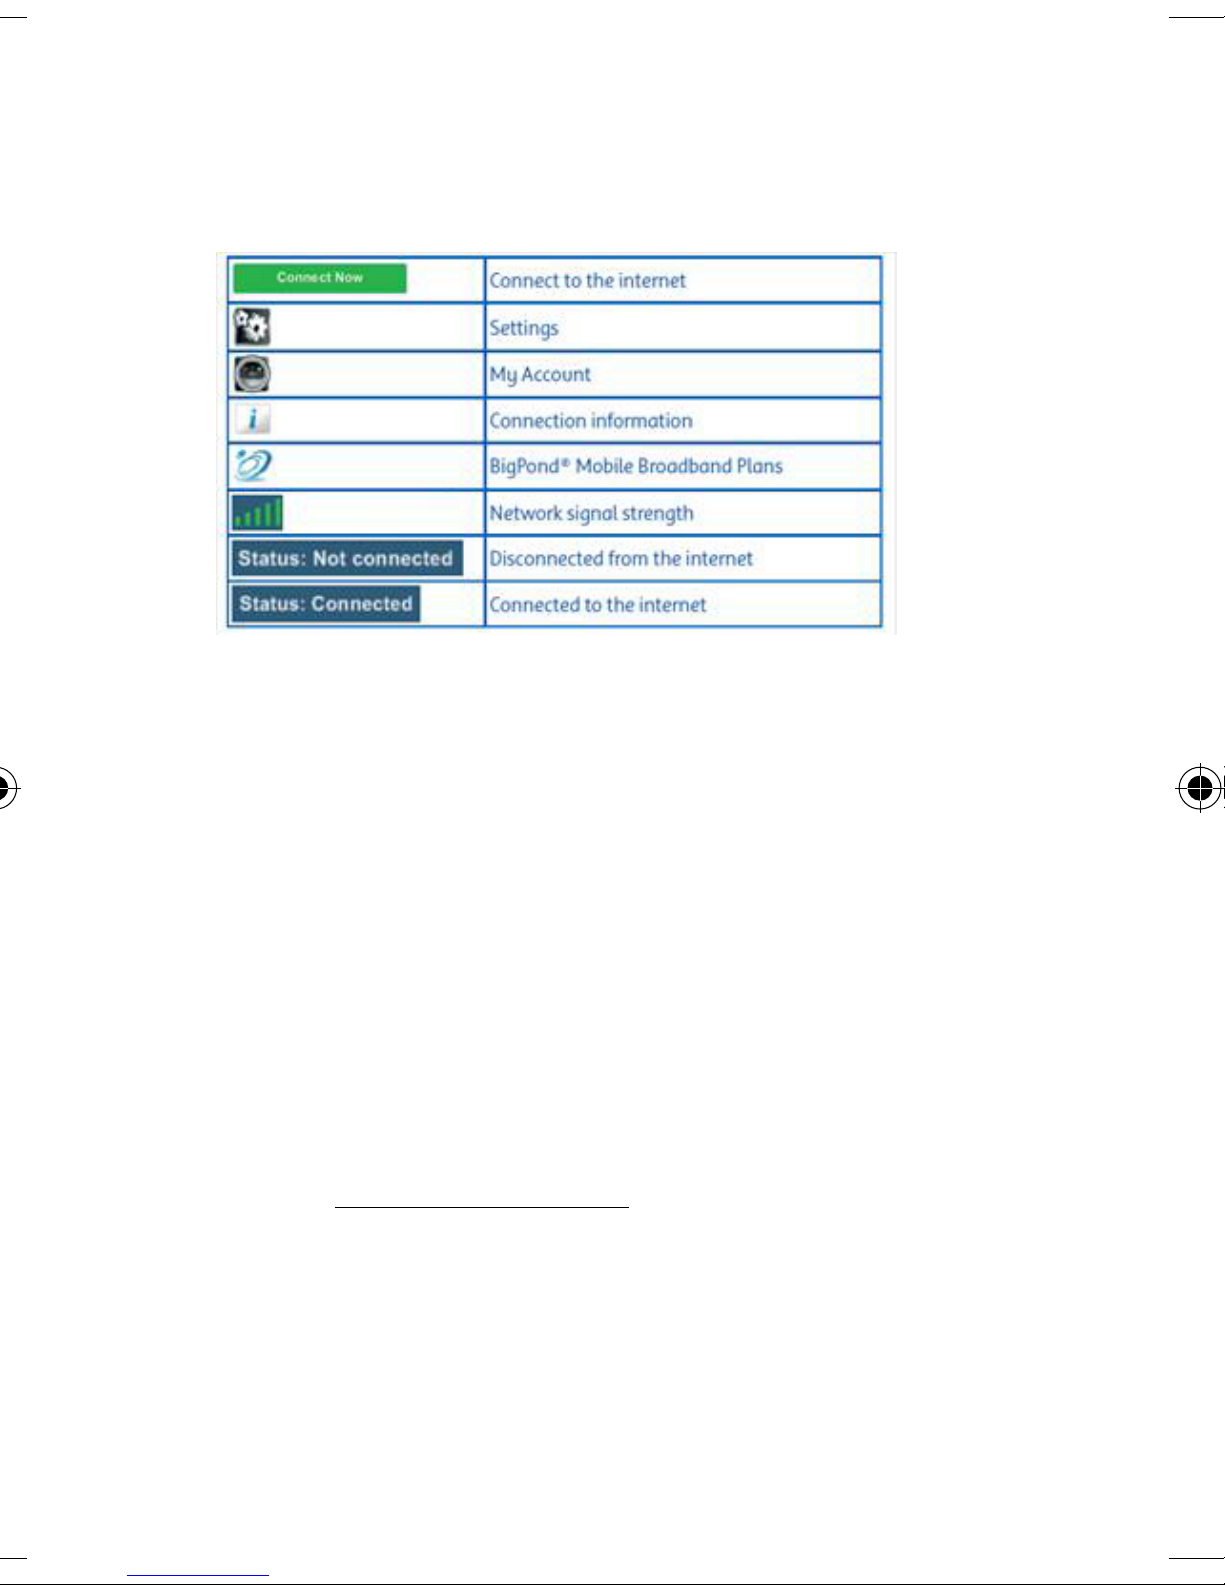
CONNECTION MANAGER ICONS
CONNECTION MANAGER UPDATES
Your Connection Manager will automatically check
for software updates periodically. Alternatively,
you can click on Tools in the Connection Manager,
and select Check for Updates menu item, to
manually download the latest software.
Alternatively you may visit the Support & Updates
page at telstra.com/ppmbb
11
Page 13

TELSTRAONE
EXPERIENCE
Your new Pre-Paid Telstra USB 4G includes
TelstraOne Experience with features that make it
easier to connect and access all of your favourite
services and functions.
12
Page 14

TelstraOne Experience includes quick and easy
access to the following service (data and content
charges apply):
TOP STORIES
BigPond News brings you breaking news from
across Australia and around the world. Once
connected, wherever and whenever news
happens, you can be kept up to date right on your
screen.
ONLINE SERVICES
TelstraOne Experience comes with internet
bookmarks and menu which brings together
weblinks to your favourite services and
applications. Once connected, access your
favourite BigPond® and internet links within one
or two clicks.
13
Page 15

SEARCH
Once connected, you can quickly search and find
what you need with Sensis®, Yellow Pages®,
White Pages® and BigPond® Music. Search right
from your Connection Manager using the
TelstraOne Experience.
WHITE PAGES® – IT’S HOW WE CONNECT
With whitepages.com.au you can find contact
information for people, businesses, government
departments and community organisations. You
can send the details to your mobile, view the
location on a map or save and share listings using
the new MyList feature.
14
Page 16

YELLOW PAGES®
With yellowpages.com.au you can find businesses,
locate them on a map and even send their details
to your mobile for later. So whatever you need to
find, Let your fingers do the Walking®.
BIGPOND® MUSIC
Get the latest hits as well as all the classics from
BigPond Music. There’s a huge library of albums
and singles to choose from. What’s more, all
BigPond Music downloads are high quality MP3s
that are compatible with all MP3 digital music
players and devices including Apple® iTunes®,
iPod® and iPhone™.
15
Page 17

EXTRA BITS YOU
SHOULD KNOW
COVERAGE
Coverage depends on your location, device and
whether your device has an external antenna
attached. Visit telstra.com/mobilebbcoverage
check if you are covered.
to
TERMS & CONDITIONS
It is important that you read and understand the
terms that apply to your service. The terms for
your Telstra Pre-Paid Mobile Broadband service
are set out in Our Customer Terms (as varied from
time to time). Below is a summary of some aspects
of Our Customer Terms. It is for information only.
For terms governing your Telstra Pre-Paid Mobile
Broadband service, please go to
16
Page 18

telstra.com/ppmbb or see Our Customer Terms at
telstra.com.au/customerterms
brochure contains a summary of the charges that
apply to our Telstra Pre-Paid Mobile Broadband
service.
. Your pricing
1. Registering and using your service
1.1 We provide the Telstra Pre-Paid Mobile
Broadband service to you mainly for your personal
use.
1.2 We will connect your Telstra Pre-Paid Mobile
Broadband service once you register it by
providing us with your name, address and details
of your intended use and other information and
identification reasonably requested by us. If you
are under 18 years of age, this includes
confirmation that you have
parent or a responsible adult to use this service.
the consent of your
17
Page 19

We may request further information from you after
12 58880
13 2200
you have registered, provided that our request is
reasonable.
1.3 You must notify us of any changes to your
name or address within 14 days of such change by
calling Customer Service on
(from a Non
Telstra phone call
and say “Prepaid”).
1.4 Your USB device pack specifies the “Network
Access Period” during which you can use the
service features or other Telstra services, once
registered. The date on which the Network Access
Period ends is the “Credit Expiry Date”.
1.5 Your Credit Expiry Date is 30 days from your
last recharge unless you are using Credit Me2U in
which case different rules will apply. Go to
telstra.com/ppmbb for Terms & Conditions.
1.6 Each Telstra Pre-Paid recharge card and
voucher is fully transferable, non-refundable and
18
Page 20

must be activated before the use by date printed
on it.
1.7 If you cancel your Telstra Pre-Paid Mobile
Broadband service (other than as a result of our
breach) or we cancel the service as a result of your
breach, all unused credit in your account will
remain with us.
1.8 Any unused credit in your account after the
Credit Expiry Date will remain with us.
1.9 If your account balance is or becomes
insufficient to cover or use a particular feature or
Telstra service, we will not provide the service to
you and will terminate any session, feature or
service in progress, except for calls to emergency
services 000 or access to My Account.
1.10 When you use the service, we will debit your
account balance in accordance with the charges
19
Page 21

set out in your pricing brochure and Our Customer
Terms (from time to time).
1.11 When your service is in recharge only period,
you cannot connect to the internet (you may call
emergency services and connect to My Account for
recharge).
1.12 If you do not recharge your service during
your recharge only period, it will be disconnected
and your service number will be reallocated to
another customer.
1.13 Any value in your account balance is not
refundable or transferable.
2. Unlocking fee
Your USB device is programmed to operate only on
the Telstra network, you may need to pay an
unlocking fee to use it on other networks.
20
Page 22

3. SIM card
3.1 We own any SIM provided to you. You must
keep it secure. You must notify us (in writing if
registered in the name of a company) immediately
if the SIM card is lost, or stolen. You are
responsible for all costs and losses resulting from
any use of the SIM card and which arises prior to
the time that we receive your notification.
3.2 Title in the Telstra Pre-Paid Mobile Broadband
USB device will pass to you when you register the
SIM card for that USB device. However, risk in the
USB device passes to you when you accept
delivery of it.
4. Changing our customer terms
We can change most of the terms (including price)
on which we supply services to you. Generally,
subject to some exceptions, if a change is not
21
Page 23

required by law or necessary for security or
technical reasons and has more than a minor
detrimental impact on you, we will tell you at least
30 days beforehand. If a change will have a
detrimental impact, we may also publish a notice
in a relevant newspaper summarising the change
3 working days beforehand. We will tell you about
changes by sending you a text message or
otherwise in writing, directing you to further
information about the charges (such as on
telstra.com or at a Telstra store). We may also
publish a notice in a national newspaper.
5. Cancellation and suspension
5.1 You can cancel your service at any time by
telling us beforehand.
22
Page 24

5.2 We may ask you to put your request in writing.
If you cancel a service before we have provided it
to you, we may charge you any costs we incur.
5.3 We may suspend or cancel a service in a
number of circumstances, for example where you
are in breach of Our Customer Terms (including
using your service in a way which we reasonable
believe is fraudulent, poses an unacceptable risk
to our security or network capability or is illegal), it
is necessary to restore or maintain our network,
there is an emergency, the law or a regulator
requires us to do so, you leave your premises, or
you become bankrupt or insolvent. The amount of
notice (if any) we give you depends on the
circumstances.
5.4 If a service is cancelled or suspended, you are
still required to pay for relevant charges incurred
up to the date of cancellation or suspension.
23
Page 25

6. Liability
Our liability to you
6.1 If our services are used by you in pursuit of
financial gain (such as to conduct share trading), it
is very important that you have another means of
communication available and do not solely rely on
our services.
6.2 In many cases, we accept liability to you for
breach of contract or negligence under the
principles applied by the courts. Some exceptions
are set out below.
6.3 As your service is provided to you for the
primary purpose of personal use, we do not accept
liability for losses that result from the use of your
service in connection with the conduct of a
business. However, we will accept that liability if it
cannot be excluded under any legislation. If that
24
Page 26

liability cannot be excluded but can be limited
under any legislation, we limit our liability to
resupplying, repairing or replacing the relevant
goods or services (or payment of the cost of
resupply, repair or replacement) where it is fair
and reasonable to do so.
6.4 We are not liable for any loss to the extent that
it is caused by you, results from your failure to
take reasonable steps to avoid or minimise your
loss, or caused by us failing to comply with our
obligations due to events outside our reasonable
control (such as failure in equipment that is not
owned or operated by us, an industrial strike or a
natural disaster).
Your liability to us
6.5 If you and one or more others are the
customer(s) for a service, each of you is jointly and
25
Page 27

individually responsible for all charges and other
obligations relating to that service.
6.6 Consumer and small business customers are
liable to us for breach of contract or negligence
under the principles applied by the courts but is
not liable to us to the extent that it is caused by us.
7. General
Please read Telstra’s Privacy Statement
“Protecting Your Privacy” available at
telstra.com.au/privacy/privacy_statement.html
which sets out how your personal information is
collected, used and disclosed (including for
marketing purposes) and your rights in relation to
accessing and correcting that information. You
agree to the collection, use and disclosure of your
personal information in accordance with the
Telstra Privacy Statement.
26
Page 28

8. Telstra FairPlay policy
It is important to us that our customers can
access our services therefore you must follow our
FairPlay Policy when you use any of our special
offers giving you calls or data usage for free or at
rates lower than the standard rates for such as set
out in Our Customer Terms (sometimes known as
FairPlay offers). Full details are available at
telstra.com.au/customerterms
9. Acceptable use policy
It is important that you comply with the
Acceptable Use Policy when using Telstra Pre-
Paid Mobile Broadband service. Our Acceptable
Use Policy deals with our rights in respect of your
service if your usage of the service:
• Causes you to breach Our Customer
Terms of law;
27
Page 29

• Causes us to breach the law;
12 58880
13 2200
• Results in us incurring liability to any
person;
• Causes interference;
• Damages our reputation or brand; and
• Attempts to manipulate any limitations
of our service.
Full details of the policy are available in Our
Customer Terms which can be found at
telstra.com.au/customerterms
10. Complaints
We aim to resolve all problems and complaints
quickly and effectively. If you have any concerns,
please visit your nearest Telstra store or call us on
and say “Prepaid”). If we are unable to resolve this
(from a Non Telstra phone call
28
Page 30

matter to your satisfaction you can contact the
Telecommunications Industry Ombudsman (“TIO”).
The TIO is an office of last resort for complaints
about telephone and internet services.
FREECALL™ 1800 062 058 TTY 1800 675 692
Translator and Interpreter Service: 13 1450
Email: tio@tio.com.au
You can also contact the Australian
Communications and MediaAuthority (“ACMA”) for
information on telecommunications issues. The
ACMA is a Commonwealth government agency
responsible for regulating the telecommunications
industry.
29
Page 31

For calls from Melbourne:
(03) 9963 6988
1300 850 115
For calls outside Melbourne:
For further information, please go to
telstra.com.au/customerterms
Apple, iPod and iTunes are trademarks of Apple
Inc., registered in the U.S. and other countries.
iPhone is a trademark of Apple Inc. iPod and
iTunes are for legal or rightholder-authorised
copying only. Don’t steal music.
™ and ® are trademarks and registered
trademarks of Telstra Corporation Limited ABN 33
051 775 556.
30
Page 32

PROBLEM
SOLVING
1. Install and test the USB device in another
computer
2. Check your SIM card is working in another
device – e.g. mobile phone
3. Insert a known working SIM card into your
USB device
4. Confirm your account is active – contact
Telstra
5. Uninstall the USB device and re-install using
Windows ‘Safe Mode’ – consult a PC
technician for help if required (PC only)
31
Page 33

Problem
Possible
Causes
Suggested Solution
The user
PC
Start the program
interface
doesn’t
start after
the USB
device is
plugged in
The USB
device has
no signal
configuration
is not correct.
(No Autorun)
The antenna
is at the
wrong angle
or position.
You have no
network
coverage.
manually by going Start
–> Program Files or use
the shortcut on the
desktop.
Adjust the angle and
position of the USB
device.
Try moving location until
you get good reception.
Visit
telstra.com/mobilebbco
verage to check if you
are covered or consider
purchasing an external
antenna from your
service provider.
You have not
entered your
PIN number at
start up.
Data
connection
failed
You have no
network
coverage
Restart the application
and enter your PIN
number. If the PIN is
invalid you cannot
connect to the network.
Try moving location until
you get good reception.
32
Page 34

The APN
configuration
is wrong.
The manual
network
selection is
wrong.
You are using
the wrong
APN.
The USB
device
cannot
connect to
the
internet
You don’t have
international
roaming
enabled on
your service.
Check with your service
provider and set the APN
in the configuration
settings.
Select the correct
network for Telstra.
Restore Automatic
mode.
Consult Telstra.
Consult your service
provider before you go
overseas to enable
roaming.
when
overseas.
No warning
tone.
The
microSD™
card
cannot be
read or is
not found.
The PC
soundcard is
disabled or on
low volume.
Re-insert the
microSD card.
The maximum
capacity is
32GB SDHC.
Check the audio card
and adjust the volume.
Try another microSD
card and make sure the
capacity and format is
correct.
33
Page 35

RF SAFETY INFORMATION
The USB device has an internal antenna. For
optimum performance with minimum power
consumption do not shield the device or cover with
any object. Covering the antenna affects signal
quality and may cause the modem to operate at a
higher power level than needed.
RADIO FREQUENCY ENERGY
The USB device is a low-power radio transmitter
and receiver. When switched on it intermittently
transmits radio frequency (RF) energy (radio
waves). The transmit power level is optimized for
best performance and automatically reduces
when there is good quality reception. Maximum
power is only used at the edge of network
coverage so under most circumstances the power
34
Page 36

output is very low. Under poor network conditions
the modem transmits at a higher power level and
may get hot.
DECLARATION OF CONFORMITY –
SPECIFIC ABSORPTION RATE (SAR)
The device is designed to be used in close
proximity to the body. We declare that the product
detailed in this manual, and in combination with
our accessories, conform with the essential
requirements of The Radio Communications
Standard (Electromagnetic Radiation Human
Exposure) 2003 and the Australian
Communications and Media Authority Section 376
of the Telecommunications Act 1997 when used at
a distance of not less than 5mm from the body.
The worst case SAR result is 1.66 W/Kg.
35
Page 37

N14945
ROHS DECLARATION
(RESTRICTION OF HAZARDOUS SUBSTANCES)
ZTE declares that the USB device is free from
hazardous materials and complies with EU RoHS
Directive and the amendments.
36
Page 38

FOR MORE INFORMATION:
CALL 12 58880
OR FROM A NON-TELSTRA PHONE
CALL 13 2200 AND SAY “PRE-PAID”
VISIT telstra.com/ppmbb
VISIT A TELSTRA STORE OR PARTNER
 Loading...