

Page 1
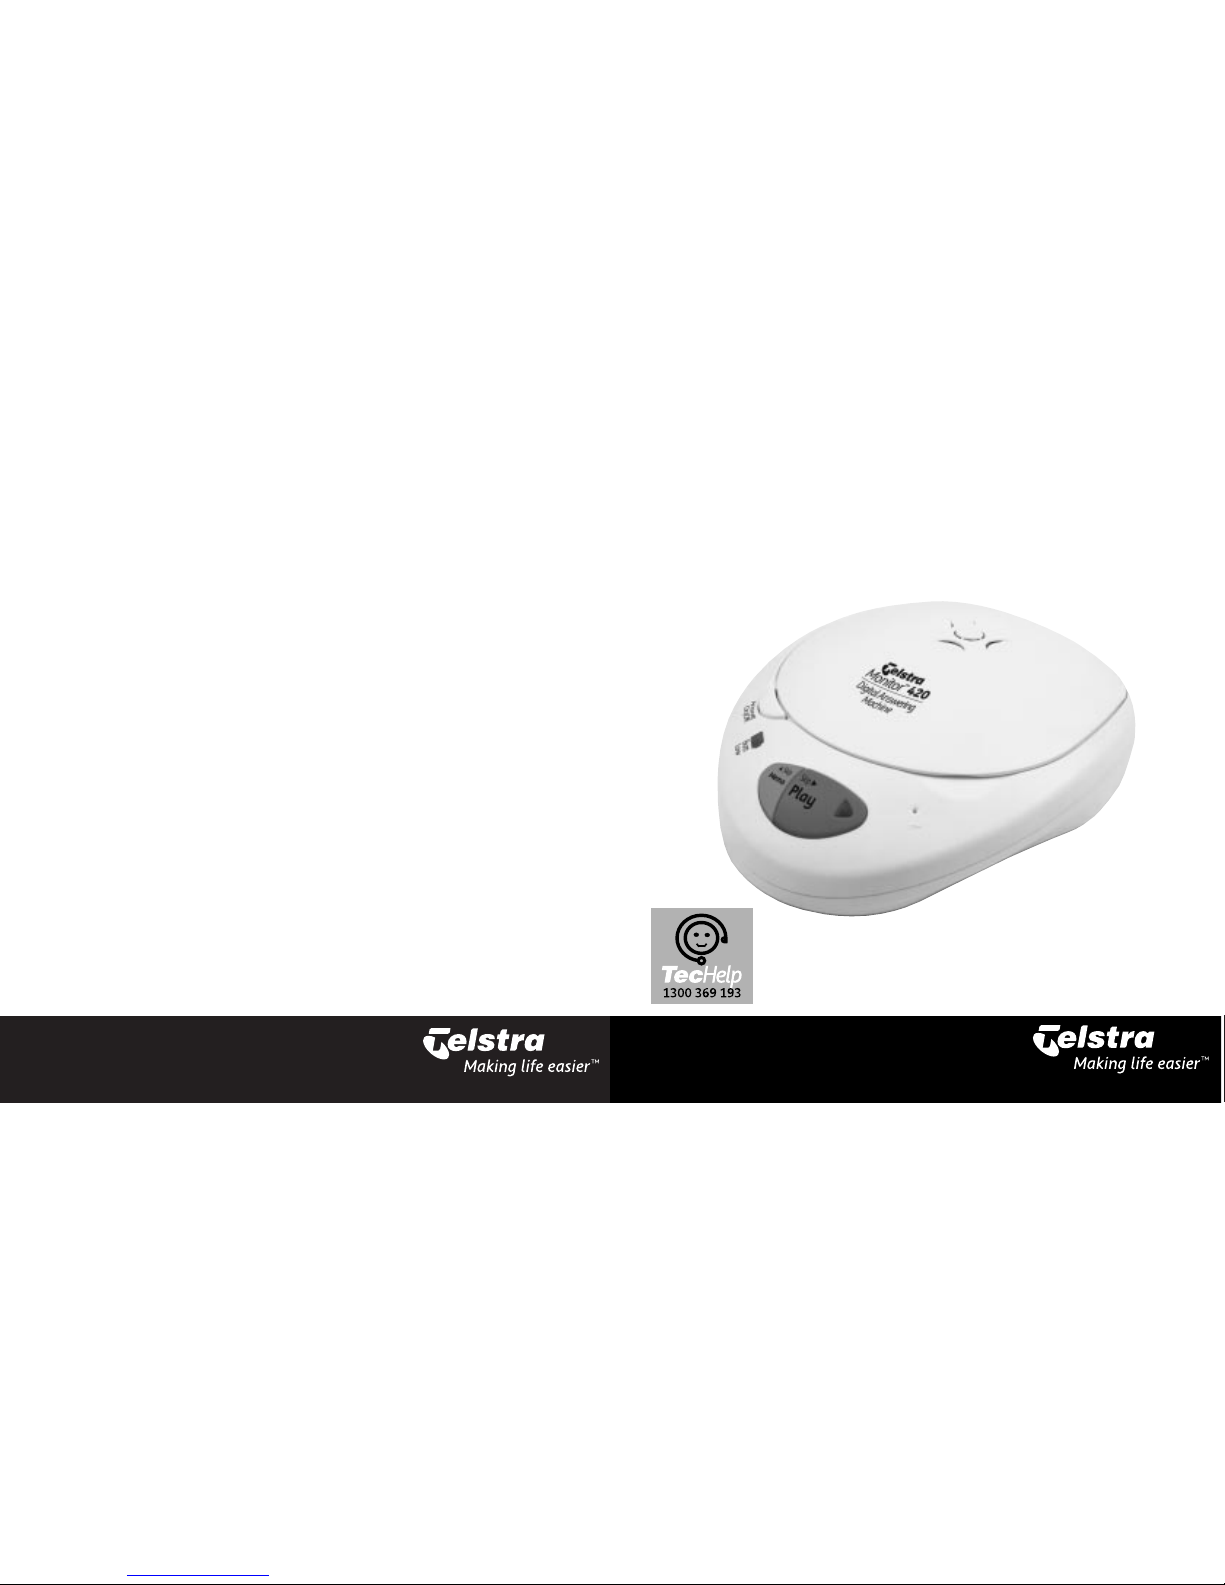
Monitor™420
Digital Answering Machine
User Guide
If you have any problems with your answering machine,
firstly refer to the Troubleshooting section of this User Guide
or call our TecHelp line on 1300 369 193.
Page 2

1
Contents
Key features 2
Remote access reference 2
Monitor™ 420 parts checklist 3
Setting up your Monitor™ 420 4
Plan the location of your Monitor™ 420 4
Wall mounting your Monitor™ 420 6
Safety instructions 6
Using your Monitor™ 420 7
Answering machine controls 7
Recording your outgoing message 8
Receiving messages 9
Call screening 11
Setting the number of rings before anser 11
Remote access 12
Setting your security code 12
Troubleshooting 15
Maintenance 15
Wall mounting template 16
Product Warranty and Customer Service 17
© COPYRIGHT 2000 Telstra Corporation Limited
This work is copyright.All rights reserved. Other than for purposes and subject to conditions
prescribed under the Copyright Act,no part of it may in any form or by any means (electronic,
mechanical, photo copying,microcopying, scanning,recording or otherwise) be reproduced,
stored in a retrieval system or transmitted without prior permission from Telstra Corporation
Limited ABN 33 051 775 556
™ Trade Mark of Telstra Corporation Limited
® Registered Trade Mark of Telstra Corporation Limited
Page 3
Remote Access
Keep a reference of your
Remote Access Security Code here:
For warranty purposes,proof of purchase is required, so please keep your receipt.
Your Monitor™ 420 has been designed for ease of use and made
to the high standards set by Telstra.
You can expect your Monitor™ 420 to give you many years of
trouble-free service.
Please read the instructions carefully before use and keep this
User Guide for future reference.
If anything is missing, please contact your place of purchase
immediately.
2 3
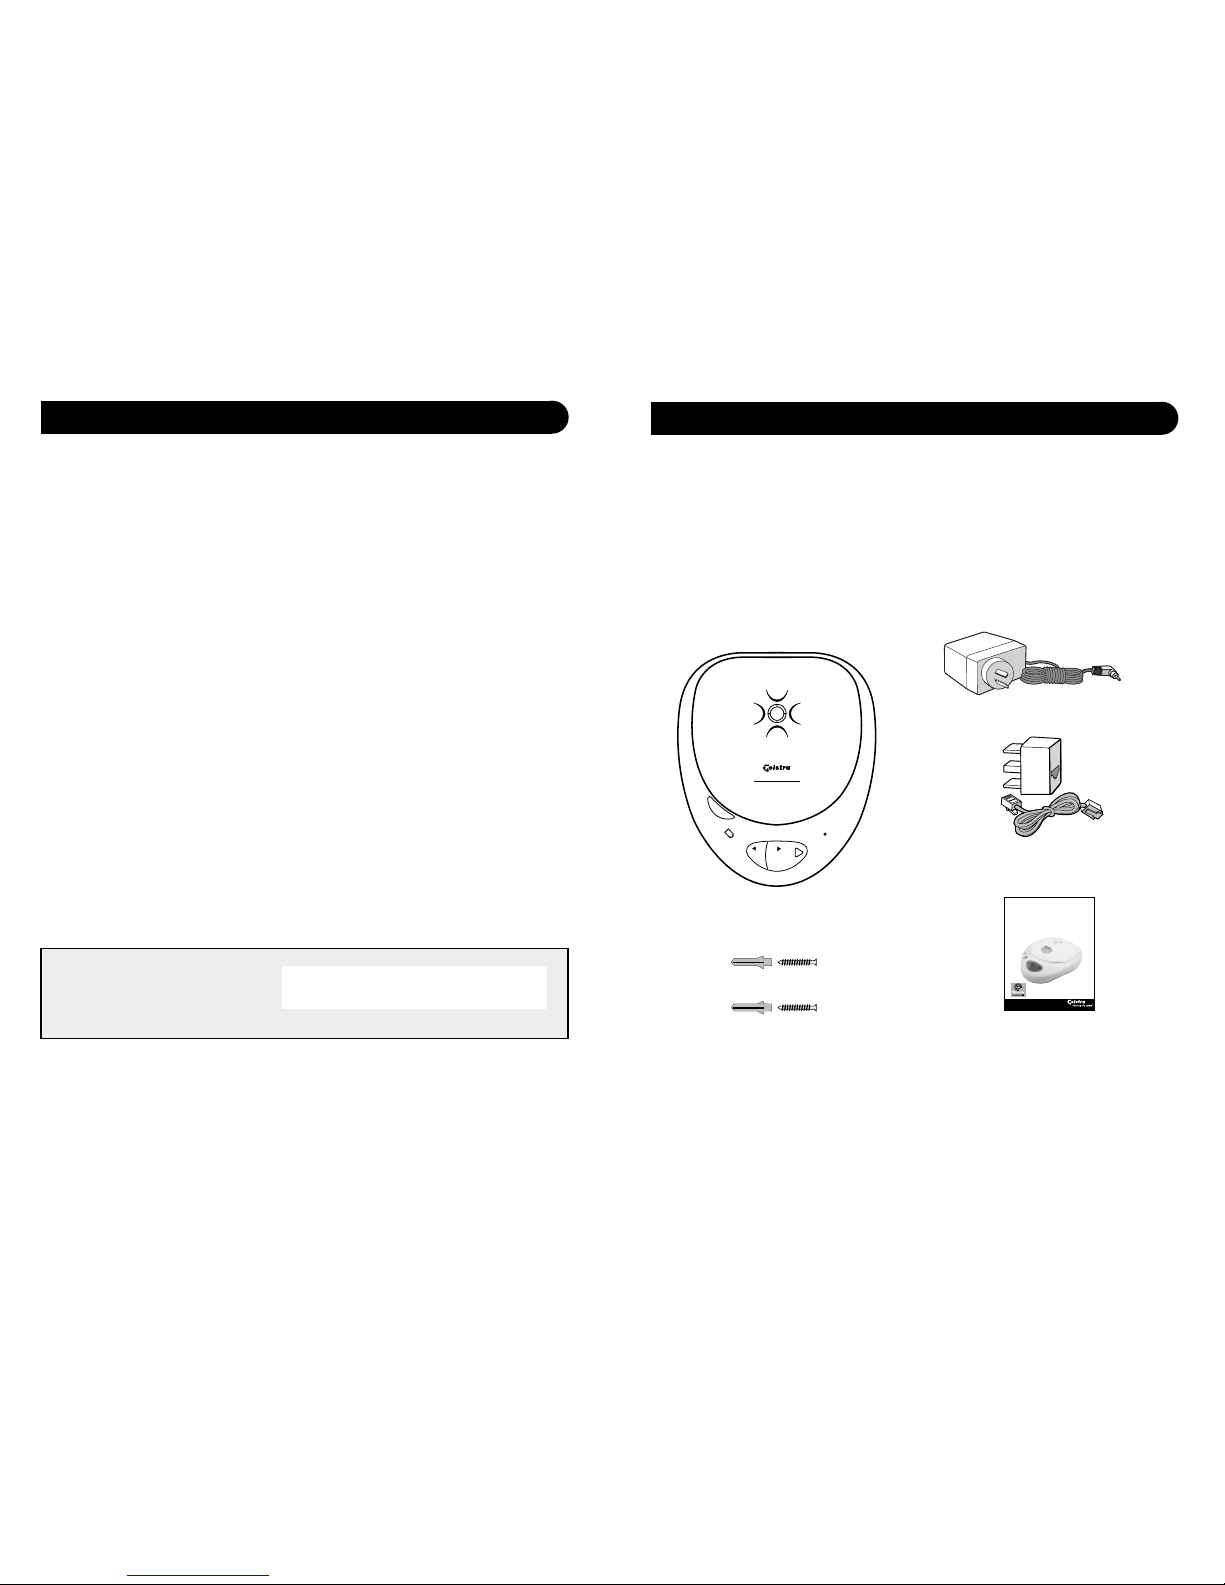
Monitor™ 420 parts checklist
Memo
Monitor™420
Digital Answering
Machine
Skip
Skip
Play
A
n
sw
e
r
o
n
/o
ff
B
a
tt
lo
w
M
ic
Key features
19 minutes recording capacity
Offers the benefits of digital recording.
Message Indicator
Allows you to see when a memo or message has been left.Also
alerts you when the memory is full by flashing rapidly.
12 step electronic volume control
Lets you set the loudspeaker volume for message playback.
Remote access
You can ring your Monitor™ 420 from another phone and switch
it on or operate it to play back your messages.
Time Saver
This means that your Monitor™ 420 will answer after 2 rings if
messages have been left. If there are no messages it will answer
after 6 rings. During Remote Access this allows you to hang up
before your Monitor™ 420 answers,therefore avoiding the cost
of a call.
Call screening
You can hear who’s calling you through the loudspeaker and
decide whether to answer the call in person or let your Monitor™
420 record a message.
Monitor™ 420 digital answering machine
Mains adaptor
Adaptor plug &
Telephone line cord
Screws and wall plugs for wall mounting Easy reference user guide
Monitor™420
Digital Answering Machine
User Guide
If you have any problems with your phone,firstly refer to the
Troubleshooting section of this User Guide or call our TecHelp
line on 1300 369 193.
Page 4

Follow these steps to set up your Monitor™ 420 ready for use.
Situate your Monitor™ 420 close enough to the phone and mains
power sockets so that the cables will reach.
Plug the mains power cord into the back of the machine
To prevent the mains cable being pulled out accidentally,route
the cable through the channel on the base of your Monitor 420.
Plug the adaptor into a mains power socket
The message indicator will light up.To record your own personal
outgoing message see page 8.
4 5
Setting up your Monitor™ 420
Plan the location of your Monitor™ 420
Insert the back up battery
The back-up battery (9v 6LR61 not supplied) ensures that all
settings and messages are saved for up to six hours in the event
of a power cut.
If the back-up battery runs out,or no battery is fitted, then in the
event of a power failure your Monitor™ 420 will revert to its
original settings and messages will be lost.
Plug your Monitor™ 420 into a socket
You can now plug your telephone into your Monitor™ 420
You will now be able to use your telephone as normal.
Your Monitor™ 420 is now ready to use.
Page 5

6
7
Wall mounting your Monitor™ 420
Wall mounting your Monitor™ 420
Use the template on page 16 to drill holes in the wall.Leave a
small gap between the screw heads and the wall.
Place your Monitor™ 420 over the screw heads and slide down.
WALL
WALL PLUG
SCREW
102mm
Safety instructions
• Use only the power adaptor supplied.
• There is a slight chance that your answering machine could be
damaged by an electrical storm.
We recommend that you unplug your Monitor™ 420 from the
mains power and telephone line socket during storms.
• Do not place your Monitor™ 420 on untreated antique
furniture.
• Do not use your Monitor™ 420 in damp,humid conditions such
as bathrooms.
• Do not expose the equipment to fire or water.
• Disconnect the telephone line before inserting the back-up
battery (9v 6LR61 not supplied).
Using your Monitor™ 420
To switch the answering machine ON and OFF
Press buttons in the order shown
You can switch your Monitor™ 420 on or off by pressing the
ANSWER ON/OFF button.
When on, the message indicator on the PLAY button lights up.
When off the message indicator goes out.
When set to ANSWER OFF your Monitor™ 420 does not delete
messages.
To adjust the loudspeaker volume
Lift the lid to adjust the volume of the loudspeaker.
To increase the volume press +.
To decrease the volume press -. The unit will beep twice when it
has reached its minimum or maximum setting.
Answering machine controls
Answer
on/off
— Volume +
72 mm
Page 6

9
8
Recording your outgoing message
The outgoing message is the message a caller hears when your
Monitor™ 420 answers a call.
You can record your own outgoing message.A typical message
might be ‘Hello,I cannot take your call at the moment,so please
leave your message after the tone’.
You can record an outgoing message of up to two minutes long.
Lift the lid of your Monitor™ 420.
Press and hold down the OGM button until you hear a long beep.
Record your message.Speak clearly, about 15-30cms from the
microphone.
To end recording release the OGM button.Your Monitor™ 420 will
automatically play the message back to you.
The machine is now ready to take messages.
To check your outgoing message
Lift the lid of your Monitor™ 420.
Press and release the OGM button. Your outgoing message will be
played back to you.
To change your outgoing message
You can change your outgoing message at any time by recording
a new message as described on this page.
After following the set-up procedure your Monitor™ 420 is ready
to receive messages.
Your Monitor™ 420 answers the call after 6 rings if you have no
messages. After your first message is recorded your Monitor™ 420
answers subsequent calls after 2 rings (see Remote Access, page 12).
A caller can leave a message of up to 2 minutes long.
Monitor™ 420 will terminate a call under certain conditions:
• If a caller paused for more than 6 seconds when leaving a
message.
• If the memory becomes full during recording.
• If the length of the incoming message is longer than 2 minutes.
Message indicator
While a message is being recorded the red indicator light on the
PLAY button remains lit.
When a message has been recorded,the red indicator light flashes.
If the memory is full
When the memory is full the message indicator will flash rapidly.
Your Monitor™ 420 will not answer any calls, allow you to record
a new outgoing message or record memo’s until you have deleted
some or all of the messages. If any of these functions are tried
whilst the memory is full you will hear 4 error beeps.
To record a memo message
You can use your Monitor™ 420 to record a memo which can be
played back by another user.A memo can be any length up to the
maximum recording time available.
Press and hold the MEMO button.Start speaking your memo
when you hear the beep.
To end the recording release the MEMO button.A beep confirms
the recording has stopped.
Skip
Play
Skip
Play
OGM
OGM
OGM
Receiving messages
Memo
Skip
Page 7

To play back messages and memos
Press buttons in the order shown
When the red light is flashing: Your messages and memos are
played back in the order they were received until all your
messages have been played.
Press the SKIP/MEMO button once to replay the current message,
or twice to go back to the previous message.
Press the SKIP/PLAY button once to skip forward to the next
message.
To delete messages
While your messages are being played back.
Lift the lid of your Monitor™ 420.
Press the DELETE button to delete messages one at a time.
To delete all messages
Lift the lid of your Monitor™ 420.
Wait until playback of all messages has finished.Within 8 seconds
press and hold
the DELETE button.
After you hear 2 beeps r
elease the DELETE button.
All messages will be deleted.
To stop playback
While your messages are being played back.
Lift the lid of your Monitor™ 420.
Press the STOP button. Playback stops.
10 11
You can let your Monitor™ 420 answer an incoming call and hear
the caller’s voice through the loudspeaker so you can decide
whether or not to take the call in person.
Press the ANSWER ON/OFF button to switch your Monitor™ 420
on.
Make sure the volume is set to an audible level.
When the phone rings, let your machine answer the call and wait
until the caller begins to leave their message.
If you want to talk to the caller in person,pick up your handset
and speak.
The Monitor™ 420 will automatically stop recording and reset to
answer new calls.
Call screening
To check the number of rings before answer
Lift the lid.
Momentarily press the STOP button. The unit will read back the
current setting.
To change the number of rings before answer
Lift the lid.
Press and hold
the STOP button. The unit will read back the
current setting and will then read back the other available
options.
When you hear the setting you wish release the STOP button.
The unit will then read back your new setting.
Setting the number of rings before answer
Memo
Skip
Skip
Play
Delete
Delete
Stop
Answer
on/off
Stop
Stop
Page 8

13
12
Remote Access
You can switch on and operate your answering machine from
another TouchTone phone to play back your messages and
memos.
To help keep your messages private, your Monitor™ 420 requires
you to enter a 3-digit Security Code before you can play back
your messages. The pre-set code is 012.
To review your Security Code
Lift the lid. Press the DELETE button momentarily.The unit will
read back your security code.
To change your Security Code
Press and hold the DELETE key until you hear a beep.Using the
PLAY button change the first number and then press DELETE.
Using the PLAY button change the second number and then press
DELETE.
Using the PLAY button change the third number and then press
DELETE.
The unit will then read back your new security code.
Remember to note your new security code on page 2 of this guide
for future reference.
Setting your security code
To operate your Monitor™ 420 remotely
Call your Monitor™ 420 phone number.
After listening to the outgoing message press
*
then key in your
Security Code e.g. 012. A beep tone will sound
On hearing the beep you can begin using the buttons on the
following page to access the function you require.
KEYPAD
KEYPAD
KEYPAD
Delete
Delete
Skip
Play
To switch on your Monitor™ 420 from another phone
This is useful if you forget to turn on your answering machine
before going out.
Ring your Monitor™ 420 phone number.After 20 rings your
machine will then answer the call.
After listening to your outgoing message press
*
button on your
telephone.
You will then be prompted to enter your security code.After the
next voice prompt "To hear main menu",press 0.Your Monitor™ 420
is now switched on and will answer incoming calls.
Page 9

1514
Troubleshooting
Maintenance
If you have any problems using your Monitor™ 420,this section
gives you the most common solutions.
LED does not light up.
Check that your Monitor™ 420 is correctly connected to the mains
and that the power cable is inserted into the socket on the back of
the machine.
Outgoing message is not clear.
Speak clearly, close enough (15-30 cms) to the microphone when
recording your message.
Incoming message does not record.
Check the Monitor™ 420 is set to ‘Answer on’.
Check you have recorded an outgoing message.
Check that the memory is not full.
You may have too many devices on your telephone line. Note the
REN number on the base of each telephone device, the total should
not exceed 3.
Battery Low light remains illuminated.
Check that you have a back up battery inserted or that the
battery has not run out.
Customer helpline
Should you still have problems with your machine,call the
TecHelp Help line on 1300 369 193.
Simply clean your Monitor™ 420 with a soft cloth.Do not clean
with a wet cloth. Do not clean with abrasive materials or solvents
as these may damage the unit.
Do not spray aerosol cleaners onto your Monitor™ 420.
Menu for Remote Access
To hear main menu Press 1.
To play all messages.Press 2.
To play new messages only.Press 3.
During Playback:
Current message being played will be deleted.If all messages
have been played you will hear 2 beeps,if you press the 3 button
within the next 5 seconds all messages will be deleted.
To skip back during message playback. Press 4.
To delete a message during playback. Press 5.
To skip forward during playback. Press 6.
To exit remote access. Press 7.
To play outgoing message press 8.
To record an outgoing message.Press 9.
To set answer ON or OFF.Press 0.
Page 10

1716
Wall mounting template
Product Warranty
Telstra Guarantees your product for 12 months from
date of purchase against any defect in materials or
workmanship under conditions of normal use and
service and subject to proof of the date of purchase
being provided and subject to the conditions
specified below.
The benefits conferred by this warranty are in
addition to all other rights and remedies in
respect of the product that the consumer has
under the Trade Practices Act and similar State
and Territory laws.
Warranty Service Conditions
Subject to your statutory rights referred to above,
Telstra expressly limits its liability with respect to
its products to the person who purchases the
Product from the Telstra authorised retailer.
Subject to your statutory rights referred to above,
Telstra expressly limits its liability with respect to
its products to whichever is the lowest amount
out of:
A. The cost of having the goods repaired
B. The cost of replacing the goods:or
C. The cost of obtaining equivalent goods.
Subject to your statutory rights referred to above,
in the event of the goods requiring service under
warranty,the owner is responsible for the cost of
transportation to the authorised service
organisation. Whilst in transit the goods are at the
owner’s risk.
Subject to your statutory rights referred to above,
should the goods be found to be in sound working
order by the authorised service organisation the
owner may be charged a service fee.
Subject to your statutory rights referred to above,
the goods will not be eligible for service if:
A. Proof of date of purchase cannot be provided:
B. The goods are not branded Telstra:
C. The goods have been rented to another person;
D.The de fect was caused by an accident, misuse,
abuse, improper installation or operation, lack
of reasonable care,unauthorised modification,
loss of parts, tampering or attempted repair by
a person not authorised by Telstra.
E. The product has been damaged by lightning or
a mains power surge.
Do you really need service?
Before calling for service under this warranty have
you :
Checked that all cables are securely connected as
detailed in the User Guide.
Referred to the User Guide to ensure that the
features are being used correctly.
If you are trying to access a network service such as
Call Waiting,confirmed with your network provider
that you have access to this feature.
If You Require Warranty Service
To obtain service during the terms of this warranty:
Call the Product Information Line (1300 369 193)
for advice and assistance on the repair of your
product, or contact us by E-mail at:
tcpsupport@techpac.com
After consulting our operators,should it be
deemed necessary to have the product serviced,
the operator will inform you of your nearest
authorised service organisation and provide a
Return Authority Number.
Please ensure that :
A. You provide proof of the date of purchase
B. That your product is suitably packaged
(Preferably in original packaging)
C. That you have included all components from
the original purchase:
D.That you provide details of the Return
Authority Number
IMPORTANT
Please retain this booklet with your sales receipt
as proof of the date of purchase
.
Techelp is our commitment to
providing superior service for our
Corded and Cordless Telephones,
Answering Machines and accessories.
We support this by providing the
following:
• Product Information Line 1300 369 193
• 12 Month Product Warranty
• Referral service for product repairs outside of
warranty
Product warranty & Customer service
 Loading...