

Page 1
www.telstra.com
© COPYRIGHT 2005 Telstra Corporation Limited
This work is copyright. All rights reserved.Other than for purposes and subject to conditions prescribed under the Copyright
Act, no part of it may in any form or by any means (electronic,mechanical, photo copying, microcopying,scanning, recording
or otherwise) be reproduced, stored in a retrieval system or transmitted without prior permission from Telstra Corporation
Limited ABN 33 051 775 556.
™ Trade Mark of Telstra Corporation Limited
® Registered Trade Mark of Telstra Corporation Limited
If you have any problem with your phone, refer to the Help section
of this User Guide or call TecHelp on 1300 369 193.
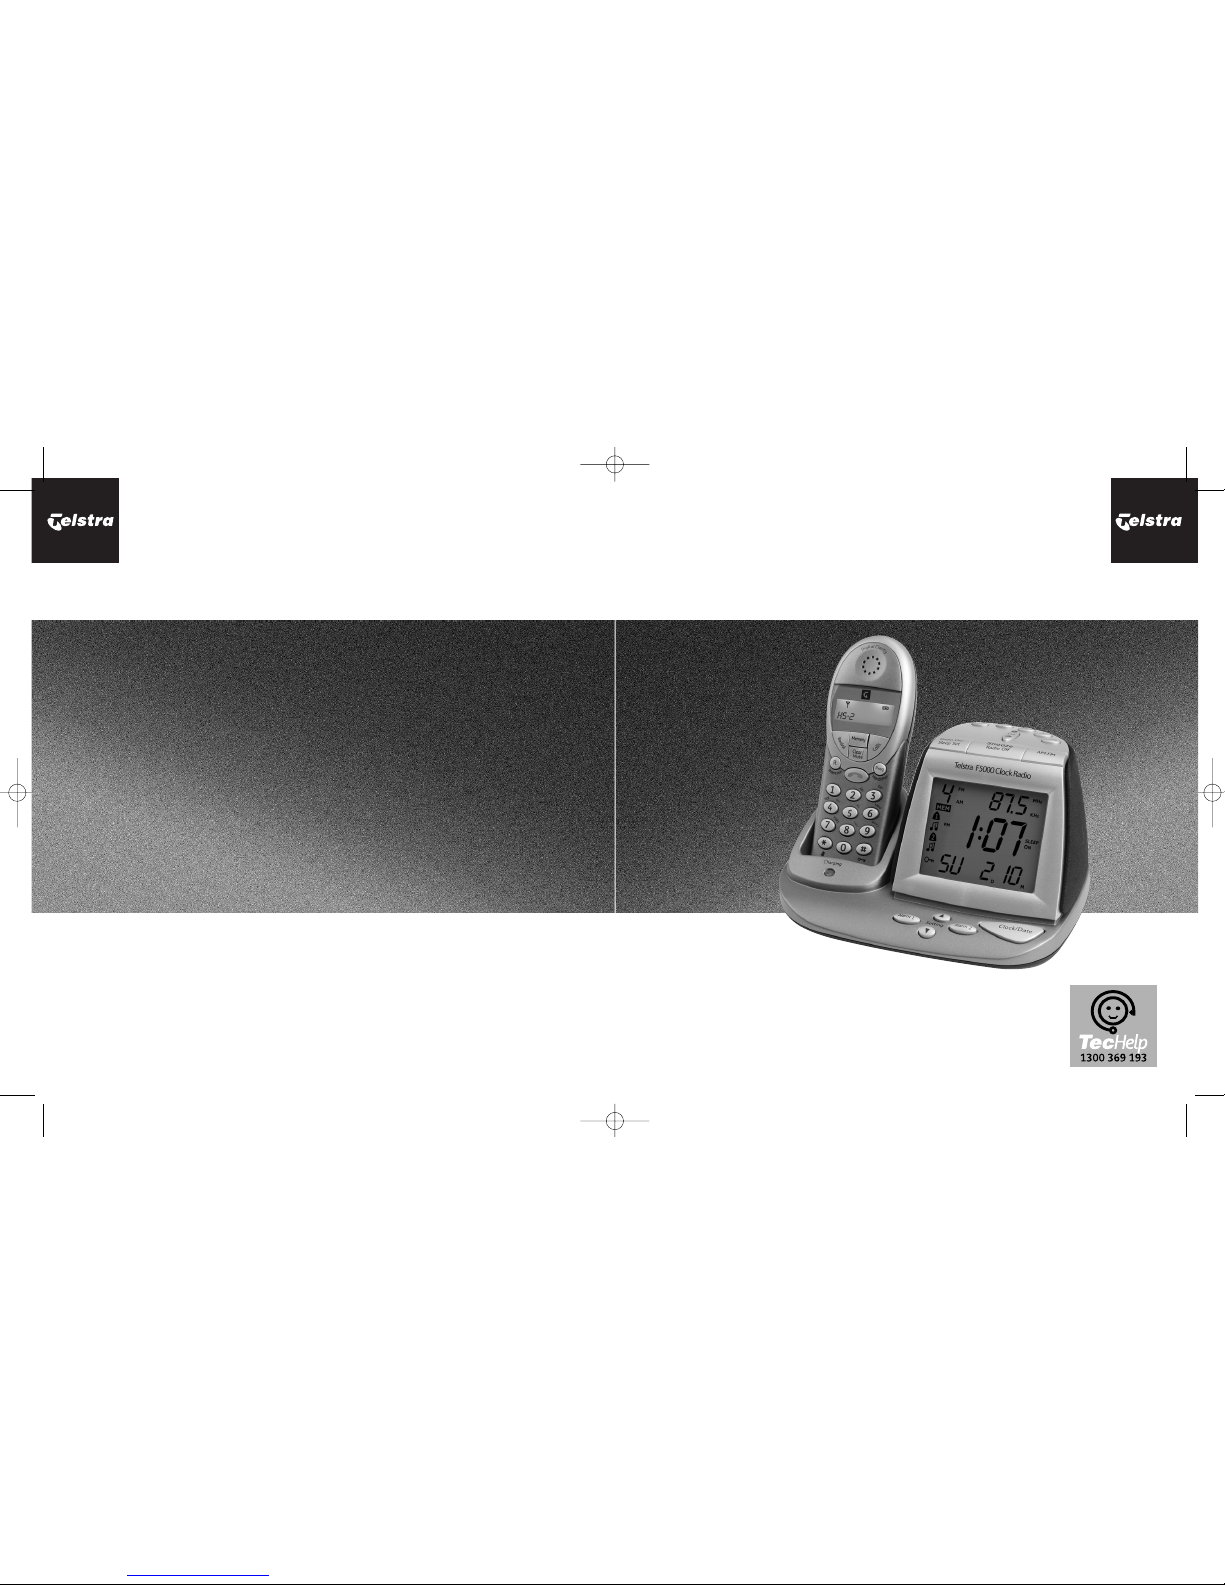
Telstra F5000
Extension Handset &
Alarm Clock Radio Charger
User
Guide
F5000/ACR UG art 9/6/05 12:32 PM Page 1
Page 2

2
Introduction
to your Telstra F5000 Extension
Handset & Alarm Clock Radio Charger
Once you have 2 or more handsets, you can access the following features: -
● Handset to handset intercom
● Handset to handset call transfer
● 3 way conference (1 external call & 2 internal callers)
Alarm Clock Radio features: -
● Large backlit display
● AM/FM radio
● Snooze control
● 2 alarms
As a Digitally Enhanced Cordless Telecommunications (DECT) product, your
Telstra F5000 provides: -
● Digital voice clarity
● Digital security
● Digital range
IMPORTANT
This handset is
designed to
operate with
either the Telstra
F5000 or Telstra
F5050.
F5000/ACR UG art 9/6/05 12:32 PM Page 3
Page 3

3
IMPORTANT
This equipment is not designed for
making emergency telephone calls
when the power fails. Alternative
arrangements should be made for
access to emergency services.
This User Guide provides you with
all the information you need to get
the most from your phone.
Before you make your first call you
will need to set up your phone.
Follow the simple instructions in
‘Getting Started’,on the next few
pages.
Need help?
If you have any problems setting up
or using your Telstra F5000, please
contact the TecHelp line on 1300
369 193.
Alternatively, you may find the
answer in ‘Help’at the back of this
guide.
Got everything?
● Telstra F5000 handset
● Telstra F5000 alarm clock
radio charger
● 2 x NiMH AAA rechargeable
batteries
● Battery compartment cover
● AC power adaptor
In addition, if you have
purchased a Telstra F5000
with multiple handsets,
you will have received
additional components,
which are shown in the
Extension User Guide.
F5000/ACR UG art 9/6/05 12:32 PM Page 4
Page 4
In this guide
4
Getting started 5
Location 5
Setting up 5
Handset registration 7
Getting to know your F5000
alarm clock radio 8
Alarm clock radio display 9
Quick guide 10
Using you Telstra F5000 extension
handset 12
Internal calls 12
Transferring calls 12
3 way conference 12
Using your Telstra F5000
alarm clock radio 13
Setting the time and date 13
To set the sleep timer 14
Alarm beeps/radio alarm 15
Snooze control 17
Switching the radio on/off 17
Selecting a radio station 18
To lock/unlock the buttons 20
Help 21
Replacing the handset batteries 21
General information 23
Safety 23
Cleaning 23
Environmental 24
Product warranty &
Customer support 25
F5000/ACR UG art 9/6/05 12:32 PM Page 5
Page 5
Getting started
5
Improving the
Radio reception
Extend the aerial
fully and trail the
aerial lead away
from the charger
to increase
reception
sensitivity.
Do not operate the
unit over a steel
desk or metal
surface as this
may lead to
interference of
reception.
WARNING
Do not place your
F5000 alarm clock
radio charger in
the bathroom or
other humid
areas.
Signal strength
The ANTENNA
symbol on
your handset
screen indicates
when you are in
range. When you
are out of range, it
flashes.
Location
Situate your product close enough to the power socket so that the
cable will reach safely without stretching. Ensure that you plan the
location so that the mains power is easily accessible in case you
need to disconnect the power.
Setting up
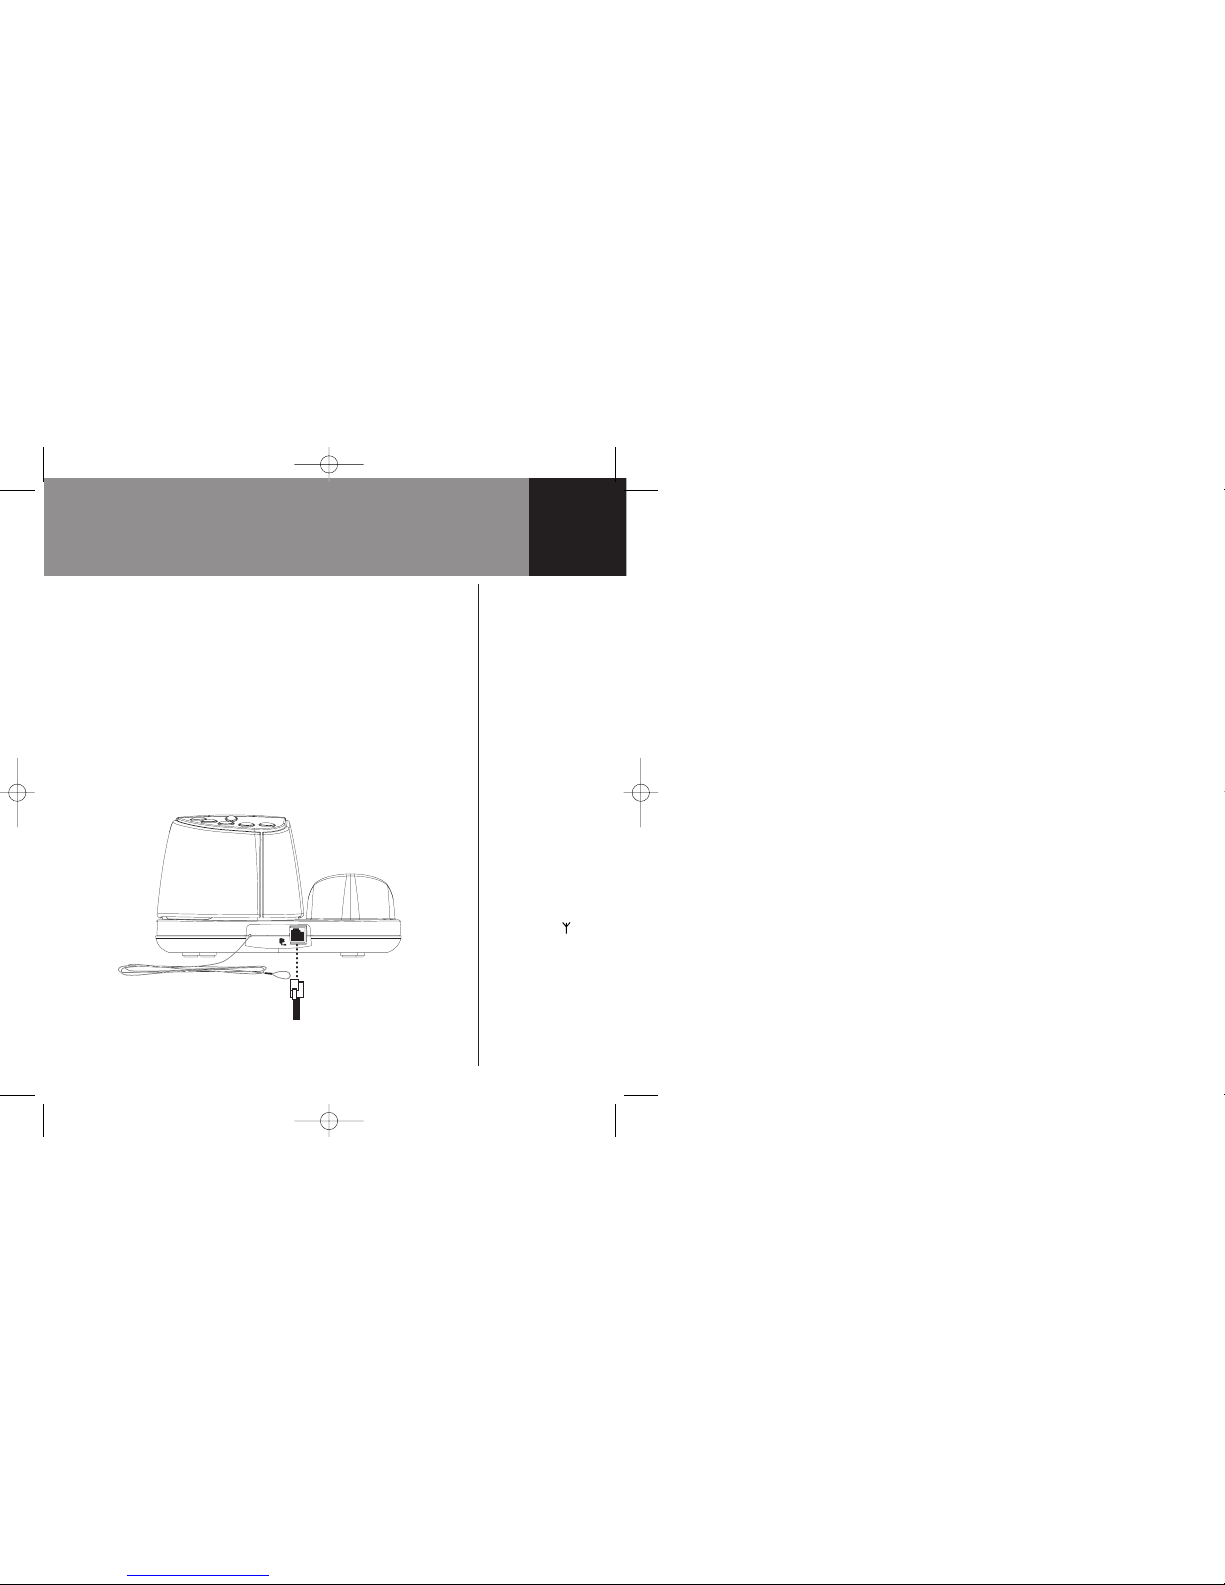
Connect the power cable
1. Plug the power cable into the power socket on the back of your
F5000 Alarm Clock Radio Charger.
2. Plug the adaptor into the mains power supply and switch on.
Power
adaptor
cable
F5000/ACR UG art 9/6/05 12:32 PM Page 6
Page 6
Getting started
6
IMPORTANT
Do not connect
the telephone line
until at least one
of the handsets is
fully charged.
The base station
must be plugged
into the mains
power at all times.
Handset range
The handset
reception range
from the main
base is up to 300m
outdoors and up
to 50m indoors.
Thick stone walls
can severely affect
the range.
Signal strength
The symbol on
your handset
screen indicates
when you are in
range. When you
are out of range, it
flashes.
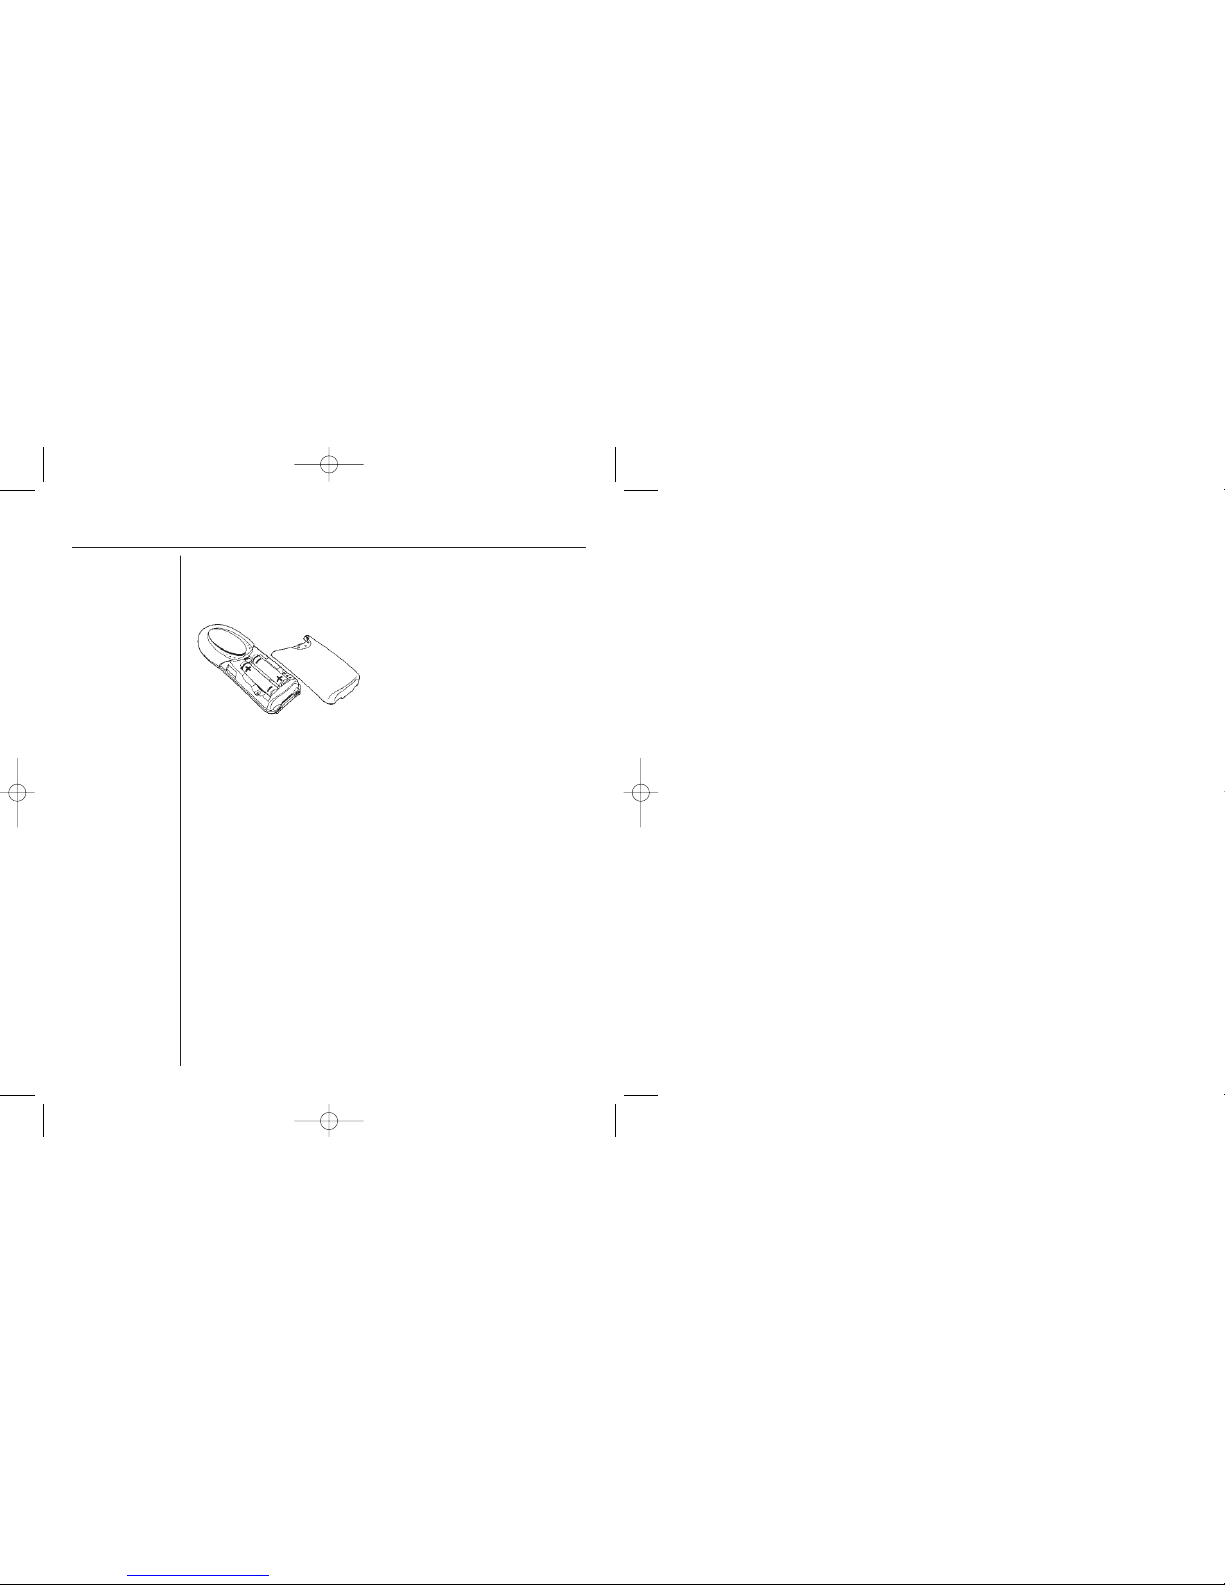
3. Insert the 2 x AAA NiMH batteries supplied into the handset. Slide
the battery compartment cover into place.
4. Charge the handset for at least 16 hours by placing the handset
on the base. The red charging light comes on.
F5000/ACR UG art 9/6/05 12:32 PM Page 7
Page 7

Getting started
7
You can register
up to 5 handsets
to your Telstra
F5000 or F5050
base units.
Handset registration
This additional handset will need to be registered to the main base
first for it to operate.
Registering a Telstra F5000 extension handset
1. If there is a handset in the base remove it whilst you are
registering the new handset.
2. Press and hold the button on the base for about 10
seconds until you hear a beep and the In Use light starts flashing.
3. On the handset to be registered,press and hold the and
buttons together until display shows BS-.
4. Enter the base number.If this is a new handset then the base
number is 1, the display shows BS-1 then PIN.
5. Enter 0000 and registration starts.When the handset beeps and
returns to standby registration is complete.
Your Telstra F5000 extension handset is now ready for use.
F5000/ACR UG art 9/6/05 12:32 PM Page 8
Page 8
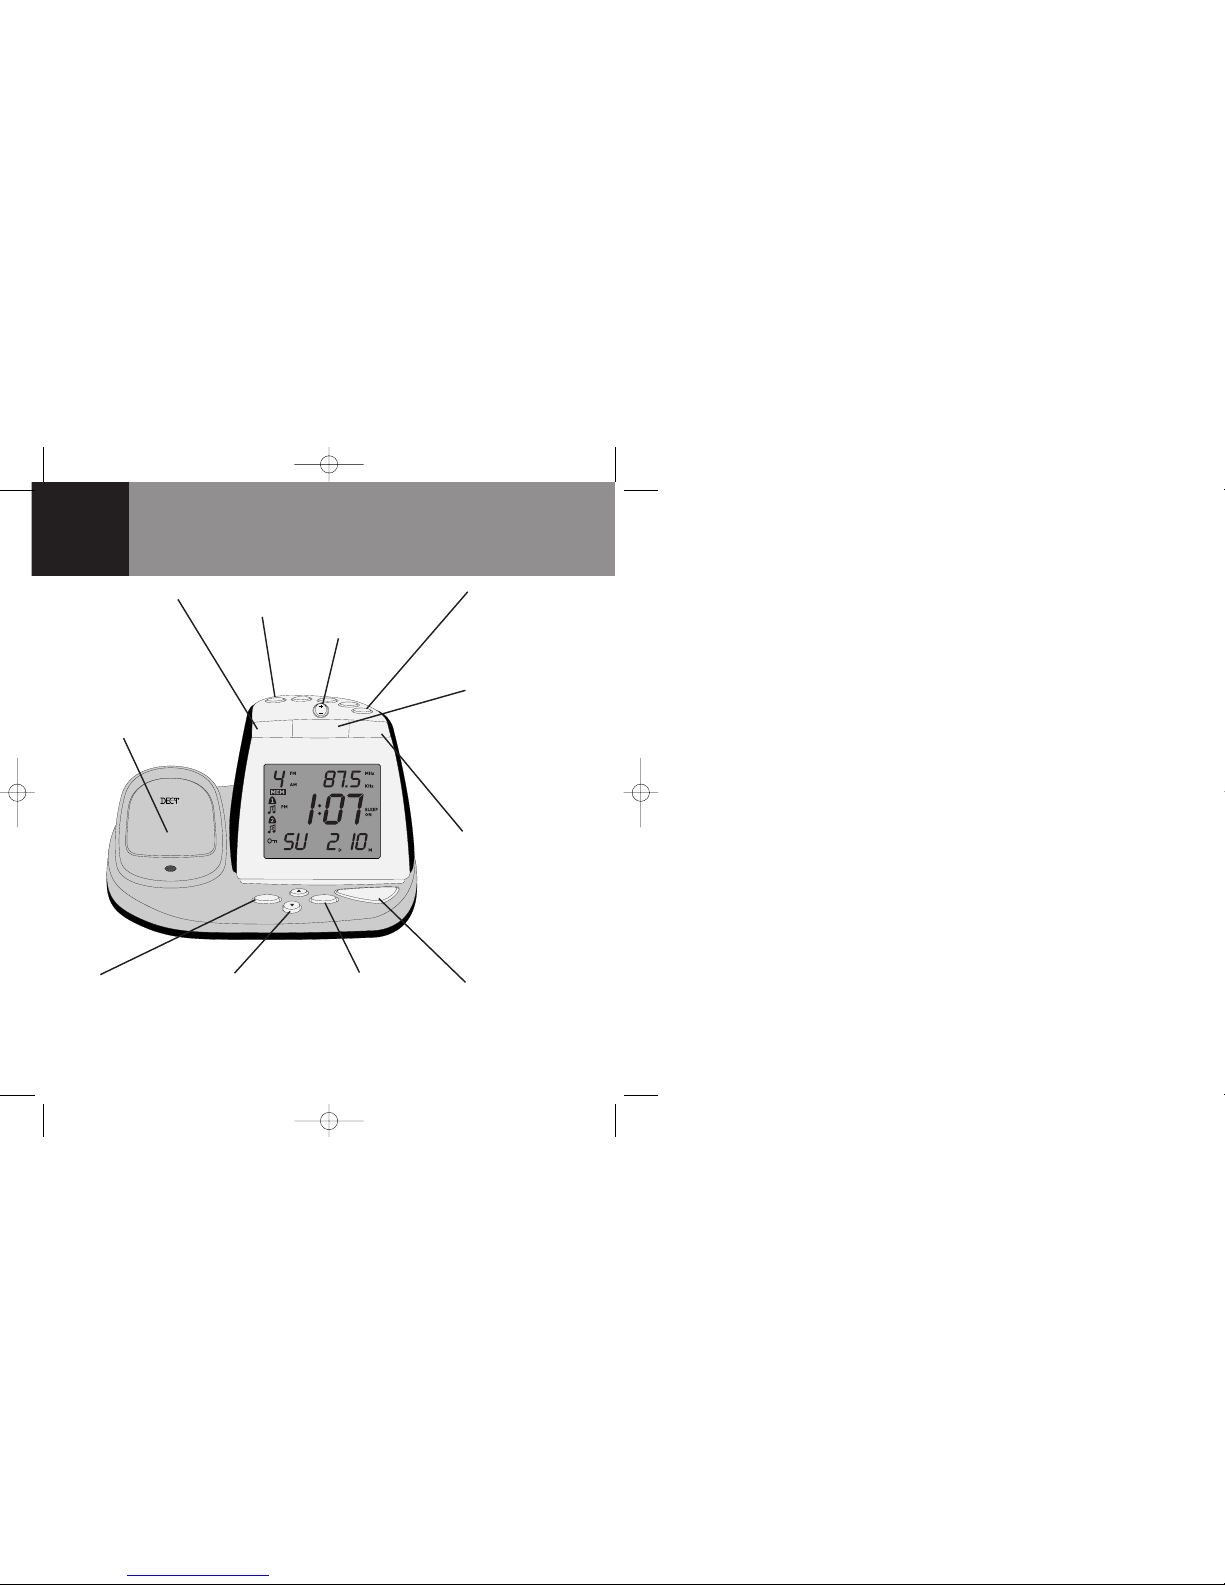
Getting to know your F5000 alarm clock radio
8
ALARM 1
Lets you set alarm
one.
UP/DOWN
Scroll up or down
when changing the
time, date and radio
frequency.
ALARM 2
Lets you set alarm
two.
CLOCK/DATE
Use to set the date,
time and alarm.
RADIO ON/SLEEP SET
Use to switch the
radio on.
Use to set the sleep
timer.When set, the
radio will switch off
after a preset time,
adjustable up to 90
minutes.
CHARGING CRADLE
1-4 PRESET
Stored radio station
memories.
VOL UP/DOWN
Use to increase or
decrease the
volume.
STORE
Use to store u p to 4
radio stations for
each band in the
preset memories.
SNOOZE/RADIO OFF
Snooze control.
Temporarily turns off
the alarm for 9
minutes.
Also press to switch
off the radio and set
the alarm.
AM/FM
Use to switch
between AM/FM
bands.
Digital Clarity
Telstra F5000 Clock Radio
4
3
1
2
Setting
Alarm 1
Alarm 2
Vol
Clock/Date
Snooze
Radio On/
Sleep Set
AM-FM
Store
Charging
P
r
e
s
e
t
s
F5000/ACR UG art 9/6/05 12:32 PM Page 9
Page 9
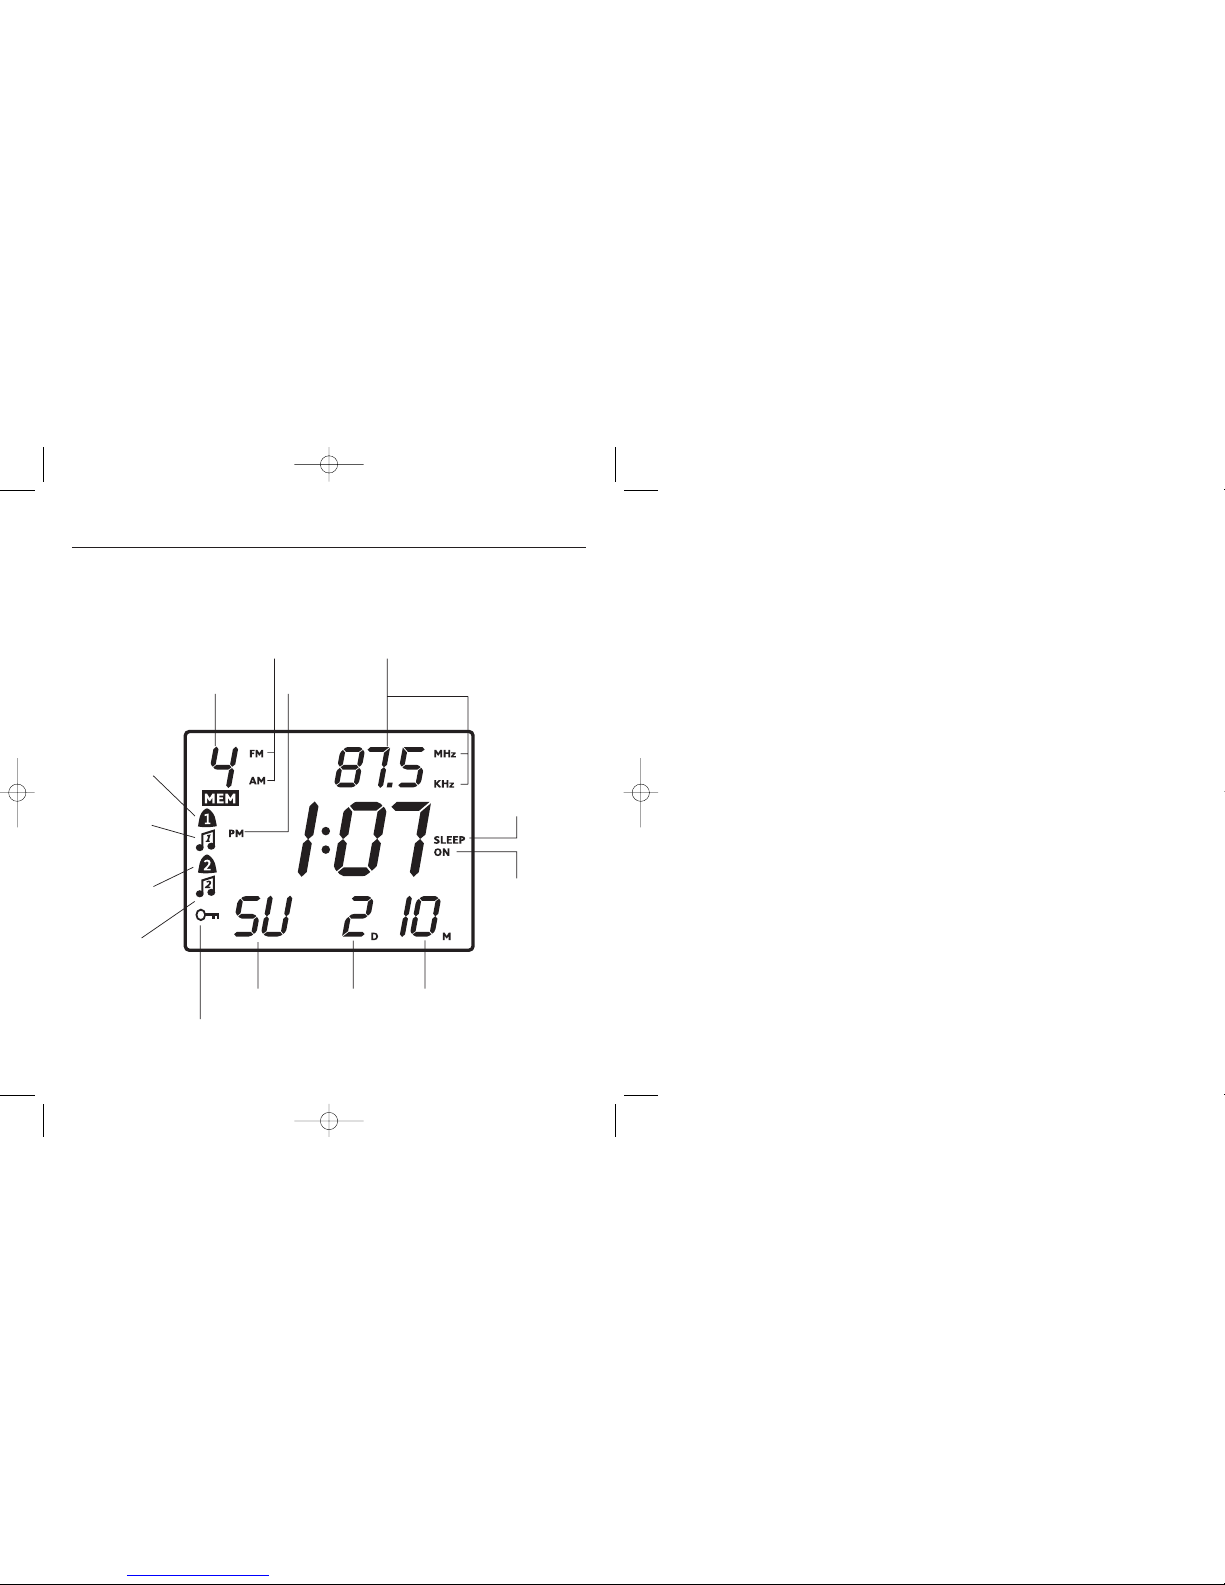
Getting to know your F5000 alarm clock radio
9
Alarm clock radio display
Displayed when playing one
of the 4 pre-set radio stations.
Shows the frequency of the radio
station you are listening to.
Displayed if
alarm one is on
and you have
beep alarm set.
Displayed if
alarm one is on
and you have
radio alarm set.
Displayed if
alarm two is on
and you have
beep alarm set.
Displayed if
alarm two is on
and you have
radio alarm set.
Displayed when
the Sleep timer
is set.
Displayed when
the radio is on
without the sleep
timer set.
Displayed when the buttons
are locked.
Day of the week.
Day
Month
Displayed to denote
the time is PM.
Shows the radio band you
are listening to AM or FM.
F5000/ACR UG art 9/6/05 12:32 PM Page 10
Page 10
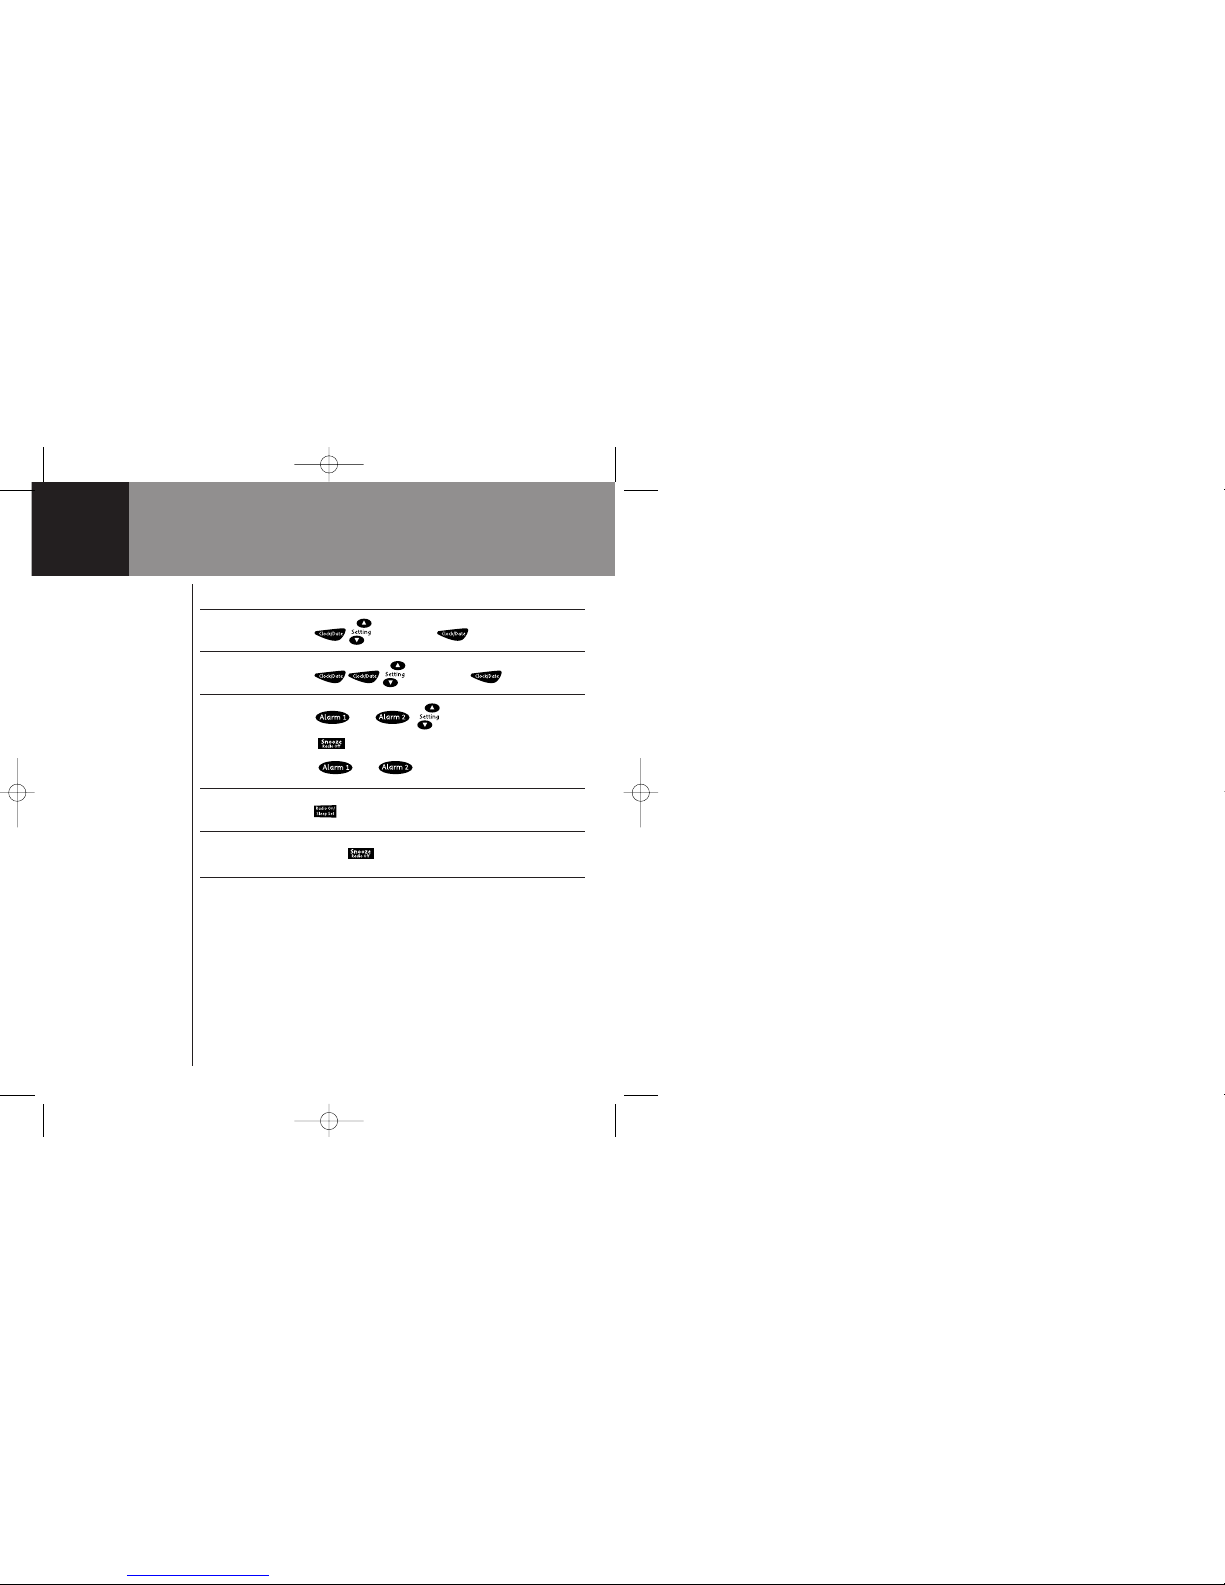
Quick guide
10
When the handset is
in the base or
charger,the red
Charging light stays
on and the battery
icon in the display
continues to cycle
from 1 to 3 bars even
when the batteries
are fully charged.
Talk/Standby time
Under ideal
conditions, fully
charged handset
batteries should give
about 10 hours
talktime or 100 hours
standby on a single
charge.
Battery low warning
If the BATTERY
symbol is flashing,
you will need to
recharge your
handset before using
it.
Function Button combination
Set time to set time
Set date to set date
Set alarm (or ) to set time.
to set daily, weekly or weekend.
(or ) to set beeps or radio.
Switch radio on
Switch radio off Press
F5000/ACR UG art 9/6/05 12:32 PM Page 11
Page 11
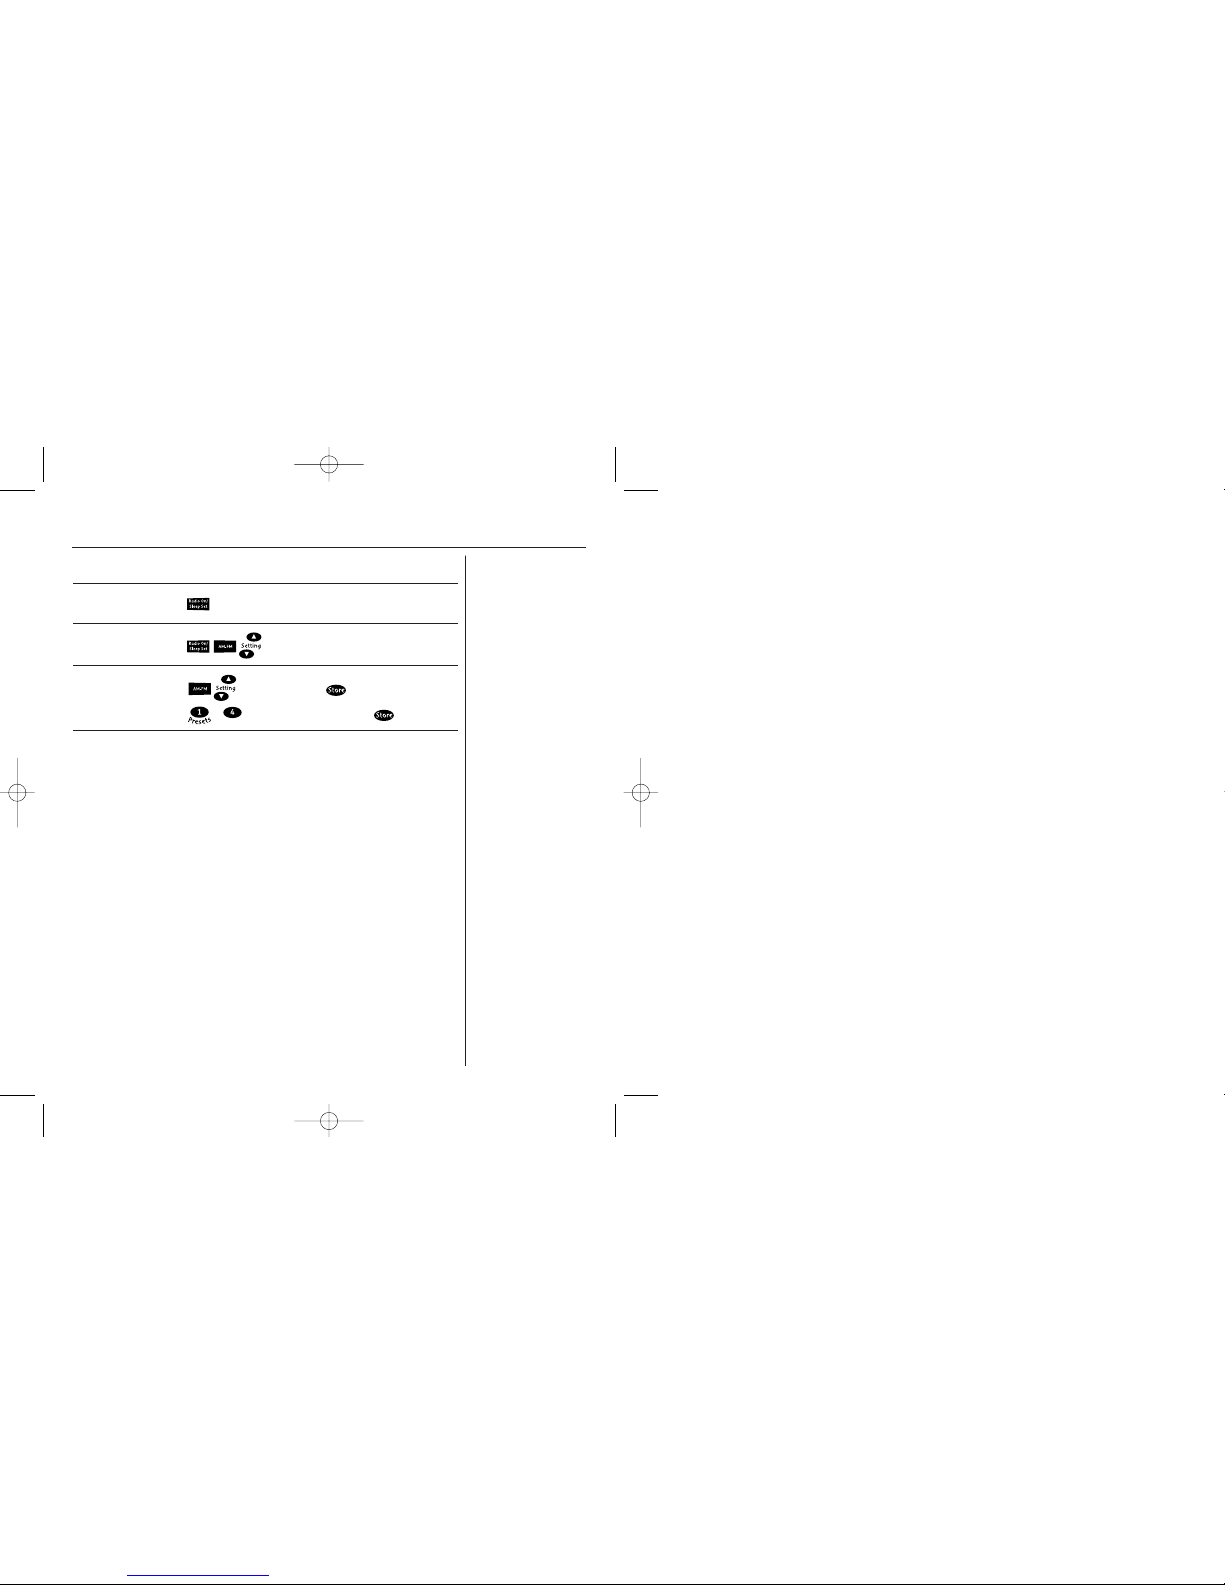
Quick guide
11
Battery
performance
To keep your
batteries in the best
condition, leave the
handset off the base
for a few hours at a
time (after the initial
16 hour charge).
New NiMH batteries
do not reach full
capacity until they
have been in normal
use for several days
Running the
batteries right down
at least once a week
will help them last
as long as possible.
The charge capacity
of rechargeable
batteries will reduce
with time as they
wear out, so
reducing the
talk/standby time of
the handset.
Eventually they will
need to be replaced.
New batteries can be
obtained from the
TecHelp line on 1300
369 193 or your local
electrical retailer.
Function Button combination
Set sleep timer Press repeatedly to select sleep timer
Tune radio
Store station in to find station .
memory - .to set station number .
F5000/ACR UG art 9/6/05 12:32 PM Page 12
Page 12

Using you F5000 extension handset
12
Please refer to
your Telstra F5000
or F5050 User
Guide for further
information on
using your
handset.
Internal calls
If you purchased the Telstra F5000 or F5050 with additional
handsets, you can make internal calls between handsets & transfer
calls.
1. Press and hold until the display shows HS and INT.
2. Enter the number of the handset you want to call. The other
handset will ring.
3. Press to end the call.
Transferring calls
With additional Telstra F5000 handsets, you can transfer an
external call to the other handset.
1. During an external call, press and hold until the display shows
HS- and INT.
2. Enter the number of the handset you want to call. The other
handset will ring.
3. When the other handset answers, press to complete the
transfer.
3 way conference
Alternatively, when the other handset answers, press and hold
for 3 seconds to enable a 3 way (2 internal & 1 external) call.
F5000/ACR UG art 9/6/05 12:32 PM Page 13
Page 13
Using your F5000 alarm clock radio
13
Please note
Your Telstra F5000
Clock is set to
adjust
automatically for
leap years until
2050.
Please note
If you do not press
any button for 15
seconds, the
display switches
back to idle mode.
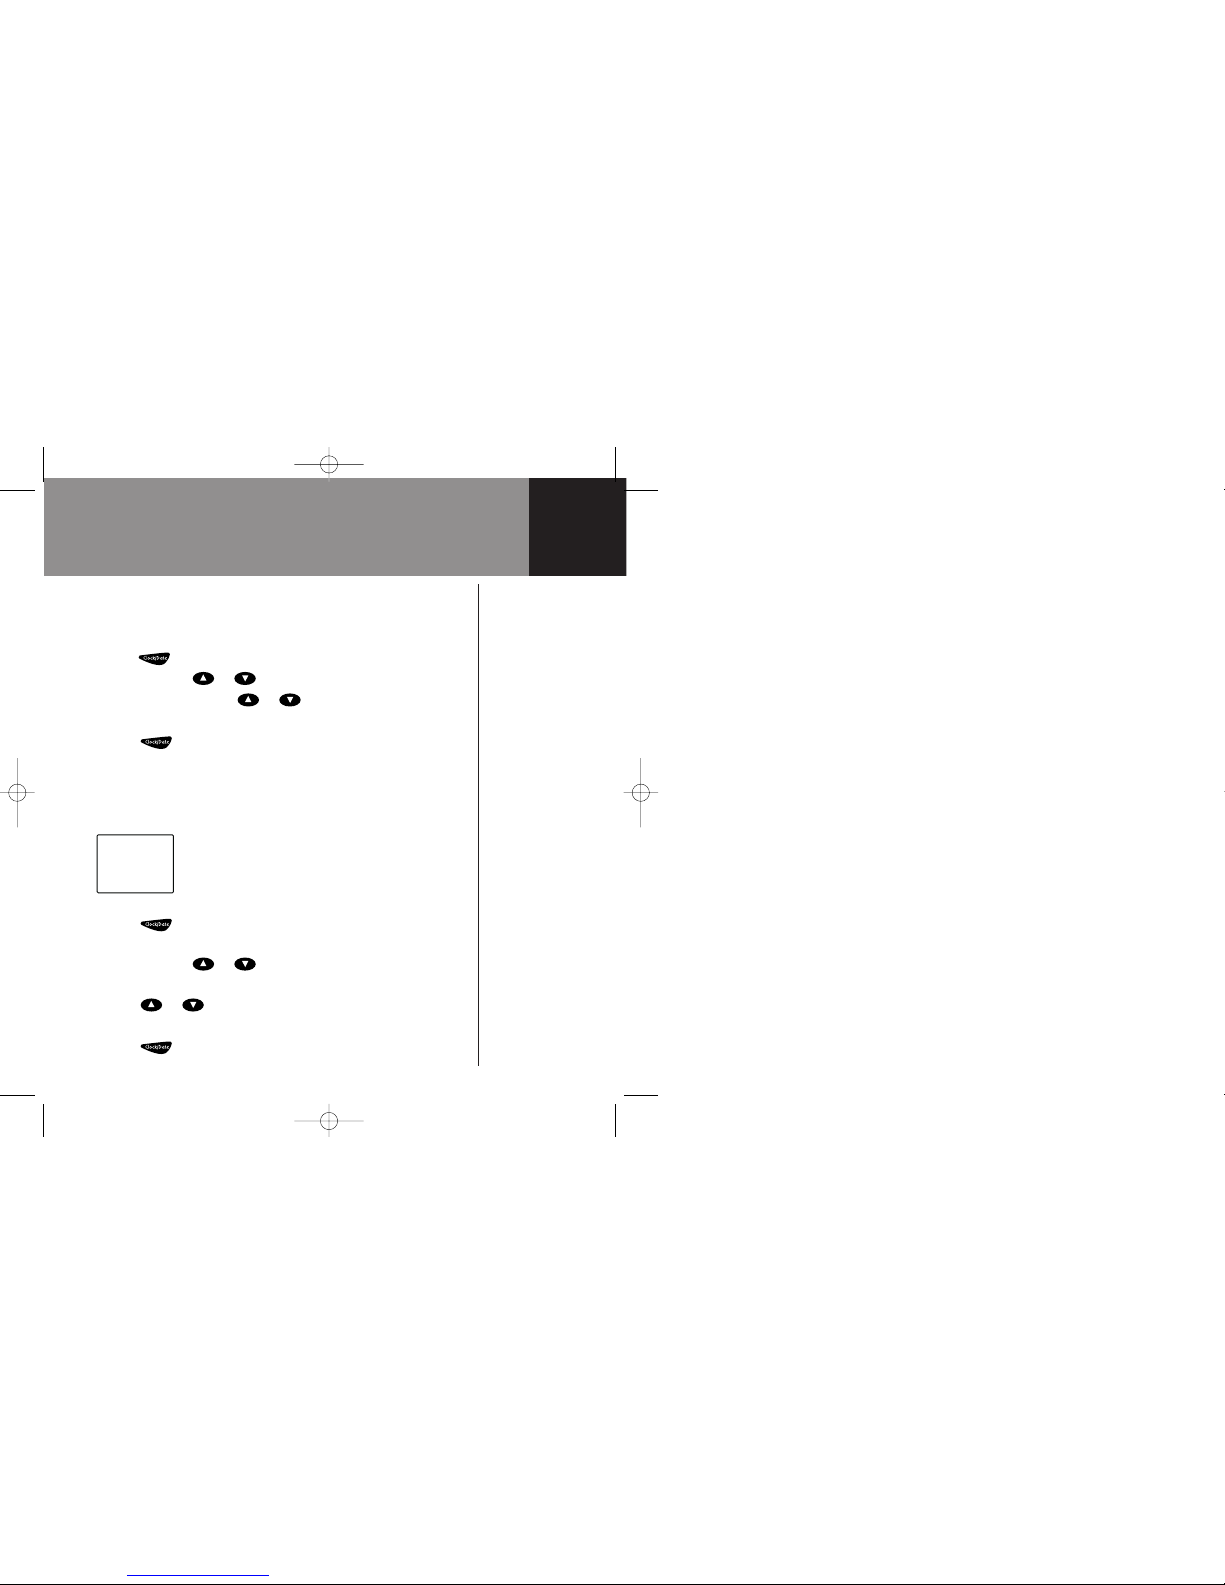
Setting the time and date
To set the time
The time is displayed in the middle line of the display.
1.Press the button. The clock setting flashes in the display.
2. Press and hold the or button to adjust the time quickly.
3. Now press and release the or button repeatedly to make
the adjustments, i.e. exact minute setting.
4. Press the button to confirm the time setting.
To set the date
The abbreviated day of the week (e.g. SU for Sunday), calendar date
and month are displayed in the bottom line of the display.
E.g.
1. Press the button twice. The year, day of the week, date and
month flash in the display.
2. Press and hold the or button to move quickly through the
days and months until the correct date is set.
3. Press the or button repeatedly to change the setting one
day at a time.
4. Press the button to confirm the date setting.
SU 2 9
PM
MD
3:05
F5000/ACR UG art 9/6/05 12:32 PM Page 14
Page 14
Using your F5000 alarm clock radio
14
To set the sleep timer
You can set the radio to switch itself off automatically at 10 minute
intervals between 10 and 90 minutes after you press the
button. With the Sleep timer set to on, SLEEP will be displayed to
the right of the time.
To set the sleep timer
1. Press once to display the current sleep timer setting, ON or
OFF. The display will show ON if no timer has been set. The radio
will then come on at the chosen station.
2. Press the button repeatedly to change the sleep timer setting
in 10 minute intervals from 90 minutes down to 10 minutes.
The radio will stay on while you change the setting.
3. When the setting you want is shown, release the button. After
4 seconds the display will return with the radio on and the sleep
timer set.
F5000/ACR UG art 9/6/05 12:32 PM Page 15
Page 15

Using your F5000 alarm clock radio
15
Alarm beeps/radio alarm
You can set two different times for the alarm beeps/radio alarm to
come on, for example:
Using ALARM 1 – you could set an alarm time for weekdays.
Using ALARM 2 – you could set an alarm time for weekends.
You can also select when each alarm will sound:
D = daily alarm
WD = weekdays only
WE = Saturday & Sunday only
When the alarm is set the display will show the icon for the type of
alarm you have set to the le ft of the time e.g.:
- Alarm Beeps
- Radio alarm
Alarm Off - No icon displayed.
When the alarm time is reached,if you have selected alarm beeps,
they will sound for 10 minutes or until they are switched off.Or, if
you have selected the radio alarm, the radio will come on for 60
minutes or until it is switched off.
F5000/ACR UG art 9/6/05 12:32 PM Page 16
Page 16
Using your F5000 alarm clock radio
16
Please note
When using the
radio alarm, the
last station you
listened to will
play when the
alarm activates.
To set the alarm
1. Press or , to select the alarm you want. The display
shows AL1 or AL2 and the current setting, e.g.07:30 and the type
of setting – daily, weekday or weekend.
2. Press and hold the or button to adjust and set the time
quickly.
3. Press the or button repeatedly to adjust the alarm time
minute by minute.
4. Press the button to select daily (d), weekday (Wd) or
weekend (WE).
5. Press the same button – or – to select the type of
alarm you want e.g.:
– Display shows
– Display shows
Alarm off – No icon is shown.
After a short while the clock radio display will revert to idle mode.
F5000/ACR UG art 9/6/05 12:32 PM Page 17
Page 17
Using your F5000 alarm clock radio
17
Please note
If the radio has
been switched on
by the alarm then
pressing the
RADIO OFF button
will activate the
SNOOZE function
and the radio will
switch back on
after 9 minutes.
Under these
circumstances to
switch the radio
off permanently,
you need to press
the
or
button once.
To switch the alarm beeps/radio off
When the alarm/radio is sounding:
1. Press or as appropriate and the alarm beeps/radio
will stop.
2. To switch the alarm off permanently, press or ( )
repeatedly until no alarm icon is shown on the display.
Snooze control
The button lets you temporarily turn off the alarm beeps or
radio for 9 minutes. When that time has elapsed, the radio or alarm
beeps will sound again. You can continue to use snooze control or
turn the alarm off completely using the or ( ) button.
To use snooze control
When the alarm beeps/radio sound, press the button.
To adjust the volume of the radio
When the alarm is on, press the or button to increase or
decrease the volume.
Switching the radio on/off
To switch the radio on
Press the button.
To switch the radio off
Press the button.
F5000/ACR UG art 9/6/05 12:32 PM Page 18
Page 18
Using your F5000 alarm clock radio
18
Selecting a radio station
The selected radio station and band will be displayed in the top line
of the display.
Band Range
FM 87.5 – 108.5 MHz
AM 522 – 1656 KHz
You can select a radio station manually or you can store up to 4
radio stations (for both AM and FM) using the preset MEMORY
buttons.
Once set, when you press one of the memory buttons ( - ),
the preset radio station will begin playing automatically.
To manually select a radio station
1. Press the button to switch the radio on.
2. Press the button to select the AM/FM band you want.
3. Press and release the or button to change the radio
frequency one step at a time.
Or
4. Press and hold the or button to move quickly through the
frequencies to select a radio station.
5. If you press and hold the or button for 3 seconds then
release, the radio will auto search then stop when it detects a
strong signal.
F5000/ACR UG art 9/6/05 12:32 PM Page 19
Page 19
Using your F5000 alarm clock radio
19
Please note
You can use the
preset buttons to
store 4 FM stations
and 4 AM stations.
To store a radio station in the preset memory
When you are tuned to a station you want to store:
1. Press the button. The display flashes MEM.
2. Select a preset memory station using buttons - . The
selected number is displayed.
3. Whilst the icon is flashing,press the button to
confirm. stops flashing and the selected station is stored.
To replace a stored station with a new one, repeat the steps above.
The new station will automatically replace the old one.
To select a preset station
1. When the radio is on, press the button to select the AM/FM
band you want.
2. Press the button for the pre-set radio station you want
( - ). The radio comes on after 1 second.
F5000/ACR UG art 9/6/05 12:32 PM Page 20
Page 20
Using your F5000 alarm clock radio
20
Please note
If the radio is on
when the buttons
are locked, you
will be unable to
switch off or
adjust the radio
without unlocking
the buttons.
To lock/unlock the buttons
You can lock the buttons so that the settings of your alarm clock
radio cannot be changed.
1. Press the button.
2. Press the button.
3. Press the button.
4. Press the button.
The display shows the icon.
Repeat these steps to unlock the buttons again.
F5000/ACR UG art 9/6/05 12:32 PM Page 21
Page 21
Help
21
If you experience
any difficulties
please call the
TecHelp line on
1300 369 193.
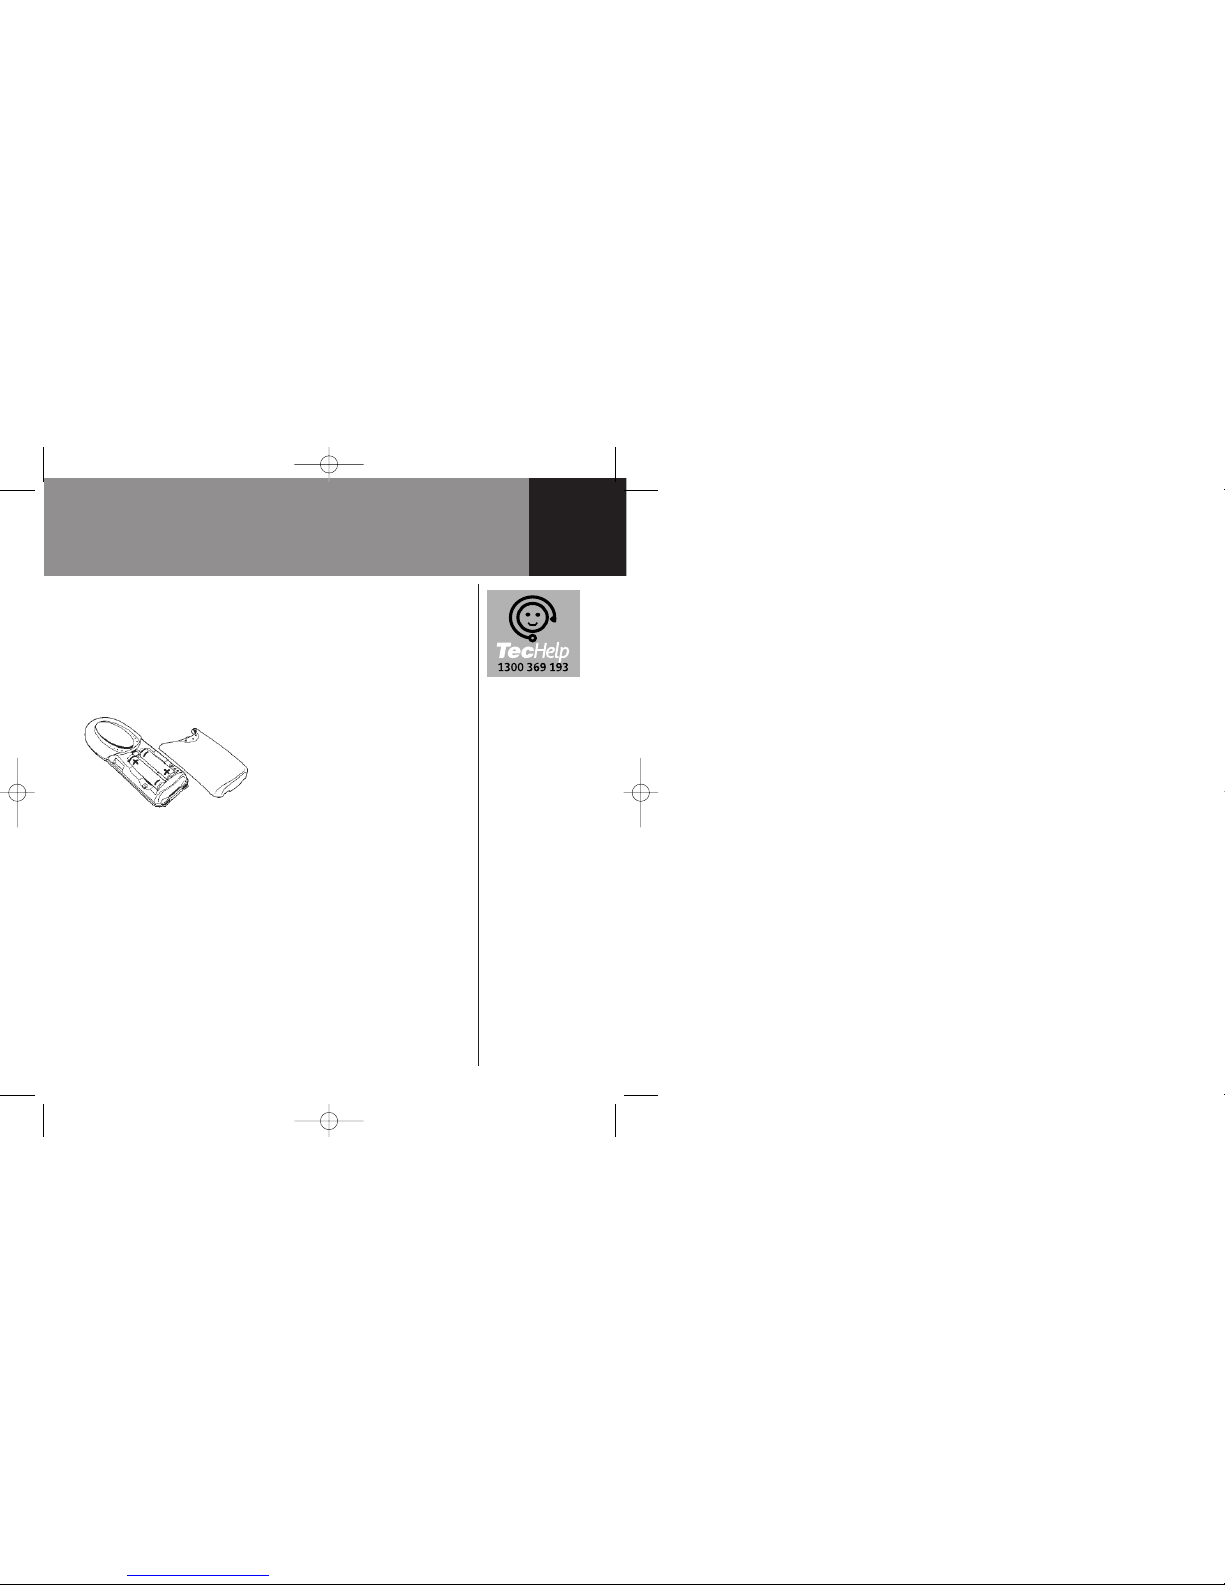
Replacing the handset batteries
After a time, you may find that the handset batteries are running
out of charge more quickly. This is a standard sign of wear and the
batteries will need replacing.
1. Slide the battery compartment cover off.Take out the old
batteries and replace with new ones.
In the event of a power failure, your Telstra F5000 Alarm Clock Radio
Charger will reset itself. If this happens the default settings will be
restored and you will need to reset any stored radio stations, the
time/date and any alarm settings.
No display appears
Handset - The batteries may be flat,dead or incorrectly inserted.
Recharge or replace the batteries.
Clock - Check that the Clock is connected to the mains power and
switched on.
F5000/ACR UG art 9/6/05 12:32 PM Page 22
Page 22

Help
22
No dial tone
● Is the telephone cord of the base plugged into the phone socket?
● Check that the base station is connected to the mains power and
switched on.
You cannot link up with the base station
● Make sure you have registered the handset to the main base unit.
See page 7.
● Is the ANTENNA icon flashing in the top left hand corner of
the display? If so, you may be out of range and need to move
closer to the base.
● Check that the mains power cable is connected at the base and
switched on.
Handset does not ring
● The ringer volume may be switched off, see page 19 of your main
telephone User Guide.
● Check that the base is plugged into the phone socket and mains
power and switched on.
F5000/ACR UG art 9/6/05 12:32 PM Page 23
Page 23

General Information
23
Safety
Only use the power supply included with the product marked Alarm Clock Radio
Using an unauthorised power supply will invalidate your guarantee and may damage
the product.
Do not open the product or power supply. This could expose you to high voltages or
other risks.
It is recommended that advice from a qualified expert be sought before using this
product in the vicinity of emergency/intensive care medical equipment.
Cleaning
Simply clean the product with a damp (not wet) cloth,or an anti-static wipe. Never use
household polish as this will damage the product. Never use a dry cloth as this may
cause a static shock.
F5000/ACR UG art 9/6/05 12:32 PM Page 24
Page 24

General information
24
Environmental
Do not expose to direct sunlight.
Do not stand your product on carpets or other surfaces which
generate fibres, or place it in locations preventing the free flow of
air over its surfaces.
Do not submerge any part of your product in water and do not use
it in damp or humid conditions,such as bathrooms.
Do not expose your product to fire, explosive or other hazardous
conditions.
There is a slight chance that your product could be damaged by an
electrical storm. We recommend that you unplug the power supply
during an electrical storm.
F5000/ACR UG art 9/6/05 12:32 PM Page 25
Page 25

Product warranty & Customer service
25
IMPORTANT
Please retain this booklet with your sales
receipt as proof of the date of purchase
Customer Service
If you require assistance in operating this product
please call the TecHelp Information Line – 1300 369
193 – or contact us by e-mail at:
t
If you are trying to access a Telstra Network Service
and require assistance specifically related to the
network service or would like to subscribe to the
service, contact Telstra on 132200 for residential or
132000 for business.
Product Warranty
Subject to the conditions below,Telstra guarantees
this product against any defect in materials or
workmanship under conditions of normal use for 13
months from date of purchase.
The benefits conferred by this warranty are in
addition to other warranties and remedies that are
implied under the Trade Practices Act and similar
State and Territory laws (Statutory Rights).
Subject to your Statutory Rights, the goods will not
be eligible for service under this warranty if:
A. Proof of purchase cannot be provided;
B. The defect was caused by an accident, misuse,
abuse, improper installation or operation,vermin
infestation,lack of reasonable care,unauthorised
modification, loss of parts, tampering or attempted
repair by a person not authorised by Telstra; or
C. The product has been damaged by lightning or a
mains power surge.
To obtain service during the terms of this warranty
call the TecHelp Information Line
on – 1300 369 193 – or contact us by e-mail at:
t
If it is necessary to have the product serviced, the
Customer Service Representative will inform you of
the product return process.
Please ensure that:
A. You provide proof of purchase;
B. Your product is suitably packaged; and
C. You have included all components from the
original purchase.
Subject to your Statutory Rights:
A. Any claim under this warranty is limited to the cost
of repair or replacement of the product; and
B. If the goods are found to be in sound working order
by the authorised service centre, you may be
charged a fee for service and for any other direct
costs associated with having the product delivered
for service.
F5000/ACR UG art 9/6/05 12:32 PM Page 26
Page 26

F5000/ACR UG art 9/6/05 12:32 PM Page 27
Page 27

F5000/ACR UG art 9/6/05 12:32 PM Page 28
 Loading...