

Page 1
1
User Manual
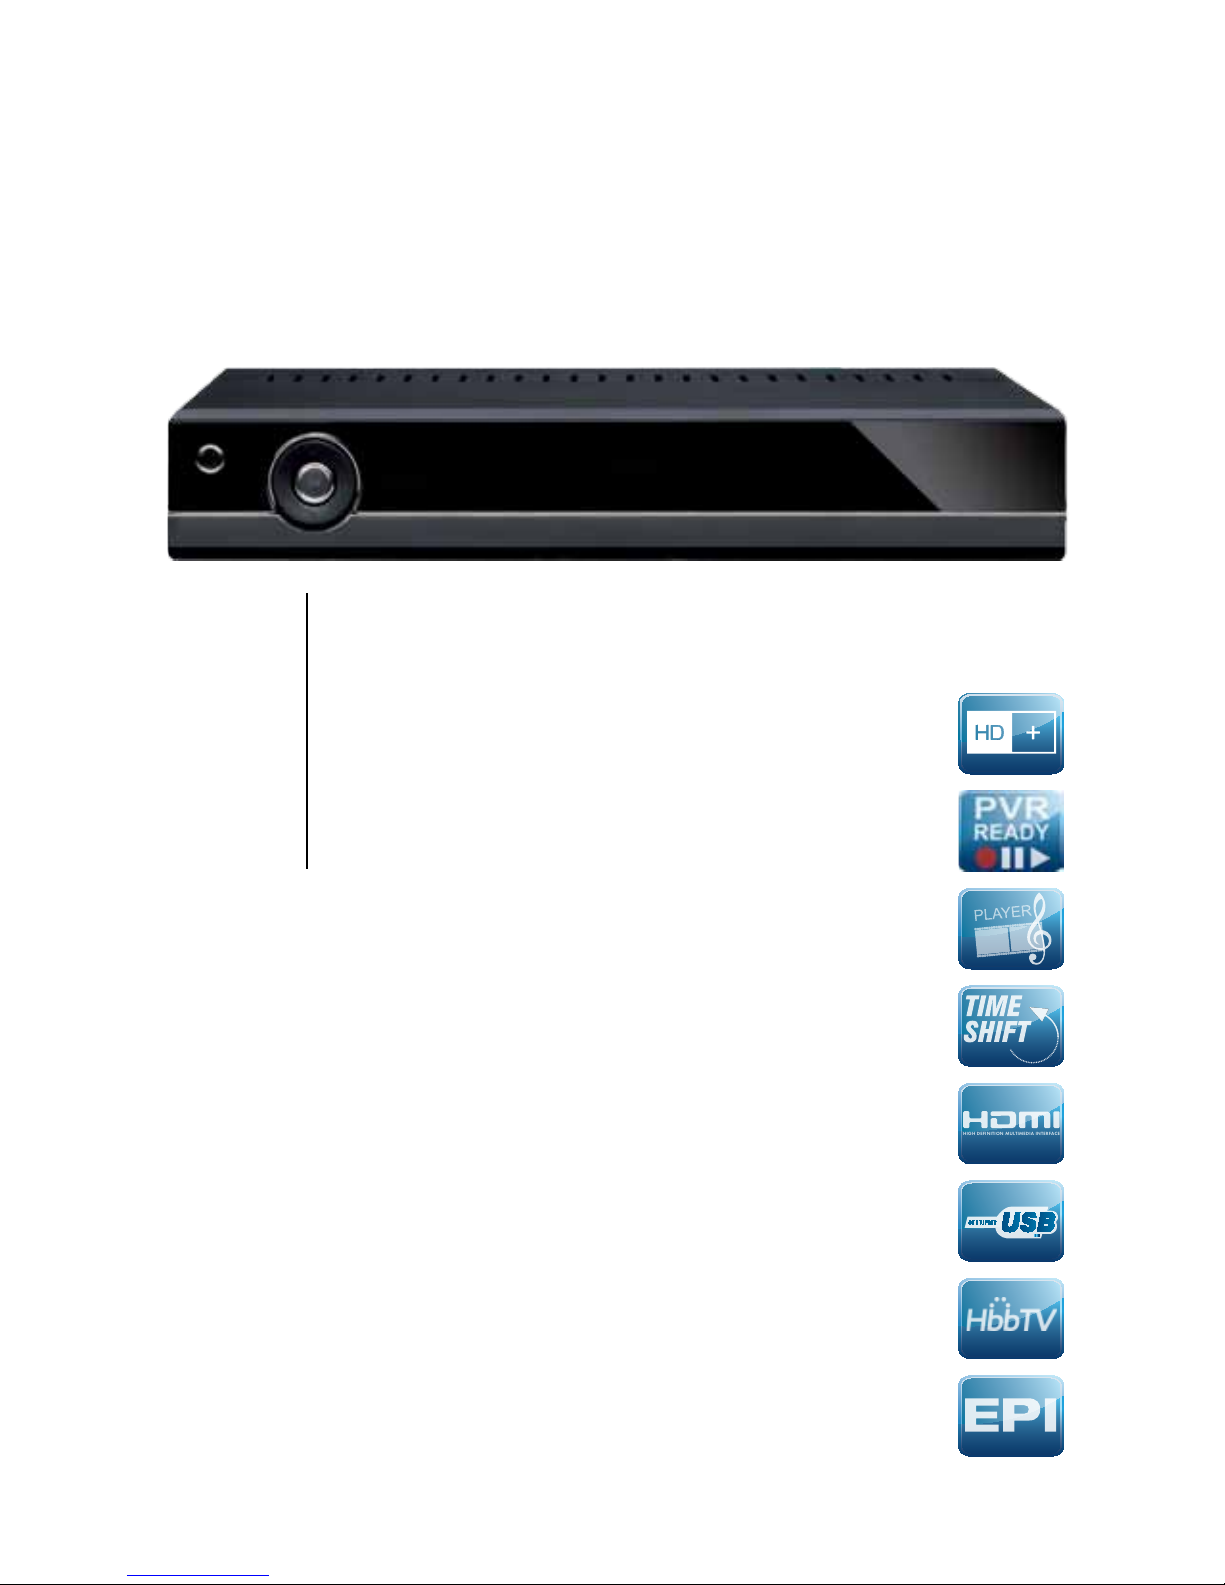
HD+ Smart TV
Satelliten Receiver
HIGH DEFINITION MULTIMEDIA INTERFACE
Page 2

44
HD+ Smart TV
Satellite Receiver
User Manual
Page 3

45
Table of Contents
Notices
Before using the product
Remote Control
Setup
The Installation Wizard
Basic Operation
The Main Menu
HbbTV Applications
Connecting external USB devices
Program Guide (EPG)
Control Panel
Channel Lists Editing
Video, photos and music streaming over your
home network
Frequently Asked Questions
Technical Specifications
Troubleshooting
Warranty, service and support
46
49
51
53
54
58
61
62
63
63
64
70
71
71
73
74
76
77
Page 4

46
Notices
COPYRIGHT© 2013 TELESTAR Digital GmbH;
Not to be copied, used or translated in part or whole without TELESTAR prior consent in writing except approval
of ownership of copyright and copyright law. Television programs, movies, video tapes, discs, and other materials
may be copyrighted. Unauthorized recording of copyrighted material may be against the copyright laws in your
region.
WARRANTY
This warranty does not cover parts which may become defective due to misuse of the information contained in
this manual. Read this manual carefully and make sure you understand the instructions provided. Should you
experience a problem with this unit, please refer to the trouble shooting section of this user manual; Please retain
the original packaging, should it be necessary at some stage to return the unit.
CE MARK FOR EUROPEAN HARMONISED STANDARDS
The CE mark which is attached to these products means it conforms to EMC Directive (2004/108/EC), Low Voltage
Directive (2006/95/EC) and RoHS Directive (2011/65/EC).
WEEE CONSUMER NOTICE
The TELESTAR product you have purchased is subject to Directive 2002/96/EC of the European Parliament and
the Council of the European Union on waste electrical and electronic equipment (WEEE) and, in jurisdictions
adopting that Directive, is marked as being put on the market after August 13, 2005, and should not be disposed
of as unsorted municipal waste. Please utilize your local WEEE collection facilities in the disposition of this product
and otherwise observe all applicable requirements. For further information on how to properly dispose of your
product and for information specific to your country, please contact your vendor or visit the “Support” section of
our website: www.telestar.de
Disposal of Old Electrical and Electronic Equipment (Applicable in the European Union and other European
countries with separate collection systems)
This symbol on the product or on its packaging indicates that this product shall not be treated as household
waste. Instead it shall be handed over to the applicable collection point for the recycling of electrical and electronic
equipment. By ensuring this product is disposed of correctly, you will help prevent potential negative consequences
for the environment and human health, which could otherwise be caused by inappropriate waste handling of this
product. The recycling of materials will help to conserve natural resources. For more detailed information about
recycling of this product, please contact your local Civic Office, your household waste disposal service, or the shop
where you purchased the product.
FOR USED BATTERIES
Disposed of the used batteries properly. Please follow the local regulations for the battery disposal.
OPEN SOURCE SOFTWARE NOTICE
The product uses certain open source operating system software distributed pursuant to GNU GENERAL
PUBLIC LICENSE version 2 and GNU LESSER GENERAL LICENSE version 2.1 each as defined and published
by the free .software foundation, inc. the following gpl and lgpl software source codes used in this product can be
provided:
GPL software LGPL software
linux kernel wedison, cairo
busybox ffmpeg
gzip
libgcc, libstdc++
WEB and Internet-based Applications
Web content and Internet-based services and applications are provided by third parties and can be terminated at
any time without any notice.
TRADEMARKS
Manufactured under license from Dolby Laboratories. ‘Dolby’ and the ‘double-D’ symbol are trademarks of Dolby
Laboratories.
Page 5
47
CAUTION: PREVENTION OF SCREEN BURN-IN
Continuous display of still images and graphics, such as on-screen displays, stock market tickers, and other
fixed (non-moving) patterns can cause permanent damage to the television. Plasma screen displays, projection
televisions, and CRT televisions are especially susceptible to this.
ABOUT THIS MANUAL
Instructions in this manual describe the operation using the controls on the remote. You can also use the
corresponding controls on the front panel with the same markings. The on-screen display illustrations used in this
manual may not match the graphics displayed on your television exactly.
SAFETY
For your safety, be aware of the following precautions.
RISK OF ELECTRIC SHOCK
DO NOT OPEN
CAUTION
!
WARNING: TO PREVENT ELECTRIC SHOCK,DO NOT REMOVE COVER, NO USER SERVICEABLE PARTS
INSIDE. REFER SERVICING TO QUALIFIED SERVICE PERSONAL.
Graphical symbols and supplemental warning markings are located on the back panel of the terminal.
WARNING: TO REDUCE THE RISK OF FIRE OR SHOCK, DO NOT EXPOSE THIS APPLIANCE TO RAIN OR
MOISTURE.
The lightning flash with arrowhead symbol within an equilateral triangle is intended to alert the user
to the presence of uninsulated dangerous voltage” within the product’s enclosure
that may be of sufficient magnitude to constitute a risk of electric shock to persons.
The exclamation point within an equilateral triangle is intended to alert the user to the presence of
important operating and maintenance (servicing) instructions in the literature accompanying the
appliance.
Product identification and supply rating are provided on the label found on the bottom of the
unit and the back panel respectively.
SAFETY PRECAUTIONS
This digital video receiver has been manufactured in accordance with international safety standards. For your own
safety, you should read the notes on safety precautions carefully, and take note of them, before operating your new
receiver. For your own safety, please be sure to follow these safety precautions.
• This product is for indoor use in moderate climates only.
• This product contains no user serviceable parts. The unit should only be opened or repaired by qualified
service personnel.
• The supplied AC power cable must be used to power this product. If the power cord becomes damaged,
it must be replaced. Always refer to qualified personnel.
• Check to make sure operating voltage of the product is identical with your local power supply, prior to
connecting it to the power socket.
• To prevent fire or shock hazard:
- Do not expose the apparatus to dripping or splashing.
- Do not place objects filled with liquids, such as vases, on the apparatus.
• Install the product so the AC power cable can be unplugged from power socket immediately, in the
event of a problem.
• The unit should not be placed near sources of open flame. No open flame sources, such as candles,
should be placed on the unit.
• Should any solid object or liquid fall into the cabinet, unplug the product and have it checked by qualified
personnel before operating it any further.
• Proper grounding: For protection from lightning and static discharge the antenna connected to this
receiver must be connected to earth ground. The proper grounding can be achieved by connection to
the earth ground system of your house/building, or by a qualified installer.
!
Page 6

48
VENTILATION
• Do not expose the product to high temperatures, such as placing it on top of other product that produce
heat or in places exposed to direct sunlight or spot lights.
• The ventilation slots on top of the product must be left uncovered to allow proper airflow into the unit.
Do not stand the product on soft furnishings or carpets. Do not stack electronic equipment on top of
the product.
• Do not place the product in a location subject to extreme changes in temperature. The temperature
gradient should be less than 10 degrees C/hour.
• Place the product in a location with adequate ventilation to prevent the build-up of heat inside the
product. The minimum ventilation space around the unit should be 7 cm. The ventilation should not be
impeded by covering the ventilation openings with items, such as newspapers, table cloth, curtains, etc.
POWER SOURCES
• The product is not disconnected from the AC power source (mains) as long as it is connected to the
power outlet or wall socket, even if the product is turned off.
• If the product will not be used for a long period of time, disconnect it from the AC power outlet or wall socket.
Page 7
49
Before using the product
This chapter provides detailed description of the product and its accessories.
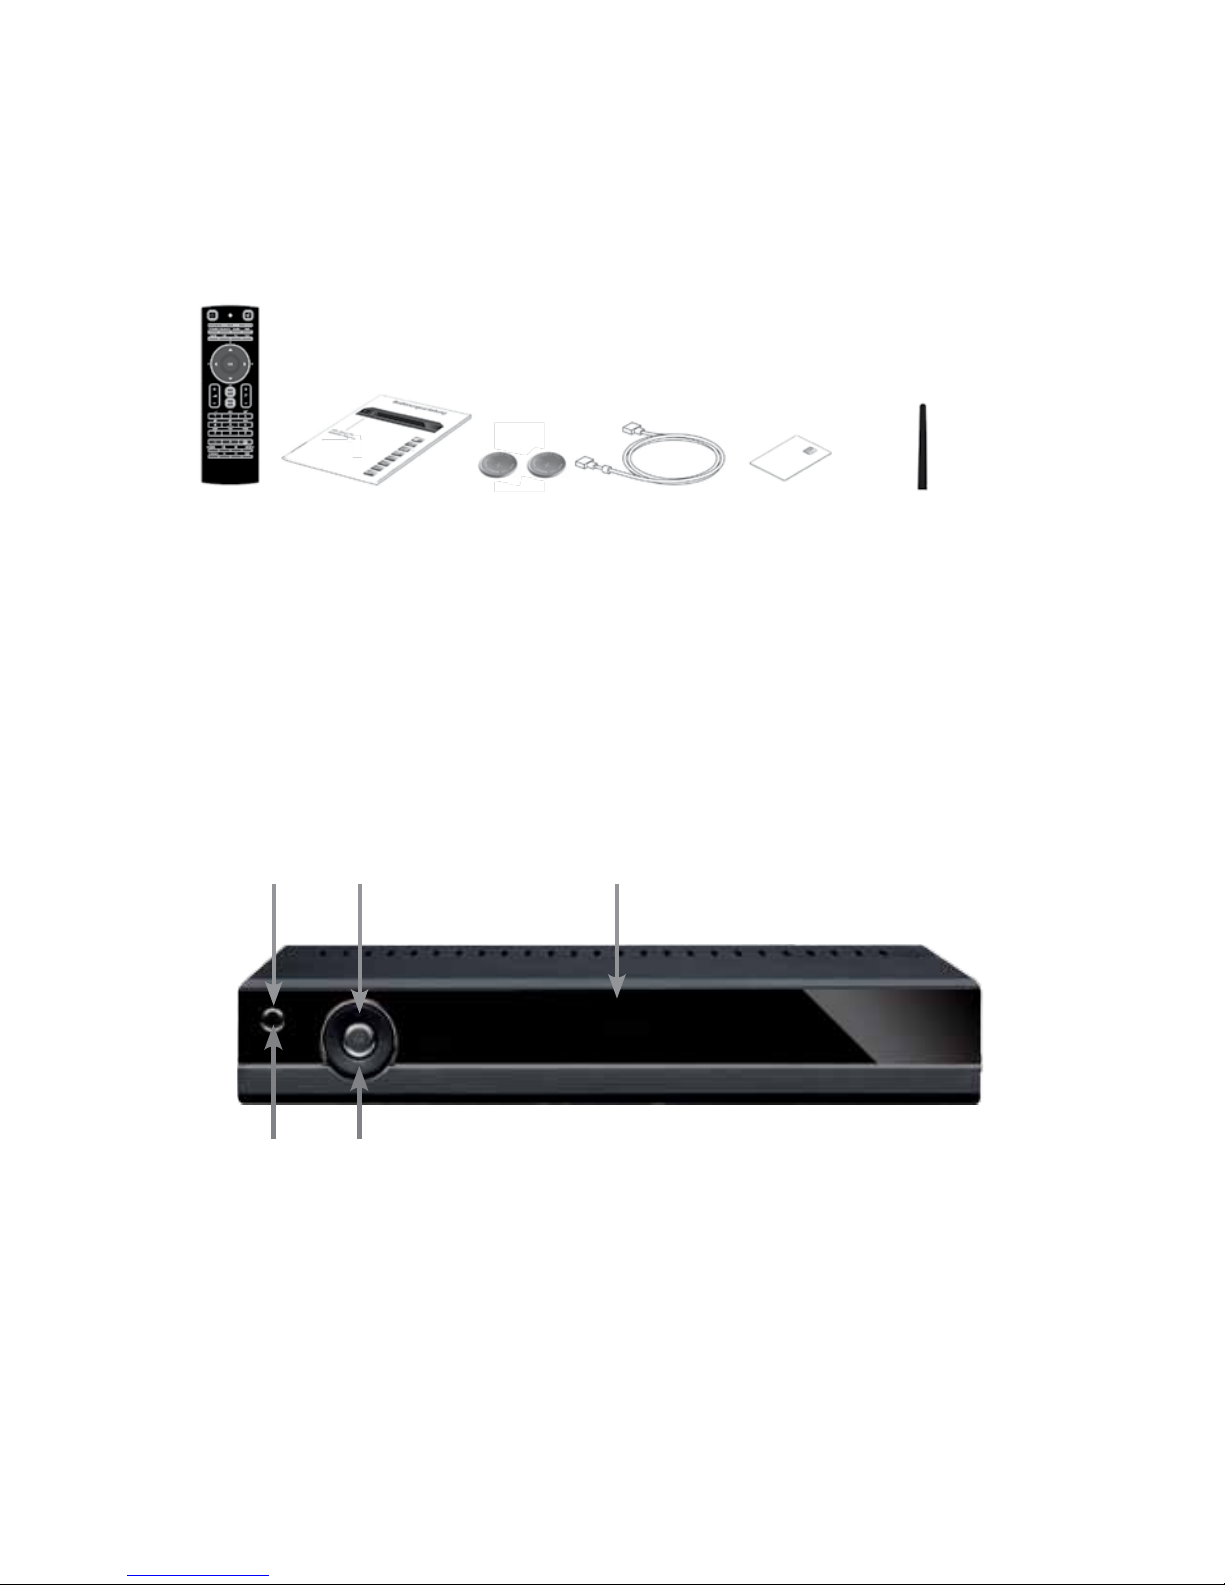
PACKAGE CONTENT
FRONT PANEL
12
3
4
5
1. VFD Display
2. Standby indication LED
3. Standby key - Switches between operation and standby modes.
4. Channel Up key
5. Channel Down key
2 Batteries HDMI Cable HD+ Smart card
Remote control
User manual
WLAN-Antenna
Page 8
50
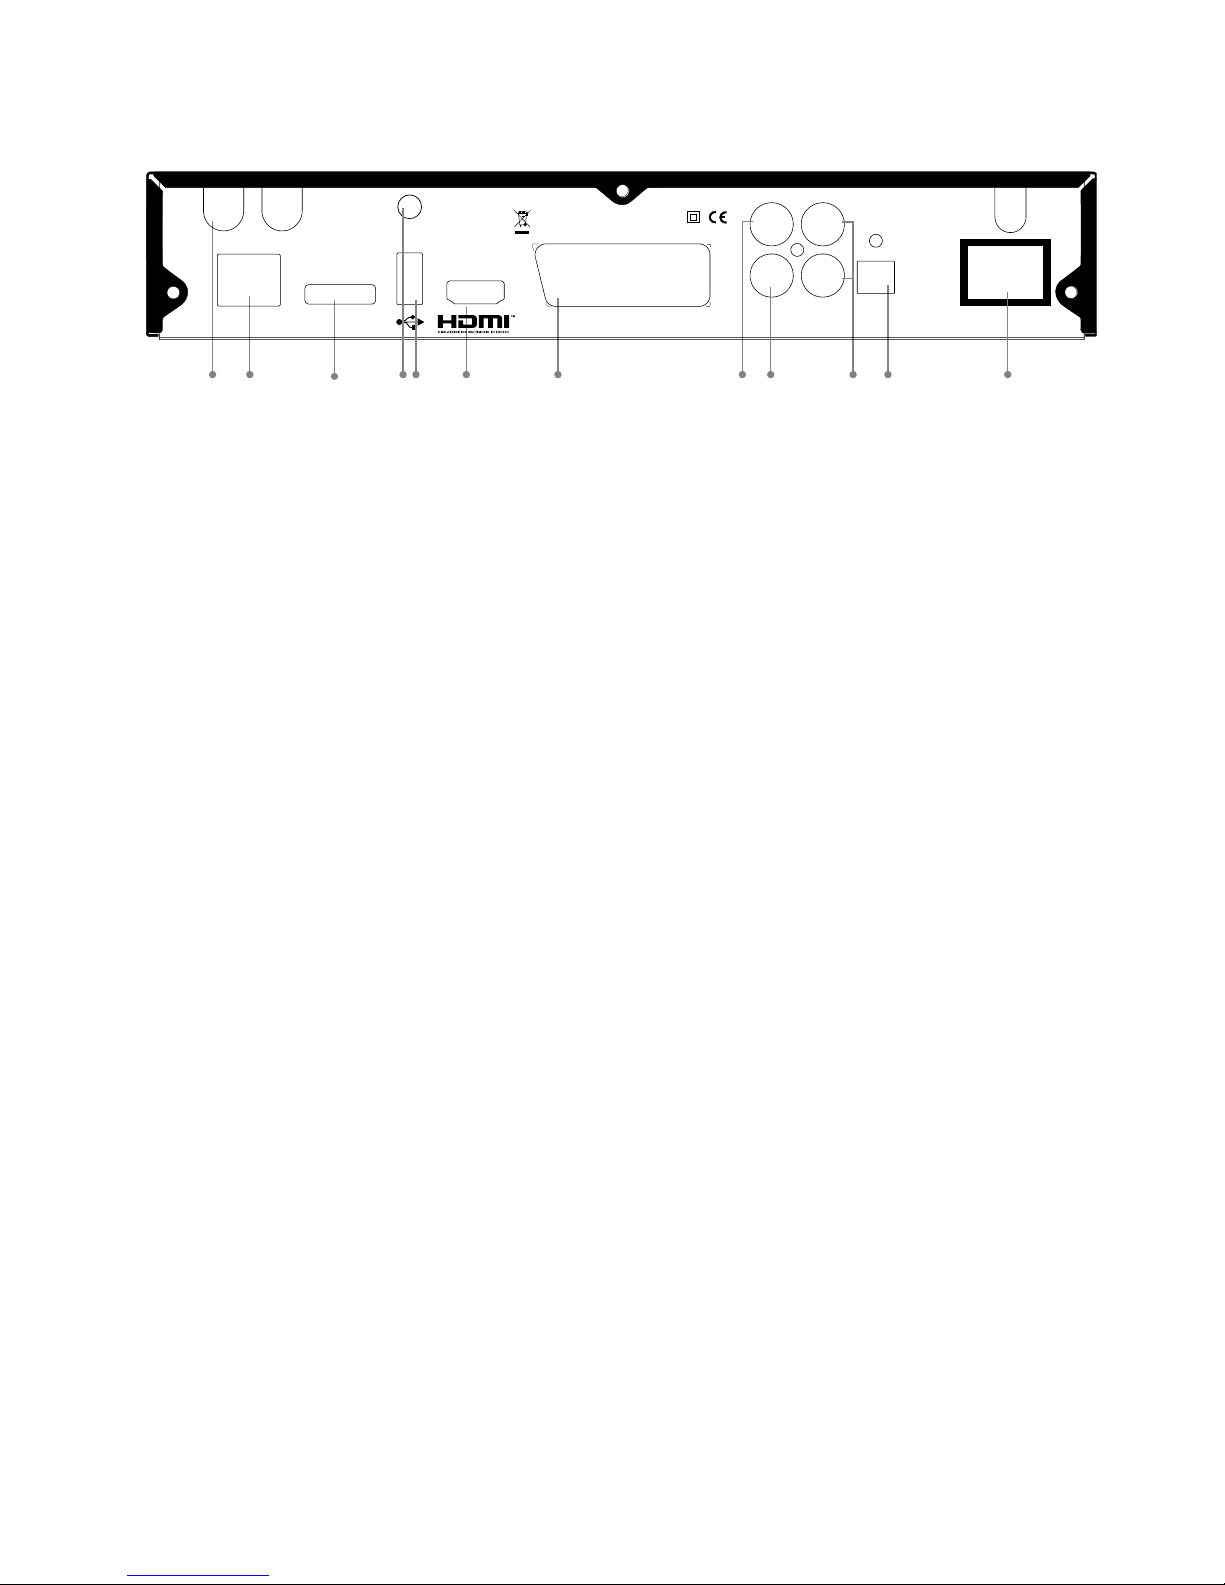
REAR PANEL
Scena 6x (IDL6650n) Rear Panel Graphics
12
3
67 8101
11
2
TV
LNB
Out
LNB In
Audio R
Audio L Video
AC 230V
50-60Hz
30W Max.
Electrical shock hazard! Do not open!
Elektroschock-Gefahr! Nicht öffnen!
950-2150Mhz
13/18V
Max. 400mA
22Khz
Off On
Made in China
SPDIF
SPDIF
Optical
WiFi
eSATALAN
54 9
1. LNB In and LNB Out
LNB In Connects to the satellite antenna cable. LNB Out allows to connect to another digital receiver.
2. LAN (RJ45)
Connection to Local Area Network (LAN) at home.
3. eSATA
Connects to a external SATA devices.
4. WiFi Antenna
Connects to a Wireless LAN home network.
5. USB Host
Connects to a USB devices.
6. HDMI
Connects to the TV using HDMI cable for High Definition signals.
7. TV SCART
Connects to a TV SCART cable. This connection supports Standard Definition TV resolutions only.
8. Digital audio, SPDIF Coaxial output
Outputs digital audio signals (S/PDIF) for home cinema connection over coaxial connector.
9. CVBS video output
Connects to the TV or DVD/VCR recorder and outputs analog composite video signals. This connection supports Standard Definition TV resolutions only.
10. AUDIO L/R
Connects to the TV or DVD/VCR recorder and outputs analogue stereo audio signals.
11. Digital audio, SPDIF optical output
Outputs digital audio signals (S/PDIF) for home cinema connection over optical connector.
12. On/Off switch
Powers on/off the receiver.
Note: The image shown may differ from the actual product.
Page 9

51
Remote Control
FIRST TIME USE:
Two 3V Lithium CR2032 batteries come pre-installed in your remote control.
When using the remote for the first time, pull out the plastic tab from the remote
to activate the batteries.
REPLACING THE BATTERIES:
With screwdriver, remove the battery tray. Insert the batteries with the “+” marking
facing up into the battery tray. Slide the tray back into the remote until it clicks.
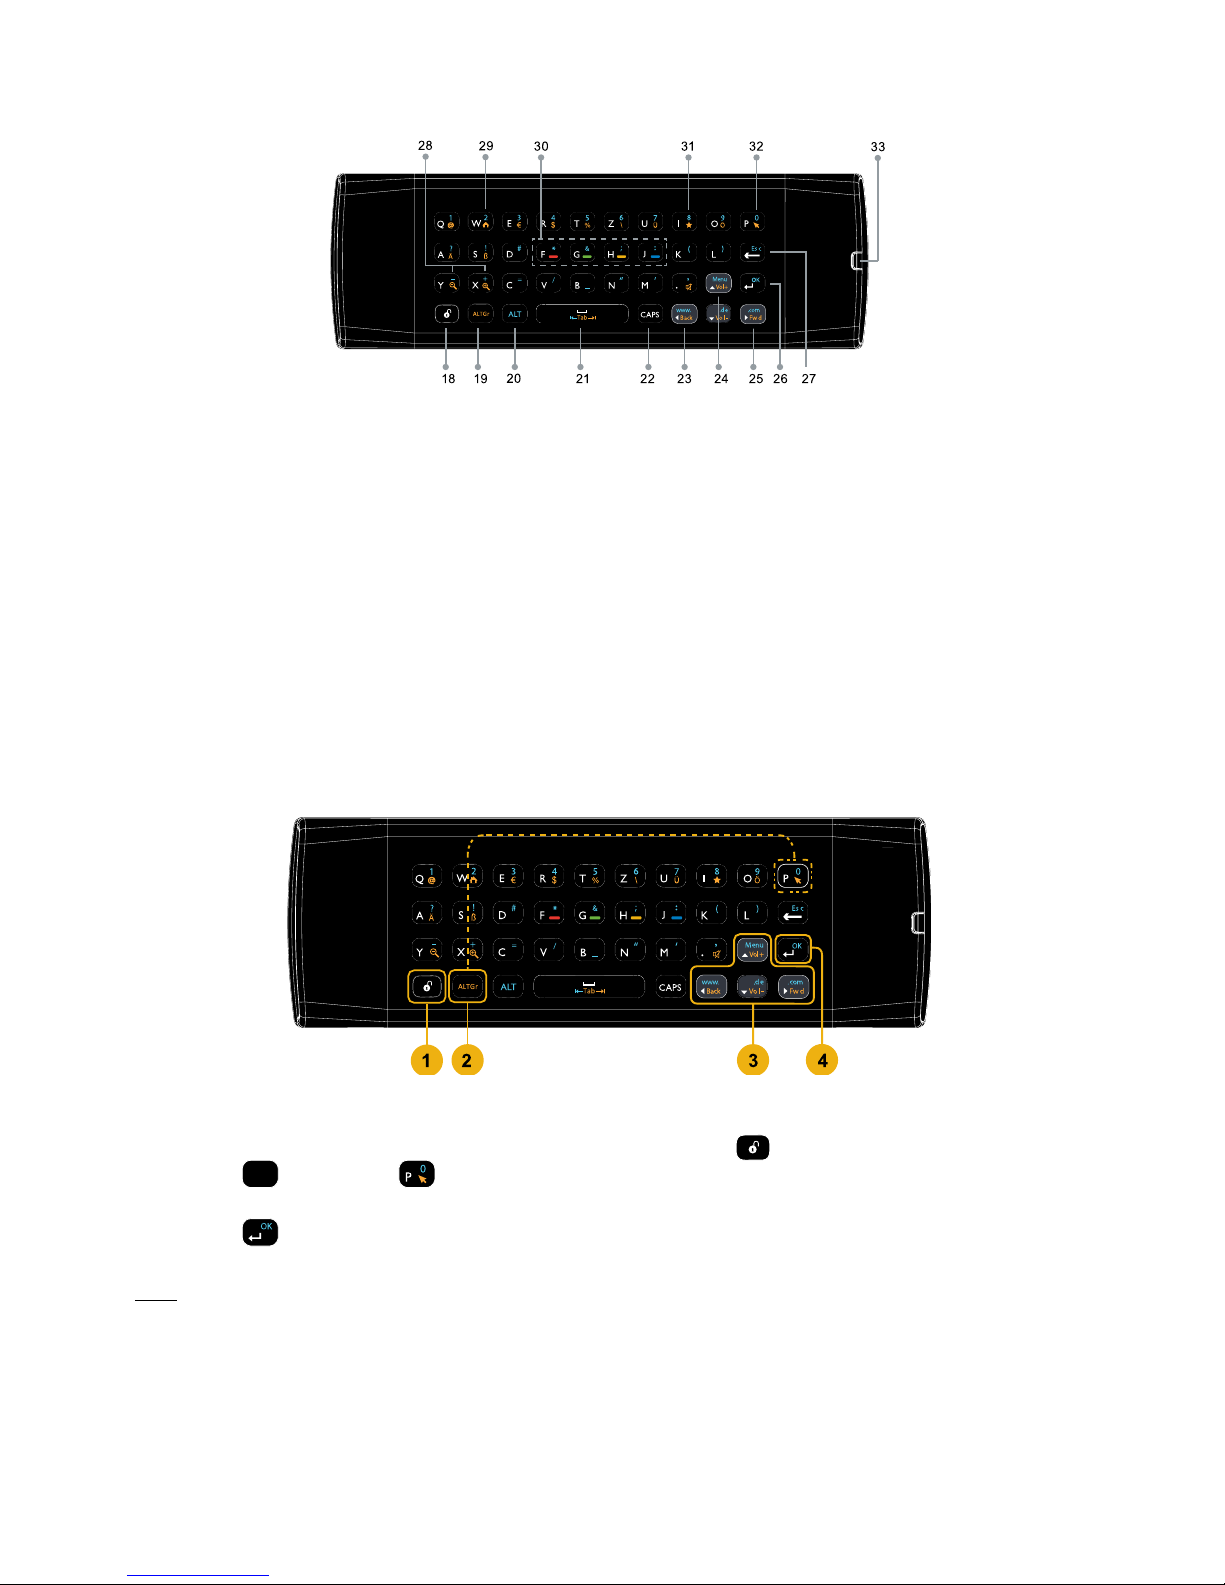
YOUR TWO-SIDED REMOTE
Your Receiver is supplied with an advanced keyboard remote control that makes internet browsing simple and
convenient.
Guide
Info
Fav.
Exit
TV/Radio Sub/AudioWeb
tuv
wxyz
pqrs
jklmnoghi
P
abc
def
_ - /
/ --
1
2 3
7
89
4
5
6
0
Menu
Back
V-format
Media
Fast Rewind / Slow motion - press to change the speed
Pause / Play - Pause during playback or live TV (Time shift)
Fast Forward / Slow motion - press to change the speed
Jumps backward during playback
Stop
Jumps forward during playback
1 Standby – switches the receiver into standby mode
2 Mute – mutes the audio outputs of the receiver
3 Color keys used for selection in On-Screen-Display menus
4 TV/Radio - displays the TV/Radio channel list
Subtitles/Audio – displays the list of available subtitle or sound-track languages
Media- Access connected media devices
Web- Access your bookmarks, home page or and HD+ SmartTV
web portals.
5 Guide – displays the TV program guide
Info – displays detailed program information
Fav – selects the favorite list the user wants to be active
Exit – leaves the menu currently on screen
6-7 Up, Down, Left, Right and OK – navigation and select keys
8 Back - toggles through recently watched channels
9 Volume up/down
10 Channel up/down
11 Menu – brings up the Main Menu on the screen
12 Keypad – for numerical and textual input
13 Record
14 Teletext - launches the teletext browser
15 V-Format - selects the picture resolution
16 Full screen - Enlarge framed video to full screen
17 Playback navigation keys (see details below)
Page 10
52
18 Unlock keyboard / backlit key press indication led 26 OK
19 ALTGr function key 27 Delete / Escape
20 ALT function key 28 Zoom In / Zoom Out
21 Tab forward / backward 29 Home-page shortcut
22 CAPS function key 30 Navigation color keys
23 Back 31 Favorites
24 Menu – Show Main menu / Top web browsing bar 32 Mouse pointer on / off
25 Forward 33 Battery compartment
Note: Keys in Yellow require use of ALTGr key to operate, keys in Blue require the ALT key.
USING THE MOUSE CURSOR
1. Make sure the keyboard side is unlocked by pressing the unlock key
.
2. Press the
ALTGr
key and then
key (one after the other) to activate/deactivate the mouse cursor.
3. Use the arrow keys to move the mouse cursor over the screen.
4. Press the
key to click on links or buttons on the web page.
Note: The mouse cursor will disappear from the screen if the mouse is idle for over 10 seconds. Press any of the
up/down/left/right arrow keys to re-display the mouse cursor on the screen.
Page 11

53
Setup
This section explains the most important functions to ensure that you can directly watch television with your new
digital receiver. Please note, additional adjustments may be required.
Note: Do not connect the digital receiver to the main power yet.
Connecting the Antenna and LNB (Low Noise Block) to the digital satellite receiver input
Connect the LNB on the satellite dish antenna directly to the digital receiver using the “LNB in” connector of the
receiver, by means of a coaxial cable. You may use the loop-through connector to connect to a second receiver.
Connecting the TV set
The digital receiver and TV set can be connected by means of a SCART cable (not supplied) or HDMI cable
(Optional).
Simply connect the two ends of the cable you select to use in connecting the receiver to the TV set. The SCART
connection ensures that audio and video signals are transmitted to the TV set in optimum quality.
The HDMI connection is recommended for HD TV. In case the TV has a HDMI input connector, a special all-digital
interface that provides the highest picture quality, connect the product to the TV with the HDMI cable.
Connecting the Network
The receiver connects to the internet through the internet router or DSL/cable modem in your home. The receiver
can connect to the router or DSL/cable modem via the Ethernet or Wi-Fi interface depending on the interfaces
supported by your router or DSL/cable modem equipment.
1. Connecting via the Ethernet port:
Connect one end of the Ethernet cable to the receiver and the other end to the LAN port at the router or DSL/
cable modem.
2. Connecting via the Wi-Fi interface
Set the options for the Wi-Fi:
• Network Name (SSID): Select the network name of your Wi-Fi access point from the list.
• Security Type (WEP, WPA, WPA2): The receiver supports WEP 40/128bit ASCII, WEP 40/128bit HEX,
WPA and WPA2. The settings of the security type of the Wi-Fi and the receiver shall be the same.
• Password: When using the security type, you must set the password. Enter the same password in the
Wi-Fi setting menu.
Note: To improve quality of service, keep the distance between the Wi-Fi access point and the receiver close.
Connection to a DVD recorder or video recorder
The DVD recorder or video recorder may be connected to the receiver via a SCART connection or the CVBS video
and analogue stereo audio outputs.
Note: The A/V output of the DVD recorder or VCR needs to be connected to the TV directly and cannot be
connected to the receiver.
Connection to a hi-fi system
The audio quality of digital TV and radio programmes can be enjoyed even more when reproduced through a hi-fi
audio system. To do this, use a RCA cinch stereo cable to connect the sockets marked Audio L/R on the receiver
to one of the inputs of your hi-fi system marked either Line, Aux or Extra.
If your hi-fi system is equipped with a digital audio input, you may use a digital RCA cinch cable to connect the
electrical (Coax) digital audio output of your receiver (socket SPDIF) to your hi-fi or Dolby Digital system.
The receiver is also equipped with an optical digital output. If your hi-fi system is equipped with an optical audio
input, you may use an optical cable to connect your hi-fi system to your digital receiver.
Connection to main power supply
After all the connections are done you can connect your digital receiver to power. Just before plugging a power
cable into the wall connector put the power switch, on the rear panel, in position 0 (off).
Page 12

54
CONNECTION DIAGRAM
TV
LNB
Out
LNB In
Audio R
Audio L Video
AC 230V
50-60Hz
30W Max.
Electrical shock hazard! Do not open!
Elektroschock-Gefahr! Nicht öffnen!
950-2150Mhz
13/18V
Max. 400mA
22Khz
Off On
Made in China
SPDIF
SPDIF
Optical
WiFi
eSATALAN
Home Network
eSATA devices
USB devices
Analogue Audio
Digital Audio
VCR/DVD Recorder
Video output only
The Installation Wizard
The first time you turn on the receiver, a “Quick Start Guide” menu will be open to assist you with the initial settings.
This menu will also appear after you do a Factory Reset.
Use the Green and Red keys on the remote control to navigate forward or back through the wizard steps. Press the
OK button to edit a parameter and select its value from the drop list that will appear on the right side of the screen.
COUNTRY AND MENU LANGUAGE
This is where you can set your country and the menu language related parameters of your digital receiver. Select
the language to be used for all menus.
Note: This does not change the language for information about programs shown in the EPG.
Press the Green key on the remote control to continue to Antenna settings.
Page 13
55
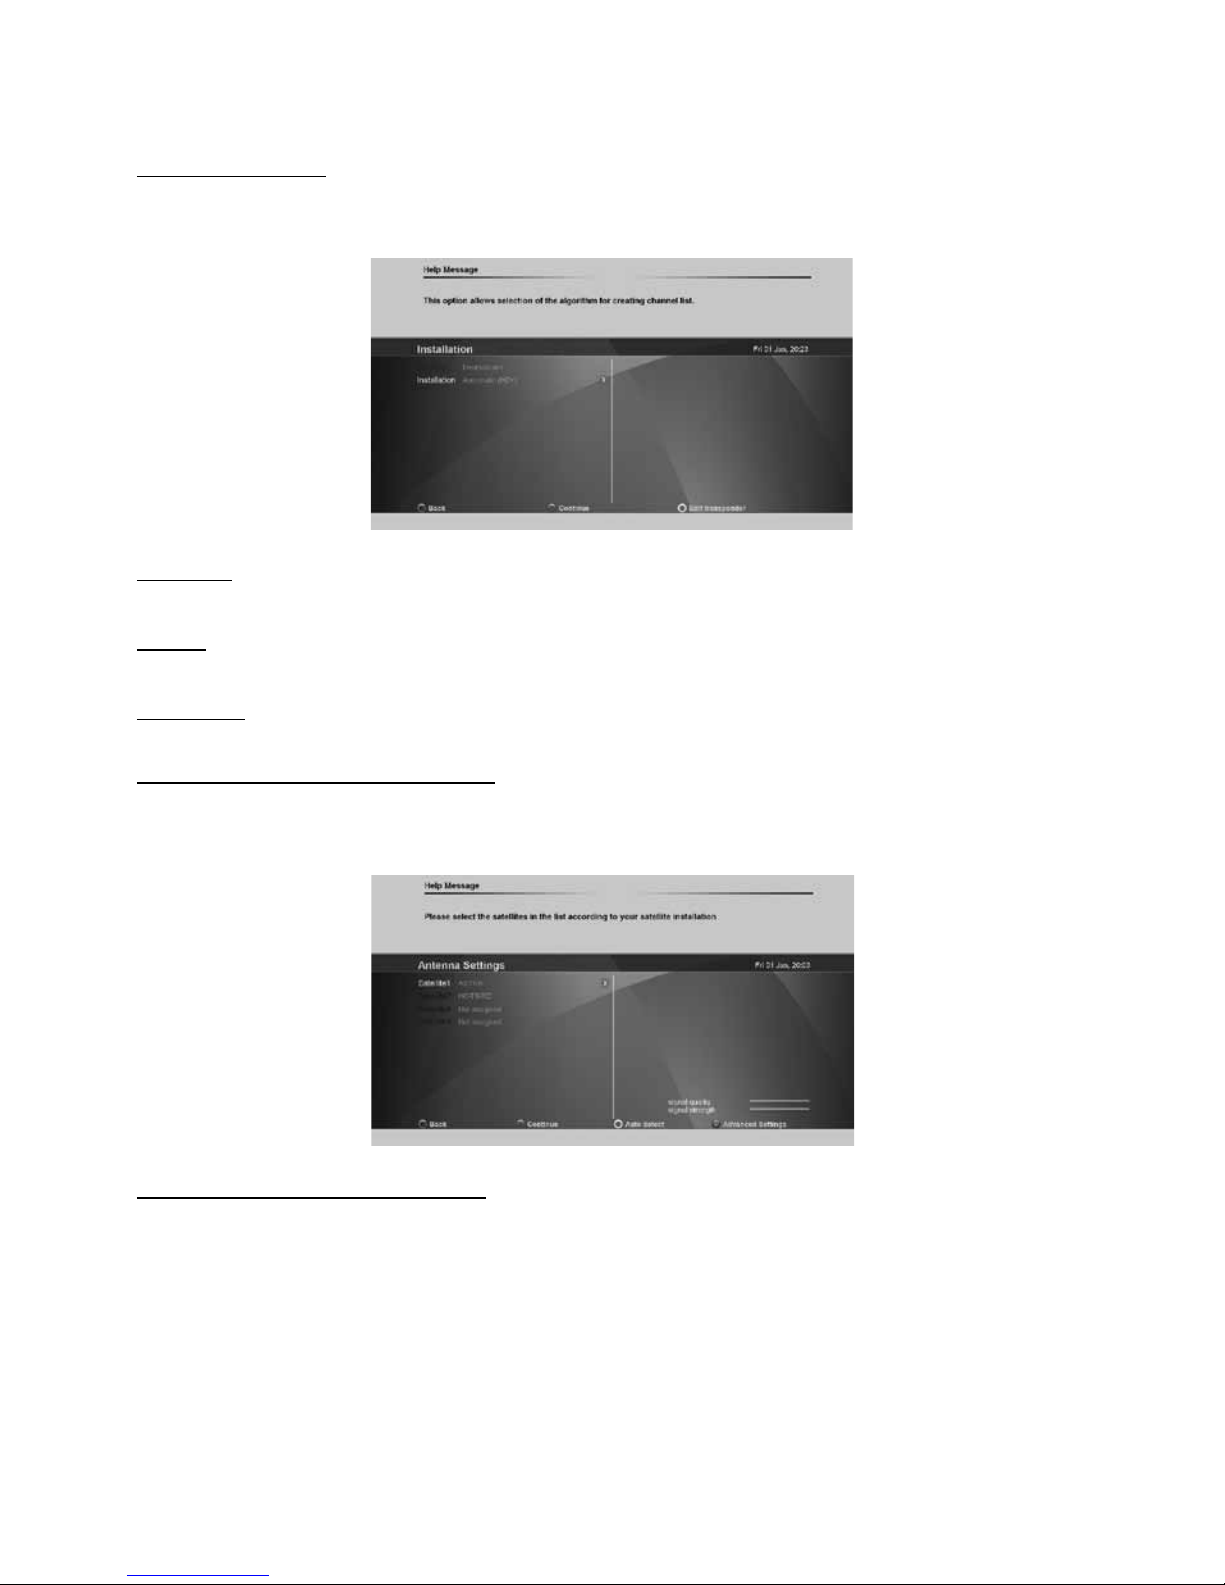
ANTENNA SETTINGS
Satellites
To set up the receiver for the type of antenna connected, follow the instructions below.
Select the satellites you wish to receive with the receiver. Each of the satellites in the built-in satellite list is
configured with predefined default parameters. You may press the Blue button - Advanced settings - to edit these
values. See below details of the Advanced Settings.
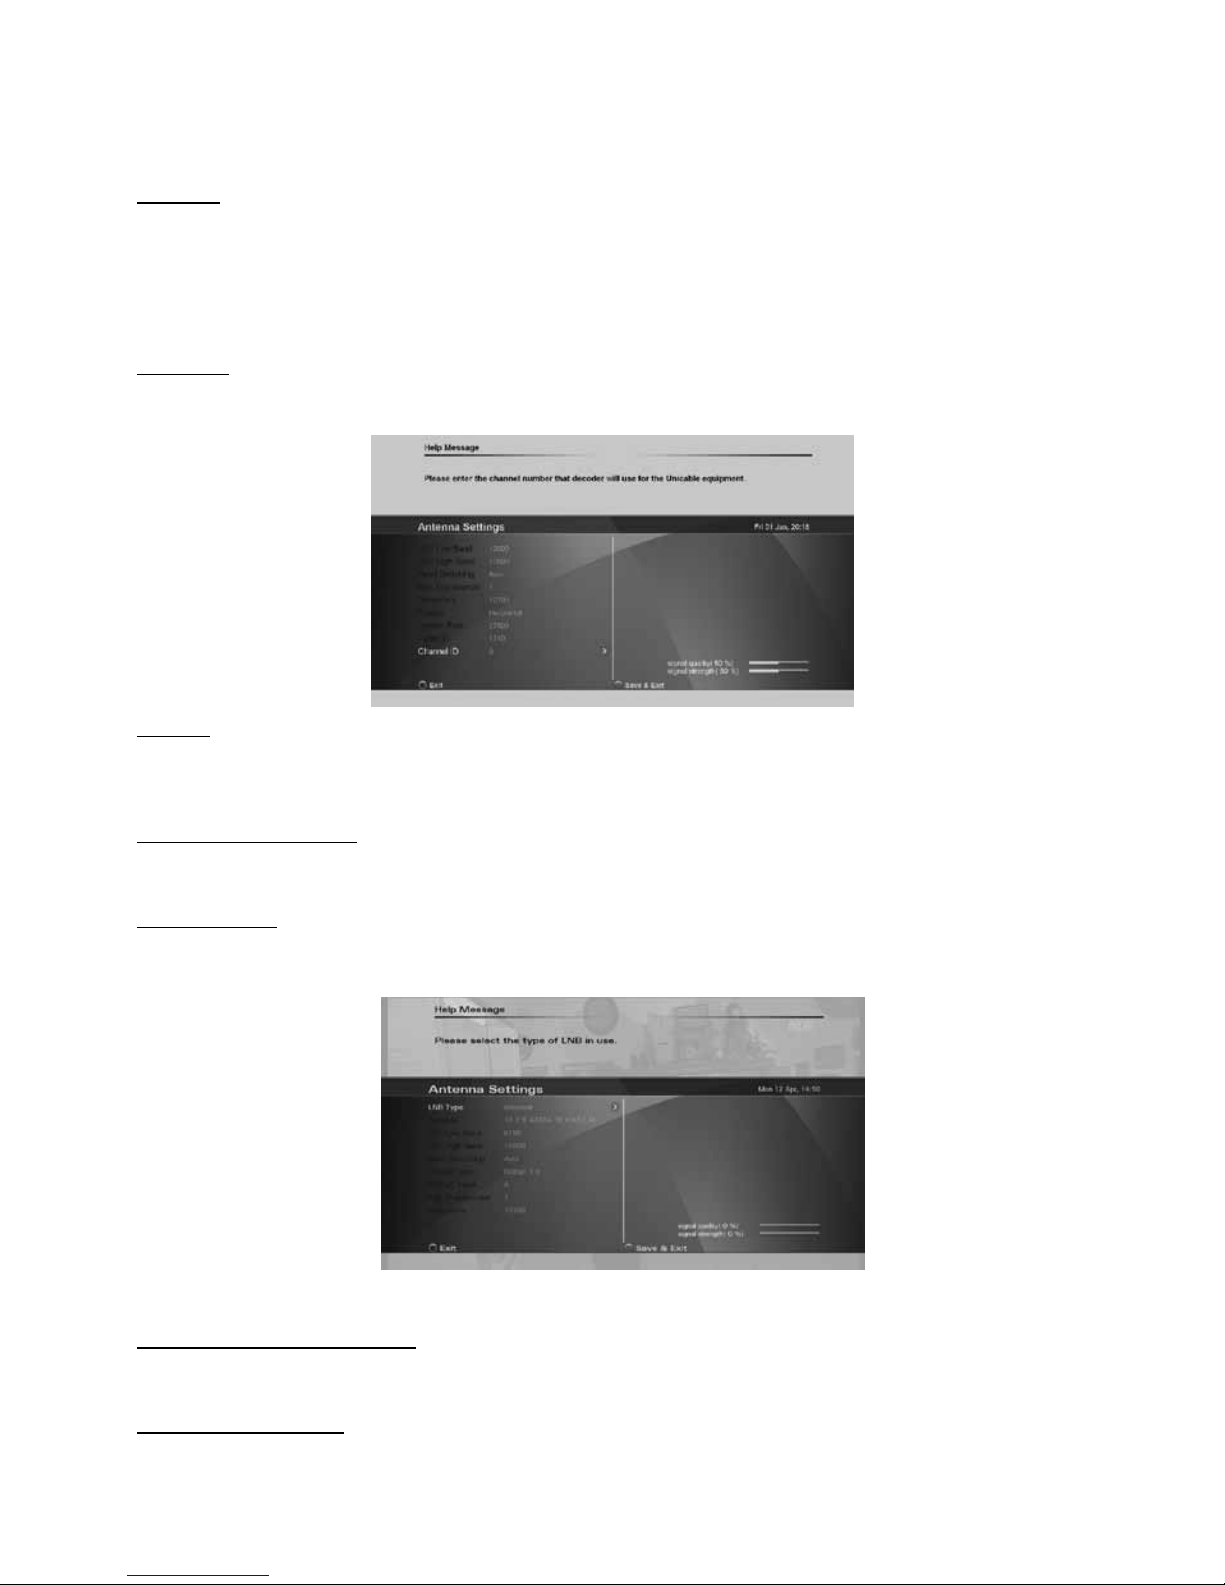
ADVANCED SATELLITE SETTINGS
LNB Type
Select Universal for most standard LNBs, or Unicable if you have a Unicable LNB or Unicable multiswitch.
Satellite
Use this option to select the satellite for which you would like to set the position. Use the color keys on the remote
control, as shown at the bottom of the screen, to delete or add a satellite from the satellite list and set their
individual settings.
LOF Low and High Band
The LOF (Local Oscillator Frequency) of the LNB is usually printed on the LNB itself or in its documentation.
You can set the High and Low LOF frequencies to match the LNB here.
Band switching
The receiver uses a 22kHz signal to control the band of the LNB. If you do not know if your LNB supports this
feature, set the option to Auto.
DiSEqC type and DiSEqC input
You can connect up to two cascadable DiSEqC switches to the receiver. This option allows you to set the type and
input port for each switch.
Reference transponder
This option allows you to set which transponder is used as the reference for the satellite signal strength.
Page 14
56
Transponder number
Use this option to select a transponder from the built-in transponder list. Once selected from the list, the Frequency,
Polarity and Symbol rate fields will be updated accordingly. Alternatively you can set these fields manually.
Frequency
Set the frequency of the reference transponder.
Polarity
Set the polarity of the reference transponder.
Symbol rate
Set the symbol rate of the reference transponder.
Tuner IF and Channel ID (Unicable only)
This option allows you to select the Unicable Tuner IF frequency (also known as User Band frequency) and the
channel ID for the receiver. In a typical Unicable installation, you are able to connect multiple receivers to a single
LNB or Multiswitch output, with each receiver set to connect to a different Unicable user band and channel ID.
Signal strength and signal quality bars
In two level bar meters, on the right side of the screen, the user can see the strength and quality of the signal
coming from the antenna dish to the tuners. These two meters can be used while doing a fine-tuning of the antenna
position. The antenna has to be adjusted to have maximum possible signal strength and signal quality.
Page 15

57
CHANNEL SEARCH
In order to view video programs, you must first do a channel search. Select the search scheme you wish the
wizard to follow:
• Select Automatic (HD+) to search for channels on HD+’s bouquets.
• Select Satellite search to search for channels on all transponders for the selected satellite
• Select Predefined List to restore a predefined channel list associated with the the Country you have
selected earlier. For some countries, a default channel list is shared.
Finding and storing the channels:
Once the options are set, press the “Green” key on the remote control to start the channel search. Once a channel
search is started, a progress bar and list of channels found will be displayed. At any time, you may stop the search
by pressing Exit on the remote control. After the channel search is complete, press the “Green” function key on the
remote control to save the channel list and exit.
Page 16
58
Basic Operation
PROGRAM NAVIGATION
• You can use the numeric keys on your remote control.
• You can use the directional keys “Up” and “Down” on your remote control or on the front panel of the
receiver.
• You can use the P+ and P- keys on your remote control
• Select your viewing list by pressing the “TV/Radio” or “FAV” key, select with the navigation key ”Left”
or ”Right” the programme list, and confirm the selection with “OK” key.
VOLUME CONTROL
Volume Control allows you to adjust the audio volume.
1. Press the Volume +/- key to adjust the audio volume.
2. Press the MUTE key to stop the audio temporarily.
Note: The mute function remains set while you switch channels.
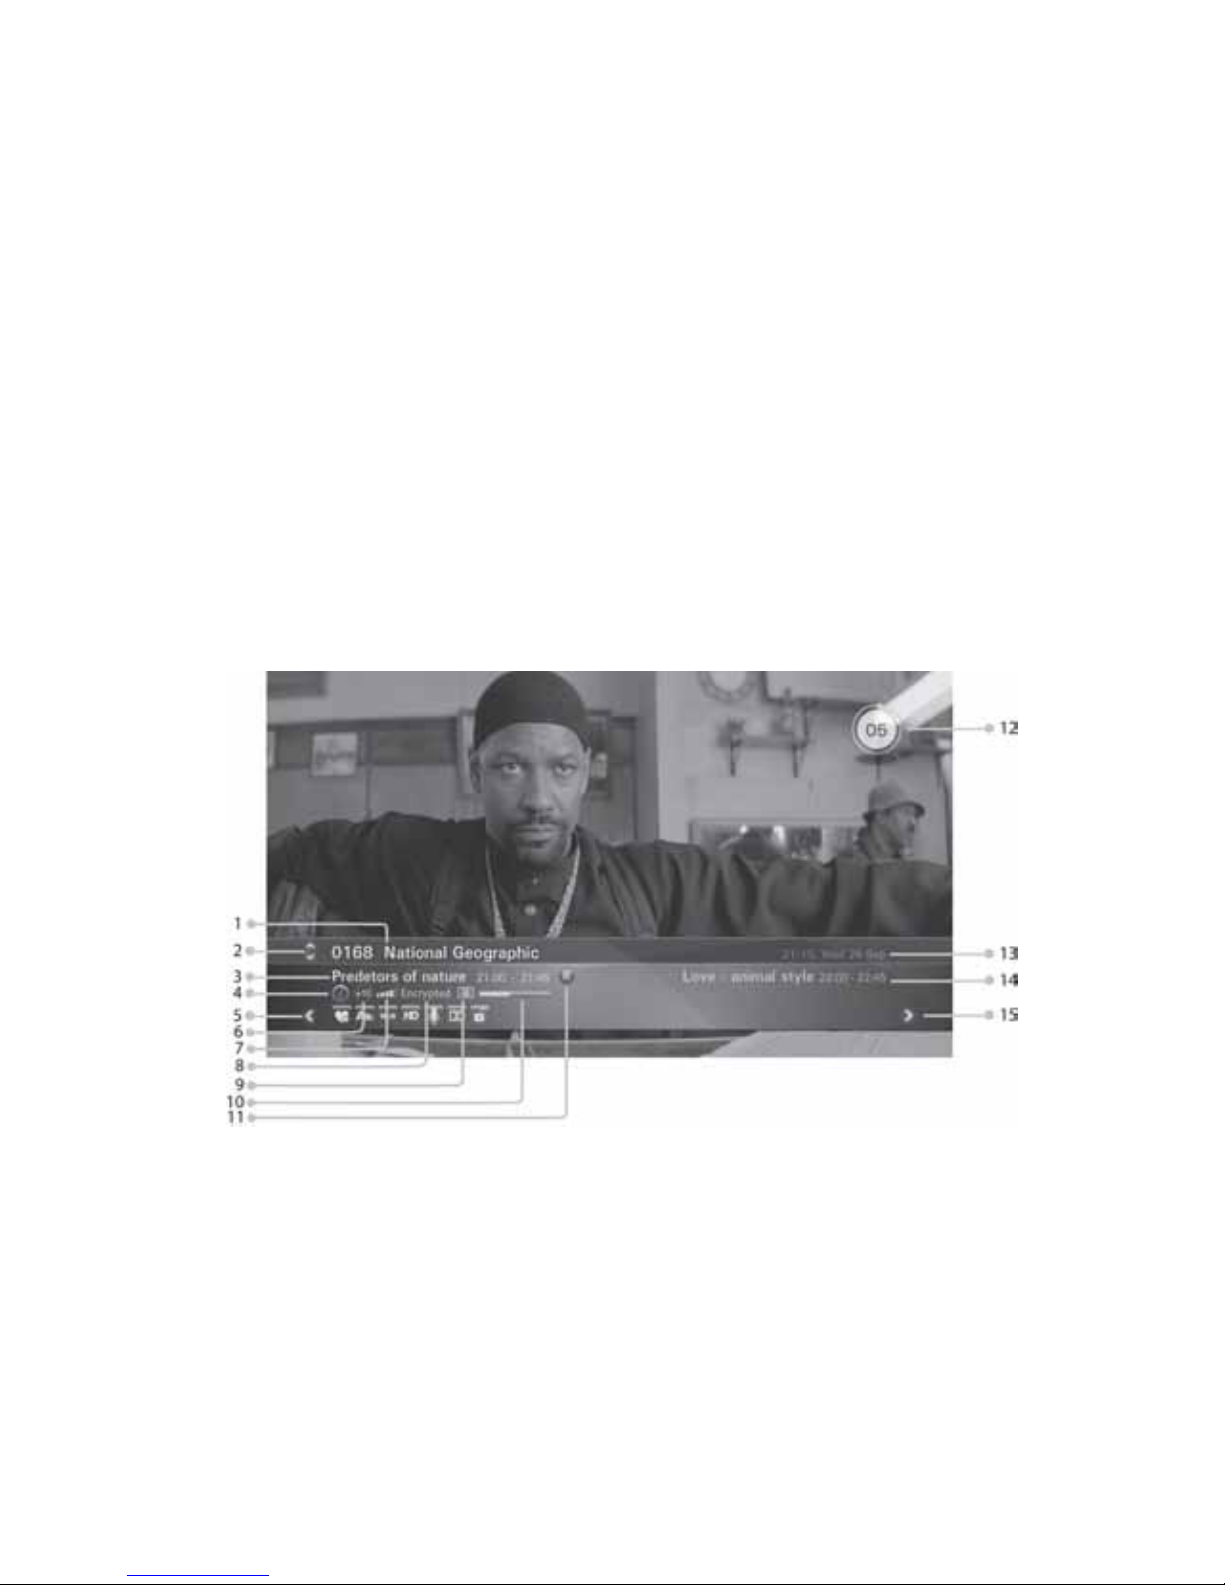
PROGRAM INFORMATION (INFO-BANNER)
Program information is always displayed for a certain period of time whenever you switch channels. You can view
the program information by pressing the Info key while watching a program. Press the Exit key to hide the infobanner.
1. Channel number and name
2. Use the Up and Down arrow keys of the remote control to change channels
3. Current program name and timeline
4. HbbTV web service notification - The icon appears when a web-based service is available along the
broadcast on this channel. Press the red color key on the remote control to launch the service on screen
5. Use the Left arrow key of the remote control to scroll through valid options for the current channel and
program. The icons on the right side describe the options - see below detailed description for each icon.
Page 17

59
6. Parental rating information (displayed if available with the program broadcast)
7. Satellite signal quality bar
8. Program encryption information
9. Teletext information (displayed if available with the program broadcast)
10. Program timeline information
11. Active recording notification
12. Volume
13. Current time and date.
14. Name and schedule of the next program
15. Use the Right arrow key of the remote control to scroll through program information, mini TV Guide, Full
TV Guide and event scheduling.
Sleep timer
Subtitles
Resolution
Parental control
Audio format
Add to favorite
Soundtrack
Format
ADD TO FAVOURITE
Scroll left with the Left arrow button when the Info-banner is displayed. Add the current channel to one of the
available favourite lists.
SUBTITLES AND SOUNDTRACKS
Some TV broadcasters provide several audio channels (Soundtracks) or subtitles information, carrying commentary
in various European languages, to accompany the TV image.
Press the ’’Audio/Subtitles” key on your remote control or scroll left with the Left arrow key when the Info-banner
is displayed until the Subtitle or Soundtracks titles are displayed with the available subtitling or audio languages.
Use the directional keys on the remote control to make a selection.
Page 18
60
ASPECT RATIO
When the info-banner is displayed, scroll left with the Left arrow key until the Aspect ratio title is displayed. Press
the Down arrow key and use the arrow keys to set the picture aspect ratio.
RESOLUTION
Resolution allows you to set the video resolution of the picture.
1. Press the V-Format key.
2. The current resolution will be displayed.
3. Each time you press the V-Format key, the resolution changes in the following sequence: 576i/p -> 720p ->
1080->1080p -> original. Alternatively, scroll left with the Left arrow key till TV Resolution title is displayed.
Press the Down key to set the resolution.
AUDIO FORMAT
When the program info-banner is displayed, scroll left with the Left arrow key until the Audio format banner is
displayed. Press the Down arrow key and use the arrow keys to select the audio format over the digital audio
outputs of the receiver.
Notes: Dolby
TM
Digital and DolbyTM Digital Plus transmissions are down mixed to analogue stereo signals or looped
through “as is” over the digital audio outputs.
Some Dolby (TM) broadcasts contain stereo or stereo+center audio data and not complete 5.1 audio channels.
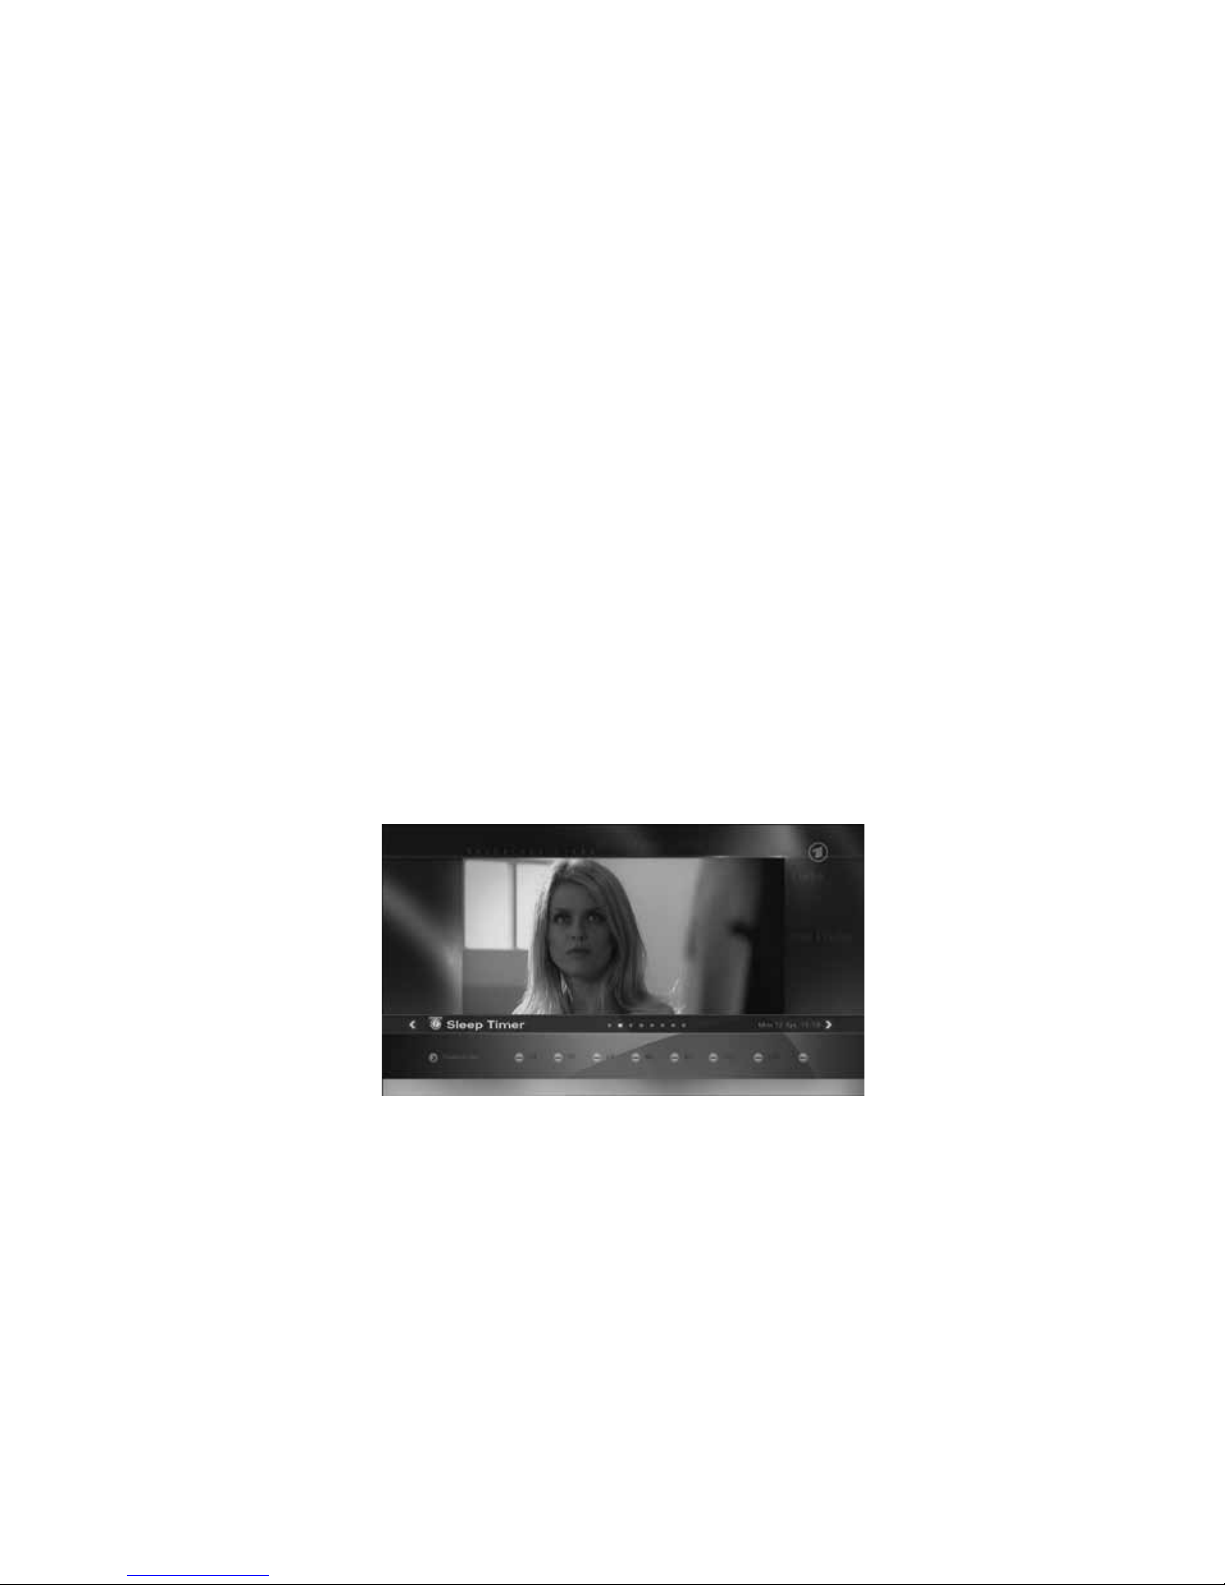
SLEEP TIMER
You can use the Sleep timer to specify a time (e.g. at night) at which the receiver is to switch to standby mode.
This is particularly useful if there is no person available at this time to manually switch the receiver to the standby
mode. Scroll left with the Left arrow key until the Sleep Timer title s displayed and set the time for automatic switch
into standby mode.
Note: When switching to standby mode, the receiver is also able to switch off some TV sets with “Slow Blanking”
on the SCART connector.
Page 19

61
TELETEXT
If teletext information is available on the current channel, the
symbol will be shown in the channel information
banner. You can press the
on the remote control to display this information. You can use the numeric keys
0-9, on the remote control, to enter a three-digit page number.
STANDBY MODE
You can put the receiver in standby mode to reduce the power consumption while the unit is not in use. The
standby mode turns off some parts of the receiver, but does not fully turn off the receiver, allowing it to start up
again very quickly when the unit is turned on. If Economic is set (see User Preferences section), the receiver will
enter a deep sleep energy saving mode when switched to standby mode. When in standby mode, the standby LED
indication will be shown on the front panel.
The Main Menu
Besides the programme that is received from the TV station, your digital receiver is able to display different
information on your TV screen like: Volume bar, Menu, Pop-ups… All those things are used as an interface
between the receiver and the user (also called GUI - Graphical User Interface or OSD - On Screen Display). The
actual GUI display generated by your receiver may differ slightly from those shown on the picture, as continuous
updates of the software may alter the appearance or even the structure of the menus.
Navigation within the GUI display is effected by the four directional keys and “OK” key, which is used to confirm a
selection, as well as in some cases by means of the coloured function keys.
To enter into main menu, press “Menu” on your remote control. Being in a menu and pressing “Menu” key you will
completely exit from all the open menu pages. Using “Exit” key you will exit only from the last open menu page.
TV
Select “Live TV” to watch live TV from the default channel list.
GUIDE (EPG)
There are two types of Guides - Full Guide and mini Guide. This entry provides direct access to full TV and Radio
listing (Full Guide) of a specific day within the coming week.
The EPG (Electronic Program Guide) gives you information about current broadcasted programmes as well as the
schedule and information for future programmes. The mini Guide is accessible through the program info-banner.
Page 20

62
See detailed description on the Full and mini Guides in the Program Guide chapter.
Note: In order for the EPG to function properly, the time and date must be set correctly.
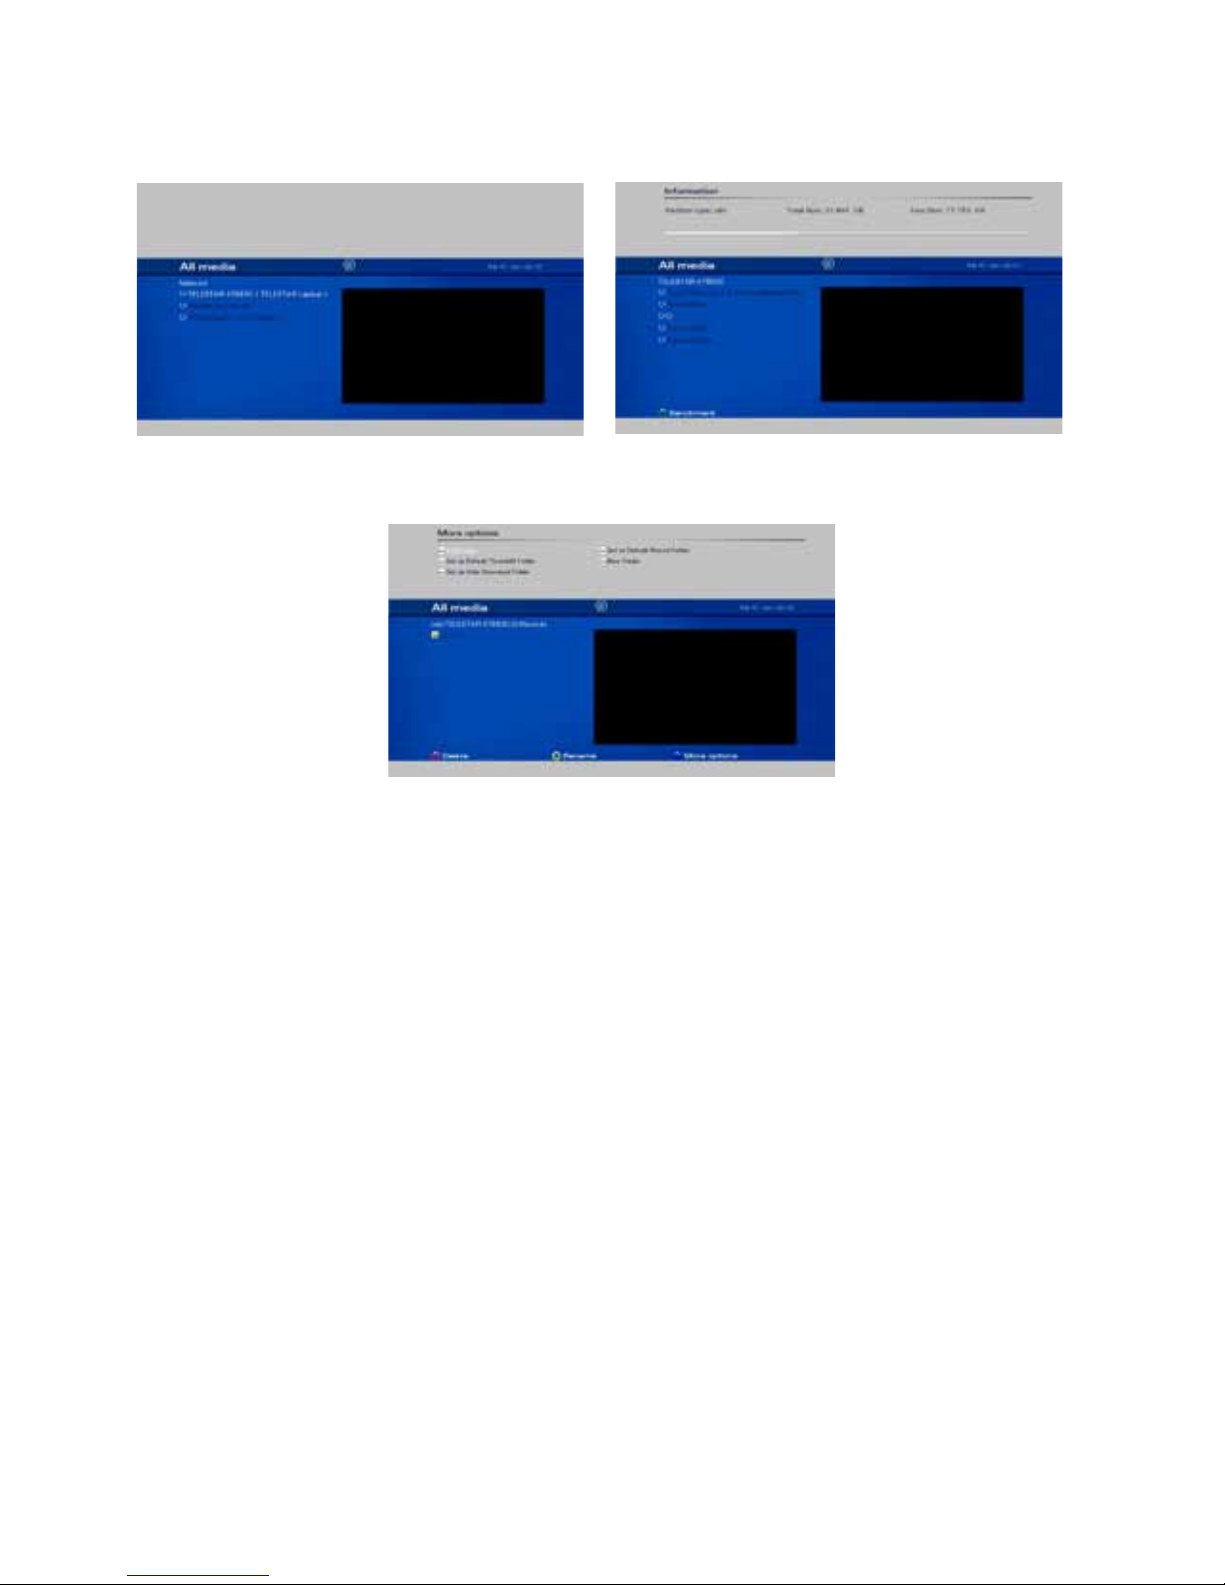
MEDIA
This entry provides various filters allowing direct access to pre-defined media folders:
• Select “All” to view the list of all media files available on the storage device.
• Select “Movies” to view a list of all the movie files on your storage device
• Select “Music” to view a list of all the music files on your storage device i.e. .mp3 files.
• Select “Photos” to view a list of all the photo files on your storage device i.e. .jpg or. bmp files.
• Select “Home videos” to view a list of all the home video files on your storage device i.e. .avi files from
your video camcoder.
WEB
This entry provides direct access to HD+ SmartTV portal.
Note: Internet-based services and applications are provided by third parties, are not under TELESTAR´s control
and can be terminated at any time without any notice.
CONTROL PANEL
To access “Control panel” , press “Menu” and scroll down to select “Control panel”. You may select the a settings
category using the navigation keys.
Please see the Control Panel chapter later in this manual for a detailed description of all settings and
their options.
HbbTV Applications
Your receiver supports HbbTV - hybrid reception of content from satellite and from the internet (HbbTV
= Hybrid Broadcast and Broadband TV).
In order to enjoy HbbTV services, your receiver must be connected to the internet (through wifi or LAN
connection).
Through HbbTV, you will be able to access new services from leading broadcasters and online services and
application providers – including video on demand (VoD), interactive advertising, web applications, games and
social networking as well as programme-related services such as digital text and EPGs.
The HbbTV services are provided and signalled to the receiver by the broadcasters (i.e. ARD, ZDF, RTL etc.).
As soon as you tune to channel, the receiver will identify the HbbTV service of the channel (if available) and will
launch it through its built-in web browser. When the HbbTV service is launched, some keys of the remote control
will have new functionality. Follow the instructions on the screen to navigate and operate the service accordingly.
Pressing the EXIT key of the remote control will leave the HbbTV service and will return to you the full control of
the receiver.
The HbbTV services may be disabled, launched automatically or provide on-screen notification - please see
more details on HbbTV settings under the User Preferences section.
Note: HbbTV services rely on your internet connection and therefore performance depends on the speed of your
connection.
Note: Like any other internet-based services and applications, HbbTV services are provided by third parties, are
not under TELESTAR´s control and can be terminated at any time without any notice.
Page 21
63
Connecting external USB & eSATA devices
Your digital receiver is equipped with a USB and eSATA connections at the back panel.
When you connect a mass storage class device, the receiver will automatically initialize the device and will display
an indication that the device is connected.
Notes: - Supported file systems - NTFS, Fat16, Fat32, Ext2
- Format Device requires entering the PIN code (default ‘0000’).
Program Guide
The following sections provide detailed description of the two types of program guides - Full Guide and mini Guide.
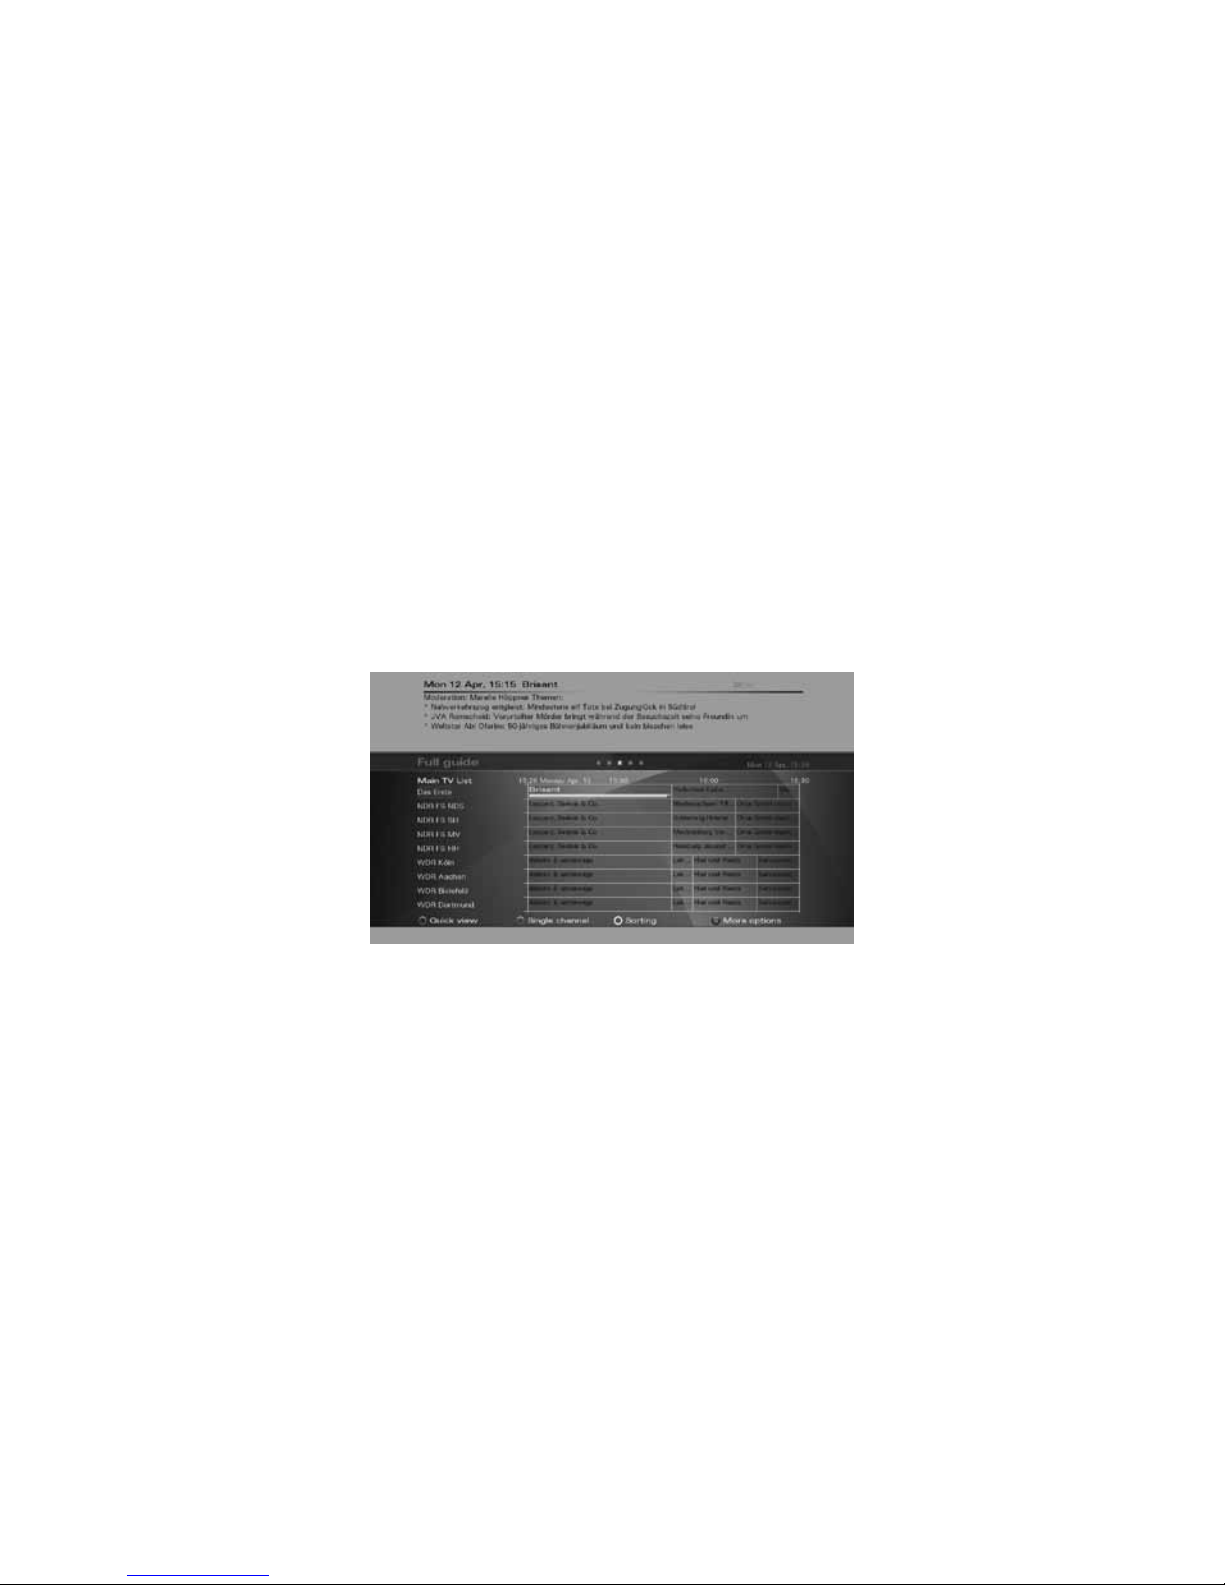
FULL GUIDE - GRID VIEW
The Guide grid view can be displayed by pressing the Guide key , selecting the Guide entry in the Main menu or
by scrolling right with the Right arrow key when program info-banner is displayed.The Guide data is provided by
the TV broadcast channels. The receiver will display the EPG data that is available for each channel. However, the
receiver can only display what is provided by the broadcast and has no influence on the quality or reliability of the
data. While you are watching TV, the data will be loaded and displayed while you using the Guide.
Note: The message «No EPG Information» means that the data is not provided by the channel, or the data is not
yet received.
The receiver is able to display the programs available on the channel currently selected, indicating the current
programme as well as all following programs. This allows you to quickly obtain an overview of programs being
broadcasted that day, and possibly those of the next several days as well, depending on the availability of the EPG
data from the broadcaster. You can use the directional keys “Up” and “Down” to select specific channels and the
directional keys “Right” and “Left” to search forward and backwards in the programme schedule. The synopsis of
the programs you navigate through is displayed above the grid view. Use the Red key on the remote control to
toggle between Full Guide grid view and Quick View (see below).Use the Green key on the remote control to toggle
between Full Guide grid view and a Single Channel View (see below).
Page 22

64
SINGLE CHANNEL VIEW
Press the “Green” function key on your remote control to toggle between the Full Guide grid view and the Single
channel view. The Single channel view makes it easier to see an overview of programs or an individual channel,
e.g. to search for repeats of a movie or to control the timer for a specific channel.
MINI GUIDE
When the program info-banner is displayed, scroll right with the Right arrow key to the mini-Guide banner. The
program synopsis will be displayed above the banner. Press the Down arrow key and navigate with the arrow keys
through the programs listed on the mini Guide banner. The synopsis of each program is displayed and you may set
a reminder for future programs by pressing the OK key on the remote.
Control Panel
In this chapter, all options of the Control Panel menu will be described.
In each of the settings screens, use the Right arrow key to view the available options for each parameter on the
right side of the screen, press OK to effect a selection and the Left arrow key to go back to the parameter list on
the left side of the screen.
USER PREFERENCES
This is where you can set the basic parameters of your digital receiver.
Start-up mode
Select whether the receiver should display the main menu or switch to the last viewed channel when starting up
from standby mode.
User interface
Set user interface parameters such as the duration of displayed menus, the transparency level of the menus and
the font size used in menu screens.
History depth
You can set the history of previously selected programmes from 1-5, and then use the “Back” key on the remote
control to switch between them.
Page 23

65
Energy mode
You can switch the receiver into three different stand-by modes:
• Rapid start-up : If you prefer to get picture and sound immediately after pressing the “On” button, use
this option.
• Light stand-by: Power consumption is reduced while the unit is not in use. This mode turns off some
parts of the receiver, allowing it to start-up again quickly when the unit is turned on.
• Economic: The receiver will enter into a deep-sleep energy-saving mode (< 1W, extended start-up time
appr. 25 seconds). When in “Economic” mode, only the stand-by LED indication will be lit.
Auto standby mode
Set the period of time upon which the receiver will automatically enter the standby mode if no user interaction
took place.
HbbTV mode
• Disabled - HbbTV services/applications are disabled.
• Auto-start - HbbTV services/applications are automatically launched.
• Notify - HbbTV services/applications are notified on screen and the user may choose to launch them
(most of the time by pressing the red color key of the remote control).
• Auto-red - HbbTV services/applications are launched in a background mode. Press the red color key
of the remote control to interact with the app.
TIME/DATE
Use this menu to set the time and date.
Automatic Time Update
If the “Automatic Time Update” is set to “On”, the receiver will receive the time and date automatically from the
broadcast signal.
Note: Some networks may transmit incorrect time or date.
Date
Use this option to manually set the date.
Local Time
Use this option to manually set the time.
Time Zone
The DVB standard broadcast time and date is for the GMT time zone. In order to display the local time correctly,
you must set the local time zone.
Page 24

66
Note: If daylight savings is enabled then the receiver is changing automatically the time on the following
condition (valid for Europe with no time limit).
• summer times begins and ends at 1:00 am universal time (Greenwich mean time)
• it begins the last Sunday in March
• it ends the last Sunday in October.
This is done in disregard of DVB broadcasted information.
RECORDING
Start/Stop recording guard intervals
Set the start/stop guard interval for your scheduled TV recordings.
USB power during standby mode
Set to “Off” in order to switch off the power of the connected USB drive during standby mode in case there are
no scheduled recordings to be performed.
Note: some USB/eSATA storage devices may not switch smoothly back on.
Recording mode
When set to “On”, you can switch channel during recording of another channel if both programs are broadcast on
the same satellite transponder.
Note: Does not apply to HD+ recordings.
LANGUAGES
Use this option to set your preferred language for the on-screen menus, primary and secondary subtitling and
soundtracks languages.
PARENTAL CONTROL
Not all TV and radio programmes are suitable for listeners or viewers of all age groups. The digital receiver
therefore provides an active parental control (lock) function, allowing you to block individual channels by means
of a four-digit security PIN code (Personal Identification Number) or restrict content viewing based on restriction
rating data if available with the program broadcast. The default PIN is ‘0000’. Use the Change PIN option to set
a new PIN any time. Use the Set Access Rights Level option to control the access to channels, system settings
or both.
Note: In case you forget your pin code, call customer service.
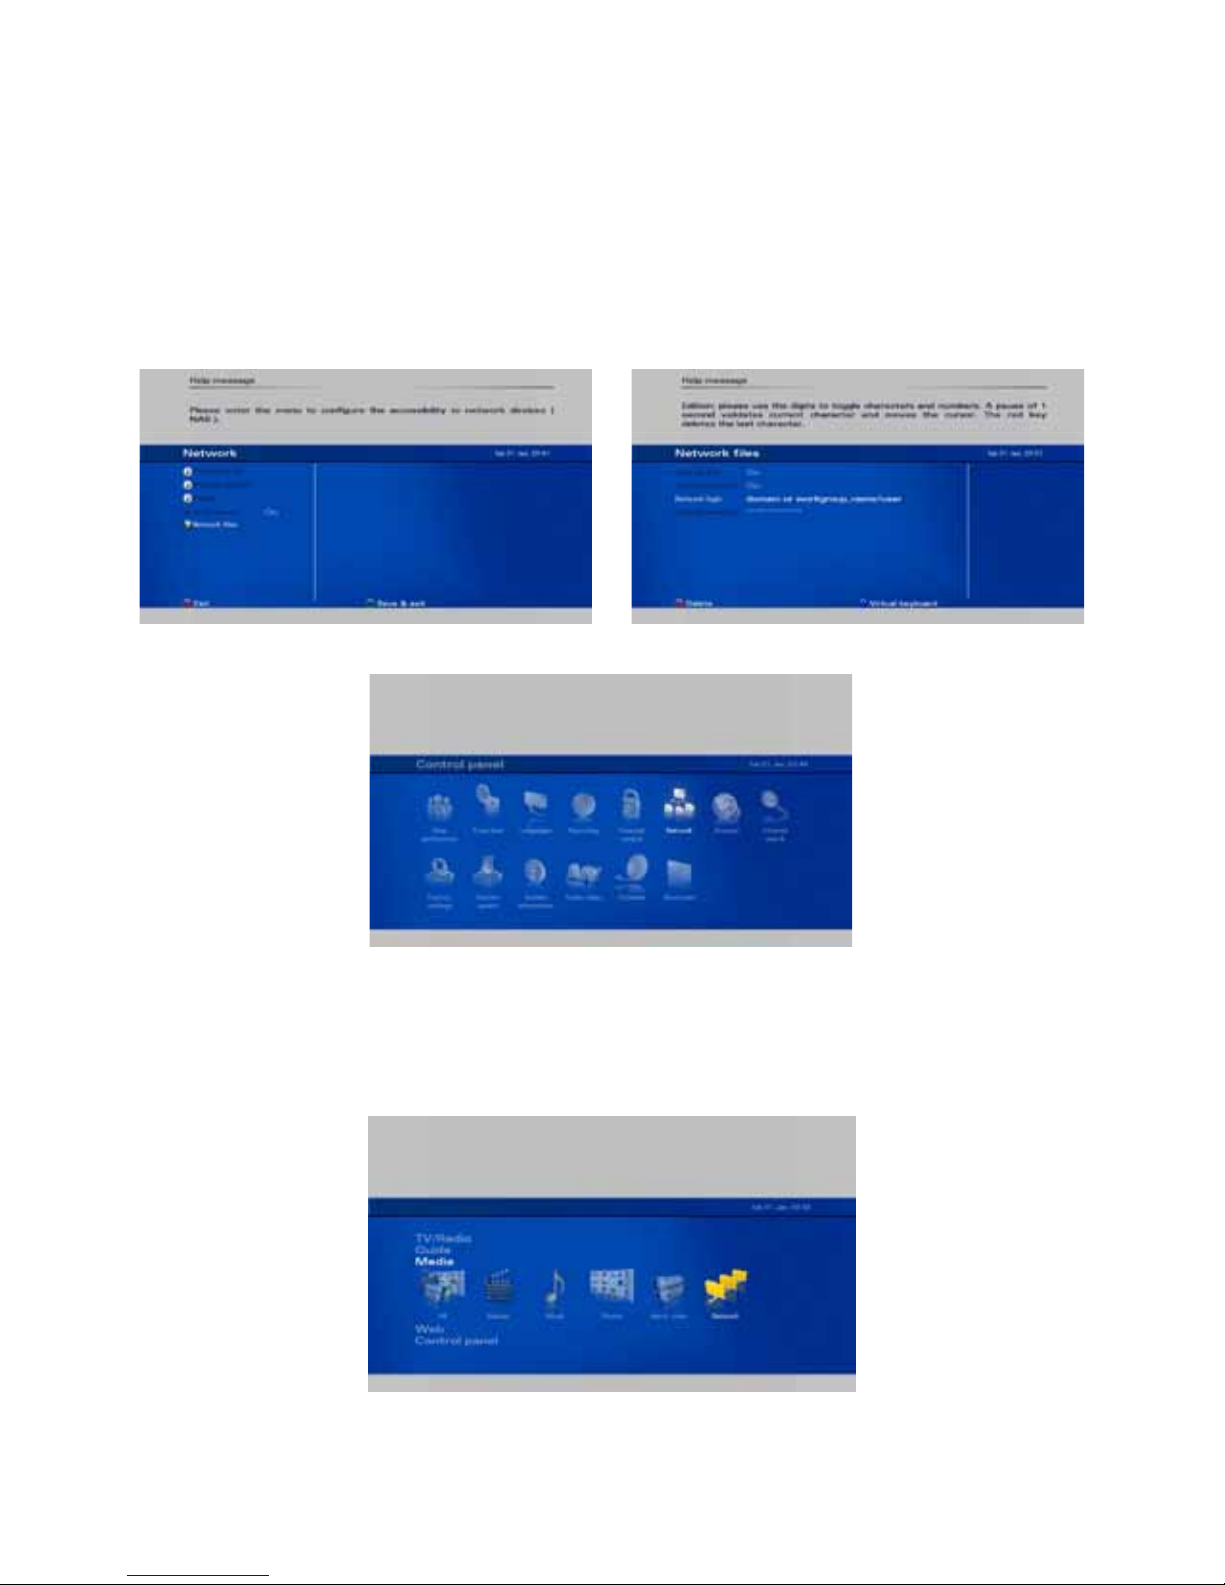
NETWORK SETTINGS
The receiver can connect to the internet through your home network router or DSL/cable modem. Connection to
the internet allows you to access internetbased content, applications and services offered by the broadcasters or
over the public internet. Use “LAN” (wired) if the receiver is connected to your home network over the Ethernet port
or WLAN (wireless) if it connects to a wireless router in your home network.
Page 25

67
Status
Check the status of your network connection.
Network Storage
See page 28 on “video, photo and music streaming via your home network”.
Network player
Set the quality of online video accessed through HLS streaming.
WEB BROWSER
Set the parameters associated with browsing web pages and online media using the built-in web browser.
Virtual on-screen keyboard
Set whether the virtual keyboard should automatically appear on screen when the web page includes an input box.
Note: You can also use the teletext button to show/hide the virtual on-screen keyboard.
USB Keyboard Layout
Set the layout of the connected USB keyboard.
Underscan
Activate the underscan if web pages are not properly displayed on your TV screen.
Over clocking
Set system speed, may result in 20% improvement to the system performance.
Delete Cookies
All downloaded cookies will be deleted.
CHANNEL SEARCH
The receiver supports automatic and advanced channel search modes. The automatic channel search was
described under the chapter of “the installation wizard”. The following section focuses on the advanced channel
search which is a customized search mode.
Advanced channel search
The advanced channel search allows you to make a channel search with customized search parameters.
Satellite
Use this option to select which satellite to search.
Frequency
Use this option to set the frequency of the transponder to search.
Polarity
Use this option to set the polarisation of the signal between horizontal,
vertical, right and left circular.
Page 26
68
Symbol rate
Use this option to set the symbol rate for the signal.
FEC
Use this option to set the FEC (Forward Error Correction).
PIDs
Use this option to set the PIDs between automatic and manual. If you choose manual, you can set the individual
Audio and Video PIDs and the PCR.
Video PID
Use this option to manually set the Video PID.
Audio PID
Use this option to manually set the Audio PID.
PCR PID
Use this option to manually set the PCR PID.
Channels
• Select All to search for all Free-to-Air and encrypted channels.
• Select Free-to-air to search only for Free-to-air channels.
• Select HD+ to search channels on HD+’s bouquets only.
DVB-S2
Define whether searching shall cover DVB-S2 transponders as well.
Finding and storing the channels
Once the options are set, press the “Green” key on the remote control to start the channel search. Once a channel
search is started, a progress bar and list of channels found will be displayed. At any time, you may stop the search
by pressing Exit on the remote control. After the channel search is complete, press the “Green” function key on
the remote control to save the channel list and exit.
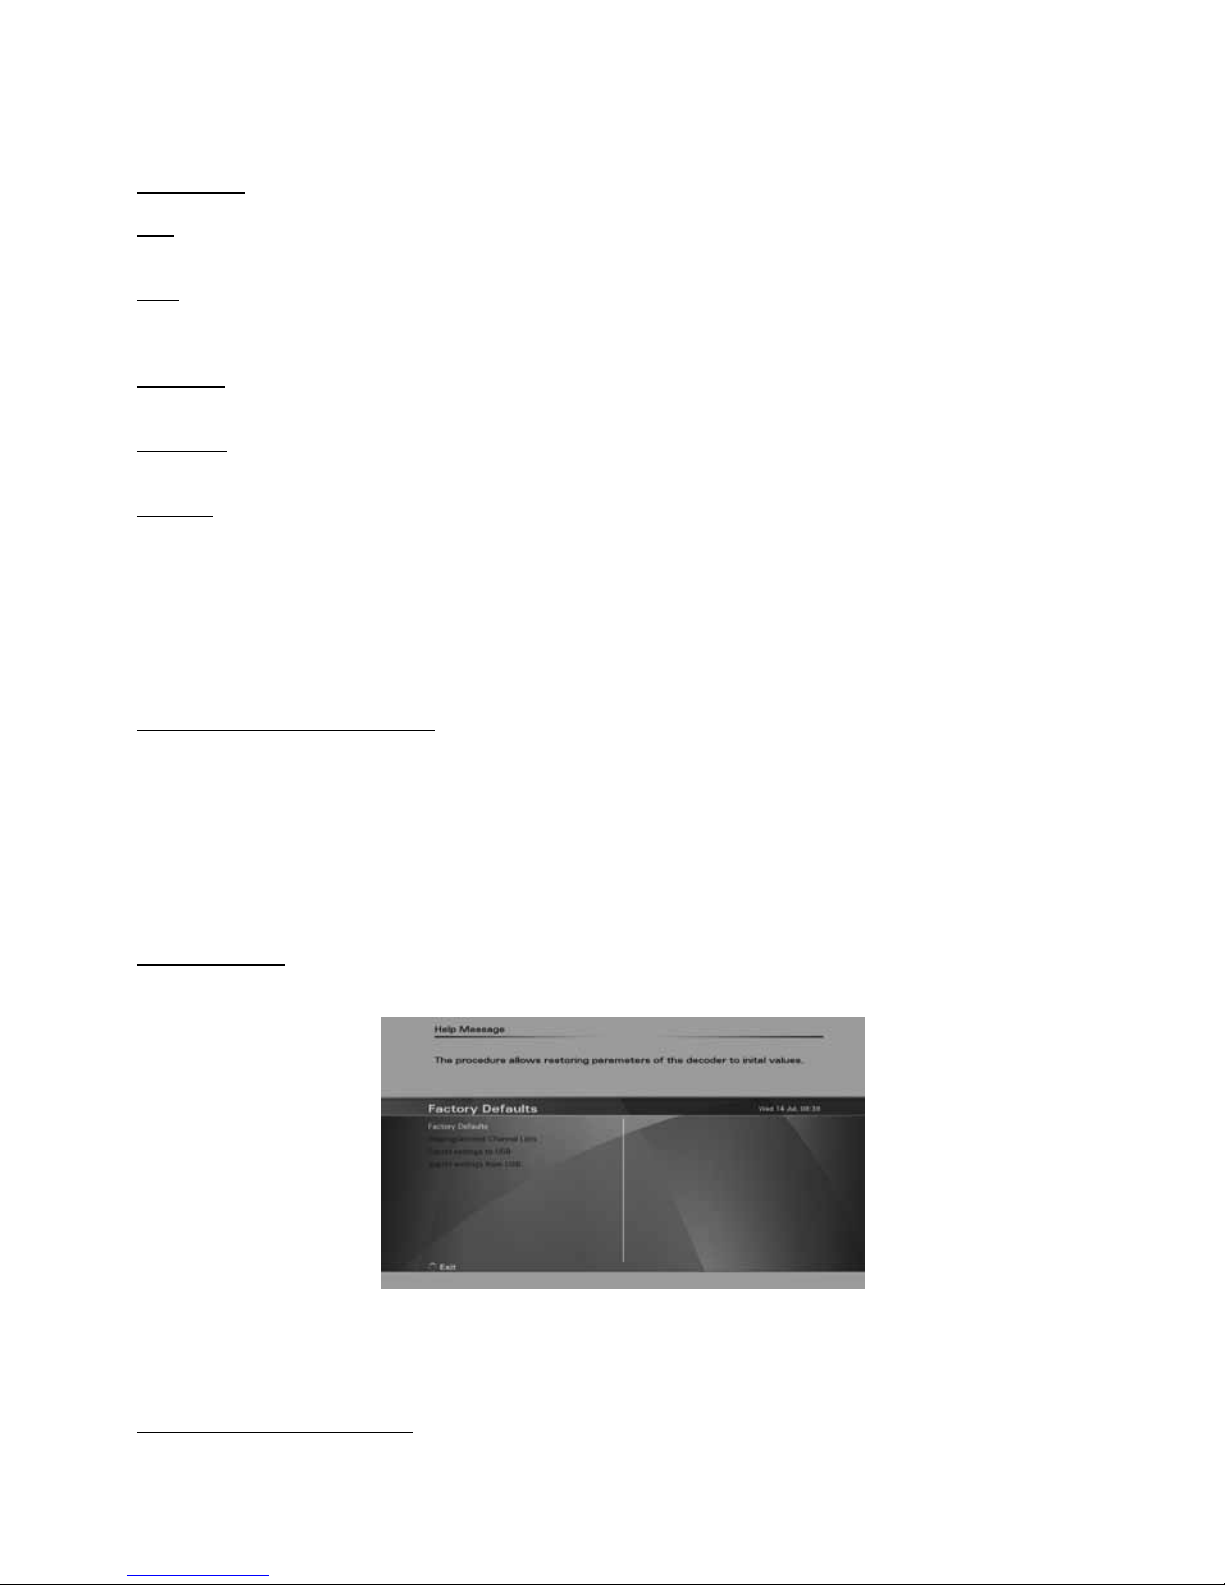
FACTORY SETTINGS
Use this option to reset the receiver to default settings. This may be necessary when a large number of settings
have accidentally been made incorrectly, for example.
Access to factory defaults is protected by a PIN code (‘0000’ by default).
Factory Defaults
Press the “OK” key and confirm with the “Green” function key, if you want to reset the unit to the “Factory default”
settings.
Note: Using this option will delete all data stored in the channel lists, and favourite lists.
After this, the “Installation Wizard” will be open. Please refer to the Installation Wizard section of this user manual
for further information.
Preprogrammed Channel Lists
Use this option to reset your TV channel lists to the receiver’s preprogrammed default program lists.
Page 27
69
SYSTEM UPDATE
This option supports three ways to update the software of the digital receiver: Over The Antenna (OTA), through
the USB port or over the internet. When this option is executed, the receiver will automatically search for new
software version at three sources in the following order - (a) on a USB disk, (b) over the internet and (c) over the
satellite. As soon as identifying the first source containing a newer software version, the receiver will reboot into
a software download mode and will start downloading the new software from the identified source. In order to
update from a USB disk, you need to download the updated software file from our website to the root directory on
the USB disk first.
The USB disk should be plugged in the USB port before executing the System Update option. Do not remove
the USB disk until the complete software update process is completed. In order to update over the internet, the
receiver must be connected to the internet over a LAN or WiFi connection. Remove any USB device from the USB
port before you execute the System Update option. If the System Update option is executed but there is no USB
disk connected and no internet connection, the receiver will search for a newer software version over the satellite.
This procedure may take very long time depending on the size of the new software file and therefore it is
recommended to use the USB or internet methods described above for software updates.
After the new software file was downloaded, the receiver will store the new software and automatically restart. All
user preferences and channel lists will remain unchanged.
Caution: Be careful not to interrupt the software update process by removing the USB stick, disconnecting the
internet or turning off the receiver, or otherwise interrupting the installation process. If the installation is interrupted
by accident, such as by a power failure, the receiver may not boot up properly afterwards.
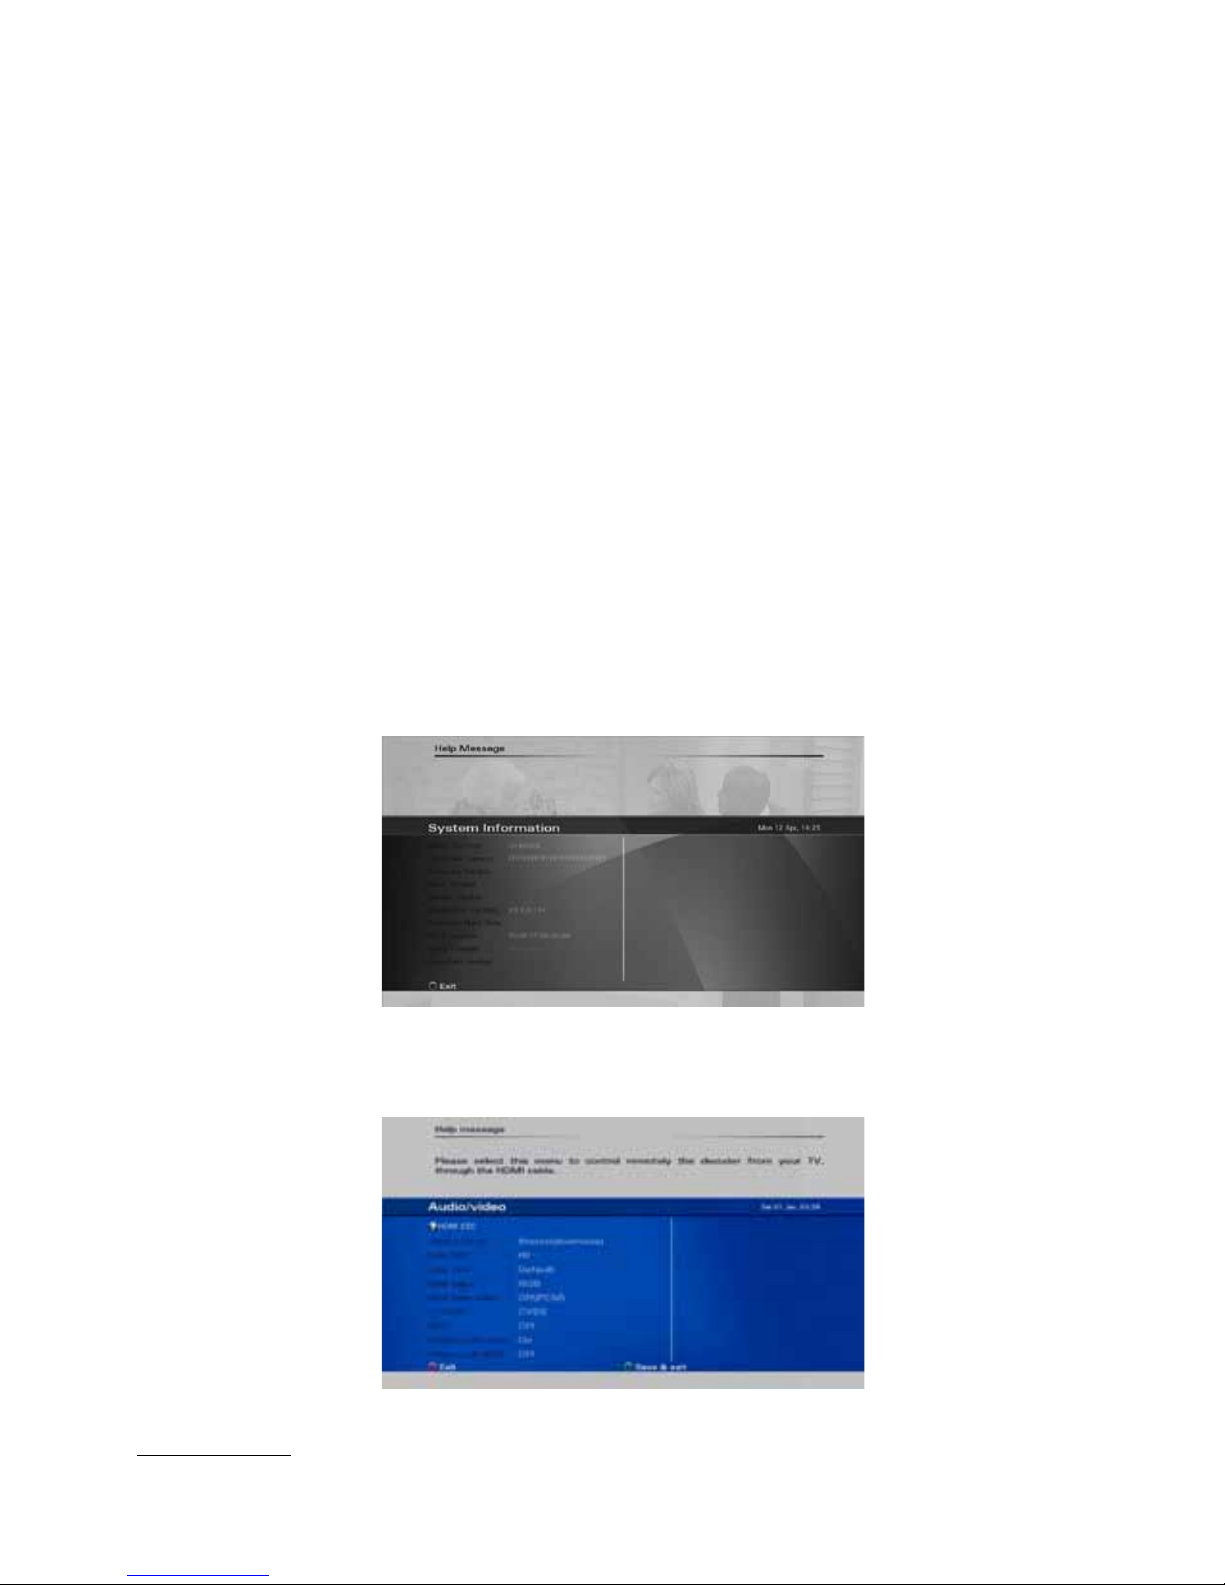
SYSTEM INFORMATION
This menu displays information related to the software and hardware version of the receiver. This information may
be required if you request service or repair.
AUDIO/VIDEO SETTINGS
This is where you can set the basic audio and video parameters of your digital receiver related to connections on
rear panel.
Digital Audio Out
Use this option to specify desired audio format on the digital audio outputs (SPDIF / HDMI). Please check that your
Page 28
70
TV supports Dolby Digital and DTS over HDMI.
HDMI Video output
Use this option to specify the video output format on the HDMI connector.
TV SCART
Use this option to specify the video output format on the TV SCART connector.
HDCP
Use this option to set HDCP protocol over the HDMI connection ‘On’ or ‘Off’.
ANTENNA SETTINGS
Antenna settings options were described under the installation wizard chapter.
SMART CARD
If your receiver is equipped with Conditional Access features, such as a CI or CA slot for a smart card, additional
options may be available in the menu. Please consult your installer or card provider for information regarding use
of your specific card.
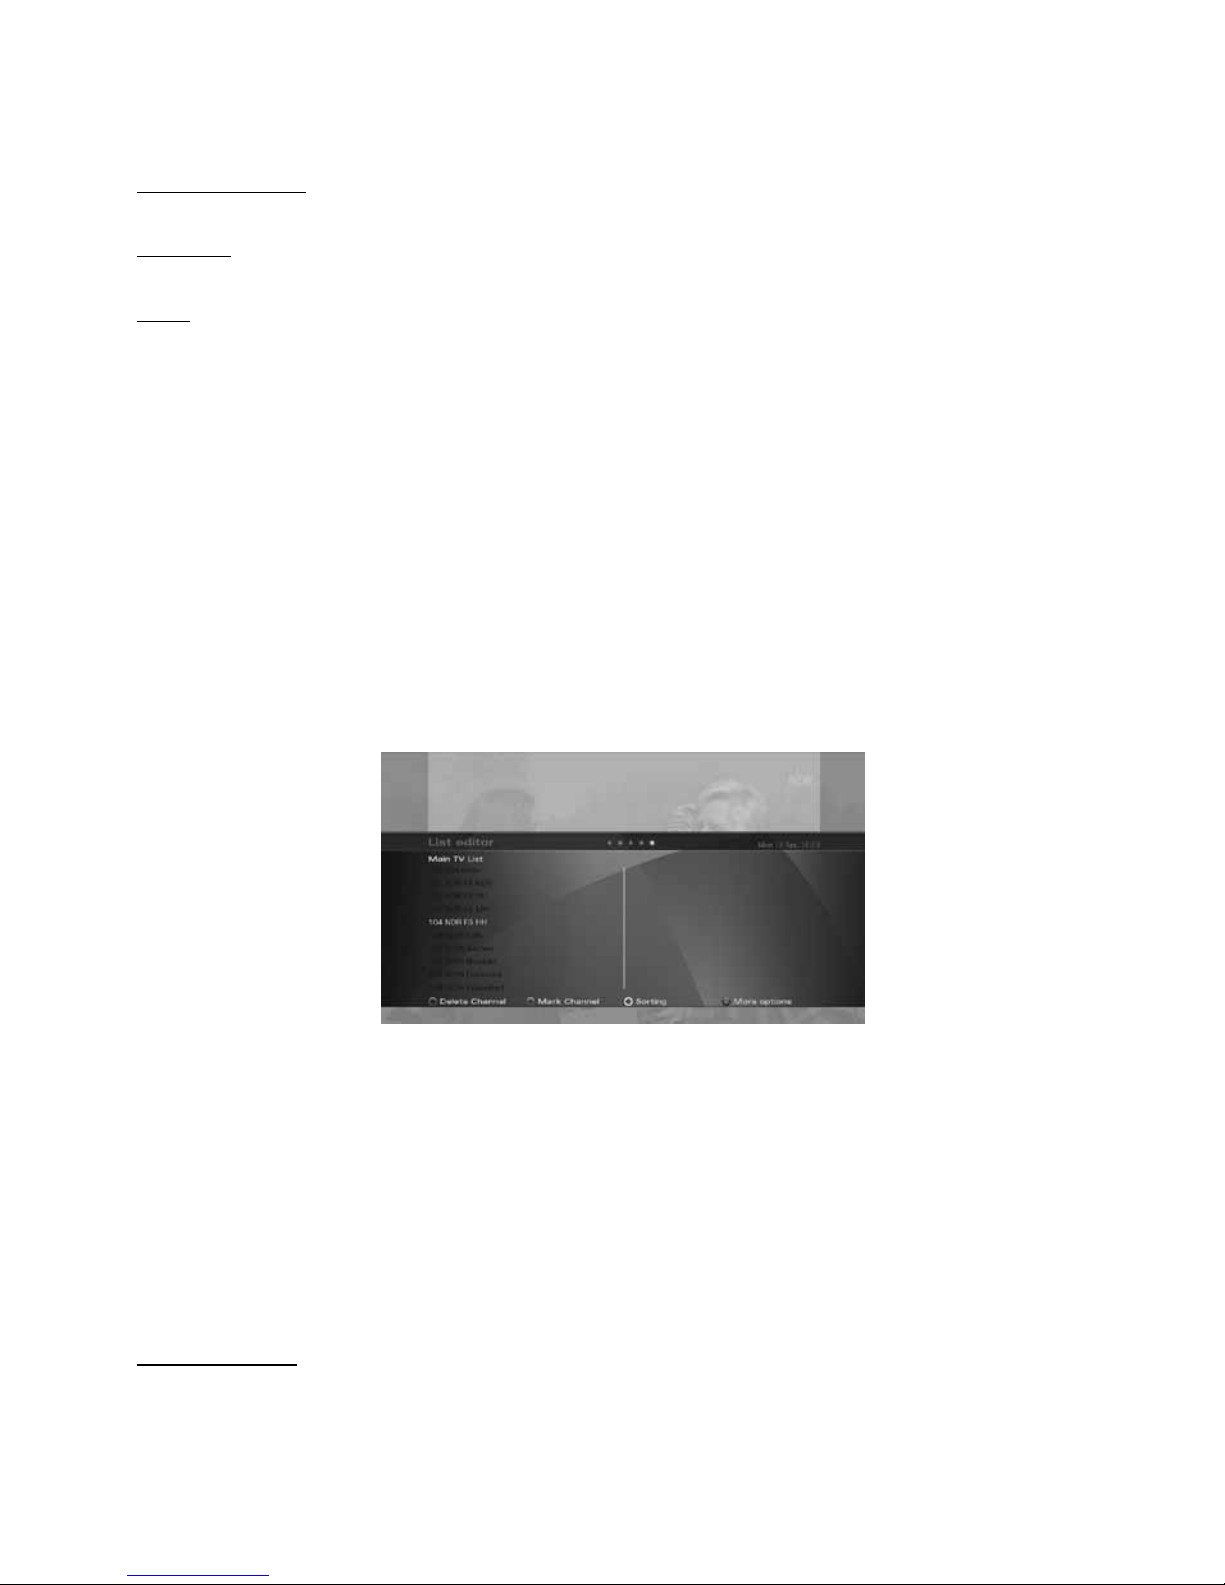
Channel Lists Editing
Use the channel list editor to create , edit and organize all of your TV, Radio and Favorite channel lists.
You can access the channel list editor from the Main
menu (press Menu -> TV -> TV list editor) or by scrolling right with the Right arrow key when the infobanner is
displayed.
The Main TV and Main Radio lists contain all of the TV and Radio programmes found during auto and manual
search (see chapter Channel search). In a table, you can see the channel numbers and names. On the right side,
there is a small preview screen, and at the bottom you can see all available options.
FAVOURITE LISTS
Your receiver allows you to create separate lists of personal favourite programmes. This means that each member
of the family, for instance, can create his or her own list of personal favourites, sorted according to their individual
preferences. Use the color keys at the bottom of the screen to manage the favorite lists.
You can add, remove, or rename favourite lists as well as edit existing favourite lists.
Note: It is possible to put TV and radio programmes in the same favourite list.
Set the active list
The digital receiver has minimum three lists: Main TV, Main Radio and My Favorite. You can add additional favorite
lists as well. Once you select one of the lists, this list will become the active list that will be used for zapping. To
select a list, you can use the TV, Radio, or Fav keys on the remote control.
Page 29
71
Video, photos and music streaming
over your home network
The Receiver will seamlessly and securely connect to your PC over your home network, stream video, music and
photos from shared folders and allow you to use your PC as a remote storage for recording and playback of your
favorite TV programs.
Accessing shared folders on connected devices i.e. PCs or Network Attached Storage (NAS) drives:
1. Set login user name and password for the shared folder you wish to access (or leave empty if shared folders
are not protected):
2. Select a connected device on your home network and access shared folders on the device:
Page 30
72
Set a shared folder to be your default storage for recorded TV:
Page 31

73
Frequently Asked Questions
MOVING CHANNELS AND EDITING YOUR FAVORITE LISTS
Under TV/Radio entry of the Main Menu, select ‘List Manager’. Select the Favorite list you would like to edit (eg My
Favorite). The next screen will display the Main list on the left side and the Favorite list on the right side. Use the
Up/Down keys to navigate to the channel you want to move from the Main list to the Favorite list, Mark the channel
by pressing the Green button (if you wish to move a block of channels, Press OK to move the channel to the
Favorite list. If you want to re-order the channels inside the Favorite list, press the Right/Left keys to switch to/from
the Favorite list. When on the Favorite list, use the Up/Down keys to navigate to the channel you want to move,
Mark the channel by pressing the Green button (if you wish to move a block of subsequent channels, use the Up/
Down keys to mark more channels) and press Green again. Use the Up/Down keys to mark the new location of the
channel you selected and press OK to move it to the new position.
MOVING CHANNELS IN MAIN LIST
Moving channels and re-ordering the Main TV or Radio lists can be done in the same way described for editing
Favorite lists. However, since the Main TV or Radio lists are being updated with routine software updates and are
also reset back to their default order pursuant to Factory Reset operation, it is not recommended to move channels
and/or re-order the Main lists. The Favorite lists are the right tool for the users to create, order and manage their
own channel lists.
IS FLASH CONTENT SUPPORTED BY THE WEB BROWSER?
The web browser embedded in your receiver is compatible with HTML5 and CE-HTML and its video player
supports the standard MPEG2/MPEG4 audio/video formats. Web content that is provided in Flash format is not
supported and may result in an error pop up message suggesting to install a Flash plug-in however such plug-in
installation is not available for the receiver due to the strict security requirements.
Page 32

74
Technical Specifications
GENERAL INFORMATION
- Full HD+ compliant Full HD+ compliant, supporting HD+ SmartTV and HD+ Replay
- WiFi and Ethernet connection
- Media library, TV recording and playback over shared folders, network and USB storage devices*
- Microsoft PlayReady DRM
- HbbTV 1.5, HTML5 support
- HLS smooth streaming and HTTP streaming
- Nagravision CAS and PRM embedded
- Number of channels: 6000, Number of favourite list: 8
- EPG: up to 7 days based on SI information
- Free remote control apps for iPhone/Android-based smartphones
- Decoding MPEG2, MPEG4, H.264, VC1, WMV, WMA, HE-AAC MKV, AVI, XViD, JPEG, Dolby™ and MP3
- Deep standby low power mode
SATELLITE FRONT-END
- Modulation: DVB-S/S2
- Input connector: F-connector (with Loop-through)
- Frequency range: 950-2150 MHz
- Symbol rate range: 1-45 MSym/s
- Input level: - 25 to - 65 dBm
- LNB voltage: 13/18V max 400 mA
- Tone control: 22 kHz
- DiSEqC and Unicable
VIDEO DECODING
- MPEG2 MP@HL, MP@ML, MPEG4 AVC high profile level 4.1
- Max resolution 1920 × 1080p
- Supported resolutions:
576i over CVBS video and SCART connectors
576i/p,720i, 720p,1080i,1080p over HDMI interface
- Standard PAL
- Aspect ratio: 4:3 and 16:9, Automatic adjustment for 16:9 TV sets, Letter Box supported
AUDIO DECODING
- Mono, Dual channel, Stereo, Joint Stereo, MPEG1, MPEG2, mp3, AC3, Dolby Digital Plus
- Digital Audio - via S/PDIF interface
Dolby Digital pass through PCM data output
REGULATORY COMPLIANCE
- Compliant to CE:
2004/108/EC (EMC)
2006/95/EC (low voltage directive)
2011/65/EC (RoHS)
POWER REQUIREMENTS
- Mains input voltage: 230V~
- Mains input frequency: 50 / 60 Hz
- Power consumption: Typ.< 11W, Max. 30W
- Deep standby mode – less than 1Watt
PHYSICAL SPECIFICATION
- Size (W * H * D): 260mm * 53mm * 225mm
- Operating temperature: +5°C to +35°C
- Storage temperature: -20°C to +60°C
CONNECTIVITY
- 1 x USB2.0 High Speed Host port
- 1 x 10/100Mbps Ethernet port, RJ45
- 1 x WiFi 802.11 b/g
* Subject to 3rd party license.
Page 33

75
REAR PANEL INTERFACES
- Front-End:
Input connector: Input connector: IEC169-2, Socket (F-connector for Satellite front end)
Loop Through Output connector: IEC169-2, Plug
- TV SCART connector:
CVBS/RGB(output)
L&R Audio (output)
Fast Blanking (output)/Slow Blanking (output)
- Digital Audio SPDIF: 1 * Coaxial (RCA), 1 * Optical
- CINCH (RCA): Audio L/R and CVBS (RCA)
- Ethernet 10/100Mbps, RJ45
- HDMI
- USB 2.0 host socket (Type A)
- Wifi antenna
- eSATA port
FRONT PANEL
- Standby, Channel Up/Down keys
- VFD display
- 1 Standby LED Indicator
- 1 IR Sensor
- 1 Smart card reader
ACCESSORIES
- User manual: English, German.
- Remote control unit with batteries
- HD+ smart card
- 1.5m HDMI cable
Page 34

76
Troubleshooting
ERROR POSSIBLE CAUSES POSSIBLE SOLUTIONS
No image, no sound, no display
No power supply Check connection cables
Short circuit in coaxial cable
Disconnect device from
mains power supply,
eliminate the short circuit
in the coaxial cable or
connections, reconnect, and
activate device
Defective or missing cables Check connecting cables
Wrong video format selected in the
OSD settings
Check the settings to make
sure your TV supports the
selected format
Small blocks in the video,
occasionally no sound, occasionally
no signal
Signal too weak
Check for defective cables
or connectors. Alternatively,
reduce the coaxial cable
length
The displayed time differs from the
current program
Incorrect time settings
Check the settings and
correct the time
Scrambled programs are not
received
The CI module or CA card is not
correctly inserted
Re-insert the Card and/or
module
The CI module or CA card belong to
a different decoding system
Use a CA module or Card for
the specific decoding system
Sound OK, but no image Device is set to a Radio channel Change to TV mode
The Remote Control does not work
The batteries are weak Replace the batteries
The batteries are installed
incorrectly
Install the batteries,
observing the correct
polarity, as marked in the
battery compartment
The remote control is not pointed
directly at the receiver
Aim the Remote Control
directly at the front of the
receiver
The front of the receiver is blocked
Remove the obstruction from
in front of the receiver
Previously receivable programs are
no longer received
The frequency has changed Start a channel search
There is a problem with the signal
Check all cables and
connectors connected to the
RECEIVER
Page 35

77
Warranty, service and support
This Limited Warranty applies only to the Product sold by TELESTAR Digital GmbH (hereby, the “Company”) the
Customer purchase for his own use and not for resale. The term “Product” in this Limited Warranty does not include
any software programs, whether pre-loaded with the Product, installed subsequently or otherwise.
1. Disclaimer and exclusion
except as specified in this limited warranty, the foregoing warranties are given and accepted in lieu of any and all
other warranties or conditions, express or implied, including, but not limited to, the implied warranties or conditions
of merchantability and fitness for a particular purpose.
to the extent an express or implied warranty cannot be excluded in some states or juridictions, the above exclusion
may not apply. in that event, such warranties are limited in duration to the warranty period. no warranties apply
after that period.
because some states or jurisdictions do not allow limitations on how long an implied warranty lasts, so the above
limitation may not apply.
this limited warranty gives customer specific legal rights, and customer may also have other rights which vary from
jurisdiction to jurisdiction.
customer is advised to consult applicable state or country laws for a full determination of your rights.
This disclaimer and exclusion shall apply even if the express warranty set forth below fails of its essential purpose.
2. Limitations of Liability
Under no circumstances shall the Company or its supplier be liable for (a) damage to, or loss or corruption of
programs, data or media, or (b) any damages whatsoever (including, but not limited to, direct or indirect damages,
loss of business profits, lost savings or other special, incidental, exemplary or consequential damages whether
for breach of warranty, contract, strict liability, tort) arising out of or resulting from the use of or inability to use the
products and/or the enclosed written materials or the provision of or failure to provide support services, even if the
Company, its supplier, an authorized Company representative, service provider or dealer have been advised of the
possibility of such damages or of any claim by any third party. Any liability of the Company or its supplier which is
not excluded shall be limited to the purchase price of the Product.
Some jurisdictions do not allow the limitation of incidental or consequential damages so this limitation may not
apply fully to the Customer, but such limitation shall apply to the maximum extent permitted by applicable law.
3. Application of the Warranty
The Company warrants the Product against critical failure resulting from original manufacturing defects in
workmanship or material, under normal use. The company does not warrant any uninterrupted or error-free
operation of the product or that all deficiencies, errors, defects or nonconformities will be corrected.
Unless the company specifies otherwise, this warranty extends only for the original user of the Product and the
Warranty applies only in the country or region in which the original user purchases the Product to the Company or
a Company Reseller in case of a resale.
4. Warranty period
The warranty period of the Product is 24 months. The warranty period for the Product starts at the day of purchase
(purchase invoice date) of the Customer, and in case of a resale by the Company Reseller not more than 45 days
after the production date marked on the Product.
This Limited Warranty extends only to the original end-user purchaser of the Product and is not transferable to
anyone who obtains ownership of the Product from the original end-user purchaser.
5. Limited Warranty Exclusions
This Warranty with respect to the Customer’s Product is subject to the following exclusions:
(i) Failure or damage resulting from misuse (including but not limited to use of any Product capacity or capability,
other than that authorized by the Company in writing), accident, modification, unsuitable physical or operating
environment, or improper maintenance by the Customer;
(ii) Failure caused by a Product for which the Company is not responsible;
(iii) Any non-Company Products, including those provided with, or installed on, a Company Product at the Customer
request;
(iv) Accessories, supply items and consumables (e.g. batteries), and structural parts (e.g. frames and covers);
(v) Service of Product alterations;
(vi) Service of a Product on which the Customer is using capacity or capability, other than that authorized by the
Company in writing;
(vii) Any Product not manufactured by or for the Company, or sold to an end-user in a country not covered under
Page 36

78
this Warranty;
(viii) Loss of any, or damage to, programs, data, or storage media. The Company may opt to replace the Product submitted
for warranty services and, thus, any data stored on the original Product may become permanently inaccessible.
This Limited Warranty is voided by removal or alteration of identification labels on the Product or its parts.
Any technical or other support provided for a Product under warranty, such as, “How to” questions and those
regarding the product set-up and installation, is provided WITHOUT WARRANTIES OF ANY KIND.
The Company is not liable for any transport/delivery/insurance costs, import duties, taxes, licensing fees and any
charges from telephone/fax communication as consequence of the failure of the Product.
Web-based content, applications and services are provided by 3rd parties and may be limited to certain regions,
require additional cost and may become unavailable at any time without prior notice. The availability, provisioning,
quality or availability of content, content copyrights, other IP rights etc. of web-based content, applications or
services are not covered by the terms of this Limited Product Warranty.
The Product is designed to allow access to the HD+ online video services and applications under the HD+ SmartTV
portal. Being an internet-based service, the HD+ SmartTV portal may be unavailable at any time without any notice
and is completely out of the control of Telestar Digital GmbH. The SmartTV portal is operated exclusively by HD+
and any claim or problem associated with the availability of the service, provisioning of the service, quality or
availability of content, content copyrights, other IP rights etc. should be addressed to HD+’s service department
directly and are not covered in any way by the terms of this Limited Product Warranty.
6. Service during the warranty period
In the event the Product is found to be defective within the warranty period, Customer’s sole and exclusive remedy
and the entire liability of the Company under this Limited warranty will be, at the Company or its Service Center,
at its option:
(1) Repair the Product by means of remote support such as, but not limited to, telephone, email support.
(2) Upon the product return to the party supplying it to the Customer, freight an insurance prepaid:
(2.1) repair or replace any defective Product or parts of the Product thereof covered by the Warranty with new or
factory-refurbished Products or parts that are equal to new products in performance.
(2.2) refund the amount paid for the product, less a reasonable allowance for usage
Unless the Company specifies otherwise, a Product or part that is repaired or replaced under this Warranty shall
be covered for the remainder of the original warranty period applying to the Product or part. All exchanged parts
and Products replaced under this Warranty will become the property of the Company.
7. To get the Limited Warranty service
In the event that a warranty service is required, you should contact your specialist dealer or the point of sale.
Warrantee claims cannot be made directly to the company - Telestar Digital GmbH. You should therefore keep
your sales receipt as proof of purchase. The Company recommends the Customer first utilize support material
shipped with the product, product diagnostics, information contained on the Web, and online support on http://
www.telestar.de.
If unsuccessful to obtain service under this warranty, the Customer must notify the Company Technical Support or
its authorized Service Center representative of the defect before the expiration of the warranty period. Customers
will provide appropriate assistance to the Telephone Support personnel to resolve issues.
If the technical support is unsuccessful, The Company or its authorized Service representative will instruct the
customer on how to receive warranty repair.
If the Customer does not know of a Company authorized service center for the Company’s product, it should
contact the reseller. If the reseller is an authorized service center, they will arrange for repair.
If the Customer reseller is not a Company authorized Product’s service center, they will direct the customer to an
authorized service center.
The Company reserves the right to charge for service in exception cases.
8. Governing Law
The Customer and the Company consent to the application of the laws of the country, in which the Customer
purchase the Product to the Company or a Reseller approved by the Company in case of a resale, to govern,
interpret, and enforce all of the Customer and the Company’s rights, duties, and obligations arising from, or
relating in any manner to, the subject matter of this Statement of Limited Warranty, without regard to conflict of
law principles.
these warranties give you specific legal rights and you may also have other rights which vary from state to state
or jurisdiction to jurisdiction.
9. Jurisdiction
All of our rights, duties, and obligations are subject to the courts of the country in which you purchase the product
to the Company or a Company Reseller in case of a resale.
Page 37

79
Notes / Notizen
Page 38

80
 Loading...