

Page 1
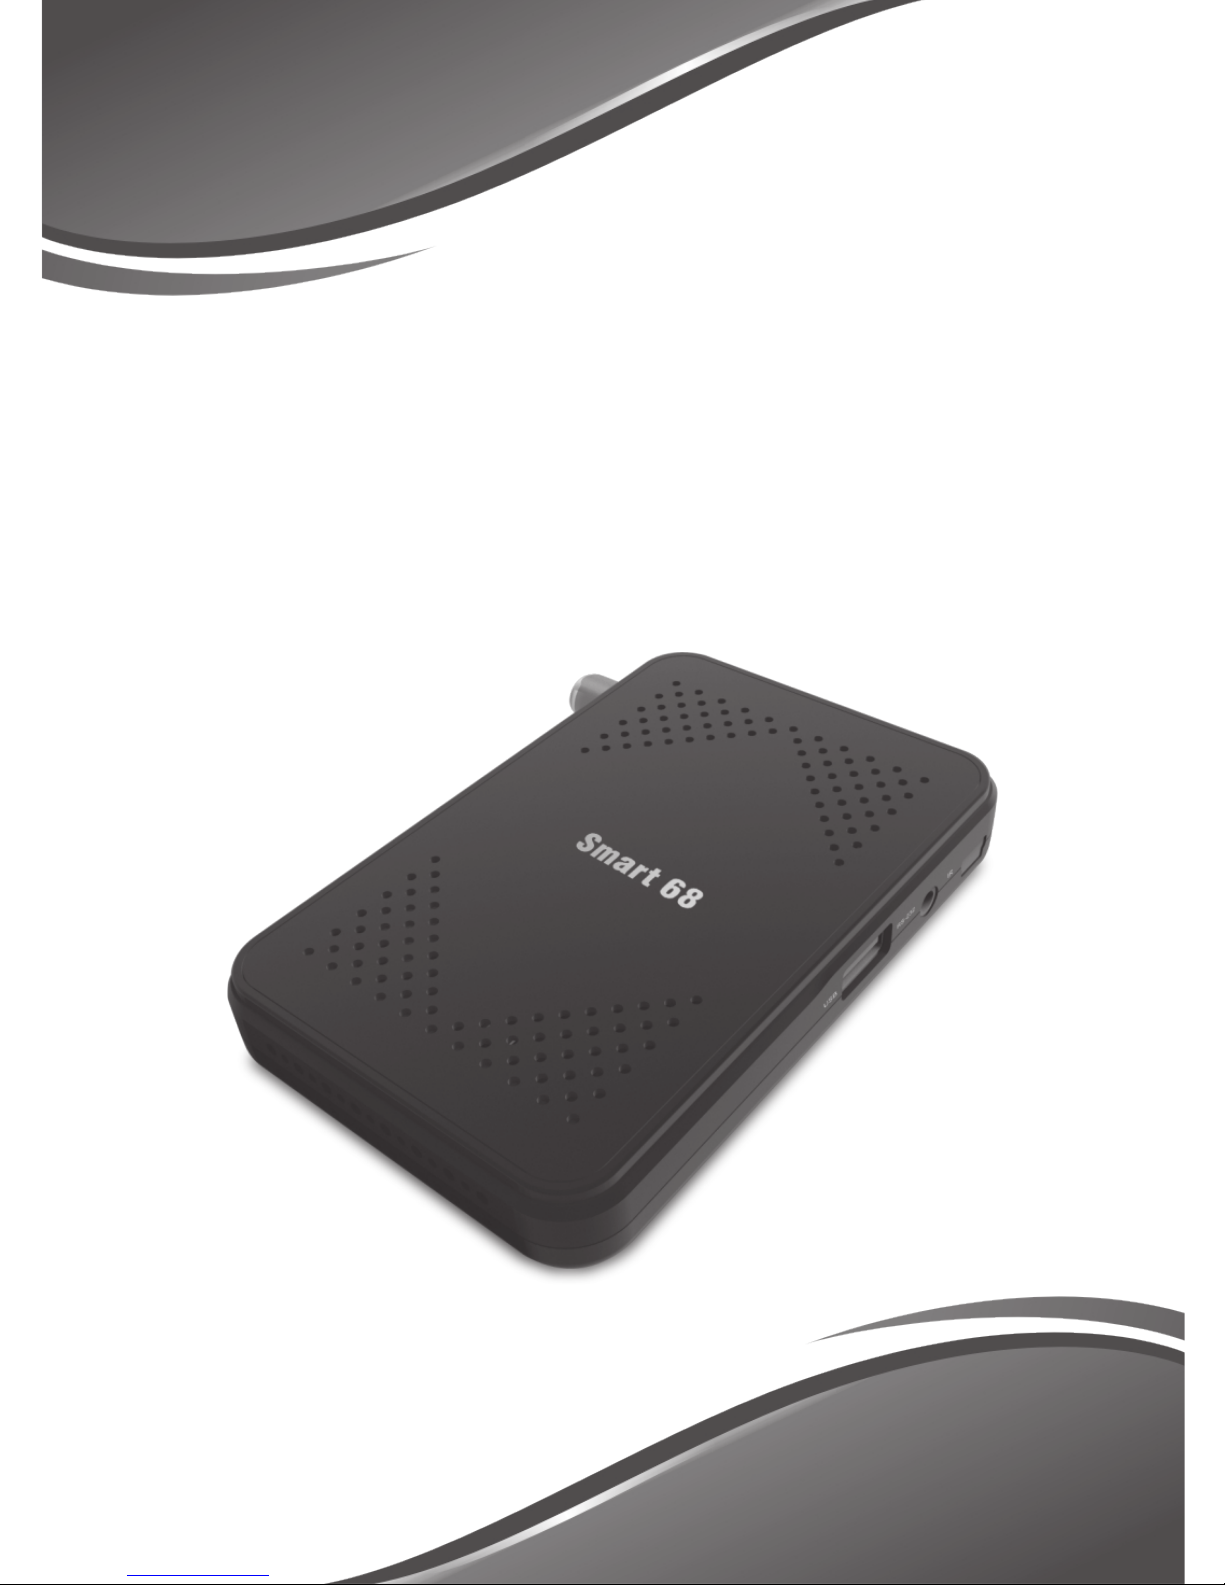
High Definition Digital Satellite Receiver
USER MANUAL
Smart 68
Page 2

1
Important Safety Instructions
1 )Read these instructions.
2 ) Keep these instructions.
3) Heed all warnings.
4 ) Follow all instructions.
5) Do not use this apparatus near water.
6) Clean only with dry cloth.
7) Do not block any ventilation openings, install in according with the instructions.
8) Do not install near any heat sources such as radiations, heat registers, stove, or
other apparatus (including amplifiers) that produce heat.
9 ) Do not defeat the safety purpose of the polarized plug. If the provided plug does not
fit into your outlet, consult an electrician for replacement of the obsolete outlet.
10) Protected the power cord from being walked on or pinched particularly at plugs,
convenience receptacles, and the point where they exit from the apparatus.
11) Only use attachments /accessories specified by the manufacturer.
12) Unplug this apparatus during lighting storms or when unused for long periods of
time.
13 )Refer all servicing to qualified service personnel. Servicing is required when the
apparatus has been damaged in any way , such as power-supply cord or plug is
damaged, liquid has been spilled or objects have fallen into the apparatus, the
apparatus has been exposed to rain or moisture, does not operate normally, or has
been dropped.
14) Mains plug is used as the disconnect device the disconnect device shall remain
readily operable.
15) The ventilation should not be impeded by covering the ventilation openings with
items, such as newspapers, table-cloth, curtains, etc.
16) No naked flame sources, such as lighted candles, should be placed on the
apparatus.
Page 3
2
17) Attention should be drawn to the environmental aspects o battery disposal.
18) The use of apparatus in moderate climate.
19) The use of apparatus shall not exposed to dripping or slashing and tht no objects
with liquids, such as vases, shall be placed on the apparatus.
WARNING: To reduce the risk of the or electric shock, the device should not be
expose drip and sprinkler.
WARNING: The batteries (installed or packed ) should be exposed to excessive heat
such as sunshine, fire or something similar.
WARNING: The USB memory stick should be plugged in the unit directly.
USB extension cable should be used to avoid falling of data transferring and
interference caused
WARNING: You must peel off the membrane of the top cover before using. Or it would
harm our receive box without emitting its heat.
This marking indicates that this product should not be disposed with
other household waste throughout the EU. To prevent possible harm to
the environment or human health from uncontrolled waste disposal,
recycle it responsibly to promote the sustainable reuse of material
resources. To return your used device please use the return and collection systems or
contract the retailer where the product was purchased. They can take this product for
environmental safe recycling.
Page 4

3
1 Panel
1.1 Panel
1. USB: Connect USB2.0 device
2. RS232: Connect to serial port
3. IR: Connect infrared remote receiver module
4. LNB IN: Used to connect the LNB to receive the signal
5. AV: This socket outputs composite video signal
6. HD: This socket outputs HDMI signal
7. DC 12v: Used to connect the 12V DC adapter
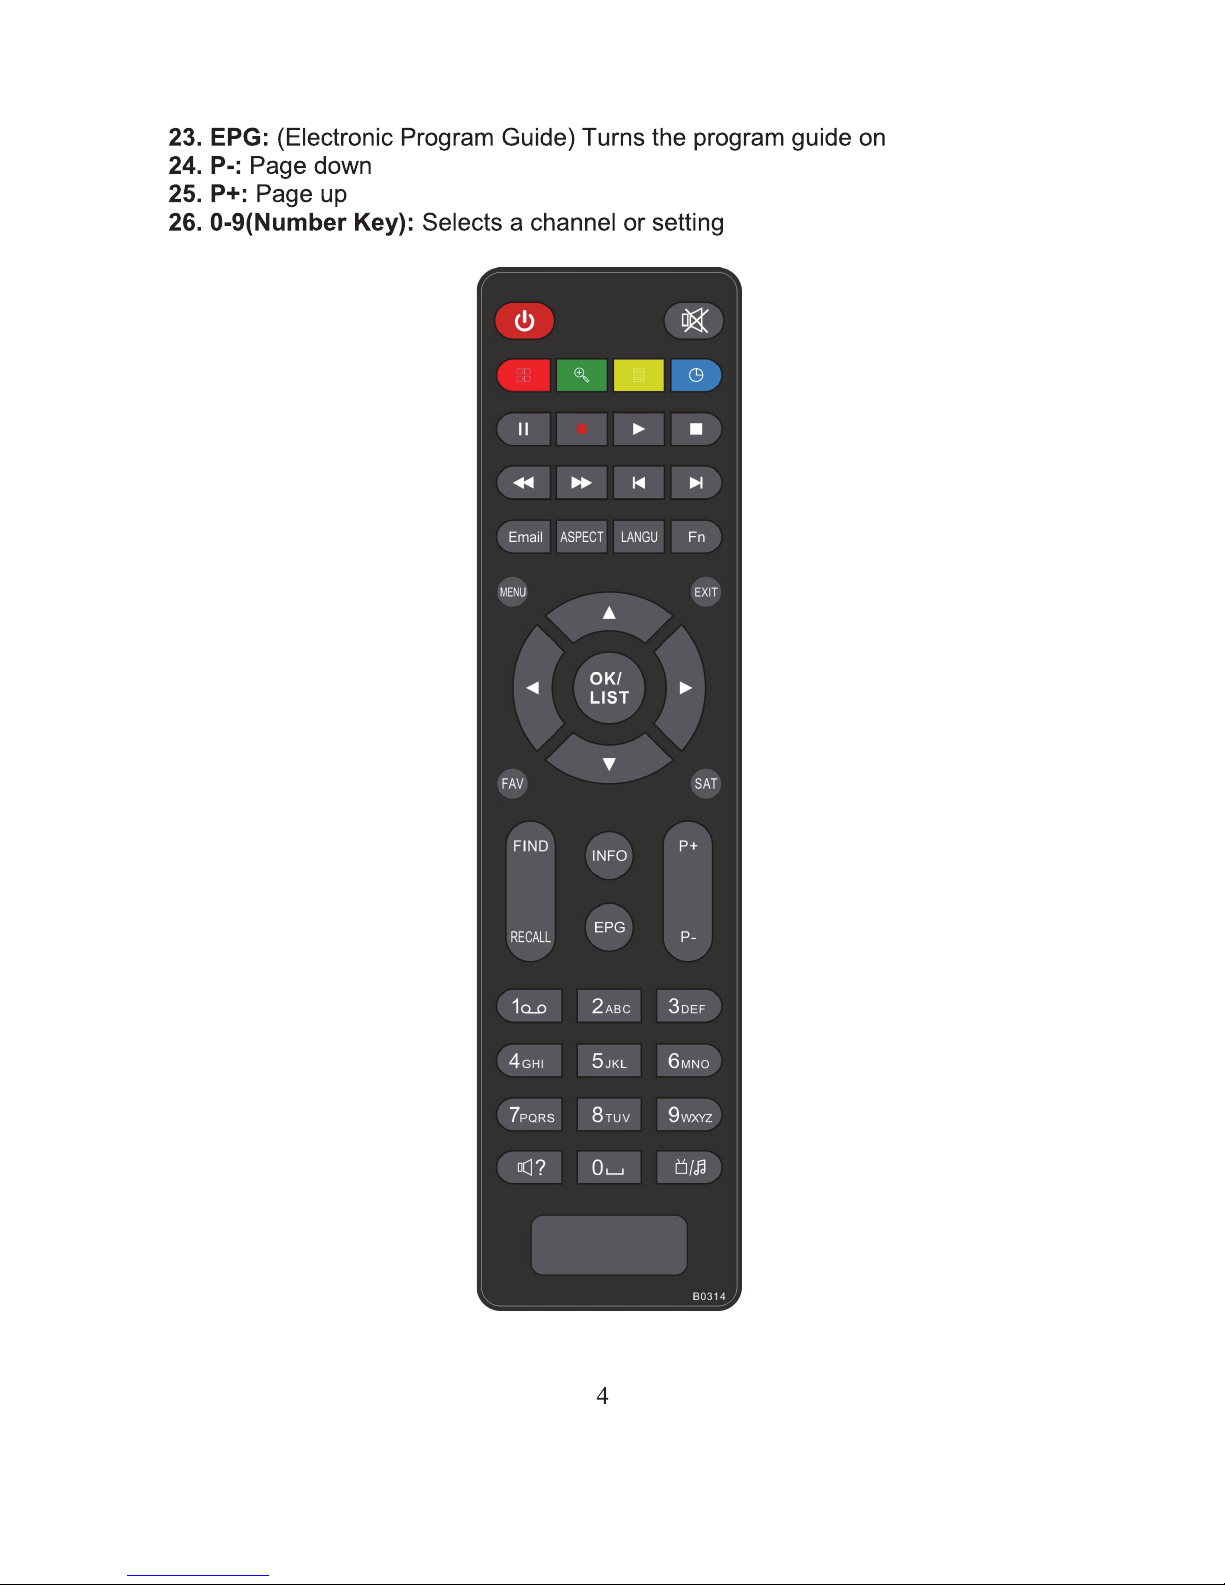
2 Remote Control
2.1 Key introduce
1. Power: Switch the product to on your standby
1. MUTE: Mute or Restore Audio Output
2. COLOUR BUTTONS:
(1) Red: Display subtitle information (2) Green: Zoom Function
(3)Yellow: Display Teletext Information (4) Blue: Positioning play media
3. Pause: Starts or pauses media play
4. Record: Used to record the program
5. Play: Starts or pauses media play
6. Stop: Stops media play/ Stop record the program
7. Rew : Searches backwards during media play
8. Fast Forward: Searches forwards during media play
9. Previous: Skips to the previous track during playing media
10. Next: Skips to the next track during playing media
11. Audio: Selects an audio language or audio model
12. TV/Radio: Switch channels between TV channels and Radio channels
13. MENU: Turns on main Menu
14. EXIT: Exit the current menu or return to the previous Menu
15. Channel Up/Down : Navigates through the menus. Selects the next or previous
Channel
16. Volume Up/Down : Navigate through the Menus. Increases or decreases
volume
17. OK/list : Confirm an entry or selection. Displays the list of channels
18. FAV: Turns on Favorite Menu
19. SAT: Selects the Satellite/ Jumps to special time during media play
20. FIND: Find function
21. RECALL: Displays play history
22. INFO: Display additional channel information
Page 5
Page 6

5
2.2 Installing the Batteries
Remove the battery cover from the Remote Control and put 2Xaaa size batteries
inside the compartment.
The diagram inside the Battery Compartment shows the correct way to install the
batteries.
3 Connections
Cautions: Make sure to check the voltage specification of the wall outlet is the same
rating with the receiver. To prevent the risk of electric shock, do not open the cover or
the back of the receiver.
Note: When connecting the receiver to other equipment, e.g. , TV,VCR and amplifier,
make sure to refer to relevant user manual for instructions. Also, make sure you
disconnect all the equipments form the main supply before the connections.
4 Main Menu
Users can press [MENU] key to call out the main menu when a program is playing in
full screen. The frame contains five items: Channel Edit, Installation, System, Tools
and Media Center.
5 Channel List
Users can enter the TV or Radio Channel List window from the Main Menu. To exit
from the current menu, press [Menu]/[Exit] key. If press [Menu] key, back to the
previous menu, and press [Exit] key to exit all menu.
6 Installation
Users can add / edit / delete and search the Satellites/TPs in the Main Menu /
Installation window. Press [Menu]/[Exit] to exit from the current menu.
6.1 Satellite List:
Press [Left/Right] to move the highlight from the satellite list at the left side to
the satellite parameter area at the right side. Press [Menu]/[Exit] to return to
the left-side satellite list.
When a satellite is highlighted, press [OK] to select or unselect the satellite.
Press [INFO] to select or unselect all satellites.
i. Scan Satellite:
Press the Blue key to enter the Satellite Search menu as shown as below:
¾ Single Satellite Search: When ‘Single Satellite Search’ is selected,
highlight the Satellite field to select a satellite to be searched.
Page 7

6
¾ Multi Satellite Search: The ‘Multi Satellite Search’ can be chosen only
when multiple satellites have been selected.
¾ FTA Only: Select Yes or No in this field.
Yes: Only search FTA channels.
No: Search FTA and encrypted channels.
¾ Scan Channel: Select TV+Radio, TV Channel or Radio Channel in
this field.
¾ Scan Mode: Select Blind Scan or Full Scan in this field.
¾ Search: Highlight ‘Search’ and press [OK] or [Right] key to enter the
search menu and start searching channels.
6.2 TP List
Highlight a satellite in the Satellite List and press [SAT] key.
Press [Up/Down] key to move the highlight in TP list. Press [Right/Left] key to
switch to the satellite parameter area at the right side. Press [Menu] to switch
back to the left side. Press [Page +/-] to go to the previous or next page. Press
[SAT] in the TP list window to return to the satellite list window.
i. TP Scan:
Press the Blue key to enter the TP Search window.
Scan Mode:
‘Normal’ – Search a certain program transmitted by the current TP
according
to the specified conditions;
‘PID’ – Search the program with the specified PID.
FTA Only:
Yes – Only search FTA channels;
No – Search FTA and encrypted channels.
Scan Channel: Select TV+Radio, TV Channel or Radio in this field.
Network Search:
Yes – Perform NIT searching;
No – Do not perform NIT searching.
Search: Press [OK] to start searching.
Page 8
7
7 System
In the Main Menu, select System to enter the System menu which contains 8 submenu
items: Language, AV Setting, Local Time Setting, Parental Lock, OSD Setting,
Favorite and Other, Press the UP/DOWN key to select an option and press Right/Left
to adjust the setting.
8 Tools
Select ‘Tools’ in the Main Menu to enter the Tools menu which contains 7 submenu
items: Information, Factory Setting, Delete All, OTA Upgrade, RS232 Upgrade, USB
Upgrade, USB Backup and Game. Press the UP/DOWN key to select an option and
press Right/Left to adjust the setting.
9 Media Center
Select ‘Tools’ in the Main Menu to enter the Tools menu which contains 8 submenu
items: Music, Picture, Movie, Record Manager, HDD Information, Storage Format,
DVR Configuration and Jump.
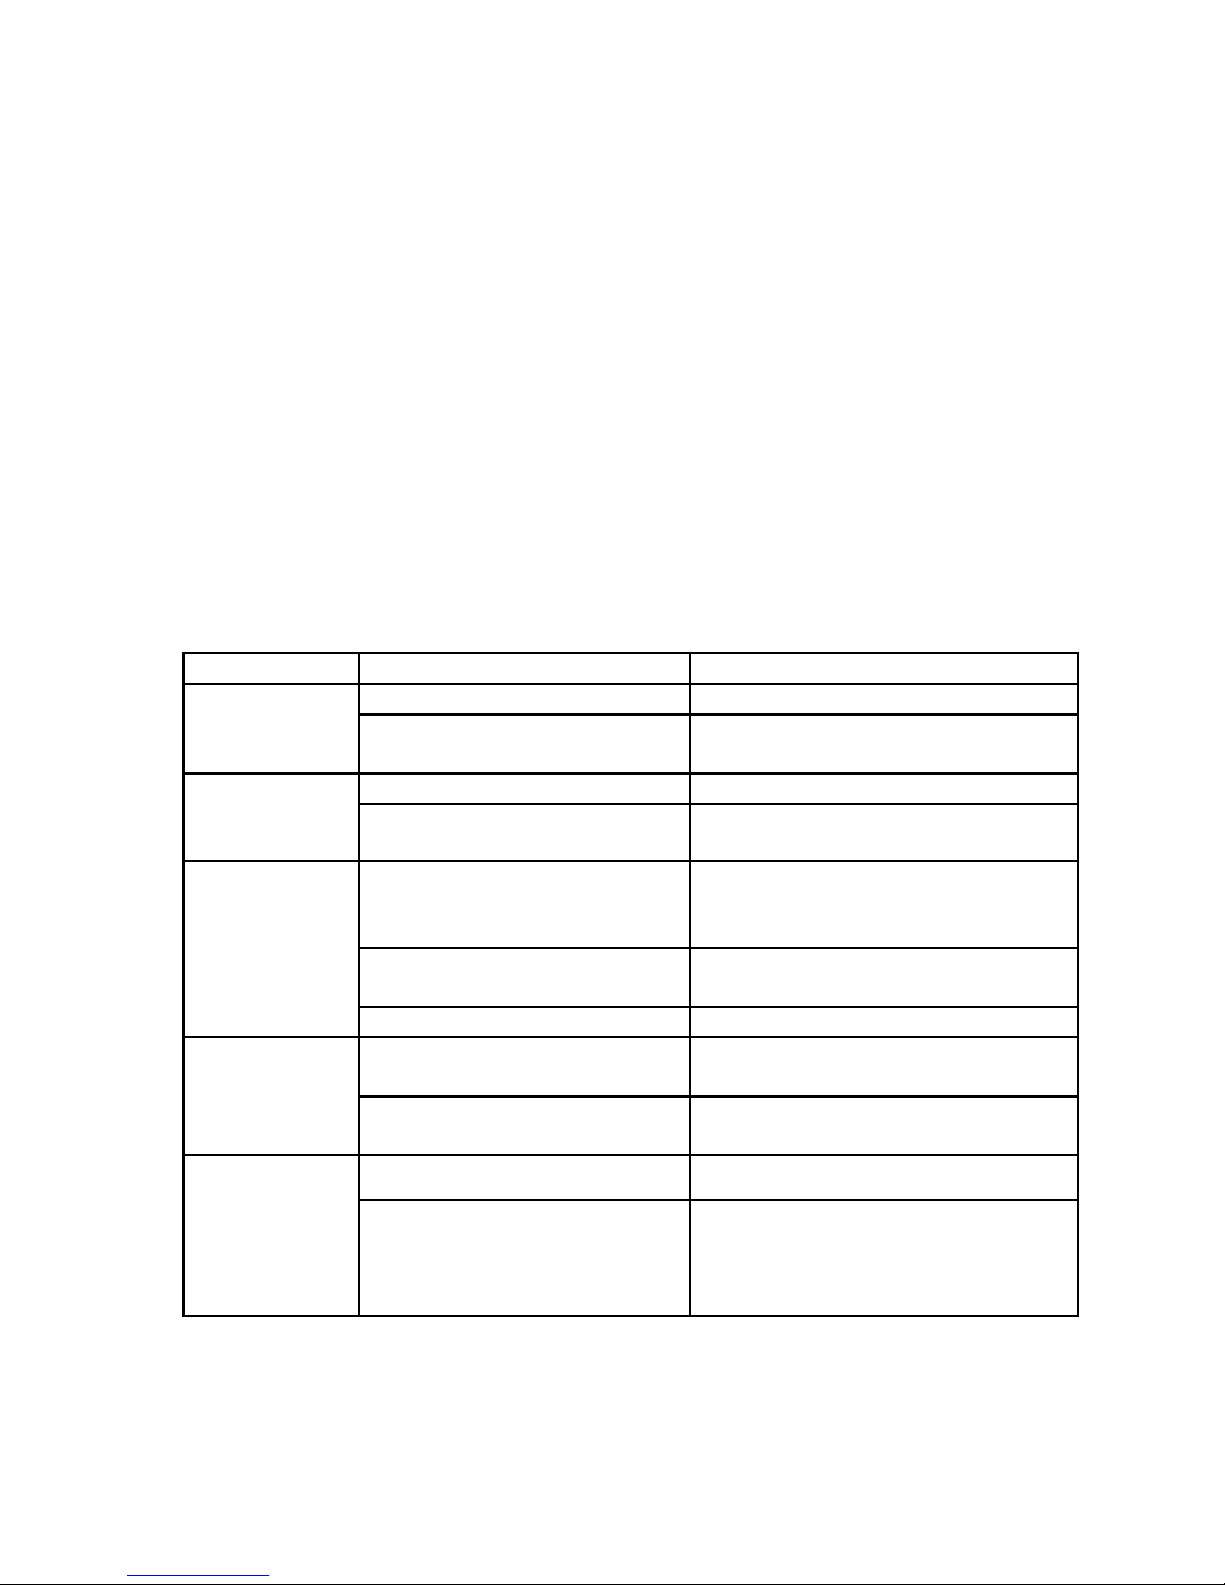
10 Troubleshooting
Problem Potential Reasons What to do
Power isn’t connected Connect the power No picture
The power switch is not
on
Switch on the power
Not connect DVB-S cable Plug in the DVB-S cable Screen
shows no
signal
Incorrect setting Set up correct parameter
No or incorrect
connection with audio
cable
Connect the audio cable
correctly
Mute the sound Switch on the correct volume
control
No sound
from
speaker
Incorrect sound track Try another sound track
No or incorrect
connection with AV cable
Connect the audio cable
correctly
Only
sound, no
image on
the screen
The program is a radio
program
Press <TV/RADIO> key to shift
into TV mode
The battery is exhausted Change new battery Remote
control unit
is not
workable
Remote control unit is not
in the right opposite of the
front panel or too far from
it
Adjust the way of holding
remote control unit and near
from the panel
Page 9
8
The image
stop
suddenly or
mosaic
The signal is too weak Strengthen the signal
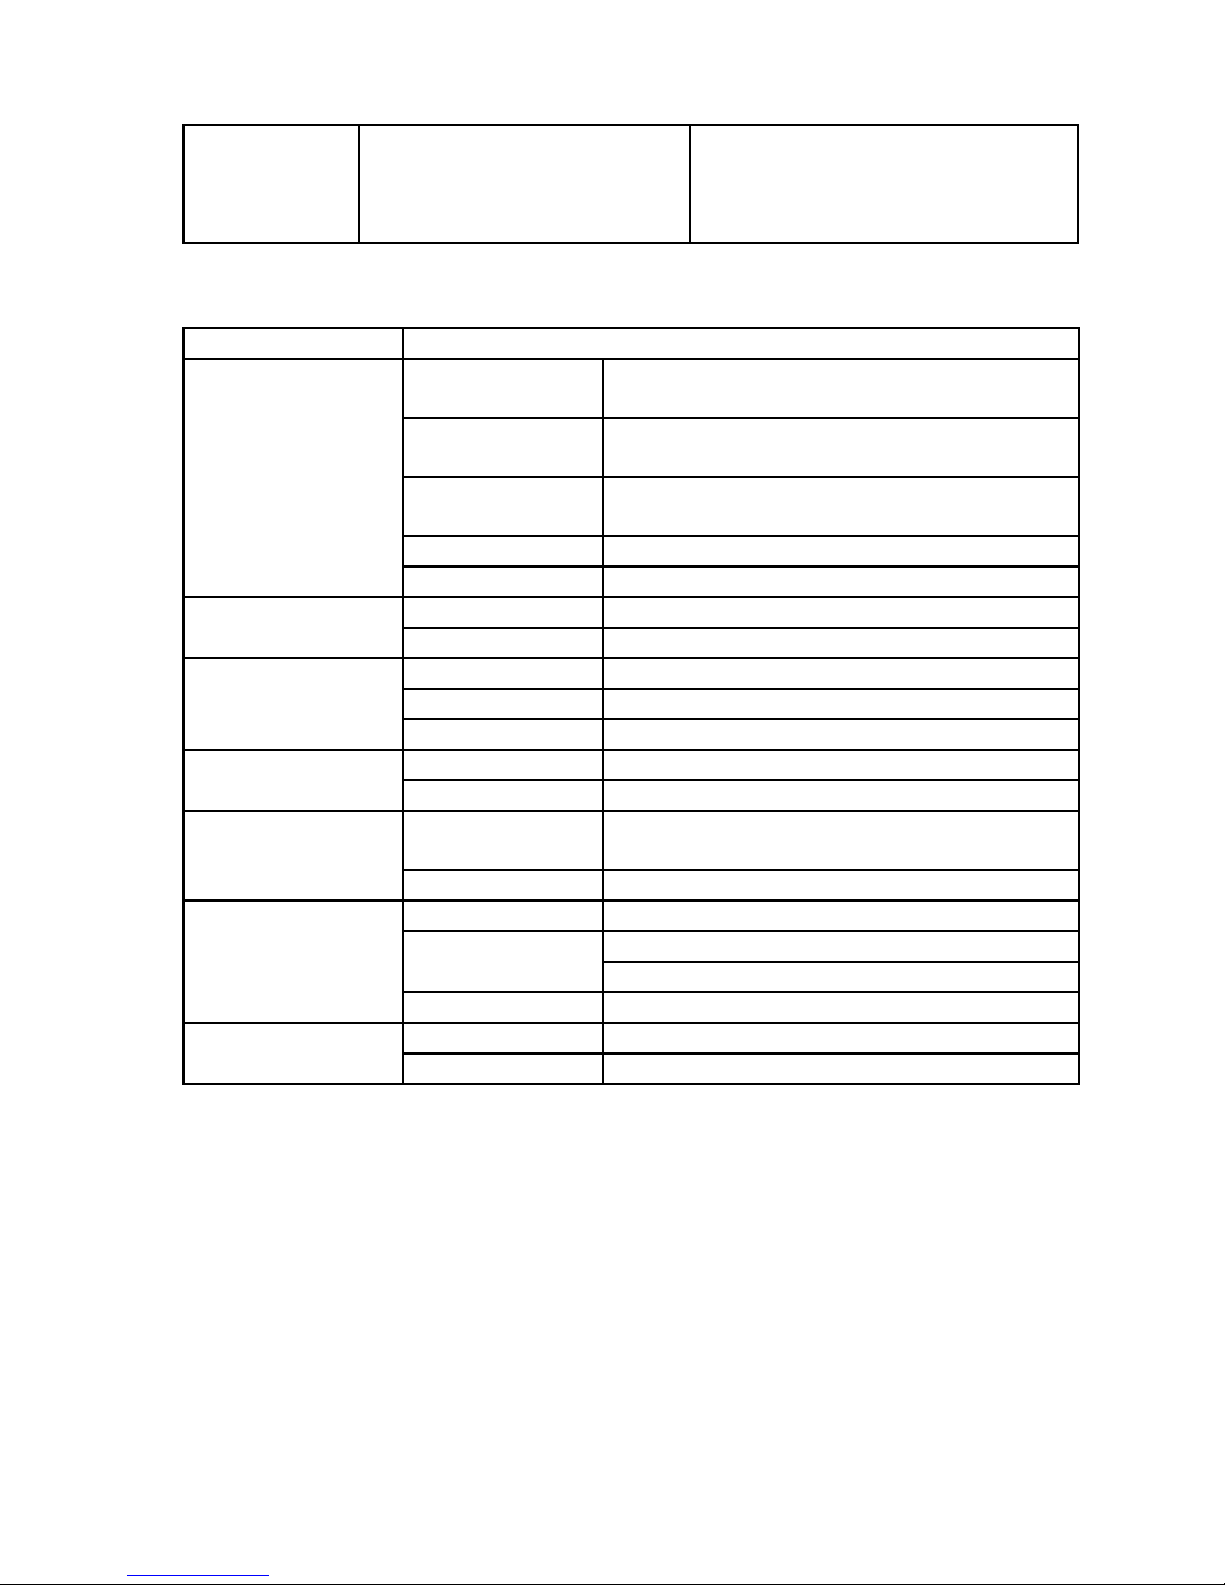
11 Technical Specifications
Item specification
Frequency
range
950MHz to 2150MHz
Input
impedance
75Ohm unbalanced
Signal input
level
-65~-25dBm
Symbol rate 2-45Mbps
Tuner
LNB power 13/18V,Max 350mA
Demodulator QPSK/8PSK
Demodulation
FEC 1/2,2/3,3/4,5/6,7/8,8/9,9/10
LNB IN F connector
USB USB 2.0
Connections
RS232 For data transport
Input
100-240V~50/60 Hz
Power
Consumption Max 12W
Decoder
module
PAL,NTSC
Display
Resolution 480i,480p,576i,576p,720p,1080i,1080p
Aspect rate 4:3(Letterbox, Pan Scan),16:9
MPEG2 Transport [email protected]
Video
MPEG4 AVC/H.264 HP@L4
Decoding
Audio MPEG2 Audio Layer I&II
Compliance ETS/EN 300421 DVB-S compliant
Others
Sound mode Right, Left, Stereo
 Loading...