

Page 1
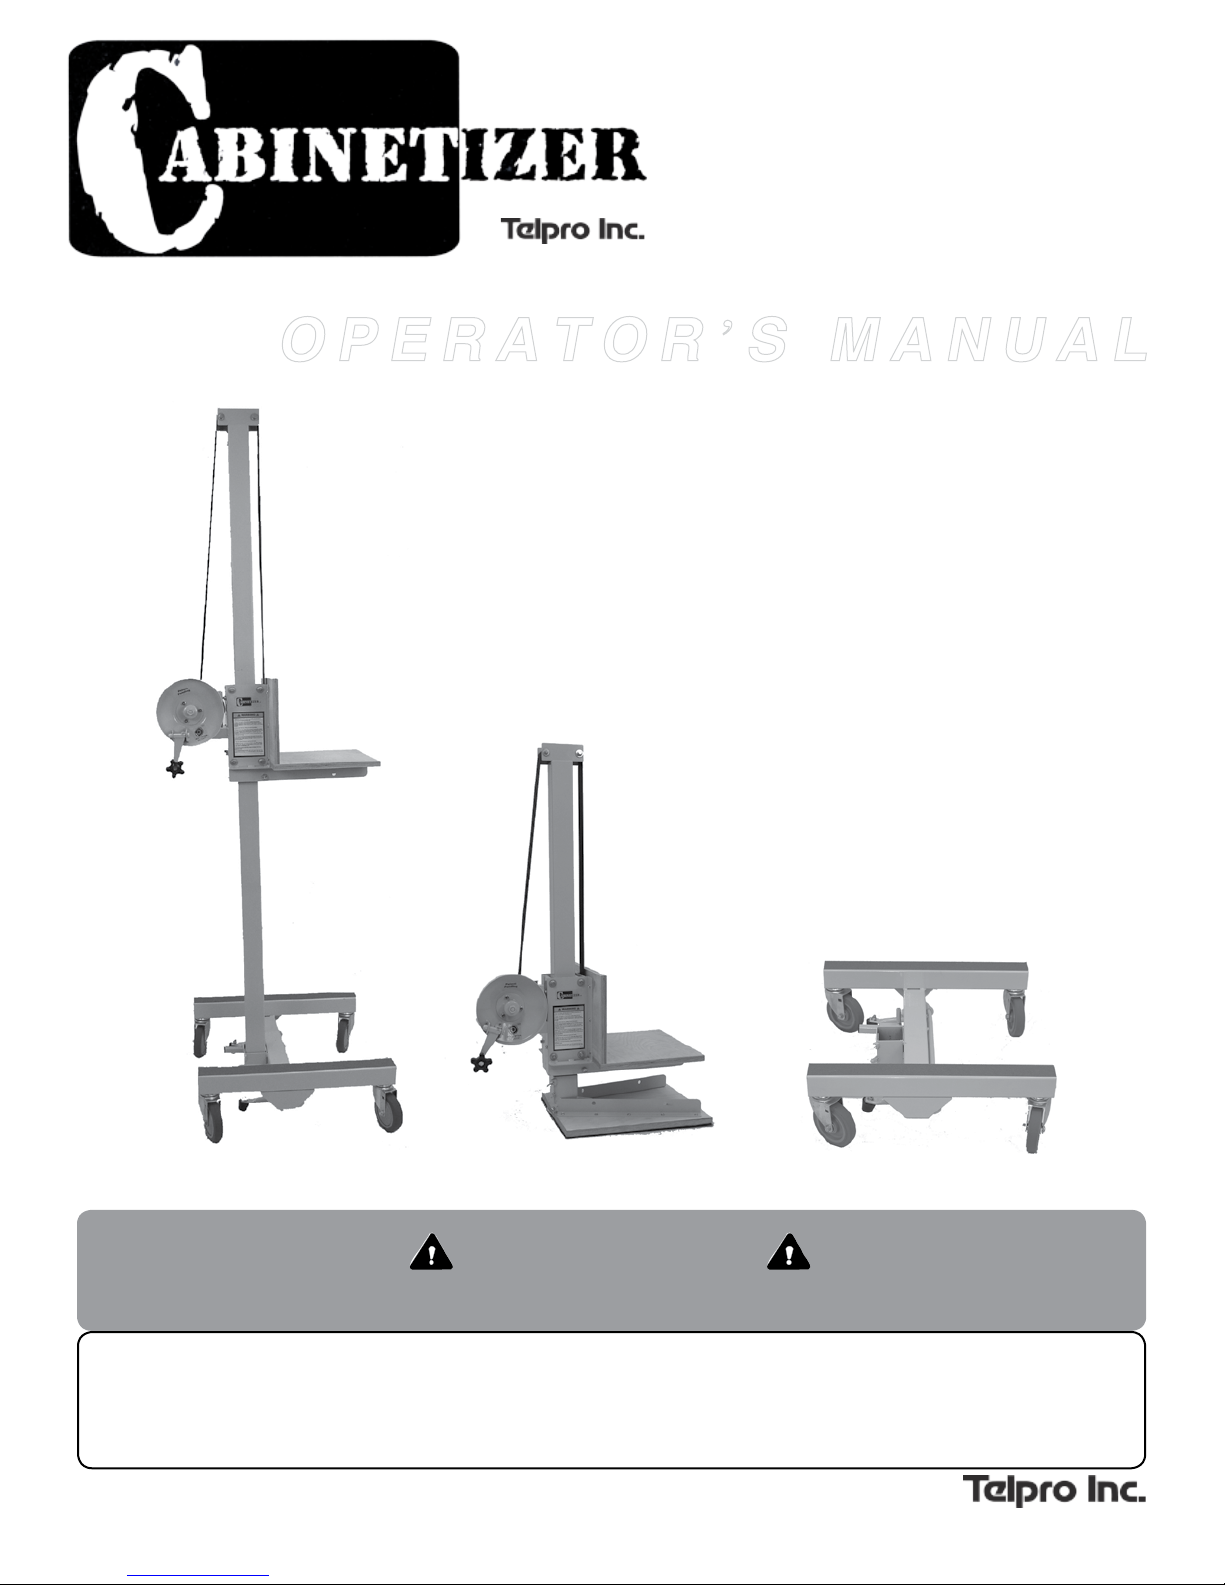
Cabinet LiftsWorld’s Best
™
by
®
O P E R A T O R ’ S M A N U A L
For Model 76
(Note: In this manual, the CabinetizerTM is shown with the optional Drill DriveTM winch assembly)
Re a d an d bec ome f am i li a r wi t h th is ma nua l BE F OR E ope rat ing u nit .
Before operating this equipment, thoroughly read this set of instructions, make sure you
understand them, and only then follow the step-by-step directions. Failure to do so could
result in serious property damage and / or serious bodily injury.
Form 42-26-00-00 version 1.5
WA RN IN G
MADE BY
© 2012 Telpro Inc. All Rights Reserved.
®
www.telproinc.com
Page 2
Warning
Read and follow these warnings and the instructions that follow. Failure to do so could
result in serious property damage and/or serious bodily injury.
• BEFORE operating this equipment, thoroughly read
this set of instructions, make sure you understand them,
and only then follow the step-by-step directions.
FAILURE TO READ AND FOLLOW THESE
INSTRUCTIONS could result in failure of the
equipment. Failure of the equipment while the lift
is raised can include a sudden and rapid lowering
of the lift and load possibly resulting in serious
property damage and/or serious bodily injury.
• Use and maintenance of the Cabinetizer
limited to authorized personnel who are trained in the proper
techniques for its safe operation and maintenance and who are
familiar with the various hazards of overhead material handling.
TM
Cabinet Lift shall be
TM
Rolling a Cabinetizer
Cabinet Lift while the load is raised can
result in tipping the lift and load possibly resulting in serious
property damage and/or serious bodily injury.
TM
• The Cabinetizer
lift and shall be used for no other purpose. The Cabinetizer
Cabinet Lift is not a personnel lift or platform and shall not be used
as such. DO NOT sit or stand on any part of the Cabinetizer
the Cabinetizer
Cabinet Lift is designed exclusively as a material
TM
TM
Cabinet Lift for purposes other than a material lift
. Using
TM
can subject the unit to stresses and loads that it was not designed
to carry. This can result in failure of the unit which may include a
sudden and rapid lowering of the lift and the load possibly resulting
in serious property damage and/or serious bodily injury.
• Keep body parts out from under load at all times.
TM
• Use the Cabinetizer
Cabinet Lift only on smooth level surfaces.
• It shall be the responsibility of any and all users of the
Cabinetizer
TM
Cabinet Lift to become familiar and comply with all:
-aspects of assembly, operation and necessary safety
precautions.
-applicable federal, state, and local statutes or regulations
TM
• The weight capacity of the Cabinetizer
Cabinet Lift is 300
lbs. (136 kg). DO NOT load the unit beyond this limit. Failure
to follow this warning can result in damage to the Cabinetizer
Cabinet Lift contributing to a sudden failure of the machine and
serious property damage and/or serious bodily injury.
TM
• DO NOT ATTEMPT TO USE YOUR Cabinetizer
Cabinet Lift
IF ANY PART IS MISSING, DAMAGED OR WORN. ORDER A
REPLACEMENT PART IMMEDIATELY. Using a Cabinetizer
Cabinet Lift with missing, damaged or worn components can
result in failure of the unit and possibly severe property damage
and/or serious bodily injury.
• INSPECT THE STRAP BEFORE EACH USE. REPLACE AT
THE FIRST SIGN OF WEAR. A worn, damaged or improperly
installed strap can fail resulting in a sudden and rapid lowering of
the lift and the load and possibly resulting in serious property
damage and/or serious bodily injury.
TM
• DO NOT ROLL a loaded Cabinetizer
Cabinet Lift while the
load is raised. Always keep the load lowered until the lift is in
place beneath the space in which the cabinets will be installed.
TM
• The Cabinetizer
electricity. KEE
Cabinet Lift is made of steel which conducts
P THE UNIT AWAY FROM LIVE ELECTRICAL
WIRES. Failure to do so could result in electrocution.
• Use only factory authorized replacement parts. Installation of
other parts can compromise the safe design of the Cabinetizer
Cabinet Lift and may cause failure of the unit possibly resulting in
serious property damage and/or serious bodily injury.
TM
TM
• Do not transport an assembled Cabinetizer
Cabinet Lift.
• Be Observant Of Any Potentially Hazardous Conditions, such as,
but not limited to:
TM
-Any obstructions
-Holes
-Loose materials -Electrical installations
-Moving machinery -Stairwells
-Open ducts -Changes in floor elevations
-Wires -Etc.
TM
• Before loading Cabinetizer
Cabinet Lift, BE SURE THE MAIN
UPRIGHT BOOM IS firmly secured to the Base and the SPLIT
BOOM CONNECTOR is fastened securely.
TM
•Always balance the load on the Cabinetizer
Cabinet Lift. Failure
to do so can result in tipping the lift and load possibly resulting in
serious property damage and/or serious bodily injury.
TM
Questions? - Call Telpro Inc. Customer Service at 1-800-448-0822 or 1-800-441-0551
1
Page 3
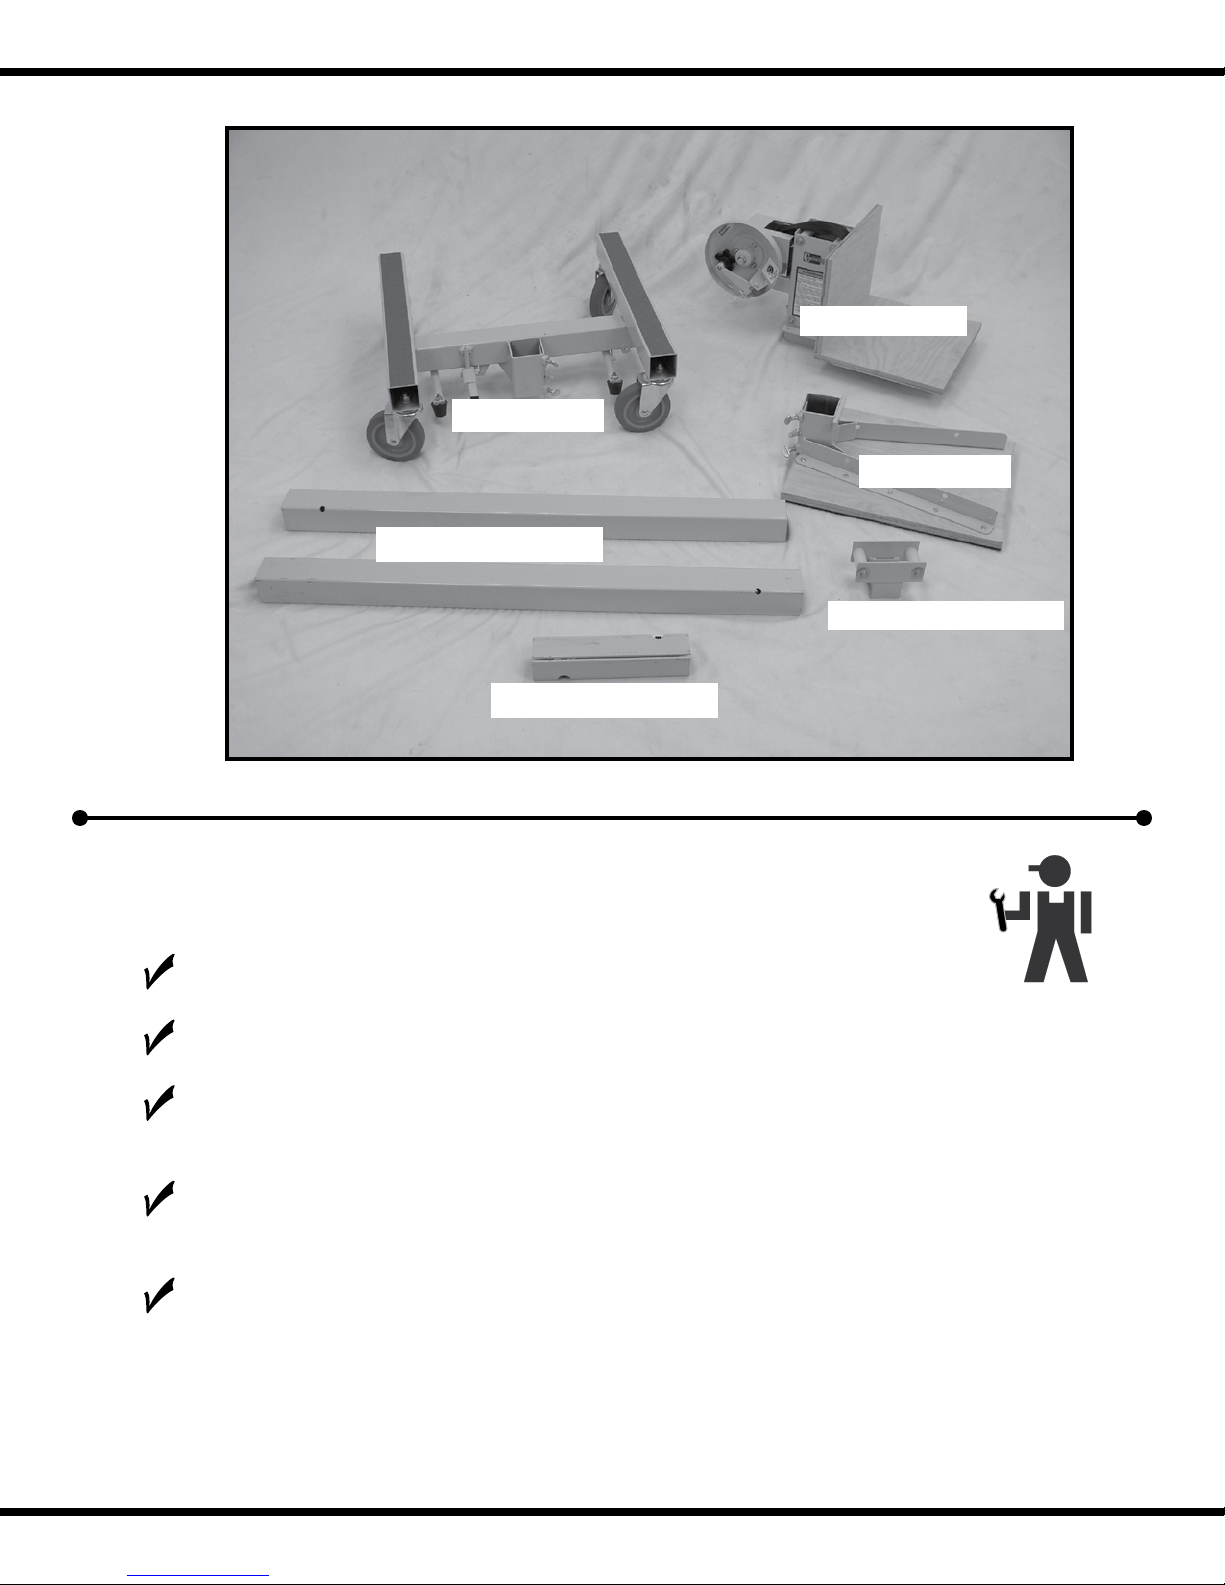
USER COMPONENTS
2 Piece Split Boom
Collar Assembly
Dolly Base
Counter Base
Top Roller Assembly
Split Boom Connector
Maintaining your Cabinetizer
Store the CabinetizerTM Cabinet Lifter in a dry place.
Lightly lubricate caster bearings, base brake assembly, and top boom rollers.
Take reasonable care to avoid damaging the Cabinetizer
when transporting it. Do not transport the Cabinetizer
Do not hammer on any members or components of the Cabinetizer
Cabinet Lifter.
TM
TM
Cabinet Lifter
TM
while it is assembled.
TM
Avoid damage to edges, surfaces, and ends of the Boom Tubes. Do
not drop them on floors or hard surfaces. Smooth, straight edges
will allow the Collar of the Cabinetizer
boom.
TM
to travel freely up and down the
2
Page 4
ASSEMBLY - Dolly Base Configuration
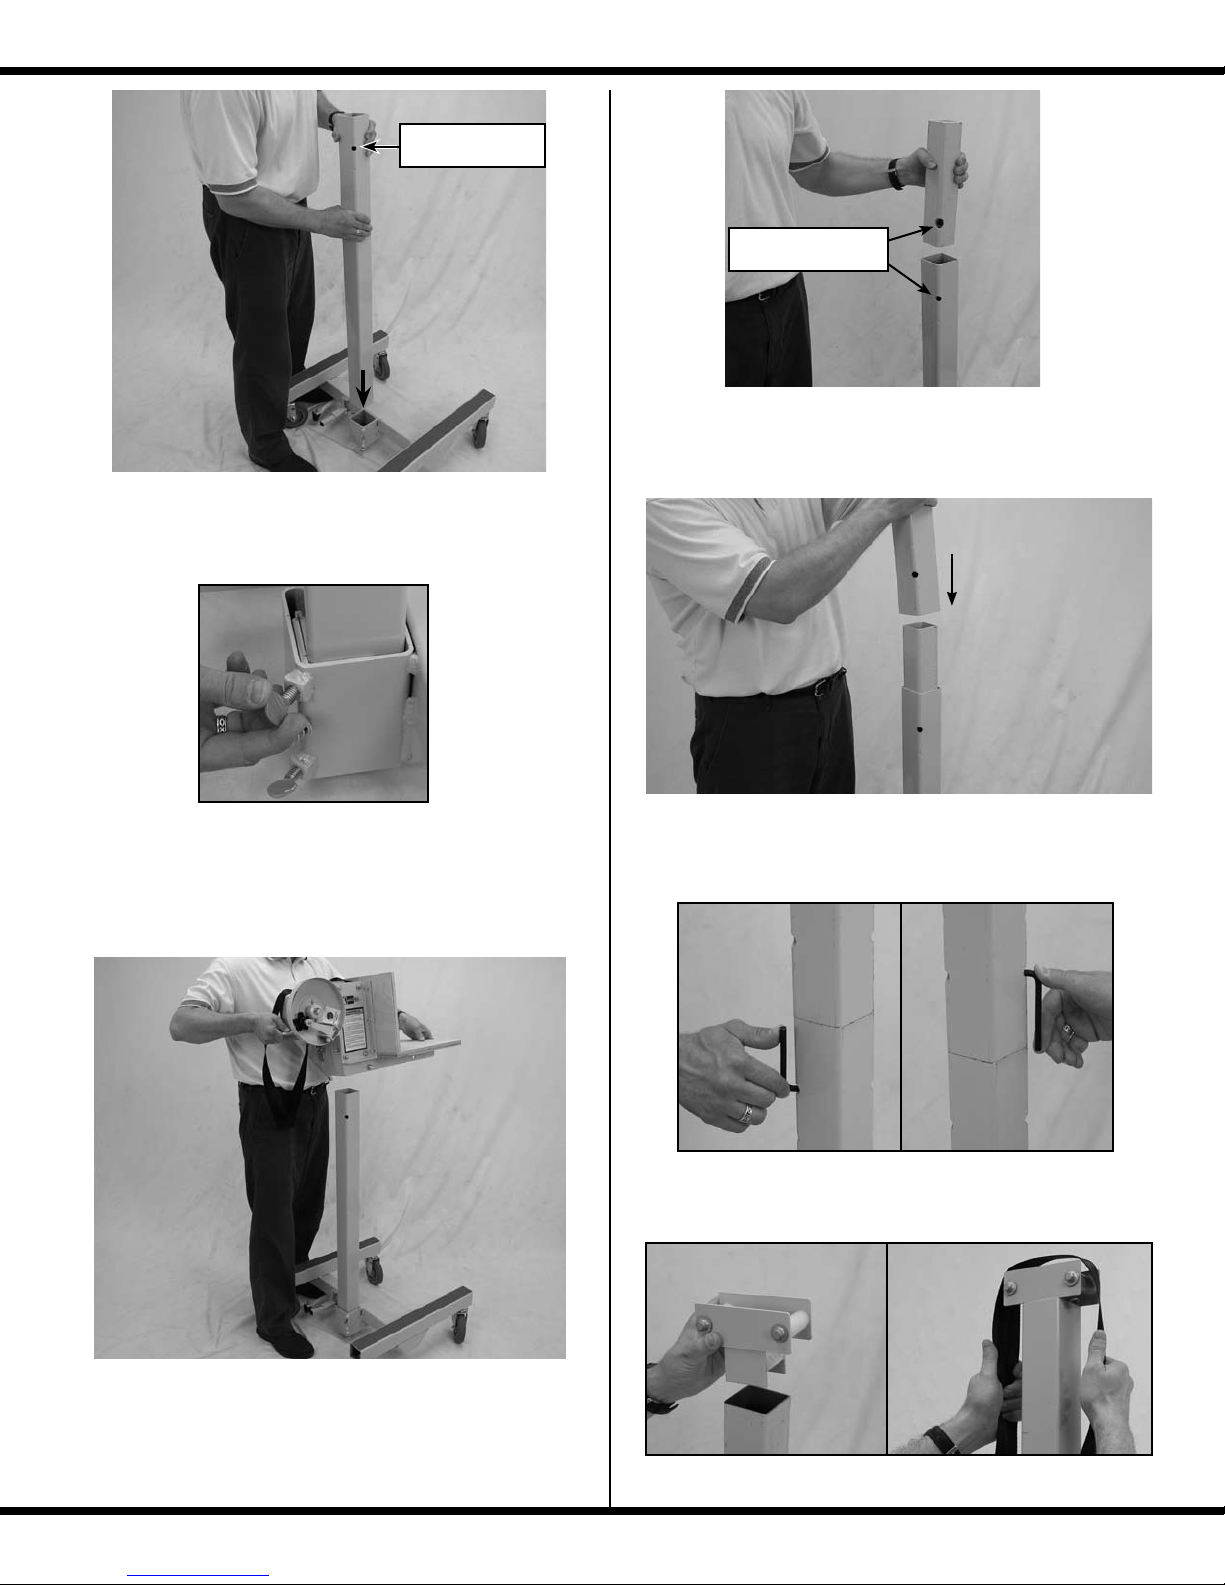
Make sure corner
holes are up.
4. Insert the split boon connector. Align the set screws
with the access holes in the boom tube
1. Install either of the boom sections into the dolly
base. Make sure the holes in the corner of the tube are
up.
Align set screws
with access holes.
2. Tighten both lock screws on the dolly base to hold
the boom tube securely.
3. Let out about a 2’ loop of strap on the Collar Assembly and slide the Collar Assembly over the boom tube.
5. Fit the second boom section over the split boom connector. Align the corner access holes with those of the
lower section.
6. Using the hex key stored on the collar assembly, tighten both set screws on the split boom connector securely.
MAKE SURE the seat of the Collar Assembly is
oriented on the same side as the longer base legs as
shown.
7. Insert the top roller assembly then position the strap
over the top rollers, raising the Collar up the Boom.
3
Page 5
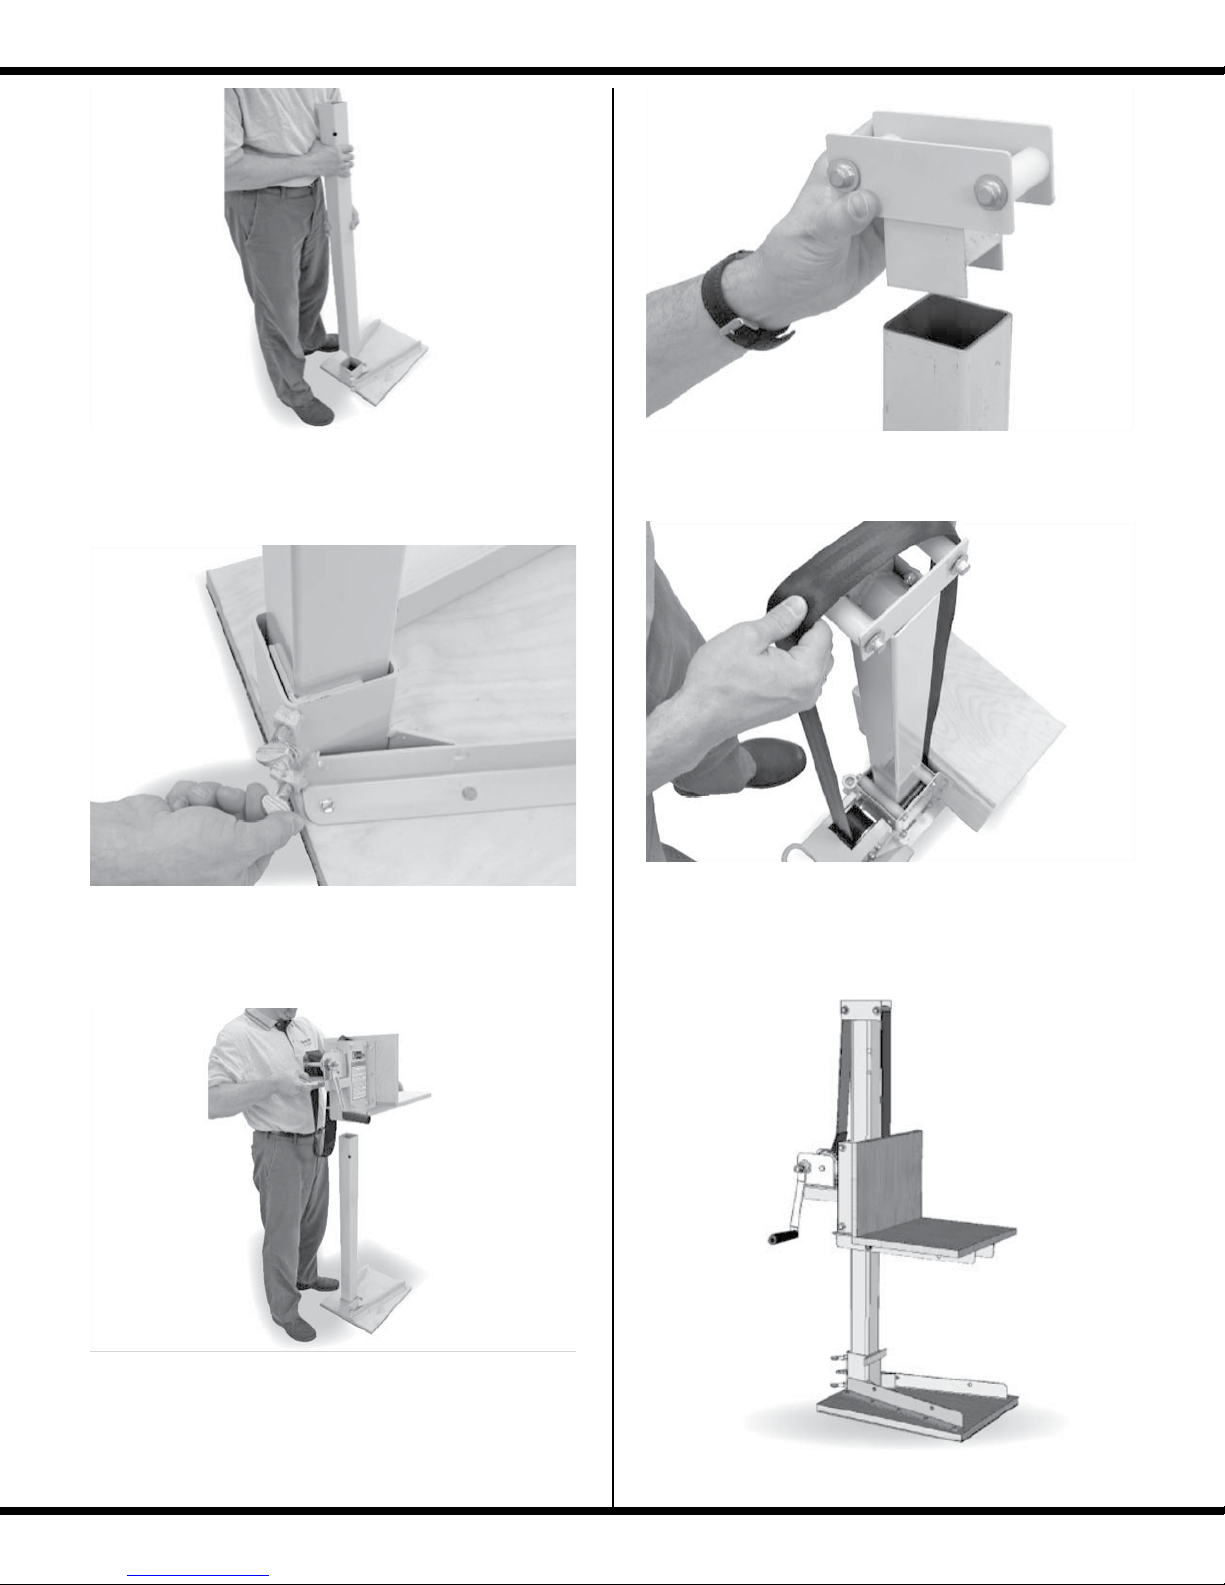
ASSEMBLY - Counter Base Configuration
1. Install either of the boom sections into the Counter
Base.
2. Tighten the thumb screws on the Counter Base to
hold the Boom rmly in place.
4. Insert the top roller assembly
5. Position the strap over the top rollers, making sure that
it is aligned straight with no twists.
3. Let out a 2’ loop of strap on the Collar Assembly
and slide the Collar Assembly over the Boom Tube.
MAKE SURE the seat of the Collar Assembly is oriented on the same side as the Counter Base as shown.
Your CabinetizerTM is now ready for use.
4
Page 6
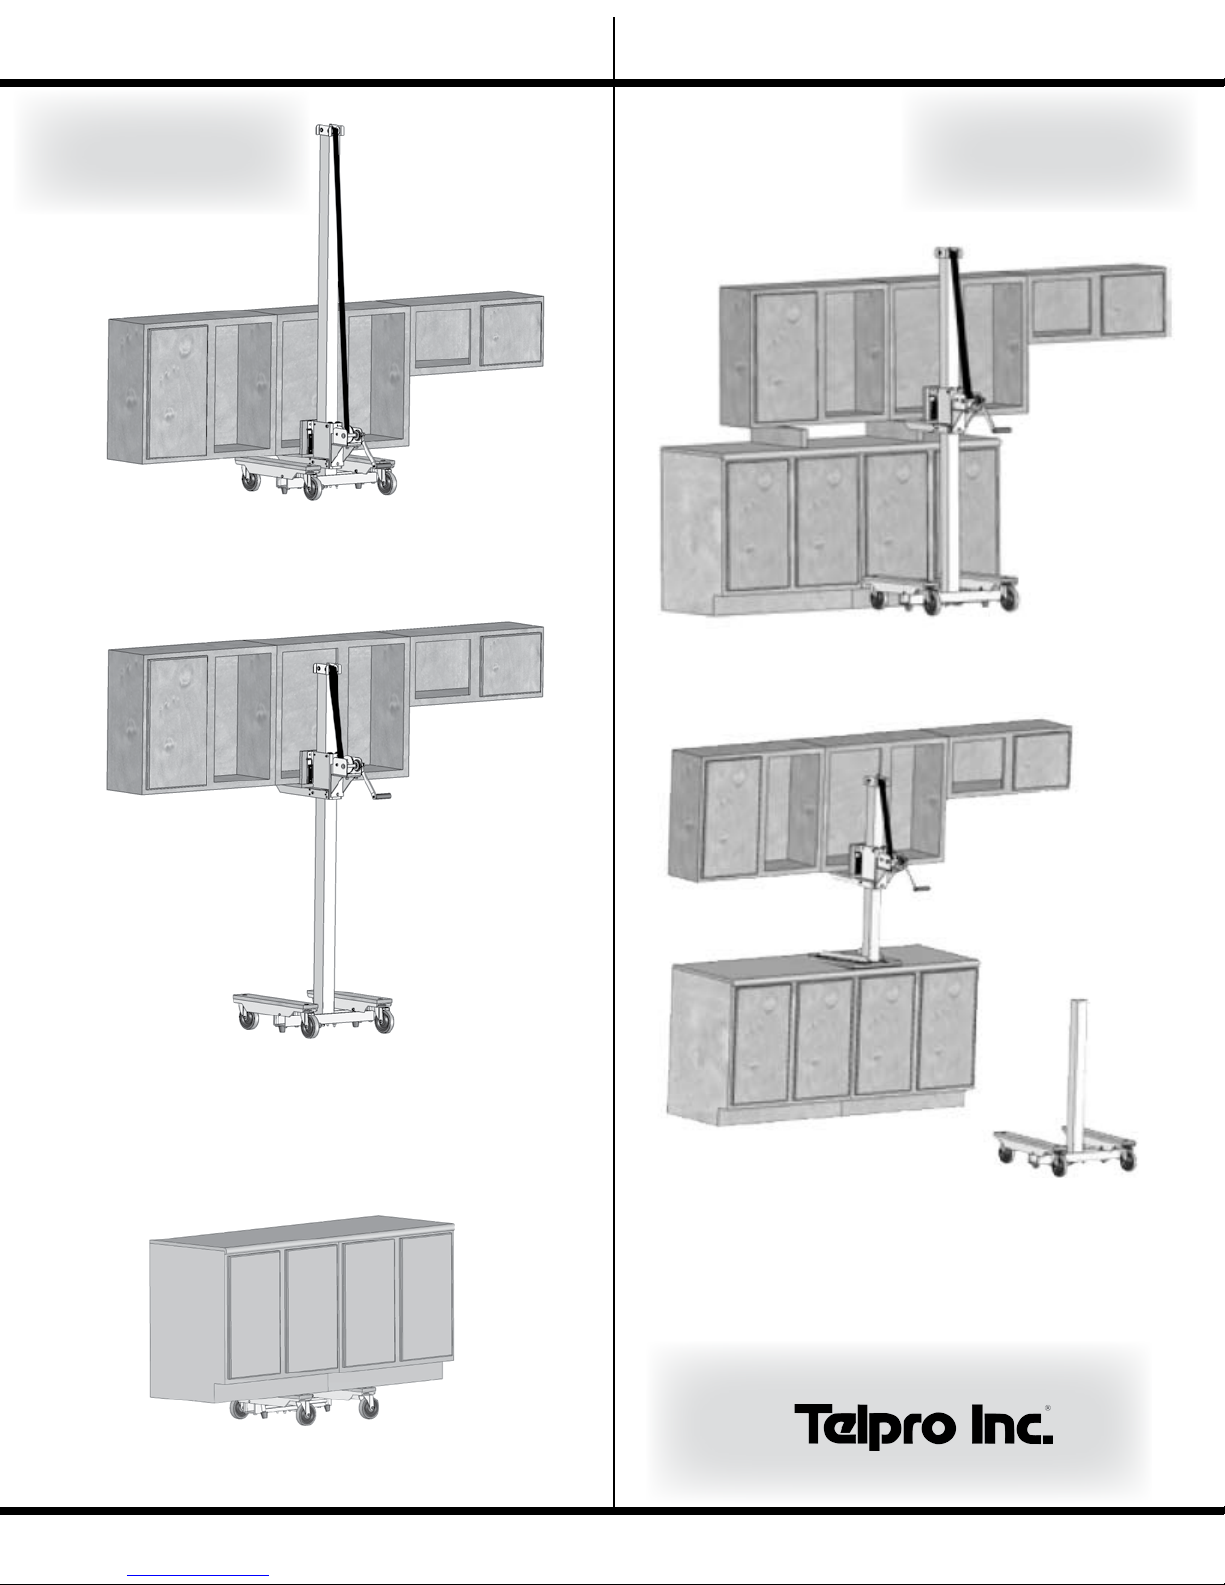
INSTALLING UPPER CABINETS
(before base cabinets)
INSTALLING UPPER CABINETS
(over existing base cabinets)
Using the Dolly Base
Configuration (p. 3) to install
upper cabinets first (before
base cabinets are in place).
1. Load cabinets onto lift.
Using the Counter Base
Configuration (p. 4) to install
upper cabinets second (when
base cabinets are in place).
1. Start by using the Dolly Base Assembly to raise the
upper cabinets to blocks (approx. 9” high, blocks not
included) on the base counters.
2. -Operate the winch to raise cabinets into place.
-Lock brake on Dolly Base.
-Level cabinets and fasten in place.
The Dolly Base can be used independantly to move
Cabinets
2. Use the Counter Base Conguration (p. 4) for nal
positioning of the cabinets.
Center the CabinetizerTM under the load, making sure
•
the weight of the load is balanced on the lift.
Operate the winch to raise cabinets into place.
•
Level cabinets and fasten in place.
•
Questions? Problems?
Call
701-775-0551
1-800-448-0822
5
 Loading...